|
|
| (90 intermediate revisions by 2 users not shown) |
| Line 1: |
Line 1: |
| ===Supporting Cast=== | | {{image|more=yes}} |
| {|width=100% cellspacing=0 border=2 cellpadding=3 style="border-collapse:collapse; background:#f5f5f5" | | ===Allies=== |
| |-style="background:#4141ff; color:white;" | | {|width=100% cellspacing=0 border=1 cellpadding=3 style="border-collapse:collapse;background:white" |
| | |-style="background:#ffeb4a; color:black;" |
| !Image | | !Image |
| !Name | | !Name |
| !Description | | !Description |
| |- | | |- |
| |align=center|[[File:Fairy Group Artwork - Super Mario 3D World.png|150px]] | | | align="center"|[[File:Fluffin' puffin.png|x90px]] |
| |align=center|[[Sprixie Princesses]]
| | !|[[Fluffin' Puffin]] |
| |align=center|Sprixie Princesses rule the [[Sprixie Kingdom]] and are captured by [[Bowser]] at the begining of the game. At the end of every world, the player rescues a Sprixie Princess and it builds a [[Clear Pipe]] to the next world. After [[World Castle]], Bowser captures all the Sprixie Princesses again, but they are rescued permanently when the player defeats [[Meowser]] in [[World Bowser]]. | | |When thrown, they create a platform of fluff that Yoshi can temporarily walk on. |
| |- | | |- |
| |align=center|[[File:SprixieSM3DW.jpg|150px]] | | | align="center"|[[File:YWW Poochy.png|x90px]] |
| |align=center|[[Sprixie]]
| | !|[[Poochy]] |
| |align=center|Sprixies are fairy-like creatures that are ruled by Sprixie Princesses. They appear in many levels and hold binoculars, allowing the player to see the end of the level. They are also found in [[Sprixie House]]s. | | |A dog that Yoshi can use as a platform to walk over unsafe terrain or to reach items in small gaps. |
| |-
| | |- |
| |align=center|[[File:SMG YellowLuma.jpg|150px]]
| | | align="center"|[[File:No image.png|x90px]] |
| |align=center|[[Luma]]
| | !|[[Egg-Plant]] |
| |align=center|Lumas make a minor appearance as non-playable characters. They can be found floating around the map in the bonus worlds. The player cannot interact with them.
| | |Flowers that spit out Yarn Balls. |
| |-
| |
| |align=center|[[File:Plessie Artwork - Super Mario 3D World.png|150px]]
| |
| |align=center|[[Plessie]]
| |
| |align=center|Plessie is a character that the player can ride across water. The player must tilt {{button|wii|stick}} to move or accelerate. The player can press {{button|wii|a}} to jump. He functions similarly to [[Dorrie]] from ''[[Super Mario 64]]'' and [[Manta Ray]] from ''[[Super Mario Galaxy]]''.
| |
| |-
| |
| |align=center|[[File:RabbitSM3DW.jpg|150px]]
| |
| |align=center|[[Rabbit]] <br>
| |
| |align=center|Rabbits can be found in several levels, where they run from the player. When caught by the player, they release power-ups, [[coins]], or [[Green Stars]].
| |
| |- | |
| |align=center|[[File:GiantRabbitSM3DW.jpg|150px]] | |
| |align=center|Giant Rabbit <br> | |
| |align=center|Similar to normal rabbits, they try to run from the player and must be caught. These rabbits release [[Mega Mushroom]]s.
| |
| |-
| |
| |align=center|[[File:Toads SMR.png|150px]]
| |
| |align=center|[[Toad (species)|Toads]] | |
| |align=center|Toads appear in and host [[Toad House]]s, where the player can win power-ups.
| |
| |} | | |} |
|
| |
|
| ==Enemies and obstacles==
| |
| {|border="1" cellpadding="3" style="background:#f5f5f5;text-align:left;border-collapse:collapse;margin-bottom:5px;width:100%;" align=center
| |
| !bgcolor="yellow" align=center|Image
| |
| !bgcolor="yellow" align=center|Description
| |
| !bgcolor="yellow" align=center|First Appearance
| |
| |-
| |
| |align=center|[[File:Baddie Box SM3DW.jpg|100px]]<br>[[Baddie Box]]
| |
| |align=center|Baddie Boxes are blocks that release [[Bob-omb]]s when approached. They cannot be destroyed.
| |
| |align=center|[[Bob-ombs Below]]
| |
| |-
| |
| |align=center|[[File:SM3DW banzaibill.jpg|200px]]<br>[[Banzai Bill]]
| |
| |align=center|Banzai Bills are a larger variety of [[Bullet Bill]]s.
| |
| |align=center|[[Bullet Bill Base]]
| |
| |-
| |
| |align=center|[[File:WiiU SM3DW 10.15.13 Scrn24.png|200px]]<br>[[Beach Koopa]]
| |
| |align=center|Beach Koopas are [[Koopa Troopa]]s that do not have shells. They act the same as normal Koopa Troopas and can be defeated with any attack.
| |
| |align=center|[[Koopa Troopa Cave]]
| |
| |-
| |
| |align=center|[[File:BiddybudSM3DW.jpg|150px]]<br>[[Biddybud]]
| |
| |align=center|Biddybuds are [[Goomba]]-like enemies that walk in a specific pattern. They can be defeated with any attack.
| |
| |align=center|[[Switch Scramble Circus]]
| |
| |-
| |
| |align=center|[[File:Deep-Black Jungle Drift.jpg|200px]]<br>[[Big Boo]]
| |
| |align=center|Big Boos are a larger variant of [[Boo]]. They can only be defeated by [[Light Box]]es and [[Invincible Mario]]
| |
| |align=center|[[Shifty Boo Mansion]]
| |
| |-
| |
| |align=center|[[File:Big Piranha Plant SM3DW.jpg|150px]]<br>[[Big Piranha Plant]]
| |
| |align=center|Big Piranha Plants are a larger variant of [[Piranha Plant]]. They attack by attempting to bite the player. They can be defeated by most attacks, though they require two hits.
| |
| |align=center|[[Mount Beanpole]]
| |
| |-
| |
| |align=center|[[File:CatBulletBill-Rosalina-SM3DW.jpg|200px]]<br>[[Bill Blaster]]
| |
| |align=center|Bill Blasters are cannons that shoot [[Bullet Bill]]s or [[Cat Bullet Bill]]s. They cannot be destroyed.
| |
| |align=center|[[Bowser's Bullet Bill Brigade]]
| |
| |-
| |
| |align=center|[[File:Blooper SM3DW.jpg|150px]]<br>[[Blooper]]
| |
| |align=center|Bloopers are squid-like enemies that appear in underwater areas. They attack by charging at the player. They can be defeated by most attacks.
| |
| |align=center|[[Rammerhead Reef]]
| |
| |-
| |
| |align=center|[[File:Baddie Box SM3DW.jpg|100px]]<br>[[Bob-omb]]
| |
| |align=center|Bob-ombs are bomb enemies. They attack by following the player and attempting to explode near them. When attacked, they can be picked up, but they must be thrown because they will explode after a few seconds.
| |
| |align=center|[[Bob-ombs Below]]
| |
| |-
| |
| |align=center|[[File:BooSM3DW.jpg|200px]]<br>[[Boo]]
| |
| |align=center|Boos are ghost enemies. They attack by floating toward the player. When looked at, they stop moving. They can only be defeated by [[Invincible Mario]] or a [[Light Box]].
| |
| |align=center|[[Shifty Boo Mansion]]
| |
| |-
| |
| |align=center|[[File:BoomerangBroSM3DW.png|100px]]<br>[[Boomerang Bro]]
| |
| |align=center|Boomerang Bros. are Koopa enemies that throw boomerangs. They can be defeated with most attacks.
| |
| |align=center|[[Beep Block Skyway]]
| |
| |-
| |
| |align=center|[[File:BulletBillSM3DW.jpg|200px]]<br>[[Bullet Bill]]
| |
| |align=center|Bullet Bills are bullets that shoot out of [[Bill Blaster]]s in a straight line. They can be defeated with most attack methods.
| |
| |align=center|[[Bowser's Bullet Bill Brigade]]
| |
| |-
| |
| |align=center|[[File:Bully Artwork - Super Mario 3D World.png|150px]]<br>[[Bully]]
| |
| |align=center|Bullies are enemies that charge at the player in attempt to push them off the platform. They can only be defeated with [[Lucky Cat Mario]], but they can be pushed off platforms by performing any attack repeatedly.
| |
| |align=center|[[Spooky Seasick Wreck]]
| |
| |-
| |
| |align=center|[[File:Cannon Box (alt) - Super Mario 3D World.png|150px]]<br>[[Cannon]]
| |
| |align=center|Cannons are boxes that shoot [[Cannonball]]s at the player. They can be destroyed if hit by a cannonball from a [[Cannon Box]] or if a [[Brick Block]] under it is hit.
| |
| |align=center|[[Bowser's Bullet Bill Brigade]]
| |
| |-
| |
| |align=center|[[File:Chargin' Chuck Artwork - Super Mario 3D World.png|150px]]<br>[[Chargin' Chuck]]
| |
| |align=center|Chargin' Chucks are large Koopas with football gear. they attack by charging at the player and ramming into them. Most attacks can defeat them, but they usually must be hit twice.
| |
| |align=center|[[Chargin' Chuck Blockade]]
| |
| |-
| |
| |align=center|[[File:CheepCheepSM3DW.jpg|150px]]<br>[[Cheep Cheep]]
| |
| |align=center|Cheep Cheeps are fish enemies that attack by swimming at the player. They can be defeated with most attacks.
| |
| |align=center|[[Pipeline Lagoon]]
| |
| |-
| |
| |align=center|[[File:CoinCofferSM3DL.png|120px]]<br>[[Coin Coffer]]
| |
| |align=center|Coin Coffers are enemies that try to run away from the player. They can be defeated by most attacks. When defeated, they release many coins.
| |
| |align=center|[[Pipeline Lagoon]]
| |
| |-
| |
| |align=center|[[File:Honeycomb Starway.jpg|200px]]<br>[[Fire Bar]]
| |
| |align=center|Fire Bars are rotating sticks with fireballs on them.
| |
| |align=center|[[Fort Fire Bros.]]
| |
| |-
| |
| |align=center|[[File:SM3DWFireBro.jpg|150px]]<br>[[Fire Bro]]
| |
| |align=center|Fire Bros. are Koopa enemies that attack by throwing fireballs. They can be defeated with most attacks.
| |
| |align=center|[[Double Cherry Pass]]
| |
| |-
| |
| |align=center|[[File:VenusFireTrapSM3DW.png|150px]]<br>[[Fire Piranha Plant]]
| |
| |align=center|Fire Piranha Plants are a variant of [[Piranha Plant]] that can shoot fireballs. They can be defeated with most attacks.
| |
| |align=center|[[Shadow-Play Alley]]
| |
| |-
| |
| |align=center|[[File:Fizzlit SM3DW.png]]<br>[[Fizzlit]]
| |
| |align=center|Fizzlits are purple blob enemies that melt into an electrically-charged puddle. They can be defeated with any attack while in their purple form.
| |
| |align=center|[[Switchboard Falls]]
| |
| |-
| |
| |align=center|[[File:Fighter Flys.PNG|100px]]<br>[[Fighter Fly]]
| |
| |align=center|Fighter Flies are bouncing fly-like enemies in the ''Luigi Bros.'' minigame
| |
| |align=center|''Luigi Bros.''
| |
| |-
| |
| |align=center|[[File:WiiU SuperMario scrn06 E3.png|200px]]<br>[[Fuzzy]]
| |
| |align=center|Fuzzies are black, furry creatures. They function as obstacles and they can only be defeated by a [[Super Star]], [[Golden Statue Mario]], or a [[Potted Piranha Plant]].
| |
| |align=center|[[Shadow-Play Alley]]
| |
| |-
| |
| |align=center|[[File:WiiU SuperMario scrn07 E3.png|200px]]<br>[[Fuzzy Horde]]
| |
| |align=center|Fuzzy Hordes are very large groups of Fuzzies. They slowly move toward the player and cannot be defeated.
| |
| |align=center|[[Fuzzy Time Mine]]
| |
| |-
| |
| |align=center|[[File:GaloombaSM3DW.png]]<br>[[Galoomba]]
| |
| |align=center|Galoombas are [[Goomba]]-like enemies that are rounder and must be attacked twice or ground-pounded to be defeated.
| |
| |align=center|[[Puffprod Peaks]]
| |
| |-
| |
| |align=center|[[File:Goomba Artwork - Super Mario 3D World.png|150px]]<br>[[Goomba]]
| |
| |align=center|Goombas are enemies that resemble brown mushrooms and attack by attempting to run into the player. They can be defeated with any attack.
| |
| |align=center|[[Super Bell Hill]]
| |
| |-
| |
| |align=center|[[File:GoombaTowerSM3DW.jpg|150px]]<br>[[Goomba Tower]]
| |
| |align=center|Goomba Towers are stacks of Goombas. They act like normal Goombas do, but must be attacked multiple times or ground-pounded to be fully defeated.
| |
| |align=center|[[Bowser's Highway Showdown]]
| |
| |-
| |
| |align=center|[[File:HammerBroSM3DW.png]]<br>[[Hammer Bro]]
| |
| |align=center|Hammer Bros. are Koopa enemies that attack by throwing hammers at the player. They can be defeated by most attacks.
| |
| |align=center|[[Enemy Blockade#Fire Bros. Hideout #3|Fire Bros. Hideout #3]]
| |
| |-
| |
| |align=center|[[File:Koopa Troopa Artwork - Super Mario 3D World.png|150px]]<br>[[Koopa Troopa]]
| |
| |align=center|Koopa Troopas are turtle-like creatures with shells. They attack by trying to walk into the player. When attacked, they will lose their shell, which can be carried.
| |
| |align=center|[[Koopa Troopa Cave]]
| |
| |-
| |
| |align=center|[[File:SM3DWLavaBubble.jpg|150px]]<br>[[Lava Bubble]]
| |
| |align=center|Lava Bubbles are living fireballs that emerge from lava and attempt to collide with the player. They can only be defeated when the player is invincible.
| |
| |align=center|[[Lava Rock Lair]]
| |
| |-
| |
| |align=center|[[File:SM3DWBlueLavaBubble.jpg|150px]]<br>[[Lava Bubble (blue)|Blue Lava Bublle]]
| |
| |align=center|Blue Lava Bubbles are Lava Bubbles that appear in levels with blue lava. They act exactly like the normal red ones.
| |
| |align=center|[[Backstreet Bustle]]
| |
| |-
| |
| |align=center|[[File:Magikoopa Artwork - Super Mario 3D World.png|150px]]<br>[[Magikoopa]]
| |
| |align=center|Magikoopas are enemies that use magic to spawn other enemies. They can be defeated by most attacks.
| |
| |align=center|[[Magikoopa Blockade]]
| |
| |-
| |
| |align=center|[[FIle:SM3DWMicroGoomba.jpg|200px]]<br>[[Micro Goomba]]
| |
| |align=center|Micro Goombas are very small variants of Goombas that attack by chasing the player. They can be defeated with any attack, but they can be pushed away if interacted with using the GamePad.
| |
| |align=center|[[Koopa Troopa Cave]]
| |
| |-
| |
| |align=center|[[File:FloatingMinesSM3DWorld.jpg|200px]]<br>[[Floating Mine]]
| |
| |align=center|Floating Mines are balls with spikes that are often found in [[Clear Pipe]]s as obstacles. They can be defeated by [[Invincible Mario]] or a fireball from [[Fire Mario]].
| |
| |align=center|[[Clear Pipe Cruise]]
| |
| |-
| |
| |align=center|[[File:Rosalina SM3DW.png|200px]]<br>[[Octoomba]]
| |
| |align=center|Octoombas are a variant of Goombas that throw projectiles at the player. They cannot be defeated with a jump, but they can be defeated with most other attacks.
| |
| |align=center|[[Super Galaxy]]
| |
| |-
| |
| |align=center|[[File:Para-Biddybuds Artwork - Super Mario 3D World.png|200px]]<br>[[Para-Biddybud]]
| |
| |align=center|Para-Biddybuds are a variant of Biddybuds that hover above the ground and fly in circles. They can be defeated with most attacks.
| |
| |align=center|[[Switch Scramble Circus]]
| |
| |-
| |
| |align=center|[[File:Peepa SM3DW.png]]<br>[[Peepa]]
| |
| |align=center|Peepas are Boo-like enemies that move in a set pattern, blocking a path. They can be defeated with a Light Box or Invincible Mario.
| |
| |align=center|[[Shifty Boo Mansion]]
| |
| |-
| |
| |align=center|[[File:PiranhaPlantSM3DW.jpg|200px]]<br>[[Piranha Plant]]
| |
| |align=center|Piranha Plants are carnivorous plants that attack by attempting to bite the player. They can be defeated by most attacks.
| |
| |align=center|[[Mount Beanpole]]
| |
| |-
| |
| |align=center|[[File:PorcupufferSM3DW.jpg|150px]]<br>[[Porcupuffer]]
| |
| |align=center|Porcupuffers are giant Cheep Cheeps that have spikes on their backs. They attempt to swim at the player and can be defeated by most attack methods (except jumps).
| |
| |align=center|[[Pipeline Lagoon]]
| |
| |-
| |
| |align=center|[[File:MarioMBNES.png|200px]]<br>[[Shellcreeper]]
| |
| |align=center|Shellcreepers are Koopa Troopa-like enemies. They are the simplest enemies that appear in the ''Luigi Bros.'' minigame.
| |
| |align=center|''Luigi Bros.''
| |
| |-
| |
| |align=center|[[File:Crab.PNG|100px]]<br>[[Sidestepper]]
| |
| |align=center|Sidesteppers are crab enemies that appear in the ''Luigi Bros.'' minigame. They require two hits to be immobilized.
| |
| |align=center|''Luigi Bros.''
| |
| |-
| |
| |align=center|[[File:Spike Artwork - Super Mario 3D World.png|150px]]<br>[[Spike]]
| |
| |align=center|Spikes are Koopa enemies that throw Spike Bars. They can be defeated with most attacks.
| |
| |align=center|[[Hands-On Hall]]
| |
| |-
| |
| |align=center|[[File:SpikeBar3dworld.jpg|200px]]<br>[[Spike Bar]]
| |
| |align=center|Spike Bars are obstacles that are usually found spinning around a block. They cannot be destroyed.
| |
| |align=center|[[Boiling Blue Bully Belt]]
| |
| |-
| |
| |align=center|[[File:SpinySM3DW.jpg|150px]]<br>[[Spiny]]
| |
| |align=center|Spinies are red Koopa Troopa-like enemies with spikes on them. They can be defeated with most attacks (except jumps).
| |
| |align=center|[[Big Bounce Byway]]
| |
| |-
| |
| |align=center|[[File:Stingby Artwork - Super Mario 3D World.png|150px]]<br>[[Stingby]]
| |
| |align=center|Stingbies are bee-like enemies that attack by chasing the player and ramming into them. They can be defeated with most attacks.
| |
| |align=center|[[Switch Scramble Circus]]
| |
| |-
| |
| |align=center|[[File:ThwompSM3DW.jpg|150px]]<br>[[Thwomp]]
| |
| |align=center|Thwomps are large stone enemies that attack by falling on the player.
| |
| |align=center|[[Bowser's Highway Showdown]]
| |
| |-
| |
| |align=center|[[File:SM3DWVolcanicDebris.jpg|200px]]<br>[[Volcanic Debris]]
| |
| |align=center|Volcanic Debris appear as molten lava falling from the sky.
| |
| |align=center|[[Hisstocrat Returns]]
| |
| |}
| |
|
| |
|
| ==Bosses== | | ==Enemies== |
| {|width=100% cellspacing=0 border=2 cellpadding=3 style="border-collapse:collapse; background:#f5f5f5" | | ===Returning=== |
| |-style="background:#ff4141; color:white;" | | <gallery> |
| | No image.png|[[Boo Guy]]s |
| | No image.png|[[Bull's-Eye Bill]]s |
| | YWW Bullet Bill.jpg|[[Bullet Bill]]s |
| | No image.png|[[Bumpty|Bumpties]] |
| | YWW Burt.jpg|[[Burt]]s |
| | YWW Cheep Cheep.jpg|[[Cheep Cheep]]s |
| | YWW Clawdaddy.jpg|[[Clawdaddy|Clawdaddies]] |
| | YWW Fang.jpg|[[Fang]]s |
| | No image.png|[[Flightless Skeleton Goonie]]s |
| | No image.png|[[Flightless Goonie]]s |
| | YWW Fly Guy.jpg|[[Fly Guy]]s |
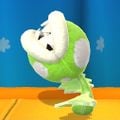
| | YCW Fooly Flower.png|[[Fooly Flower]]s |
| | Gargantua Blargg YWW.jpg|[[Gargantua Blargg]]s |
| | No image.png|[[Goonie]]s |
| | YWW Gusty.jpg|[[Gusty|Gusties]] |
| | Snifberg the Unfeeling Battle.jpg|[[Icy Spiked Ball]]s |
| | No image.png|[[Item Balloon]]s |
| | YWW Koopa Paratroopa.jpg|[[Koopa Paratroopa]]s |
| | YWW Koopa Troopa.jpg|[[Koopa Troopa]]s |
| | YWW Lakitu.jpg|[[Lakitu]]s |
| | YWW Lava Drop.jpg|[[Lava Drop]]s |
| | YWW Little Mouser.jpg|[[Little Mouser]]s |
| | RollinDowntheRiver.png|[[Lunge Fish]] |
| | YWW Monty Mole.jpg|[[Monty Mole]]s |
| | No image.png|[[Naval Bud]]s |
| | YWW Giant Nep-Enut.jpg|[[Nep-Enut]]s |
| | YWW Nipper Plant.jpg|[[Nipper Plant]]s |
| | No image.png|[[Nipper Spore]]s |
| | YWW Piranha Plant.jpg|[[Piranha Plant]]s |
| | Ukiki Yoshi's Woolly World.png|[[Seedy Sally]]s |
| | No image.png|[[Short Fuse]]s |
| | YWW Shy Guy.jpg|[[Shy Guy]]s |
| | YWW Shy Guy Tower.jpg|[[Shy Guy Tower]]s |
| | No image.png|[[Skeleton Goonie]]s |
| | No image.png|[[Snifit]]s |
| | SnowGuys YoshiWoollyWorld.png|[[Snow Guy]]s |
| | No image.png|[[Spiked Ball]]s |
| | No image.png|[[Spinner]]s |
| | No image.png|[[Spiny Egg]]s |
| | No image.png|[[Spray Fish]]es |
| | No image.png|[[Stalking Piranha Plant]]s |
| | Stilt Guy YWW.jpg|[[Stilt Guy]]s |
| | YWW TapTap.jpg|[[Tap-Tap]]s |
| | Ukiki Yoshi's Woolly World.png|[[Ukiki]]s |
| | No image.png|[[Wall Lakitu]]s |
| | YWW Wild Ptooie Piranha.jpg|[[Wild Ptooie Piranha]]s |
| | YWW Woozy Guy.jpg|[[Woozy Guy]]s |
| | </gallery> |
| | |
| | ==Items and objects== |
| | {|width=100% cellspacing=0 border=1 cellpadding=3 style="border-collapse:collapse;background:white" |
| | |-style="background:deepskyblue; color:black;" |
| !Image | | !Image |
| !Name | | !Name |
| !Times Encountered
| |
| !Description | | !Description |
| |- | | |- |
| |align=center|[[File:Bowser Mobile Artwork - Super Mario 3D World.png|150px]] | | |align="center"|[[File:YWW Blue Yarn Ball.jpg|x70px]] |
| |align=center|[[Bowser]]
| | !|[[Yarn Ball]]s |
| |align=center|2 ([[Bowser's Highway Showdown]] and [[Bowser's Lava Lake Keep]])
| | |Balls that can be thrown by Yoshi to weave objects, attack enemies, and collect items. |
| |align=center|Bowser is the main antagonist who invades the [[Sprixie Kingdom]] and captures the seven [[Sprixie Princesses]]. Bowser drives his [[Bowser Mobile]] and attacks by throwing [[Kick Bomb]]s and fireballs at the player. He is fought by returning the [[Kick Bomb]]s at him and is defeated after nine hits. | |
| |- | | |- |
| |align=center|[[File:Cat Bowser.jpg|150px]] | | |align="center"|[[File:No image.png|x70px]] |
| |align=center|[[Meowser]]
| | ![[! Switch]]es |
| |align=center|1 ([[The Great Tower of Bowser Land]])
| | |Reveal bonus areas or transform [[Dotted-Line Block]]s into solid blocks, allowing Yoshi to reach otherwise inaccessible areas. |
| |align=center|Meowser is the cat form of Bowser who is found after Bowser uses a [[Super Bell]]. He is defeated after the player hits the giant [[POW Block]] four times. | |
| |- | | |- |
| |align=center|[[File:BoomBoomRenderSM3DW.png|150px]] | | |align="center"|[[File:YWW Beads.jpg|x70px]] |
| |align=center|[[Boom Boom]]
| | !|[[Bead]]s |
| |align=center|3 ([[Bowser's Bullet Bill Brigade]], [[Bowser's Bob-omb Brigade]], and [[Boss Blitz]]) | | |Can be used to purchase [[Power Badge]]s for use in other levels. |
| |align=center|Boom Boom is a weak boss who attacks by spinning, bouncing around the stage, and turning invisible. He must be stomped three times to be defeated.
| |
| |- | | |- |
| |align=center|[[File:PomPomSM3DW.jpg|150px]] | | |align="center"|[[File:YWW Blue Chomp Rock.jpg|x70px]] |
| |align=center|[[Pom Pom]]
| | !|[[Chomp Rock]]s |
| |align=center|3 ([[The Bullet Bill Express]], [[The Bowser Express]], and [[Boss Blitz]]) | | |Large balls that can be rolled by Yoshi to break soft rock, activate switches, and access otherwise-inaccessible areas. |
| |align=center|Pom Pom is a female version of Boom Boom. She attacks by multiplying and throwing a star at the player. Like Boom Boom, she must be stomped three times to be defeated.
| |
| |- | | |- |
| |align=center|[[File:Hisstocrat.png|150px]] | | |align="center"|[[File:No image.png|x70px]] |
| |align=center|[[Hisstocrat]]
| | !|[[Egg Block|Yarn Basket]]s |
| |align=center|2 ([[A Banquet with Hisstocrat]] and [[Boss Blitz]])
| | |Blocks that release Yarn Balls when hit. |
| |align=center|Hisstocrat is a snake-like creature who attacks by emerging from the ground and hurling boulders at the player. He also sends out smaller snakes, some of which have [[Super Bell]]s on them. To defeat him, the player must stomp on his head three times. | |
| |- | | |- |
| |align=center|[[File:Queen Hisstocrat.jpg|150px]] | | |align="center"|[[File:No image.png|x70px]] |
| |align=center|[[Queen Hisstocrat]]
| | !|[[Flipper]]s |
| |align=center|2 ([[Hisstocrat Returns]] and [[Boss Blitz]]) | | |One-way gates. |
| |align=center|Queen Hisstocrat is a female version of Histocrat. She acts very similarly; her only differences are that she uses fireballs instead of boulders and that she is pink.
| |
| |- | | |- |
| |align=center|[[File:King Brolder SM3DW.png|150px]] | | |align="center"|[[File:YWW Fruit Beads.jpg|x70px]] |
| |align=center|[[Boss Brolder]] | | !|[[Fruit]] |
| |align=center|3 ([[Lava Rock Lair]], [[Brolder Blockade Is Back]], and [[Boss Blitz]])
| | | |
| |align=center|Boss Brolder is a large boulder that attacks by attempting to roll over the player or release flaming rocks. He is defeated by hitting smaller boulders at him three times. | |
| |- | | |- |
| |align=center|[[File:KingKa-Thunk artwork.png|150px]] | | |align="center"|[[File:Yoshi's Woolly World - E3 2014 screen 6.jpg|x70px]] |
| |align=center|[[King Ka-Thunk]]
| | !|[[Goal Ring]]s |
| |align=center|2 ([[King Ka-thunk's Castle]] and [[Boss Blitz]])
| | |A ring of Beads that marks the end of a level. |
| |align=center|King Ka-Thunk is a metal square with spikes that is attached to the inside of a large [[Ka-Thunk]]. He mainly attacks by moving around inside his frame and trying to slam down on the player. To defeat him, the player must stomp his backside three times. | |
| |- | | |- |
| |align=center|[[File:PrinceBully SM3DW.png|150px]] | | |align="center"|[[File:No image.png|x70px]] |
| |align=center|[[Prince Bully]]
| | !|[[Heart (item)|Heart]]s |
| |align=center|2 ([[Prince Bully Blockade]] and [[Prince Bully Blockade]]) | | |Usually released in groups from Winged Clouds and Checkpoints. They increase Yoshi's health meter when collected. |
| |align=center|Prince Bully is a large [[Bully]] that attacks by ramming into the player and spitting fireballs. He is defeated by being pushed into a Clear Pipe and stomped on after he comes out three times. | |
| |- | | |- |
| |align=center|[[File:Motley Encore.jpg|150px]] | | |align="center"|[[File:No image.png|x70px]] |
| |align=center|[[Motley Bossblob]]
| | !|[[Number Platform]]s |
| |align=center|3 ([[Motley Bossblob's Big Battle]], [[Motley Bossblob's Encore]], and [[Boss Blitz]])
| | |Small platforms marked with a number that Yoshi can only stand on a limited number of times before they disappear. |
| |align=center|Motley Bossblob is a [[Koopaling]]-like clown that attacks by gathering large metallic blobs to become a large monster, then attempting to jump on the player. The player must defeat him by stomping on him three times when he releases his blobs. | |
| |}
| |
| ==Items and objects==
| |
| {|width=100% cellspacing=0 border=2 cellpadding=3 style="border-collapse:collapse; background:#f5f5f5"
| |
| |-style="background:#009700; color:white;"
| |
| !Image
| |
| !Transformation
| |
| !Description
| |
| |- | | |- |
| !colspan=3 style="background:#a6eba6;"|New power-ups
| | |align="center"|[[File:No image.png|x70px]] |
| | !|[[Paddle wheel]]s |
| | |Wheels that move when stood on. They consist of four small platforms arranged in a circle. |
| |- | | |- |
| |align=center|[[File:Super Bell Artwork - Super Mario 3D World.png|150px]]<br>[[Super Bell]] | | |align="center"|[[File:Clear-pbadge.jpg|x70px]] |
| |align=center|[[File:Cat Mario Artwork - Super Mario 3D World.png|150px]]<br>[[Cat Mario]]
| | !|[[Power Badge (Yoshi's Woolly World)|Power Badge]]s |
| |align=center|The Super Bell is a golden bell that transforms Mario into Cat Mario. This allows him to climb walls and the [[Goal Pole]] and pounce at enemies. He can also attack enemies that he stands near. | | |Power-ups that can be purchased with Beads at the start of a level, granting Yoshi specific powers within that level. |
| |- | | |- |
| |align=center|[[File:Double Cherry Artwork - Super Mario 3D World.png|150px]]<br>[[Double Cherry]] | | |align="center"|[[File:PresentBox YWW.png|x70px]] |
| |align=center|[[File:Double Mario Artwork - Super Mario 3D World.png|150px]]<br>[[Double Mario]]
| | !|[[Present Box]]es |
| |align=center|The Double Cherry is a set of cherries that transform Mario into Double Mario. An identical clone of Mario will appear. This allows the player to activate certain switches or defeat more enemies. | | |Boxes that can be unraveled with Yoshi's tongue, releasing an item. |
| |- | | |- |
| |align=center|[[File:Lucky Bell.png|150px]]<br>[[Lucky Bell]] | | |align="center"|[[File:YWW Smiley Flower.jpg|x70px]] |
| |align=center|[[File:Golden Statue Mario.png|150px]]<br>[[Lucky Cat Mario]] | | !|[[Smiley Flower]]s |
| |align=center|The Lucky Bell is a bronze bell that transforms Mario into Lucky Cat Mario. This form functions identically to Cat Mario, with the added feature of transforming into an invincible golden statue when ground-pounding. This allows him to collect many coins and defeat most enemies that cannot otherwise be defeated. It begins appearing in [[World Mushroom (Super Mario 3D World)|World Mushroom]]. | | |Five of these appear in each level. Collecting all of them in a world unlocks an extra level in that world. |
| |- | | |- |
| !colspan=3 style="background:#a6eba6;"|Returning power-ups
| | |align="center"|[[File:No image.png|x70px]] |
| | !|[[Spring Ball]]s |
| | |Balls that bounce the player high in the air when jumped on. |
| |- | | |- |
| |align=center|[[File:Super Mushroom Artwork - Super Mario 3D World.png|150px]]<br>[[Super Mushroom]] | | |align="center"|[[File:StampPatch.png|x70px]] |
| |align=center|[[File:Mario Artwork - Super Mario 3D World.png|150px]]<br>[[Super Mario]] | | !|[[Stamp Patch]]es |
| |align=center|Collecting the Super Mushroom transforms the player into Super Mario, making them bigger and allowing them to take a hit from an enemy without immediately losing a life. This is the default form of Mario.
| | |Unlock new [[Miiverse]] stamps when collected. |
| |- | | |- |
| |align=center|[[File:Fire Flower Artwork - Super Mario 3D World.png|150px]]<br>[[Fire Flower]] | | |align="center"|[[File:No image.png|x70px]] |
| |align=center|[[File:Fire Mario Artwork - Super Mario 3D World.png|150px]]<br>[[Fire Mario]] | | !|[[Transformation Door]]s |
| |align=center|Collecting the Fire Flower transforms Mario into Fire Mario. This allows him to throw fireballs to defeat enemies. | | |Doors that teleport Yoshi to another part of a level or a sub-area. |
| |- | | |- |
| |align=center|[[File:Boomerang Flower Artwork - Super Mario 3D World.png|150px]]<br>[[Boomerang Flower]] | | |align="center"|[[File:No image.png|x70px]] |
| |align=center|[[File:Boomerang Mario Artwork - Super Mario 3D World.png|150px]]<br>[[Boomerang Mario]]
| | !|[[Warp Pipe]]s |
| |align=center|When Mario collects the Boomerang Flower, he gets a blue Koopa shell and can throw boomerangs to collect items or defeat enemies. | | |Pipes that teleport Yoshi to another part of a level or a sub-area. |
| |- | | |- |
| |align=center|[[File:Super Leaf Artwork - Super Mario 3D World.png|150px]]<br>[[Super Leaf]] | | |align="center"|[[File:YWW Watermelon.jpg|x70px]] |
| |align=center|[[File:Tanooki Mario Artwork - Super Mario 3D World.png|150px]]<br>[[Tanooki Mario]] | | !|[[Watermelon]]s |
| |align=center|When the player collects a Super Leaf, they transform into Tanooki Mario. This allows them to float through the air for a short time and whip enemies with their tail. | | |Fruits that, when eaten, allow Yoshi to spit out seeds. |
| |- | | |- |
| |align=center|[[File:Invincibility Leaf Artwork - Super Mario 3D World.png|150px]]<br>[[Invincibility Leaf]] | | |align="center"|[[File:No image.png|x70px]] |
| |align=center|[[File:White Tanooki Mario Artwork - Super Mario 3D World.png|150px]]<br>[[White Raccoon Mario]] | | !|[[Winged Cloud]]s |
| |align=center|When the player dies more than five times in a level, an [[Assist Block]] appears, containing an Invincibility Leaf. When it is collected, he functions exactly like [[Tanooki Mario]], but with the added feature of being invincible. If this leaf is collected, the stars on the player's save file will not sparkle. | | |Releases an item or triggers an event when hit with a Yarn Ball. |
| |- | | |- |
| |align=center|[[File:Mega Mushroom Artwork - Super Mario 3D World.png|150px]]<br>[[Mega Mushroom]] | | |align="center"|[[File:YWW Cyan Wonder Wool.jpg|x70px]] |
| |align=center|[[File:Mega Mario Group Artwork - Super Mario 3D World.png|150px]]<br>[[Mega Mario]]
| | !|[[Wonder Wool]]s |
| |align=center|When the player collects a Mega Mushroom, they become very large and can defeat most enemeies and destroy most objects by touching them. He can also ground-pound to create a shockwave that can defeat nearby enemies.
| | |Five of these appear in each level. Collecting all of them in a level knits together that level's Yoshi design. |
| |-
| |
| |align=center|[[File:Super Star Artwork - Super Mario 3D World.png|150px]]<br>[[Super Star]]
| |
| |align=center|[[File:SM3DW Invincible Mario.jpg|150px]]<br>[[Invincible Mario]]
| |
| |align=center|When the player collects a Super Star, they become invincible and can run faster for a short time and can defeat almost any enemy they touch. In multiplayer mode, they also share the power with any character they touch.
| |
| |-
| |
| !colspan=3 style="background:#a6eba6;"|Support items | |
| |-
| |
| |align=center|[[File:Cannon Box (alt) - Super Mario 3D World.png|150px]]<br>[[Cannon Box]]
| |
| |align=center|[[File:Cannon Box Artwork - Super Mario 3D World.png|150px]]
| |
| |align=center|Cannon Boxes are created when certain [[? Block]]s are hit. When worn, they continually shoot cannonballs that can defeat enemies or destroy objects. If the player holds {{button|wiiu|x}}/{{button|wiiu|y}}/{{button|wii|1}}/{{button|wii|b}}, the cannon can be charged, allowing the ball to travel farther.
| |
| |- | |
| |align=center|[[File:Shiny Question Block Artwork - Super Mario 3D World.png|150px]]<br>[[Coin Box]]
| |
| |align=center|[[File:Toad Coin Box.jpg|150px]]
| |
| |align=center|Coin Boxes are types of [[? Block]]s that can be worn by the player. When the player walks, they will collect coins.
| |
| |-
| |
| |align=center|[[File:Koopa Troopa Artwork - Super Mario 3D World.png|150px]]<br>[[Green Shell]]
| |
| |align=center|[[File:ShellMarioSM3DW.jpg|150px]]
| |
| |align=center|Green Shells are shells originally from [[Koopa Troopa]]s. If the player crouches while holding one, they will enter the shell and can scoot around for a few seconds, defeating enemies and bouncing off walls. The shell will change color to match the player.
| |
| |-
| |
| |align=center|[[File:Goomba Hat Artwork - Super Mario 3D World.png|150px]]<br>[[Goomba Mask]]
| |
| |align=center|[[File:WiiU SM3DW 10.15.13 Scrn09.png|150px]]
| |
| |align=center|When the player wears a Goomba Mask, Goombas and Goomba variants will not attack the player, though other types of enemies still will. When the player jumps, a Goomba sound effect can be heard.
| |
| |-
| |
| |align=center|[[File:Light Box Artwork - Super Mario 3D World.png|150px]]<br>[[Light Box]]
| |
| |align=center|[[File:Light Box Screenshot - Super Mario 3D World.png|150px]]
| |
| |align=center|Light Boxes are wearable blocks containing light bulbs. They are found mainly in [[Ghost House]]s and can be used to defeat [[Boo]]s and Boo variants. Light Boxes will change color to match the player.
| |
| |-
| |
| |align=center|[[File:Piranha Plant Artwork - Super Mario 3D World.png|150px]]<br>[[Potted Piranha Plant]]
| |
| |align=center|[[File:PottedPiranhaSM3DW.jpg|150px]]
| |
| |align=center|Potted Piranha Plants are portable [[Piranha Plant]]s that the player can hold. They will eat enemies they come in contact with and will collect items. They will also attack other players in multiplayer mode.
| |
| |-
| |
| |align=center|[[File:Propeller Box Artwork - Super Mario 3D World.png|150px]]<br>[[Propeller Box]]
| |
| |align=center|[[File:WiiU SM3DW 10.15.13 Scrn26.png|150px]]
| |
| |align=center|Propeller Boxes can be worn by the player and allow the player to fly for a short time. The box changes color to match the player.
| |
| |-
| |
| |align=center|[[File:Kuribon Shoe Artwork - Super Mario 3D World.png|150px]]<br>[[Ice Skate]]
| |
| |align=center|[[File:WiiU SM3DW 10.15.13 Scrn04.png|150px]]
| |
| |align=center|Ice Skates are items based on [[Goomba's Shoe]]s. They are found with Goombas in them and can be worn by the player to skate across ice. The player will defeat enemies they run into.
| |
| |}
| |
| | |
| ===Items===
| |
| {|width=100% cellspacing=0 border=2 cellpadding=3 style="border-collapse:collapse; background:#f5f5f5"
| |
| |-style="background:#ff00ff; color:white;"
| |
| !Image
| |
| !Description
| |
| |-
| |
| |align=center|[[File:1-Up Mushroom Artwork - Super Mario 3D World.png|150px]]<br>[[1-Up Mushroom]]
| |
| |align=center|description
| |
| |-
| |
| |align=center|[[File:Plus Clock Artwork - Super Mario 3D World.png|150px]]<br>[[+ Clock]]
| |
| |align=center|description
| |
| |-
| |
| |align=center|[[File:Question Block Artwork - Super Mario 3D World.png|150px]]<br>[[? Block]]
| |
| |align=center|description
| |
| |-
| |
| |align=center|[[File:Assist Block Artwork - Super Mario 3D World.png|150px]]<br>[[Assist Block]]
| |
| |align=center|description
| |
| |-
| |
| |align=center|[[File:Baseball Artwork - Super Mario 3D World.png|150px]]<br>[[Baseball (item)|Baseball]]
| |
| |align=center|description
| |
| |-
| |
| |align=center|[[File:Boomerangbro3Dworld.jpg|150px]]<br>[[Beep Block]]
| |
| |align=center|description
| |
| |-
| |
| |align=center|[[File:BlueCoinSM3DW.jpg|150px]]<br>[[Blue Coin]]
| |
| |align=center|description
| |
| |-
| |
| |align=center|[[File:BoardSM3DW.jpg|150px]]<br>[[Board (Super Mario 3D Land)|Board]]
| |
| |align=center|description
| |
| |-
| |
| |align=center|[[File:BombSM3DW.jpg|150px]]<br>[[Bomb (item)|Bomb]]
| |
| |align=center|description
| |
| |-
| |
| |align=center|[[File:Yellow Tile Sprint Screenshot - Super Mario 3D World.png|150px]]<br>[[Boost Pad]]
| |
| |align=center|description
| |
| |-
| |
| |align=center|[[File:Brick Block Artwork - Super Mario 3D World.png|150px]]<br>[[Brick Block]]
| |
| |align=center|description
| |
| |-
| |
| |align=center|[[File:CatWheel.PNG|150px]]<br>[[Cat Wheel]]
| |
| |align=center|description
| |
| |-
| |
| |align=center|[[File:Character switch.jpg|150px]]<br>[[Character Switch]]
| |
| |align=center|description
| |
| |-
| |
| |align=center|[[File:CheckpointFlagSM3DW.jpg|150px]]<br>[[Checkpoint Flag]]
| |
| |align=center|description
| |
| |-
| |
| |align=center|[[File:Clear Pipe Artwork - Super Mario 3D World.png|100px]]<br>[[Clear Pipe]]
| |
| |align=center|description
| |
| |-
| |
| |align=center|[[File:Cloud Cannon.jpg|150px]]<br>[[Cloud Cannon]]
| |
| |align=center|description
| |
| |-
| |
| |align=center|[[File:Coin Artwork - Super Mario 3D World.png|150px]]<br>[[Coin]]
| |
| |align=center|description
| |
| |-
| |
| |align=center|[[File:Shiny Question Block Artwork - Super Mario 3D World.png|150px]]<br>[[Coin Box]]
| |
| |align=center|description
| |
| |-
| |
| |align=center|[[File:SM3DWColorPanels.png|150px]]<br>[[Color Panel]]
| |
| |align=center|description
| |
| |-
| |
| |align=center|[[File:SM3DW 1-4 Luigi.jpeg|150px]]<br>[[Coin Ring]]
| |
| |align=center|description
| |
| |-
| |
| |align=center|[[File:Coin Stack Artwork - Super Mario 3D World.png|150px]]<br>[[Coin Stack]]
| |
| |align=center|description
| |
| |-
| |
| |align=center|[[File:Crate3DLand.png]]<br>[[Crate]]
| |
| |align=center|description
| |
| |-
| |
| |align=center|[[File:SM3DW World3-2.png|150px]]<br>[[Donut Block]]
| |
| |align=center|description
| |
| |-
| |
| |align=center|[[File:SM3dwflpswitch.PNG]]<br>[[Flipswitch Panel]]
| |
| |align=center|description
| |
| |-
| |
| |align=center|[[File:Flagpole-SM3DL.png|75px]]<br>[[Goal Pole]]
| |
| |align=center|description
| |
| |-
| |
| |align=center|[[File:GoldShellSM3DW.jpg|150px]]<br>[[Gold Shell]]
| |
| |align=center|description
| |
| |-
| |
| |align=center|[[File:GreenCoinSM3DW.jpg|150px]]<br>[[Green Coin]]
| |
| |align=center|description
| |
| |-
| |
| |align=center|[[File:Green Star Artwork - Super Mario 3D World.png|150px]]<br>[[Green Star]]
| |
| |align=center|description
| |
| |-
| |
| |align=center|[[File:GreenRingSM3DW.jpg|150px]]<br>[[Green Ring]]
| |
| |align=center|description
| |
| |-
| |
| |align=center|[[File:GiantQBlockSM3DW.jpg|150px]]<br>[[Giant ? Block]]
| |
| |align=center|description
| |
| |-
| |
| |align=center|[[File:GiantBrickBlockSM3DW.jpg|150px]]<br>[[Giant Brick Block]]
| |
| |align=center|description
| |
| |-
| |
| |align=center|[[File:Key Coin.png|150px]]<br>[[Key Coin]]
| |
| |align=center|description
| |
| |-
| |
| |align=center|[[File:Bowser Mobile Battle.png|150px]]<br>[[Kick Bomb]]
| |
| |align=center|description
| |
| |-
| |
| |align=center|[[File:SM3DW Multi-Vator.jpg|150px]]<br>[[Multi-Vator]]
| |
| |align=center|description
| |
| |-
| |
| |align=center|[[File:WiiU SM3DW 10.15.13 Scrn10.png|150px]]<br>[[Mushroom Trampoline]]
| |
| |align=center|description
| |
| |-
| |
| |align=center|[[File:MysteryBoxSM3DW.jpg|150px]]<br>[[Mystery Box]]
| |
| |align=center|description
| |
| |-
| |
| |align=center|[[image|150px]]<br>[[name]]
| |
| |align=center|description
| |
| |-
| |
| |align=center|[[image|150px]]<br>[[name]]
| |
| |align=center|description
| |
| |-
| |
| |align=center|[[image|150px]]<br>[[name]]
| |
| |align=center|description
| |
| |-
| |
| |align=center|[[image|150px]]<br>[[name]]
| |
| |align=center|description
| |
| |-
| |
| |align=center|[[image|150px]]<br>[[name]]
| |
| |align=center|description
| |
| |-
| |
| |align=center|[[image|150px]]<br>[[name]]
| |
| |align=center|description
| |
| |-
| |
| |align=center|[[image|150px]]<br>[[name]]
| |
| |align=center|description
| |
| |-
| |
| |align=center|[[image|150px]]<br>[[name]]
| |
| |align=center|description
| |
| |-
| |
| |align=center|[[image|150px]]<br>[[name]]
| |
| |align=center|description
| |
| |-
| |
| |align=center|[[image|150px]]<br>[[name]]
| |
| |align=center|description
| |
| |-
| |
| |align=center|[[image|150px]]<br>[[name]]
| |
| |align=center|description
| |
| |-
| |
| |align=center|[[image|150px]]<br>[[name]]
| |
| |align=center|description
| |
| |-
| |
| |align=center|[[image|150px]]<br>[[name]]
| |
| |align=center|description
| |
| |-
| |
| |align=center|[[image|150px]]<br>[[name]]
| |
| |align=center|description
| |
| |-
| |
| |align=center|[[image|150px]]<br>[[name]]
| |
| |align=center|description
| |
| |-
| |
| |align=center|[[image|150px]]<br>[[name]]
| |
| |align=center|description
| |
| |-
| |
| |align=center|[[image|150px]]<br>[[name]]
| |
| |align=center|description
| |
| |-
| |
| |align=center|[[image|150px]]<br>[[name]]
| |
| |align=center|description
| |
| |-
| |
| |align=center|[[image|150px]]<br>[[name]]
| |
| |align=center|description
| |
| |-
| |
| |align=center|[[image|150px]]<br>[[name]]
| |
| |align=center|description
| |
| |-
| |
| |align=center|[[image|150px]]<br>[[name]]
| |
| |align=center|description
| |
| |-
| |
| |align=center|[[File:PSwitchSM3DW.jpg|150px]]<br>[[P Switch]]
| |
| |align=center|description
| |
| |-
| |
| |}
| |
| | |
| {|
| |
| |- valign=top
| |
| |
| |
| *[[1-Up Mushroom]]s
| |
| *[[+ Clock]]s
| |
| *[[? Block]]s
| |
| *[[Assist Block]]s
| |
| *[[Baseball (item)|Baseball]]
| |
| *[[Blue Coin]]s
| |
| *[[Beat Block]]s
| |
| *[[Board (Super Mario 3D Land)|Board]]s
| |
| *[[Bomb (item)|Bombs]]
| |
| *[[Boost Pad]]s
| |
| *[[Brick Block]]s
| |
| *[[Character Switch]]es
| |
| *[[Cat Wheel]]s
| |
| *[[Checkpoint Flag]]
| |
| *[[Clear Pipe]]s
| |
| |
| |
| *[[Cloud Cannon]]s
| |
| *[[Coin]]s
| |
| *[[Coin Stack]]s
| |
| *[[Coin Block]]s
| |
| *[[Coin Ring]]s
| |
| *[[Color Panel]]s
| |
| *[[Crate]]s
| |
| *[[Donut Lift]]s
| |
| *[[Elevator]]s
| |
| *[[Flipswitch Panel]]s
| |
| *[[Goal Pole]]s
| |
| *Gold [[P Switch]]
| |
| *[[Gold Shell]]
| |
| *Gold Warp Pipe
| |
| *[[Green Star]]s
| |
| |
| |
| *[[Green Coin]]s
| |
| *[[Green Ring]]s
| |
| *[[Giant Brick Block]]s
| |
| *[[Giant ? Block]]s
| |
| *[[Key Coin]]s
| |
| *[[Kick Bomb]]s
| |
| *[[Multi-Vator]]s
| |
| *[[Mushroom Trampoline]]s
| |
| *[[Mystery Box]]es
| |
| *P Plate
| |
| *[[P Switch]]
| |
| *[[POW Block]]s
| |
| *[[Red-Blue Panel]]s
| |
| *[[Red Coin]]s
| |
| *[[Red Ring]]s
| |
| |
| |
| *[[Rock Block]]s
| |
| *[[Rope]]s
| |
| *[[Roulette Block]]s
| |
| *[[Stamp]]s
| |
| *[[Snowball]]s
| |
| *[[Switch Block (Super Mario 3D World)|Switch Block]]s
| |
| *[[Switchboard]]s
| |
| *[[Touchstone]]s
| |
| *[[Trampoline]]s
| |
| *[[Warp Box]]es
| |
| *[[Warp Pipe]]s
| |
| |} | | |} |


