The 'Shroom:Issue 191/Strategy Wing

Director's Notes
Written by: Hooded Pitohui (talk)

Hello, all of you readers of The 'Shroom, and welcome back to Strategy Wing, my only refuge in this annoyingly mild winter. Seriously, where's the snow? Where's the chill? Unfortunately, I don't possess a supercomputer capable of simulating the atmosphere yet (they keep telling me it's "not in the budget" and "doesn't serve The 'Shroom in any way), so I can't answer those questions. I can tell you where you can read about Payday 2 skill trees, Digimon recruiting, and self-imposed Minecraft challenges, though! Where can you read all of this? Why, right here!
We have a smattering of new and returning sections for you this month, along with our usual staples. First, we welcome Waluigi Time (talk) right back into the team with Digging Deeper, his new Minecraft-focused section where he'll be suggesting challenges you can use to spice up your time in survival mode. Kinger returns with more criminal enterprise tips on his bi-monthly schedule. Finally, our master tactician Koops (talk) rejoins us to resume his Fire Emblem: The Blazing Blade playthrough. Of course, we also have your usual Digimon and Pokémon offerings, as well!
If you'd like to join the Strategy Wing team, covering these series or any others, you can head on to the sign up page and send an application to our Statistics Manager, Meta Knight. Whether you want to give us challenges and tips like Waluigi Time in Digging Deeper or Kinger in Getting that Payday, you want to give us a guide or let's play as File City Files and Koops, Your Emblem is on Fire offer, or you just really want to cover the history or a game series in great detail or break down how your favorite game is designed, we can find a place for you! Should you want to submit a special one-off Strategy Wing section for issue 200, you can do that too! Start here to find out more information on that... after you read what our team here has prepared for you!
On that note, I won't keep you from getting to it any longer! You go on and read, and I'll convene the staff and see if citing Fake News' Weather Forecast convinces them to let me make that purchase...
Section of the Month
Congratulations to Waluigi Time (talk) and Mustard Machine (talk) for taking a joint first place with a guide to the final boss battle in the Toy Story 2 videogame and with a guide to getting the essential services of File City up and running, respectively! I want to give a specific nod to To Infinity and Beyond for emphasizing a strategy for dividing and conquering the final boss trio and to File City Files for introducing a new organizational format that keeps each segment concise while highlighting the importance of a given Digimon to File City. Keep up the good work, you two, and, all of our readers, please keep voting to show your support for our writers!
| STRATEGY WING SECTION OF THE MONTH | ||||
|---|---|---|---|---|
| Place | Section | Votes | % | Writer |
| 1st | To Infinity and Beyond | 5 | 35.71% | Waluigi Time (talk) |
| 1st | File City Files | 5 | 35.71% | Mustard Machine (talk) |
| 2nd | Pitohui's Pokémon Academy | 4 | 28.57% | Hooded Pitohui (talk) |
Digging Deeper
Written by: Waluigi Time (talk)

Hello there, 'Shroom readers! Do you play Minecraft? Do you enjoy survival mode? Are you looking for ways to spice up a playthrough? If you answered yes to all three of those questions, then this section is for you! If you didn't, you should read it anyway. I'm going to talk about a 100% self-imposed challenge that you can do to make your survival mode playthrough more interesting that I call the Vegan Challenge! The only requirements for this challenge are that you're playing a version that has mobs in it, which should cover pretty much the entire game's history.
How does it work?
The premise of this is simple - don't kill any animals, or use any animal products. (Whether you want to add not damaging animals at all to this is up to you, but you should probably avoid that anyway.) For the purposes of this challenge, we'll be defining "animal" as any mob based on a real world animal, so you can still slay creepers to your heart's content. (Yes, I know they came from pigs in development, but we're not getting that technical here.) As of the time of writing, this is the full list of mobs you cannot kill:
- Axolotl
- Bat
- Bee
- Cat/Ocelot
- Chicken
- Cod/Salmon/Tropical Fish/Pufferfish
- Cow/Mooshroom
- Dolphin
- Fox
- Frog/Tadpole
- Goat
- Guardian/Elder Guardian
- Hoglin/Zoglin
- Horse/Donkey/Mule/Skeleton Horse
- Llama/Trader Llama
- Panda
- Parrot
- Pig
- Piglin/Piglin Brute/Zombified Piglin
- Polar Bear
- Rabbit
- Sheep
- Silverfish
- Spider/Cave Spider
- Squid/Glow Squid
- Turtle
- Wolf
It's pretty self-explanatory, so it shouldn't be too difficult to add to this list for future updates or modded versions of the game. And since this is self-imposed, you're free to add or remove any mobs from this list if you disagree with an inclusion or think I missed something.
As for not using animal products, to clarify, that doesn't mean that every item dropped by these mobs is off limits. If you manage to find them through other methods, like loot from chests, they're okay to use. (But if you're doing this challenge in multiplayer, I'm not suggesting that you go and steal other players' things! You don't know where those came from, after all.) However, there are some items that you shouldn't be using under any circumstances, either because they are animal products or are crafted with them. If you manage to end up with any of these, just throw them away or store them somewhere, or trade them away to villagers. This list is, again, accurate as of the time of writing.
- Any meat, raw or cooked
- Arrows, including variants
- Beehive
- Book/Book and Quill
- Bookshelf
- Cake
- Candle
- Egg
- Enchanting Table
- Feather
- Froglights
- Goat Horn
- Honey in any form
- Ink Sac/Glow Ink Sac
- Item Frame/Glow Item Frame
- Leather, including armor
- Milk Bucket
- Potion of Harming/Invisibility/Leaping/Poison/Slowness/the Turtle Master/Water Breathing/Weakness, including upgraded versions
- Pumpkin Pie
- Rabbit Hide
- Rabbit Stew
- Rabbit's Foot
- Rotten Flesh
- Scute
- Spider Eye/Fermented Spider Eye
- Turtle Egg
- Turtle Shell
- Waxed copper in any form
As alternatives to some of these items, enchanted tools and armor can be found as loot or obtained through trading, and firework rockets can replace arrows in ranged combat when used with a crossbow. Certain recipes of Suspicious Stew will briefly give you Jump Boost, Poison, or Weakness, replacing some of the potions.
Also, even if you don't have to kill them to get it, don't run around harvesting items from animals. Shearing sheep, milking cows and mooshrooms, collecting honey from bee nests, and anything similar you can think of, are off limits. You can't use most of these items anyway. Wool can be easily obtained otherwise by crafting it from string, trading with villagers, or finding it in naturally generated structures. You can also find beds in villages, or trade with villagers for them.
Finally, a brief word about fishing. Whether or not you want to allow it is up to you, but if you do, make sure it's only catch and release, and that any actual fish you fish up are tossed back into a body of water as soon as possible. Then they can live a fulfilling life of floating on the surface for 5 minutes before despawning.
Can I have pets?

This is really up to your own preference, but I'm going to say yes. Taming wolves, parrots, horses (and their variants), and llamas is perfectly fine. One caveat with wolves is that since you're not allowed to use any meat items, you can't breed or heal them, so be careful with them! Although it's arguable whether you're actually the one using the meat here, so you could make an exception here if you wanted to. Accidentally killing your own tamed mobs through indirect means (i.e. falling too far on your horse or your wolves getting decimated in a creeper explosion) is permissible as long as they actually were accidents.
You probably noticed that I excluded cats from the list altogether, and that's because you need to obtain and use raw fish to tame them. The same potential exception with wolves applies here though, if you really want one.
What about the Ender Dragon?

While dragons aren't exactly "real world animals", you could argue that the Ender Dragon should also be included in this challenge. I've personally excluded it because it's a major point of game progression, and it being a fantasy-based mob gives some leeway here. You're welcome to add it to the list in your own playthrough, of course. If you do so, the Dragon Egg, Dragon Head, Dragon's Breath, and all Lingering Potions are off-limit items as well. Just keep in mind that doing this in singleplayer will prevent you from exploring the rest of The End, which contains valuable loot, including the Elytra.
If you decided to spare the Ender Dragon but still want an end goal, fighting the Wither is a good substitute. Alternatively, if you don't want a boss fight to be your endgame, you can try looking for something rare, like a mushroom biome or other types of rare world generation, or adding other challenges to complete along the way.
I messed up, now what?

Since the challenge is entirely self-imposed, the penalty for breaking any of its rules is also self-imposed, and therefore you can decide what works best. Maybe you could throw away all your items as if you "died", or on the more extreme end, play by hardcore rules and stop using the world entirely. Or maybe you can just move on and act as if nothing happened, trying your best not to let it happen again. From that perspective, you could consider it more of a minimal harm run than a no harm run.
That's all the words
That's pretty much it, hopefully I didn't miss anything obvious! I hope you enjoyed reading this, and if you decide to try it out, I hope you enjoy that too. Don't forget, it's all just for fun, and the only person setting limits is you. Feel free to add on to or remove from this challenge as you see fit to make it your ideal experience.
I'll be back with another one of these next month. If you have any ideas for challenges like this one, let me know and I'll consider writing about it, or you could write about it yourself in your own version of this section!
File City Files
Hello Strategy Wing readers, and welcome back to File City Files, The 'Shroom's number one section about the Playstation's most popular pet simulator/adventure game/cryptic nonsense factory, Digimon World. Last month, we finally began the process of restoring the once prosperous File City, discovering a few new areas along the way. This month, we're going to continue the process of bringing Digimon back to the city and we're going to start exploring these new areas!
We'll primarily be using these maps for exploration this month.
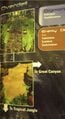
The rich tropical jungle
A spooky trail leading into the graveyard


The Very Hungry Kunemon
In Native Forest, if you take the rightward path past the area with the toilet, you'll find yourself in Kunemon's Bed. You can also get to Kunemon's Bed by simply taking the downward path from Digimon Bridge. Inside Kunemon's Bed, a Kunemon (surprise!) sits in a tree, munching leaves. If you talk to him, Kunemon will tell you that he is hungry. If you decide to feed him, he'll thank you for the food and then challenge you to a fight. One thing that's important to note is that you can give Kunemon anything that the game considers food, so meat, fish, and digimushrooms are all acceptable. I recommend giving him digimushrooms entirely because they're the least filling food item and because they grow in the wild.

In battle, Kunemon has 900 HP, and his attacks can cause two different status effects. The first attack he has is Poison Claw, which, as we discussed last month, can cause poisoning, which lowers health gradually and makes your Digimon slower. Kunemon's other two attacks are Static Elect and Electric Cloud. Static Elect is basically his version of Sonic Jab, so he'll run up and attack you with electricity. Electric Cloud is a ranged attack where he throws a cloud of electricity at you. These attacks are dangerous not only from a damage output sense, but also because they can stun you. In this game, stun is represented by a Digimon being surrounded by three yellow rings. Stun lasts for ten seconds and, during that time, your Digimon won't be able to do anything.

If you only have a rookie, this fight isn't going to be a walk in the park, and you'll probably need to bring in a few recovery items. With a Champion, though, this fight shouldn't be too difficult. When you defeat Kunemon, he drops an MP Chip. After the fight, the player tells Kunemon to join the city and work off what he ate, which Kunemon agrees to do!
Purpose in City: Kunemon eats away at the bushes between Digimon Bridge and the City.
This creates a shortcut the player can use to enter Tropical Jungle faster. Kunemon also has one more minor function. Talk to him, and he will mention a specific food from a region tastes good. For example, he'll say a Blue Apple from the Native Forest tastes good. This might not sound like anything important, but this does tell the player to be aware of certain special items to look out for as they travel the digital world's many regions.
The Amnesiac Shopkeep of the Jungle.
From the entrance of Tropical Jungle, keep going right until you hit a fork in the road. At the fork, there are two options, up or right. Going up will take you to the Mangrove Region. The Mangrove Region consists of a vast jungle connected by wooden bridges. The area has a number of ModokiBetamons; you'll want to avoid them unless you want to farm easy battles or the small recovery items they sometimes drop.


You'll instead want to find the single Betamon in the area (you'll know when you've found him, because he's a darker shade of green). Once you find him, talk to him and he'll tell you that you smell like the city. This brings back his memories of living in the city, reminding him he used to live in the city, and he decides to return to the city. It's a pretty easy recruitment. I mean, usually, we have to at least punch them in the face!
Purpose in City: Betamon joins Coealmon in the towns shop, expanding its item selection. After recruiting Betamon, the following items will now be for sale:
- Medium Recovery- 500 bits
- Various-300 bits
- Autopilot-300 bits
The Autopilot is really useful, because it takes you back to the city upon your Digimon eating it. The Various cures status effects in battle. Finally, the Medium Recovery restores 1500 HP.
The (Stupid) Ghost in the Graveyard.
In the Tropical Jungle, if you go to where you spawn after Coealmon brings you to the jungle, then take the north route, you will end up in the Overdell. The Overdell has two routes you can take. You can either continue following the trail and enter the Great Canyon, or you can dodge (or fight) the two Darkrizamons and enter the gate, which then takes you to the Overdell Cemetery. The two Darkizamons are pretty easy to dodge when entering the cemetery, but they're kind of hard to avoid when leaving since they'll start moving as soon as the screen loads and the game doesn't give you a lot of room to move. They aren't super tough Digimon by any means, but there are two of them (although it's possible one will flee), so either be prepared to fight or have an Autopilot which will take you right back to town. Inside the cemetery, there's a giant mansion, but don't worry about that yet. We're not going to be talking about that for a long, long, long time. Instead, our Digimon of interest is the Bakemon, the Digimon that looks like an old bedsheet ghost and does not wear a hat. Talking to him, he begins talking in stupid ghost language which your character can't understand (if you talk to a Soulmon inside the mansion, it'll refer to Bakemon as "the stupid one").


So there's a bit of misconception with this part. A lot of people think that, if you have a Bakemon with you, your Bakemon will translate, allowing you to understand the questions. That's not true. You see, while having a Bakemon with you after you recruit Bakemon will allow you to understand the Bakemon you can talk to in the city, it does nothing for you when he asks you his questions. So, basically, this part is stupid and if you don't know the answers already, you can't recruit him. Basically, Bakemon asks you three questions, and the answers are "Yes", "Yes", and "No", in that order. If you successfully answer his questions, he flies away to join the city. If you answer one incorrectly, don't worry. Just leave the cemetery and come back, and he'll be waiting to ask his questions again.
Purpose in City: Nothing! Bakemon is the first in what will be a pretty decent list of Digimon that add no real function to the city.
Officially, Bakemon patrols the city to protect it, but that doesn't enhance the city's function in anyway. Instead, Bakemon just floats around "patrolling". Oh, also, just as an example of how dumb Bakemon is, when you talk to Jijimon, instead of getting a little hint about what he does, Jijimon basically goes "I don't know, I couldn't understand him."
We live in a Digiciety.
Digimon, like all living things, need to poop. It's just a fact of life, no need to be immature about it. But Digimon are sophisticated creatures who don't want to poop on the ground like savages. That's why the world is littered with toilets for your Digimon to crap in and why the shop will eventually sell single use Portable Toilets. But what happens if you fail to find a toilet? What happens if you let your Digimon crap on the ground like a savage? Well, four things happen. First, that poop stays on the ground as a permanent reminder of your shame. You're also, as previously mentioned, given a care mistake. At the same time, your Digimon's discipline meter also drops, like your Digimon is a bad dog. Finally, your virus meter begins to fill. What's a "virus meter", you ask? Well, the game actually keeps track of how many times your Digimon poops on the ground, and, each time it does, the meter adds one to its count. What happens if you fill the meter? Well, if you fill the meter by taking sixteen poops on the ground, your Digimon automatically digivolves into Sukamon, the poop-based Digimon.

Sukamon is a champion rank virus Digimon that sucks, which makes sense seeing how it's a punishment for your neglect. Sukamon is basically a Numemon, except worse because it doesn't even have the cool feature Numemon has (that we'll get into at a later date). Instead, all Sukamon has is a shallow initial move pool and really bad stats. One important thing to note is that, no matter what kind of Digimon you have, it will Digivolve into Sukamon when the meter fills. It doesn't matter if it's a fresh or an ultimate Digimon; when that meter fills, it becomes Sukamon. Now, there are two things that slightly make this okay. First, once you fill the meter, it resets, and, secondly, it's possible to reverse the transformation. Deep within the Trash Mountain, there's a colony of Sukamon.
Within that colony, there is a KingSukamon, a special ultimate level Digimon that rules over the Sukamon. If you talk to him, he will very reluctantly transform your Sukamon back into what ever it was before. So getting Sukamon is not the end of the world as long as your have access to KingSukamon, but, really, just don't fill the virus meter. I mean, really, it shouldn't be that hard! There are toilets everywhere!
The Digimon we recruited this month are kind of mixed bag. We got a shortcut that will be helpful and save time. The shop expanded, now selling better healing items and the ability to return to town easily. Finally, a stupid ghost who doesn't do anything, but at least adds flavor, came to File City. We did also learn a valuable lesson, that being that not every Digimon we bring into the city is going to be a super important part of inner workings of the city. The important thing is that we recognize that, in order to save the city and therefore the island, we have to bring as many Digimon as possible into the city, even if they add little value. That's going to be it for this month. Join us next month as we continue rebuilding File City in File City Files.
Getting That Payday
Welcome, crime do-ers, to Getting That Payday, a Payday 2 strategy guide, and happy new year's! Oh, wait, never mind, it's February. Welp, I guess there go my plans for fireworks. I'm back after I made the decision to switch to bi-monthy, so I suppose you'll just have to survive with only six articles a year. I know, it seems impossible, but I believe you'll make it! Well, thinking about it, it's definitely going to be more than six a year. I mean, I'm already brainstorming for Issue 200, so you've still got plenty to look out for! And speaking of things to look out for, Payday 3 finally got a proper teaser trailer! It's not much, but I've now got a new most anticipated game for this year, so that speaks for itself. I also suppose now would also be a good time to mention that, once Payday 3 comes out sometime this year, this article will be switching gears and focusing on Payday 3, not a major shift, but still a shift nonetheless. But enough with all this preamble, we've got crimes to commit! And what a better way to start the, uh, the middle of February with than a new skill tree? That being that of the Tank! With the Tank skill tree, you become an unmovable Goliath, able to tank bullets with ease and shrug off even the highest caliber rounds!
How Does One Payday 2? As the goofiest heister alive, you, along with the rest of the Payday gang, commit stupid crime via co-op shooting gameplay against hoards of cops. With the assistance of various skill trees, weapons, perk decks full of extra, well, perks to gain an advantage, and of course plenty of fashionable masks, you take D.C. with the full force of four insane people with inexplicable access to the strongest gear in existence.
Iron Giant
Starting off with the first Tier of upgrades, the single one we have is Resilience. This increases your armor recovery rate by 15%. Nothing too major, but it does mean less time sitting behind cover healing, and more time blowing things up, and isn't that what we all want in life? Acing the skill lowers the duration of flashbangs for you by 75%. This is a unique, if simple, upgrade that means you can just keep going without stopping! You can probably see the pattern that the skill tree uses for its skills.
Going up to Tier 2, we have everyone's favorite maybe-Christmas skill, Die Hard! While interacting with objects, like rebooting a drill, picking up money, or lockpicking a door, you take 50% less damage. This, along with the other Tier 2 upgrade, makes Tank one of the better skill trees for carrying bags. Acing it also ups the armor points of all ballistic vests (so basically, all armor) by 20. More health to get shot with, simple as that.
Alongside it in Tier 2 is Transporter. Transporter allows you to throw bags farther by 50%, meaning quicker trips to and from vaults. Another nice, simple skill that has strong effects. When aced, Transporter gives you a 1% reduction of the bag moving speed penalty for every ten armor points you have. This doesn't make too much sense in lore other than "Oh I learned techniques on how to hold bags better while using armor", but it is especially useful, and shows how great Tank is for bag moving, something that you wouldn't expect from a skill tree about taking hits like Muhammad Ali.

Going further up to Tier 3, we have Shock and Awe. Named after a military strategy focused on disorienting and demoralizing enemies, it takes shape by increasing the armor recovery rates of you and the rest of your crew by 25%. Once again, we find an upgrade in armor, letting you get in the action faster, though also getting your team the same buff, showing how even the biggest lugs can have the power of friendship in their hearts. Aced, it gives your weapons a chance at knocking back enemy shields when shooting them, with higher damage weapons having a higher chance, along with melee hits having a 100% chance. This is my favorite skill in the skill tree, mainly because I hate shields with a burning passion, but also because it gives melee builds a solid skill to cover up some of their weaknesses.
The other skill in Tier 3 is Bullseye. With every headshot you nail, you recover five armor, although it can only be activated once every two seconds. This, in comparison to Shock and Awe, gives Tank a gun-focused build, letting you shoot down hoards without needing to back down. Once Aced, it gives an extra twenty armor per headshot, for a total of twenty-five armor every headshot. Just a better version of the basic version, although sometimes more complicated builds simply aren't necessary.

Finally in Tier 4, we have Iron Man. Unlocking this skill gives you 30% extra armor, stacking on top of every other armor upgrade you've gotten, which lets you get ridiculous amounts of armor and make yourself basically unkillable, even on harder difficulties. Acing it is where the fun begins, though, as it unlocks the Improved Combined Tactical Vest. When equipped, the ICTV gives you the most armor in the game, so much that you can barely move a muscle, but who needs mobility when you can get hit by a semi truck and dent the truck?
Now, as a nice cherry to top off the article, how about we keep this going with a build of my own creation? Introducing...
The Heavy Weapons Guy!

Of course, start by maxing out the Tank skill tree. From there, put the other points in Ammo Specialist, Oppressor, and if you want, Medic. Weapon wise, grab a Minigun from the Special group for your primary weapon, and a shotgun of some kind as a secondary. Put on Boxing Gloves as a melee, and either an Ammo Bag or a Doctors Bag/First Aid Kit as your equipment (If you're feeling spicy, then put some points in Engineer to get Jack Of All Trades Aced, so you can bring both!). Equip the ICTV as armor, and grab your choice of throwable. Finally, equip the Muscle Perk Deck to complement the high armor with high health, along with a healthy dash of striking fear into the hearts of your foes, and you'll have a front-lining, sandvich eating, cop killing machine!
That's it for this month's issue, and after two months in development, hopefully it was worth the wait. Alright, enough TF2 references. This was a fun article to make, purely because I, get this, actually started writing it at a reasonable time. That's right, I made this a paragraph or two at a time instead of waking up the day that it's due and realizing "Oh no, I have eight paragraphs to write," and hastily getting this finished while attempting to pay attention to like, stoichiometry or something. I think it's time to wrap it up now, though, so have a good day. This has been professional heister Kinger, signing off.
Pitohui's Pokémon Academy
Written by: Hooded Pitohui (talk)
Hello class! I hope you've all been keeping up with your studies. With all this talk about The 'Shroom releasing issue 200 in November, November seems to me as good a month as any to set as the due date for your 2023 term projects. I expect to see you putting your lessons to good use raising your own Pokémon by then! Should you want to go the extra mile, you might even consider writing your methods down and submitting your own Pokémon-raising article to The 'Shroom for issue 200. If you go that route, you can turn in your submission any time between now and November 11th!
That's enough prattling on about the future, though, isn't it? I say it's about time we turned our attention to the present and the distant past, which is why, this month, we'll be examining a Pokémon you can presently catch on the icy slopes in the northern province of Paldea. Traveling and hunting in small packs, coordinating and employing devious tactics to subdue their prey, which can range from small Alolan Sandshrew to the large Mamoswine, Weavile is the evolution of a Johtonian Sneasel that levels up during the night while holding a Razor Claw. I do recommend you read up on its hunting strategies in your own time, as they illuminate Weavile's disposition, but, for today, we'll keep our focus on battles, rather than hunting.
As always, if you're just joining us, I recommend that you take a moment to read the condensed course syllabus in the box below.
First, a Smogon University course, this course is not. No, this academy's lessons are designed to get trainers of any stripe thinking about how they can raise their Pokémon, and, as a result, aren't designed to keep up with the widely-accepted metagame for the series. In some cases, the way I've raised my Pokémon may even flies in the face of conventional wisdom. If you're looking for top-tier strategies, do check out Smogon, but if you merely want to get a little deeper into raising Pokémon while still doing things your own way, feel free to use this section as a reference.
Since we all know the importance of citing our sources, I also need to credit the design of some of the tables used in these lectures to Crocodile Dippy, author of the Pocket Handbook which can be found in early editions of Strategy Wing.In addition, should you need a refresher on terms commonly used in this class, you'll want to take a look in this second box. If you ever find yourself lost during class, feel free to message me, and I can update this handout with additional terms.
Base Stats: Base stats are the values associated with a particular Pokémon species, and are the same across every individual Pokémon of a given species. You have no influence on them. You can think of them as traits tied to a species. A chimp isn't ever going to be able to get as good as digging as a mole will be, and, likewise, an Abra is never going to have the defensive prowess a Shuckle has.
Individual Values (IVs): Individual values, as their name implies, are associated with individual Pokémon. They range from 0 to 31 in each stat, with 31 being considered a "perfect" IV and higher numbers corresponding to different stats. Magikarp A and Magikarp B will have the same base stats, but they may very well have different IVs. To stick with the animal analogy, one mole may be born with larger claws than another mole, and that first mole is probably going to have an easier time digging through dirt than the latter. Individual values are set in stone, strictly speaking, but you can use Hyper Training (from Generation VII onwards) to functionally get a perfect IV in a stat.
Effort Values (EVs): Effort values are the one thing you can easily change. A Pokémon can earn, primarily through battling, but also through means like the use of certain items or mechanics like Super Training, up to a total of 510 effort values, with up to 252 in any given stat. To finish off the animal analogy, no matter what kind of claws a mole is born with, moles who have more experience digging are probably going to be better at digging than moles which have never dug.
Nature: A Pokémon's nature is, more or a less, a stat modifier with a name meant to make it sound like a Pokémon has some personality. Natures will raise one stat by ten percent and lower another stat by ten percent. Some natures raise and lower the same stat, canceling out the effect and leaving stats unchanged. Natures can be functionally changed with the use of special mint items from Generation VIII onwards.
STAB: STAB stands for Same-Type Attack Bonus, and refers to the boosted power of moves that match the type of the move's user. To illustrate this, consider the case of a Lombre, a dual-type Pokémon which is both a Water-type and a Grass-type. Any Water-type moves Lombre uses will have their power boosted by 1.5x, and any Grass-type moves Lombre uses will, likewise, have their power boosted by 1.5x. (There are circumstances where this does not apply, and, while the 1.5x multiplier is typical, some games use other multipliers.)
Now, as we usually do, we'll begin by looking at Weavile's base stats. Those of you who attended our previous class session should spot some similarities to Sawsbuck immediately. Attack and speed are once again Weavile's best stats, though Weavile handily outspeeds Sawsbuck and outperforms it in attack. Like Sawsbuck, Weavile also has middling defensive stats, with its physical defense outright stretching far into "poor" territory. Finally, still fitting the mold of a more extreme, more specialized Sawsbuck, Weavile's special attack is abysmal.
When we take this altogether, it's not difficult to select an approach to raising Weavile. We'll invest heavily in speed and attack to create a frail striker that can, ideally, keep quickly taking out opponents without giving them a chance to attack. Once again, we're lucky to have a clear dump stat, and we can entirely disregard special attack as we set IVs and boost Weavile's EVs.

|
Name: | Weavile | Base HP: | 70 | |
| Species: | Sharp Claw | Base Attack: | 120 | ||
| Type: | Dark | Ice | Base Defense: | 65 | |
| Abilities: | Pressure | Base Special Attack: | 45 | ||
| Pickpocket | Base Special Defense: | 85 | |||

|
Base Speed: | 125 | |||
With a plan in place, our work is simple. We ensure every stat aside from special attack has a 31 IV (if you're short on time or patience, at the least, you should ensure that attack and speed have IVs of 31). We then invest 252 EVs into attack, do the same in speed, and invest the remaining six EVs into one of the defensive stats. I chose to invest the extra EVs into HP because an extra point of HP could help Weavile out whether a special move, physical move, or some form of chip damage (poisoning, sandstorm) affects it, though you might consider investing them into its special defense, Weavile's highest defensive stat. Weavile does, after all, have a slightly better chance of withstanding a single special attack than any physical attack.
For Weavile's nature, we want Adamant or Jolly, no contest. We want to lower special attack and raise either Weavile's attack or speed. I went with Adamant because I feel Weavile is fast enough to outspeed a wide range of threats without the boost from a Jolly nature, and I would rather it be able to hit with that much more power to ensure it gets KOs.
Before we fully settle on this, however, we should examine Weavile's abilities. Weavile gets a choice between Pressure and Pickpocket, and, unfortunately for the icy weasel, neither ability is all that useful. Pickpocket sounds useful on the surface. You may be tempted to think that taking away an opponent's held item can ruin certain strategies they may be employing. There may be some cases where that's true, but running Pickpocket means that Weavile itself can't go in with a held item, and, even if you don't feel that is a loss, you can only make use of Pickpocket once (unless you employ some strategy involving Fling), meaning you have to save Weavile until your opponent sends out the Pokémon with the held item you want to pilfer. Pressure, at least, can waste some PP on high-power, low-PP moves as Weavile gets taken out. Choose Pressure, is my recommendation.
| Level: 63 | HP IV | 31 | HP EVs: | 6 | HP: | 181 | ||

|
Attack IV | 31 | Attack EVs: | 252 | Attack: | 236 | ||
| Defense IV | 31 | Defense EVs: | 0 | Defense: | 106 | |||
| Special Attack IV | 27 | Special Attack EVs: | 0 | Special Attack: | 70 | |||
| Special Defense IV | 31 | Special Defense EVs: | 0 | Special Defense: | 131 | |||
| Nature: Adamant | Speed IV | 31 | Speed EVs: | 252 | Speed: | 221 | ||
Our choice of ability here doesn't affect our stats at all, so, let's discuss move choices. As usual, we'll begin by looking for STAB options, physical moves here, of course. A quick glance at Weavile's learnest reveals four options for viable physical Ice-type moves: Avalanche, Ice Punch, Ice Spinner, and Icicle Crash. Of these four, we can eliminate Avalanche easily, as its base power is only 60 unless Weavile has already been damaged in the same turn. Weavile is fast and frail enough that it's unlikely it can get much use out of the doubled base power Avalanche can get, so we can eliminate it from the list. Ice Punch is a serviceable reliable option, but it does have lower base power than our other two remaining options, so, unless you really want a chance to freeze an opponent (I would say that chance is too unreliable to matter), you shouldn't go with it. That just leaves the choice between Ice Spinner, with a respectable base power and the ability to clear away any altered Terrain, or Icicle Crash, with greater power but only 90% accuracy. Here, the choice really comes down to how much risk that Weavile's move will miss that you want to take. I've elected to be caution and go with Ice Spinner, but, I have a Weavile I raised in Kalos who does have Icicle Crash, so I wouldn't steer you away from the more powerful option, either.
For our second STAB move, our options are Fling (difficult to use reliably), Assurance (potentially useful in a Double Battle, but unlikely, with Weavile being so fast), Bite (base power too low), Beat Up (weakens as more party members faint), Thief (base power too low, and its secondary effect requires Weavile to have no held item), Foul Play (runs off the opponent's attack, rather than Weavile's), and Night Slash. Needless to say, select Night Slash.
| Ice Spinner | Physical | The user covers its feet in thin ice and twirls around, slamming into the target. This move's spinning motion also destroys the terrain. |
| Night Slash | Physical | The user slashes the target the instant an opportunity arises. This move has a heightened chance of landing a critical hit. |
| Brick Break | Physical | The user attacks with a swift chop. This move can also break barriers, such as Light Screen and Reflect. |
| Swords Dance | Status | A frenetic dance to uplift the fighting spirit. This sharply boosts the user's Attack stat. |
For our other two moves, we actually have a number of options. Weavile has a few unexpected types covered in its learnest. Among the physical moves with decent base power and minimal drawbacks that Weavile can learn are Brick Break, Shadow Claw, Poison Jab, and X-Scissor, covering the Fighting-, Ghost-, Poison-, and Bug-types. My recommendation is looking at these four moves and seeing if Weavile can cover any of its weaknesses with them (as Weavile unfortunately has a number of common weaknesses). Unfortunately, none of them are effective against Fighting-types, to which Weavile has a 4x weakness. X-Scissor is effective against none of Weavile's weaknesses, nor is Shadow Claw.
That leaves Brick Break and Poison Jab. Now, Brick Break is super effective against two of Weavile's weaknesses, those two being Rock-types and Steel-types. Poison Jab, on the other hand, is super effective against only one of Weavile's weaknesses, that being Fairy-types. I chose Brick Break this time, though I did have Poison Jab on my Weavile from Kalos, and I can see a case for it. Rock and Steel Pokémon have high physical defense, typically, and even with a coverage move, Weavile might fail to KO them and then get KOed itself. Fairy-type Pokémon tend to have better special defense than defense, so there's a chance Weavile, with its high attack, can KO them with a supereffective move. I'd call either option reasonable.
For a final move, while we could include X-Scissor or Shadow Claw for a surprise or just run both coverage moves, I do recommend a move that can raise Weavile's stats if an opportunity to spend a turn on a status move presents itself. Again, Weavile should hit as hard as possible to knock out as many foes as it can before it takes a hit, so an attack boost is a boon. Especially if you run Icicle Crash, you might be tempted to choose Hone Claws. That's not a bad choice, per se, but I don't consider the accuracy boost worth the loss of being able to boost Weavile's attack twice in one turn as you can with Swords Dance. If Weavile has the chance to boost its stats, a chance it may only get once, the focus should be on raising its attack as quickly as possible, which is why I have selected Swords Dance.
With that, we finish today's lecture just in time! Now that you know how to raise a Weavile of your own, perhaps a trek through the mountains at night doesn't seem so frightening now! Er, although, I still would recommend caution. Mountain travel at night can be dangerous. Now, for next class... Ah, yes, hold on, there's something I haven't yet addressed. Some of you may be wondering why I mentioned the past at the start of today's lecture, but went on to cover nothing historical. That's a fair question. I'll have an answer for you in a future class session. Until then, I suggest you all consider brushing up on an introduction to Sinnoh in the distant past, when the region was still known as Hisui, hm? Consider that your assignment for next class. Until then, you're dismissed!
Koops, Your Emblem is on Fire
It's been a long time, I think. Merry Christmas, happy New Year, happy birthday to me, happy Valentine's day, and the works. It's finally time to dive into the most notorious group of maps in the game, the first of which is pretty much iconic.
Let us begin.
Nino
One of the Black Fang. True and innocent.

Level 5 Mage
HP: 19 (55%)
Mag: 7 (50%)
Skl: 8 (55%)
Spd: 11 (60%)
Luck: 10 (45%)
Def: 4 (15%)
Res: 7 (50%)
Con: 3 (+1 Upon promotion)
Move: 5 (+1 Upon promotion)
Weapon Ranks: C Anima (+D Staves Upon promotion)
Say hello to Nino. Or don't. Whichever works best.
There's really not that much to unpack here. Nino is a very straightforward unit with a very straightforward purpose. She's here to satisfy some people's needs to minmax. And, uh... she fails at that job spectacularly. First of all, Nino is an extremely late joiner, and joins at a very low level. She is spending more of her time being babied and trained up than she is actually contributing, what with the low bases she joins with. They're certainly workable, but still more than low enough to require more care than should be necessary. Now the catch here is that her growths are supposed to be super high to offset this, going from zero to hero in a matter of levels... but there's just the thing. You need 100 EXP to get a level, that's 100 EXP you need to dedicate to her to have a chance to earn stats. And even if it is relatively easy to get EXP... well her growths aren't even that high. A bunch of 50%s in all stats doesn't say much, really, and is most certainly not high enough to justify her usage, much less high enough to salvage her stats within a reasonable timeframe. On average, Nino isn't gonna end up any better than a trained Erk or Pent (though in all fairness the latter is cracked to begin with).
Fun fact, while 11 Speed in theory is fine enough for a bit, her base 3 Con ensures she gets weighed down by even a basic Fire tome. And with only 7 base magic, she's not putting that speed stat to such great use. All in all, Nino isn't a unit worth training given the time and resources needed to make her just decent, what little she could theoretically offer is already provided by other much better units, and she doesn't even properly play the role of a late joiner with high growths given her very coin-flippy growths.
Jaffar
The Black Fang's Angel of Death. Once served Nergal.

Level 13 Assassin.
HP: 34 (65%)
Str: 19 (15%)
Skl: 25 (40%)
Spd: 24 (35%)
Luck: 10 (20%)
Def: 15 (30%)
Res: 11 (30%)
Con: 8
Move: 6
Weapon Ranks: A Swords
Kinda funny that to recruit this guy you need to unlock the very gaiden that gives you the thief promotion item. It's either you get Jaffar or no assassins at all.
Anyway, Jaffar is basically just Karel again. Unlike Karel, however, Jaffar cannot use a Wo Dao, but he also has much better stats. His strength is one point off being capped (that 15% may kick in anytime), and his other stats are nothing to laugh at either. He is swordlocked, but his combat is so good that it doesn't cripple him as much, being practically invincible as is. His speed also allows him to double certain specific enemies in the next chapter that are something of an inconvenience on Hector Hard Mode. Jaffar is a unit with no real weakness outside his obvious minimal availability and weapon type.
Next time, we do more stuff. Bye.
| The 'Shroom: Issue 191 | |
|---|---|
| Staff sections | Staff Notes • The 'Shroom Spotlight • Issue 200: Open Call |
| Features | Fake News • Fun Stuff • Palette Swap • Pipe Plaza • Critic Corner • Strategy Wing |