The 'Shroom:Issue 206/Strategy Wing
Director's Notes
Written by: Hooded Pitohui (talk)
Hello, all you readers of The 'Shroom! Before I sat down to write these notes, I was scraping gunk off of an old can opener with a toothpick. Now, this was after soaking it with vinegar and giving it a fierce scrubbing with an old toothbrush, and, if I do say so myself, all of those methods in tandem produced a nice and clean can opener! You aren't here to read an account of my time cleaning kitchen tools, though (if you are, I fear you'll be rather disappointed), so let me get into the news!
After transmitting their reports on a battle with Kraid and on the qualities of the strange Ice Pikmin last month, Meta Knight (talk) and Shoey (talk) have taken off through the sea of stars yet again. I'll be keeping an eye out for a signal with another Galactic Expedition and the next edition of The Anatomy of a Pikmin, but they're not here yet. In the meanwhile, though, we've still got a slate of six great sections for you to check out!
Though Analogman was defeated, his evil lurks, so our adventures on File Island continue in this penultimate edition of File City Files. Be sure to give it a read! Not only will you find it inspiriting, but you'll also get some neat trivia on a mistranslation and a very useful agricultural tip. Elsewhere, Waluigi Time (talk) ventures into the sweltering Lethal Lava Land in Shine Get. Perhaps he should have brought Ice Man's weapon to put out fires? Well, if he needed a guide on the best way to get it, he'd only have to scroll down a bit to get some tips on obtaining it from Sparks (talk)! Rock-types have an advantage over Fire-types, so maybe he would benefit from reading this month's guide on raising a Rampardos, too...
As you read this month, keep in mind that there is always a place waiting for you on the Strategy Wing team! If you happen to feel a little spark of inspiration and want to talk about the best way to cover a particular game, reach out and I'll gladly talk through ideas with you. If you're feeling confident, go ahead and send an application, even! With our Paper Mario: The Thousand-Year Door special coming in July now, this is a great time to, say, write up a small section on your favorite badge set-ups. You aren't limited to games, either. If you, say, happen to have an effective technique for cleaning (maybe something like... oh, I don't know, can openers), you could share that here, too!
Now that I've brought it all back around, though, it's time I let you get on with reading what our writers have prepared for you this month! Join me in looking at the Section of the Month results, then go forth and enjoy!
Section of the Month
Well, well, it looks as though I'll be transmitting a congratulations to the cosmos! Surely Shoey won't object if I set up a transmitter on the roof to thank Meta Knight (talk) for his excellent guide to battling Kraid in last month's Galactic Expedition. With illustrative diagrammed images, concise and clear text, and even a short video as an additional reference, our swordsman of the stars produced a stellar section. We'll be watching for his next transmission with bated breath!
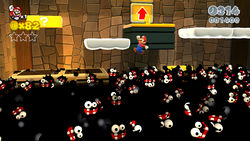
Down on earth, infiltrating strongholds was all the rage, with Four Steps for a 3D World analyzing the design of Searchlight Sneak from Super Mario 3D World and Waluigi Time (talk) busting into an ancient fortress to battle Bowser. It would seem that concise, brisk coverage of platforming sections and commentary on the oddities of Bowser's plans and funny jank from an old Flash game are winning strategies.
My thanks go out to everyone on the Strategy Wing team! If you want to show your appreciation to our writers, keep on voting, and maybe tell someone what you liked about their section in a Poochy's Pick nomination!
| STRATEGY WING SECTION OF THE MONTH | ||||
|---|---|---|---|---|
| Place | Section | Votes | % | Writer |
| 1st | Galactic Expedition | 4 | 30.77% | Meta Knight (talk) |
| 2nd | Four Steps for a 3D World | 3 | 23.08% | Hooded Pitohui (talk) |
| 3rd | Shine Get | 2 | 15.38% | Waluigi Time (talk) |
File City Files
Hello, and welcome back to File City Files, the number one source of Digimon World information from the home of the two-time reigning NCAA Woman's Basketball Tournament runners-up. Last month, we finally scaled the glitched-out Mt. Infinity and found the source of the calamity. It turned out the source was a big nerd named Analogman, who, angry that he couldn't get a girlfriend and because his parents kept yelling at him to stop watching so much subbed-and-not-dubbed anime and get a job, decided to enslave the Digital World to rule as a god-emperor so that he wouldn't have to be threatened with going outside and seeing the sun anymore. After a long and grueling (sort of) fight, we defeated his champion, the powerful digital menace Machinedramon. Angry that his plan failed and that now he'd have to possibly face being an adult, Analogman attempted to destroy all of the Digital World with a bomb, only for it to be redirected back at him, killing him and ending his reign of terror over File Island. OR SO IT SEEMED! Back at home, as we desperately attempted to explain how we totes saved the Digital World for real to our friends, Mamemon suddenly and randomly appeared. I mean, really? Mamemon? I mean, yeah, we hung out for a little bit, but it's not like we were friends or anything. Well, whatever. Mamemon gets busy telling us that Analogman has returned and we need to return to the Digital World immediately!
The Last Ride of File Island's Hero
Back in File City, we can resume the process of recruiting all the recruitable Digimon and getting all the Prosperity Points. Sadly, though, we will not be able to do this with our beloved GBA the Monzaemon. Unfortunately, after so many intense battles, our beloved partner only has about a day left. After giving it all to save his home, having defeated so many different Ultimate Digimon, it's almost time for GBA to rest, scattering his data before reviving as a new Digimon to help us on our quest! But before he passes, we're going to do just a little bit more work with him. We start with that old favorite, the fish glitch. Buying 55 Meats, we head to the lake and catch 55 Digianchovies, but we're not going to use them quite yet. Instead, we're going to spend the vast majority of our money on Digimon cards at the shop.
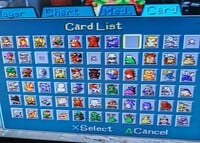
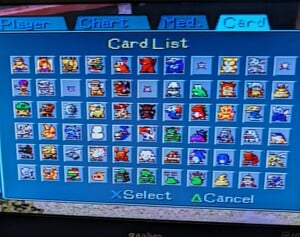
Why are we doing this? Well, because come hell or high water, I'm going to get all the Digimon cards in this game! Why are you looking at me? I can stop buying cards anytime I want… I don't have a problem… YOU HAVE A PROBLEM! Anyways, having spent all but like 34,000 bits on cards, we're frustratingly close to having them all, only missing one single card…
Anyway, now stocked with so many duplicate cards, I have a plan! Going into Birdramon's hut, we go to Misty Trees and from there make our way into ShogunGekomon's Volume Villa! Why, you might ask? Well, you see, we're going to trade all of our extra cards for Merit Points.
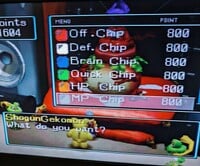
Now, normally I think after you get the Amazing Rod that Merit Points are a waste of time since Digivolution items are almost entirely worthless and the healing items you can get there you can just buy with real money instead. Plus, while ShogunGekomon also offers stat chips which give permanent stat buffs to your Digimon, they're very expensive, with a single chip costing 800 Merit Points. Just for clarity, the highest quality of card is worth 100 Merit Points, so you'd need eight of the highest caliber of card for one stat chip. Since you aren't required to get Digimon Cards at all and since you can only get Digimon Cards through gacha in the item shop or through the secret item shop in the Gear Savanna, you can see how Merit Points, while neat, don't really affect most playthroughs.
For us though, well, since we've done the fish exploit so many times and since I played Card Gacha like a million times… It's not an addiction! I can stop whenever! Oh, where was I? Oh yeah, because of that, I have a ton of extra cards! Enough cards to get over 2,400 Merit Points! That means we can buy three stat-raising chips for the next Digimon. I carefully select them and go with a Quick Chip, an Offense Chip, and a Brain Chip.
Training the Next Champion of File City
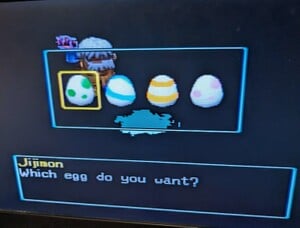
Sadly, shortly after we make our purchase, GBA the Monzaemon, our loyal companion, passes on to the great Digital Graveyard. In his place, an Egg appears. Since, unlike last time, we no longer have access to turning a Numemon into a Monzaemon, we actually have to try and raise this one! Once again, we are given our choice of four eggs.
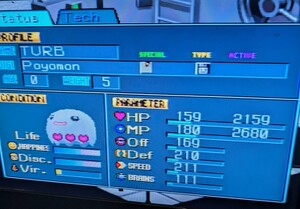
This time we will be selecting the egg with yellow stripes. Hatching from this egg is the adorable ghost-like Poyomon. For his name, we will be naming him Turb for reasons that will become clear later! So, since we're actually going to be trying on this one unlike our last egg, here's kind of how raising a baby works. First off, we're going to give little baby Poyomon all of our stat-boosting items so that he'll become the buffest baby possible! Now, unfortunately little baby Turb has neither the happiness nor the discipline of the stout GBA, so on occasion he will reject the chip we try to give him, but if you think I won't yell at a baby then you've got another thing coming.
If your Digimon ever rejects an item, you simply scold them from the commands menu. This will increase their happiness and discipline, and, more importantly, they'll then eat the item on the next go. Unfortunately, no matter how buff you get your baby, you can't go out and fight wild Digimon. I mean, you can, but the only attack your baby will have is Bubble, which is so weak that even the weakest of ModokiBetamon take like a million years to defeat!
So now it's time to start some training so you can get the buffest Digimon possible. This is what we'll be doing for the bulk of our Digimon's early life. A Digimon's life span goes like this:
- Poyomon will Digivolve after 12 hours.
- He will always Digivolve into Tokomon.
- From there, after one day, Tokomon will Digivolve into a Rookie Digimon.
- Tokomon has 3 Rookie Digimon he can Digivolve into:
- If Offense, Strength, or Brains is the highest stat, it will Digivolve into Patamon.
- If Speed is the highest stat and at least 10% of HP, it will Digivolve into Biyomon.
- Finally, if you sleep in Kunemon's bed, Tokomon has a 50% chance of becoming a Kunemon.
- Tokomon has 3 Rookie Digimon he can Digivolve into:
So, like I said, we're going to spend the bulk of time training because Fresh and In-Training Digimon have like zero combat potential and I can't use our rookie for what I need to do! In my opinion, the three most important stats to train are Offense, HP, and Speed. Now Offense and HP are pretty self-explanatory. You want to hit as hard as possible and you want to be able to absorb as much damage as possible. Speed controls how often your Digimon will attack, so you want that to be pretty high, since, you know, you want your Digimon to attack and not stand around like a dingus! Luckily, by this point, we have the gym almost completely maxed out since we've got Kabuterimon and Kuwagamon. We also have access to Piximon's Training Manual, which I recommend buying as long as you have a lot of money (it costs 50,000 bits) because that makes training give out better stat increases. Unfortunately, we don't have access to SuperCarrots or HawkRadishes because I'm a moron, but you'll probably have access to them by this point. SuperCarrots lower weight and boost training in Offense, MP and Brains while HawkRadishes raise weight and boost training in HP, Speed, and Defense. These boosts last until your Digimon eats something again!
At the end of all of our training, through our efforts we get a Patamon! But we won't have him for long!
The Disappearance of the Lord of Greylord Mansion
With a rookie Digimon in hand, we can now execute my master plan! But before I started on my master plan, first I took Patamon to the arena and mopped up the floor in a Rookie Tournament, winning 2,000 bits and a Double Flop in the process! But on with my master plan! Do you remember the graveyard where we recruited Bakemon all the way back in Issue 191? Do you remember how a forcefield prevented us from entering the mansion in the graveyard? Well, much like the Ice Sanctuary, we require a specific type of Digimon, in this case a Virus Digimon! The best way to get a Virus Digimon that isn't a stupid Numemon is by forcing your Rookie into Digivolving into a Bakemon! Now, you might be asking "how do we force it to Digivolve into a Bakemon?". Well, the answer is both complicated and simple. You see, whenever your Rookie Digimon loses a battle, it has a 10% chance of becoming a Bakemon. We're going to exploit this by forcing Turb to lose a fight. Now, this can take many attempts because, remember, it is only a 10% chance, but luckily I got it on the first time, so I can now introduce our Virus Champion, Turb the Bakemon!
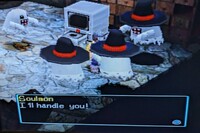
With our new ghostly pal in tow, we head to the graveyard and, with the forcefield no longer affecting us, we enter the Greylord Mansion. Right off the bat, we marvel about how big this mansion is. We scream "anybody home?" and, since nobody answers, we decide it must be fine for us to start exploring it. Which is odd reasoning at best! The Greylord Mansion is split into many different rooms. If you go up the stairs, you'll find that you can't open any of the three doors, with the door on the left not even having a keyhole! On the first floor, the door immediately to your right is sealed by some sort of weird force (probably a lock), while the door right above it on the wall is also locked. Finally, at the top of the right side, we find a door that can actually be opened! This door leads to the bathroom, because even ghosts and ghouls have to poop! Now we have doors on both sides. The door on the right is locked… because of course it is! (getting real "last level of Princess Tomato" vibes from all this), but the door on the left leads to a room where we find three Soulmon crowded around a PC. Inside the PC is a piece of Sirloin. You'll notice the Soulmon don't try to attack us.
They only engage in combat if you force them too! I would say it's worth it to fight the Soulmon if you have a Bakemon because they know moves Bakemon can learn. For instance, I learned Electric Cloud from the Soulmon I fought! Also, one thing that is cool is that Bakemon learns electric moves, so that badass Thunder Justice move I learned from WaruMonzaemon can also be used by Bakemon!
Inside this room is also a fridge that's locked, preventing us from just absolutely raiding this fridge! Seriously, we were going to make the biggest sandwich you've ever seen, but alas! Luckily, the door leading out of this room isn't locked, so we leave this little den and enter a small hallway containing another two PCs which contain an Omni Disk and an Auto Pilot, respectively. Leaving the hallway, we enter a dining room where we spot a twinkle from the fireplace. Investigating it, we find a key, which, like, what?
Who put a key in the fireplace? That's a terrible place for a key! But this is good for us, because we can finally explore some of these damn locked rooms! There are two additional doors in this room, but they both lead to the main hallway. Armed with the Mansion Key, these locked doors are no match for us! We head to the last locked room on the first floor (well, outside of the one that's locked with magic). Unlocking it takes us to another room with another fireplace. This fireplace doesn't have any treasure, but it does have two PCs! Both PCs contain fucking Brain Chips, hell yeah! Turb is going to be the smartest ghost in the world!
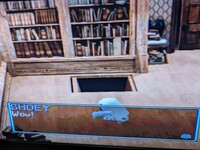
With all the rooms on the first floor thoroughly explored, we head back upstairs. Going to the right, we unlock the first door, which leads to a library. Clicking on the bookshelf closest to the left side of the door, we find a bunch of books. Unfortunately, we can't read any of them…BUT THEN WE FIND A BOOK WITH A SWEET-ASS COVER! HELL YEAH! AND WE WOULDN'T BE A REAL EXPLORATION WITHOUT A LITTLE THEFT SO HELL YEAH WE'RE TAKING IT WITH US! FUCK IT! We attempt to steal this book, but it turns out that it was a trap! A trap door opens from underneath us, sending us screaming as we fall.
Turb can float, so you think he'd be okay, but nope, he took like 1,200 damage from the fall! We like super sprain our ankle as we pitifully wallow in pain. We slowly get up, making a mental note to not steal any more cool books we find. We then realize we were wrong and that there was actually one more door to open, that being the door facing to the right of the bathroom. Opening that door takes us to a little room with a staircase going up, and that staircase takes us to a giant laboratory. Inside is a PC with an MP Chip! Hell yeah! I change my mind; stealing is great! We progress through this laboratory, which has huge giant lightbulbs sticking out everywhere.
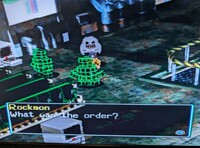
Suddenly there are two Rockmon guarding a PC. What the hell are they doing outside of Mt. Infinity!? We go to congratulate them on landing back on their feet after that whole Mt. Infinity explosion, but of course this means a fight. Luckily, they're very weak, so we send them running. But still, it's good to see they landed on their feet after that whole explosion nonsense.
We keep walking through this Frankenstein monstrosity when we, uh, accidentally step over another trap… Wait. You know what? No. This one wasn't even a trap! We just step over an obvious hole, falling down again! This time we fall into an entirely new room which appears to be some sort of study. There's a PC in the room, so obviously we steal whatever is in that (it's medicine). Taking the only way out, we find a room with a coffin in it.
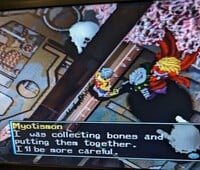
Touching the coffin reveals a staircase leading to the mansion's basement. Being the brave and trusting sort and having never seen any vampire movie, we decide to go down the staircase. What do we find? Well, lying passed out on the floor is - OH GOD, COUNT YORGA??? Oh, wait, no. It's Myotismon… WAIT! THAT'S EVEN WORSE! HAVEN'T YOU SEEN THE ANIME? RUN! RUNNNNNN!
Unfortunately, our heroes have not seen the anime, so they instead approach the wounded vampire. The wounded vampire complains about his intense hunger and begs us to bring him meat. Now, I wouldn't trust Myotismon personally, but since our character has seen neither Count Yorga, Vampire nor the Digimon Adventure anime, he offers to help. First, he offers up the farm-fresh meat we already have.
But commoner meat isn't good enough for Myotismon. Instead, he gives us the key to his meat fridge and asks us to bring him his special meat. We return to the fridge and open it, aaaaand… there's no meat… Instead, there's a note telling us: "Return to the position where you got the points from the dumb one".
Following the note, we leave the mansion and, sure enough, the meat is outside, just hanging out on the lawn. This meat is Steak, and you might be asking "what is the difference between Steak and Sirloin?" Well, it's actually something of a translation error.
The Japanese version of Digimon World specifies that this meat is dripping with blood while the English version just treats it as any other type of meat. It's kind of a confusing decision, all things considered, but, regardless, heading back to Myotismon, we give the blood-soaked steak to the hungry vampire. Grateful, Myotismon thanks us for saving him and, more importantly, doesn't suck our blood or turn us into vampires. Instead, he introduces himself as Myotismon, lord of Greylord Mansion. In turn, we introduce ourselves as Shoey and Turb, two dudes with attitude on a mission to save File Island. Hearing this, Myotismon chuckles and says that we have a lot to talk about before inviting us to dine with him. The food is delicious, a true feast fit for a lord as great as Myotismon! As we eat, Myotismon fills us in on everything. Because of the calamity, his men aren't listening to him anymore. Instead, they talk about such concepts as "worker's rights" and question what makes Myotismon fit to lead them. You know, stupid peasant rabble! He then goes on to explain that his men are supposed to bring him his meals, and that he got so caught up in his work that he forgot to eat. We try telling him he needs a better work-life balance, but Myotismon questions if everybody on the island is acting like his men are. We sadly inform him that, yes, all the Digimon are losing their memories. Now, you could argue that this doesn't make a lot of sense within the storyline since we've already beaten Analogman, but since the whole reason we're here is because of his supposed return, I guess it makes sense that the Digimon haven't fully recovered yet. But while I can look past this little bit of clunkiness, the very next sequence doesn't work at all. Myotismon asks if somebody is causing this, and we're like "hmmmm". What do you mean "hmmmm"? You know who is causing this! We blew him up with a bomb!
Myotismon asks what he can do. We inform him that we're building a city to unite the island and hint that maybe he should join, but Myotismon being a member of the aristocracy, a man of noble birth and blue blood, can't even think about joining the common rabble in File City.
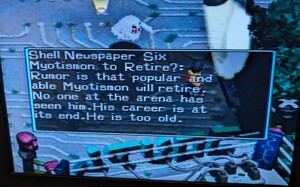
He briefly considers sending his men to join the city but quickly realizes his men are lunkheads only good at fucking people up. We then invite his men to participate in the arena and Myotismon quickly agrees, thinking it will be the perfect refresher for his men! We ask Myotismon if he's interested in being an example for his men by fighting in the arena. He gives a somewhat non-committal answer, saying he'll fight but that first he has to finish his research. With that, the dinner ends and we part ways as friends. Though we're a little sad we didn't really bring anybody to the city. Since we're kind of running out of leads, we go to check the Shellmon newsboard, where we see a new headline.
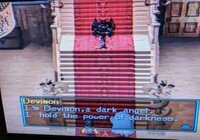
Retirement? That's strange… He was just talking about his important research and now he's thinking about retirement? Also, that line about him being too old seems pretty unprofessional if you ask me. But still, we decide we better head back the Greylord Mansion and see what's up (also, as a side note, to do this quest line you have to read this headline. It won't start working until you do). Heading into the mansion, we check Myotismon's usual spots. We check the dining room and he's not there. Then we check his lab and, huh, he's not there either… That's odd… We go to leave when, suddenly, we get a bad feeling in our gut. Suddenly Devimon appears at the top of the stairs! We ask him who he is, which, like, come on, guy! We've met Devimon! He works in our town! We've bought things from him!
Devimon taunts us, telling us that Myotismon might be alive or he might not be. He then tells us that he's not sure if he played a hand in what happened to Myotismon's downfall. All he knows is that we're enemies. He then flies away as we barely try to stop him. But don't worry! He gets his! He works in retail now!
With that, we now have access to the final door in Greylord Mansion, that being the door immediately to the right on the first floor. This leads into an underground lab! The first hallway of the lab is flanked by two Darkizamons, but don't worry because they're not too difficult to avoid. At the end of the hallway are two paths. The right side is guarded by three Darkrizamons which could be annoying, but since we bought Numemon's Enemy Repel, the ones we didn't talk to have a higher chance of fleeing and boy do they! They bail immediately, leaving only one Darkizamon to foolishly take us on.
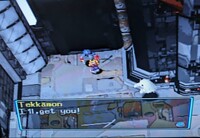
The left side is guarded by a discount not-Giromon, AKA Tekkamon. Tekkamon is an Ultimate-level Digimon, which explains why he's on his own, but honestly he's not that tough… Really, by this point, you should be able to defeat either path with ease!
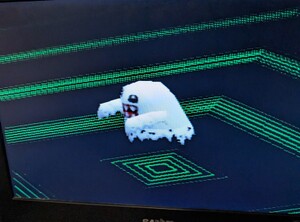
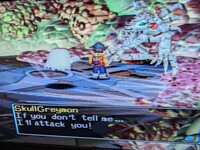
You'll want to defeat the Tekkamon because, once you do, you can enter the opening he was guarding. Passing through that entrance, you enter into a strange part of the laboratory. Body parts are scattered throughout as if part of some mad experiment. At the end of it all, a large pile of bones stands near piles of flesh. We approach the bones, which suddenly come to life, demanding to know if we're Shoey. Shocked, we can only stammer in horror at the monster before us. The monster turns his attention away from us before asking Bakemon if he's Turb? Staring into the eyes of this this this thing, we don't feel any life from it, only evil pulsating from its bones. This is Skullgreymon, Ultimate-level skeletal Digimon.
Furious at being ignored, Skullgreymon demands we answer him or face its wrath, but before we can talk, Skullgreymon decides it's tired of waiting and decides to kill us. SkullGreymon has 5,800 HP and three attacks. He has the very powerful Buster Drive, the pretty weak Dynamite Kick, and the buffing move War Cry. For as fearsome as SkullGreymon is built up, he's not actually that strong. While Buster Drive plus War Cry make him very powerful damage-wise, Buster Drive is actually a pretty unreliable move that misses a lot and has a large charge time where the user can be knocked out of the move. As long as you come in with either an average Ultimate or and above-average Champion and have enough healing items, you shouldn't have any problem defeating him!
In a rage over its defeat, SkullGreymon again threatens to attack us before disappearing (dropping an Offense Chip for our trouble!). With the beast defeated, we realize we need to save Myotismon! But where is he? He's actually in the previous room. It's a little weird because he just suddenly shows up in the previous room, once again knocked out. Myotismon explains that Devimon ruined his experiments with evil! Hearing this and already not a fan of Devimon, we call him a big jerk.
Myotismon explains that, while Devimon was always a tricky Digimon, he was never evil. He then goes on to speculate that (correctly, as it turns out) perhaps Devimon has been brainwashed by something or someone. While we're somewhat skeptical of this, Myotoismon tells us that the Devimon he knew could be a huge asset to our group (which, again, he's spot on). After this, Myotismon tells us that he's going to return to fighting in the Arena, which leads us to…
Purpose In City: So you might be surprised to hear this, but officially it's SkullGreymon and not Myotismon who joins the city! Well, technically they both do, but you only get points for SkullGreymon. SkullGreymon joins the arena and will fight in Ultimate Digimon tournaments, and the same goes for Myotismon.
The Plant of all Plants!
Looking for more leads on Digimon to bring to File City, we talk to Angemon, who tells us "Talk to a plant about another plant". Now, you might notice that this basically means nothing! This is a terrible hint that doesn't help you at all. What it's supposed to hint at is that, on the 15th day of every month, a special plant will spawn next to Tanemon. This is the Rain Plant, which can be used to restore 1,000 MP.
But oh man will you regret it if you use it for that! This is very important. I cannot stress this enough. You can only get the Rain Plant on the 15th day of each month. If you fail to pick up the Rain Plant because you forgot about it or, say, you just don't know about it, it despawns as soon as Day 16 begins! And before you ask, yes, Angemon's hint is the only hint you get about it!
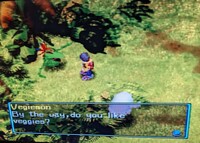
Once you pick up the Rain Plant, talk to Tanemon and he will tell you about the Rain Plant. After he's done telling you about the Rain Plant, head to the Tropical Jungle, where, in the area before the Great Canyon, you will now see a little plant that has sprouted. Noticing that the plant looks like it's wilting, we decide to use the Rain Plant! The Rain Plant lives up to its name, summoning a rain cloud which gives precious life-giving water, the nectar of the gods, onto the plant. Once the rain cloud dissipates, a Digimon springs from the ground. This is Vegiemon, Champion-level Digimon. Vegiemon asks us if we like vegetables and you're given two options, yes or no.
If you answer "no", Vegiemon gets offended and challenges you to a fight for the honor of vegetables everywhere! But if you answer that you do like vegetables, Vegiemon declares you must be a nice guy and decides to join us on our adventure. After an insanely dumb conversation, we get frustrated and tell Vegiemon to just join the city, to which Vegiemon happily agrees!
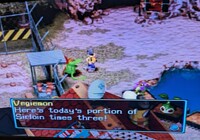
Purpose in City:' Vegiemon is a master of agriculture and serves as the final upgrade to the meat farm. Fencing off the farm to prevent vermin from stealing the meat and using special proprietary fertilizer, Vegimon grows, Sirloin the heartiest of meats.
Even most Ultimates will get full from a single Sirloin! Vegiemon also runs a side business selling SuperCarrots and HawkRadishes, which, as I explained earlier, boost training results!
Vegiemon is one of the most useful Digimon in the game and it's kind of shitty that's he's locked behind something that, if you forget to do it, you don't get a chance to do again until an entire in-game month passes. This is actually what happened to me! When I was doing the Ogremon questline, I thought that the Rain Plant appeared on Day 15 and stayed until Day 30. But nope! It only appears on Day 15, which really messed with my File City Files plans! So, yeah, my big and important tip is that on Day 15 make sure you get the Rain Plant!
That's going to all for this month. It's kind of bittersweet, because next month is going to be the final File City Files. Next month, we're going to recruit the final Digimon to File City on our way to destroying Analogman's evil once and for all! Also, in case you're wondering…
I did in fact get all the Digimon Cards! My reward? Another medal that means nothing in game!
Four Steps for a 3D World
Written by: Hooded Pitohui (talk)
Hello, all you readers of The 'Shroom, and welcome back to Four Steps for a 3D World, a section in which we look at levels from a selection of 3D Super Mario titles through the lens of a design philosophy Koichi Hayashida discussed in an interview.
In brief, 3D Mario game levels in certain titles are designed around an introduction that lets a player learn a mechanic in a safe environment, further development that builds on what the player is learning and introduces more complicated aspects of a mechanic, a twist that adds some kind of significant wrinkle or challenge to force players to consider the mechanic from a new angle, and a conclusion which gives players one final satisfying chance to show they've mastered the mechanic. We look at 3D Mario levels and see if they conform to this model while trying to get some insight on how a good level is constructed.
While we'll branch out into some non-Hayashida-directed games in the coming months, for this month, we're sticking to Super Mario 3D World. We have run out of explosives, so instead, we're going to take a trip to Trick Trap Tower! This is a peculiar level, locking the player into a perspective which has them looking into towers through a glass window for most of the level. It's one of those enclosed levels you occasionally get in 3D Mario titles. We aren't here to go over a history of similar levels, though! We have a question to answer. Does Trick Trap Tower follow our familiar four steps, or is this level strange on a level deeper than just perspective?
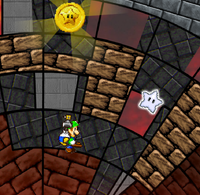
This first segment didn't feel much like the typical introduction step. Arguably, it did introduce the idea of moving around this enclosed tower space, and, admittedly, there isn't much of a need to introduce Thwomps and moving platforms this late into the game. From the perspective of familiarizing the player with moving through and enclosed tower and encouraging exploration, there might be an argument to be made that this could be called the level's introduction step, but if you bear with me through the rest of the level, I'll elaborate on why I don't find it to fit the mold.
Now it's indisputable that this level is throwing us a curveball. Checkpoint areas are usually risk-free pitstops and usually I don't single them out when breaking down a level like this, and I can say it's not the Intermission 2 segment that's breaking with the four step structure. No, it's entirely Intermission 1, which, after climbing and exploring a tower and dealing with "traps" suddenly thrusts players into an enemy arena (though without requiring that the players battle the enemies). At my most charitable, I could say that this feels like an ambush, which does fit with the whole "tricks and traps" concept, I suppose. Even if I grant that, though, it feels out of place. The start of the level was priming players for navigating obstacles in tight spaces and exploring, and this is doing neither of those things. That's another reason I don't feel as though the first segment in this level should be called a proper introduction step.
This is only the middle of the level, though. There is time for the level to get back on track, so to speak, so let's enter the second tower and see if it does that.
Things do not get back on track. We do at least have a return to navigating an enclosed tower, connecting back to the first segment of the level in some way. None of the elements within this second tower, however, connect to the elements in the first tower other than vaguely and loosely possibly being considered "traps". There is no using moving platforms to get around or rising on and slipping underneath Thwomps. Instead, we have a completely different set of platforms and enemies that aren't really directly building on what was in the first tower.
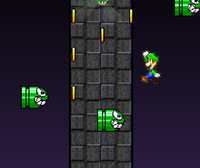
Even so, you might be able to make a case that these are still the development section and the twist section, I concede. The climb up the tower is developing the expectations on the player from "navigate an enclosed tower space" to "hunt for Key Coins while you navigate an enclosed tower space". Then, of course, the release of the poisonous gas and the scramble back down is certainly a "twist". There is a case to be made, for certain, but I'm not sure if I buy it. After all, that first tower seemed to emphasize exploration heavily. It had multiple routes you could take to climb to the top, and even an entire hidden area on its backside. Here, while there is one place a Green Star is tucked away, the rest of the path is entirely linear. I don't think I could really call this exploring the tower to find the Key Coins. I feel there's a disconnect between the linearity of these segments and the relative openness of the first that undermines their connection.
| Step | Notes |
|---|---|
Segment 4
|
Exiting the Warp Box, players arrive at an open space with a yellow platform to carry them to the top of the flagpole. |
Only at the end does an element from the first segment of the level reappear. This, at least, closely resembles the usual conclusion step. Then again, since the conclusion step is usually marked by one little challenge that takes the player to the top of the flagpole, it feels hard to mess it up.
After all that, it's time to answer the all-important question. Do we see Hayashida's four steps in this level? What's the verdict? Ehhhhhh, it's arguable, and, personally, I'm not convinced by the arguments. As I noted earlier, I do think there's grounds from which to argue that the four steps inform this level's design. If you argue that the central lesson being taught and built around is navigating through and ascending an enclosed tower, then, sure. There is an (more dangerous than usual, but that's understandable for a late-game level) introductory section that teaches that skill to players, they do develop it by then asking players to collect Key Coins, and they turn it on its head by forcing players to race out of a tower.
My problems with that, though, are two-fold. One, that idea of navigating the enclosed tower space actually feels secondary to the elements within the towers. I don't think that's an unreasonable position. Even the level's name puts the spotlight on the alleged traps! Yet those traps don't really feel like they have a throughline. Thwomps and the moving yellow platforms in the first tower facilitate exploration, perhaps slowing players down but also allowing players to platform through gaps and take multiple routes up the tower. Meanwhile, the obstacles and enemies in the second tower seem to mainly delay players as they go up and down a linear pathway. That leads to my other problem with the claim that this level is built around the four steps. The two towers read to me as emphasizing very different things! The first encourages exploration, having a linear pathway but also presenting multiple routes upwards and having a whole secretive area. The second has one secretive area (that you aren't stopping at on the way down if you miss it on the way up!) but is otherwise a completely linear path. It makes the two towers feel disconnected in design.
I understand why they designed the second tower with a greater focus on linearity. The whole escape sequence wouldn't work as well without a linear path littered with a few obstacles. At the same time, I think it was a poor decision. With the Key Coins especially, perhaps they should have doubled down on the design of the first tower and scattered them around the different faces of the tower while having multiple routes up through the tower. I feel like it would have made for a stronger throughline for the level and would have allowed players to actually search a bit for the Key Coins rather than simply encountering them all on a railroaded pathway. Plus, it would have allowed them to maybe bring back in those yellow platforms, or use the tilting platforms in more creative ways that better meshed with the focus on navigating an enclosed space.
As is, though, I think this level loses something for turning away from the four steps a bit. They're not an end-all-be-all, and it can be good for a level, as we've seen before, to break from them. Here, however, the different segments of the level only feel loosely connected, and that makes the level a bit less memorable as a whole. If I had to guess, you probably remember the Fuzzy Time Mine chase better than this poison gas escape, and I would attribute that to Fuzzy Time Mine being able to tailor every piece of its design to a tense escape and this level's clashing philosophies not allowing for that.
That's just my take, though! If you think I'm wrong, send in your perspective on the level! For now, with four Key Coins that didn't flood the tower with a toxic cloud, three out-of-place Magikoopas, two towers, and one somewhat-inconsistent level, this has been Four Steps for a 3D World!
Shine Get
Written by: Waluigi Time (talk)
Hello there 'Shroom readers, and welcome back to Shine Get, the number one 'Shroom section where the apocalypse is in two days!!! It was also in two days almost a month ago but the Mushroom Kingdom hasn't been incinerated yet. Clearly, Bowser is a fraud and the Meteor of Ultamite[sic] Destruction is an elaborate hoax, so I feel a little better about slowly dealing with this one month at a time. Anyway, there's a bunch of new levels accessible now! Technically they were already accessible before if you knew what hidden shortcuts to use, but I didn't want to do things out of order...
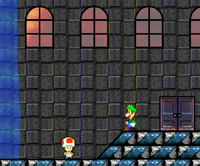
Great way to start things off, I managed to completely forget where the next section of the castle is and had to fumble around the castle for a bit! It's in the top middle door in the main room, the same area where the Sling Star and elevators are. Head to the right and unlock that door, and if you're playing as Luigi, you get to watch him briefly transform into Mario again! I love the jankiness in this game. This leads to the upper hallway, with several new levels to explore and Toads to talk to. Topics of conversation include rumors of castle secrets, a James Bond impersonator with short-term memory loss, a Spider-Toad clinging to the wall, and the 2008 economic crash, among others! Enough of that, though, it's time to turn up the heat in Lethal Lava Land!
Mission 1: The Bully's Tower
Apparently, the Bullies and Toads have been at war, according to the mission description and a Toad at the beginning of the level. My money's on the Bullies. Also, shoutout to Runouw for using the much more fun "Melty Molten Galaxy" from Super Mario Galaxy for this level's track! The Toad isn't helpful and says to talk to the general in the Toad Fortress instead. It's pretty nice in here, actually! There's a map of the area and even some waterfalls! Can I just stay here? No? Okay. There's even more Toads to talk to in here, and get this, one of them even greets Luigi by name! So yeah, it was totally possible to have a trigger for that for a random NPC who doesn't even have anything valuable to say, but doing it for the actually important story moments was off the table, apparently. (And yes, I did come back as Mario to make sure this wasn't a Toad who only addresses Luigi for some reason.) Ignoring those questionable priorities, the general is at the top of the fortress after swimming up one of the waterfalls and taking the Sling Star. He explains that the Bullies and Toads used to get along, but the arrival of the Shine Sprites turned the Bullies evil for some reason and now they're at war. One of the Toad squadrons found a key to infiltrate the Bully's Tower but got badly injured, so now Luigi needs to end the war by stealing their Shine Sprite, I guess! Actually, the key is only a figment of everyone's imagination; you can beat this mission without even entering the Toad Fortress.
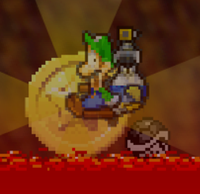
The Bully's Tower is just a short walk to the right, but now the Toads are kind of enemies! They're launching Bob-ombs from the fortress and you'll still take damage if you get caught in the explosion. Sometimes they even shoot a massive barrage of Bob-ombs all at once! I tried to get a picture of that happening but they wouldn't cooperate and instead I just died several times. If you don't dawdle, it's not too bad, just avoid lava and explosions. After a set of rising and sinking platforms, there's a little tower with a Star Coin at the top. Unfortunately, even with Luigi, I was just barely unable to reach it, so I'll make a note of that for later. You might be intended to bounce off of the Skeleton Goonies to reach this, but they fly away pretty quick and don't come back. Anyway, the way forward is basically just a bunch of the different platforming challenges you've already seen in this game, just over lava. I don't think I need to go into detail describing them at this point! Once I reach the exterior of the Bully's Tower, I heroically break through their defenses (read: spin attack through two sets of blocks and knock one Bully into lava), grab the Hover Nozzle, and head inside.
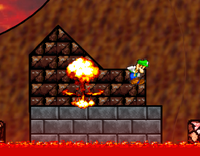
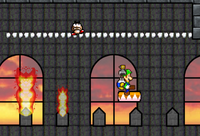
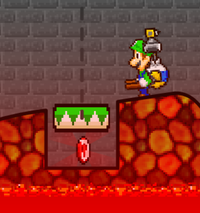
The inside of the fortress is... more lava platforming, who knew! Lots of moving platforms, sinking platforms, and Bullies. Having F.L.U.D.D. makes it pretty easy, although there is one neat obstacle pictured to the right where you're riding on a moving platform with some fire geysers underneath. If you get burnt, you get launched up through a semisolid platform into an alcove with some Goombas inside, forcing you to deal with them and walk back to where the ride started to try again. It's a little thing, but I just think it's neat since it could've just ended up being avoiding the fire geysers and trying to land back on the platform if you get burnt. After getting past that and riding one more elevator, surprise boss time! Big Bully is waiting and won't give up the Shine Sprite. Big Bully is an extremely easy fight that's just a palette swapped Chief Chilly from all the way back in Snowman's Land! Knock him into the lava three times and he's done. F.L.U.D.D. once again makes this super easy, and I managed to combo Big Bully back into the lava when he was trying to jump back out, which was pretty funny.
Mission 2: Into the Volcano
The war is over now! The environment and NPC dialogue even reflect this, which is pretty cool. Something's up with the volcano now, though! A Toad says to go to the left, but I continue ahead and grab that Star Coin now that I'm well equipped with the Hover Nozzle. Just out of curiosity, I kept going to the right to check out the Bully's Tower - apparently they didn't get the memo about the end of the war, because it's still fully guarded and you can even fight the Big Bully again! I have a feeling Runouw expected you to actually listen to the NPC's advice instead of trying to pick everything apart for the sake of a Mario newspaper 15 years later.
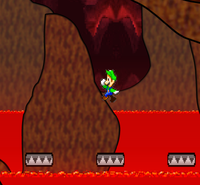
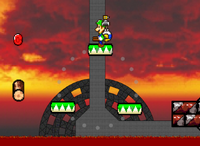
Anyway, how about actually working on the objective? Heading left is a lot like heading right, more lava platforming fun. There's not much to do for now on the first screen, but on the second screen there's another map showing that the volcano is close by, and just after that there's a Star Coin underneath a moving platform with fire geysers. I ended up getting launched into the air by a fire geyser and landing on the Star Coin, then falling into the lava and dying! But it's okay, it was funny and made a good picture. Right after that there's a Rocket Nozzle and an arrow pointing up, but before following it I went just a little more to the left to grab a Turbo Nozzle, just to have it ready. Following the arrow, I arrive on a cliffside with an entrance into the volcano.
This is kind of like the secret levels in Super Mario Sunshine because the heat in the volcano causes the water in F.L.U.D.D.'s tank to evaporate, making it useless here. You might be able to get a few seconds of use out of it right at the beginning, but nothing game changing. Anyway, what's the theme of this edition? Platforming that would be too boring to actually describe! Also, there's a sign placed in front of a fire geyser that teaches you nothing can damage you while you're reading signs. Remember to read, kids, it'll save your life apparently. Eventually I reach what can only somewhat be called a fork in the road, because the path to the right is just all sorts of lava and fire and death and I've already killed Luigi too many times today. Not for long, though! After a couple of seesaw platforms to the left, there's a Metal Cap to go through the lava fire death tunnel with. The switch inside causes some new platforms to appear back to the left that are used to progress further. Unfortunately, the path ahead is eventually blocked, but a sign says that good things come to those who wait. Standing in front of it until the blocks disappear drops you onto an elevator to move forward. After a little bit of additional platforming, there's a Sling Star to the next section.
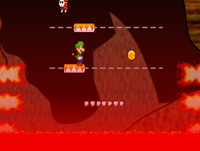
Now here's where things get interesting. The volcano starts to erupt, so now this is a vertical section with quickly rising lava! The game throws in a bunch of different platform types so it's just getting through these as fast as possible. Pretty early on, there's another Star Coin in a circle of rotating platforms that's very hard to miss. You may, however, end up getting roasted trying to grab it like I did! It's a pretty quick segment overall, especially if you're not trying to grab screenshots for a 'Shroom section. At the end there's a Sling Star to save you from the volcano's wrath just before it erupts, sealing the entrance and releasing the Shine Sprite. For some reason, this world specifically seems to have nothing but problems when Shine Sprites are involved.
Mission 3: The Lava Wheel
The Toads don't really have anything to say anymore, so now it's back to plain old mission descriptions. We're going to want to head to the right past the Bully's Tower until reaching the Lava Wheel. This is an extremely simple Silver Star hunting mission, all five of them are inside the wheel so just pick them up as it turns. There's also a Star Coin near one of them, so be sure to grab that as well. The only real trick here is to stay away from the left side of the wheel as much as you can because it might pull you straight down into the lava if you're not careful. Despite what a nearby Toad claims, it's not actually instant death if that happens, but it's pretty close. Not much else to say here, this was a very easy Shine get!
Mission 4: Red-Hot Red-Coins
Ahh, the Red Coins. Always so interesting to write about! These are all scattered around the area just to the left of Toad Fortress known as the steps. The first one is in plain sight on top of a set of spinning platforms just as you arrive. The second one is under an elevator, requiring the usual trick of stepping on to activate it and then back off to grab the Red Coin before it returns to its original position. Taking the elevator up, there's a Sling Star that shoots you directly to the third Red Coin, which was at the top of some sinking stairs that I already crossed. It's way too high to get just by jumping up the stairs, though! Back to the elevator again, to the left there's two Red Coins underneath a seesaw that will definitely kill you if you try to grab them, so I'll be keeping my eyes open for power-ups. For now, I'm going to take the elevator once more, this time taking the moving platform on the left to some floating platforms.
There's a map here showing what we already know about the location of these Red Coins! You'll want to use the Rocket Nozzle in front of the sign to grab a Star Coin, though. This is my 43rd, unlocking the Level Designer's Other Tileset, the junk drawer of level design elements. There's a few different ways to go from here. I started by going right, finding the fourth Red Coin (not counting those rudely placed ones for now) in the middle of another circle of spinning platforms, and the fifth at the end of a short segment of falling logs. Easy stuff, thanks to the nearby Hover Nozzle! The sixth Red Coin is perched on a single log on the left side after another set of spinning platforms. Now there's just those two left. Going back to the right again, instead of continuing that way, I turn left to get on top of the main platform thing and grab a Metal Cap! I drop down with that, grab those last two Red Coins in one fell swoop, and the Shine Sprite spawns at the top of that elevator again. One more ride for the road!
Mission 5: The Secret of the Fortress
Well what do you know, there was a secret in the Toad Fortress (or Blue Toad's Fortress, this game's terminology is about as consistent as all the Super Mario 64 licensed guidebooks out there) this whole time! On the left side of the fortress, the bottom brick is cracked and can be broken with a spin attack, opening up a passageway to a secret area. Unfortunately, F.L.U.D.D. is deactivated in this area, but you know what's not deactivated? Bill Blasters! There's so many of them in so many different colors, it's like a Bullet Bill factory had a going out of business sale and the Toads bought every single one they had. At first, it's all about platforming while dodging Bullet Bills, and then it becomes all about platforming using Bullet Bills! A word of advice here, you can mostly ignore the sign that says spin attacks are your friend. Without F.L.U.D.D., it's good to use to have more control for the platforming, along with defeating Bullet Bills, but once you get to sections where you're meant to bounce off Bullet Bills, using the spin attack just gets you killed! Instead of bouncing off the Bullet Bill, it instantly dies and you keep falling without any boost, most likely into the bottomless pit below. I learned this lesson the hard way.
Anyway, this is a really fun segment! Very satisfying to hear all those boinks as you bounce off of Bullet Bills. There's a lot of them being fired pretty much constantly, so you usually don't have to worry about running out and dying unless you're just being irresponsible. Shortly after a segment where you have to jump upwards using green Bullet Bills, there's the final Star Coin of this level under a seesaw. It's very hard to miss, but in case you need some colors to help, the Bullet Bills here are gold! It's tricky to get, because not many Bullet Bills fly that low to bounce off of. Just be patient, and uh, maybe accept that you'll just have to die and respawn with the Star Coin still collected, like what happened to me. This section is back to being more about avoiding the Bullet Bills across regular platforming, but it's the final section before the Shine Sprite.
And that's Lethal Lava Land wrapped up, with a total of 42 Shine Sprites and 44 Star Coins! It's a pretty strong start to the upper hallway, in my opinion. The missions are fun, there's some interesting bits of level design, and even some cool (or maybe hot?) worldbuilding. Thanks for reading, and join me again next month when I tackle Tall Tall Mountain and two days will still have not passed somehow!
Pitohui's Pokémon Academy
Written by: Hooded Pitohui (talk)
Ah, hello, hello, class. It is good to be back. I may have to ask that you pardon me, however, if you should find I lack an enthusiastic demeanor this class session. I fear I'm a bit fatigued still, you see, from a recent trip to Castelia City. Oh, but, I should say that I don't mention that incidentally! There are numerous museums within reasonable distance of Castelia, and hardly is it a challenge at all to find a display on extinct Pokémon. Taking inspiration from one such museum and bearing in mind that dinosaurs excite across generational divisions, I took the liberty of having a Skull Fossil restored so that we could have a bit of a spectacle in class today.
Now, let the past inspire the present, for today's topic is raising an unmatched Pokémon with unmatched force, the charming prehistoric battering ram, Rampardos!
Before we breathe some life into the ancient world, allow me to remind those of you who are just joining us to take a look at our course policies in the first box below. If you need to review the most commonly-used terms in this class, open up the second box.
First, a Smogon University course, this course is not. No, this academy's lessons are designed to get trainers of any stripe thinking about how they can raise their Pokémon, and, as a result, aren't designed to keep up with the widely-accepted metagame for the series. In some cases, the way I've raised my Pokémon may even flies in the face of conventional wisdom. If you're looking for top-tier strategies, do check out Smogon, but if you merely want to get a little deeper into raising Pokémon while still doing things your own way, feel free to use this section as a reference.
Since we all know the importance of citing our sources, I also need to credit the design of some of the tables used in these lectures to Crocodile Dippy, author of the Pocket Handbook which can be found in early editions of Strategy Wing.Base Stats: Base stats are the values associated with a particular Pokémon species, and are the same across every individual Pokémon of a given species. You have no influence on them. You can think of them as traits tied to a species. A chimp isn't ever going to be able to get as good as digging as a mole will be, and, likewise, an Abra is never going to have the defensive prowess a Shuckle has.
Individual Values (IVs): Individual values, as their name implies, are associated with individual Pokémon. They range from 0 to 31 in each stat, with 31 being considered a "perfect" IV and higher numbers corresponding to different stats. Magikarp A and Magikarp B will have the same base stats, but they may very well have different IVs. To stick with the animal analogy, one mole may be born with larger claws than another mole, and that first mole is probably going to have an easier time digging through dirt than the latter. Individual values are set in stone, strictly speaking, but you can use Hyper Training (from Generation VII onwards) to functionally get a perfect IV in a stat.
Effort Values (EVs): Effort values are the one thing you can easily change. A Pokémon can earn, primarily through battling, but also through means like the use of certain items or mechanics like Super Training, up to a total of 510 effort values, with up to 252 in any given stat. To finish off the animal analogy, no matter what kind of claws a mole is born with, moles who have more experience digging are probably going to be better at digging than moles which have never dug.
Nature: A Pokémon's nature is, more or a less, a stat modifier with a name meant to make it sound like a Pokémon has some personality. Natures will raise one stat by ten percent and lower another stat by ten percent. Some natures raise and lower the same stat, canceling out the effect and leaving stats unchanged. Natures can be functionally changed with the use of special mint items from Generation VIII onwards.
STAB: STAB stands for Same-Type Attack Bonus, and refers to the boosted power of moves that match the type of the move's user. To illustrate this, consider the case of a Lombre, a dual-type Pokémon which is both a Water-type and a Grass-type. Any Water-type moves Lombre uses will have their power boosted by 1.5x, and any Grass-type moves Lombre uses will, likewise, have their power boosted by 1.5x. (There are circumstances where this does not apply, and, while the 1.5x multiplier is typical, some games use other multipliers.)
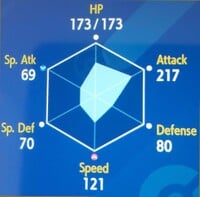
Revived from a fossil or not, Rampardos remains a Pokémon, so we shall treat it like any other Pokémon by first examining its base stats. What we find, you'll notice, is an extraordinary physical attack stat! I do mean extraordinary. Current research suggests that Rampardos possess more physical strength than any other "regular" - that is, non-Legendary, not an Ultra Beast, and not Mega Evolved - Pokémon!
Unfortunately, physical attack is Rampardos' only stand-out stat. All of its other stats are middling at best. Even worse, its speed stat is merely middling. Were it lower, we might be able to use Trick Room to unleash Rampardos' power to devastating effect. Though I must emphasize the "might" in that statement. Even under Trick Room conditions, Rampardos' frail nature makes priority moves a serious threat to it, and there's also the matter of switching into the Trick Room safely.
Regardless, we know we must capitalize on that attack stat, so we will make the most of the speed we have and attempt to make it possible for Rampardos to move quickly enough to put its strength to good use.

|
Name: | Rampardos | Base HP: | 97 | |
| Species: | Head Butt | Base Attack: | 165 | ||
| Type: | Rock | Base Defense: | 60 | ||
| Abilities: | Mold Breaker | Base Special Attack: | 65 | ||
| Sheer Force | Base Special Defense: | 50 | |||
| Base Speed: | 58 | ||||
In light of our plan, it makes the most sense to invest a full 252 EVs in both attack and speed, giving the leftover EVs to HP to add just a bit of extra bulk to Rampardos. While we aren't investing in defenses, it still benefits us to keep defense and special defense as high as possible, so let's designate special attack as our dump stat and choose a Nature which reduces it. We're going to stack Rampardos' moveset with physical moves anyway, after all, so it makes no difference to us if special attack is low. Rampardos' attack stat is already high enough and we need to gain every bit of speed we can, so we'll go with a Jolly Nature in particular, lowering special attack while raising speed.
That covers our EV distribution and, implicitly, our desired IV distribution, so it's time we turn our attention to selecting an Ability. Rampardos has two possible abilities, those being Mold Breaker and Sheer Force. Mold Breaker allows Rampardos to ignore (most of) the Abilities of other Pokémon. This can have some uses. For instance, it can allow Rampardos to use Earthquake against a Pokémon with Levitate. If you absolutely need to use it - and you may, because Rampardos' other Ability is its Hidden Ability, which can be tricky to actually obtain - then you can use it.
That said, Sheer Force is far and away the better option here. Any move that has a secondary effect, such as, say, a chance to inflict a status condition or lower the opponent's stats, will not have its secondary effect activate, but, in return, the power of the move will be boosted by about 30%. Rampardos is far better equipped for straightforward offense than any tricky strategy, so this suits it just fine while further capitalizing on its massive attack stat. It's a great ability for Rampardos that pairs well with its attack stat and it will help inform the moves we select, so I recommend Sheer Force if it's at all possible to obtain it.
With that established, we can get into building Rampardos' moveset!
If you've been attending class regularly, you'll know by now that we typically begin by searching for a STAB move for our Pokémon of choice. In this case, we want to search Rampardos' moveset for a physical Rock-type move. There are actually a few candidates that fit our criteria in Rampardos' moveset, but the only ones with the level of power we're interested in are Rock Slide (75 BP), Stone Edge (100 BP), and Head Smash (150 BP). Now, you might be tempted to take a close look at Rock Slide. After all, it's the only one of these three moves to get the Sheer Force boost, which takes its power up to a very respectable 97.5 BP. Even with that boost, though, it has slightly less power than Stone Edge and worse accuracy (75% compared to 80%) than Stone Edge. The only advantage Rock Slide has over the other two moves is higher PP, but we're expecting Rampardos to hit hard, not last long, so I would say that the higher power is worth the tradeoff.
That leaves us with a choice between Stone Edge and Head Smash, neither benefiting from Sheer Force, both having a mere five PP, and both having 80% accuracy. Now, Head Smash clearly has higher power, but it comes with a drawback. When using Head Smash, Rampardos will take 50% of the damage it deals (this is not affected by Sheer Force), and, considering we expect Rampardos to hit like a speeding truck, that recoil damage will add up quickly. That said, keeping in mind that we don't expect Rampardos to have much in the way of longevity, I'd say the recoil damage is a worthwhile tradeoff. It's better to ensure Rampardos has KO-ing power than to try and keep Rampardos in battle over the long haul, so I suggest going with Head Smash. If you're truly concerned about recoil, though, Stone Edge is at least a viable alternative.
Moving on, we're going to ignore Sheer Force just a little longer because Rampardos has access to the ever-reliable Earthquake (BP of 100). Earthquake is solidly powerful physical move that gives Rampardos broad coverage while also giving it a counter to Steel-types in particular. While it is a shame it can't capitalize on Sheer Force, it's simply too useful to turn down.
Now we finally get to factoring in Sheer Force. For our final two moves, we'd ideally like one move which focuses solely on power and that breaks the 100 base power barrier with the Sheer Force boost and another move which gives Rampardos a counter to one or more of its weaknesses.
For the former, we have a choice of Zen Headbutt, Crunch, and Iron Head (all of which have a base power of 80 and get boosted up to about 104) or Body Slam (base power of 85, boosted to about 110). Thanks to its higher base power, you might be tempted to go with Body Slam. That's entirely workable, if you go that route, since Earthquake can take care of Steel-types and Rock-types who would resist it. Really, any of those options except for Iron Head are workable, with Iron Head being excluded because the Steel-type does poorly offensive. Myself, though, I've selected Zen Headbutt. The Psychic-type isn't spectacular in terms of offensive coverage, but it does well enough, especially with Earthquake to take care of Steel-types, and it covers Rampardos' Fighting-type weakness nicely.
In the interest of coverage, for a final move I elected to put Fire Punch on Rampardos, giving it yet another means of dealing with Steel-types (and, less importantly, Bug-types), a means of hitting Ice-types extra hard, and a means of countering its Grass-type weakness. Fire Punch also gets the Sheer Force bonus, giving it a very respectable 97.5 base power. If for some reason you're really worried about Water-types over Grass-types, you could swap it out for Thunder Punch. The coverage isn't as good with Thunder Punch, though.
| Head Smash | 
|
The user attacks the target with a hazardous, full-power headbutt. This also damages the user terribly. |
| Earthquake | 
|
The user sets off an earthquake that strikes every Pokémon around it. |
| Fire Punch | 
|
The target is attacked with a fiery punch. This may also leave the target with a burn. |
| Zen Headbutt | 
|
The user focuses its willpower to its head and attacks the target. This may also make the target flinch. |
With that, then, we've built Rampardos' moveset up nicely, with a few alternative possibilities, no less. Now then, we wrapped that up fairly quickly today, so... Well, they say Rampardos can easily fell a tree with a headbutt, and we do have a tree in need of removal on the campus grounds. Shall we make a deal? Follow me outside and we'll use the remaining lecture time for a little demonstration, and all I'll ask in return is that you attend next class session with a report on a fossil Pokémon - aside from Rampardos - of your choice!
I think you'll find those terms agreeable, so come now, let's get outside! I shall see you all next month, no doubt all eager to raise another Pokémon!
An Overly Detailed and Funny Walkthrough of Mega Man
Welcome back! Last month, we beat three of Dr. Wily's Robot Masters. This month, we're going to take on the remaining three, starting with Elec Man!
Elec Man
The Beginning of the Climb
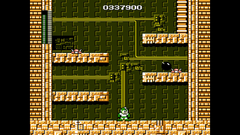
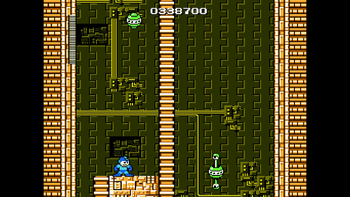
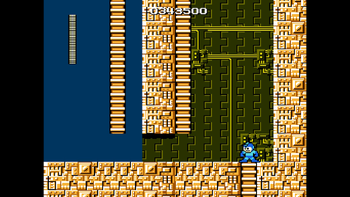
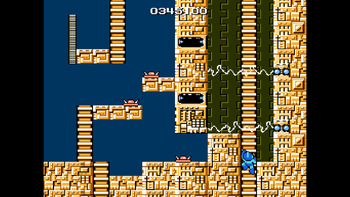
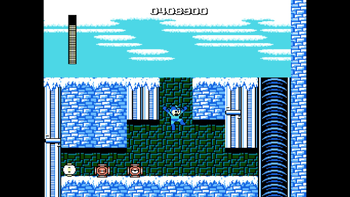
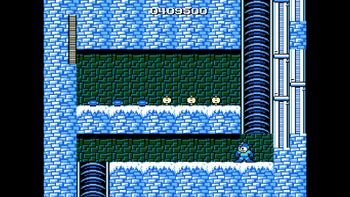
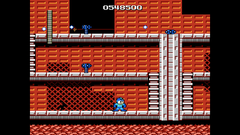
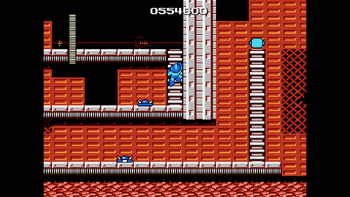
The first room in this stage has us using platforms with those typically-invincible ground enemies from Bomb Man's stage. It's kinda difficult to reach the ladder up above with them around, so I used Bomb Man's weapon to blow them up! That'll make things much easier. Don't be afraid to use your special weapons!
The room above has more of those enemies, this time on smaller platforms! If you didn't have a weapon to take them out, you'd have to shoot them when they're on an edge to stun them, and then have precise platforming to climb. With bombs however, I can cross out the "precise" part. Now I'm free to jump wherever I want to!
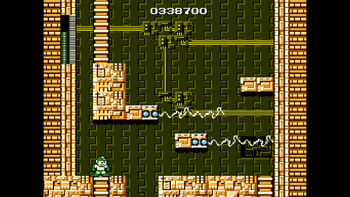
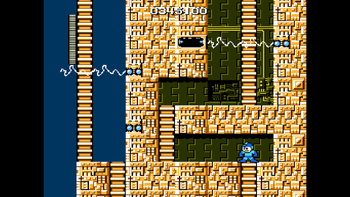
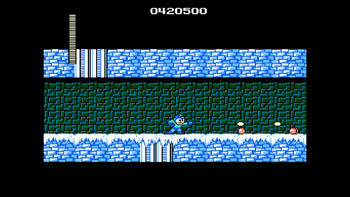
The next room has none of those enemies, but instead the platforms fire off electricity every now and then! We now have to time our jumps and proceed onwards.
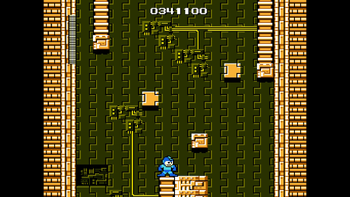
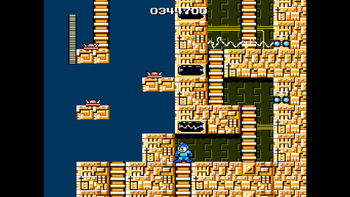
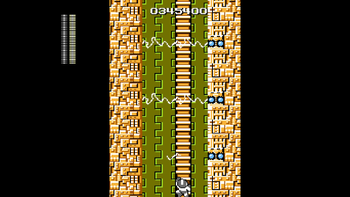
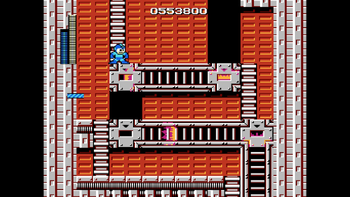
This next section has a very long ladder leading upwards. There are also these floating green enemies that only move up and down, but that will fire lightning at Mega Man if he is in range. You can try to rush through, but you'll probably take lots of damage if you do so. What I do is shoot the ones on the left before they can shoot me, because those ones descend rather than ascend. The ones on the right won't be able to reach me in time. The next room continues the ladder with more of these enemies.
At the top of the ladder are these blocks that disappear and reappear in set places. There are also two ladders that lead upwards; one on the left, and the other on the right. Use these blocks to climb upwards and reach a destination!
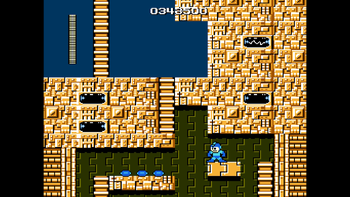
The left ladder leads to some weapon energy as well as a dead end, while the right has more of these blocks that lead to another ladder. If you haven't guessed it already, this entire stage is climbing upwards. At least it's more engaging than Cut Man's stage! Also, now we can see the sky!
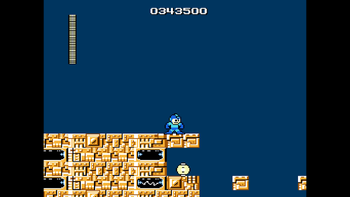
Now for a break in climbing. We must jump across many small platforms to reach a ladder leading even higher. Looks like Mario isn't the only precise platformer around!
Which Way to Go?
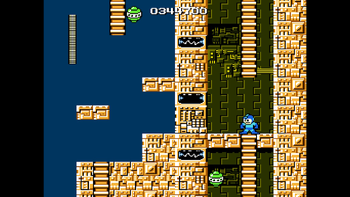
Now we have two ladder choices again. I'm gonna go right. You better hurry on making your choice though – more lightning enemies will ambush you!
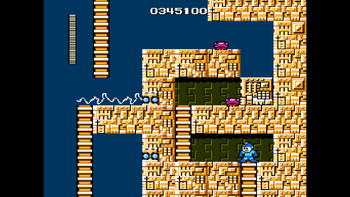
I'm going right, so the next room has more electricity for me to avoid. The left side has those enemies, so with a weapon like Bomb Man's weapon you can get rid of them.
Now we have a break, or so you thought! I say "go go go", as more of those voltage villains are here too!
The next room has no enemies, but instead an interesting item behind big blocks. Using Guts Man's ability, I can discard of the blocks and grab the item. This item grants me the "M" power that allows me to create platforms! It's vital that you grab this item – you'll need it later on. It's also recommended to clear Guts Man's stage before this because you won't have to return to this stage. Now we have more ladder choices, and so I'll go right again.
Now the next room has ground enemies on the left and electricity on the right. I'm running out of things to say here!
The next room just has electricity on both sides! No enemies this time around.
The next area has jumping pink enemies on the right and electricity on the left. A rock blocks the right path, but using Guts Man's ability and the "M" powerup we just obtained, we can bypass this!
The next area is another platforming section, followed by reaching another ladder while avoiding electricity. Oh! Looks like my Nintendo Switch is running low on battery. Let me charge it real quick. Alright, it's plugged in! Let's continue.
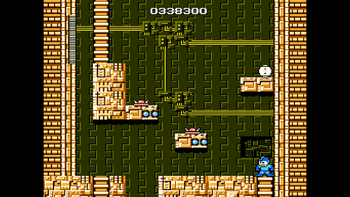
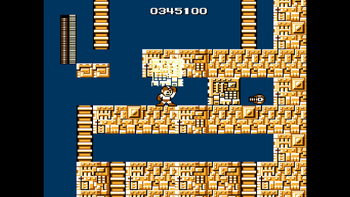
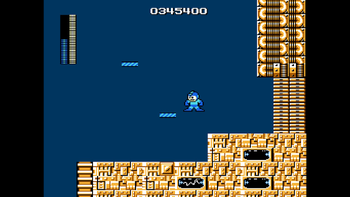
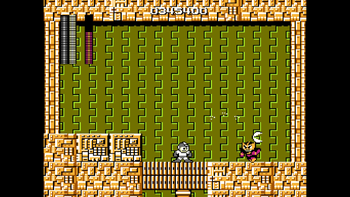
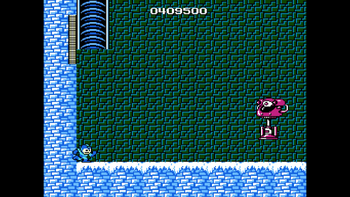
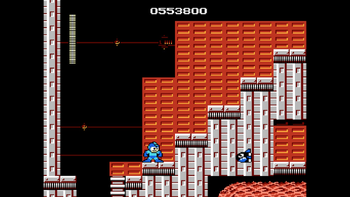
At the peak before the boss door is another one of the cyclops mechs! This one is difficult to get past, so I used the "M" powerup to create platforms leading me higher than the enemy. While it tried to chase me, it fell down to the room below. Aw yeah!
An Electrifying Match
Now we must climb up a ladder to reach to Elec Man. There are two rooms of electricity to get past, and then it's battle time!
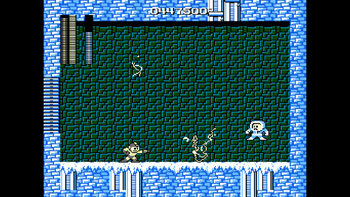
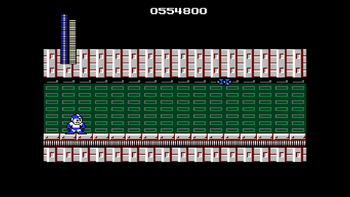
Elec Man is the toughest Robot Master, no question. He's super fast and throws electricity that deals MASSIVE damage to you. It's nigh impossible to defeat him without Cut Man's weapon. Has there ever been anyone who beat Elec Man without his weakness? Thankfully, three hits of Cut Man's weapon will put an end to Elec Man. Also, don't ask me how but I didn't take any damage from him. Two more left!
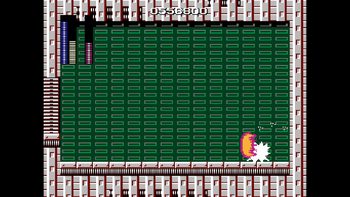
Elec Man's weapon allows Mega Man to throw large bolts of electricity in front of him, as well as two smaller bolts above and below him. It's possibly the best weapon in the game! Up next is Ice Man!
Ice Man
A Cold Greeting
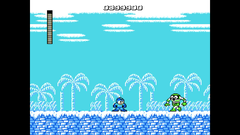
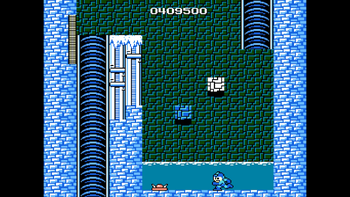
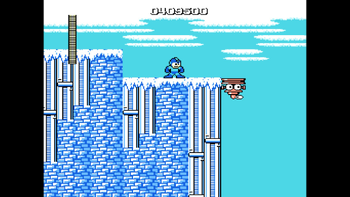
Ice Man's stage is set in a snowy island(?) that is very slippery. In our way there are these weird green guys that run at us and detach from the lower half of their body and fly at us, dive bombing us too. Shooting their body will only quicken the process, but one shot at their head will defeat them for good. After some progress, there is water! Let's dive in!
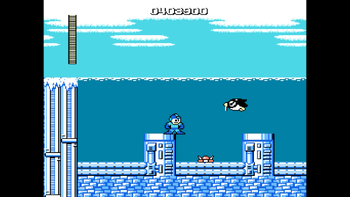
In the water, Mega Man becomes sluggish but jumps higher and becomes floaty. There are those ground enemies again, but also these penguins that swim in the same pattern as the Bullet Bill-like enemies from Bomb Man's stage. These ones don't explode, so they're the easier enemies here. We will eventually exit the water.
There is now a "pipe" that will lead underground. Before it, however, are orange eye blocks guarding a health powerup.
The first underground room has a ground enemy as well as the return of the disappearing and reappearing blocks! Use them to reach the top, or you can use the "M" powerup, but I recommend saving it for later…
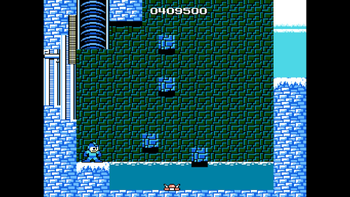
After falling down some more, we must get past another block section. This one is more tricky, as multiple blocks can appear and disappear at once. Keep at it! You'll get through eventually. Just don't take too much damage from that ground enemy down in the water below…
Flying Platform Craziness
What follows is one of the worst platforming section in a video game. We must traverse across moving platforms with eyes that fire left and right whenever they change direction. The worst part, though, is that these platforms are random! There's a small break in between, but then there'll be penguins attacking you! The best way to get past this is by using the "M" powerup. Save it for here!
At the end is a 1-Up for you! There's also a pipe leading down.
The area below has powerups for you… if you don't miss them, that is. The area below has another bad surprise:
It's another pink cyclops mech! This time it's a straight path, so just fire at it until it's gone. The boss room is found right afterwards!
Ice to See You!
There is a hallway that has an infinite amount of penguins. You can use this area to farm for powerups and, if you're lucky enough, 1-Ups! Time to fight Ice Man!
Ice Man is one of the tougher bosses in the game, as he throws slow-moving icicles that deal MASSIVE damage. Like Elec Man, I wonder if anyone has ever beat him without using his weakness? Three attacks will do the trick! Goodbye Ice Man, and only Fire Man is left!
Ice Man's weapon allows Mega Man to fire an ice wave in front of him. This does no damage to enemies, but can freeze enemies and fire alike! Time to go after the last Robot Master, Fire Man!
Fire Man
Bringing the Heat
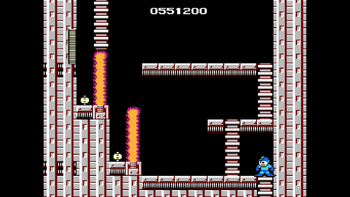
Fire Man's stage has lots of fire (obviously) with lava too! In the starting area are blue "screw" enemies that are in the ground. As we start below them, we have the advantage over them! We then have to climb downwards where more of these enemies are.
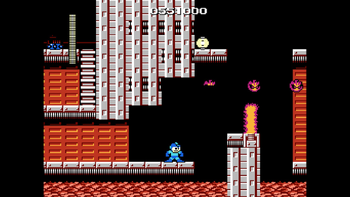
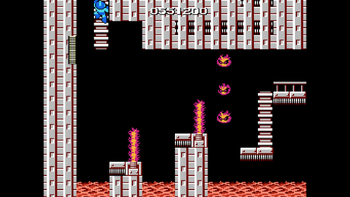
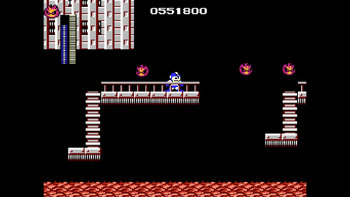
After making some progress, we now have to jump across gaps with lava while avoiding fire that protrudes and retracts at set places. These flames can be frozen temporarily by using Ice Man's weapon on them. They also block all projectiles. We must also be wary of fireballs with eyes that jump from lava and slowly float down in groups of three. Elec Man's weapon can help to deal with them if they're above you. A ladder leads up upward!
The next room has small health powerups guarded by more fire. You can ignore the flames and just go higher.
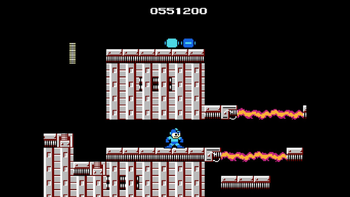
The next area has two more flames and also "flame electricity" that acts similar to the electricity in Elec Man's stage. If you have the "M" powerup, you can traverse above the flame and collect some weapon energy too! After some more flames, we must descend via ladder. The area below has more flame fireballs despite there not being any lava. Time to go down some more!
I Don't Lava It!
The area below is pretty bonkers! There are small platforms with more flames, as well as fireballs. This is very difficult to get through, so ,if you have it, use Ice Man's weapon to freeze the flames!
Now we have to jump across more fiery gaps and avoid some more fireballs! Seriously, they are everywhere! One fireball gave me a 1-Up though, so that's generous of them! There are gaps with flames, but then there's another ladder leading upwards. Too much fire to describe it all…
This next section has us avoiding fast-moving flames that are very difficult to avoid. To get past this easily, use the "M" powerup to create yourself a little shortcut!
At the top, there are blue versions of the Bullet Bill enemies from Bomb Man's stage! We must avoid them as we traverse this next area inhabited by blue versions of the ground enemies we've seen before.
After getting past them, we have more gaps with fireballs and then two flames guarding the boss door!
Blazing Battle
The hallway leading to the boss has the screw enemies, but only on the ceiling this time, unlike Cut Man's stage. After making it through them, it's time to fight Fire Man!
Fire Man is a very weird boss. If you don't move, he won't attack you as much, but if you just spam attacks, he will spam back. I really don't know how he works, but I just kept using Ice Man's weapon whenever I was close to him and hardly moved at all. I still took damage, but it could've been a lot worse. It's one of the more difficult fights in my opinion. Now all Robot Masters are defeated!
Fire Man's weapon allows Mega Man to fire a fireball, as well as give him a temporarily fire "shield" around him. It's a pretty good weapon!
We've defeated all the Robot Masters now, so, next month, we'll take the fight to Dr. Wily! See you then!
An Octet Gazette
Written by: Museful Traveler (talk)
Hm, it would appear that even in a new land, that which concerns those of a certain profession remains unchanged. Here, too, just as in my homeland, merchants value one thing above all else - leaves. Yes, while the merchants of Solistia have been hardened by the elements to a greater degree than the merchants with which I am familiar, their cooperation is still a matter of how much coin I carry. How comforting.
Welcome back to An Octet Gazette, readers of The 'Shroom! By now, you know the drill. This month, we're looking at my personal favorite job class in the Octopath games, Merchants! Before we can get into looking at the changes the developers made to the job class between the two games, though, let's briefly talk about the "boost" half of "Break & Boost"!
You've Got Boost Power!
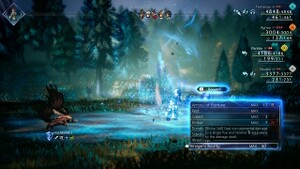
The boost half of the system is quite straightforward. At the beginning of every battle, every party member receives one BP (Boost Point). Every traveler has their own collection of BP, and a given traveler can have a maximum of five BP at any given time. Unless they are afflicted by a status condition that prevents it, a traveler can, on any turn, spend up to three BP to increase the strength of their attacks, the number of times they attack, or the duration of some boon or status effect that their move grants. Of course, the more BP spent, the greater the increase in power or duration received.
At the start of every turn, any travelers who have not spent BP on the previous turn gain one point of BP. If a traveler did spend BP on the previous turn, whether they spent just one or reached maximum boost by spending all three, they get nothing. It's also possible to restore BP to a traveler by spending a turn feeding them an Energizing Pomegranate (or a select few other items). It's a simple system, but between the cap only allowing a traveler to accumulate a couple BP more than they can spend at once and having to choose between spending BP and building it back up, it's pretty effective when it comes to making players think about the time to spend BP and go for a big strike versus, say, the time to heal up or to chip away at an enemy's shield points.
A Merchant's Selling Points
Speaking of spending and saving, it's high time we get to discussing the Merchant job, starting with an appraisal of the weapons that merchants can wield!
After the Scholar and Dancer jobs granted access to one weapon each, we finally find a job that wields multiple weapon types! Merchants get access to both bows and polearms, providing extra coverage befitting a well-rounded and flexible job that can pair with just about any other.
Let's jump right into going over the skills of the Merchant job in both games, keeping that theme of flexibility in mind. Of the eight starting jobs, the Merchant job has the most mechanically-varied skillset, with merchants being best-suited for a support role.
Right away in the first game, you can see that support role reflected in Sidestep, Rest, Donate BP, and Collect. While Tradewinds and Trade Tempest are bog-standard offensive elemental magic attacks with the usual "costs less but hits a single target" versus "costs more but hits all enemies" distinction, notable mostly for being the only wind attacks on any of the starting jobs, these other four skills focus instead of gathering, extending, or shuffling around resources.
How Rest and Sidestep fit into that resource-management schematic may not be immediately apparent, with Rest being a simple self-targeting healing move. If you think of it less in terms of healing and more as a way of gathering HP and SP, though, it might make a little more sense. While it might seem strange to think of HP and SP as resources, I assure you that the games do offer some ways to spread SP around and to do some interesting things in terms of replenishing and spending it. Sidestep may seem to fit even less, but the way I look at it is that it's a move about extending your resources - in this case, HP, and maybe even BP if you use it to secure an extra damage-free turn to build up BP. Once again, it might not really feel that way in isolation, but, oh, once you start to get into some endgame strategies and combine different skills from different jobs, you can start spreading Sidestep's boon around and do some impressive work with it.
How Donate BP and Collect fit in with the idea of gathering and shuffling resources should be a little clearer. Collect lets a traveler take money from a single enemy, fattening your wallet and giving you more to spend on armor and items. You can only collect from a given foe in a given battle one time, and the chance of success rises as a foe's remaining HP drops (you can also spend BP to boost your odds of success). It's very straightforward (and, honestly, it's worth it to hear the voiceclips a number of the travelers have when using the move). Donate BP is about giving rather than taking, and lets a traveler grant some extra BP to another traveler. Despite what the name might suggest, the skill doesn't actually take BP from the merchant using it. Instead, the target gets one extra BP for free as a baseline. If the merchant does boost and spend their BP, the target gets an additional BP for every boost level, allowing a merchant to spend up to three BP to give another traveler up to four BP. It's a simple skill, but an extremely useful one that you will get plenty of mileage out of.
Skipping over Hired Help for a moment, Bifelgan's Bounty is actually another (mostly) straightforward skill, functioning as something akin to a damage-dealing, superpowered Collect. The traveler using the skill launches a powerful attack (one that, while indeed not associated with an element, still runs off of their elemental attack stat!), dealing damage and getting money equivalent to the damage they dealt. Note that it does mean damage dealt. A full-powered attack against an enemy that barely has any health left isn't going to net much money! With the right set-up, this can be a decent way to make a bit of cash, and you might want to have some cash on hand in battles so you can take advantage of Hired Help.
What is Hired Help, though? Well, it's among the most unique skills in the game, not an attack itself so much as a list of potential attacks, and requiring that you spend money (leaves, as the currency is called) while costing no SP. You can cause any of these purchased attacks to hit multiple times by spending BP before using Hired Help, too, stretching your money further. So long as you have the cash, none of the following options are off-limits:
So, as you can see, with Hired Help, the Merchant job class technically provides access to five weapon types and two types of elemental magic. On top of a varied set of skills outside of Hired Help, they can slot into almost any role necessary while simultaneously playing a general support role and helping out the rest of the party.
Does the second game retain that flexibility, or does it try to push the Merchant job in a different direction? Let's get into it and see what differences we have!
Reappraisal: The Merchant in the Second Game
For the most part, what we're presented with here is the same! The most striking difference is that, as happened with a few jobs in the second game, the Merchant job's associated elemental magic has been swapped around. No longer do merchants get access to wind magic; instead, they swap their single-target wind spell for a single-target fire spell. Rather than Trade Tempest getting the exact same elemental swap treatment, though, a herd-hitting magic attack has been dropped from the lineup altogether.
With a slot opened up, the Merchant job has received an entirely new move in the form of Arrow of Fortune. This is a move that falls somewhere between Collect and Bifelgan's Bounty, doing damage while harvesting some resource like the latter but taking less set-up and in that way being more akin to the former. Unlike those two moves, though, it doesn't harvest money, instead harvesting another form of "currency" - JP (Job Points). This is a currency only in the mechanical sense, being a resource that can be spent on unlocking a job's skills (and thus its Support Skills, as well). It fits with the resource-harvesting aspect of the rest of the job's skillset and it definitely has use in the early game for building up JP quickly. While it doesn't really expand the Merchant skillset in any way, it's worthwhile in its own way and an understandable swap.
It's pretty clear, then, that the Merchant job remains a resource-focused, well-rounded support job, but there is one more change that's not immediately apparent in the skillset list. Hired Help has been expanded and most of the available options have been swapped out or reworked.
There are some clear parallels here. The cheapest mercenary option returns unchanged, and, while they work differently here, parallels can be drawn between the ruffian/bandit options and dancer/thespian options in terms of price. The veteran soldier option returns with only minor changes, still serving (for most of the game) as the most powerful (but costliest) option. The middle of the range has been expanded a bit, with the guard option being a little cheaper than the old cleric option and a new pricey-but-not-unreasonably-so Beastling option. In general, you can see a new emphasis on secondary effects and buffs/debuffs.
Most notably, an option for foreign assassins has been added, overtaking the veteran soldier option as the priciest option but dealing a great amount of damage and coming with a useful party-wide heal as a secondary boon. What's really interesting, though, is that this option isn't there from the start. It has to be earned by completing a late-game sidequest. It's an interesting choice that makes Hired Help that much more mechanically unique!
Those are all the changes to the Merchant job, though. All of those other skills remain the same! While their abilities have been expanded a bit, merchants in Octopath II retain their emphasis on playing support and gathering resources. With that examined, let's wrap up with a look at the job's Support Skills in both games!
Support Skills
| Name | Effect |
|---|---|
| Endless Items | Have a 25% chance of not consuming an item used by the equipping character |
| Grows on Trees | Receive additional money after battles |
| Hang Tough | If not already low on health, survive otherwise fatal attacks with 1 HP |
| SP Saver | Halves the SP costs for all skills used by the equipping character |
Unsurprisingly, the Support Skills of the Merchant job in the first game are mostly focused on harvesting and stretching out resources! Be it money, items, or SP, three of the four Support Skills here either get the party more of something or makes what they have go further. The odd one out here is Hang Tough, which might be included because it meshes generally with the Merchant job's support role, giving merchants in the party one last chance to use send BP to another traveler or to use an item to heal up a traveler.
| Name | Effect |
|---|---|
| Grows on Trees | Receive additional money after battles |
| Boost-Start | The equipping character begins the battle with one additional BP |
| Hang Tough | If not already low on health, survive otherwise fatal attacks with 1 HP |
| Full Power | Receive a full Latent Power gauge at the start of a battle |
Octopath Traveler II changes which resources are being harvested, but otherwise keeps the same arrangement of three resource-related Support Skills and Hang Tough. Grows on Trees returns unchanged and continues to focus on gathering extra money, but rather than stretching items and SP, the new support skills of the Merchant job scrounge up additional BP and Latent Power energy (we'll get to Latent Powers down the road).
All in all, the Merchant job didn't change that much between the two games! There's only one other thing that changed, and that, of course, is what character starts with the Merchant job. In the first game, that would be Tressa Colzione, and the honor in the second game instead goes to Partitio Yellowil. We'll talk more about them down the line, though. For now, we'll wrap it up. Join me next month and we'll look at the Thief job!
| The 'Shroom: Issue 206 | |
|---|---|
| Staff sections | Staff Notes • The 'Shroom Spotlight • Poochy's Picks • Credits |
| Features | Fake News • Fun Stuff • Palette Swap • Pipe Plaza • Critic Corner • Strategy Wing |


