Fast Barrel Blast: Difference between revisions
LinkTheLefty (talk | contribs) mNo edit summary |
(dkwiki) |
||
| Line 1: | Line 1: | ||
{{levelbox | {{levelbox | ||
|image=[[File:Fast Barrel Blast.png]] | |||
|image=[[File:Fast Barrel Blast.png | |||
|code=4-4 | |code=4-4 | ||
|game=''[[Donkey Kong Land]]'' | |game=''[[Donkey Kong Land]]'' | ||
| Line 8: | Line 7: | ||
|after=[[Skyscraper Caper|>>]] | |after=[[Skyscraper Caper|>>]] | ||
}} | }} | ||
'''Fast Barrel Blast''' is the twenty-seventh level in | '''Fast Barrel Blast''' is the twenty-seventh level in ''[[Donkey Kong Land]]'' and the fourth level of [[Big Ape City]]. | ||
==Summary== | |||
Fast Barrel Blast is the second and last blimp level. As the level's name suggests, there are many [[Barrel Cannon]]s that [[Donkey Kong]] and [[Diddy Kong]] must shoot from. Unlike earlier levels, the Barrel Cannons move faster. Some items such as a [[Kong Token]] or [[KONG Letters]] can be collected by launching if the [[Kong]]s shoot out at the right time. Sometimes, the Kongs can shoot over the Barrel Cannons to take a shortcut in the level. There are a few [[tire (object)|tire]]s that the Kongs can use to reach certain areas. There are a few walking segments where uncommon enemies such as [[Mini-Necky]]s and [[Krusha]]s are encountered. | |||
== | ==Layout== | ||
{{rewrite|section= | {{rewrite|section=yes}} | ||
[[File:FastBarrelBlast-1.png|thumb|left|A Mini-Necky at the beginning of the level]] | [[File:FastBarrelBlast-1.png|thumb|left|A Mini-Necky at the beginning of the level]] | ||
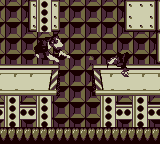
From the start of the level, the [[Kong]]s must bounce off of a few [[Kritter]]s and land in a barrel. It will shoot them up a ledge, where they have to defeat a [[Mini-Necky]] and jump down another ledge. There, they will find a large abyss, and the only way to cross it is by using [[barrel]]s. With good aim, the Kongs must shoot barrel-to-barrel over the gap and make it to the other side. In this area, they will have to jump over a few [[Krusha]]s and travel to another abyss. Barrels must be used again to get over it. This time, the Kongs will only have to shoot in a straight line, although they must watch out for a few [[Zinger]]s as they go. On the other side of the pit, they will find the [[Continue Point]]. | From the start of the level, the [[Kong]]s must bounce off of a few [[Kritter]]s and land in a barrel. It will shoot them up a ledge, where they have to defeat a [[Mini-Necky]] and jump down another ledge. There, they will find a large abyss, and the only way to cross it is by using [[barrel]]s. With good aim, the Kongs must shoot barrel-to-barrel over the gap and make it to the other side. In this area, they will have to jump over a few [[Krusha]]s and travel to another abyss. Barrels must be used again to get over it. This time, the Kongs will only have to shoot in a straight line, although they must watch out for a few [[Zinger]]s as they go. On the other side of the pit, they will find the [[Continue Point]]. | ||
| Line 20: | Line 20: | ||
{{br|left}} | {{br|left}} | ||
==Enemies== | ==Enemies== | ||
*[[ | *[[Gnawty]] | ||
*[[Hogwash the Flying Pig]] | |||
*[[Kritter]] | *[[Kritter]] | ||
*[[Krusha]] | *[[Krusha]] | ||
*[[ | *[[Mini-Necky]] | ||
*[[Zinger]] | *[[Zinger]] | ||
==Items== | ==Items== | ||
*[[DK Barrel]]s: 3 | *[[DK Barrel]]s: 3 | ||
*[[Kong Token]]s: 2 | *[[Kong Token]]s: 2 | ||
===K-O-N-G Letters=== | |||
*K: Above a barrel cannon that's used to cross an abyss. | |||
*O: Found in a barrel blasting segment. | |||
*N: Also located in a barrel blasting segment. | |||
*G: In the second bonus stage. | |||
==Bonus Area(s)== | ==Bonus Area(s)== | ||
{|class=wikitable | |||
!Image | |||
!Description | |||
|- | |||
| | |||
|Shortly after a Mini-Necky at the start, the Kongs must jump down a large ledge while following a banana trail. By doing so, the Kongs land onto a weak spot of the ground, causing a [[rope]] to rise out. By grabbing it, the Kongs are taken to the first [[Bonus Area]]. There, the Kongs must jump on a button to release their Kong Tokens from a Barrel Cannon individually. They earn an [[extra life]] for each Kong Token they catch. Once they run out of tokens, the Kongs return into the main level. | |||
|- | |||
|[[File:FastBarrelBlast-G.png]] | |||
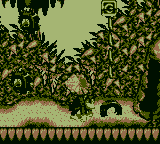
|At the end of the level, instead of continuing down a ledge leading to the portal, the Kongs must instead go to the left end. They must do a roll jump to land in an Auto-Fire Barrel which blasts them to a Bonus Area. The area takes place in a jungle, where the Kongs must avoid three [[Mincer]]s encircling the path. Afterward, the Kongs can bounce from a half tire stuck in the ground to reach the letter G above. A cave opening is next to the tire, and by entering it the Kongs return into the main level. | |||
|} | |||
==Gallery== | ==Gallery== | ||
Revision as of 00:52, November 16, 2019
Template:Levelbox Fast Barrel Blast is the twenty-seventh level in Donkey Kong Land and the fourth level of Big Ape City.
Summary
Fast Barrel Blast is the second and last blimp level. As the level's name suggests, there are many Barrel Cannons that Donkey Kong and Diddy Kong must shoot from. Unlike earlier levels, the Barrel Cannons move faster. Some items such as a Kong Token or KONG Letters can be collected by launching if the Kongs shoot out at the right time. Sometimes, the Kongs can shoot over the Barrel Cannons to take a shortcut in the level. There are a few tires that the Kongs can use to reach certain areas. There are a few walking segments where uncommon enemies such as Mini-Neckys and Krushas are encountered.
Layout
It has been requested that this section be rewritten.
From the start of the level, the Kongs must bounce off of a few Kritters and land in a barrel. It will shoot them up a ledge, where they have to defeat a Mini-Necky and jump down another ledge. There, they will find a large abyss, and the only way to cross it is by using barrels. With good aim, the Kongs must shoot barrel-to-barrel over the gap and make it to the other side. In this area, they will have to jump over a few Krushas and travel to another abyss. Barrels must be used again to get over it. This time, the Kongs will only have to shoot in a straight line, although they must watch out for a few Zingers as they go. On the other side of the pit, they will find the Continue Point.
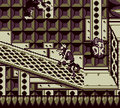
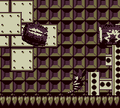
Halfway through the level, the heroes must jump into another barrel and shoot towards the banana trails. When they get out of the last barrel in this area, they should defeat two Slippas and jump up to another barrel. After shooting to the second barrel, the group must bounce off of a tire to reach the following barrel, then continue to blast across the gap below. Back on the ground and out of the barrels, they will have to carefully beat some enemies. Bouncing off of a nearby tire will take the heroes to another barrel, and the Kongs must again, shoot over a large abyss. Once they finish shooting through the barrels in a straight path, they will land on a safe area. There, they will need to jump off a cliff to reach a tire. When they bounce off of it and move to the right, they will encounter a Hogwash. It must be bounced off of just like the tire, and Donkey and Diddy Kong will land in a barrel right after it. They should aim the barrel to shoot them to a banana trail. When they follow the path of bananas and get over the wide abyss, the group should head east and drop down a ledge. They will see a portal, which must be jumped into. After the Kongs do so, they will be lead to the next level.
Enemies
Items
- DK Barrels: 3
- Kong Tokens: 2
K-O-N-G Letters
- K: Above a barrel cannon that's used to cross an abyss.
- O: Found in a barrel blasting segment.
- N: Also located in a barrel blasting segment.
- G: In the second bonus stage.
Bonus Area(s)
| Image | Description |
|---|---|
| Shortly after a Mini-Necky at the start, the Kongs must jump down a large ledge while following a banana trail. By doing so, the Kongs land onto a weak spot of the ground, causing a rope to rise out. By grabbing it, the Kongs are taken to the first Bonus Area. There, the Kongs must jump on a button to release their Kong Tokens from a Barrel Cannon individually. They earn an extra life for each Kong Token they catch. Once they run out of tokens, the Kongs return into the main level. | |

|
At the end of the level, instead of continuing down a ledge leading to the portal, the Kongs must instead go to the left end. They must do a roll jump to land in an Auto-Fire Barrel which blasts them to a Bonus Area. The area takes place in a jungle, where the Kongs must avoid three Mincers encircling the path. Afterward, the Kongs can bounce from a half tire stuck in the ground to reach the letter G above. A cave opening is next to the tire, and by entering it the Kongs return into the main level. |
Gallery
Names in other languages
| Language | Name | Meaning | Notes |
|---|---|---|---|
| Spanish | Barriles y despegues[?] | Barrels and launches |
| show Donkey Kong Land |
|---|


