Chain Link Chamber (Donkey Kong Country 2: Diddy's Kong Quest): Difference between revisions
(edit summary removed) |
No edit summary |
||
| (46 intermediate revisions by 21 users not shown) | |||
| Line 1: | Line 1: | ||
{{ | {{italic title|id=yes}} | ||
{{ | {{DKC level infobox | ||
|image=[[File:Chain Link Chamber.png]] | |||
|image=[[File:Chain Link Chamber.png | |||
|code=6 - 5 | |code=6 - 5 | ||
|world=[[K. Rool's Keep]] | |||
|game=''[[Donkey Kong Country 2: Diddy's Kong Quest]]'' | |game=''[[Donkey Kong Country 2: Diddy's Kong Quest]]'' | ||
| | |track=Krook's March | ||
|before=[[Clapper's Cavern (Donkey Kong Country 2: Diddy's Kong Quest)|<<]] | |before=[[Clapper's Cavern (Donkey Kong Country 2: Diddy's Kong Quest)|<<]] | ||
|after=[[Toxic Tower (Donkey Kong Country 2: Diddy's Kong Quest)|>>]] | |after=[[Toxic Tower (Donkey Kong Country 2: Diddy's Kong Quest)|>>]] | ||
| | |before3=[[Windy Well (Donkey Kong Country 2: Diddy's Kong Quest)|<<]] | ||
| | |after3=[[Toxic Tower (Donkey Kong Country 2: Diddy's Kong Quest)|>>]] | ||
}} | }} | ||
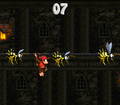
'''Chain Link Chamber''' is the thirty-second level of | '''Chain Link Chamber''' is the thirty-second level of ''[[Donkey Kong Country 2: Diddy's Kong Quest]]''. It is the fifth level of [[K. Rool's Keep]]. It takes place inside a castle, just like [[Castle Crush]] and [[Toxic Tower (Donkey Kong Country 2: Diddy's Kong Quest)|Toxic Tower]]. This level involves [[Diddy Kong|Diddy]] and [[Dixie Kong]] climbing up a series of chains, often paired together in the shape of a grid. Chain Link Chamber is the only castle level that does not have any stage hazards requiring the Kongs to quickly progress through the level. The level also features a handful of enemies: [[Zinger]]s are the main and most common enemy, and are found flying around the chains throughout. There are also [[Klinger]]s, who climb and slide down the chains, a few [[Krook]]s who toss their hook at [[Kong]]s from a distance, and some dark and yellow [[Klobber]]s who try ramming into the Kongs as they climb up the level. Depending on the route that they take, Diddy and Dixie may also encounter [[Mini-Necky]]s, who also try swooping into them. | ||
==Layout== | |||
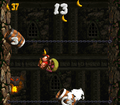
[[File:Chain Link Chamber DKC2 GBA screen.png|thumb|left|Chain Link Chamber in the Game Boy Advance version]] | |||
From the start of the level, the monkeys must climb across a few chains. There are a few Klingers sliding along these chains, though, and they must be avoided at all costs. After this, the Kongs must climb up a longer rope and enter a large chamber of chains. Once they maneuver around the area and avoid all the Klingers lurking about, they have to jump up many chains in the northeast part of the area and dodge several Zingers in their way. Then, the Kongs will have to climb straight up one long rope, while avoiding Krooks hiding in the alcoves nearby, who will throw their sharp hooks at them. Soon, the monkeys will come up to a fork-in-the-road. They can go either left or right, although both sides take them to the same exact point. On the east side, they have to shoot up the area through a few barrels, while on the west side, they must climb up several chains and avoid some Zingers. After choosing a path and completing the obstacles, the heroes must climb up another long chain and enter a large area where they will encounter several Zingers. They will have to move around the foes and continue upwards, only to meet even more Zingers. They Kongs must dodge them all and find the [[Star Barrel]] in an alcove to the left. | |||
From that point, the monkeys must keep going up the chains and watch out for Klobbers charging at them. After that, there is another fork-in-the-road that the Kongs must get through. They can go to the left route, where they will have to climb up a long chain and avoid some Mini-Neckys, or they may take the right route, where they must jump up some chains and also avoid a pair of Zingers. Once they get through this part, they should continue upwards and enter another chamber filed with pesky Zingers. After they maneuver around all the enemies, the must climb up two chains. As they climb up, there will be two Kannons shooting at them. They will have to move back and forth to each chain to dodge the falling kannonballs. Once at the top of this chain, the Kongs must climb up some more chains and soon have to face their biggest challenge yet. Eventually, the monkeys will find a pair of Zingers chasing them, and they have to hop up many chains as fast as they can. Soon, they will get to the top of this chain, and have to hop down another chain, still having a couple of Zingers chasing them. The heroes must continue through the level with the foes on their tails for a while longer, until they finally begin to climb a separate rope. When they climb this, Mini-Neckys will be swooping down at them, so they have to act fast. Soon, the group will climb up one of the last chains and watch out for the life sucking Klobber hidden in an alcove. At the top of this chain, they can find the [[End of Level Target]], which rotates between a [[banana]], [[Banana Bunch]], or a [[Banana Coin]] for a prize. | |||
== | ==Enemies== | ||
The following enemies appear in the following quantities: | |||
<gallery> | |||
Kannon DKC2 enemy.png|[[Kannon]] (2) | |||
Klinger DKC2.png|[[Klinger]] (5) | |||
Klobber DKC2 yellow.png|[[Klobber]] (yellow) (4) | |||
Klobber DKC2 gray.png|Klobber (dark) (3) | |||
Krook DKC2.png|[[Krook]] (3) | |||
Kutlass DKC2 green.png|[[Kutlass]] (green) (2) | |||
Kutlass DKC2 yellow.png|Kutlass (yellow) (1) | |||
Mini Necky DKC2.png|[[Mini-Necky]] (12) | |||
Zinger DKC2 yellow.png|[[Zinger]] (yellow) (46) | |||
</gallery> | |||
== | ==Items and objects== | ||
The following items and objects appear in the following quantities: | |||
<gallery> | |||
Banana Coin.png|[[Banana Coin]] (1) | |||
DK Barrel.png|[[DK Barrel]] (4) | |||
</gallery> | |||
==== | ===KONG Letters=== | ||
[[File:ChainLinkChamber-K.png|thumb|The location of the letter K]] | |||
*'''K:''' At the very start, the Kongs must pass the first few Klingers, then climb down the located on the far left to obtain the letter K. | |||
*'''O:''' There are two letter O's in a symmetrical area of Chain Link Chamber. It is found after passing a swarm of Zingers and [[Blast Barrel]]s. There is an aloft alcove on both sides with the letter O. If either "O" is collected, the other one disappears. | |||
*'''N:''' The letter N can be obtained on the path to the Video Game Hero Coin. It is located in a square-shaped alcove just before the Video Game Hero Coin. | |||
*'''G:''' At the very end, the Kongs must skip the [[End of Level Target]] and use [[team up]] to get on top of a ledge. The letter G is located above the ledge. | |||
{{br}} | |||
===Key items=== | |||
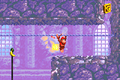
[[File:Chain Link Chamber DKC2 GBA.png|thumb|The location of the golden feather]] | |||
*'''[[DK Coin|Cranky's Video Game Hero Coin]]:''' Shortly after the Star Barrel, the Kongs must climb up a pair of two ropes, with two Kannons firing down at them from above. While climbing a rope, the Kongs notice a lone banana. They must jump directly to the right through the wall and go onward to find the Video Game Hero Coin. | |||
*'''[[Golden feather]] (Game Boy Advance version only):''' After collecting the Video Game Hero Coin, Diddy and Dixie must pass the two Kannons. They are then chased upward by two Zingers and must jump from one horizontal tightrope to the next. When they reach the top, the Kongs can collect the golden feather in an alcove. They must quickly collect it before the Zingers hit them. | |||
*'''[[Photograph]] (Game Boy Advance version only):''' The photograph appears at the start of the level. After passing the first pair of Klingers and climbing up the long, vertical rope, the Kongs can find the next pair of Klingers. The Kongs can obtain the photograph by using [[team up]] on the second Klinger to the right. | |||
{{br}} | |||
==Bonus Areas== | |||
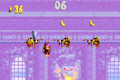
[[File:DKC2 ChainLinkChamber Bonus.png|thumb|The Kongs heading towards the [[Kannon]] that launches them to the first Bonus Area.]] | |||
Chain-Link Chamber has two Bonus Levels, listed by type: | |||
*'''''Find the Kremkoin!''''': Near the start, the Kongs encounter three Krooks. They must continue climbing up to the third Krook and defeat him. They must continue left into an alcove, with a yellow Klobber guarding the [[Cannonball|kannonball]]. The Kongs must defeat it, pick up the kannonball, and then jump below to the next alcove located to the southeast. They must defeat the Krook and activate the [[Cannon|kannon]] with their kannonball. In this Bonus Area, Diddy and Dixie have 20 seconds to obtain the [[Kremkoin]] at the top. To do so, they must head across three horizontal ropes. The Kongs must go right on the first rope and continue to the next one from a hook, and go left on the second rope. After reaching the third tightrope, the Kongs must continue right before finding the Kremkoin on a platform. | |||
*'''''Find the Kremkoin!''''': After passing the two Kannons, they must continue right until reaching a vertical chain. They must jump from the chain through a secret passage in the wall to the left. They must travel through the wall, which directs them to the location of the two Kannons. The Kongs must defeat both Kannons to reveal an obscured entrance leading to the Bonus Area. In this Bonus Area, the Kongs have 15 seconds to obtain the Kremkoin. They must blast between a series of seven [[Spinner Barrel|Rotatable Barrel]]s, with a few bananas indicating the direction and location in which they should blast to the next Rotatable Barrel. The seventh Rotatable Barrel can take them directly up to the ledge with the Kremkoin. | |||
{{br}} | |||
==Gallery== | |||
<gallery> | |||
DKC2 ChainLinkChamber.png|Dixie is trapped between several Zingers | |||
ChainLinkChamberSNES1.png|Dixie hangs on some chains | |||
ChainLinkChamber-O.png|The location of the letter O | |||
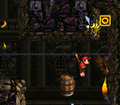
DKC2 ChainLinkChamber StarBarrel.png|Diddy hanging below the [[Star Barrel]] | |||
Chain Link Chamber Bonus Area 1.png|The first Bonus Level | |||
Chain Link Chamber Bonus Area 2.png|The second Bonus Level | |||
Chain Link Chamber DKC2 GBA Bonus Area 1.png|The first Bonus Level in the Game Boy Advance version | |||
ChainLinkChamber-G.png|Location of the letter G in the Game Boy Advance version | |||
</gallery> | |||
==Names in other languages== | ==Names in other languages== | ||
{{ | {{foreign names | ||
|Jap=クサリのとう | |Jap=クサリのとう | ||
|JapR=Kusari no | |JapR=Kusari no Tō | ||
|JapM=Chain Tower | |JapM=Chain Tower | ||
|Spa=Cámara Cadena | |Spa=Cámara Cadena | ||
|SpaM=Chain Chamber | |SpaM=Chain Chamber | ||
| | |Fre=Salon du Maillon | ||
| | |FreM=Link Lounge | ||
|Ger=Ketten Kletten | |Ger=Ketten Kletten | ||
|GerM=Chain Climb | |GerM=Chain Climb | ||
|Ita=Caverna di Catene | |||
|ItaM=Cave of Chains | |||
}} | }} | ||
{{DKC2}} | {{DKC2}} | ||
[[Category:Crocodile Isle]] | [[Category:Crocodile Isle]] | ||
[[Category:Dungeons]] | [[Category:Dungeons]] | ||
[[Category:Donkey Kong Country 2: Diddy's Kong Quest | [[Category:Donkey Kong Country 2: Diddy's Kong Quest levels]] | ||
Latest revision as of 16:41, January 20, 2024
| Level | |
|---|---|
| Chain Link Chamber | |

| |
| Level code | 6 - 5 |
| World | K. Rool's Keep |
| Game | Donkey Kong Country 2: Diddy's Kong Quest |
| Music track | Krook's March |
| << Directory of levels (SNES) >> | |
| << Directory of levels (GBA) >> | |
Chain Link Chamber is the thirty-second level of Donkey Kong Country 2: Diddy's Kong Quest. It is the fifth level of K. Rool's Keep. It takes place inside a castle, just like Castle Crush and Toxic Tower. This level involves Diddy and Dixie Kong climbing up a series of chains, often paired together in the shape of a grid. Chain Link Chamber is the only castle level that does not have any stage hazards requiring the Kongs to quickly progress through the level. The level also features a handful of enemies: Zingers are the main and most common enemy, and are found flying around the chains throughout. There are also Klingers, who climb and slide down the chains, a few Krooks who toss their hook at Kongs from a distance, and some dark and yellow Klobbers who try ramming into the Kongs as they climb up the level. Depending on the route that they take, Diddy and Dixie may also encounter Mini-Neckys, who also try swooping into them.
Layout[edit]

From the start of the level, the monkeys must climb across a few chains. There are a few Klingers sliding along these chains, though, and they must be avoided at all costs. After this, the Kongs must climb up a longer rope and enter a large chamber of chains. Once they maneuver around the area and avoid all the Klingers lurking about, they have to jump up many chains in the northeast part of the area and dodge several Zingers in their way. Then, the Kongs will have to climb straight up one long rope, while avoiding Krooks hiding in the alcoves nearby, who will throw their sharp hooks at them. Soon, the monkeys will come up to a fork-in-the-road. They can go either left or right, although both sides take them to the same exact point. On the east side, they have to shoot up the area through a few barrels, while on the west side, they must climb up several chains and avoid some Zingers. After choosing a path and completing the obstacles, the heroes must climb up another long chain and enter a large area where they will encounter several Zingers. They will have to move around the foes and continue upwards, only to meet even more Zingers. They Kongs must dodge them all and find the Star Barrel in an alcove to the left.
From that point, the monkeys must keep going up the chains and watch out for Klobbers charging at them. After that, there is another fork-in-the-road that the Kongs must get through. They can go to the left route, where they will have to climb up a long chain and avoid some Mini-Neckys, or they may take the right route, where they must jump up some chains and also avoid a pair of Zingers. Once they get through this part, they should continue upwards and enter another chamber filed with pesky Zingers. After they maneuver around all the enemies, the must climb up two chains. As they climb up, there will be two Kannons shooting at them. They will have to move back and forth to each chain to dodge the falling kannonballs. Once at the top of this chain, the Kongs must climb up some more chains and soon have to face their biggest challenge yet. Eventually, the monkeys will find a pair of Zingers chasing them, and they have to hop up many chains as fast as they can. Soon, they will get to the top of this chain, and have to hop down another chain, still having a couple of Zingers chasing them. The heroes must continue through the level with the foes on their tails for a while longer, until they finally begin to climb a separate rope. When they climb this, Mini-Neckys will be swooping down at them, so they have to act fast. Soon, the group will climb up one of the last chains and watch out for the life sucking Klobber hidden in an alcove. At the top of this chain, they can find the End of Level Target, which rotates between a banana, Banana Bunch, or a Banana Coin for a prize.
Enemies[edit]
The following enemies appear in the following quantities:

Kannon (2)

Klinger (5)

Klobber (yellow) (4)

Klobber (dark) (3)

Krook (3)

Kutlass (green) (2)

Kutlass (yellow) (1)

Mini-Necky (12)

Zinger (yellow) (46)


Items and objects[edit]
The following items and objects appear in the following quantities:

Banana Coin (1)

DK Barrel (4)


KONG Letters[edit]

- K: At the very start, the Kongs must pass the first few Klingers, then climb down the located on the far left to obtain the letter K.
- O: There are two letter O's in a symmetrical area of Chain Link Chamber. It is found after passing a swarm of Zingers and Blast Barrels. There is an aloft alcove on both sides with the letter O. If either "O" is collected, the other one disappears.
- N: The letter N can be obtained on the path to the Video Game Hero Coin. It is located in a square-shaped alcove just before the Video Game Hero Coin.
- G: At the very end, the Kongs must skip the End of Level Target and use team up to get on top of a ledge. The letter G is located above the ledge.
Key items[edit]

- Cranky's Video Game Hero Coin: Shortly after the Star Barrel, the Kongs must climb up a pair of two ropes, with two Kannons firing down at them from above. While climbing a rope, the Kongs notice a lone banana. They must jump directly to the right through the wall and go onward to find the Video Game Hero Coin.
- Golden feather (Game Boy Advance version only): After collecting the Video Game Hero Coin, Diddy and Dixie must pass the two Kannons. They are then chased upward by two Zingers and must jump from one horizontal tightrope to the next. When they reach the top, the Kongs can collect the golden feather in an alcove. They must quickly collect it before the Zingers hit them.
- Photograph (Game Boy Advance version only): The photograph appears at the start of the level. After passing the first pair of Klingers and climbing up the long, vertical rope, the Kongs can find the next pair of Klingers. The Kongs can obtain the photograph by using team up on the second Klinger to the right.
Bonus Areas[edit]

Chain-Link Chamber has two Bonus Levels, listed by type:
- Find the Kremkoin!: Near the start, the Kongs encounter three Krooks. They must continue climbing up to the third Krook and defeat him. They must continue left into an alcove, with a yellow Klobber guarding the kannonball. The Kongs must defeat it, pick up the kannonball, and then jump below to the next alcove located to the southeast. They must defeat the Krook and activate the kannon with their kannonball. In this Bonus Area, Diddy and Dixie have 20 seconds to obtain the Kremkoin at the top. To do so, they must head across three horizontal ropes. The Kongs must go right on the first rope and continue to the next one from a hook, and go left on the second rope. After reaching the third tightrope, the Kongs must continue right before finding the Kremkoin on a platform.
- Find the Kremkoin!: After passing the two Kannons, they must continue right until reaching a vertical chain. They must jump from the chain through a secret passage in the wall to the left. They must travel through the wall, which directs them to the location of the two Kannons. The Kongs must defeat both Kannons to reveal an obscured entrance leading to the Bonus Area. In this Bonus Area, the Kongs have 15 seconds to obtain the Kremkoin. They must blast between a series of seven Rotatable Barrels, with a few bananas indicating the direction and location in which they should blast to the next Rotatable Barrel. The seventh Rotatable Barrel can take them directly up to the ledge with the Kremkoin.
Gallery[edit]
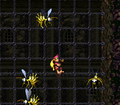
Dixie is trapped between several Zingers
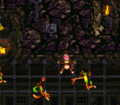
Dixie hangs on some chains
The location of the letter O

Diddy hanging below the Star Barrel
The first Bonus Level
The second Bonus Level
The first Bonus Level in the Game Boy Advance version
Location of the letter G in the Game Boy Advance version


Names in other languages[edit]
| Language | Name | Meaning |
|---|---|---|
| Japanese | クサリのとう Kusari no Tō |
Chain Tower |
| French | Salon du Maillon |
Link Lounge |
| German | Ketten Kletten |
Chain Climb |
| Italian | Caverna di Catene |
Cave of Chains |
| Spanish | Cámara Cadena |
Chain Chamber |