Barrel Boulevard: Difference between revisions
Fawfulfury65 (talk | contribs) mNo edit summary |
m (Text replacement - "{{[Mm]ore images" to "{{image|more=yes") |
||
| (42 intermediate revisions by 22 users not shown) | |||
| Line 1: | Line 1: | ||
{{image}} | {{image|more=yes|Bonus Levels}} | ||
{{level | {{level infobox | ||
|image= | |image=[[File:Barrel Boulevard DKL3c.png]] | ||
|code=6-5 | |||
|code=6 - 5 | |world=[[Lost World (Donkey Kong Land III)|The Lost World]] | ||
|game=''[[Donkey Kong Land III]] | |game=''[[Donkey Kong Land III]]'' | ||
|before=[[Rainforest Rumble|<<]] | |before=[[Rainforest Rumble|<<]] | ||
|after=[[Ghoulish Grotto|>>]] | |after=[[Ghoulish Grotto|>>]] | ||
}} | }} | ||
'''Barrel Boulevard''' is the thirty- | '''Barrel Boulevard''' is the thirty-fifth level in ''[[Donkey Kong Land III]]'' and the fifth level in the [[Lost World (Donkey Kong Land III)|Lost World]]. It takes place in a factory, and is the last factory level. The main feature is the several [[Bazuka]]s, who shoot [[barrel]]s from their cannon. [[Dixie Kong|Dixie]] and [[Kiddy Kong|Kiddy]] can jump from the barrels shot out by Bazukas to move across large gaps. The Kongs can use moving platforms and horizontal ropes to move across tubs of molten lava. [[Karbine]]s are another enemy that appear throughout the level, and other enemies in the level include [[Bristles]], [[Kobble]]s, [[Re-Koil|Rekoil]], and [[Sneek]]s. There are some alternate paths that lead to collectibles such as [[bear coin]]s or hidden areas with a [[Bonus Barrel]] or the [[Koin]]. | ||
==Layout== | |||
[[File:Barrel Boulevard DKL3 Klasp.png|thumb|left|Dixie climbing toward a Klasp over a pool of molten lava]] | |||
At the start, the Kongs must walk down the factory's path to find a barrel. It blasts them to a lower area, where they meet a Bazuka. They need to jump over the foe and grab the letter K in an alcove. Farther on, they find some more Bazukas to avoid, along with some Krumples. Soon, the apes need to drop down to a platform and ride down on an elevator, while watching out for a lone Karbine, to reach a lower area. There, they meet another Bazuka and the letter O. The group have to continue through the level from there and travel west, defeating some more enemies. After dropping into a couple of small pits, the Kongs find another Bazuka to dodge. Passing this foe, they need to fall through another pit and hit the [[Star Barrel]] around some platforms jutting out of the walls. | |||
Halfway through the level, the heroes ride down an elevator to grab onto a rope. They have to climb across this long rope while dodging a Klasp to reach solid ground again. There, they need to defeat a few Bristles and hop down some more ledges, finding other enemies to beat. Soon, they have to jump platform to platform and dodge a Karbine to reach a lower area of the level. After hitting into the letter N, they grab onto another tightrope. Climbing across this will lead the heroes into more enemies. They must avoid each of the Buzzes and Karbines to end up in a small space with a Knocka. After this, they need to fall into a small gap and head under some Buzzes to find a barrel. It blasts them to the letter G and then to the next floor of the level. From there, they have to travel west again and defeat a few more enemies to find another barrel. It can blast the heroes into another chain of barrels to get to an even lower part of the stage. At this point, [[Kiddy Kong]] and [[Dixie Kong]] need to ride down an elevator to find a rope. They have to climb along the rope and let go of it at a dead end to find a [[bear coin]]. Back on the ground, they need to head west and drop down into a pit. There, the Kongs have to walk a little farther to find the [[Level Flag|End of Level Flag]]. | |||
{{br}} | |||
== | ==Enemies== | ||
*[[Bazuka]] | |||
*[[Bristles]] | |||
*[[Karbine]] | |||
*[[Kobble]] | |||
*[[Re-Koil|Rekoil]] | |||
*[[Sneek]] | |||
==Items== | |||
[[File:BarrelBoulevard-N.png|thumb|The letter "N"]] | |||
*[[Bear coin]]: 4 | |||
*[[DK Barrel]]: 3 | |||
== | *[[Red Balloon|Extra Life Balloon]]: 1 | ||
*[[Iron Barrel|Steel Barrel]]: 1 | |||
===K-O-N-G Letters=== | |||
* | *K: Located past the first Bazuka | ||
* | *O: Shortly after encountering the first Karbine enemy, past a Bazuka. | ||
*N: Guarded by a Karbine past the first tightrope with Klasp. | |||
*G: The Kongs are launched into the letter G as they progress in the level. | |||
===DK Coin=== | ===DK Coin=== | ||
When the Kongs find the letter O, they must go left and jump over a gap with large stair platforms to find a [[Iron Barrel|Steel Barrel]] on the other side. They must pick it up and continue down from two stair platforms to reach a tight space with the level's [[Koin]]. The Kongs must throw the Steel Barrel to a wall on either side and then jump for the [[Koin]] to face up. The Steel Barrel bounces off into Koin and defeats him. The Kongs can blast out of the area from a Barrel Cannon to the left. | |||
* | ==Bonus Levels== | ||
Barrel Boulevard has two [[Bonus room|Bonus Level]]s: | |||
*Right before the letter O is a Bazuka firing out some barrels. Dixie is required to reach the [[Bonus Barrel]]; she must first bounce on a barrel shot out by Bazuka and then use her [[Helicopter Spin]] in midair and move to the left until she enters a [[Bonus Barrel]]. In the [[Bonus Level]], the Kongs have 20 seconds to collect 16 [[star (Donkey Kong franchise)|star]]s. They blast between four [[Booster Barrel]]s, each with four stars over them, to collect the stars as they go across a pit of molten lava. After the Kongs collect every star, the [[Bonus Coin (Donkey Kong franchise)|Bonus Coin]] appears on a platform to the right. | |||
*Under the letter N, the Kongs must grab on a horizontal rope and drop below at the very right. The Kongs must move down five stair platforms and climb across a pair of two more horizontal ropes. A Klasp is on each rope, and the Kongs must avoid them. The second Bonus Barrel is to the very left, under the top rope. In the Bonus Level, the Kongs instantly start in a Barrel Cannon, and they have 20 seconds to blast from many [[Spinner Barrel|Rotatable Barrel]]s and reach the Bonus Coin on a platform at the very right. A trail of bananas is between each Rotatable Barrel to indicate which direction the Kongs must go. | |||
==Gallery== | |||
<gallery> | |||
Barrel Boulevard DKL3 Bazuka.png|Dixie jumps over a Bazuka | |||
Barrel Boulevard DKL3 first Bonus Barrel.png|Dixie bounces to the first Bonus Barrel | |||
</gallery> | |||
==Names in other languages== | |||
{{foreign names | |||
|Jap=タルストリート | |||
|JapR=Taru Sutorīto | |||
|JapM=Barrel Street | |||
}} | |||
{{DKL3}} | {{DKL3}} | ||
[[ | [[Category:Donkey Kong Land III levels]] | ||
[[ | [[Category:Factories]] | ||
[[ | [[Category:Northern Kremisphere]] | ||
[[Category:Secret levels]] | |||
Latest revision as of 19:25, May 28, 2024
It has been requested that more images be uploaded for this article. Remove this notice only after the additional images have been added. Specifics: Bonus Levels
| Level | |
|---|---|
| Barrel Boulevard | |
| |
| Level code | 6-5 |
| World | The Lost World |
| Game | Donkey Kong Land III |
| << Directory of levels >> | |
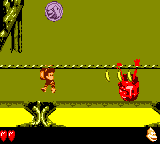
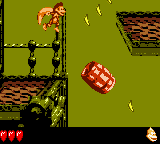
Barrel Boulevard is the thirty-fifth level in Donkey Kong Land III and the fifth level in the Lost World. It takes place in a factory, and is the last factory level. The main feature is the several Bazukas, who shoot barrels from their cannon. Dixie and Kiddy can jump from the barrels shot out by Bazukas to move across large gaps. The Kongs can use moving platforms and horizontal ropes to move across tubs of molten lava. Karbines are another enemy that appear throughout the level, and other enemies in the level include Bristles, Kobbles, Rekoil, and Sneeks. There are some alternate paths that lead to collectibles such as bear coins or hidden areas with a Bonus Barrel or the Koin.
Layout[edit]
At the start, the Kongs must walk down the factory's path to find a barrel. It blasts them to a lower area, where they meet a Bazuka. They need to jump over the foe and grab the letter K in an alcove. Farther on, they find some more Bazukas to avoid, along with some Krumples. Soon, the apes need to drop down to a platform and ride down on an elevator, while watching out for a lone Karbine, to reach a lower area. There, they meet another Bazuka and the letter O. The group have to continue through the level from there and travel west, defeating some more enemies. After dropping into a couple of small pits, the Kongs find another Bazuka to dodge. Passing this foe, they need to fall through another pit and hit the Star Barrel around some platforms jutting out of the walls.
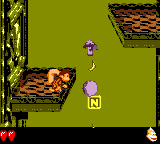
Halfway through the level, the heroes ride down an elevator to grab onto a rope. They have to climb across this long rope while dodging a Klasp to reach solid ground again. There, they need to defeat a few Bristles and hop down some more ledges, finding other enemies to beat. Soon, they have to jump platform to platform and dodge a Karbine to reach a lower area of the level. After hitting into the letter N, they grab onto another tightrope. Climbing across this will lead the heroes into more enemies. They must avoid each of the Buzzes and Karbines to end up in a small space with a Knocka. After this, they need to fall into a small gap and head under some Buzzes to find a barrel. It blasts them to the letter G and then to the next floor of the level. From there, they have to travel west again and defeat a few more enemies to find another barrel. It can blast the heroes into another chain of barrels to get to an even lower part of the stage. At this point, Kiddy Kong and Dixie Kong need to ride down an elevator to find a rope. They have to climb along the rope and let go of it at a dead end to find a bear coin. Back on the ground, they need to head west and drop down into a pit. There, the Kongs have to walk a little farther to find the End of Level Flag.
Enemies[edit]
Items[edit]
- Bear coin: 4
- DK Barrel: 3
- Extra Life Balloon: 1
- Steel Barrel: 1
K-O-N-G Letters[edit]
- K: Located past the first Bazuka
- O: Shortly after encountering the first Karbine enemy, past a Bazuka.
- N: Guarded by a Karbine past the first tightrope with Klasp.
- G: The Kongs are launched into the letter G as they progress in the level.
DK Coin[edit]
When the Kongs find the letter O, they must go left and jump over a gap with large stair platforms to find a Steel Barrel on the other side. They must pick it up and continue down from two stair platforms to reach a tight space with the level's Koin. The Kongs must throw the Steel Barrel to a wall on either side and then jump for the Koin to face up. The Steel Barrel bounces off into Koin and defeats him. The Kongs can blast out of the area from a Barrel Cannon to the left.
Bonus Levels[edit]
Barrel Boulevard has two Bonus Levels:
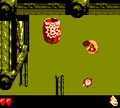
- Right before the letter O is a Bazuka firing out some barrels. Dixie is required to reach the Bonus Barrel; she must first bounce on a barrel shot out by Bazuka and then use her Helicopter Spin in midair and move to the left until she enters a Bonus Barrel. In the Bonus Level, the Kongs have 20 seconds to collect 16 stars. They blast between four Booster Barrels, each with four stars over them, to collect the stars as they go across a pit of molten lava. After the Kongs collect every star, the Bonus Coin appears on a platform to the right.
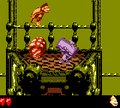
- Under the letter N, the Kongs must grab on a horizontal rope and drop below at the very right. The Kongs must move down five stair platforms and climb across a pair of two more horizontal ropes. A Klasp is on each rope, and the Kongs must avoid them. The second Bonus Barrel is to the very left, under the top rope. In the Bonus Level, the Kongs instantly start in a Barrel Cannon, and they have 20 seconds to blast from many Rotatable Barrels and reach the Bonus Coin on a platform at the very right. A trail of bananas is between each Rotatable Barrel to indicate which direction the Kongs must go.
Gallery[edit]
Names in other languages[edit]
| Language | Name | Meaning | Notes |
|---|---|---|---|
| Japanese | タルストリート[?] Taru Sutorīto |
Barrel Street |
