Whoopsy Desert: Difference between revisions
No edit summary Tags: Mobile edit Advanced mobile edit |
|||
| (10 intermediate revisions by 8 users not shown) | |||
| Line 9: | Line 9: | ||
|secret=[[Disturbing Tomb|**]] | |secret=[[Disturbing Tomb|**]] | ||
}} | }} | ||
'''Whoopsy Desert''' is the second level of [[Ratl Ruins]] in ''[[Wario Land: Shake It!]]''. It is the first level containing a [[ | {{quote|This is Whoopsy Desert. It should be easy for you, [[Wario|Mr. Wario]]! Oh, and there's a secret map here!|[[Merfle|Brown Merfle]]|Wario Land: Shake It!}} | ||
'''Whoopsy Desert''' is the second level of [[Ratl Ruins]] in ''[[Wario Land: Shake It!]]''. It is the first level containing a [[Secret Map]] which leads to [[Disturbing Tomb]]. | |||
==Layout== | ==Layout== | ||
Being only the second proper level in the game, it is relatively simple, but it introduces [[Bomb Block (Wario Land: Shake It!)|Bomb Block]]s that explode after however many seconds are displayed on it when something comes in physical contact with it. In the beginning, [[Wario]] can get coin bags by performing an [[Earthshake Punch]] to destroy the Bomb Blocks. He also encounters a small pyramid which can be lifted up by punching the ground. Next, he enters a large pyramid where he first encounters the [[Blast-O-Cannon]], with which he can shoot himself up, break stone blocks, and reach higher areas. As he exits the pyramid, another small pyramid appears, inside which there is a [[Max Fastosity Dasherator]] that helps Wario reach a hidden [[List of treasures in Wario Land: Shake It!|treasure]]. Afterwards, he enters another large pyramid with more [[coin]]s and Blast-O-Cannons. In a section with many Blast-O-Cannons, Wario needs to shoot himself several times to reach the final Blast-O-Cannon directing him to the [[Merfle Barrel|caged]] [[Merfle]]. Once Wario breaks the cage, a model of the [[Shake King]]'s head topples over and if Wario | Being only the second proper level in the game, it is relatively simple, but it introduces [[Bomb Block (Wario Land: Shake It!)|Bomb Block]]s that explode after however many seconds are displayed on it when something comes in physical contact with it. In the beginning, [[Wario]] can get coin bags by performing an [[Earthshake Punch]] to destroy the Bomb Blocks. He also encounters a small pyramid which can be lifted up by punching the ground. Next, he enters a large pyramid where he first encounters the [[Blast-O-Cannon]], with which he can shoot himself up, break stone blocks, and reach higher areas. As he exits the pyramid, another small pyramid appears, inside which there is a [[Max Fastosity Dasherator]] that helps Wario reach a hidden [[List of treasures in Wario Land: Shake It!|treasure]]. Afterwards, he enters another large pyramid with more [[coin]]s and Blast-O-Cannons. In a section with many Blast-O-Cannons, Wario needs to shoot himself several times to reach the final Blast-O-Cannon directing him to the [[Merfle Barrel|caged]] [[Merfle]]. Once Wario breaks the cage, a model of the [[Shake King]]'s head topples over, and if Wario does not use the Max Fastosity Dasherator to beat the head to the other side, it will block out the fastest path, forcing him to take a slower route. | ||
==Secret Map location== | ==Secret Map location== | ||
| Line 19: | Line 20: | ||
== Missions == | == Missions == | ||
{{image|section=yes|Each mission has an icon associated. They should be uploaded and added to this section.}} | |||
{{WLSI missions table | |||
|icon1=[[File:No image.png|18px]] | |||
|mission1=''Finish before the clock hits 1:55:00'' | |||
|icon2=[[File:No image.png|18px]] | |||
|mission2=''Collect 30,000 [[coin]]s'' | |||
|icon3=[[File:No image.png|18px]] | |||
|mission3=''Destroy all [[Bomb Block (Wario Land: Shake It!)|bomb block]]s'' | |||
}} | |||
==Enemies== | |||
*[[Bandinero]] (red and yellow) | |||
*[[Floating Bandinero]] | |||
==Treasures== | ==Treasures== | ||
| Line 28: | Line 39: | ||
!width="5%"|Chest location | !width="5%"|Chest location | ||
!width="5%"|Treasure | !width="5%"|Treasure | ||
!width="15%"|NTSC-U description | !width="15%"|NTSC-U description | ||
!width="15%"|PAL description | !width="15%"|PAL description | ||
|- | |- | ||
|[[File:WLSI Whoopsy Desert chest1.png|200px]] | |[[File:WLSI Whoopsy Desert chest1.png|200px]] | ||
|[[File:WLSItreasure7.png]]<br>Cheese Pyramid | |||
|[[File:WLSItreasure7.png | |colspan=2 align=left|''Supposedly, this is how the great mouse rulers of the past are entombed.'' | ||
|colspan=2|''Supposedly, this is how the great mouse rulers of the past are entombed. | |||
|- | |- | ||
|[[File:WLSI Whoopsy Desert chest2.png|200px]] | |[[File:WLSI Whoopsy Desert chest2.png|200px]] | ||
|[[File:WLSItreasure8.png]]<br>Liquid Giggles | |||
|[[File:WLSItreasure8.png | |colspan=2 align=left|''It turns out you can bottle laughter. Who knew?'' | ||
|colspan=2|''It turns out you can bottle laughter. Who knew? | |||
|- | |- | ||
|[[File:WLSI Whoopsy Desert chest3.png|200px]] | |[[File:WLSI Whoopsy Desert chest3.png|200px]] | ||
|Ancient Digital Watch<br><small>Gold Dust Hourglass</small> | |[[File:WLSItreasure9.png]]<br>Ancient Digital Watch<br><small>Gold Dust Hourglass</small> | ||
| | |align=left|''Hard to read and too bulky to wear on your wrist, but at least its battery never runs out.'' | ||
|''Hard to read and too bulky to wear on your wrist, but at least its battery never runs out. | |align=left|''How extravagant! You could lose yourself for hours watching its glittering sands fall...'' | ||
|''How extravagant! You could lose yourself for hours watching its glittering sands fall... | |||
|} | |} | ||
==Data== | ==Data== | ||
{{WLSI level data | |||
|time=2:30:00 | |||
|coins=33,790 | |||
}} | |||
==Names in other languages== | ==Names in other languages== | ||
| Line 65: | Line 74: | ||
|KorR=Atteutteu Samak | |KorR=Atteutteu Samak | ||
|KorM=Oh-Hot-Hot Desert | |KorM=Oh-Hot-Hot Desert | ||
|Spa=Desierto desolado | |||
|SpaM=Desolate Desert | |||
|Fre=Désert Misère | |||
|FreM=Misery Desert | |||
}} | }} | ||
Latest revision as of 12:59, October 25, 2024
| Level | |
|---|---|
| Whoopsy Desert | |
| |
| Level code | 1-2 |
| Game | Wario Land: Shake It! |
| Music track | Whoopsy Desert (before freeing Merfle) Disturbing Tomb (after freeing Merfle) |
| << Directory of levels >> ** | |
- “This is Whoopsy Desert. It should be easy for you, Mr. Wario! Oh, and there's a secret map here!”
- —Brown Merfle, Wario Land: Shake It!
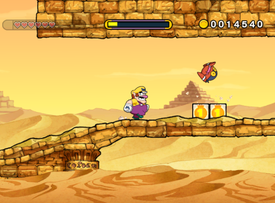
Whoopsy Desert is the second level of Ratl Ruins in Wario Land: Shake It!. It is the first level containing a Secret Map which leads to Disturbing Tomb.
Layout[edit]
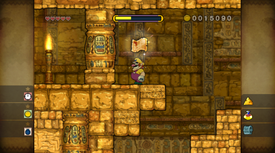
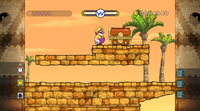
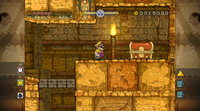
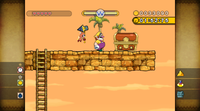
Being only the second proper level in the game, it is relatively simple, but it introduces Bomb Blocks that explode after however many seconds are displayed on it when something comes in physical contact with it. In the beginning, Wario can get coin bags by performing an Earthshake Punch to destroy the Bomb Blocks. He also encounters a small pyramid which can be lifted up by punching the ground. Next, he enters a large pyramid where he first encounters the Blast-O-Cannon, with which he can shoot himself up, break stone blocks, and reach higher areas. As he exits the pyramid, another small pyramid appears, inside which there is a Max Fastosity Dasherator that helps Wario reach a hidden treasure. Afterwards, he enters another large pyramid with more coins and Blast-O-Cannons. In a section with many Blast-O-Cannons, Wario needs to shoot himself several times to reach the final Blast-O-Cannon directing him to the caged Merfle. Once Wario breaks the cage, a model of the Shake King's head topples over, and if Wario does not use the Max Fastosity Dasherator to beat the head to the other side, it will block out the fastest path, forcing him to take a slower route.
Secret Map location[edit]
This level has a Secret Map to Disturbing Tomb. As Wario enters the first pyramid, he should use the Blast-O-Cannon to break several stone blocks, then he needs to turn back and jump to the platform with a large silver coin. Standing there and performing an Earthshake Punch reveals the map.
Missions[edit]
It has been requested that at least one image be uploaded for this section. Remove this notice only after the image(s) have been added. Specifics: Each mission has an icon associated. They should be uploaded and added to this section.
| Icon | Mission
|
|---|---|
| Finish before the clock hits 1:55:00 | |
| Collect 30,000 coins | |
| Destroy all bomb blocks |
Enemies[edit]
- Bandinero (red and yellow)
- Floating Bandinero
Treasures[edit]
Data[edit]
| Given time | Sum of coins |
|---|---|
| 2:30:00 | 33,790 |
Names in other languages[edit]
| Language | Name | Meaning | Notes |
|---|---|---|---|
| Japanese | ホットットさばく[?] Hottotto sabaku |
Pun of「アッチッチ」(acchicchi, Japanese expression meaning "hot") and "hot" +「さばく」(sabaku, "desert") | |
| French | Désert Misère[?] | Misery Desert | |
| German | Weite Wüstenei[?] | Far Wasteland | |
| Italian | Deserto Sconcerto[?] | Disconcert Desert | |
| Korean | 앗뜨뜨 사막[?] Atteutteu Samak |
Oh-Hot-Hot Desert | |
| Spanish | Desierto desolado[?] | Desolate Desert |
