Gallery:Wario Land II: Difference between revisions
LinkTheLefty (talk | contribs) mNo edit summary |
|||
| (35 intermediate revisions by 15 users not shown) | |||
| Line 2: | Line 2: | ||
This is a gallery of images for the game ''[[Wario Land II]]''. | This is a gallery of images for the game ''[[Wario Land II]]''. | ||
==Logos== | ==Logos== | ||
<gallery widths=" | <gallery widths="300px"> | ||
WarioLand2Logo.png| | WarioLand2Logo.png|International logo | ||
WL2 JP Logo.png|Japanese logo | WL2 JP Logo.png|Japanese logo | ||
</gallery> | </gallery> | ||
| Line 11: | Line 11: | ||
<gallery> | <gallery> | ||
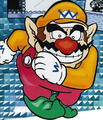
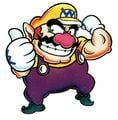
MarioLand2Wario.png|Promotional artwork of [[Wario]] | MarioLand2Wario.png|Promotional artwork of [[Wario]] | ||
Warioland2promoart.png|Wario | |||
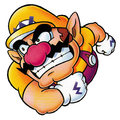
Warioland4.jpg|Wario | Warioland4.jpg|Wario | ||
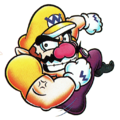
Warioland2coverwario.png|Wario, from the cover art | Warioland2coverwario.png|Wario, from the cover art | ||
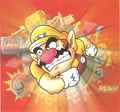
WL2 WarioAttack.png|Wario using his signature attack | WL2 WarioAttack.png|Wario using [[Dash Attack|his signature attack]] | ||
WL2 WarioSleeping.png|Wario asleep | WL2 WarioSleeping.png|Wario asleep | ||
Bouncy Wario WL2.png|[[Bouncy Wario]] | Bouncy Wario WL2.png|[[Bouncy Wario]] | ||
WL2 Crazy Wario.png|[[Crazy Wario]] | |||
Fat Wario WL2.png|[[Fat Wario]] | Fat Wario WL2.png|[[Fat Wario]] | ||
Flat Wario WL2.png|[[Flat Wario]] | Flat Wario WL2.png|[[Flat Wario]] | ||
WL2 Hot Wario.png|[[Flaming Wario|Hot Wario]] | |||
Puffy Wario | WL2 Puffy Wario.png|[[Puffy Wario]] | ||
WL2 Tiny Wario.png|[[Tiny Wario]] | |||
Zombie Wario WL2.png|[[Zombie Wario]] | Zombie Wario WL2.png|[[Zombie Wario]] | ||
</gallery> | </gallery> | ||
| Line 28: | Line 29: | ||
<gallery> | <gallery> | ||
Puncher.png|[[Punch (enemy)|Punch]] | Puncher.png|[[Punch (enemy)|Punch]] | ||
WL2 Cook.gif|[[Cook]] | |||
Grunt WL2.png|[[Grunt (Wario Land II)|Grunt]] | Grunt WL2.png|[[Grunt (Wario Land II)|Grunt]] | ||
WarioLandIIHen.png|[[Hen]] | WarioLandIIHen.png|[[Hen]] | ||
| Line 53: | Line 54: | ||
===Allies=== | ===Allies=== | ||
<gallery> | <gallery> | ||
WL2 | WL2 O Seagull.png|[[Albatross|Gull]] | ||
WL2 | WL2 HenSprite.png|[[Hen]] | ||
WL2 O Owl.png|[[Owl (species)|Owl]] | WL2 O Owl.png|[[Owl (species)|Owl]] | ||
WL2 O Turtle.png|[[Turtle (Wario Land series)|Turtle]] | WL2 O Turtle.png|[[Turtle (Wario Land series)|Turtle]] | ||
| Line 73: | Line 74: | ||
WL2 MechaKuri.png|[[Mecha Kuri]] | WL2 MechaKuri.png|[[Mecha Kuri]] | ||
WL2 GiantSpearMan.png|[[Giant spear man]] | WL2 GiantSpearMan.png|[[Giant spear man]] | ||
GiantSpearManWL2.gif|[[Giant spear man]] | |||
</gallery> | </gallery> | ||
===Enemies=== | ===Enemies=== | ||
<gallery> | <gallery> | ||
WL2 E CrazyAlarm.png|[[Alarm clock ( | WL2 E CrazyAlarm.png|[[Alarm clock (obstacle)|Alarm clock]] | ||
WL2 E Bee.png|[[Bee (Wario Land II)|Bee]] | WL2 E Bee.png|[[Bee (Wario Land II)|Bee]] | ||
WL2 E BlueBird2.png|[[Bird ( | WL2 E BlueBird2.png|[[Bird (Wario Land series)|Bird]] | ||
WL2 E Rat.png|[[Chūta]] | WL2 E Rat.png|[[Chūta]] | ||
|A rodent that emerges from mouse holes and attacks by bumping into Wario. | |A rodent that emerges from mouse holes and attacks by bumping into Wario. | ||
WL2 E Cook.png|[[Cook]] | WL2 E Cook.png|[[Cook]] | ||
WL2 E Bat.png|[[D-Bat]] | WL2 E Bat.png|[[D-Bat]] | ||
Wario Land 2 E DD.png|[[D.D.]] | Wario Land 2 E DD.png|[[D.D.]] | ||
WL2 E | WL2 E Swordfish.png|[[Drill]] | ||
WL2 E Flame.png|[[Flame (Wario Land II)|Flame]] | WL2 E Flame.png|[[Flame (Wario Land II)|Flame]] | ||
WL2 E Windowpain.png|[[Gaugau]] | WL2 E Windowpain.png|[[Gaugau]] | ||
WL2 E Ghost.png|[[Ghost (Wario Land II enemy)|Ghost]] | Windowpain WL2.png|Gaugau | ||
WL2 E Grunt.png|[[Grunt (Wario Land II)|Grunt]] | WL2 E Ghost.png|[[Ghost (Wario Land II enemy)|Ghost]] | ||
WL2 E ToothBlob.png|[[Gugi]] | WL2 E Grunt.png|[[Grunt (Wario Land II)|Grunt]] | ||
WL2 E Bugzapper.png|[[Inamazu]] | WL2 E ToothBlob.png|[[Gugi]] | ||
Kamukamu.png|[[Kamukamu]] (Game Boy | WL2 E Bugzapper.png|[[Inamazu]] | ||
WL2 E Skullcopter.png|[[Kotsuheri]] | Kamukamu.png|[[Kamukamu]] (Game Boy version only) | ||
WL2 E Pelican.png|[[Pecan]] | Kamukamu_GBC.png|Kamukamu (Game Boy Color version, unused) | ||
WL2 E Skullcopter.png|[[Kotsuheri]] | |||
WL2 E Pelican.png|[[Pecan]] | |||
Penguin WL2C sprite.png|[[Penguin (enemy)|Penguin]] | Penguin WL2C sprite.png|[[Penguin (enemy)|Penguin]] | ||
Penguin WL2J sprite.png|Penguin (Japanese version) | Penguin WL2J sprite.png|Penguin (Japanese version) | ||
WL2 E PirateGoom.png|[[Pirate Goom]] | WL2 E PirateGoom.png|[[Pirate Goom]] | ||
WL2 E Punch.png|[[Punch (enemy)|Punch]] | WL2 E Ape.png|[[Pogo Guy]] | ||
WL2 E Rooster.png|[[Rooster]] | WL2 E Punch.png|[[Punch (enemy)|Punch]] | ||
WL2 E | WL2 E Rooster.png|[[Rooster]] | ||
WL2 E | WL2 E FlyingFish.png|[[Tobī]] | ||
WL2 E | WL2 E Spikeshell.png|[[Togemen]] | ||
WL2 E | WL2 E FishingFish.png|[[Tsuriuo]] | ||
WL2 E WhitePuff.png|[[White puff]] | WL2 E Eel.png|[[Utsutsubo]] | ||
WL2 E WizardGoom.png|[[Wizard]] | WL2 E WhitePuff.png|[[White puff]] | ||
WL2 E WizardGoom.png|[[Wizard]] | |||
WL2 E Freezy.png|[[Yukimaru]] | WL2 E Freezy.png|[[Yukimaru]] | ||
WL2 E Zombie.png|[[Zombie]] | WL2 E Zombie.png|[[Zombie]] | ||
</gallery> | </gallery> | ||
===Items | ===Items and objects=== | ||
<gallery> | <gallery> | ||
WL2 O Coin.png|[[Coin]] | WL2 O Coin.png|[[Coin]] | ||
WL2 O WarioCoin.png|[[10-Coin|10 Gold Coin]] | WL2 O WarioCoin.png|[[10-Coin|10 Gold Coin]] | ||
WL2 O SilverCoin.png|[[ | WL2 O SilverCoin.png|[[100-Coin|100 Coin]] | ||
WL2 O BreakableBlock.png|[[Brick Block]] | WL2 O BreakableBlock.png|[[Brick Block|Brick]] | ||
WL2 O FireBlock.png|[[Bonfire Block]] | |||
WL2 O EnemyBlock.png|[[Enemy Block]] | WL2 O EnemyBlock.png|[[Enemy Block]] | ||
WL2 O | WL2 O CrackedBlock.png|[[Doughnut block]] | ||
WL2 O | WL2 O GlassBlock.png|[[Ice Block|Ice block]] | ||
WL2 O Switch.png|[[Switch (Wario Land | WL2 O Switch.png|[[Switch (Wario Land II)|Switch]] | ||
WL2 O Stove.png|[[Stove]] | WL2 O Stove.png|[[Stove]] | ||
WL2 O Elevator.png|[[Elevator]] | WL2 O Elevator.png|[[Elevator]] | ||
WL2 O ConveyorBelt.png|[[Conveyor Belt]] | WL2 O ConveyorBelt.png|[[Conveyor Belt]] | ||
WL2 O Blade.png|[[ | WL2 O Blade.png|[[Lance]] | ||
WL2 O Thorn.png|[[Spike (Wario Land series)|Spike]] | WL2 O Thorn.png|[[Spike (Wario Land series)|Spike]] | ||
WL2 O Spikes.png|[[Spike Trap|Spikes]] | WL2 O Spikes.png|[[Spike Trap|Spikes]] | ||
| Line 131: | Line 135: | ||
==Screenshots== | ==Screenshots== | ||
===Game Boy=== | |||
<gallery> | |||
WL2 GB Title screen.png|Title screen | |||
WL2 S Title.png|Title screen (Super Game Boy) | |||
WL2 1-1 mono.png|Wario and a Pirate Goom | |||
</gallery> | |||
===Game Boy Color=== | |||
<gallery> | <gallery> | ||
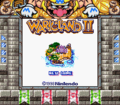
WL2 | WL2 GBC title screen.png|Title screen | ||
WL2 C Title.png| | WL2 C Title.png|Japanese title screen | ||
WL2 1-1 C.png|Wario and a Pirate Goom | |||
WL2 1-1 C.png|Wario and a Pirate Goom | |||
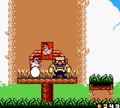
Wario Land 2 S 1-1.png|Wario in his bedroom | Wario Land 2 S 1-1.png|Wario in his bedroom | ||
Wario Land 2 S 1-4.png|Flat Wario condition | Wario Land 2 S 1-4.png|Flat Wario condition | ||
| Line 142: | Line 153: | ||
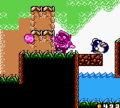
Wario Land 2 S 2-5.png|Wario battling Bobo | Wario Land 2 S 2-5.png|Wario battling Bobo | ||
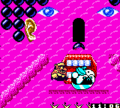
Wario Land 2 S 5-5.png|Captain Syrup and one of her various crafts | Wario Land 2 S 5-5.png|Captain Syrup and one of her various crafts | ||
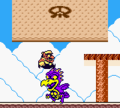
Wario Land 2 S 6(2).png| | Wario Land 2 S 6(2).png|Battling the last of the giant spear men | ||
</gallery> | </gallery> | ||
==Box art== | ==Box art== | ||
===Game Boy=== | |||
<gallery> | <gallery> | ||
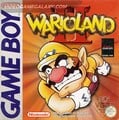
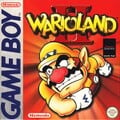
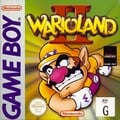
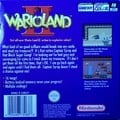
WarioLand2.jpg|North American | WarioLand2.jpg|North American box art | ||
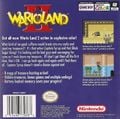
WL2Europe.jpg|European Game Boy box art | WL2 Box BR.jpg|Brazilian box art | ||
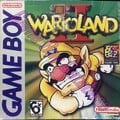
Wario Land 2 GBC JP cover.jpg|Japanese box art | WL2Europe.jpg|European box art | ||
WL2 Box FR.jpg|French and Dutch box art | |||
WL2 Box DE.jpg|German box art | |||
WL2 Box AU.jpg|Australasian box art | |||
</gallery> | |||
===Game Boy Color=== | |||
<gallery> | |||
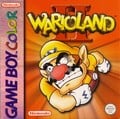
Wario Land 2 GBC NA cover.jpg|North American box art | |||
Wario Land 2 Box NA alt.jpg|North American box art (Later release) | |||
WLIIGBCBackAmerica.jpg|North American box art (back) | |||
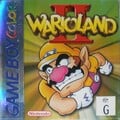
Wario Land 2 box art.jpg|European box art | |||
WLIIGBCBackEurope.jpg|European box art (back) | |||
WL2 GBC Box AU.jpg|Australasian box art | |||
WL2 GBC Back AU.jpg|Australasian box art (back) | |||
Wario Land 2 GBC JP cover.jpg|Japanese box art | |||
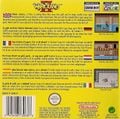
WLIIBackJapan.jpg|Japanese box art (back) | WLIIBackJapan.jpg|Japanese box art (back) | ||
</gallery> | </gallery> | ||
==Miscellaneous== | ==Miscellaneous== | ||
< | <gallery> | ||
WL2icon.png|Nintendo 3DS [[Virtual Console]] icon | |||
WL2 3DS VC trailer pic.jpg|Promotional still for the Nintendo 3DS Virtual Console release in Europe | |||
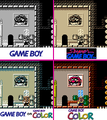
Wario Land II Game Boy - Super Game Boy - Game Boy Color palette comparison.png|Comparison of three default palettes for the Game Boy version and the palette of the Game Boy Color port | |||
</gallery> | </gallery> | ||
{{Galleries}} | {{Galleries}} | ||
{{WL2}} | {{WL2}} | ||
[[Category:Galleries | [[Category:Galleries]] | ||
[[Category:Wario Land II|*]] | [[Category:Wario Land II|*]] | ||
[[de:Wario Land II/Galerie]] | |||
Revision as of 08:29, April 25, 2025
This is a gallery of images for the game Wario Land II.
Logos
International logo
Japanese logo

Artwork
Wario
Promotional artwork of Wario
Wario
Wario
Wario, from the cover art
Wario using his signature attack
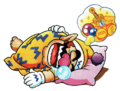
Wario asleep


Other Characters


Sprites and Models
Wario

Egg Wario


Allies


Bosses

Captain Syrup


Enemies

Gaugau

Kamukamu (Game Boy version only)

Kamukamu (Game Boy Color version, unused)

Penguin (Japanese version)


Items and objects


Screenshots
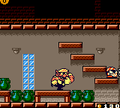
Game Boy
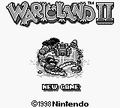
Title screen
Title screen (Super Game Boy)
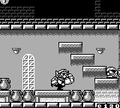
Wario and a Pirate Goom


Game Boy Color
Title screen
Japanese title screen
Wario and a Pirate Goom
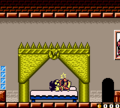
Wario in his bedroom
Flat Wario condition
Wario and his hen
Crazy Wario
Wario battling Bobo

Captain Syrup and one of her various crafts
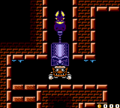
Battling the last of the giant spear men


.png)
Box art
Game Boy
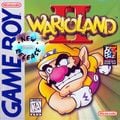
North American box art
Brazilian box art
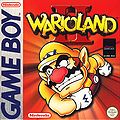
European box art
French and Dutch box art
German box art
Australasian box art


Game Boy Color
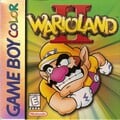
North American box art
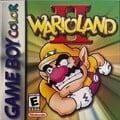
North American box art (Later release)
North American box art (back)
European box art
European box art (back)
Australasian box art
Australasian box art (back)
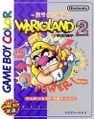
Japanese box art
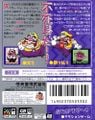
Japanese box art (back)


Miscellaneous

Nintendo 3DS Virtual Console icon
Promotional still for the Nintendo 3DS Virtual Console release in Europe
Comparison of three default palettes for the Game Boy version and the palette of the Game Boy Color port


| show Galleries |
|---|
| show Wario Land II |
|---|
