Director's Notes
Written by: Stooben Rooben (talk)
Vhat is zhis? Are ve still receiving no applications? You are trying my PATIENCE!
Well, I guess I'll just continue right on then. Here we are at Issue 102. This is a pretty normal issue for Strategy Wing — we have four sections to present this time around. Thanks to all my writers for sending in their sections this month. Y'all are great!
Don't have much time to stick around and chat this issue, since I'm moving at the end of the month and gotta get packed and prepared and notify a bunch of people and yada yada yada. Next month I'll be around a lot more; the issue is gonna be a huge ~treat~. And in case you didn't see me mention it on our forum, I will be starting 'Shroom Mafia III the day of Issue 103's release, October 17th. I will likely be sending out rolecards a few days before then. It's gonna be a really exciting game; I've spent a very long time working on it to make the roles fun and interesting. People of all skill levels should find themselves on more-or-less equal ground.
Anyway, I'm done babbling. On to Section of the Month, and then our new sections for Issue 102!
Section of the Month
| STRATEGY WING SECTION OF THE MONTH | ||||
|---|---|---|---|---|
| Place | Section | Votes | % | Writer |
| 1st | Pocket Handbook | 10 | 50.0% | Crocodile Dippy |
| 2nd | Mario Kart: Wheel Tips Corner | 7 | 35.0% | Yoshi876 |
| 3rd | Mario Calendar | 3 | 15.0% | Paper Yoshi |
Congratulations to Crocodile Dippy (talk) for winning Strategy Wing's Section of the Month for the second month in a row; her Pocket Handbook submission last month detailing Volcarona received an even half of the votes for August. In second place, is Yoshi876 (talk) with his highly varied and helpful Mario Kart: Wheel Tips Corner section; he received 35% of August's votes. Claiming third place is Paper Yoshi (talk); his neatly-organized and always educational section, Mario Calendar, received 15% of the public's votes last month. Congratulations to all three of you, you're doing simply great work with this team~
Yoshi876 has some tips to help you Pract-X your driving skills.
[read more]
Trying to get the most out of your Pokémon? The sky is the limit with Dippy's Altaria advice.
[read more]
From the Mushroom Vaults
Written by: Stooben Rooben (talk)
Hello, and welcome to this edition of From the Mushroom Vaults! You know the drill — here, I cover tips, tricks, cheats, hints, cheats, secrets, and cheats. Can you guess what I'll be covering this month? That's right — secrets! Secret exits, to be precise.
Yes, again. Shut up.
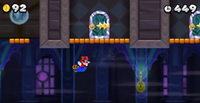
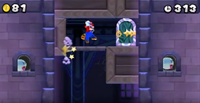
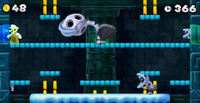
This month, I'll be covering the secret exits of a 3DS title I've been playing recently due to...well, boredom, mostly. It's a title that I probably wouldn't have played if I weren't in a place where I'm playing games so intermittently; that is one thing that's nice about the game — you can just kind of jump in and out of it when you want to (if you want to). I picked it up over a year ago for discounted price but only just now got around to playing it: New Super Mario Bros. 2.
Yes, I know. Shut up.
Secrets: New Super Mario Bros. 2 (3DS)
Rather than boring you with potential visual rewards for collecting Animal Crossing proportions of Coins, how about I just get around to telling you where those secret exits are? There are actually quite a few, as it turns out.
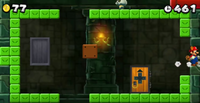
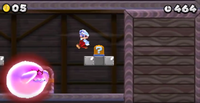
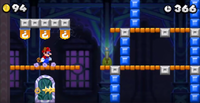
First up, is Template:World-link. The secret exit here is pretty easy to find, but can be a little dangerous to access if your jump timing isn't all that great. It can be accessed early on by passing through a door to a secret room. There is a group of Snake Blocks here that, if you look carefully, are blocking (ho ho) a small path to the right. Every now and then, the Snake Blocks will clear out just long enough for you to jump to the pathway, but it is a somewhat small window of time that you will have to do it. After you clear the secret exit, you will unlock a road that leads to Template:World-link. This cannon will take you to World Mushroom.
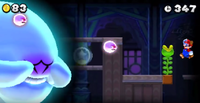
Next, we have Template:World-link, one of those levels where you're chased by a disturbingly large enemy — in this case, Boohemoth. Somewhere along your stressed travels, you should run across a hidden ? Block that contains a vine that leads up to a new (and safer) room with a single door that leads to your secret exit. This one's really not too hard to access, even from a timing perspective. The secret exit here will give you access to a Toad House and World 2-B.
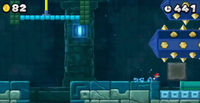
Template:World-link has a secret exit that requires a Mini Mushroom to access. A short way into the level, you'll find a tiny Warp Pipe off to the right, hidden behind a block and some spiked pillars that like to retract periodically to grant you access. Once you go through this Pipe, you'll have to swim a even further, past a few Fish Bones and a collection of stone pillars that will move around in ways that take forever to finally allow you passage to the top of the room. At this point, you'll find your secret exit through a red Pipe to the right. This will give you access to a Toad House and Template:World-link, which is actually the path to World Flower.
Another level in this world, World 3-4, has a secret exit that...really, isn't much of a secret. The pipe is right out in the open. At the end of the level's first screen, you will see a green Pipe that leads up, and a red Pipe that leads right; the red Pipe will lead you to your secret exit, as usual. The next area it leads you to has a ton of crates and enemies floating in that toxic purple liquid (from Sonic 2?) that you will need to stay on higher ground to avoid. Eventually, you will run across a narrow path with two brick blocks stacked vertically to block your way; you will need something to break these, like a Koopa Shell or a Raccoon Suit in order to continue. Once you clear the exit, you will gain access to World 3-B.
Aaaaand another in the same world, Template:World-link. Telling you exactly where this one is at might be a little difficult. You know that guy you ask for directions and he tells you, like, a dozen twists and turns that you have to remember in a very precise order otherwise you'll get lost? That's kinda the case here. You have to go through a couple of doors to get there, some within a group of others that may get you confused with just a text description. I will tell you that you'll need to be Raccoon Mario to pull this one off. This video here shows you how to access the door that will take you to the level's secret exit. Going through this secret exit will create a shortcut that bypasses World 3-5 and goes straight to Template:World-link.
This next one is in Template:World-link (finally). You don't really need any power-ups to pull this one off, although I guess a Raccoon Leaf could potentially make it easier. In the room where the walls are moved by Boos, you will need to travel for a bit and eventually perform a Wall Kick in order to reach the door to the secret exit. When you reach the outside, you will find the flagpole is being guarded by a Big Boo, although you can bypass him really easily and finish the level. Clearing the exit will unlock the path to World 4-B.
Once again, we're in World 4, this time Template:World-link. For the most part, you can just play this level like normal to find the secret exit. There will come a very recognizable point in the level with a Big Bone Piranha Plant crammed at the center of the autoscrolling stage. To this dude's left, you'll see a blue Pipe that will lead you to a safe room with some coins and another blue Pipe (this one, in turn, leading you outside and to the flagpole). Once you clear this exit, you will gain access to World 4-C.
Moving on to World 5-1, we have another level that requires you to pass several screens before your reach the true secret exit. The level itself is loaded with tightropes you can bounce real high off of, and with Koopa Paratroopas that make reaching certain areas a somewhat enjoyable challenge. Since this is another secret exit that would require multiple screenshots to point you in the right direction, I'm going to instead link you to another YouTube video for this game from Phoenixmaster1, this one detailing World 5-1 as a whole. Clearing this exit will unlock the path to Template:World-link.
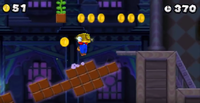
Continuing from the last secret exit, Template:World-link has its own secret exit that will lead you to World 5-A. The secret exit requires a few screens to clear, but the most important turn you need to remember is that a Vine must be released from a hidden ? Block by a specific platform. There's a screenshot of it to your left; the Vine will lead you to a set of collapsing stairs that will take you to another room that contains another alternate path you must take. Towards the end of the room, a Big Boo will spawn by a set of four doors. At this point, you should let the Big Boo chase you for a short distance so that it leaves the door it spawned by (the one on the top right); if you enter this door, you will be taken outside and can eventually make your way to the flagpole from there.
Continuing yet again from the previous exit, World 5-A has its own secret exit that will act as a shortcut, giving you access to a Toad House and Template:World-link without having to complete World 5-5 or World 5-6. Honestly, finding this exit isn't a huge deal. You can just play the level like normal, except for one thing: when you run across the Springboard, you will need to carry it with you until the end of the level. When the stage stops autoscrolling and you see the regular flagpole, you should see two Brick Blocks here. If you drop the Springboard below the Brick Block on the right, jump on it and hit that block, a Vine will sprout out, leading you to another area high above the current one. After making a few long, Coin-doused jumps in this area, you will reach the secret exit's flagpole.
You gotta love Ghost Houses, man. All sorts of paths, an abundance of Boos, and a penchant for alternate exits. Template:World-link is no exception. The path to this secret exit is another somewhat lengthy and awkward path that you could lose your way along, or end up just running in circles. Another one of these videos shows how to reach the end of the secret exit. It requires a pretty sweet series of Wall Jumps in order to access, as well as bypassing a few more Big Boos. Finishing the level with this exit will give you access to World 6-A.
How about we jump past the rest of these boring NUMBERED worlds and go to some COOL MARIO ICON worlds instead? First up, we have the trademark MUSHROOM world. Specifically, Template:World-link. This is a colorful level full of bright platforms and a decent amount of most of your standard enemies (Koopas and Paratroopas, in particular). Finding the secret exit here isn't a huge challenge, really...but then again, none of these really are. Somewhere around halfway through the level, you will need to hit another hidden ? Block that will reveal a Vine; that Vine will take you to a higher area that ends with a red flagpole indicative of every other secret exit. Clearing the level this way will give you access to World ![]() Mushroom-A.
Mushroom-A.
Up next in this long list of exits is Template:World-link. ..."World Mushroom-Ghost House". Wow, that sounds silly. Seriously though, as is tradition with Ghost Houses, navigating this level the first few times is like navigating a maze. Finding the secret exit in particular is a bit convoluted and definitely requires some exploration. Eventually, you will find a room with three upside-down P-Switches; by hitting the middle and right ones, you can haul plumber booty across the room and gain access to an attic-like cranny with a door that leads outside. You may have to perform a Wall Kick or get Raccoon Mario to fly a little bit to get up here. Once you walk outside the door, the flagpole will be just a short distance away, behind — surprise — another Big Boo. Once you clear this exit, you will be able to enter Template:World-link.
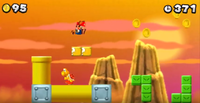
We're nearing the end of the list now. Only two left, both in the same world. The first of those two is in Template:World-link. This is one of the few truly awesome levels in the game to me, if only for one reason: it has MOUNTAINS!!! Mountains are super-great and if you think otherwise, pls go. ...Ahem, moving along, this secret exit has a pretty cool gimmick you have to take advantage of in order to find. At a certain point in this level, you'll see two ? Blocks grouped together side-by-side near a red Koopa Troopa. By Ground Pounding the ? Block on the right, you will make it soar to the left and sprout wings — at this point, you should just stay on top of the ? Block and let it fly you across the stage. At some point, it'll stop moving to the right and fly straight up at a great speed. It's kind of funny, really. The ? Block takes you to a new area that contains the flagpole you need to touch to clear the exit. Once you do, you will gain access to Template:World-link.
Our last entry in this list is Template:World-link. I didn't know flowers could have ghosts. Huh. Must be a lot of pissed off flowers out there... Well, no matter how mad those flowers may be, I've gotta finish this section properly, so let me tell you what to do. Honestly, it's not difficult at all. All you must do is ascend the level until you reach a ? Block that contains a Star; activating it will turn all the blocks below into coins, unblocking (HO HO) the path that you need to access the secret exit. If you slide down the wall on the right during this time, you'll see a platform sticking out with a sign pointing right; follow this into the next room and you will find a door that will take you outside. Say "hello" to another Big Boo, since it's the last one you'll see in this issue's guide; once you touch the red flagpole, you'll have cleared the level and unlocked access to Template:World-link.
Oh man. That ended up being a lot longer than I expected. Now I'm late for surgery.
Well, I hope you found these secrets helpful! See you all next month with some Halloween-themed games! Thanks for reading!
Mario Kart: Wheel Tips Corner
Hello, 'Shroom racers, and welcome to Mario Kart Wheel Tips Corner! Here, I plan to give you just some extra tips to help you with your racing, or just some changes in a track that might catch you off guard if you aren't prepared for them. So the lights are out, let's start racing.
Kool Karts
You can't race if you don't have a Kart to do it in, so in this section I'll give you some facts about a Kart, Bike or ATV that you can use hopefully for racing success.
This month's Kool Kart, the Cact-X, is not something you want to get behind, or to the side of, or in front of, really... Those spikes could hurt. The Kart gives the Sea Speed, Handling and Off-Road stats a 0.25 boost; however it also decreases the Speed, Air Speed, Acceleration and Mini-Turbo stats by 0.25. None of these stats sound particularly thrilling, until you factor in that 0.25 is actually a quarter, this means that in the sea the Cact-X is a quarter times faster than a Standard Kart which gives no stat boosts, but is a quarter times slower in the air (or on land) than a Standard Kart. Looking at where the Cact-X loses stats does make it seem quite unappealing, as all of its losses are focused around speed, even the Mini-Turbo which deals with how much speed you get after a successful drift; however factor in one of Mario Kart 7's new features, driving underwater, it does become slightly useful. A course that would really showcase this is Cheep Cheep Lagoon (or Cheep Cheep Cape to us in PAL regions), as the majority of this race takes place underwater. Whilst your opponent may be able to catch you on the ground sections, your overall Sea Speed should be enough to give you a significant enough gap that they shouldn't be able to catch you anytime soon.
What's Changed?
Retro tracks are now a huge portion of the Mario Kart games, typically amounting to half the courses in the game. But usually these courses change some things up, so in this section I'll help you find out "What's Changed" in the retro tracks.
This issue we're going to look at what's changed in Mushroom Bridge. This track first appeared in Mario Kart: Double Dash!!, before returning in Mario Kart DS, and there are quite a few changes. Obviously, the graphics changed, that's a given at this point, but there are quite a few other changes. The main ones are the vehicles that appear on the track — in its Double Dash!! incarnation, many vehicles like Bomb Cars and Wiggler Buses were driving around; but these have all been removed in Mario Kart DS, where all the vehicles in the track are instead the same ones that were used in Shroom Ridge. The track was also made considerably shorter, and the only shortcut that remained in the track was the one over the hill just before the bridge.
Ace Shortcut
In this small section I give you a way to shave a few seconds off your time, whether you know about it or not. Be warned, most of these shortcuts will require a Mushroom.
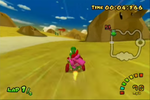
This shortcut can be used in Dry Dry Desert from Mario Kart: Double Dash!!, and it also managed to survive the transition to Wii U, meaning that it can be used in Mario Kart 8. Just after the first corner, by some rocks with eyes you can boost across the sand bit using a Mushroom. You can also boost over several other corners in a similar way, as this track is full of them.
Pocket Handbook
Written by: Crocodile Dippy (talk)
Hello again, my amateur Pokémon masters, to another instalment of Pocket Handbook, The 'Shroom's number one stop for Pokémon elitism. It's the end of Summer for you yanks, which naturally means the end of Winter for me down under, my most hated month because I am a Crocodile Woman and need warmth on my ragged skin. To commemorate this glorious occasion, I've decided to celebrate the season in the south, Spring, and what better way to do that than to do a little spring cleaning? A fair few Pokémon have an emphasis on cleanliness, but I've opted to go for one of my favourite Pokémon, Altaria, because... look at it, it's so fluffy.

|
Name: | Altaria | HP: | 75 | |
| Species: | Humming | Attack: | 70 | ||
| Type: | Dragon | Flying | Defense: | 90 | |
| Abilities: | Natural Cure | Special Attack: | 70 | ||
| Cloud Nine | Special Defense: | 105 | |||
| Speed: | 80 | ||||
Prior to Generation III, there existed only four dragons; the Dratini line, and Kingdra, the final form of the Horsea line. This was probably to emphasise their rarity, but did make the use of that typing a tad predictable, which prompted Game Freak to incorporate a myriad of weird-looking dragons in Pokémon Ruby and Sapphire. Thus, we have Swablu, an adorable little fluff ball borb that loves to clean things with its wings and sit atop people's heads like a fluffy hat, which evolves into the majestic dragon Altaria, whose melodic voice inspires visions of dreamlike wonder in all listeners. Indeed, Altaria is actually inspired by the Peng, a massive bird in Chinese mythology whose very name has become symbolic with greatness and high achievements in Chinese culture. Quite a distinction, although Altaria sat as an overlooked master of the skies up until its most recent appearance in Pokémon Omega Ruby and Alpha Sapphire.
First, I'll cover normal Altaria. Altaria's biggest strength happens to also be its biggest downfall, as while its fairly mixed stats grant it a bit of versatility, none of them excel enough to make Altaria a particular force to be reckoned with either which way. It's too slow to go toe-to-toe against other potent dragon threats like Salamence or Flygon, not powerful enough to beat out Haxorus or Hydreigon, with its only saving grace being its defenses, which still sit only slightly above that of the other powerful dragons, aside from Goodra. Altaria does, however, offer with it a degree of unpredictability due to its broad moveset that allow it to take on a variety of support roles, both aggressive and defensive. My standard moveset structure for a normal Altaria would probably be along the lines of:
| Haze | Status | The user creates a haze that eliminates every stat change among all the Pokémon engaged in battle. |
| Heal Bell | Status | The user makes a soothing bell chime to heal the status problems of all the party Pokémon. |
| Roost | Status | The user lands and rests its body. It restores the user’s HP by up to half of its max HP. |
| Dragon Pulse | Special | The target is attacked with a shock wave generated by the user's gaping mouth. |
This is somewhat of a mish-mash of an offensive and defensive support build. Haze is there simply to punish set-up Pokémon, since it negates all their stat changes, rendering all their hard work to become an unstoppable killing machine completely moot. Heal Bell is where the big support plays come in, as Altaria is capable of curing your entire team of status ailments in a single turn, especially useful if you're dealing with a team that's focusing heavily on crippling your team rather than destroying them with brute force. Roost is just a fantastic recovery move all-around, and can mitigate Altaria's weaknesses from its Flying typing provided it can move faster than its opponent, so I guess my sweeping advice for everyone is that you should teach Roost to all your Flying-type Pokémon. Finally, Dragon Pulse is really just there for some STAB damage output, just in case you need Altaria to do a simple revenge assassination job for you. If you want to put a stronger focus on aggressive plays, then good options would be Tailwind to help give your team some added speed for a few turns, Roar to force priority threats out of play or to rack up entry hazard damage from Spikes or Stealth Rock, while good defensive options would be Substitute if you don't think simply healing with Roost is going to be enough to waste your opponents time, Featherdance if you want to further cripple your opponent's physical offensive capabilities, and of course Perish Song, for those who feel that being a complete dick is central to their competitive Pokémon experience.
Ability-wise, Altaria has access to two very good abilities in the form of Natural Cure and its hidden ability Cloud Nine. Both abilities have their uses, with Natural Cure being a good counter to teams that may seek to cripple Altaria with status ailments to hamper its capability to disrupt the enemy team, allowing Altaria to cure any status ailment if it switches out. Given it's a support Pokémon, you're very likely to be switching it out once it has served its immediate purpose. Cloud Nine serves as a counter to weather-based teams, as it will negate all weather conditions in effect, which has the potential of completely tearing apart entire team structures. Pick the one that works best for your team, but remember that Altaria's performance can be held back a bit if it doesn't have easy status healing from Natural Cure, so choose carefully. In terms of items, I would probably go for Leftovers or White Herb, since the former is just a fantastic item all-around that grants Altaria an added bit of sustain, while the latter can counter-act anti-status moves like Taunt or Torment, granted for only one turn. In terms of its strengths and weaknesses, Altaria is somewhat flawed due to being vulnerable to a lot of common attacking types, although it does carry a hefty amount of useful resistances and a potent immunity:
| Weaknesses | Dragon | Fairy | Ice | Rock | |
| Resistances | Bug | Fighting | Fire | Grass | Water |
| Immunities | Ground |
This makes its only above-average defenses pale somewhat due to how easy it is to exploit its glaring weaknesses, hence why trying to run a support Altaria parallel to most opposing Dragon-types is disastrous, to say nothing of the threat of Fairy-type Pokémon. Switching Altaria in and out constantly can be dangerous if your opponent has set up Stealth Rock, since Altaria will take super-effective damage from it which can whittle it down considerably; sure, you'll likely have Roost on-hand in any build for sustain, but it accelerates the process to the point where you'll be wasting turns healing yourself when you could be doing actual support things instead. Support Altaria is very diverse and viable, no doubt, but certainly not for every team, and can prove to be dead weight on an enemy team that's geared more towards brute force rather than setting up, since Altaria simply has no answer for that. That is, until we get to the real juicy buff Altaria received in the latest games...

|
Name: | Mega Altaria | HP: | 75 | |
| Species: | Humming | Attack: | 110 | ||
| Type: | Dragon | Fairy | Defense: | 110 | |
| Abilities: | Pixilate | Special Attack: | 110 | ||
| Special Defense: | 105 | ||||
| Speed: | 80 | ||||
That's right, it's Mega Altaria, the newest stage in this adorable little fluffball's evolutionary line that grants it an even more excessive volume of cotton and fluff on its body, including a makeshift Dutch cap. Mega Altaria is arguably the most adorable mega evolution in the series thus far, unless you're a furry and think that Lopunny's ripped tights are the sexiest thing in the whole world, in which case, get help. Mega Altaria receives potent buffs to both of its attacking stats, as well as a small increase to its Defense, whilst also trading its Flying typing for Fairy typing, which combos beautifully well not only with its Dragon typing offering it an insane total of seven resistances and an immunity, but also its new ability, Pixilate, which turns any Normal-type move Mega Altaria uses into a Fairy-type move, buffs its damage by %30, then applies a same-type attack bonus to it. Suddenly, the other Dragons that Altaria feared before now tremble before the adorable might of its glorious mega evolution. All these factors have swiftly pushed the little bird that could into a potent, versatile force to be reckoned with, being one of the few mega evolutions that can genuinely throw your opponent for a loop since they'll still be unsure exactly what playstyle and moveset you'll be running with it. A fairly standard build would be:
| Dragon Dance | Status | The user vigorously performs a mystic, powerful dance that boosts its Attack and Speed stats. |
| Hyper Voice | Special | The user lets loose a horribly echoing shout with the power to inflict damage. |
| Roost | Status | The user lands and rests its body. It restores the user’s HP by up to half of its max HP. |
| Earthquake | Physical | The user sets off an earthquake that strikes those around it. |
Of course Roost is still there, especially now that you're running without Leftovers to aid your recovery. Dragon Dance is there to help set-up Altaria, since it buffs its already considerable Attack stat whilst also helping to improve its otherwise still lacklustre Speed; a far cry from the "remove all stat changes" Haze strat I mentioned earlier, hm? Hyper Voice will be your primary damage output, as its already potent power is amplified ridiculously by Mega Altaria's Pixilate ability, which can decimate pretty much any Dragon-type in one shot aside from Goodra and the Dragon mega evolutions. It also has the added benefits of hitting both or potentially all opposing Pokémon in a double-battle or triple-battle (needs to be in the middle position to hit everyone in triple battles, tho, which is a... somewhat precarious position to be in), and will hit opponents through Substitute, although be warned that Pokémon with the ability Soundproof will be unaffected by this move. Finally we have some physical damage in the form of Earthquake, a just plain brilliant move that allows Mega Altaria to deal with the new Poison-type and Steel-type threats that its Fairy typing has unfortunately granted it.
Mega Altaria is still, however, a hugely versatile Pokémon, capable of running as the mixed attacker I just outlined, exclusively as a special attacker, defensive wall, and of course, the support role I mentioned earlier with normal Altaria. You can trade Hyper Voice out for a max happiness Return, which can actually dish out more overall damage than Hyper Voice, at the cost of Substitute-piercing and multi-target damage. If you intend to dedicate Mega Altaria to special attacks, removing Dragon Dance and Earthquake in favour of Agility for the double-up speed boost, and Fire Blast for raw damage output and coverage to cope with Ice-types and Steel-types, although you will be foregoing any means to fight against Fire-types without Earthquake. Defensively, Substitute can be used in tandem with Roost and either Roar or Perish Song to stall your opponents whilst forcing switch-outs to rack up entry hazard damage, or just to aggravate set-up attackers in general. My absolute favourite potential move to incorporate in defensive strategies with Mega Altaria is Cotton Guard, being one of the absolute best buff moves in the game by increasing the user's Defense stat by three stages in one turn, which can work beautifully to frustrate raw physical damage dealers, especially Mega Scizor and Mega Metagross whom otherwise terrify the fluffy little cloud.
| Weaknesses | Fairy | Ice | Poison | Steel | |||
| Resistances | Bug | Dark | Electric | Fighting | Fire | Grass | Water |
| Immunities | Dragon |
I don't need to talk about items and abilities for Mega Altaria, because you're stuck with Altarianite and Pixilate, but do note that even with its myriad of resistances, you should never overestimate Mega Altaria's tankability now that it can't hold Leftovers and can't naturally heal from status ailments with Natural Cure. Depending on what type of moveset and playstyle you're running, you'll always be left shortchanged against certain line-ups; tossing Heal Bell aside or mega evolving to get rid of Natural Cure leaves your team vulnerable to status ailments, ignoring Earthquake takes away the valued Ground-type coverage to deal with many common Poison-types and Steel-type foes, getting rid of Roost robs you of precious recovery, etc. While Mega Altaria dominates opposing dragons with its raw Fairy-type damage, its lacks a cohesive answer for other tanky Fairy-types like Clefable or Florges. Likewise, its vulnerability to Poison-types is quite glaring unless it has Earthquake, special mention going to Mega Venusaur whose typing and ability allow it to not only tank but heal from anything Mega Altaria tries to throw at it, whilst tainting the majestic avian's wings with a Sludge Bomb or two. But of course, not even a glorious poofy sky-dragon is without its weaknesses, and so long as you have a brilliant team composition to allow Altaria or its Mega evolution free flight, you'll be sure to find yourself in fluffy victory.
Mario Calendar
Written by: Paper Yoshi (talk)
Hi, everyone, and welcome to the September Issue of Mario Calendar!! Once again, no news for this section, so it's time to check all the Mario, Donkey Kong, Yoshi and Wario games released in a September day!
| Abb. | Console/Store |
|---|---|
| NES | Nintendo Entertainment System |
| SNES | Super Nintendo Entertainment System |
| N64 | Nintendo 64 |
| N64DD | Nintendo 64DD |
| GCN | Nintendo GameCube |
| Wii | Nintendo Wii |
| Wii U | Nintendo Wii U |
| GB | Game Boy |
| VB | Virtual Boy |
| GBC | Game Boy Color |
| GBA | Game Boy Advance |
| NDS | Nintendo DS |
| 3DS | Nintendo 3DS |
| WiiVC | Wii Shop - Virtual Console |
| 3DSVC | Nintendo eShop (3DS) - Virtual Console |
| WiiUVC | Nintendo eShop (Wii U) - Virtual Console |
| Abb. | Region |
|---|---|
| NA | North America |
| JP | Japan |
| EU | Europe |
| AU | Australia/New Zealand |
| KO | Republic of Korea |
| CN | People's Rep. of China |
| HK | Hong Kong, China |
| TW | Republic of China (Taiwan) |
- September 1st
- 1986 (EU): Mario Bros. (NES)
- 1992 (NA): Super Mario Kart (SNES)
- 2008 (NA): Super Mario RPG: Legend of the Seven Stars (SNES)
- September 3rd
- 2004 (EU/AU): WarioWare, Inc.: Mega Party Game$! (GCN)
- 2007 (NA): Donkey Kong Jr. Math (NES-WiiVC)
- September 4th, 2008 (KO): Super Mario Galaxy (Wii)
- September 5th, 2003 (JP): Mario Golf: Toadstool Tour (GCN)
- September 9th, 1983 (JP): Mario Bros. (NES)
- September 10th
- 2007 (NA): DK: Jungle Climber (NDS)
- 2014 (JP): Mario Golf: GBA Tour (GBA-WiiUVC)
- September 11th, 2014 (EU/AU): Super Mario Ball (GBA-WiiUVC)
- September 12th, 2013 (EU/AU): Super Mario Bros. (NES-WiiUVC)
- September 13th
- 2001 (AU): Mario Kart: Super Circuit (GBA)
- 2005 (JP):
- Mario Tennis Advance (GBA)
- Dr. Mario & Puzzle League (GBA)
- 2014 (JP): Super Smash Bros. for Nintendo 3DS (3DS)
- September 14th
- 1992 (JP): Super Mario Bros. USA (NES)
- 1995 (JP): Mario no Super Picross (SNES)
- 1999 (EU/AU): Mario Golf (N64)
- 2001:
- (JP): Luigi's Mansion (GCN)
- (EU): Mario Kart: Super Circuit (GBA)
- 2007:
- (EU/AU): Super Mario Bros.: The Lost Levels (NES-WiiVC)
- (EU): Super Paper Mario (Wii)
- 2009 (NA): Mario & Luigi: Bowser's Inside Story (NDS)
- September 15th
- 1987 (EU): Donkey Kong 3 (NES)
- 2005 (AU): Mario Party 6 (GCN)
- September 17th
- 2004 (EU): Mario Golf: Advance Tour (GBA)
- 2007 (NA): Yoshi's Story (N64-WiiVC)
- 2014 (JP): Super Mario Ball (GBA-WiiUVC)
- September 19th
- 2012 (JP): Wrecking Crew (NES-3DSVC)
- 2013 (NA): Super Mario Bros. (NES-WiiUVC)
- September 20th
- 2002 (JP): Yoshi's Island: Super Mario Advance 3 (GBA)
- 2007:
- (AU): Super Paper Mario (Wii)
- (JP): Mario Strikers Charged (Wii)
- September 21st, 2011 (JP): Mario's Picross (GB-3DSVC)
- September 22nd, 2008 (NA): Wario Land: Shake It! (Wii)
- September 23rd, 2002 (KO) Super Mario World: Super Mario Advance 2 (GBA)
- September 24th, 2002 (NA): Yoshi's Island: Super Mario Advance 3 (GBA)
- September 25th
- 2006 (NA): Mario vs. Donkey Kong 2: March of the Minis (NDS)
- 2008 (AU): Wario Land: The Shake Dimension (Wii)
- 2014 (EU): Game & Watch Gallery 3 (GBC-3DSVC)
- September 26th
- 1996 (NA): Super Mario 64 (N64)
- 2008 (EU): Wario Land: The Shake Dimension (Wii)
- 2013 (NA): Donkey Kong 3 (NES-WiiUVC)
- 2014 (AU): Game & Watch Gallery 3 (GBC-3DSVC)
- September 27th
- 1997 (JP): Game & Watch Gallery 2 (GB)
- 2004 (NA): Donkey Konga (GCN)
- September 28th
- 1990 (EU):
- Super Mario Land (GB)
- Alleyway (GB)
- 2012 (HK/TW): Mario Kart 7 (3DS)
- 1990 (EU):
- September 29th
- 2011 (NA/EU/AU): Super Mario Land 2: 6 Golden Coins (GB-3DSVC)
- September 30th, 2008 (JP): Mario Golf 64 (N64-WiiVC)
- September 1993 (NA): Yoshi's Safari (SNES)
- September 1994 (NA): Mario's Early Years! Fun with Numbers (SNES)
- September 2008 (AU): Game & Watch Collection (NDS)
- September 2010 (AU): Game & Watch Collection 2 (NDS)
And that's all for now!! See you next month!!
| The 'Shroom 102 | |
|---|---|
| Staff sections | Opening Statement |
| Sub-teams | Fake News • Fun Stuff • Palette Swap • Pipe Plaza • Critic Corner• Strategy Wing |
| Specials | Ultimate Character Tournament |
| Closing Statement | |


