The 'Shroom:Issue 200/Beginner's Guide to Debian Xfce
Beginner's Guide to Debian Xfce
Written by: MiracleDinner (talk)
Are you interested in using Debian with Xfce?
Debian with Xfce is a fantastic option for a free and open-source operating system that will never fail on them, can be customised any way you want, and gives power to its users. It will remain consistent over time with only major system upgrades every 2 years. Want new software faster than that? You can backport specific software that you need, or change your whole system to a "rolling release"-like cycle by moving to the Debian Sid branch. But I always prefer to use the Stable branch (currently Debian 12 "Bookworm") since I like my system to be, well, stable.
So, interested in trying it out? Good news! - it's very easy. Better yet, you don't even need to permanently install Debian+Xfce to your computer to give it a spin! All you need is a PC and a USB flash drive. Follow these steps to give Debian+Xfce a free trial without permanently altering your PC:
Trying Out Debian with a USB Flash Drive Boot
1. Head over to https://cdimage.debian.org/debian-cd/current-live/amd64/.
2. Prefer to download over a peer-to-peer network? Click bt-hybrid, then click "debian-live-12.2.0-amd64-xfce.iso.torrent" to download the torrent file, then use your preferred BitTorrent client to download the Debian ISO.
3. Prefer a direct download? Click iso-hybrid, then click "debian-live-12.2.0-amd64-xfce.iso" to download the ISO directly.
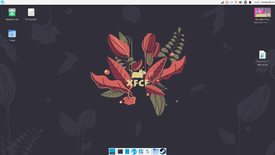
4. There are many good solutions to putting an ISO onto a USB flash drive that will make it bootable. I like Ventoy in particular – it allows you to have as many bootable ISOs as you want on a single USB flash drive.
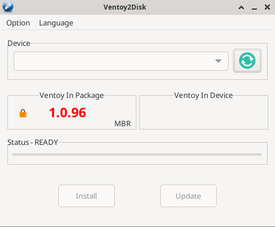
5. Be aware that Ventoy will need to destroy all data currently on your USB flash drive in order to make it bootable, so you'll need to back up any data on the drive first. Then, download Ventoy for your operating system (here)
6. Make absolutely sure you're selecting the USB flash drive, then click Install to install Ventoy to your USB flash drive. Then use your file manager to put your Debian Xfce ISO on the "Ventoy" drive.
7. You now need to open the BIOS menu on your PC. There's usually a specific combo for this on the keyboard – on my desktop it is achievable by spamming the DEL key on startup. The next step depends exactly on your motherboard but you'll need to boot from the USB flash drive plugged in.
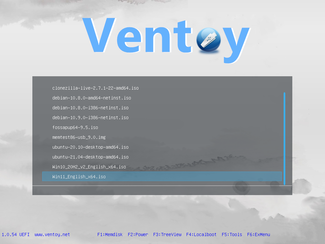
8. If you're successful, you'll see the Ventoy menu. Select the menu option corresponding to the filename of the Debian Xfce ISO you put on your Ventoy drive. You should now see the GRUB menu. You'll need to select "Debian GNU/Linux" to access to the live environment. On the way, you'll see a beautiful loading screen ("Plymouth") which says "Debian 12"
9. You're now in the Debian + Xfce live environment! Debian is running from your USB drive, rather than from your PC's hard drive, and as long as you do not mount or erase your hard drive contents from within the live system, nothing you do now is permanent.
Familiarizing Yourself with Debian's Features
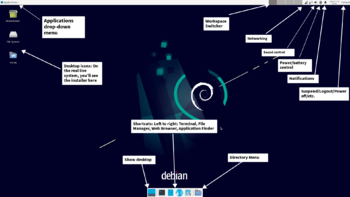
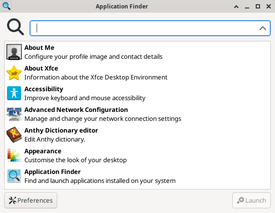
10. Now you can get familiar with the Xfce desktop environment. Your main taskbar is at the top of the screen, where you'll see the Applications drop-down menu on the left, the buttons representing any open windows which you can click to switch between them, and on the right, several icons including Wifi (the more blue columns, the stronger your signal), volume, battery, notifications, and the time. Click on your username ("Debian live user" in the live environment) to shut down, suspend/sleep, logout, lock screen, etc. On the bottom is the "Show Desktop" button, and launchers for the Web Browser (Firefox by default), File Manager, Terminal Emulator, and Application Finder (use this if you want to type to search for an app.) There's also the Directory menu on the bottom taskbar but I never used this much.
11. If you want to, you can customise Xfce now. Or, you can leave that until later since nothing you do now is permanent.
12. Want to browse the web? Connect to the internet by clicking the Networking icon on the top taskbar, and then select your Wifi network's SSID and enter the password. Then you can open Firefox using the web browser shortcut on the bottom panel.
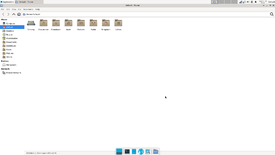
13. Feel like reorganising your files? Select the file manager shortcut on the bottom taskbar to open Xfce's very own file manager, Thunar. It works very intuitively, with common locations on the side bar on the left (you can also drag folders onto the side bar to create shortcuts), and you can double click on files or folders to open them or right click for more options such as renaming or copying files. You can choose between an icon view and a list view in Thunar. I also find it very helpful to tick Edit > Preferences > Remember view settings for each folder.
14. For any apps other than the ones you have shortcuts to on the bottom panel, there are a couple of ways to open applications: You can find them in the Applications drop down menu on the top left, or you can open Application Finder (either from the bottom panel shortcut or by pressing Alt-F3) and type to search for it there. However, you can also have another convenient method to launch apps by installing Whisker Menu (see below), which is what I typically do.
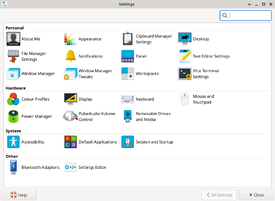
15. Want to change Xfce's settings? Open Settings Manager (not to be confused with Settings Editor, which isn't for beginners) You can access all of Xfce's settings here!
- For instance, to reverse the scroll direction on your touchpad you can go to Mouse and Touchpad (make sure you select your touchpad as a device).
- Or you can open the Panel section of Settings Manager to make many customisations to the panel, such as repositioning them, or altering or re-ordering the items on the panel
- I recommend replacing Applications Menu with Whisker Menu in the Items tab – it will produce a start menu akin to Windows 7.
- If you wish to bind Whisker menu to your Start key, go to
Settings Manager > Keyboard > Application shortcutsand add a shortcut, enterxfce4-popup-whiskermenuas the command and press Super key to bind it to that.
- If you wish to bind Whisker menu to your Start key, go to
- You can use the keyboard section to alter keyboard shortcuts, change keyboard layouts, or assign the Compose Key – I use this to type umlauts ä ö and ü in German, and to type the eszett ß.
- To activate the compose key, go to
Settings Manager > Keyboard > Layout tab > Uncheck use system defaults > Go to Compose Key drop-down list > Select Right Alt.Then, you can type eszetts and umlauts:
- To activate the compose key, go to
- For all compose characters, start by pressing left shift together with right alt, you may then see a weird character on your screen indicating you're in "compose mode", and then you can type the following "codes" to get your desired characters:
ü = u followed by "
ö = o followed by "
ä = a followed by "
(the above can be substituted with capitals, too)
ß = double s
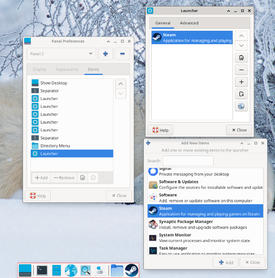
16. If you want easier access to a particular application, a good option is to go to Settings Manager > Panel settings > Items > Add > Launcher > Select the spanner icon > Select + > Search for and add your chosen application, then reposition that launcher using the arrow buttons to your desired place on the panel. You can now launch that app by clicking its icon on the panel. Alternatively, if you use Whisker Menu, click on Whisker Menu and search for your desired app, then right click and select "Add to favourites."
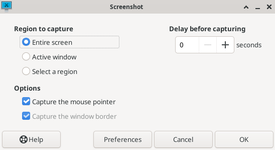
17. Want to take a screenshot? Simply press the Print Screen key to access an interface for saving screenshots of what you're looking at in part or in whole.
Installing Debian
18. Feel ready to install Debian? Click the Install Debian desktop icon. This opens the Calamares installer. It's very simple – select your time zone, language. For disk partitioning, I recommend one of two broad approaches:
If you want to install Debian alongside Windows
Use Windows' Disk Management software to shrink the size of the disk partition that Windows resides on first, to free up however much space you want for Debian (I recommend 25GB at minimum for basic usage, and considerably more for tasks that may involve high storage space such as video editing and AAA gaming.) Then, boot Debian Xfce live and when you get to the partitioning stage in Calamares, select "Replace a partition" and then make sure you select the Empty Space, so that in the before and after comparison on-screen, you can see that what once was Empty Space becomes Debian.
If you want your PC to only have Debian and have no existing data on your hard drive that you wish to save and haven't backed up:
Erase disk and install Debian. Then, you can select your Username (you can add more users later if you wish) and Password for your system. You'll need to use your password a lot when doing privileged actions in Debian, so set something you'll be able to easily type, but make sure it's still a secure password and not easily guessed. You can also name your system (if I'm honest, I often leave it at the default.)
Make absolutely sure that all settings are correct on the summary, especially the partitioning if you have data on your PC that you don't want to lose (but really, you should back up any essential data before you confirm installation).
When you are happy everything is correct, confirm and start the installation and wait for the bar to fill to 100%. Take a water break as it may take a significant amount of time (perhaps 10-30 minutes in my experience). Wait for the "all done message" and you can then restart your PC!
When you restart, you should be greeted by the Grub menu. There, you can select Debian and boot into it. If you had Windows on your PC and still wish to access it, try logging into Debian + Xfce and opening Terminal Emulator, then do:
sudo nano /etc/default/grub
(enter your password)
(uncomment GRUB_DISABLE_OS_PROBER=false)
sudo update-grub
sudo reboot
Now you can select "Windows Boot Manager" on the Grub menu to boot Windows.
Congratulations, you have installed Debian + Xfce on your PC! By following earlier steps in this guide, you can use your PC for all sorts of tasks and change essential settings, like you could on the live Debian system, but now everything is permanent. In short, don't do things you aren't sure are safe!
Where next?
Customizing Your System Layout
19. Now that your system is permanent, set up your system layout exactly how you want. I generally prefer to:
- Add the Whisker Menu in place of Application menu, bind it to Super key
- Increase font size (
Settings Manager > Appearance > Font and Settings Manager > Window Manager) - Change icon theme from Tango to Adwaita (
Settings Manager > Appearance > Icons).- You can download many icon themes from online and put them in your
/home/username/.iconsfolder, then they'll appear in this menu. Likewise, you can also install custom themes by downloading them into the/home/username/.themesfolder.
- You can download many icon themes from online and put them in your
- Increase desktop icon size (Right click on
desktop > Desktop settings > Icons) - Change desktop background (download a picture from online, then
right click > set as wallpaper) - Change the clock to time only and increase font size (
right click on clock on top taskbar > properties) - Add a reboot option (right click your username on the
taskbar > properties > tick restart under Actions) - Increase the size of the top panel (
Settings Manager > Panel > Measurements > Row size) and set icon size to automatic (switch to Appearance tab.)
Additionally, I don't use workspaces, so I right click the workspace switcher on the top panel (the four rectangles), select workspace settings, reduce number of workspaces to 1, and then remove the workspace switcher from the top panel. After that, it should be possible to tile windows by dragging them to the left or right of the screen, or to maximise them by dragging to the top (or using the maximise button, of course.)
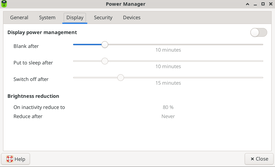
20. If you're on a laptop, I recommend going to Settings Manager > Power Manager and there you can change behaviour such as your laptop automatically blanking its screen, going to sleep, and shutting down if no activity is detected, and whether or not you wish for your laptop screen to lock when you close the lid.
21. Want Bluetooth? Open a Terminal Emulator and type:
sudo apt install blueman bluetooth task-laptop
sudo systemctl enable bluetooth.service
sudo reboot
When you reboot, you should be able to manage Bluetooth with Bluetooth Manager.
22. One of my favourite applications is Redshift. It's an application that reduces blue light automatically at night to be easier on your eyes. To use Redshift, open a Terminal Emulator and type:
sudo apt install redshift-gtk
sudo reboot
When your PC has rebooted, run "Redshift" from Application Finder or Whisker Menu. You should see a bulb on your taskbar. Right click it and check "enabled" and "autostart".
23. If you have a NVIDIA GPU, I highly recommend installing the NVIDIA proprietary driver. Type "sudo apt install nvidia-driver" and follow the onscreen instructions, and then reboot.
24. Want more applications? It's generally really easy to install applications by Googling "How to install [app] on Linux" but in general you'll use one of a few methods:
- Debian repository:
sudo apt install [packagename]- Example:
sudo apt install steam-installer
- Example:
- Deb file downloaded from online:
sudo apt install [copy and paste the file from Thunar, which will insert the full path to the .deb file into the command line]
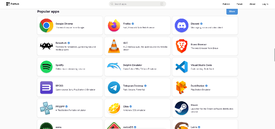
- Flatpak:
- Go to
flatpak.org/setup/debianand follow the instructions. Many great applications can be found on Flathub, such as Citra emulator.
- Go to
- AppImage:
- You can download these and use the command
chmod a+x [path to file], then simply run them!
- You can download these and use the command
25. To update all packages on your system, type sudo apt update && sudo apt upgrade in the Terminal Emulator. Debian 12's currently the latest, but when Debian 13 comes out you'll be able to upgrade to Debian 13 by running sudo apt edit-sources and replacing all instances of "bookworm" with "trixie." Or, if you want to upgrade to Debian sid to get the latest packages at the cost of stability, replace "bookworm" with "sid" (you can do this any time you wish, but there's no going back!)
Good luck with your Debian + Xfce journey! It may be a learning curve at first but it is very rewarding.
