The 'Shroom:Issue 201/Strategy Wing
Director's Notes
Written by: Hooded Pitohui (talk)
Hello, all you readers of The 'Shroom! Well, believe it or not, it's December. We're on the verge of closing out 2023. I mean, for The 'Shroom and Strategy Wing specifically, we are closing out the year. Before signing off for the year, I'd like to thank you all one last time for all the support you showed to Strategy Wing's big issue 200 extravaganza! Our writers put a lot of effort into making it the biggest edition of Strategy Wing we've ever had, so thank you for giving it a read!
Hopefully you took some inspiration from it, hm? We would be thrilled to have you join the team, and we have room enough for everyone! Maybe you want to write a focused guide like Meta Knight in Galactic Expedition! Maybe you want to give us a walkthrough with a humorous angle, like File City Files by Shoey! Maybe you'd just like a chance to dig deep into some characters you like and their story, like Waluigi Time did in Rising From Obscurity! We've got room for all of it and more, so give that sign-up page a look as the holidays settle down, ask questions if you have them, and send in an application!
Well, I suppose it's best to make it through the holidays, first, but, bey, we have some sections here to help with that! We're still relaxing a little after getting issue 200 together, so a few of our regular sections have taken the month. They'll be back next year, though! For now, as you find a little downtime over the holiday season, we have Digimon, Super Mario 63, and Pikmin for you, so go on, get cozy, and enjoy!
Section of the Month
Those adorable, poisonous White Pikmin take first place! Er, or, rather, the thorough coverage of them, alongside the detailed commentary provided on their nerfs in Pikmin 3 and limited usefulness of their gimmick of damaging enemies when eaten, which Shoey (talk) provided leads the section to take first place. While it goes from my favorite Pikmin type to his, let's also take a moment to congratulate Waluigi Time (talk) on taking second and third with his coverage of our first Super Mario 63 Bowser Battle (plus a new nozzle) and a retrospective on the return of the Koopalings. Congratulations to everyone who submitted for our big 200 blowout! Please do keep voting to show your support, and, hey, if you like a section, consider tossing a Poochy Pick nomination its way, too.
| STRATEGY WING SECTION OF THE MONTH | ||||
|---|---|---|---|---|
| Place | Section | Votes | % | Writer |
| 1st | The Anatomy of a Pikmin | 6 | 28.57% | Shoey (talk) |
| 2nd | Shine Get | 5 | 23.81% | Waluigi Time (talk) |
| 3rd | Rising From Obscurity | 3 | 14.29% | Waluigi Time (talk) |
File City Files
Hello again, and welcome to another thrilling File City Files, the number one Iowa-sourced Digimon World guide. Last month, we officially passed the halfway point in Digimon World. This month, we continue our adventure to save File Island.
The Wandering Ultimate of the Jungle
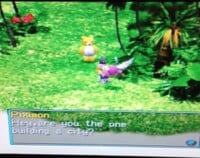
So this is a real fun one. In the second screen of the Native Jungle (the one Coelamon brings you too way back at the beginning of the game), there is a special secret Digimon you can recruit. Usually there are two Digimon on the screen, those being two Muchomon during the day, or two J-Mojyamon at night. But, and this is very rare, in fact there's only a THREE PERCENT CHANCE IT WILL HAPPEN, sometimes a different Digimon will show up on screen.
This is Piximon, and don't let his small size trick you, Piximon is an Ultimate-level Digimon. He's one of the three Digimon that I classify as "Wandering Ultimates," along with Mamemon and MetalMamemon. These three Ultimates all share the common thread of appearing on a single screen very rarely (AGAIN, THREE PERCENT CHANCE). They're also all small in stature but will mess you up, because, again, these are very powerful Digimon.
Now, see, the cool thing is the game does, in fact, not tell you about these three. Well, Angemon might hint at it eventually… but, more to the point, this goddamn game randomly throws Ultimate-level Digimon at you. And this is with, I cannot stress enough, a 3% chance of them appearing. So chances are that, if you find them by happenstance, you're probably not going to be prepared to deal with them and they'll beat your ass. Or, if you're like me and you were prepared to fight them, you have to just keep going from screen to screen, hoping one of them appears and wasting precious time! Remember, your Digimon will die of old age and it's not like we can just save and load if he's not there. You can only save when your Digimon goes to sleep. The time cost matters!
These Digimon are dumb, and if you aren't planning on getting 100% of File City done, they aren't worth the effort to get unless you just so happen to run into them. I was originally going to do all three of them in one issue, but the process of getting them is so tedious and the odds of getting all three in one day are so low that I just didn't think it would be worth the lifespan loss of my Digimon to do so. But, anyways, hey, we found Piximon, who is the most useful of the three!
Piximon asks us if we're the ones who are building the city. Naturally, we tell him that, yes, we're the ones building the city. The proud Piximon then boasts that we're very lucky to have met him before telling us that he's an Ultimate Digimon and that, if we beat him, he'll join our little city. Not one to back down from a challenge, we eagerly accept his challenge and order GBA to kick his ass. This is a very tough fight! Do not do it unless you are prepared! Piximon has 5,200 HP which isn't too bad. What really makes it hard is his attacks. Piximon knows Confused Storm, Danger Sting, and Bug. All of his attacks can cause status effects, with Confused Storm causing the confused effect, which will cause your Digimon to run around uselessly. Bug and Danger Sting can both cause the flat effect, turning your Digmon into a weak 8-bit version of itself. Bug is also a very strong attack with a 500 base power, which puts it 5th on the technique rankings in terms of raw power. Piximon can even use Bug twice in a row, which will drain your HP fast. In addition, Piximon is one of the fastest bosses in the game, so he's constantly throwing rapid-fire attacks at you. By the time he landed his finisher, poor GBA had only landed like two attacks. You're going to want high speed for this fight, and I'd even recommend bringing in some hispeed disks to raise your speed during battle, just to give you a little bit of a speed edge. I cannot stress this enough, do not fight this Digimon if you don't have, at the very least, a very strong Champion and a lot of health items. He will kick your ass if you're unprepared. Upon being defeated' Piximon drops an MP Chip before flying off to join the city!
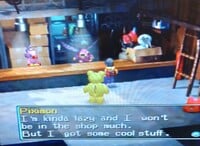
Purpose in City: Piximon takes a job in the town shop, but by his own admittance he's a fairly lazy fellow, so he only appears infrequently. Piximon doesn't operate as a normal shopkeep. Instead, he sells his training manual for 50,000 bits, guaranteeing you that, if you buy it, you can become as strong as him.
Finally a Fast Travel System
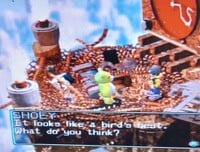
So now that we have over 50 prosperity points and have Jijimon's upgraded house, we can finally get one of the most useful Digimon in the game. Well, technically we could have gotten them like six issues ago, but we'll get into why we haven't later! Return to the Great Canyon and enter the elevator. This time, send the elevator up. This will take you to what appears to be a giant bird's nest.
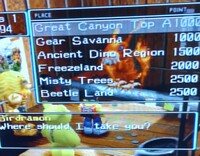
Entering it, you and your partner conclude that, yep, it is in fact a giant bird nest. Suddenly, we hear a noise and a giant flaming bird appears from the sky! This is a Birdramon, and she challenges us to a fight. By this point in the game, Birdramon is, quite frankly, nothing. She's a mid-level champion Digimon with only 3,700 HP. It was so easy, in fact, I didn't have to use a single recovery item! For an attack, Birdramon used Prominence Beam, one of the premier fire moves. If you have a Digimon that can learn Prominence Beam, it might be worth it to do this fight a few times, because Prominence Beam is the second-most powerful fire move and it can cause the flat effect.
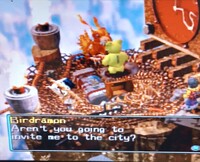
Upon being defeated, Birdramon doesn't drop anything, because birds are jerks! Instead, she compliments us on our fighting skills. Then, after we apologize for entering her nest without permission, she tells us not to worry about a thing. She then says something weird; she tells us that we're probably the only human left on the island. We attempt to question her on her statement, but she deflects. Instead, she asks us if we're going to invite her to join the city. Remembering our mission and putting aside her odd statement, we invite her to the city. Birdramon not only agrees to join the city, but she even gives us a lift back to the city!
Purpose in the city Like I said, Birdramon is easily one of the best recruitable Digimon in the game. Birdramon opens up Birdra Transport ,which basically operates as a fast travel system, equivalent to Fly in Pokémon. For a price, Birdramon will take you to the majority of regions in the game. She doesn't take you to every region. For example, she won't take you to Native Forest or Tropical Jungle, because, quite frankly, those regions are too close to need fast travel. She'll take you to almost all the far away regions, though, which makes traversing the game much easier.
Now you might be wondering why we didn't get this earlier. You see, copies of Digimon World aren't actually made of code. They're actually made of duct tape and string. So my personal copy (because, remember, I play on the original PS1) has a glitch. For some reason, if I get Birdramon before Jijimon's house upgrades, that part of File City just won't load. Or, if it will load, it takes over 10 minutes to do so… each time I go to that screen. That screen also happens to be where the meat farm is. All of this means that it just isn't worth it to get Birdramon until I upgrade Jijimon's hut, because it's just too annoying to load the meat farm with the glitch. I don't know why Jijimon's upgraded house fixes it, and I actually don't know if that's what fixes it, because it could also be getting Leomon, who hangs out in the hut, which fixes it. This is a copy-specific bug too. I've done three different save files and each one had the same bug!
The Treasure of the Leomon Tomb
If you take a bit of a side street in the Gear Savanna, you'll come across the scene of a Patamon being attacked by a Goburimon (which is really odd, because Goburimon don't appear in Gear Savanna outside of this scene).
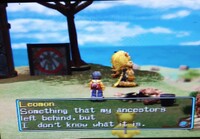
Now, being the heroes we are, we were prepared to protect this poor Patamon, but before we could jump into action, a mysterious lion Digimon appears and saves the Patamon. This is Leomon, a Champion-level Digimon. As soon as he appears, he leaves, but not before delivering a pretty cool line about how if you need help, you just call him. The Patamon runs after him and, well, so do we, damn it! The next screen is a cliffside where Leomon stands watching over the Savanna. This cliff contains two trainings, one that boosts attack and the other that boosts speed. Talking to Leomon, he'll tell you that he's heard of you.
We ask him to join the city, but he tells us he can't. For years, he's been searching for something, a family treasure that has been lost to time. He tells us that, if we find his family's long-lost treasure, he will join the city, which we readily agree to, desiring to recruit such a powerful ally! Oh, and, just in case you're wondering, no, that Patamon is never seen again!
So this ones a real, like, "how are you supposed to know" case, because the actual solution is sort of hinted at, but only if you find a pretty out-of-the-way optional piece of dialogue. So think back to the Drill Tunnel, where the main area had three branching paths (not counting the entrance). The left went to the overheating Drimogemon. The right lead to the Drimogemon we helped dig, and to the Volcano.
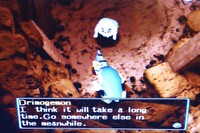
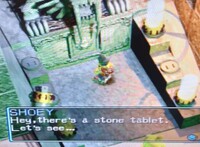
But we never explored the center path. This leads to another Drimogemon digging away. If you talk to him early in the game, he tells you that he's digging and to come back later. But once you hit 45 prosperity points and initiate the Leomon quest, if you return to that tunnel, you'll see that Drimogemon has excavated it and opened a new pathway. This pathways leads to the very creatively titled Leomon's Ancestor Cave. Inside this cave, Drimogemon tells you that he's hit some sort of tablet and that he can't go any further. Also inside this cave are two computers, one containing an Offense Chip and the other an X. If you approach what appears to be an altar of a SaberLeomon, you find that, inside the altar, there is a stone tablet written in a language we can't understand.
Naturally, we decide to steal this tomb treasure. But we start feeling guilty and decide we better do the right thing and give it to Leomon. With the tablet in hand, we return to Leomon, giving it to him. Examining it, Leomon is easily able to make out the text.
"When danger comes to the island, go to the city."
Having learned that his ancestors came to the same obvious conclusion that we did, Leomon agrees to join the city. I do think this is actually pretty cool from a lore standpoint, because it shows just how important File City has been to the Digimon. Even Digimon who passed generations ago recognized how important it was, and left a message for their descendants telling them to aid the city if there's danger.
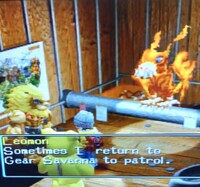
Purpose in City: Like seemingly all Digimon that have their own quest line, Leomon does basically nothing in the city! He hangs out in the Birdra Transport Hut, where, if you talk to him, he tells you he sometimes returns to Gear Savanna for patrol. About the only useful thing he does is tell you that he's heard of the existence of the secret shop in the Gear Savanna. Which isn't really useful because the Shellmon bulletin board has the same information. So, yeah, once again the game builds up a recruitable Digimon only for them to basically not do anything in the city!
That'll bring this month's File City Files to a close. Join us next month when we finally take advantage of the Whamon water ferry service and explore the mechanical Factory Town.
Shine Get
Written by: Waluigi Time (talk)
Hello there, 'Shroom readers, and welcome back to Shine Get! Last time in Super Mario 63, we beat up Bowser for the first time and got the key to the basement of Peach's Castle! This time, I'll be checking it out and seeing what's down there. Hopefully it's more Shine Sprites. (Spoiler alert, it is!)
There's already plenty to do in the basement, mostly because I've been working ahead a lot. The most obvious thing is the painting for Hazy Maze Cave, so I'll be tackling that in this month's issue! There's a Toad standing by the painting who refuses to go in, but he vehemently denies that he's scared. He just doesn't feel like it... Yeah, sure, generic nameless Toad. Well thankfully, Mario's not a chicken and/or struggling from motivational issues, mostly because I'm puppeteering him and I refuse to let him be either of those things. Into the caves we go!
Mission 1: The Underground Lake
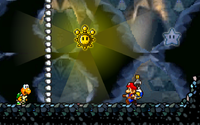
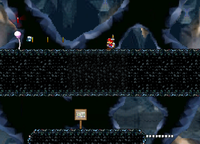
There's a hidden pool with a Shine Sprite in it! That's the mission. There's no rallying call from the mission select or any lore about the pool, just... find it! After passing by a few enemies and a rickety death trap bridge, there's a sign with a map of Hazy Maze Cave. It's not super helpful, just being a silhouette of the layout without actually noting any landmarks. That's not so great for me, since unfortunately, my memory of this level is a bit... hazy. Eh? See what I did there? There's a Rocket Nozzle nearby that I don't really need since I'm not planning to go vertical at the moment, but hey, some F.L.U.D.D. is better than no F.L.U.D.D., and it's nice to have around just in case. Except after crossing an even death trappier bridge there's a Hover Nozzle, so I'm swapping those out right away! The next screen is the Pit Room, aptly named for the bottomless pit within. This room seems like a good place for a fight, but there's no contenders worth my attention. Rats. The Hover Nozzle makes navigating this room very easy, and at the end just before the next screen, I switch to the Rocket Nozzle to jump up into an alcove with a Star Coin, which also unlocks the Level Designer's Snow Tileset.
Going to the right on the next screen is a dead end, but there's a tunnel going downward, so I jump down there. The tunnel is deep enough that it causes Mario to do his iconic falling yell from Super Mario 64, which is always a good time! When I played this game back in the day, I always thought that clip was hilarious and would build custom levels specifically designed for making Mario do the yell. Anyway, funny vocal clips aside, there's a Turbo Nozzle at the bottom and a pool of water to the left. Hm, I wonder... I Turbo across the pool and, surprise surprise, it's the Shine Sprite! Maybe my memory wasn't so hazy after all.
Mission 2: The Deadly Toxic Maze
The next goal is a toxic maze underneath the Side Room, where no non-metallic creature can survive (subtle!). Where's the Side Room? I don't know! I have an inkling of where it might be based on the map, though, so I purposely jump into one of the death trap bridge pits. They're not actually death, there's just more cave down here. I head all the way to the right, and on the next screen, and all the way down the vertical hallway. To the left is the Side Room! On the right trail. There's a lot of distracting stuff around here, including enemies and magic carpets. Ignoring all that and going towards the left some more, eventually I find a sign marking the Toxic Maze and jump down into the pit.
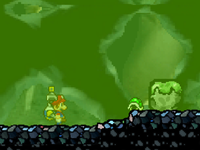
Sure is toxic. The dubious green stuff causes Mario's health to go down while he's in it, though there's a few areas above to catch a breather. There's even an emergency exit at a fork in the road, but I'm not going to use that! I'm either going to get this Shine Sprite or Mario is going to die trying! Luckily, the upper path has a few helpful things on it. There's a heart for unlimited health restoration, and more importantly, the Metal Cap! I grab that and turn back around to take the lower path, and in the process, I discovered that this maze has false advertising, because I turned a Fly Guy into a regular Shy Guy and knocked it down into the green stuff, and nothing bad happened to it! (Until I squished it, anyway.) The Metal Cap ran out after another fork, but thankfully the upper path has a refill on it, along with a Star Coin. After that I took the lower path at the next fork, which was a mistake. I turned back around and took the upper path instead, which led to the Shine Sprite. But then I got curious and I wondered if there were any secrets, so I ignored it and turned around... This turned out to be a tremendous waste of time that only got Mario killed. Oops. So I had to run through the maze again, but it's not that difficult, thankfully. Shine get!
After returning to the castle, the cowardly Toad has disappeared. I'll report back if anything interesting happens as a result.
Mission 3: The Caged Shine Sprite
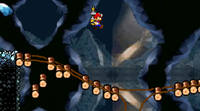
I didn't mention this before, but before I went down into the tunnel to the pool in the first mission, there was a cage nearby with a Shine Sprite in it. I ignored it then because it was the wrong mission, but now it's time to figure that out. The mission description hints that it can be reached from above, so I decided to grab the Rocket Nozzle on the way in. Based on the map at the start of the level, I'm guessing that the idea is to use it in the Pit Room. Taking the high road in there leads to a conspicuous up arrow and a coin trail, so I rocket up there, leading to another screen up above. There's a sign here, and I was hoping it had some useful information, but it just says to be careful and not fall. Thanks, sign.
Rocketing up and to the right through some Paratroopas leads to another screen right above the room with the caged Shine Sprite in it. Want to know how I know that? Because I fell down and had to come back! Anyway, it's just a short and fairly simple bit of platforming. The "ground" below the platforms drops you into the room underneath, so at least you don't die, I guess. Reaching the end gives me no choice but to drop down, and I land in the cage with the Shine Sprite! There's also a Vanish Cap in here, which is just for getting out in case you ended up down here and don't want the Shine Sprite. I do want it though, so yoink!
Mission 4: Excavating the 8 Red Coins
Oh, cool, Red Coins... I actually haven't seen too many of these so far, so it's time for some exploration. First, I decided to rocket up above the first room and check things out up here, since I hadn't been here yet. The first one is up and to the left past some tilting platforms. There's a sign nearby with the zooming controls, which means it's probably a good time to zoom out for better visibility! Doing so reveals a Star Coin hidden in a fake tunnel to the left. There's a Vanish Cap all the way to the left, but I don't think it's that important so I just turned around and ignored it. Back to the tilting platform, I rocket up further and head to the left for a second Red Coin, but it turns out the floor is also fake and I fell through back to the sign. This seems like it's here just to troll you, since it's really easy to F.L.U.D.D. back up through it. Anyway, two Red Coins collected!
Heading off the screen to the right leads to another platforming segment, with more rotating and tilting platforms. After progressing a bit, there's an up arrow, and rocketing up leads to another Star Coin! Although it begs the question, if your secret is so secret that you need to direct players to where the secret is, is it really secret anymore? Anyway, after going a little further I'm back at the don't fall sign from last time. Yep, this is that room! There's no Red Coins in the next room, but I used it as a convenient dropoff down to the pool entrance. Hugging the wall to the left while dropping down leads into an extra little crevasse with a Star Coin in it. This is the 25th Star Coin, and the game wishes me a Merry Christmas! See guys, I totally planned that. (He did not plan that) Oh yeah, it unlocks the Volcano Tileset too. Jumping out of here and hugging the wall to the right this time reveals another crevasse, this time with a Red Coin accessible by rocketing. At this point I got a little too curious and ended up on a detour, which I'll be writing about a little later. For now, I'll pretend it didn't happen!
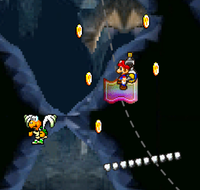
So after retracing my steps, I took a Sling Star back out to continue the hunt. Next I checked the Pit Room, which didn't have any more Red Coins, but it did have death! I got clobbered by an iron ball and fell in the pit. Oops. My exploration led back to the room with the magic carpet in it, and thankfully, the map in here has Red Coin locations on it now! So there's three more Red Coins in this room, and two in an area past the Pit Room. It seemed like a good idea to ride the carpet, so I did! It's pretty simple, just ride it, collect the coins along the way, and don't get clobbered by enemies or rock formations. Shortly after the third Red Coin in here, I jumped ship and rocketed up and to the right, where I found the final Star Coin for this level. Now all that's left is to investigate that last area.
Thankfully, it's easy to reach from here, just head right until the game doesn't let you anymore! Everything interesting is above the ground though, so I rocket upwards and find another platforming section. It's another pretty easy one, especially with F.L.U.D.D. equipped. Basically, just keep going to the right and up. I found both Red Coins on the way, but I was curious about what would happen if I kept going. Turns out, rocketing at the end just dumps you in the Pit Room by the iron ball generator. At that point, I just went back to the carpet room again because the Shine Sprite spawns here.
Mission 5: The Secret of the Lake
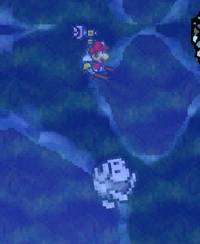
Hey, remember that detour I mentioned? Well, I accidentally ended up in a secret area during Mission 4 and the game wouldn't let me out. So, down at the hidden pool, going to the right side of the room and rocketing upwards reveals a Metal Cap. With this, you can ground pound a box underwater that opens the entrance to the Secret of the Lake! The goal here is to collect the five Silver Stars scattered around underwater. I highly recommend using the Turbo Nozzle here. The first Silver Star is right at the entrance to the water, just a little down and to the left. The next one is just below that area, and just below that there's a third one! Great collectible arrangement? The fourth one is farther out of the way, basically all the way up and to the right. From here, the fifth and final Silver Star is a little to the left and all the way at the bottom. And that's it! The Shine Sprite spawns in an underwater tunnel up and to the right, with a little bit of a "challenge" with some vertically moving blocks that may or may not smoosh Mario with bad timing. They're no problem though, especially with the Turbo Nozzle, and that's another Shine added to the total, albeit a little out of order.
After this I was told that another room in the Upper Castle Hallway opened up. But game, I just got started on the basement...
Anyway, that wraps up Hazy Maze Cave! It's kind of an interesting level, because even though I have all the collectibles, it has me feeling like maybe there's still parts of it I didn't see. Nothing interesting happened with the Toad, by the way, but he does return after reloading the save. I guess it's just a programming quirk. With some progress made into the basement, I now have 25 Shine Sprites and 26 Star Coins! Next time, more stuff in the basement. Shocker, I know. See you then!
The Anatomy of a Pikmin
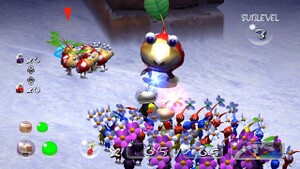
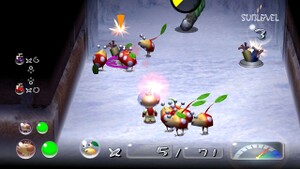
Hello, and welcome back to The Anatomy of a Pikmin, the 'Shroom's number one source for Pikmin information. This month, we're going to finish talking about the Pikmin that debuted in Pikmin 2. Not only is this month's subject the last Pikmin type that debuted in Pikmin 2, but it also happens to be my personal favorite Pikmin species, the parasitic Bulbmin!
Bulbmin are not your average Pikmin, and, in my opinion, they're probably the most unique Pikmin type in the whole series. Found only in select caves, Bulbmin are Bulborbs that have been infected by an unseen parasitic type of Pikmin. The parasites fully control the juvenile Bulbmin specimens while maintaining partial control over adult Bulborbs.
In a way, the adult Bulbmin acts as a captain for the Juvenile Bulbmin, who will follow the Adult Bulbmin around. Unfortunately, while the Pikmin parasite inside the Bulborb controls the majority of the adult Bulbmin's actions, it is unable to suppress the natural hunger instincts of the Bulborb, so the Bulborb will attack and attempt to eat your Pikmin. Now, of course, it's also possible, scientifically speaking, that the parasite that possess the Bulbmin attempts to eat Pikmin out of a need for nourishment to survive, but that's beside the point! Luckily, adult Bulbmin are no more powerful than a standard Red Bulborb, so they're pretty easy to defeat. Upon being defeated, the Juvenile Bulbmin scatter, and, upon a whistle from the captain, will join your army of Pikmin.
Bulbmin serve a very interesting niche in Pikmin 2. Only found in three caves, those being the Frontier Cavern, Submerged Castle, and Hole of Heroes, they basically serve as a means of restocking your Pikmin ranks in difficult caves. Since you can't bring more Pikmin into a cave after you enter it, their main function is to serve as a simple and creative way to let you replenish your army in certain caves. An adult Bulbmin can have up to 10 juvenile Bulbmin following him depending on how many Pikmin you have in the cave, so, if you have more than 90 Pikmin, you'll be able to get as many Bulbmin that will take your total up to 100. In other words, if you have 94 Pikmin, you get 6 Bulbmin.
Bulbmin attack with the same strength of a Yellow Pikmin or a Blue Pikmin, and because you don't pluck them out of the ground, they are always stuck in leaf mode. Well, outside of the Frontier Cave, that is, where they can be planted by a Swooping Snitchbug in Sublevel 4 and a Mamuta in Sublevel 5. This makes Frontier Cavern the only cave where you can actually see Bulbmin with either buds or flowers.
Where Bulbmin really shine is that they're immune to all hazards, making them a great help in destroying hazard-based obstacles and enemies. Unfortunately, Bulbmin, unlike the other Pikmin 2 introductions, Purple and White Pikmin, cannot leave the caves they are found in. There's no in-game explanation for why that is. I mean, obviously the reason is because Bulbmin would be super broken if they weren't confined to specific caves, but I do think it's odd that there really isn't any in-game reason for why they can't leave caves… Maybe direct sunlight will kill them! But luckily, every cave that Bulbmin exist in have Candypop Buds that you can use to turn Bulbmin into Pikmin that can be used outside of caves!
So Bulbmin are a very tough Pikmin to really rate, because they kind of serve this very odd niche function. In two of the three caves Bulbmin are in, they really only serve the function of replenishing your ranks. Though they can also be useful in specific situations like, say, if you didn't bring enough Blue Pikmin and need extra Pikmin to carry a treasure out of the water or if you want to knock down an electrical fence more quickly. Their uses aren't very creative, and you could really argue these caves could have gone just as well without them. After all, if you brought 100 Pikmin to one of these caves and preserved them, you wouldn't even see the Bulbmin, and they really aren't required if you brought a balanced army into the cave.
Where Bulbmin really shine, however, and where they see their best and most creative use is in the Submerged Castle. As the cave entrance is underwater, you can only bring Blue Pikmin into the Submerged Castle, so Bulbmin serve as your only recourse for destroying elemental hazards or taking out non-water-based elemental enemies easily. Since every floor in the Submerged Castle is a timed gauntlet to complete things before the Waterwraith appears, you really can't just use Blue Pikmin and try to go around these obstacles. You need the Bulbmin to take them out for you. There's a reason the Submerged Castle has the highest amount of potential Bulbmin in it, with a potential 40 Bulbmin you can get. They even get the best use out of the Candypop Buds at the end o the cave, since you can turn Bulbmin into the ever-useful Purple Pikmin who are needed to defeat the Waterwraith. Of the three caves Bulbmin appear in, Submerged Castle is the only one where they feel truly useful. In the other two, they kind of feel a little shoehorned in just to make the caves a little easier.
Sadly for the Bulbmin, they have yet to make another appearance after Pikmin 2. Data exists for them in the files of Pikmin 3, implying that, at one point in time, they were planned to appear in the game, but they were cut. Then in Pikmin 4, while they don't appear, they're at least mentioned by Olimar in his notes for the Startle Spore. I understand why they haven't made an appearance since their debut. At the end of the day, with their skillset, they're kind of hard to balance around. It works fine in Pikmin 2, which has secluded caves and you just balance them around not leaving the caves, but Pikmin 3 doesn't have caves, so, outside of challenge mode, there's really just no place to put them. And even then, they'd be so good in challenge mode because of their immunities to elemental hazards that they'd break that mode!
Though Pikmin 4 brought back caves, they changed how the caves worked and added Wild Pikmin within the caves that can counteract different hazards. So, adding Bulbmin, while nice, would have just been a little superfluous. But there is one cave where I think they had a real missed opportunity. They remade the Submerged Castle (as the Engulfed Castle), and, once again, you could only enter it with Blue Pikmin. I think they should have put Bulbmin in the Engulfed Castle, even if they only appeared in that cave. I think it would have been a cute little detail that everyone would have loved.
I still love Bulbmin. I think they're the most unique idea for a Pikmin, what with being a parasite that takes over a common enemy and all. I think they're adorable, and I really want them to return, but I wouldn't be shocked if they never did. Again, I don't think they can really exist without a natural balance factor like locking them exclusively to caves, and since they only appear in three of the fourteen caves and they only really feel needed in one of those, I can see how they wouldn't come back. It's hard to think of reasons why you'd need them. So, while they're my favorite Pikmin and I really want them to come back, I'm just not holding my breath!
That's going to wrap up the Pikmin of Pikmin 2. Join me next month when I look at the Rock Pikmin from Pikmin 3.
| The 'Shroom: Issue 201 | |
|---|---|
| Staff sections | Staff Notes • The 'Shroom Spotlight • End-of-the-Year Awards • Director Election |
| Features | Fake News • Fun Stuff • Palette Swap • Pipe Plaza • Critic Corner • Strategy Wing |


