Gallery:Super Mario Maker 2: Difference between revisions
| Line 899: | Line 899: | ||
RookieToads.png|[[March of the Rookie Toads]] | RookieToads.png|[[March of the Rookie Toads]] | ||
Super Mario Bros. W1-1-.jpg|[[Super Mario Bros. W1-1?]] | Super Mario Bros. W1-1-.jpg|[[Super Mario Bros. W1-1?]] | ||
</gallery> | |||
====Official courses==== | |||
=====NintendoNM===== | |||
<gallery> | |||
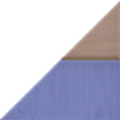
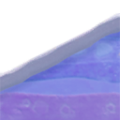
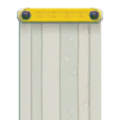
CloudyPlanetEscapeKit.png|[[Cloudy Planet Escape (Kit)|Cloudy Planet Escape [Kit]]] | |||
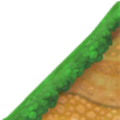
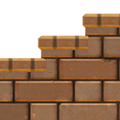
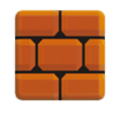
WackyWatersKrysta.png|[[Wacky Waters (Krysta)|Wacky Waters [Krysta]]] | |||
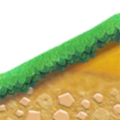
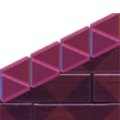
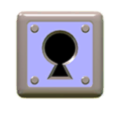
TrickyTrapPyramidChris.png|[[Tricky Trap Pyramid (Chris)|Tricky Trap Pyramid [Chris]]] | |||
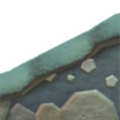
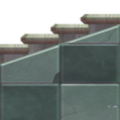
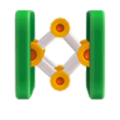
BonkersBounceHouseKit.png|[[Bonkers Bounce House (Kit)|Bonkers Bounce House [Kit]]] | |||
NeverAMinute.png|[[Never A Minute]] | |||
WeMadeItTogether.png|[[We Made It Together :)]] | |||
AntHillAntics.png|[[Ant Hill Antics]] | |||
</gallery> | |||
=====NintendoJP===== | |||
<gallery> | |||
NintendoJPlevel1.png|[[Mario Shinwa e (Yoiko Original)|マリオ神話へ【よゐこオリジナル】]] | |||
NintendoJPMA.png|[[Mario Aratanaru Shinwa e (Nintendo Version)|マリオ新たなる神話へ【任天堂バージョン】]] | |||
SuperballMario.png|[[Superball Mario (level)|スーパーボールマリオ/Superball Mario]] | |||
SuperMarioUSO.png|[[Super Mario U SO|スーパーマリオU SO]] | |||
BuilderMario.png|[[Builder Mario (level)|ビルダーマリオ/Builder Mario]] | |||
NintendoJP6.png|[[Minna de Atsumete!|みんなであつめて!]] | |||
NintendoJP7.png|[[Minna de Awasete!|みんなであわせて!]] | |||
</gallery> | |||
=====NintendoUS===== | |||
<gallery> | |||
Round1Invitational2019.png|[[Round I: Invitational 2019]] | |||
Round2Invitational2019.png|[[Round II: Invitational 2019]] | |||
Finals1Invitational2019.png|[[Finals I: Invitational 2019]] | |||
Finals2Invitational2019.png|[[Finals II: Invitational 2019]] | |||
Finals3Invitational2019.png|[[Finals III: Invitational 2019]] | |||
Finals4Invitational2019.png|[[Finals IV: Invitational 2019]] | |||
RubySlipperySlopes.png|[[Ruby's Slippery Slopes]] | |||
DakotaFrozenFlames.png|[[Dakota's Frozen Flames]] | |||
SouthwestSuperSkyChallenge.png|[[Southwest Super Sky Challenge]] | |||
StarlightSpin.png|[[Starlight Spin]] | |||
SMM2TreeFortress.png|[[Tree Fortress]] | |||
SMM2 Temple of the Triforce.jpg|[[Temple of the Triforce]] | |||
SMM2 Girls Make Games Castle.jpg|[[Girls Make Games Castle]] | |||
</gallery> | |||
=====NintendoEU===== | |||
<gallery> | |||
Fun+Furious.png|[[Fun & Furious]] | |||
HotCold SMM2.png|[[Hot & Cold]] | |||
Nocoverart.png|[[Everyone, Dodge!]] | |||
</gallery> | |||
=====NintendoAU===== | |||
<gallery> | |||
FindingBoomBoom SMM2.png|[[Finding Boom Boom]] | |||
FelineCrafty SMM2.png|[[Feline Crafty]] | |||
TheAngrySunEffect SMM2.png|[[The Angry Sun Effect]] | |||
TheWindyMoonEffect SMM2.png|[[The Windy Moon Effect]] | |||
HalloweenEscape SMM2.png|[[PAX AUS - Halloween Escape]] | |||
ARunWithTheFish SMM2.png|[[PAX AUS - A Run With The Fish!]] | |||
SMM2 Rhythm of the Koopa Shell.jpg|[[Rhythm of the Koopa Shell]] | |||
Nocoverart.png|[[Everyone, BREAK!]] | |||
</gallery> | </gallery> | ||
Revision as of 02:16, June 5, 2021
It has been requested that more images be uploaded for this article. Remove this notice only after the additional image(s) have been added.
The following is a gallery of images for Super Mario Maker 2.
Logos

Logo; seen on the in-game title screen and specific pre-order bonuses.

Alternate logo; seen on box-art and specific pre-order bonuses.

Japanese logo

Alternate Japanese logo

Simplified Chinese logo
Alternate simplified Chinese logo

Traditional Chinese logo
- SMM2 Alternate Traditional Chinese Logo.jpg
Alternate traditional Chinese logo
Box art
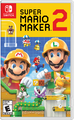
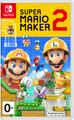
American/Latin American box art
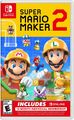
Limited Edition North American box art
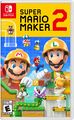
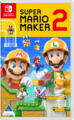
Canadian box art
Pan-European box art
Limited Edition Pan-European box art
German box art
Limited Edition German box art
Russian box art
South African box art
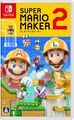
Japanese box art
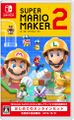
Limited Edition Japanese box art
Korean box art

Limited Edition Korean box art
Hong Kong/Taiwanese box art
Limited Edition Hong Kong box art


Artwork
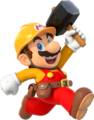
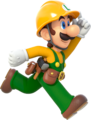
Builder Mario running
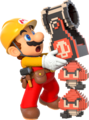
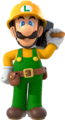
Builder Mario
Builder Mario
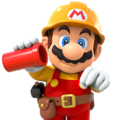
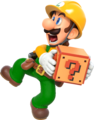
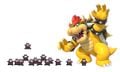
Builder Mario with two 8-Bit Goombas and an 8-Bit Bill Blaster
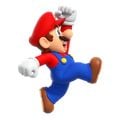
Mario jumping
Builder Luigi running
Builder Luigi
Builder Luigi panicking
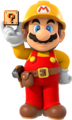
Builder Toad playing on a ? Block
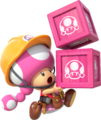
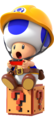
Builder Toadette with two Builder Boxes
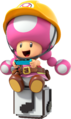
Builder Toadette playing on a Note Block

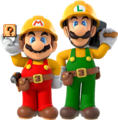
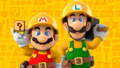
Mario and Luigi
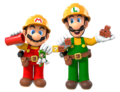
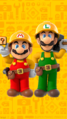
Builder Mario and Luigi
Builder Mario and Luigi
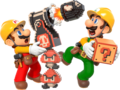
Builder Mario and Luigi with two 8-Bit Goombas with an 8-Bit Bill Blaster firing an 8-Bit Bullet Bill on top
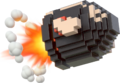
8-Bit Bullet Bill

Builder Toad and Toadette playing on top of a ? Block and a Note Block
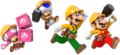
Group artwork of Builder Mario, Luigi, Toad and Toadette

Pipes with various objects attached to them
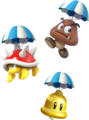
A Super Bell, Goomba and Spiny with parachutes
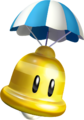
A Super Bell with a parachute
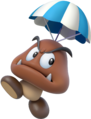
A Goomba with a parachute
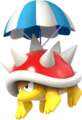
A Spiny with a parachute
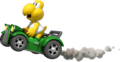
A Beach Koopa driving the Koopa Troopa Car
A horizontal moving Thwomp
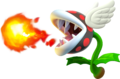
A Super Mario 3D World-styled Fire Piranha Plant with wings attached to it
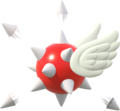
A Spiny Egg with wings attached
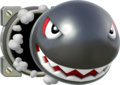
A Banzai Bill being shot in the background by its cannon
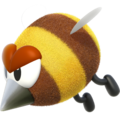
A Stingby
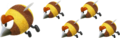
A swarm of Stingbies
A Goomba traveling in a Clear Pipe

A Cat Bullet Bill traveling

A Super Star with wings in the Super Mario Bros. style
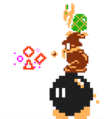
Koopa Troopa, Magikoopa and Mega Bob-omb in the Super Mario Bros. style

An ! Block

Peach's Castle
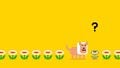
Banner from topic for introduce Superball Flower from official Japanese website
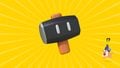
Banner from topic for introduce Super Hammer from official Japanese website

A Ninji Ghost claw diving

A Ninji Ghost riding the Goomba's Shoe

A Ninji Ghost on a Yoshi Car
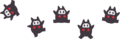
Ninji Ghosts
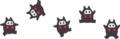
Ninji Ghosts

Ninji Ghosts floating
Promotional artwork for the "Cape Mario Master" Ninji Speedruns course
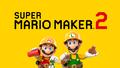
Illustration artwork
Promotional artwork from Nintendo's official site
- SMM2 group art and logo.png
Promotional artwork with logo
Background image
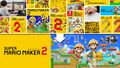
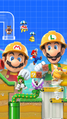
Illustration containing concept artwork of key art
Desktop June calendar wallpaper from My Nintendo
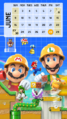
Smartphone June calendar wallpaper from My Nintendo
Desktop June calendar wallpaper from My Nintendo
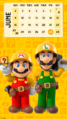
Smartphone June calendar wallpaper from My Nintendo
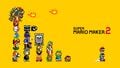
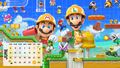
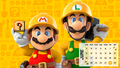
Desktop wallpaper from My Nintendo
Smartphone wallpaper from My Nintendo
Desktop wallpaper from My Nintendo
Smartphone wallpaper from My Nintendo
Desktop wallpaper from My Nintendo
Smartphone wallpaper from My Nintendo
Cold Stone-branded wallpaper from My Nintendo
Cold Stone-branded wallpaper from My Nintendo
Cold Stone-branded wallpaper from My Nintendo
Cold Stone-branded wallpaper from My Nintendo
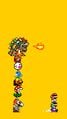
Super Mario Bros. style version of the promotional banner

Artwork from topic of Nintendo, for celebrating the submitted courses in the world reaches 10 million
Artwork from topic of Nintendo in Japan, for celebrating the submitted courses in the world reaches 10 million
Artwork from topic of Nintendo in Hong Kong, for celebrating the submitted courses in the world reaches 10 million
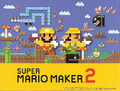
Promotional wallpaper
Promotional wallpaper
Promotional wallpaper
Promotional wallpaper


Sprites and models
For sprites returning from Super Mario Maker, see Gallery:Super Mario Maker sprites.
General
Stamps
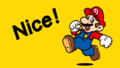
"Nice!"
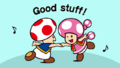
"Good stuff!"

"So tough..."

"EASY"
"Seriously?!"
"Wow!"
"Cool idea!"
"SPEEDRUN!"

"How?!"
"Be careful!"

"So close!"

"Beat it!"


Story Mode Staff Roll


World Maker
Weird Mario pointing


Super Mario Bros. style

Angry Sun

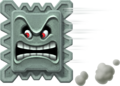
Banzai Bill (Underground)

Blasta Mechakoopa stomped

Boom Boom

Boom Boom stomped

Boom Boom crouching

Winged Boom Boom

Winged Boom Boom stomped

Winged Boom Boom crouching

Goombrat

Goombrat swimming

Goombrat dead

Homing missile

Homing missile

Mechakoopa stomped

Lakitu (picked up by SMB2 Mario)

Moon

Phanto

A Shy Stretch (appears only at nighttime)

Spike Ball (Underground)

Thwomp (Moving horizontally)

Zappa Mechakoopa stomped

Iggy's magic wand

Iggy's magic blast

Larry's magic wand

Larry's magic blast

Lemmy's ball

Morton's magic wand

Roy's magic wand

Wendy's magic wand

Blue Block

Blue Dotted Line Block

Blue Conveyor Belt

Red Conveyor Belt

Conveyor Belt

Conveyor Belt (Underground)

Conveyor Belt (Castle)

Blue Conveyor Belt

Red Conveyor Belt

Checkpoint Flag

Checkpoint Flag

? Block fragment (night Underground theme) (v1.00)

Brick Block (night Underground theme) (v1.00)

Cloud Block (night Underground theme) (v1.00)

Cloud Block (disintegrated by SMB2 Mario)

Donut Block (night Underground theme) (v1.00)

Gentle Slope

Gentle Slope (Underground theme)

Ground icon (Ground theme)
Ground icon (Underground theme)
Ground icon (Underwater theme)
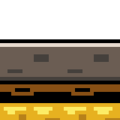
Ground icon (Castle theme)
Ground icon (Airship theme)
Ground icon (night Airship theme)
Ground icon (Ghost House theme)
Ground icon (Desert theme)
Ground icon (Sky theme)
Ground icon (Snow theme)
Ground icon (night Snow theme)
Ground icon (Forest theme)

Hard Block (night Underground theme) (v1.00)

Hard Block fragment (night Underground theme) (v1.00)

Falling Icicle

Icicle

Mushroom Platform (Snow theme)

Mushroom Platform (Snow theme)

Mushroom Platform (Snow theme)

Mushroom Platform (night Snow theme)

Mushroom Platform (night Snow theme)

Mushroom Platform (night Snow theme)

Note Block (night Underground theme) (v1.00)

Music Block (night Underground theme) (v1.00)

ON/OFF Switch

ON/OFF Switch

ON/OFF Switch

Red Dotted Line Block

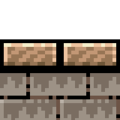
Semisolid Platform (Desert theme)

Semisolid Platform (Desert theme)

Semisolid Platform (Desert theme)

Semisolid Platform (Sky theme)

Semisolid Platform (Sky theme)

Semisolid Platform (Snow theme)

Semisolid Platform (Snow theme)

Semisolid Platform (Snow theme)

Snake Block

Spike Trap (night Underground theme) (v1.00)
Spike Trap (night Snow theme)

Steep Slope (Ground theme)

Steep Slope icon (Underground theme)

Steep Slope icon (Underwater theme)

Steep Slope icon (Castle theme)

Steep Slope icon (Airship theme)

Steep Slope icon (Ghost House theme)

Steep Slope icon (Desert theme)

Steep Slope icon (Sky theme)

Steep Slope icon (Snow theme)

Steep Slope icon (Forest theme)

Used Block (night Underground theme) (v1.00)

Used Block fragment (night Underground theme) (v1.00)

Blue Warp Pipe

Yellow Warp Pipe

Red Warp Pipe

Parachute

Big Mushroom (rescaled)

Big Mushroom stacked with a Super Mushroom

Bomb

Fire Flower stacked with a Super Mushroom

Master Sword

SMB2 Mushroom stacked with a Super Mushroom

Cursed Key

Superball Flower

Superball Flower stacked with a Super Mushroom

10-Coin

30-Coin

50-Coin

Coin (night Underground theme) (v1.00)

Dry Bones Shell

Dry Bones Shell used by Mario

Dry Bones Shell used by Luigi

Dry Bones Shell used by Toad

Dry Bones Shell used by Toadette

Small Toad

Small Toadette

Super Toad

Super Toadette

Fire Toad

Fire Toadette

Big Toad

Big Toadette

Superball Mario

Superball Luigi

Superball Toad

Superball Toadette

Master Sword Mario (multiplayer)

Master Sword Mario (single player), Master Sword Luigi (single player and multiplayer)

Master Sword Toad

Master Sword Toadette

SMB2 Luigi

SMB2 Toad

SMB2 Toadette

Goal Pole (uncompleted Clear Condition)

Axe (uncompleted Clear Condition)

Fortress (Snow theme)

Arrow Sign (Snow theme)


Super Mario Bros. 3 style

Angry Sun

Banzai Bill

Banzai Bill (Underground)

Boom Boom

Winged Boom Boom

Bull's-Eye Banzai

Goombrat

Goombrat

Mechakoopa

Blasta Mechakoopa

Zappa Mechakoopa

Pokey

Snow Pokey

Shy Stretch

Spike

Spike Ball

Snowball

Thwomp

Thwomp

Iggy

Iggy's magic wand

Larry

Larry's magic wand

Lemmy

Ludwig

Ludwig's magic wand

Morton

Morton's magic wand

Roy

Roy's magic wand

Wendy

Wendy's magic wand

Blue Block

Blue Dotted Line Block

P Block

Checkpoint Flag

Checkpoint Flag

Checkpoint Flag
Gentle Slope
Ground (Ground theme)
Ground (Underground theme)

Ground (Underwater theme)
Ground (Castle theme)
Ground (night Castle theme)
Ground (Airship theme)
Ground (night Airship theme)
Ground (Ghost House theme)
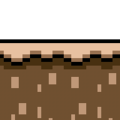
Ground (Desert theme)

Ground (Sky theme)
Ground (Snow theme)
Ground (night Snow theme)
Ground (Forest theme)

Falling Icicle

Icicle

ON/OFF Switch

ON/OFF Switch

ON/OFF Switch

ON/OFF Switch

Red Block

Red Dotted Line Block

Snake Block

Snake Block

Frozen Coin
Spike Trap

Twister

Blue Warp Pipe

Yellow Warp Pipe

Red Warp Pipe

Bubble

Parachute

Frog Suit stacked with a Super Mushroom

Rotten Mushroom

10-Coin

30-Coin

50-Coin

Dry Bones Shell

Small Luigi

Small Toad

Small Toadette

Super Luigi

Super Toad

Super Toadette

Fire Luigi

Fire Toad

Fire Toadette

Raccoon Luigi

Raccoon Toad

Raccoon Toadette

Frog Mario (multiplayer)

Frog Mario (single player), Frog Luigi (single player and multiplayer)

Frog Toad

Frog Toadette

Axe (uncompleted Clear Condition)

Arrow Sign (Snow theme)


Super Mario World style

Angry Sun

Banzai Bill

Boom Boom

Winged Boom Boom

Bull's-Eye Banzai
- SMM2 Galoombrat.png

Mechakoopa

Blasta Mechakoopa

Zappa Mechakoopa

Snow Pokey

Shy Stretch

Spike

Spike Ball

Snowball

Thwomp

Thwomp

Iggy

Iggy's magic wand

Lemmy

Lemmy's magic wand

Larry

Larry's magic wand

Ludwig

Ludwig's magic wand

Morton

Morton's magic wand

Roy

Roy's magic wand

Wendy

Wendy's magic wand

Blue Block

Blue Dotted Line Block

P Block

Checkpoint Flag

Checkpoint Flag

Checkpoint Flag

Checkpoint Flag

Checkpoint Flag

Checkpoint Flag
Ground (Ground theme)
Ground (Underground theme)
Ground (Underwater theme)
Ground (night Underwater theme)
Ground (Castle theme)
Ground (Airship theme)
Ground (Ghost House theme)
Ground (Desert theme)

Ground (Sky theme)
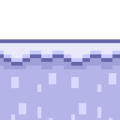
Ground (Snow theme)
Ground (night Snow theme)

Ground (Forest theme)

Falling Icicle

Icicle

ON/OFF Switch

ON/OFF Switch

ON/OFF Switch

ON/OFF Switch

Red Block

Red Dotted Line Block

Snake Block

Snake Block

Frozen Coin

Twister

Blue Warp Pipe

Yellow Warp Pipe

Red Warp Pipe

Bubble

Parachute

P Balloon stacked with a Super Mushroom

Rotten Mushroom

10-Coin

30-Coin

50-Coin

Dry Bones Shell

Small Luigi

Small Toad

Small Toadette

Super Luigi

Super Toad

Super Toadette

Fire Luigi

Fire Toad

Fire Toadette

Cape Luigi

Cape Toad

Cape Toadette

Balloon Luigi

Balloon Toad

Balloon Toadette

Axe (uncompleted Clear Condition)

Arrow Sign (Snow theme)


New Super Mario Bros. U style
Angry Sun
Ground icon (Ground theme)
Ground icon (Underground theme)
Ground icon (Underwater theme)

Ground icon (Castle theme)

Ground icon (Airship theme)
Ground icon (night Airship theme)
Ground icon (Ghost House theme)
Ground icon (Desert theme)
Ground icon (Sky theme)
Ground icon (Snow theme)
Ground icon (night Snow theme)
Ground icon (Forest theme)
Mushroom Platform (Airship)
Semisolid Platform (Sky)

Semisolid Platform (Sky)
Semisolid Platform (Sky)

ON/OFF Switch

Red Dotted Line Block

Blue Dotted Line Block

Red Block

Blue Block

Spike Trap

10-Coin

10-Coin
30-Coin
50-Coin

Bubble
Bridge icon (Snow Night theme)

Rotten Mushroom icon

Goombrat icon

Spike icon

Spike Ball icon

Snowball icon
Dry Bones Shell icon

Pokey icon

Snow Pokey icon
Boom Boom icon

Larry icon

Iggy icon

Wendy icon

Lemmy icon

Roy icon

Morton icon

Ludwig icon

Banzai Bill icon

Bull's Eye Banzai icon

Falling Icicle icon

Twister icon

Checkpoint Flag icon

P Switch

Seesaw icon

Swinging Claw icon

Snake Block icon

Fast Snake Block icon


Super Mario 3D World style

Mario (2D icon)

Luigi (2D icon)

Toad (2D icon)

Toadette (2D icon)
Ground (Ground theme)
Ground (Underground theme)
Ground (Underwater theme)
Ground (Castle theme)
Ground (Airship theme)
Ground (Ghost House theme)
Ground (Desert theme)

Ground (Sky theme)
Ground (Snow theme)
Ground (Forest theme)
Steep Slope (Ground theme)
Steep Slope (Underground theme)
Steep Slope (Underwater theme)
Steep Slope (Castle theme)
Steep Slope (Airship theme)
Steep Slope (Ghost House theme)
Steep Slope (Desert theme)
Steep Slope (Sky theme)

Steep Slope (Snow theme)
Steep Slope (Forest theme)
Gentle Slope (Ground theme)
Gentle Slope (Underground theme)
Gentle Slope (Underwater theme)
Gentle Slope (Castle theme)
Gentle Slope (Airship theme)
Gentle Slope (Ghost House theme)
Gentle Slope (Desert theme)
Gentle Slope (Sky theme)
Gentle Slope (Snow theme)
Gentle Slope (Forest theme)
Green Warp Pipe
Red Warp Pipe
Blue Warp Pipe
Yellow Warp Pipe
Semisolid Platform (Ground theme)
Brick Block (Block)

Crystal Block (Block) (Underground/Forest theme)

Bull's-eye Blaster

Falling Icicle

Stationary Icicle
Warp Box (With Key)
Horizontal Trampoline
Yellow Spike Block
Red Spike Block
Blue Spike Block

Fast Snake Block
Slow Conveyor Belt
Slow Sloped Conveyor Belt
Fast Conveyor Belt
Fast Sloped Conveyor Belt

Red Blinking Block
Blue Blinking Block
Red Track Block
Blue Track Block
Tree (Ground theme, Sky theme, Ghost House theme, Airship theme, Castle theme)
Tree (Desert theme)

Tree (Underground, Forest theme)
Tree (Underwater theme)

Tree (Snow theme

Orange Mushroom Trampoline

Blue Mushroom Trampoline


Screenshots
Level Screenshots
Story Mode


Official courses
NintendoNM
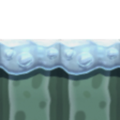
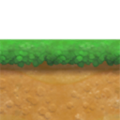
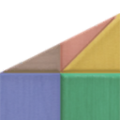
![Cloudy Planet Escape [Kit]](/File:CloudyPlanetEscapeKit.png)
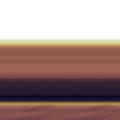
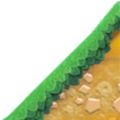
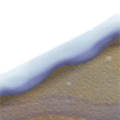
![Wacky Waters [Krysta]](/File:WackyWatersKrysta.png)
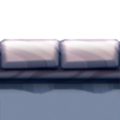
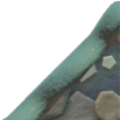
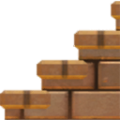
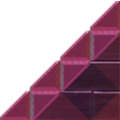
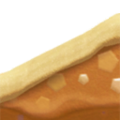
![Tricky Trap Pyramid [Chris]](/File:TrickyTrapPyramidChris.png)
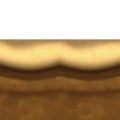
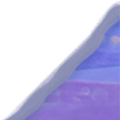
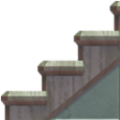
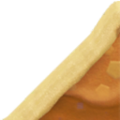
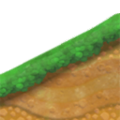
![Bonkers Bounce House [Kit]](/File:BonkersBounceHouseKit.png)


NintendoJP


NintendoUS


NintendoEU


NintendoAU


Ninji Speedruns


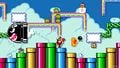
Pre-release

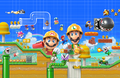
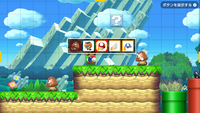
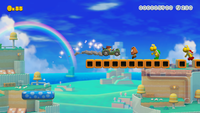
The level editor in action
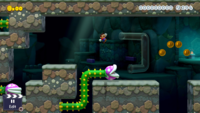
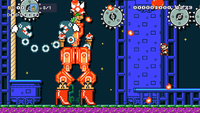
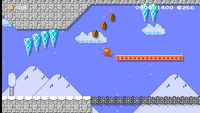
An underground level in the Super Mario World style featuring Twisters
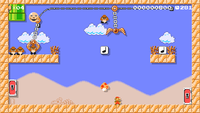
A desert level in the Super Mario Bros. 3 style with the Angry Sun
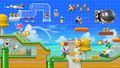
A snow level in the New Super Mario Bros. U style using snake blocks

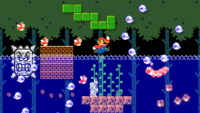
A forest level in the Super Mario World style featuring rising and falling water with Blurps

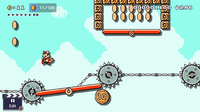
A Super Mario World ground level using ON/OFF Switches
A Super Mario 3D World course using the ground theme

A desert Super Mario 3D World course
An underground Super Mario 3D World course with Piranha Creepers
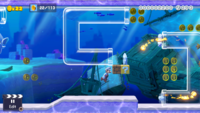
An underwater Super Mario 3D World course
A Super Mario 3D World level using the Airship theme
An airship Super Mario Bros. 3 course with a Seesaw and a 10 Gold Coin.
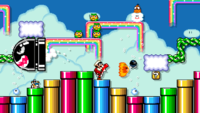
A Super Mario World level in the Ghost House theme featuring Parabuzzies, Boos, and a red pipe
A New Super Mario Bros. U level in the Forest theme at night
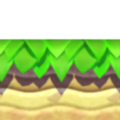
A forest course in the Super Mario 3D World style with various enemies.
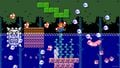
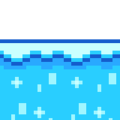
A forest theme in the Super Mario Bros. style with rising water.
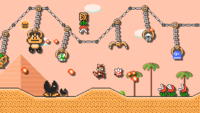
A desert theme in the Super Mario Bros. 3 style with Swinging Claws handling enemies
A sky theme in the Super Mario World style with various enemies
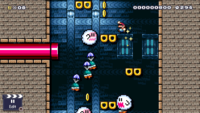
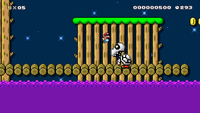
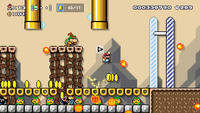
A New Super Mario Bros. U style in the Castle theme at night

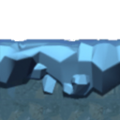
A snow theme in the Super Mario 3D World style with some enemies and Meowser
A forest theme in the Super Mario Bros. 3 style at night
Goomba with selectable modifiers
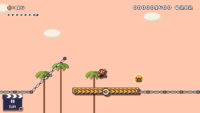
A desert theme in the Super Mario Bros style
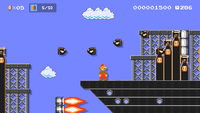
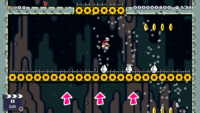
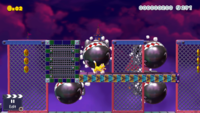
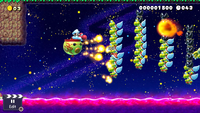
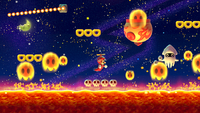
An airship theme in the Super Mario Bros. style with a clear condition involving collecting coins
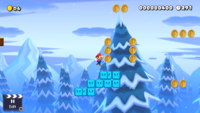
A snow theme in the Super Mario Bros style with icicles
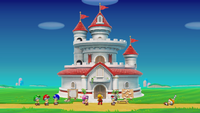
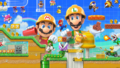
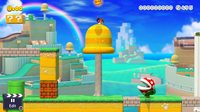
Peach's Castle in Story Mode
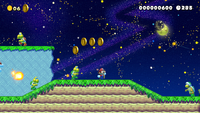
An overworld theme in New Super Mario Bros. U style at night
A forest theme in Super Mario World style at night
An overworld theme in Super Mario 3D World style of Mario riding the Koopa Troopa Car
A desert theme in the Super Mario World style with various enemies

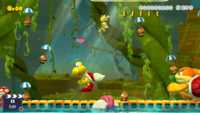
A ghost house theme in the Super Mario World style with Mario, Luigi, Toad, and Toadette

A forest theme in the Super Mario Bros style with Big Mario, Luigi, Toad, and Toadette riding the Goomba's Shoe


Promotional videos from Instagram


Miscellaneous
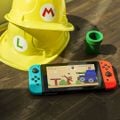
Promotional photo from Nintendo's Instagram account
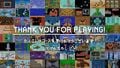
Illustration for thank the players' upload courses in the Course World
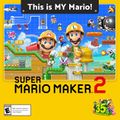
"This is MY Mario!" promotional online asset for the Super Mario Bros. 35th Anniversary (2020)
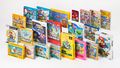
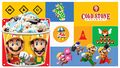
Promotional display of the entire Super Mario series released from 1985 to 2020, for the Super Mario Bros. 35th Anniversary (2020)


Play Nintendo


| Super Mario Maker 2 | ||
|---|---|---|
| Characters | Playable characters | Mario • Luigi • Toad • Toadette |
| Supporting characters | Coursebot • Worldbotb • Mr. Eraser • Nina • Princess Peach • Undodog • Yamamura • Partrick • Soundfrog • Toads • Yoshi/Red Yoshi | |
| Course elements | Game styles | Super Mario Bros. • Super Mario Bros. 3 • Super Mario World • New Super Mario Bros. U • Super Mario 3D World |
| Themes | Ground • Underground • Underwater • Ghost House • Airship • Castle • Desert • Snow • Forest • Sky | |
| Terrain | ? Block • Brick Block/Rotating Block • Bridge • Clear Pipe • Cloud Block • Crystal Block • Donut Block • Frozen Coina • Ground • Hard Block • Hidden Block • Ice Block • Mushroom Platform • Note Block/Music Block • P Blocka • Warp Pipe • Rock Block • Semisolid Platform • Slope • Spike Block • Spike Trap | |
| Items | 1-Up Mushroom/Rotten Mushroom • 10-Coin/30-Coin/50-Coin • Big Mushroom • Boomerang Flowerb • Bullet Bill Maskb • Cannon Boxb • Coin • Cape Feather • Fire Flower • Frog Suitb • Goomba Maskb • Goomba's Shoe/Stiletto • Master Sworda • Pink Coin • Power Balloonb • Propeller Boxb • Propeller Mushroom • Red POW Boxb • SMB2 Mushroomb • Super Acornb • Super Bell • Super Hammer • Super Leaf • Super Mushroom • Super Star • Superball Flower • Yoshi's Egg/Big Red Yoshi's Egg | |
| Enemies | Angry Sun/Moon • Ant Trooper/Big Ant Trooper • Unshelled Koopa Troopa • Blooper/Big Blooper/Blooper Nanny/Blooper Baby • Bob-omb/Mega Bob-omb/Parabomb • Boo/Big Boo/Boo Buddies/Stretch • Boom Boom • Bowser/Meowser • Bowser Jr. • Bully/Big Bully • Buzzy Beetle/Big Buzzy Beetle/Buzzy Beetle Tower/Para-Beetle/Heavy Para-Beetle/Buzzy Shell • Chain Chomp/Big Chain Chomp • Charvaargh • Cheep Cheep/Big Cheep Cheep/Blurp (SMW)/Deep Cheep/Big Deep Cheep • Dry Bones/Big Dry Bones/Parabones/Dry Bones Shell • Fire Bro/Heavy Fire Bro • Fire Piranha Plant/Big Fire Piranha • Fish Bone • Goomba/Big Goomba/Paragoomba/Big Paragoomba/Galoomba (SMW)/Big Galoomba (SMW)/Flying Goomba (SMW)/Para-Goomba (SMW)/ Goombrat/Kodeka Kakibō/Goombud (SMW)/Goomba Tower/Shoe Goomba/Stiletto Goomba • Hammer Bro/Sledge Bro • Hop-Chops • Horned Ant Trooper • Jelectro • Jumping Piranha Plant • Koopa Clown Car/Junior Clown Car/Fire Koopa Clown Car/Fire Junior Clown Car • Koopa Troopa/Big Koopa Troopa/Koopa Paratroopa/Big Koopa Paratroopa • Koopa Troopa Car • Koopalingsb (Larry · Morton · Wendy · Iggy · Roy · Lemmy · Ludwig) • Lakitu • Lava Bubble/Big Lava Bubble • Magikoopa/Big Magikoopa • Mechakoopab/Blasta Mechakoopab/Zappa Mechakoopab/Mega Mechakoopab • Monty Mole/Big Monty Mole • Muncher • Peepa • Piranha Creeper • Piranha Plant/Big Piranha Plant • Pokeya/Snow Pokeya • Pom Pom • Porcupuffer • Rocky Wrench • Skipsqueak • Spikea/Mega Spikea • Spike Balla/Giant Spiked Balla/Snowballa • Spike Top/Spiky Parabuzzy • Spiny/Big Spiny/Spiny Shell • Spiny Egg • Spiny Skipsqueak • Stingby • Thwomp/Big Thwomp • Wiggler/Big Wiggler | |
| Gizmos | ! Block • Arrow Sign • Banzai Bill • Bill Blaster/Bull's-Eye Blaster • Blinking Block • Bumper • Bull's-Eye Banzai/Cat Banzai Bill • Bull's-Eye Bill/Cat Bullet Bill • Bullet Bill • Burner • Cannon/Giant cannon • Conveyor Belt/ON/OFF Conveyor Belt • Checkpoint Flag • Crate • Dash Blocka • Fire Bar • Grinder • Icicle • Mushroom Trampoline/ON/OFF Trampolineb • Key/Cursed Keyb • Lava Lift • Lift/Flimsy Lift/Cloud Lift • ON/OFF Switch/Dotted-Line Block • One-Way Wall • P Switch • POW Block • Red POW Block • Seesaw • Skewer • Snake Block • Swinging Claw • Track • Track Block • Trampoline • Tree • Twister • Vine • Warp Box/Warp Box (With Key) • Warp Door/P Warp Door/Key Door | |
| Miscellaneous | Starting blocks • Stone (Story Mode) • Toad (Story Mode) • Wings | |
| Mario's moves | Charge jumpb (SMB) • Crawl (SM3DW) • Crouch • Crouch Jump (SM3DW) • Dash • Dive (SM3DW) • Double Jump (NSMBU) • Drill Spin (NSMBU & SM3DWb) • Ground Pound (NSMBU & SM3DW) • Jump • Long Jump (SM3DW) • Midair Spin (NSMBU) • Roll (SM3DW) • Slide (all except SMB) • Spin Jump (SMW, NSMBU, & SM3DW) • Swim • Triple Jump (NSMBU) • Wall Jump (NSMBU & SM3DW) | |
| Miscellaneous | Assist parts • Course Maker • Fan-made courses highlighted by Nintendo • Gallery • Glitches • Media • Mii outfits • Minigamesb (Catch & Win! • Match & Win! • Pop & Win!) • Ninji* • Peach's Castle • Phantob • Quotes • Sound effects • Staff • Yamamura's Dojo | |