The 'Shroom:Issue 195/Strategy Wing
Director's Notes
Written by: Hooded Pitohui (talk)
Hello, all you readers of The 'Shroom, and welcome to the Strategy Wing Theater, which is definitely not just the normal Strategy Wing offices except with a red curtain put up and the lights all dimmed! We have a show for you tonight, here, folks. Now, I myself may have spent a little too long in the HQ's basement theater this month, but, rest assured, once I rest up, Four Steps for a 3D World and Pitohui's Pokémon Academy will return next month. In return for their absence, though, we do have a new section to premiere this month!
So, settle into your seats and refill your soda if you need to, because we're starting off tonight's feature by dusting off a retro reel as Waluigi Time presents the old Flash game, Super Mario 63 in Shine Get. We'll follow that up with a showing of Digimon World: The Great Battle for the Street Sign, directed by Martin Shoersese. Then it's onto our feature film of the night, the one you've all been waiting for, with the name you know well, John Wick in... Payday 2!. For those of you who like to stick around after the main feature, our very own theater star, Koops, will be showing late-night test screenings for The Battle Against Nergal, featuring a glimpse at the second act of the film, where the heroes regroup and seek wisdom to help them in their coming fight.
For those of you who enjoy tonight's showing and find some inspiration, we'll leave off with a reminder that you can join the Strategy Wing team at any time by going over to the ticket counter and talking with our Statistics Manager, Meta Knight, after the show. Perhaps you want to do a let's play of a blast from the past like Shine Get, or perhaps there's an obscure gem you'd like to cover like File City Files does. Whatever you want, we'll find a place for you, and I'll be coming behind with a broom!
We have a real treat for you on the pink screen of Strategy Wing, so get comfortable, and start the countdown, for the show is about to begin!
Section of the Month
Thank you all kindly for voting the walk down the Footlight Lane and the look at how it puts a little variation on Hayashida's four steps! There will be levels with even greater variation to explore in July, but, for now, don't forget to vote for this month's sections to show your support to our writers!
| STRATEGY WING SECTION OF THE MONTH | ||||
|---|---|---|---|---|
| Place | Section | Votes | % | Writer |
| 1st | Four Steps for a 3D World | 8 | 50.00% | Hooded Pitohui (talk) |
| 2nd | Pitohui's Pokémon Academy | 6 | 37.50% | Hooded Pitohui (talk) |
File City Files
Welcome back to File City Files, the Midwest's number one-ranked Digimon World strategy column. Last month was a pretty contained section, what with us recruiting three Digimon in three consecutive screens of the Gear Savannah. This month, though, we return to our globetrotting ways, exploring new areas as we hunt for new Digimon to join our city.
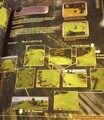
For this month, we're primarily going to be using these Prima guide maps:
THE BATTLE FOR THE STREET SIGN
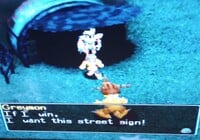
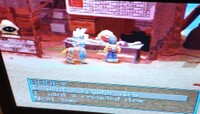
We'll start this month by returning to File City to talk to Jijimon. Jijimon will tell us all the Digimon we've recruited, giving a brief description of what they add to the town. Once we leave, we're suddenly confronted by a Greymon! (this will only happen if you have more than fifteen prosperity points). Greymon is here because he's heard rumors about us all around the island and he's looking for a rumble, and guess what? If he wins, he's taking our street sign... even though File City doesn't have a street sign.
In battle, Greymon is a very tough opponent, having 4,800 HP. Greymon has three different attacks, these being Dynamite Kick, Magma Bomb, and Red Inferno. Magma Bomb and Red Inferno are particularly dangerous. This fight can also temporarily softlock you if you aren't strong enough to beat him, since, if you lose this fight, you'll return to Jijimon's house, and every time you leave the house, you'll be confronted by Greymon again. This means that if you have a Digimon that's not strong enough to beat Greymon, or you don't have very many items and you had saved inside Jijimon's house, not realizing you had enough prosperity points to trigger the Greymon fight (because how could you?), you will be locked into fighting Greymon until you either beat him or he kills your Digimon three times, which will reduce your Digimon to a new egg. This spares you from immediately battling again, because Greymon won't fight a baby. I mean, he's not a monster! Upon being defeated, Greymon drops a Offense Chip!
Purpose in City: Greymon, being the warrior he is, declares that your techniques are still amateurish. He decides to help "train" you by opening a fighting arena. The fighting arena allows you to enter multiple different fighting tournaments of various classes.
These tournaments, depending on difficulty, give out various prizes. There's tournaments for Rookie, Champion, and Ultimate Digimon. The tournaments, especially once you get into the more advanced Champion and Ultimate tournaments, are pretty tough, but if your Digimon is tough enough, they give out pretty good prizes!
Curling: Every Kid's Favorite Sport!
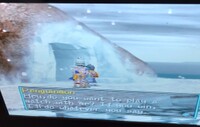
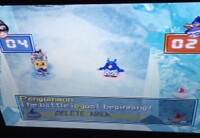
Next, we're going to take the invisible bridge into the Top Bridge area. Then, following the map, we're going to enter Freezeland. Then, following the Freezeland map, we're going to head towards Penguinmon's Cave. Outside of Penguinmon's Cave sits, well, a Penguinmon, who challenges us to a game and says that, if we win, he'll do what ever we want!
The game in question? Curling! That's right! Digimon World has a curling minigame because it was made by crazy people.
The way curling works is that each player gets five... pucks? Are they called pucks? There's a few types of pucks. There's light ones that travel faster and don't require much power. Medium pucks are the base puck. There are, naturally, heavy pucks which require the most power to slide but are the hardest for an opponent to move. Finally, there are pucks that will grab onto whatever they stop on.
The pucks you get are random. For instance, against Penguinmon in this run, that cheater got two of the grabby pucks, but I didn't get any. There are three ways to score in curling. The easiest way is to land in the big center circle, which is worth one point. But inside that circle, as well as in the corner directly across from your player, is a smaller circle with the word "good" on it. Landing in either of those is worth two points! If at any point your puck or Penguinmon's puck is knocked out of any of the circles, you lose those points. In addition, directly across from Penguinmon is a circle marked "bad". Landing in there, you lose two points. It's actually a fun little minigame, and there's some legitimate strategy as to whether you want to aim for your own points or try to remove Penguinmon's points. If you lose, it's no biggie. You can try again, but keep in mind that, after losing once, you have to give Penguinmon a fish to play again! After defeating Penguinmon, he'll tell you that you're the first person to ever defeat him and then join the city!
Purpose in City: Penguinmon joins the arena! Only, instead of joining as a fighter, he opens up his own curling rink! Here, you can play the curling minigame whenever you want for the low, low price of a fish. If you win, you're given a prize! The prizes you can win are the following:
- Rooster (Digivolves a Rookie Digimon into Kokatorimon)
- Restore Floppy
- Omnipotent Floppy
- Giant Meat
- Large Recovery Floppy
- Medium MP Floppy
One Mon's Trash Is Another Mon's Fishing Rod
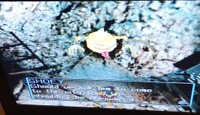
Returning to Gear Savannah, we're now going to enter Trash Mountain, or, as the Sukamon that live there call it, the Dust Kingdom. The parts of Trash Mountain accessible to us aren't very much, consisting only of a screen with wild Geremon (palette-swapped Numemons), Platinum Scumon (palette-swapped Sukamons), and Psychemon (palette-swapped Gabumons). Unless you have a filth Digimon with you, you'll want to avoid them, because, unlike their weaker regular counterparts, these filth Digimon are actually quite tough. But if you do have a filth Digimon that's got good stats (Nanimon, Sukamon, or Numemon), this is the best place to learn filth moves. Past the first screen, we enter the main hub of Trash Mountain, where we're met with a Sukamon who explains that this is the kingdom of Sukamon.
He also explains that we can't live here and that no Sukamon would want to leave Trash Mountain because it is paradise for Sukamon. So it doesn't look like we'll get any recruits here! He leaves with one final warning, cautioning us not to make the King of Sukamon mad, lest he curse us with his powerful Digivolution techniques!
Despite not having any Digimon to recruit, there's still a few points of interest here. For one thing, you can pick up the game's first fishing rod, giving you the ability to fish! We'll go over fishing later, but that's really the main thing here. There's also a Sukamon who will trade us an Etemon card for a King of Sukamon card! There's also a training exercise here where you can command your Digimon to stick his head in garbage. This gives you a huge MP boost, but it also lowers your Digimon's happiness obviously.
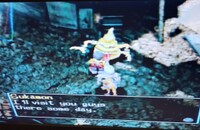
Finally, there's the King of Sukamon, who will transform your Digimon back into its original form if it turns into a Sukamon! And, oh, hey, while none of the Sukamon want to join the city, there is one who is interested in visiting it!
Purpose in City: Nothing! Sukamon only hangs out by the toilet at night, complaining about it! He's still worth one prosperity point, though!
The Savannah's Secret Shop
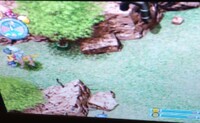
In the Savannah, there's a special shop that's quite easy to miss, only available for the first fifteen days of the month and only accessible from a somewhat obscured path.
The Secret Shop is a mysterious black market run by strange little hooded men. Their shop consists of two booths. The booth on the left is a Digimon Card shop. This is probably going to be the more useful of the two shops. The Digimon Card shop basically operates as the only way to buy guaranteed quality cards. While you can get cards in town, you can only get them out of the card gacha machine inside the town store. Here, you have two options. You can either buy cards in packs of three, getting random cards, or the shopkeep sells individual cards, with prices differing based on their rarity. He also buys cards off of you, so you can make some fast cash if you have a lot of duplicate cards. Because you can buy individual cards here, the secret shop is essential for filling out your card collection.
The other booth is actually the more interesting booth, even though odds are you'll never need to take advantage of its more useful service. The booth on the right is the Recycle Shop, a shop that sells recycled items. Now, odds are, when you first get there, the shop will just be a regular store selling basic healing items and food. But here's the thing. When you lose a fight, you have a chance of losing your items.
Well, any item you lose will be for sale at the recycling shop. So, if you lose a fight within the first fifteen days and lose an item you didn't want to lose, you can simply go to the secret shop and attempt to buy it back. Like I said, most people wont lose many fights, so this feature doesn't come up a ton, but if you do happen to lose a fight and lose, say a stat-boosting item, you can simply attempt to repurchase it from the recycling shop.
That's going to be all for this month. Tune in next month as we continue exploring File Island.
Getting That Payday
Once again, welcome everyone to Getting That Payday, the Payday 2 strategy guide! Now, did you know Payday 2 has a lot of crossovers? From Scarface to "Goat Simulator" of all things, there's no shortage of strange collaborations in the game. This month, though, for the special summer issue, we'll be looking at the first crossover Payday 2 had, being with the still thriving John Wick franchise! More specifically, we're doing an overview of the three John Wick packs that came out all the way back in 2014, 2016, and 2017!
I'm Running Out of Ways to Question What Payday 2 is. Not running out of ways to explain it, though! Guns are your best friends against the endless hordes of police, well, other than your three actual friends helping you in the co-op heisting simulator. Grab cash, steal diamonds, wonder why a random Ukrainian man wants you to steal nuclear warheads for him, and do so much more. Plus, practically endless gun combinations with weapon mods. A personal favorite of mine is the sniper that doesn't have a barrel. Like, at all. Just a stock and a firing mechanism.
One aspect that we're covering is Perk Decks. Simply enough, it's a set of nine upgrades, five of which are unique for each deck, that gives you an edge. Simple as that.
John Wick Chapter 0: Payday
Update 40 to Payday 2 brought with it the John Wick DLC for free. In it, we had the man himself as a playable character, designed after Keanu Reeves himself. Along with it, we had the Chimano Compact pistol and the URSA Tanto knife as his two signature weapons, and the Hitman perk deck. This deck was the first deck to be introduced after the mechanic came out with the four for the original characters, and John was the first added character post launch. Who else to add as the first additional playable character for a crime simulator then the most dangerous man alive?
Now for a quick covering of the Hitman perk deck, it's nothing special. It simply gives you 45% extra armor recovery rate, makes akimbo weapons better, and makes your armor recover after 1.5 seconds guaranteed. A pretty mediocre perk deck, outclassed by most others. Of course, you could just do it for the flavor, which is rather respectable, but as for me? I'll stick to getting drunk off Stoic, thank you very much.
Of course, this was not the only crossover with the film series. In 2016, the John Wick Weapon Pack released with 4 new weapons from the movies, being the Contractor and its Akimbo variant, the Desertfox, and the Jackal. A solid roundup of weapons. Plus, one of the funnest throwables, the Throwing Knife. Now, you can play darts with the guards while waiting for the safe to crack! Or I guess play darts on the guards?
Now, for the last and largest section, the John Wick Heist Pack! The stealth-only The Yacht and the loud-only Brooklyn 10-10 heists were both added here as further playgrounds for the Payday gang. Both contracted by the Continental Hotel, these have you stealth around a busy yacht in order to grab a hard drive from the server room, and free a man from a gang and extract him to safety.
First off, we have the Yacht Heist. You'll be getting in there and grabbing some illegal money that was meant for a political campaign (now entering your greedy hands), and then entering, shutting down, and grabbing a hard drive from the server room. Entering the eponymous Yacht, we start off at the end of the dock, and nearby you can find the server room with the hard drive in it. Of course, that won't be until the end. First, we need to grab the cash. You'll find and hack into a laptop which gives you some vague instructions on where everything is. Think of it as a treasure hunt you did as kids! Of course, instead of finding chocolate coins or a $5 bill, you're searching for hundreds of thousands of dollars in illegal cash.
Once you've got the place cleared out of cash, your next stop is taking down the security system. Head back to the laptop and have Bain hack into them. After 20 seconds, you'll be able to enter the main server room. Find the coolant used for the servers, and shut them all down. This will probably be the trickiest part of the heist, with lasers guarding the coolant and, like, one, maybe two guards. This level is weird because you can go massive stretches of area without a single guard showing up. Anyways, get the cooling, and you're in... after getting the manual override switches flicked. Don't worry, this is the last part. Once that's done, grab that hard drive and get the hell out.
For the other half of the pack, let's push into Brooklyn 10-10. Here, you need to get one of the Continental's main staff members, Charon, out of a gang's grips. You'll enter an unassuming building which leads to a window where Charon is being held just below. Take out the three gang members guarding him, and he'll get up and grab his gun. Don't expect it to do much work, as you'll be the one covering for him for the most part. By this point, the police are certainly on you, so you'll need to have someone on crowd control duty. For this, may I suggest a Molotov cocktail? Rather cheap and effective.
From there, you need to keep him guarded while he picks open a door, as gang members and cops will be constantly harassing him. Eventually, he'll get through and you will have to meet up with him on the roof. Some quick jumps and many cops later, and you'll finally meet with even more gang members flooding Charon. Not out of the water yet, bud. Taking them out, you keep moving towards several caged rooms. Some will have ammo and crowbars, and others will have various loot you will need to finish the mission. Grab it, cover Charon one last time, and finally rendezvous with him down an elevator shaft. Hop down, head to the extraction point, and finally be out of there.
As an epilogue, why not talk about Continental Coins? These coins are currency for the underworld in the John Wick franchise, and were later added to Payday 2 as a way to purchase weapon mods and upgrade the Safehouse (Note to self: Make an article on the Safehouse, there's a lot of cool things going on there), among other things. Why a crossover with John Wick for a fundamental game mechanic, we do not know. Probably for that sweet John Wick sponsor cash.
So that's it for this month! Say, have you seen the Payday 3 trailer? That went out right as I was finishing up this article and now I can talk about it! So far, the game looks great, with new movement mechanics, some fun physics, and as it seems the ridiculous skills from Payday 2 are still there. I mean, not much else of an explanation for three shots being fired out of a double-barreled shotgun. Also, Cloakers run on walls like the original game again. I am terrified. But enough of that, I think it's time for me to wrap this up. As always, this is professional heister Kinger, signing off.
Shine Get
Written by: Waluigi Time (talk)
Hello there, 'Shroom readers, and welcome to my latest Strategy Wing venture, Shine Get! Despite what you might think from the name, I'm not playing Super Mario Sunshine today. In fact, this section isn't about a game made by Nintendo at all. Instead, we'll be running through Super Mario 63, a 2009 Flash game made by Runouw. As you can probably guess by the title, it's heavily inspired by Super Mario 64, while also taking elements from other Mario games of the 90's and 2000's in its gameplay, visuals, and music. It's a product of its time in a charming way, and in my opinion, is one of the best Mario Flash games out there. If you're interested in playing the game, official uploads are still available on Runouw's personal website and Newgrounds, though you'll need some way of accessing Flash content. It's also been preserved in BlueMaxima's Flashpoint archive.
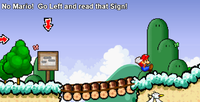
After creating a new file, there's a quick cutscene of a few Toads outside of Peach's Castle, awaiting Mario's arrival for his surprise party... and then I'm immediately thrown into the tutorial! Mario refuses to let me control him and reads the first sign on his own, which tells us how to move and read signs, which is pretty important, I guess. The sign says to practice by reading the next sign, but having played this game many times before, I don't need any tutorials! So I run forward, ignoring the sign, and...
Mario slams facefirst into an invisible wall and a message pops up saying to read the sign. Curses, foiled again.
Begrudgingly, I go back and read the sign, which explains how to move around (again!), jump, duck, and use the action buttons. With the basic controls under our belt, the tutorial stops being so hand-holdy and now I can ignore all the reading material I want to! I should probably mention them, though... there's another sign after these two explaining how to dive and backflip, and a Toad who tells us that we can talk to Toads after we already talk to him. He's not very helpful. The game then throws in a hill that's a little too tall to teach you about the double jump.
At this point, I've already encountered the game's most prominent glitch, though thankfully it's a harmless one. In certain areas, all of the game's sounds will only play out of one speaker, so if you decide to check the game out yourself, don't worry, your headphones aren't dying.
After managing to avoid falling down a hole, another sign tells us that we should jump on Goombas. If I felt like being more contrarian, I'd probably ignore them, but... squish. Here we're taught that we can regain health by collecting five coins. The game even hands out a blue coin to demonstrate it immediately! How nice of it! On the next screen I'm greeted by some Bob-ombs and a sign explaining the spin attack. In my neverending quest to be thorough in Strategy Wing sections, I deliberately ignore these instructions and try ground pounding them instead (the game hasn't taught us about ground pounding yet, but I already know, hehe). Good news, it works. A nearby sign explains ground pounding for real, followed by an impromptu swimming tutorial.
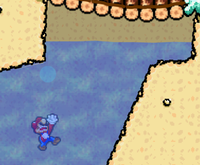
Unlike Super Mario 64, health and the air meter are separated, so you can't recover health by jumping in water and resurfacing, unfortunately. I decide to do some experimenting since I forgot what happens, and it turns out that even though they're separate, no matter how much health you have, Mario immediately drowns once the air meter runs out. So now I'm down one life, but hey, I got knowledge out of it and I got to die in the tutorial, which is funny. Actually, I lied, we're not down one life, because after that I got sidetracked and wanted to see if I could get a game over in the tutorial for comedy purposes. As it turns out, even though it shows your lives decreasing from 5 to 4 when you die, it keeps going back up to 5! No game overs in the tutorial for me... Anyway, I just respawn at the beginning of the screen, so no real harm done. Catching up to where we were, the game explains the triple jump using the combined powers of signs and even taller cliffs.
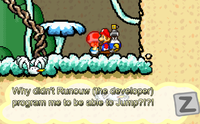
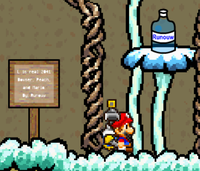
On the next screen, the box for F.L.U.D.D.'s Hover Nozzle is sitting out there ripe for the taking. Yep, F.L.U.D.D. is in this game! Behind 64, Sunshine probably has the most influence on this game. I tried on a previous run and you actually can finish the tutorial without collecting F.L.U.D.D. through a combination of jumps, backflips, and dives. I was hoping this would break the game by not letting you collect it later, but it doesn't. Mario will still have F.L.U.D.D. equipped in the cutscene after completing the tutorial, though. So, if you want to break the game's continuity, you can do that. Another cliff stands in my way to demonstrate F.L.U.D.D., and standing at the bottom is a Toad who's trying to jump up the mushrooms, breaking the fourth wall and complaining that the developer didn't program him to be able to jump. Sucks to be this guy.
Not much of note through the rest of the screen, just more practice hovering. A sign explains that F.L.U.D.D. can be refilled by jumping in water, and on the next screen, there's a complementary Runouw brand water bottle that does the same thing. Then it's back to more platforming, but now it's up in the sky and involving spinning platforms, so a fall is a lot more inconvenient now! There's a sign explaining how to zoom in and out, and up in the clouds there's a Toad who we strike up a pleasant conversation with. In proper Mario RPG fashion, Mario has no written dialogue but manages to communicate to this Toad that they're hundreds of feet in the air anyway, causing the poor guy to freak out and wonder how he got up here in the first place. Another signpost on a cloud explains how to pause, so I guess we've hit the point where they can't actually demonstrate anything they want to teach us in-game so signs are just being tossed around now. Works for me. One last stretch of platforming and I'm at the end, with a warp pipe leading to Peach's Castle.
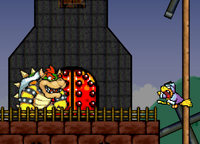
As Mario travels down the pipe, it's cutscene time again! Things aren't all great in the Mushroom Kingdom, as we find out that Bowser is preparing to invade as the first phase of his Master Plan. (It's capitalized, so it must be important!) Meanwhile, Mario approaches Peach's Castle just as the Toads have finished setting up for the surprise party. Peach left the cake in the fridge though, which is apparently a problem, but uh... does anyone really have a problem with refrigerated cake? One of the Toads reveals that today is apparently the anniversary of the events of Super Mario Bros., as the party is in celebration of the first time Mario defeated Bowser, and not, and I quote, "one of the many insignificant times after". Poor Bowser. Mario arrives, immediately followed by Bowser who opens fire on the castle! I guess Mario's not getting that party, but at least he gets a pretty cool Flash game instead. As the Koopa Troop attacks, Bowser confronts Peach and apparently burns a Toad to death with his fire breath when Peach tries to use him as a shield Smash Bros. style. I'll say this, Bowser definitely pulls no punches in this game. Kamek dispatches Mario fairly easily on Bowser's orders, and the two of them infiltrate the castle to destroy the Shine Sprite Orb, giving Bowser full control over the castle by scattering the Shine Sprites which will eventually be lost forever, according to Kamek. With the castle under his control and Mario (supposedly) unable to enter, Bowser ominously states that he's going to begin searching for It. I don't know why he needs a Yoshi, but okay!
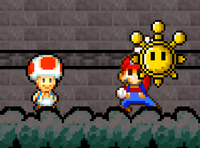
Four hours later, Mario is woken up by a Toad named Eddie. He basically tells Mario that everything's gone down the toilet. Luckily, Mario finds a Shine Sprite lying in the grass. Eddie goes into the castle (so much for whatever measures Bowser had in place!) and control of Mario is finally back within my capable hands. I say this as the person who killed him twice on purpose to see what would happen. Maybe he should be concerned... Anyway, basically all of the doors in the castle are still locked, including one with a barrier of just one Shine Sprite, which we technically have, but don't actually have, so there's no option other than following Eddie, who probably has secret teleportation powers considering I entered a door before he did but he was across the room when I came in. There's an elevator made immediately redundant by the superior Sling Star, which Eddie explains was added as a surprise for the party. So we have the lore explanation, but from a game design perspective, I'm not sure why they're both here. Oh well! Mario restores the Shine Sprite Orb by throwing a whole single Shine Sprite at it, and Eddie says that he's going to guard it in case Bowser or Kamek return to interfere. Sorry Eddie, but smart money's on the Koopas.
Now that I officially have one Shine Sprite, the door to the first level is now accessible! I think I'll save that one for next time, though. Next month, we get into the game proper and tackle Bob-omb Battlefield! Hopefully I'll see you then!
Koops, Your Emblem is on Fire
Welp, here you go. A one parter. We're nearing the end of the game at a steady pace, and we'll most likely finish this shit within the year.
Once again, no new recruits, but all the next few issues will have at least one. See you next time as we discover the reason behind Bartre's progressive gains.
| The 'Shroom: Issue 195 | |
|---|---|
| Staff sections | Staff Notes • The 'Shroom Spotlight |
| Features | Fake News • Fun Stuff • Palette Swap • Pipe Plaza • Critic Corner • Strategy Wing |
| Specials | Coming Soon • Community Awards Dossier • Challenger Approaching! |


