The 'Shroom:Issue 200/Strategy Wing
Director's Notes
Written by: Hooded Pitohui (talk)
Hello, all of you readers of The 'Shroom, and welcome to a very special edition of Strategy Wing! Not only is this the 200th issue of The 'Shroom; this is also the 100th edition of this team! That's right, for about eight years now since its creation in issue 100, through three Directors and dozens of writers, Strategy Wing has been bringing you tips, tricks, challenges, and analyses for all of your favorite games! Okay, well, maybe it's not always your favorite games... For me, though, that's some of the charm of the team. I would never have known about, say, Digimon World or Payday 2 without it!
I have two other sets of notes to write for this issue, and I have a number of announcements to get to here, but, if you'll give me a moment, I'd like to extend my thanks to the members of the Strategy Wing team and to our guests for this issue. Shoey and Waluigi Time have been wonderful memebers of the team, bringing passion and humor to the team in equal measure. They've taken us through, collectively, quite the wide array of games, some with a great deal of meaning and nostalgia to them. Whether we were laughing at Percy and despairing at mazes, conquering feudal Japan, adventuring as Buzz Lightyear, or collecting Shine Sprites in two dimensions, their sections have been entertaining us for years, and they've brought a great deal of charm to Strategy Wing.
Kinger, our professional heister, brought an entirely new genre to Strategy Wing with Getting that Payday, while Koops, our chief tactician, brought a brand-new format! One might be doing crime, and one might be playing the part of valiant heroes, but we have the both of them to thank for sharing all sorts of tips, from the best perks to pick from for getting away with dough from what units to count on (Marcus, always Marcus)!
Finally, I'd like ths shed some light on two people who've been writing for Strategy Wing since back in the long-gone days of 2016, Meta Knight and Yoshi876! Meta, my predecessor in this very chair who is rejoining us for this issue, was one of the pillars of Strategy Wing back in the day, walking us through everything to be found on Mario Party boards and taking us on expeditions to distant planets. Alongside Yoshi876, sharing his Mario Kart tricks and experiences or sharing Pokédex entries, Meta saw the team through its maturation post-issue 100, the two of them giving it a steady stream of sections that helped to shape it and get it here.
Thank you, Strategy Wing writers, and thank you, as well, our readers! It's been a great journey with all of you!
Alright, that's enough of the sappy stuff out of the way (for now)! Let me direct you to some sections, because there's quite a bit for you to sink your teeth into this month! Not only do we have our suite of regular sections, from The Anatomy of a Pikmin to Shine Get, but we also have a number of new sections and one-off specials! Shoey and Waluigi Time have brought special looks at the rise and fall of some Koopas resembling Bowser, so be sure to check out both Fading Into Obscurity and Rising From Obscurity! Then, don't miss Meta and the grand return of Galactic Expedition, bringing you everything you need to know on the boss battles from Metroid Dread as an ongoing, volunteer-based section. Also here to stick around, we have a new section from Shoey where we step into the shoes (no pun intended) of a coach in the NCAA circa the early 2000s! We've got a college football team to take to the top (maybe), so check out Shoeyball: Gridiron Conquest to find out how we do it!
I've gone on long enough now, so, allow me to let the rest of the Strategy Wing team take it from here! Go and and read, read, read!
Section of the Month
Industry and agriculture were both in high-demand last month, it seems! A look at the structure of Super Mario Galaxy 2's Chompworks Galaxy and ideas for raising the apple-based Flapple took a joint first place. That wasn't the only plant-like creature last month, though, with a thorough look at the broken-in-Pikmin 2 Purple Pikmin! Be sure to read up this month and see if their fellow Pikmin 2 debuts were as broken in their first game!
| STRATEGY WING SECTION OF THE MONTH | ||||
|---|---|---|---|---|
| Place | Section | Votes | % | Writer |
| 1st | Four Steps for a 3D World | 5 | 25.00% | Hooded Pitohui (talk) |
| 1st | Pitohui's Pokémon Academy | 5 | 25.00% | Hooded Pitohui (talk) |
| 2nd | The Anatomy of a Pikmin | 4 | 20.00% | Shoey (talk) |
| 3rd | Shine Get | 3 | 15.00% | Waluigi Time (talk) |
Digging Deeper
Written by: Waluigi Time (talk)
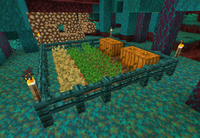
Hello there, 'Shroom readers, and welcome to a special edition of Digging Deeper! Today I'm going to be doing something a little different than past issues. Rather than coming up with a challenge per se, I'm going to be covering how to live sustainably in the Nether in Minecraft. At that point, the challenge is up to you! Maybe you'd just like to spend the majority of your playthrough in the Nether, or you'd like to take things one step further and stay in the Nether permanently (keep in mind you won't be able to access the End at all if you take this route). Whatever the case may be, if you're on Java Edition, you'll need to be playing on version 1.16 or later.
Nether 101
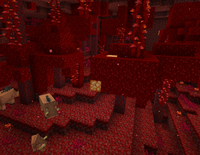
The Nether doesn't have the regular kinds of wood or stone found in the Overworld, but thankfully, there's some counterparts available so you're not completely out of luck. The two unique types of wood available in the Nether, crimson and warped, can be used for almost anything that the other wood types can, except for boats. Of course, since there's no water, the only use you'd have for boats is to hold and transport mobs. While there's no cobblestone, blackstone works as a substitute in most recipes. This doesn't apply to redstone-based blocks like pistons, dispensers, and levers, which still need regular cobblestone, and there's no counterpart for regular stone for recipes that require it.
You also need food to stay alive, and there's a few sources of it. Hoglins, which you can find in crimson forests, are basically angry Nether pigs, and they drop porkchops as well as leather. Despite being hostile, they're also farmable and can be bred with crimson fungus. They're repelled by warped fungus, respawn anchors, and Nether portals, so you can place these around your hoglin farm to keep them from trying to kill you. The regular red and brown mushrooms also spawn in the Nether, and can be farmed as normal with bonemeal. You can potentially find food as loot in bastion remnants too, though that's not something I would suggest relying on since it's not renewable. If you get really desperate, zombified piglins drop rotten flesh. Yum?
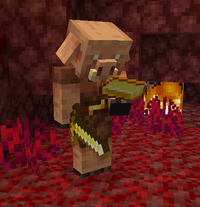
Something you'll have to contend with is the native piglins, found in the Nether wastes, crimson forests, and bastion remnants. The adult ones are neutral and will always attack you, unless you're wearing at least one piece of golden armor. I recommend using a golden helmet, since it's the smallest loss of armor protection and durability compared to a full diamond set. They'll also become hostile if you open or break most containers or mine gold in their vicinity, or if you attack them first, regardless of your armor. In bastion remnants, you'll also encounter the stronger piglin brutes who are always hostile, so beware!
The piglins aren't just there to get in your way, though. They're kind of like the Nether's counterpart of villagers, because you can barter with them. If you drop a gold ingot on the ground by a piglin, they'll pick it up, examine it for a bit, and then they give you a random item from their bartering pool in exchange for it. Between the items they have and the randomness, it's not super great, but at least it's not that expensive thanks to the abundance of gold in the Nether. For a Nether-focused playthrough, their best offerings are probably water bottles for potion making, which is the only way to get them in the Nether, and crying obsidian for crafting respawn anchors. Bartering only works with adult piglins, though. Baby piglins will just take your gold and run away, and piglin brutes won't take gold at all.
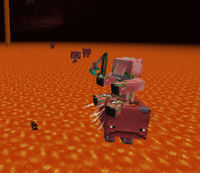
Speaking of native mobs, if you want to traverse lava lakes without the risk of falling off a bridge and getting cooked, consider using the strider, a weird little guy that can walk on lava, and one of the few peaceful mobs in the Nether. If you put a saddle on one, you can control the direction they go with a warped fungus on a stick, similar to pigs, and right clicking makes you go even faster. You can also breed them with warped fungus to make even more of them. Just be careful, because the fungus stick does have durability on it. Unless you have extra warped fungus with you, you could end up stranded in the middle of a lava lake with no way to get back. I probably don't need to go into any further detail about why that's a less than ideal situation. Occasionally, they even spawn with a zombified piglin riding them, so you get a free saddle to work with.
Other mobs you'll find are zombified piglins, which leave you alone as long as you don't attack them; ghasts, which shoot explosive fireballs that you can knock back at them; magma cubes, the Nether's equivalent of slimes; and blazes and wither skeletons, guardians of the Nether fortresses that inflict dangerous status effects but have important loot. Blazes are only spawned by monster spawner blocks, so make sure to keep some around for future use. Endermen, skeletons, and rarely chickens as jockeys also spawn.
The Nether also has a very valuable resource, the aptly-named netherite, which is basically diamonds 2! You can use it to upgrade diamond tools and gear, making them more effective, durable, and immune to burning when dropped. It's also used to craft the lodestone, a block that lets you change the direction a compass points to, which is especially helpful since compasses normally don't work in the Nether. Unfortunately, the process of upgrading gear is tedious and a little bit complicated. First, you have to find ancient debris which rarely generates underground, mainly at Y=15. Smelting the ancient debris gives you one piece of netherite scrap, and once you get four of those, you can combine them with four gold ingots to make a single netherite ingot. Then you need to find a smithing template in a bastion remnant - as long as you have at least one, you can duplicate them, but it costs diamonds - and then use a smithing table to combine the ingot, template, and the item you want to upgrade.
I'm moving to the Nether
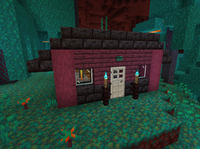
The Nether is a very inhospitable place, so you'll probably want to get a base established for shelter and getting farms set up sooner rather than later. I strongly recommend using the warped forest biome for this. It's actually a very safe biome as far as the Nether goes, as no hostile mobs will spawn there, so the only trouble you'll really have to deal with is endermen. (However, if a nether fortress or bastion remnant happens to generate in a warped forest, the associated mobs will still spawn there. Avoid picking a warped forest with either of these.) As a bonus, the warped fungus that naturally generates here scares away hoglins. For maximum security, stay away from the borders and build deeper within the biome instead to avoid straggler hostile mobs that may wander in (or catching a ghast's line of sight).
Fire is no stranger in the Nether, so don't use flammable materials for anything facing the exterior of your base! For practical purposes, that's really just Overworld wood types and wool, unless you think it's a good idea to build a house out of leaves for some reason. Most other blocks are on the table, and as a general rule, blocks that are native to the Nether won't burn, including crimson and warped wood.
You may also want to do some mob-proofing. Proper lighting will prevent endermen from spawning, but they can still teleport inside your base, and the last thing you want is an angry enderman following you into your home! Endermen need three empty blocks vertically to teleport into, so you can keep them out by placing something like carpet in areas where the ceiling is exactly 3 blocks high, or building only 2.5 blocks high or lower by using slabs. Piglins can use doors, so consider using iron doors, trapdoors, or fence gates as an entrance for your base, or more advanced contraptions if you're so inclined. You likely won't be encountering them much in the warped forests, but better safe than sorry.
Those considerations aside, building a base in the Nether is mostly the same as in the Overworld. Just don't expect to use water because it evaporates, although you can still store it in a cauldron, and do not use beds because they will explode if you try to sleep in them! The Nether equivalent for setting your spawn point is the respawn anchor, so use that instead. It's crafted using crying obsidian, which can be salvaged from ruined portals in the Overworld or looted from bastion remnants, and glowstone blocks. You'll also need to use glowstone blocks to keep it charged, otherwise it won't work.
Your Nether shopping list
Since you'll be spending at least the majority of your time in the Nether, you're going to want to stock up on Overworld resources. First, I'll quickly go over what Overworld resources are already available in the Nether. For simplicity's sake, some items crafted with these components have been omitted from the list. Keep in mind that for items that can only be found as loot from structures, they will get harder to find as your playthrough goes on, since you'll have to travel farther to find more.
- Arrows (dropped by skeletons, bastion remnant loot)
- Bones (dropped by skeletons and wither skeletons)
- Bows (dropped by skeletons)
- Chicken (dropped by chickens)
- Coal (dropped by wither skeletons)
- Crossbows (dropped by piglins, bastion remnant loot)
- Crying obsidian (piglin bartering, bastion remnant loot)
- Diamonds (structure loot)
- Diamond swords, pickaxes, shovels, and armor (bastion remnant loot)
- Eggs (generated by chickens)
- Ender pearls (dropped by endermen)
- Feathers (dropped by chickens)
- Flint and steel (Nether fortress loot)
- Gold (natural generation, structure loot)
- Golden apples (bastion remnant loot)
- Golden carrots (bastion remnant loot)
- Gravel (natural generation, piglin bartering)
- Gunpowder (dropped by ghasts)
- Horse armor (Nether fortress loot)
- Iron (structure loot)
- Leather (dropped by hoglins, piglin bartering, bastion remnant loot)
- Mushrooms (natural generation)
- Obsidian (piglin bartering, structure loot)
- Porkchops (dropped by hoglins)
- Rotten flesh (dropped by zombified piglins)
- Saddles (dropped by strider jockeys, structure loot)
- String (dropped by striders, piglin bartering, bastion remnant loot)
- Water bottles (piglin bartering)
The seeds of change
You might think that the Nether would be a totally inhospitable environment for farming, but it actually isn't! Wheat, carrots, potatoes, beetroots, pumpkins, melons, sweet berries, bamboo, and cocoa beans can all be planted, grown, and harvested in the Nether. The key is generally dirt. With the exception of cocoa beans, which use jungle logs, all of these can grow on dirt or dirt that has been converted to farmland. While farmland normally dries up and reverts to dirt without water, this won't happen if there's a crop planted on it, which is what makes farming several of these possible. Chorus fruit can also be planted on end stone, but you'll need to get pretty far in the game since it's only found in the End. Most of these can be a decent source of food or revenue from villagers, which I'll discuss in the next section.
You can also bring mobs from the Overworld and farm them as well. I would recommend bringing bees, chickens, cows, rabbits, sheep, and turtles, which gives you a good spread of items. The rest of them don't really give you much of value to merit bringing them all the way in, unless you want to start a mob zoo for the novelty of it. One thing to note is that turtles are bred using seagrass, which isn't farmable in the Nether. If you're not interested in the Potion of the Turtle Master, which gives you Resistance at the expense of Slowness, you can safely skip them.
If you want to use other wood types besides crimson and warped, you can bring the respective saplings, plant them on dirt, and grow them in the Nether. You can also grow cacti on sand, if you want that. Vines can be grown as a cheap alternative to ladders, as long as you have shears to harvest them.
It takes a village
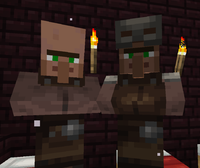
Villagers, believe it or not, can be a vital resource if you're willing to do the work of transporting them. I recommend getting at least an armorer, toolsmith, weaponsmith, librarian, cleric, and farmer. At higher levels of trade, the first three will allow you to renewably obtain diamond tools and armor, so you won't have to rely on structure loot for them. They usually come with enchantments on them already, but those can be removed with a grindstone. The librarian sells books for enchantments and glass, and the cleric sells lapis lazuli to power the enchanting table and redstone. The farmer isn't as important as the others, but it's an easy way to reliably trade for emeralds to buy items from the other villagers, since the crops they buy can be easily farmed. The extra professions can probably be skipped since the things they have that you can't get in the Nether aren't super useful.
Each profession needs a specific job site block, which will assign the job to that villager and allow them to restock items after trading. Each job site block can only be claimed by one villager at a time, so you may need some extra. Here's a quick list of each job, the corresponding job site block, and the items they offer that you can't otherwise get in the Nether. In addition, all villagers offer emeralds.
- Armorer - Blast Furnace
Bells, chainmail armor; renewable source of iron and diamond armor - Butcher - Smoker
Rabbit stew - Cartographer - Cartography Table
Globe banner patterns, maps - Cleric - Brewing Stand
Bottles o' enchanting, lapis lazuli, redstone dust - Farmer - Composter
Apples, bread, cake, glistering melon slices, pumpkin pie, suspicious stew - Fisherman - Barrel
Buckets of cod - Fletcher - Fletching Table
Tipped arrows - Leatherworker - Cauldron
N/A - Librarian - Lectern
Bookshelves, clocks, compasses, glass, name tags - Mason - Stonecutter
Bricks, chiseled stone bricks, dripstone blocks, polished stone blocks, terracotta - Shepherd - Loom
N/A - Toolsmith - Smithing Table
Bells; renewable source of iron and diamond axes, hoes, pickaxes, and shovels - Weaponsmith - Grindstone
Bells; renewable source of iron and diamond axes and swords
The blast furnace, cartography table, lectern, stonecutter, and grindstone are crafted with materials not available in the Nether, so keep that in mind. You will also need one bed per villager to establish it as an actual village. Be very careful with these! The villagers can sleep in them just fine (they must think they're so special), but if you happen to accidentally right click on one... KABOOM! Wouldn't want to lose those villagers you went to all the trouble of transporting. Once you have enough beds and job site blocks, whatever you want to build for them is up to you. It can be anything from a bare-minimum-function dungeon to an elaborate city!
For transporting them to the Nether, a minecart track to a portal is probably the most reliable method, and is easily reusable. Just shove a villager into a minecart and send them on their way! If your base is farther away from the portal, you'll also want another track to get them there. Boats will also work (even over land) if you shove a villager in one, but you'll have to manually bring them to the portal one at a time. However, if you need to increase elevation at all, you'll need pistons to lift the boat up. Or you can just push them along naturally or force them through tunnels to the portal, but both of those options are pain.
Villagers can also be bred, so if you don't have all the professions you want, this is a much easier method of getting more of them than bringing them from the Overworld. To breed villagers, you'll need at least one extra bed compared to the total number of villagers you have, and then throw food at them! Yeah, that's how it works. Each villager needs to have 3 bread or 12 carrots, potatoes, or beetroots in their inventory. This may also happen naturally because farmers will throw excess food at other villagers. The mobGriefing game rule needs to be set to true (this is the default setting) for it to work, though.
NOTE: As I'm writing this, Mojang is actively working on adjusting villager trading. Some of these trades may be more difficult or not possible at all in later versions of the game. For example, one currently proposed change is that you will also have to pay diamonds for diamond armor, and the armor pieces offered are fixed based on what biome the villager comes from. This change wouldn't make it impossible to renewably get diamond armor, but you would need to find diamonds as loot from Nether structures and increase the number of villagers you have as well as the number of locations you're bringing them in from. Pre-existing villager trades are retained from earlier versions though, so if you play on Java Edition, you could always start in an older version, get villagers ready, and then upgrade. As of 1.20.2, no changes have been implemented.
Burnt out
For anything that wasn't mentioned in those last three sections, well... you better stock up while you can! That's probably everything you need to stay in the Nether for a prolonged time, unless I forgot something, in which case feel free to tell me I did a big dumb. Hopefully you enjoyed reading this, and I hope you have fun if you try this in-game! If you have any ideas for a challenge you'd like me to write about, let me know and I'll consider it, or you can apply to write this section yourself if you'd like!
Rising From Obscurity
Written by: Waluigi Time (talk)
Hello there, 'Shroom readers! If you've been reading The 'Shroom long enough, or if you just like digging through the archives, you may remember a little section known as Fading Into Obscurity. The section discussed various characters that had disappeared from the Super Mario franchise, whether they were just one-offs or at one time had a recurring role. It appeared under various writers intermittently from October 2009 until April 2014, then the section itself faded into obscurity.
Today I'm going to do something inspired by that old section, with a new spin. Rather than looking at characters that have disappeared (or just never re-appeared) from the franchise, I'll be talking about some characters that once faded into obscurity but have since made their return to the games, and seeing what they've been up to since then. Welcome to Rising From Obscurity!
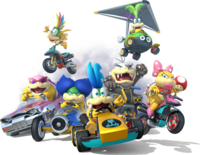
So, who better to discuss than the very first subjects of Fading Into Obscurity, the poster children for making a grand return in the Mario franchise, the Koopalings! The Koopalings were introduced in Super Mario Bros. 3 in 1988, where they served as the bosses at the end of the first seven worlds, and were the ones responsible for transforming the Mushroom Kings into various creatures. At the time, they were depicted as being Bowser's children, though Nintendo has since retconned this, with Bowser Jr. now being treated as Bowser's only child. The Koopalings remained prominent throughout the SNES era and appeared as bosses in multiple games, most notably Super Mario World. They also appeared in various other media, including The Adventures of Super Mario Bros. 3 and the Super Mario World cartoon, which gave them defined personalities.
But as the SNES era went on, their appearances began to dwindle. Their final appearance of the 90's was in the infamous Hotel Mario released in 1994, where they once again appeared as the bosses of the game's worlds, or hotels, rather. After this, the Koopalings only appeared in remakes, and Iggy got a brief cameo in Super Mario Sunshine using footage from World. They would not be seen in a new game again until they made a surprise reappearance in Mario & Luigi: Superstar Saga in 2003. They all appeared as bosses during the game's climax in Bowser's Castle, though unfortunately, they didn't receive any dialogue. After Superstar Saga, they disappeared from the franchise once again. They were planned to reappear as bosses in Super Princess Peach at some point in development, but were scrapped.
Finally, in 2009, the Koopalings returned in New Super Mario Bros. Wii, each of them being fought twice, first as a mid-boss in each world, followed up by a more gimmicky rematch enhanced by Kamek's magic at the end of the world. Appearing in 3D for the first time brought updated designs for the Koopalings. Morton, Roy, and Ludwig only had coloration changes, Larry, Wendy, and Lemmy had minor modifications to their design, and Iggy received a drastic redesign.
They didn't have any physical appearances outside of ports until New Super Mario Bros. 2 and New Super Mario Bros. U in 2012, once again as the world bosses, then returned in full force through the rest of the Wii U/3DS era. In 2014, all seven of them appeared as playable characters for the first time in Mario Kart 8 after being introduced 26 years earlier, then became de facto fighters in Super Smash Bros. for Nintendo 3DS / Wii U as Bowser Jr.'s model swaps. Over the next few years, they continued to make playable appearances in various games. They also returned to RPGs as major villains in Mario & Luigi: Paper Jam and Paper Mario: Color Splash, and play prominent roles in the side-stories of the Superstar Saga and Bowser's Inside Story remakes, establishing defined personalities for them for the first time since the 90's. Most recently, they've appeared in Mario Kart Live: Home Circuit as NPC opponents, and the ill-fated Dr. Mario World as playable doctors. It's kind of funny because which game their actual latest appearance was in is different depending on the Koopaling, since some of them were already in Dr. Mario World when Home Circuit was released, and others were added afterwards.
Despite their frequent appearances, the Koopalings are still conspicuously absent from many areas of the franchise. Barring Iggy's Sunshine cameo, they haven't appeared in the 3D platformers at all, with characters like Bowser Jr., Boom Boom and Pom Pom, and the Broodals fulfilling similar roles. They are yet to appear in the Mario Party series, and their participation in the sports games is very lacking. Only the Mario & Sonic titles have featured any of the Koopalings as playable characters, though only Larry, Wendy, Roy, and Ludwig, and all of them were relegated to guest characters locked to certain events. Morton, Iggy, and Lemmy have not physically appeared in any sports titles to date.
The Koopalings kind of have a sad rise from obscurity. They're probably the most prominent they've ever been, but they don't have the popularity with the fanbase they used to. Their reappearance in New Super Mario Bros. Wii was definitely exciting at the time, but now they're viewed more as just part of the standard Super Mario fare or being roster hogs. While they're likely here to stay, only time will tell whether they'll continue to branch out.
Fading Into Obscurity
Hello readers, and welcome to a special issue 200 edition of Fading Into Obscurity. Inspired by Waluigi Time's special, Rising From Obscurity, which itself was inspired by the old recurring section Fading Into Obscurity, this edition of Fading Into Obscurity, as the name suggests, is about characters or species that were once prominent in various parts of the Mario franchise who have been basically forgotten or left behind. Funnily enough, you could even argue that Fading Into Obscurity is counterprogramming for Waluigi Time's Rising From Obscurity. While he focuses on the Koopalings' rise from forgotten bosses to Mario Kart superstars, I'm going to be covering the Koopa Kids, who, in the early days of Mario Party, acted as Bowser's faithful mischief makers. By the Wii era, they were relegated to the dustbin of history.
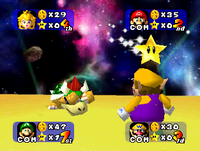
Appearing in the first Mario Party, Koopa Kids, then known as Baby Bowsers, played a minor role in the game. They're only seen in the hidden stage, the Eternal Star, which is unlocked after beating all seven other boards and collecting hone-hundred stars. Here, a group of seven of them serve as Toad's replacement on star spaces. However, instead of selling you the star for the 20 coins, they bet you the star in a dice game (after paying them twenty coins, of course). After a fairly minor role in Mario Party 1, Koopa Kids would turn into, essentially, the Anti-Toad for the rest of the N64 games.
In Mario Party 2, a Koopa Kid would appear on the board on a random space, basically acting as an opposite star space. When the player passes them, the Koopa Kid will take five coins (although, occasionally, they give five coins). When a star is bought and the star space moves, the Koopa Kid space warps to where the star space previously was. The Koopa Kids would also appear in most of the item games. They served as a dummy option for failure; giving out nothing if the player missed an item. The Koopa Kids were also prominently featured on the Bowser Land board, doing things like running a crooked item shop, a parade, and bank.
In the final game of the N64 trilogy, Koopa Kids get a mixed bag. On one hand, they still appear in most of the boards and act as the Anti-Toad. However, unlike the previous two games, they aren't really mischief makers, because they no longer have their own version of the star space with a negative effect. They also don't have a big connection with Bowser in this game; only appearing with him in the story mode to carry him off after he's beaten up by Waluigi. Instead of doing mischief to hinder the players, Koopa Kids instead occasionally replace Toad in the item shop, where they sell some of the more troll items such as Reverse Mushrooms and the Lucky Lamp. They also sometimes replace Toad on the item spaces, where they tend to reward players who answer the "bad" option on the questions. They still appear in some of the item minigames and serve as the booby prize, but that's really the only thing they do to directly hinder the player. Koopa Kids would also get what would be, at this point, their closest thing to a playable appearance in the side mode, Duel Mode. Appearing as one of the obtainable duel partners, the Koopa Kids cost three coins per turn. On a successful attack, they turn into Bowser, doing triple damage! But, on the other hand, if they fail, they do zero damage.
As you can see, the N64 trilogy was very good to the Koopa Kids. They went from an obstacle, exclusive to a stage most people didn't unlock, to having their own space and regularly appearing as Bowser's minions throughout the game. Finally, in Mario Party 3, while their connection to Bowser isn't as prominent, and they don't exactly hinder the player, they still play a prominent role in the game and even have items only they sell.
The good times would keep on rolling for the Koopa Kids in the Gamecube era, starting in Mario Party 4, where they essentially took over the Bowser spaces! Now instead of Bowser appearing when the player land on a Bowser space, Koopa Kid typically appears and takes between ten and thirty coins from the player. Koopa Kids, acting as servants to Bowser, also appear in the Bowser Minigames, where two of them explain the rules of each games. Koopa Kids even get promoted to board host! They act as the hosts of the final board, Bowser's Gnarly Party, and appear to attack the player in the final minigame, the creatively-named "The Final Battle!". Koopa Kids even make their first playable appearance as an unlockable character in Ztar's special minigame, Beach Volley Folly.
Things would only get better for Koopa Kid in Mario Party 5 and Mario Party 6. First, Koopa Kid serves as the secondary antagonist in the story mode of Mario Party 5, helping Bowser ruin the dreams of everyone. Here, a single Koopa Kid would split himself into multicolored versions of himself and battle the player on a slimmed-down version of each board, with the player needing to drain all three of their coins. These Koopa Kids, colored red, blue, and green, would appear in various roles in the rest of the Gamecube era.
But secondly, Koopa Kid is, for the first time, promoted to playable status in the parties themselves, with Koopa Kid now being playable in all the modes except Story Mode and Card Party. Going from enemy in a board most people hadn't played to playable character in the games themselves, things were only looking up for the Koopa Kids. Then, in Mario Party 6, things in fact got even better for the Koopa Kids! While they weren't really in the story mode and their connection to Bowser isn't really used (with the Koopa Kids only appearing as the opponents in the Solo Mode), Koopa Kids, for the first and (spoiler) only time, were promoted to a fully playable character! Yes, that means they are playable in all modes! Man, with each passing game, Koopa Kids only get more and more integral to the series!
Unfortunately, Mario Party 6 would prove to be the high mark for the Koopa Kids. They'd appear in the spin-off game Mario Party Advance, doing whatever the hell that game was about (fighting you for Gaddgets). They would then return in Mario Party 7, but with a much-reduced role. Here, Koopa Kids would get their own special orb ,the Koopa Kid Orb. When the player gets one, a Koopa Kid space is created. Koopa Kid spaces basically operate like nerfed Bowser spaces. Koopa Kids commit various acts of mischief, like swapping players' positions, swapping orbs, and equally redistributing the wealth. They also a play a role in some of the Bowser minigames, such as Bowser's Lovely Lift, where they operate a cannon and fire at the players. The three multicolored Koopa Kids also return in a minor role as obstacles in the multiplayer Bowser minigames.
The Gamecube era is a little strange, because, for the majority of it, the Koopa Kids just keep rising in prominence. They go from mostly replacing Bowser on Koopa Kid spaces, while also being an unlockable character in one of the minigames, to being playable in most modes and integral to the story mode. Then they rise ever further to being playable in all modes while still being featured as opponents in a side mode. Finally, though, they're reduced back down to only having their own space and being an obstacle in Bowser minigames.
Unfortunately for Koopa Kids, Mario Party 7 would be their last physical appearance. They never made it to the Wii era. Instead, Koopa Kids were replaced by Bowser's actual son, Bowser Jr., who would make his first appearance in Mario Party DS, or Mario Party 9 if you only count the numbered games. Now, Bowser Jr. first appeared in Super Mario Sunshine, which predates Mario Party 4, so you might be wondering why he didn't replace them sooner. Well, my guess is that, since Mario Party 4 came out only months before Super Mario Sunshine, they didn't have time to replace the Koopa Kids. It's also possible they didn't know that Bowser Jr. would become important to the series. Then, since they already had the assets for Koopa Kids made, they just kept using them in the Gamecube games, but when they switched systems, they decided to just replace them with Bowser Jr., which makes sense. I mean, the Koopa Kids had never appeared outside of Mario Party, but Bowser Jr. was appearing in all the Mario games, so it just made sense to replace these spin-off exclusive characters with one that is canonically directly related to Bowser.
For the record, when I say replaced, I mean Bowser Jr. fully replaced the Koopa Kids. Not only did he take over their recurring role as Bowser's minion, but even when they bring back old content, such as the minigames in Mario Party: The Top 100 and Mario Party Superstars, they replace the Koopa Kids with Bowser Jr. The only appearance the Koopa Kids have had after the Wii era were cameos on boxart seen in galleries in Mario Party: The Top 100 and Mario Party Superstars. Because of this total replacement, I think it's safe to say the Koopa Kids are never going to return to the Mario Party games. They've truly faded into obscurity.
File City Files
Hello again and welcome to File City Files, eastern Iowa's number-one source for Digimon World information. Last month, we got our first ultimate. This month, we're going to take advantage of that ultimate and recruit even more Digimon to File City.
The Honorable Warrior in the Ice
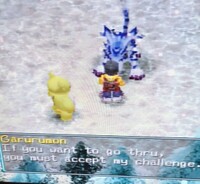
Sitting on the border of Freezeland and the Misty Trees in the early hours of the day, the mighty warrior Garurumon stands guard.
He declares that if you wish to pass through his lands, you must defeat him in combat (or you can just go around him). Garurumon is a champion-level Digimon with 4,200 HP. He's a mighty warrior with a number of powerful attacks such as Ice Statue, Giga Freeze, and the stat-boosting War Cry. Upon being defeated, Garurumon admits that he let his guard down but declares that a two-on-one fight isn't fair.
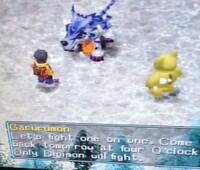
In anger, Garurumon declares that he's never lost a fair fight and challenges you to a rematch, telling you to return at 4 AM, and that, this time, only DIgimon will fight. So, you actually have a window between 4 AM and 4 PM to face off with him. He's not kidding, either. In this rematch, you aren't able to issue commands or use items, but, as a way to balance it, if you wait less than a full day to challenge him, he will only have half of his health.
The rematch is one of the tougher fights in the game. You don't even have direct control of your Digimon in a normal fight, and, in this fight, you have even less control! But I do have a couple tips. Before we get into those, also note that, because you can't issue any commands, you aren't able to use your finisher move, since that's a command. But don't worry! That cheater Garurumon can still use his!
So here's a few tips to make this fight easier (because, come on, this is Strategy Wing. it is kind of what we do). The first one is obvious. Don't forget about the fight! If you wait more than a day to do it, Garurumon will be at full health, and you really want to take advantage of the halving of his health. Speed and offense are the most important stats in this fight, offense because it determines how hard you can hit, and speed because it determines how fast you can hit. Since this fight can easily end up a damage race, you're going to want to have enough speed to be able to rapid-strike Garurumon. The last tip is that you should make sure you only set your most powerful moves. Since you don't have any control over your Digmon, the last thing you want them to do is keep using weak moves like Sonic Jab or Spit Fire. If you do those things and as you have a solid champion or ultimate, you should be able to beat Garurumon. After beating him, Garurumon admits defeat, acknowledging he's lost a fair fight. Garurumon asks us how we got so strong.
This leads to a sequence of us furiously attempting to explain how the island is in trouble and that we need him to join the city to help. Garurumon agrees to help, but first he's going to examine this city and determine if he likes it or not!
Purpose in the City: Garurumon takes his years of combat experience guarding the border between Misty Trees and Freezeland… and takes a job as a line cook in the restaurant…?
Garuruamon specializes in home-style cooking with a focus on health, and by that I mean he cooks lots of steaks!
- T-Bone Steak (1,000 bits): This eight-ounce, well-done T-bone increased HP by 10 while also increasing discipline and decreasing tiredness.
- DX-Steak (2,500 bits): This deluxe twelve-ounce porterhouse increase HP by 30 and brains by 2 while also increasing happiness and discipline and decreasing tiredness.
- Phantom Steak (5,000 bits): This ghostly sixteen-ounce ribeye steak increase HP by 50, and brains by 3 while also increasing happiness and discipline and decreasing tiredness.
The Angel in the Sanctuary
Luckily for us (almost as if this was planned) Monzaemon, our current Digimon, is a Vaccine-type Digimon. This is important because Vaccine-type Digimon have their own dungeon, the Ice Sanctuary. Located deep within Freezeland, the Ice Sanctuary is a beautiful building made entirely of ice (duh). It is only by vaccine Digimon; attempting to enter with any other Digimon will result in being blocked by a forcefield.
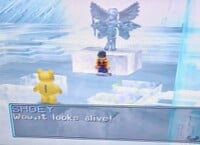
Entering the Ice Sanctuary, we find, in the middle of the first room, a mysterious statue of an angel that looks almost lifelike.
But, of course, that's stupid! Statues aren't alive, and, since we don't see anything else in here, we go to leave. But before we can leave, our Digimon, GBA, takes interest in the statue, and suddenly a hidden passage opens up for us to explore!
The depths of the Ice Sanctuary are essentially a maze. The first room is a large hallway with two Icemon and a Blue Meremon. There are also two computers, with one containing a Large Recovery and the other holding a Restore. At the end of the hallway, there is a staircase that leads to a room with some training exercise you can do. One increases HP and the other increases defense. Both of these are supercharged training, with the defense one increasing my Monzaemon's defense by 15, and the HP one increasing its HP by 156. But this is actually a dead end!
The real path is hidden in the background in the right side of the room, just a little bit above the first computer. The next room is a vast, empty room with two Gururumon (which are not Garurumons!). On the top right and bottom right sit two teleport pads, and here's where things become a maze.
If you pick the correct teleporter, you head onto the next room, while if you get it wrong, you're taken to one of the previous rooms! How are you supposed to know which one to press? Excellent question! I believe Digimon's World's answer is, of course, "fuck you". But luckily, you're here with Iowa's number-one Digimon World expert and I know the answer! Pick the top right one!
The next room is a narrow hallway with a Hyogamon standing guard in front of you. This guy is basically impossible to dodge. I mean, you can try and give him the old rope-a-dope, but it's much easier to just kick his ass. Unfortunately, the later portion of the hallway is guarded by a Hyogamon and a Gururumon, and, once again, it's very had to get around them. So once again, more asskicking! At the end of this hallway is a staircase leading to another room with more teleporters. This time, there is a teleporter in every corner of the room. The bottom two are guarded by one Blue Meramon each, and the top two are guarded by an Icemon each (creative names on these enemies). Once again, the answer is top right. Upon exiting this teleporter, you're confronted by two Hyogamons and an Icemon staring you down, with a teleporter behind you if you wish to flee.
Of course, we're no cowards, so we stand and fight (and, luckily for us, the Icemon ran away, which always has a chance to happen in multi-Digimon fights). After we send those Digiclones packing, we head to the bottom of room, where there's a bright ball of light in the floor. Stepping into the circle of light causes light to fill the room, and out from the light calls out a voice:
He who seeks my help, the time has come! I give you the blessings of my wings!
Of course, we have no idea who is calling out to us, and, when the light clears, we stand there baffled. Confused over whatever it is that just happened, we enter the teleporter in the room (but not before raiding the computers, which contain a Protection and a Super Recovery). Of course, naturally, this teleporter doesn't take us back to the entrance of the Ice Sanctuary. No that would make sense! Instead, it takes us the start of the previous room. You'll want to take the top left teleporter in here, because that takes you back to the start of the Ice Sanctuary. BUT! Then you have to re-enter the underground passage and then climb back up the stairs out of the passage. This causes you to realize the statue that was at the entrance is now gone. Then, suddenly, flying out from the blinding light comes an angel, Angemon to be exact. He explains that, now that he's back to life, he's ready to fulfill his duties while we stand there not knowing what he's talking about. He starts talking about knowing heaven and soul-y instructions, and we're like, "whatever bozo, just come to the city."
He keeps trying to talk in his ye old heaven talk until, finally, we're like, "dude, I don't know what you're saying. You going to the city now?" Finally, he stops yapping and agrees to join the city.
Purpose in the City: Angemon serves as Jijimon's official record keeper and File City's administrator. But more importantly for us, Angemon uses his divine powers to inform us about Digimon we can recruit.
Now, he doesn't outright say where they are. Instead, he gives us indirect hints about Digimon and what to look for. If you're stuck and you can't figure out where to go to find the next Digimon to recruit, it's a good idea to check with Angemon, because he'll probably have some information he can give you!
Space Aliens? In My Digimon World?
This next Digimon is a little weird, because it's a two-step recruitment Digimon but it really doesn't have any reason to be! So, once you get to 30 Prosperity Points, if you check the Shellmon news bulletin board, it mentions that there have been sighting of strange markings in the Mt. Panorama Spore Area. If you head to the Spore Area, you'll see, yep, there are in fact strange markings there. The newspaper tells no lies! That's the first step! Then, once you get to 45 Prosperity Points, a new section of the Shellmon newspaper is written. This one, on page eight (which is page eight even if you don't have all the pages through seven) ,mentions that there are reports of people seeing the actual alien behind the marks! Excited over the potential of seeing an alien, we rush back to the Spore Area! Upon entering the Spore Area, we see that the markings have expanded, WHEN SUDDENLY AN ALIEN APPEARS, AND, OH GOD, HE'S GOT A GUN! Not looking to get blasted, we try to talk this alien down, and luckily it turns out he's pretty trusting. All we had tell him was that we aren't his enemy and he lowered his gun.
We try to tell him all about what's happening with the island and how we need every Digimon's help to save the island, but he just stares at us with his hand on his gun. We start to think that maybe he just doesn't understand us, when, suddenly, he says "okay" and flies off, joining the city without so much as a struggle!
Purpose in the City: Vademon joins the restaurant, bringing the exotic tastes of his home planet to File City. Unlike most Digimon who work in the restaurant, Vademon doesn't have set hours he works.
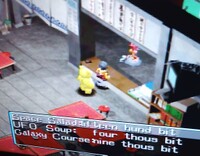
Instead, he just randomly shows up to serve his intergalactic cuisine, and he charges outrageous prices! Look at this menu!
- Space Salad (1,500 bits): This out-of-this-world salad increases HP and MP by 10. It also increases every other stat by 1 while increasing happiness and discipline and decreasing tiredness
- UFO Soup (4,000 bits): This even more out-of-this-world soup increases HP and MP by 20 and increases every other stat by 2. It also increases happiness and discipline while decreasing tiredness
- Galaxy Course (9,000 bits): Can you guess? Yes, that's right, this dish increases HP by 30, MP by 30, and every other stat by 3. It also increases happiness and discipline while decreasing tiredness.
Honestly, of all the restaurant people we have so far, this one seems the least worthwhile. I mean, 9,000 bits for what? 30 HP and MP and a measly 3-point increase in other stats? Are you mad?
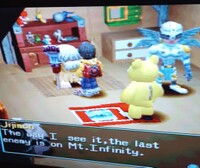
With that, though, I have an important Digimon World announcement to offset our disappointing new chef. With the addition of these three to File City, we've officially passed the halfway Prosperity Point… point. In fact, we now have 51/100 Prosperity Points! With this, talking to Jijimon (whose house has got a huge upgrade since last saw it) will reveal that the opening to Mt. Infinity has appeared behind the waterfall in File City.
He also tells us that he believes the final enemy could be in Mt. Infinity and warns us that it'll be dangerous. But yeah, we've hit the halfway point! But we're not going to be tackling Mt. Infinity anytime soon. instead, next month, we'll be… Hey! What the hell is that!?
Ambush from the Sky
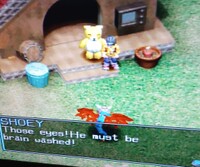
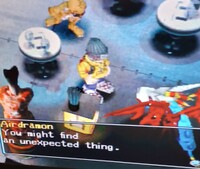
Upon leaving Jijimon's House after obtaining 50 Prosperity Points, suddenly a DIgimon comes from the sky, landing a sneak attack on us. This Digimon is Airdramon, who declares that he's finally found us and expresses a desire to defeat us. Staring into this aerial Digimon's eyes, we come to the horrific conclusion that he's brainwashed!
We realize the only way to snap him out of this is to fight him. So, sadly, we solemnly prepare to do battle to save Airdramon from his brainwashing. Airdramon is a champion-level Digimon with 4,400 health. The Airdramon fight can go one of two ways. You see, Airdramon has three attacks, those being Megalo Spark, Confused Storm, and Hurricane. Each of those attacks can cause a status effect. Megalo Spark causes stun, and Confused Storm and Hurricane cause confusion. Of the three attacks, Megalo Spark is the most dangerous, because, not only does it cause stun, but it also fires almost instantaneously, so you can't knock Airdramon out of the attack. The other two have long wind-ups on their attack animations, so it's perfectly possible to knock Airdramon out of his attack before he can fire it off. Because of this, the fight can really go one of two ways. Either you body Airdramon because he keeps casting Confused Storm and Hurricane and you manage to attack him out of his attacks, or you get ragdolled as he hits you with move after move causing some sort of status effect. I did this fight three times, and, in two of them, the latter happened, with the former only happening in the first attempt. Because of this, I don't know if I'd say the fight is hard per se, but it can definitely be an annoying fight and it will provide some challenge if you aren't prepared.
Once you defeat Aidramon, he declares that, no matter what happens, he must defeat you, then passes out. Concerned, we rush Airdramon into Jijimon's house for urgent medical attention. With Airdramon in critical condition and resting in a bed in the back of Jijimon's house, we confer with Jijimon and both agree that we need to climb Mt. Infinity and defeat whatever evil lays in wait, lest that evil harm any other Digimon.
Purpose in the City: Airdramon, as of right now, doesn't qualify as a recruitment. In fact, he won't even wake up until the final boss is beaten.
But once the final boss is defeated, Airdramon hangs out in the arena lobby, taking up a job as the city's official fortune teller. But don't worry! These fortunes are just silly nonsense and don't actually have any impact on the game itself… or do they?
I think this is a good stopping point. We're now officially halfway through getting every Digimon into File City. If we wanted to, we could now do the final dungeon. Of course, that wouldn't be any fun, so that's not what we're going to be doing! So, join us next month as we continue with the second half of our playthrough!
Shine Get
Written by: Waluigi Time (talk)
Hello there, 'Shroom readers! For this month's issue of Shine Get, we'll be taking the fight to Bowser in Super Mario 63 for the first time since Mario got demolished in a cutscene at the beginning of the game! Hopefully this time goes a little bit better than that. After all, there's a locked door in the castle gating progress, and Bowser has the key...
Secret Course: Peach's Garden
Before dealing with Bowser, I want to head to the castle's backyard, which was unlocked back in Issue 198. The doors on both sides of the castle's front door lead to the same hallway. The lower door is locked for now, but the upper door leads to the backyard. It feels kind of ominous back here, because there's no music playing, just ambient noises of chirping birds. I think having any kind of sound besides Mario draws attention to the lack of music, because the pure silence of the castle's front grounds doesn't have this effect. Or maybe it's just my experience playing Toy Story 2, where the boss levels are silent apart from ambience before you trigger the fight... Anyway, the left is a dead end, so to the right it is.
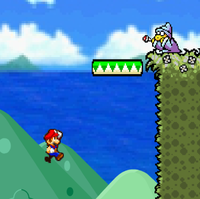
And the music kicks back in! Good old "Princess Peach's Castle" from Super Smash Bros. Melee. Still ominous though, a hint appears on the screen about the controls for spin attacking and diving, and there's another sign saying to spin attack the nearby box. Hm, I think something might be about to go down here. The box has a 1-Up inside though! I drop down and go all the way to the right, encountering Kamek. He's very blunt here and tells Mario that he'll have to kill him now because he might mess up Bowser's plan. We don't actually get to fight Kamek, he just teleports or flies around the arena, using his magic to summon Goombas, Bob-ombs, or just cause explosions. He can also rain Bob-ombs from the sky, but this will also drop some blue coins for healing. It's not really a battle against Kamek as much as it is trying to survive what he throws out, made easy by the amount of coins that drop. Over the course of the fight, he'll summon two pipes that spawn extra Goombas.
Eventually, Kamek decides he's wasted enough time, and tells Mario he'll just leave him trapped here with his goomba's[sic]. He spawns one last Goomba, then uses his magic Yoshi's Island style to power it up into Goomboss! Now the real fight begins. Goomboss uses the classic Goomba strategy of walking back and forth, apparently having no care for his underlings, as any unfortunate Goombas he happens to walk into will get knocked back and die. He can also leap offscreen and then land wherever you are. Finally, he's impervious to most of Mario's moveset, only vulnerable to ground pounds. He grows a little every time he gets ground pounded to make it more difficult, but between Mario's already impressive jumping and the two platforms going up and down around the arena, he's not that difficult to deal with. Three ground pounds later and he explodes, leaving behind a green Shine Sprite! Why is it green? I don't know. It doesn't even stay green when Mario picks it up.
Despite being considered a Secret Course, this still isn't the last one of that elusive Group A. The game actually considers this the third storyline Shine Sprite. The second one is still unaccounted for, though.
Secret Course: Bowser's Trap (In the Dark World)
The upper leftmost door in the main hall leads to a room with a portrait of Peach in it, and oh no the floor gives way and it turns into a portrait of Bowser, wow, what a shocker, didn't see that coming. It's actually almost comically easy to jump away, but I do have to make some progress, so here we go!
I don't usually do this, but I want to highlight the music used in all of Bowser's levels in this game. Rather than pulling Koopa's Road from Super Mario 64, Runouw used an arrangement of the song by ParagonX9 titled "The Alternate Route". You ever wonder what would happen if Bowser was on Newgrounds in the 2000's? This song would happen. It's a really good track that sets the atmosphere for these levels so well.
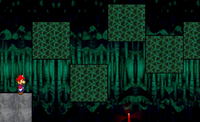
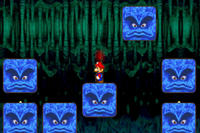
Bowser's hoarding Red Coins of his own, so I head to the left to grab the first one, then start the journey through this trap. Bowser really loves moving parts apparently, there's a lot of blocks moving up and down, and the first encounter with Bullies proper (not counting "Chief Chilly"). Under another set of moving blocks there's a Red Coin, with another block moving back and forth to drop down on to get it, which I did, but I wasn't so great at getting back up after that. Bowser's trap claims a whole one Mario, but there's more where that came from. The third Red Coin is just past all those moving blocks, and a fourth on top of the Thwomp here. You could ride the Thwomp back up after it lands to get this one, but I just triple jumped. It's easier that way.
There's more platforming with all the stops - platforms rotate, move, and spin to their hearts content - then I dash past some Thwomps before getting taunted with a message from Bowser himself, saying that Mario will never get past his Evil Elevator. Bowser has big cartoon villain energy here, just slapping evil onto extremely mundane things. So what makes this elevator so evil? Thwomps! As it moves upward, Thwomps will come down from above and try to squash Mario. So basically, just dodge these on the way up. I managed to avoid getting flattened, and grabbed the fifth Red Coin. I also rode the Thwomps to the top of the stack for a 1-Up, and a second one on the platform to the left. I probably shouldn't have dropped down because there was another Red Coin here that I probably could've cheesed, but it's not too bad. I just head across to the end, get on top of the platforms, and go back to the right for it. Going back to where I was, there's a Star Coin, but it's wedged between platforms that I have no way of getting through. I ignore it for now and press on, finding the pipe to Bowser, but there's also a Red Coin over a gap and an arrow pointing to it... Who could resist that? I jumped down to grab it, and then I missed the platform to the right... Now I have to do the entire level again!
Oh well, it wasn't that hard, and I still made it unscathed through the Evil Elevator. We'll just say I'm sticking it to Bowser, okay? On the platform below is the Hover Nozzle, and a sign from Bowser saying that his warp pipe disables F.L.U.D.D., so it's useless. Not useless for jumping up from below and grabbing that Star Coin, though! At this point I realized I explored everything and only have 7 Red Coins, so uh, I'll be right back...
You know where it was? It was on top of that first set of Thwomps before the Evil Elevator. Go figure. Anyway, I get back to the end, and grab the Shine Sprite! And even though I made it all the way to the end of the level, it kicks me back to the castle with the Shine Sprite, because of course it does. Let me just run through the level again real quick...
Back at the end, I head down the pipe to confront Bowser himself! Bowser taunts Mario, saying a wimp like him could never grab him by the tail and swing him around by pressing right and left repeatedly. Real smooth, Bowser. Bowser attacks by spitting fireballs or a constant stream of fire breath. The fun thing about Bowser's fire breath is that it makes Mario jump around when he gets hurt because, well, it's fire! I think the ice water in Chief Chilly's arena probably did this too, but I didn't have direct experience with that this playthrough. Sure had direct experience with Bowser's flames, though... Anyway, Mario got beaten within a literal inch of life, mostly because I was trying to grab a screenshot during the fight, but I still managed to get it one try. Just dive behind him, which isn't too difficult since his response time isn't as good as it was in 64, then right and left him into the bombs on the side of the arena! He's beefier than his original counterpart though, and it takes three hits. I undershot every time, but he still didn't turn around in time to avoid me grabbing him by the tail again.
After being defeated, Bowser groans, disappears into the sky, and drops a key. I grab it and return to the castle, where I'm told that this unlocks the castle's basement. Woohoo, a brand new set of levels to kick off the post-200 era with!...?
Suddenly, Bowser's voice echos, telling Mario that he wouldn't give him the key to the basement that easily - the key was actually cursed and will warp Mario far away from the castle!
Secret Course: Mushroom Kingdom 2
Luckily, there's something useful in the outskirts of the Mushroom Kingdom, because Mario wouldn't have been conveniently warped here if there wasn't. After a bit of platforming in these grassy plains, I discover the Turbo Nozzle, finally accessible! This thing is super fun, and in terms of speed, it puts cartwheeling Mario across the screen to shame, and also causes him to crash into walls if you come in too fast, which is always good for a fun time. You can also use it to dash across water, and it works just as well underwater too, and since you're down there it'll be constantly replenishing water. The only downside is that it's basically worthless for horizontal movement, but that's what the Hover Nozzle is already for, and you can switch between nozzles you've collected in a level at any time.
Anyway, there's an underwater bit here to get accustomed to the Turbo Nozzle with. There's two switches down here in tunnels accessible by going to the left and right. I press both of them after a bit of Turbo-ing around, and a platform appears above the water. I ride it up to the clouds, and this place is very not Turbo Nozzle friendly! Lots of small platforms that are easy to rocket off of, but eventually, the platforms become spaced too far apart to reach with the regular jump. The Turbo Nozzle comes in handy once again, and thankfully there's some coin trails to let you get the hang of it.
With the platforming sorted out, I reach the next screen, and Peach's Castle is already in view. I guess Bowser's teleportation wasn't as far away as he thought, huh? I head all the way to the right, where there's a box for the Rocket Nozzle! This one propels Mario upward to reach new heights that weren't possible before. It eats through F.L.U.D.D.'s water supply much faster than the others though, using up 5/100 units of water each time. The tutorial here is basically just... go up. Once I reach the top, the good old Hover Nozzle presents itself for the last platforming bit, and then I encounter four more Hover Nozzle boxes.
Seriously, what's up with this? Was E. Gadd having a going out of business sale? Who knows. Anyway, after this I end up not being able to go any further with the Hover Nozzle, which is where the game teaches you about how to switch between nozzles. The rest of the level switches between the same scenarios for Rocket, Turbo, Hover, then back to Rocket. With the platforming conquered, I reach the Shine Sprite and grab it, then get sent back to the castle. This is the second storyline Shine Sprite by the way, so I guess I was supposed to come here before fighting Kamek and Goomboss.
Even though I've just now unlocked the basement, I get a message saying I have enough Shine Sprites to access the last door down there where Bowser is hopefully hiding. Hurray for overachieving! Also, yes, despite the key being cursed, Mario still has it and can unlock the basement with it. No, this is never explained, so just roll with it. Anyway, with the completion of this level, the Turbo and Rocket Nozzles are now available everywhere we find them instead of being transparent and unusable.
Also, we can revisit Mushroom Kingdom 2 at any point with a new warp pipe on the left side of the castle grounds. You can also return to the original Mushroom Kingdom tutorial from the castle grounds by walking offscreen to the left (this has been here the whole time), and once back here, walking offscreen to the right instead of using the warp pipe leads to Mushroom Kingdom 2 as well. This is pretty confusing, actually, you walk to the left and then go back to the right and end up somewhere completely different. There's no reason to go back to these places, but if you want to, you can.
I'm really questioning this game's definition of "Secret Course" considering we were pretty much forced to visit two of these levels. Oh well. With a nice, even total of 20 Shine Sprites and 20 Star Coins, that's roughly the first third of the game completed! Next time, I'll use that key to unlock the basement, which will hopefully open the door to getting more use out of these new nozzles. See you then!
Galactic Expedition
Written by: Meta Knight (talk)
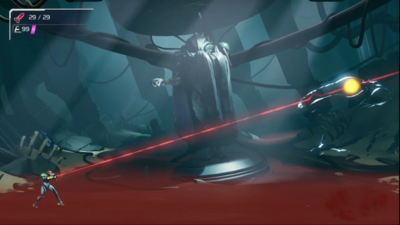
It's been five years since the last expedition was in The 'Shroom. Deep in the archives you'll find complete guides through the horrors of Planet Zebes in Metroid, and the isolating depths of Metroid 2 to exterminate all of the titular creatures on their home planet. Since then, a new journey ushers in a sense of dread in the most spectacular way.
In this special issue, Galactic Expedition revives with a trip to Planet ZDR featured in Metroid Dread. Personally, I don't think this wonderful entry needs a walkthrough because the overworld is so well-designed. Samus feels so smooth to control, and the game always seems to put you in the right place without telling you anything. In this sense, it feels both linear and non-linear at the same time, while still allowing the capability to discover new pathways through sequence-breaking. I might go over some of these alternate routes and other tricks found both in Metroid Dread and throughout the series in the future.
Instead this section will highlight a different aspect of Metroid Dread that I adore: the bosses. For the most part, they are incredibly well designed. To be clear, they can be challenging if you're not aware of what's going on, and on my first playthrough I certainly died a lot. What makes this gallery of rogues so engaging is the fact that every attack has a pattern to watch out for, and can be avoided, which is exactly what I was faced with clearing the game on Dread Mode (I died a lot on that playthrough as well).
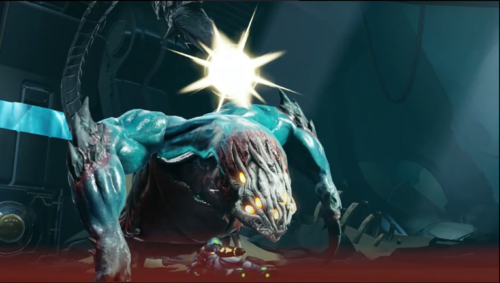
This isn't a review section, so without further adieu, let's kick things off with Corpius!
Corpius
Phase One
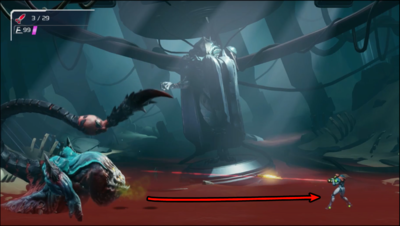
The easiest way to start off with this phase is to just keep unloading missiles right into Corpius' head. At this point, the head is the only vulnerable point, so keep spamming away. If you run out of missiles, then continuously fire the Charge Beam instead. You'll have to keep an eye on what Corpius is doing too, because body language is the key giveaway for determining which attack is about to be unleashed.
| Spitball | ||
|---|---|---|
|
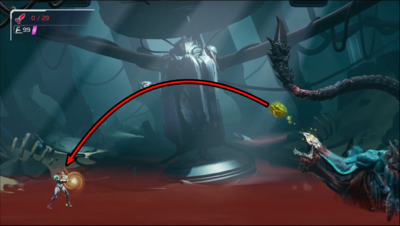
Corpius will take a gulp as it moves its head back toward its body, then spit out a projectile toward you. This will move in an arching fashion, so either get out of the way, or shoot it to regain some extra energy or ammo. | ||
| Tail Whip | ||
|---|---|---|
|
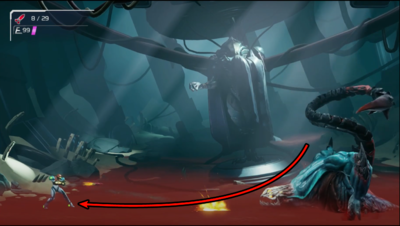
Corpius' head will be low to the ground, and its tail coiled into a helix formation. When this happens, it will strike in front of you by whipping its tail on the floor. This has a pretty long reach, so jump above and out of the way. | ||
| Tail Spear | ||
|---|---|---|
|
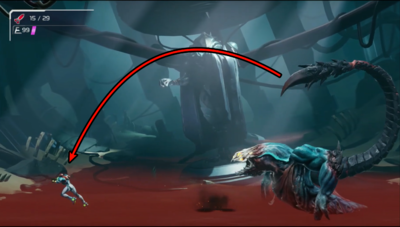
For this attack, Corpius lifts its neck into the air and pulls its tail back. It will be a singular curve, and Corpius will then attempt to pierce you by attacking in a forward arc. Jump back to avoid it, or if you don't have enough space, then you can attempt to get closer to Corpius on ground level, but that's riskier. | ||
After enough damage in this phase, you'll get a cutscene and proceed to the next segment.
Phase Two
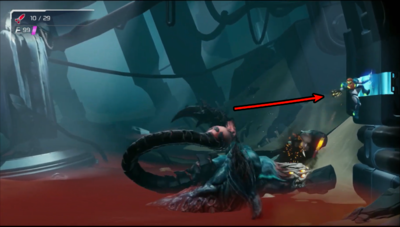
This part is pretty much the same as the last. The only difference is that this time, Corpius is invisible, and you have to attack a specific portion of the tail instead of the head. The weak point is made fairly clear because it glows. The section starts off yellow, but will gradually turn red as this phase continues. The attack patterns remain the same though, so you can use the same tactics to dodge. As far as being able to tell which attack Corpius will do, focus on the position of the tail that's glowing. That in combination with the subtle outline enables you to make out the shape of the tail, and consequently how to counter.
Upon dishing out enough ammunition into the tail, you'll get another cinematic showcasing Corpius' rear. As unfortunate as being mooned by an alien creature is, this is actually a key moment. Slide underneath Corpius to trigger a quick time event. Parry when the flash happens, and rapidly shoot your missiles.
Phase Three
Either through a successful barrage following the quick time event, or by doing enough damage normally, the last portion begins. This combines everything from the previous two phases, along with introducing some new attacks. Aim for the head when Corpius is visible, and the tail when transparency occurs. For familiar attacks, utilize the same tactics, but watch out for the following too:
| Poison Gas | ||
|---|---|---|
|
Corpius will keep its mouth closed and you'll see yellow smoke leak out. It will also move closer toward you, so stay distant and jump onto the Spider Magnet on the wall to the side. This is a perfect opportunity to get some shots into the head. | ||
| Tackle | ||
|---|---|---|
|
The reaction time is pretty quick for this attack, but chances are if you've hung onto the wall long enough, Corpius will move close to the edge. Usually, this means it is about to lunge precisely at the Spider Magnet you're hanging onto. Jump over Corpius quickly to get out of the way. | ||
You'll need to do enough damage to both the head and the tail, but you might encounter a situation where Corpius is invisible and the tail is not glowing. When this happens, it means Corpius is in the middle of turning around. Move away toward the opposite side, and when it reappears, slide underneath to trigger another quick time event. Getting a successful counter here is pretty much guaranteed to end the fight with enough missiles spammed, but even without that it isn't much longer for you to succeed. When it's all said and done, you'll be rewarded with the Phantom Cloak, and you can continue on your adventure.
Overall, Corpius isn't too bad, and is a good introduction to the nature of how many of the bosses in Metroid Dread play out. Hopefully you found something to enjoy throughout this edition. Thanks for joining me on this Galactic Expedition, and I'll see you next time.
Pitohui's Pokémon Academy
Written by: Hooded Pitohui (talk)
Well, class, today is a momentous occasion, isn't it? I'm certain I hardly need to tell you the reason behind the fireworks and the celebratory atmosphere. Now, I know that, amidst all of the celebrations, it might be a tad difficult to focus on your coursework today. You all want to get over to that new mall, I'd presume, yes? Well, worry not, we'll try to keep this short and interesting!
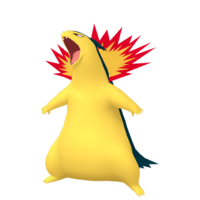
In honor of the fireworks lighting up the night sky, I thought we might do well to have some fireworks of our own, which is why, alongside the staff of The 'Shroom having included a Cyndaquil and a Quilava among their ranks, I've brought along a (Johtonian) Typhlosion for our class today! I'm sure you're just erupting with excitement, so we'll get underway right away!
As always, if you need a refresher on our course policies, open up the box below as we begin.
First, a Smogon University course, this course is not. No, this academy's lessons are designed to get trainers of any stripe thinking about how they can raise their Pokémon, and, as a result, aren't designed to keep up with the widely-accepted metagame for the series. In some cases, the way I've raised my Pokémon may even flies in the face of conventional wisdom. If you're looking for top-tier strategies, do check out Smogon, but if you merely want to get a little deeper into raising Pokémon while still doing things your own way, feel free to use this section as a reference.
Since we all know the importance of citing our sources, I also need to credit the design of some of the tables used in these lectures to Crocodile Dippy, author of the Pocket Handbook which can be found in early editions of Strategy Wing.In addition, if you find yourself struggling to remember the terminology we use in this course, please open the box below for a cheat sheet on the most common terms we'll discuss.
Base Stats: Base stats are the values associated with a particular Pokémon species, and are the same across every individual Pokémon of a given species. You have no influence on them. You can think of them as traits tied to a species. A chimp isn't ever going to be able to get as good as digging as a mole will be, and, likewise, an Abra is never going to have the defensive prowess a Shuckle has.
Individual Values (IVs): Individual values, as their name implies, are associated with individual Pokémon. They range from 0 to 31 in each stat, with 31 being considered a "perfect" IV and higher numbers corresponding to different stats. Magikarp A and Magikarp B will have the same base stats, but they may very well have different IVs. To stick with the animal analogy, one mole may be born with larger claws than another mole, and that first mole is probably going to have an easier time digging through dirt than the latter. Individual values are set in stone, strictly speaking, but you can use Hyper Training (from Generation VII onwards) to functionally get a perfect IV in a stat.
Effort Values (EVs): Effort values are the one thing you can easily change. A Pokémon can earn, primarily through battling, but also through means like the use of certain items or mechanics like Super Training, up to a total of 510 effort values, with up to 252 in any given stat. To finish off the animal analogy, no matter what kind of claws a mole is born with, moles who have more experience digging are probably going to be better at digging than moles which have never dug.
Nature: A Pokémon's nature is, more or a less, a stat modifier with a name meant to make it sound like a Pokémon has some personality. Natures will raise one stat by ten percent and lower another stat by ten percent. Some natures raise and lower the same stat, canceling out the effect and leaving stats unchanged. Natures can be functionally changed with the use of special mint items from Generation VIII onwards.
STAB: STAB stands for Same-Type Attack Bonus, and refers to the boosted power of moves that match the type of the move's user. To illustrate this, consider the case of a Lombre, a dual-type Pokémon which is both a Water-type and a Grass-type. Any Water-type moves Lombre uses will have their power boosted by 1.5x, and any Grass-type moves Lombre uses will, likewise, have their power boosted by 1.5x. (There are circumstances where this does not apply, and, while the 1.5x multiplier is typical, some games use other multipliers.)
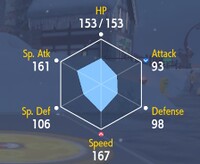
Examining Typhlosion's base stats, it should be immediately apparent to you that we have an offensive specialist here. Typhlosion's defensive stats are all middling at best, so we'll focus exclusively on the offensive stats. Speed is high enough to be worth investing in as opposed to considering something like setting Typhlosion up in a Trick Room team (it's nowhere near low enough for that, in fact), so we look at the two attacking stats and find that special attack is higher. Our path forward is clear. We'll invest fully in speed and special attack and turn attack into a dump stat. We'll still want to aim for 31 IVs in the three defensive stats, though. In my case, I had a bit of bad luck breeding this month and ended up with 31 IVs in everything but defense, so I patched that up with a little Hyper Training. Generally, though, if you want to save yourself a Bottle Cap, aim for perfect IVs in everything but attack.
|
Name: | Typhlosion | Base HP: | 78 | |
| Species: | Volcano | Base Attack: | 74 | ||
| Type: | Fire | Base Defense: | 78 | ||
| Abilities: | Blaze | Base Special Attack: | 109 | ||
| Flash Fire | Base Special Defense: | 85 | |||
| Base Speed: | 100 | ||||
Our discussion of EVs will be brief this session. Simply put in 252 EVs in special attack and speed! Quite easy, no? As for the remaining six, since HP and defense are equally low, I would advise against trying to split the difference between the defensive stats by investing in HP. Just invest the remaining six in Typhlosion's special defense to shore it up, and try to keep Typhlosion away from physical attackers.
We know already that we don't care about attack and would, in fact, prefer that it be as low as possible to make moves such as Foul Play less threatening, so, for a Nature, we're choosing between Bold, Modest, Calm, and Timid. We should aim to boost one of our most important stats, so we narrow that further to Modest and Timid. You may be able to do well with either, but, personally, I'm going to go with (and recommend) a Timid Nature, because that extra edge on speed might allow Typhlosion to KO Pokémon before they can threaten it.
We're almost to our discussion of a moveset, but, first we need to choose an ability. Now, Blaze, common to all Fire-type starter lines and providing a power boost to Fire-type moves when a Pokémon's HP is low, isn't a bad ability. Should it be your only option, you can run with it successfully. I would still, however, recommend Flash Fire over it. While the power boost that it can provide is more situational, it gives Typhlosion an immunity. If you can predict an opponent will use a Fire-type move, you can safely switch into Typhlosion, taking no damage (from the move - hazards, especially Stealth Rock, will still be an issue) and getting a power boost. Overall, both abilities are usable, but we're going to continue onward with Flash Fire.
Now we can get into discussion of a moveset, and we'll begin, as always, by choosing a powerful STAB move. All of the usual suspects are in Typhlosion's learnset. We can choose from the reliable Flamethrower, the powerful-but-stat-lowering Overheat, or the powerful-but-inaccurate Fire Blast. Normally, we'd choose between these three... and we still will, but we have a better option for our primary STAB move, and that is Eruption. Eruption has a base power of 150 (compare to Fire Blast's base 110 power or Overheat's base 130), and it doesn't have an accuracy drawback. There is, however, a catch. Eruption's power is reduced as Typhlosion's HP is reduced. The less HP Typhlosion has remaining, the less damage Eruption does. We still want to run with Eruption, because a fresh Typhlosion will be able to do great damage with it, but we'll also pick from one of our standards as a secondary STAB move for when Typhlosion is worn down.
Which of the three moves you choose as your secondary STAB move is, to a degree, a matter of preference. I would say that any of them are workable, but which is best will depend on your strategies and what team you place Typhlosion in. Overheat stands out as the riskiest option to me because of its special attack drop. While it could be effective if you were confident Typhlosion was about to be knocked out anyway and you simply wanted to take a parting shot, if your prediction is wrong and you take that parting shot prematurely, you've limited all of Typhlosion's offensive options. Normally, I prefer the more conservative Flamethrower, because I'm fairly risk-averse when it comes to low accuracy moves, but since this is a secondary STAB move that will get used when Typhlosion is already in a precarious position, I'm going to go with Fire Blast.
| Eruption | Special | The user attacks opposing Pokémon with explosive fury. The lower the user's HP, the lower the move's power. |
| Fire Blast | Special | The target is attacked with an intense blast of all-consuming fire. This may also leave the target with a burn. |
| Shadow Ball | Special | The user attacks by hurling a shadowy blob at the target. This may also lower the target’s Sp. Def stat. |
| Focus Blast | Special | The user heightens its mental focus and unleashes its power. This may also lower the target's Sp. Def stat. |
For our remaining two moveslots, we're going to forgo any status moves and stick with special offensive moves, since we've set up a fast powerhouse and there are better Pokémon for setting such things up. Now, we'd like to have more than Fire-type moves, so our options are: Shadow Ball, Focus Blast, Solar Beam, and Extrasensory (this one can only be learned via a Mirror Herb). I want to address Solar Beam first. Solar Beam is a classic Water-type counter on Fire-types, with a wide distribution across Fire-types, and it's not a bad option, actually covering all of Typhlosion's weaknesses, if you have harsh sunlight set up. We are not teaching Typhlosion Sunny Day, so you would be reliant on other Pokémon on its team to provide the sunlight. You can try this and experiment with it if you want, but it's not something I'm going to pursue.
That leaves us with three options, and we'll further narrow them down by comparing Shadow Ball and Extrasensory, since they have the same base power (80). Extrasensory has a 10% chance of making the opposing Pokémon flinch, Shadow Ball has a 20% chance of lowering the opponent's special defense, and neither of them really have an advantage over the other as far as type goes. While flinching could be useful, it's going to be very situational. It's too rare to rely upon, and, ideally, Typhlosion is knocking out opponents outright, not banking on them flinching so it can finish them off. The special defense drop, meanwhile, benefits Typhlosion across the board, so, we will go with Shadow Ball.
That leaves Focus Blast as our default final choice... even in spite of its accuracy problems. At least it covers Typhlosion's Rock-type weakness and comes with its own chance of a special defense drop.
With that last move slotted in, we conclude this session's lesson! I told you I'd keep it brief this month, didn't I? Now, I know some of you have been asking about a supplementary session to go over how to actually, say, raise a Pokémon's EVs. Do be sure you check the main page of The 'Shroom for more information on that. For now, though, I do believe I should let all of you - and Typhlosion - get on with the fireworks viewing!
Four Steps for a 3D World
Written by: Hooded Pitohui (talk)
Hello, all you readers of The 'Shroom, and welcome back to Four Steps for a 3D World, a section where you can skip this little two-paragraph intro if you've been following along for a few months! For those who haven't been following the section, what we're doing here is taking levels from Super Mario games directed by Koichi Hayashida and seeing if we can successfully identify the four steps that, according to a design philosophy Hayashida has discussed in interviews, a Nintendo-made 3D Super Mario level should take a player through.
According to Hayashida, these levels are (in the games he has influenced, at least) designed around an introduction that lets a player learn a mechanic in a safe environment, further development that builds on what the player is learning and introduces more complicated aspects of a mechanic, a twist that adds some kind of significant wrinkle or challenge to force players to consider the mechanic from a new angle, and a conclusion which gives players one final satisfying chance to show they've mastered the mechanic. Knowing these four steps, we dissect levels from games he directed and see if we can tease out all four steps hopefully gaining some insight as to when it's advantageous or disadvantageous to stray from these four steps.
For this month, we're jumping back into the 3DS title, Super Mario 3D Land. While I have fond memories of many consoles, truth be told, I've always been more of a handheld person. The GBC, GBA, DS, 3DS, I always considered them fantastic little gaming devices. That may, perhaps, go a ways towards explaining my fondness for Super Mario 3D Land. Are its levels less diverse than other 3D Mario titles' levels? Yes. Are its special worlds, disappointingly, mostly just "harder" remixes of existing levels? Yes. Despite these flaws and more, I still find it charming and enjoyable, and I wanted to cover it for the big two-zero-zero.
More specifically, I wanted to cover a level that I have fond memories of messing around in when I was young, enjoying the aesthetics and - not entirely incidental to my choosing it for this issue - the night sky and the firework-like colorful lights in it. I don't expect this month's level to align that closely with our typical four steps, but let's take a look at what it offers anyway! With no further ado, let's jump into Special 1-3!
In terms of our four steps, this is the messiest level we've covered to date! It gets, at best, through two of them, taking a bit of time to get to the Development section and then losing the thread right afterwards. Now, the question is, does that make this a bad level? My answer is "yes and no". It's true that this level doesn't really evolve the mechanic it uses, doesn't really provide anything new for the player to do, and doesn't provide a challenge. A game where the majority of the levels were structured the same way as this one would be a boring game indeed!
At the same time, I still think that this level is a little fun in its context? Amidst a bunch of special world levels that boil down to collecting clocks to beat a level on a restrictively low timer or playing through a level you've already seen that now has spiky enemies spammed around the map, it's not bad as a refreshing breather, a level to just run around in, have fun in, and enjoy the atmosphere in. That's probably why I returned to it so often back in the day! It's a level built around presentation over gameplay. This level and its regular world counterpart were meant to both show off the 3D of the 3DS and bring back a sense of nostalgia with platforms modeled on retro sprites. It's a gimmick level, and, judged on those merits rather, not a bad one, I'd say.
This level is messy, because it prioritized aesthetics and immersion in its atmosphere, but that's not such a bad thing, applied very sparingly. Maybe it's a good reminder that, as we continue on with this section and analyze and critique more levels, that it's not bad, once in a blue moon, to just sit back and... well, enjoy the fireworks.
So, with four types of enemies in this level (not counting the Baddie Boxes), three Fireball platforms sprinkled throughout, two-hundred issues of The 'Shroom, and one night of celebrating the fireworks ahead of us, this has been Four Steps for a 3D World for the month!
Shoeyball: Gridiron Conquest
Written by: Coach Shoe (talk)
Hello, and welcome to a new type of Strategy Wing section! This section is going to be a little different than the usual style, covering one of the greatest game series that no longer exists, the old NCAA Football games made by EA Sports. Featuring every FBS school at the time along with every FCS school, the NCAA Football games were an important part of my childhood. Whether it was just playing games against my brother, trying to complete all the classic game endings featured in NCAA 2005 (which was a really underrated feature of the game), or playing a number of overtime games in order to get all the rivalry trophies (setting games to overtime was the quickest way to win them and thus to claim the trophy), I spent a lot of time with these games.
The games had it all, including full lists of records you could break, bowl and rivalry trophies you could claim (because as we all know, if a game doesn't end with the winner getting a trophy, does it really matter?), and more. But the most important mode was the dynasty mode. Picking any team in the FBS (or, if you wanted to, you could import an FCS team into the FBS), you become the head coach of the team. It's your job to make that team as good as possible. You set the offense and defense and you recruit the players. You can even play the games if you want. If you do well, glory can be yours, and you can even get job offers from better teams to be their coach! If you do poorly, however, you can be fired, and only the lowest of the low will hire you. This is the mode we spent the most time playing as kids, raising empires from nothing to claim the ultimate glory. So that's what we're going to do in this section, too. But, as kids, we also had three rules we always had to follow that we're also going to follow in this section:
- You can't start out with a ranked team.
- You can only actively play one game a season; the rest will be simulated.
- You have to play as if you're a regular coach, which means no going for it on 4th down in stupid scenarios.
So, with the rules established, it's time to start our dynasty, but first, which game should we use? Now, as a kid, I have the most fond memories of NCAA Football 2005, which I do have a copy of for the PS2. I also have a copy of NCAA Football 2009 and NCAA Football 2010, both of which I had a lot of fun playing. Those two also have deeper mechanics then NCAA 2005. Sadly, I don't actually own a PS2, and none of the local used game shops had them for sale when I went to look (they did have a Magnavox Odyssey 2 for 100 dollars, which it took every portion of my will power to not buy). Since we can't play NCAA 2005, instead we're going to be doing the only NCAA game I have on the Nintendo GameCube, NCAA Football 2003, a game which, while I didn't play a lot, does have some symbolic value to me because its cover athlete is legendary Oregon Ducks quarterback Joey Harrington. It was Joey Harrington's Ducks victory in the 2002 Fiesta Bowl which made me into a lifelong Oregon Ducks fan, you see. Go Ducks!
Now that we have our game picked out, the next question is "which team should we pick for our dynasty in NCAA 2003 for the Nintendo GameCube?". Well, I think the answer is obvious; we will be coaching the Indiana Hoosiers of the Big 10!
Why Indiana, you might ask? Well, here's the thing. Indiana is known for many things, like college basketball success, The Indianapolis 500, and a weirdly large amount of vice presidents between 1869-1913, but one thing Indiana is not known for is college football success. In fact, Indiana is one of, if not the least successful Power 5 college football programs. For reference, Power 5 refers to the five "major" conferences in college football, these being: the ACC, the Big 10, the Big 12, the Pac-12 (RIP), and the SEC. Each conference, at this point in history, primarily represented a collection of teams in a certain region, with the Big 10 consisting of teams from the Midwest (and Penn State, which is in Pennsylvania).
For additional clarity's sake, in NCAA 2003 there's a sixth power conference the Big East (a strange mishmash of basketball-only schools and football-only schools), which now no longer exists in Division 1 football after it was eaten alive by the ACC, Big 10, and Big 12 during the early 2010s NCAA Conference realignment. The football remnants of those who were left behind ended up forming the American Conference, and the basketball-only teams reformed into a new basketball-only Big East.
A Losing Record
Anyways, back to our subject! Indiana, despite being in the Big 10 since fucking 1899, only has two Big 10 titles, one in 1945 and one in 1967. In 1945, Indiana saw perhaps their greatest success under the coaching of College Football Hall of Famer Bo McMillin. With Bo leading them, they finished 9-0-1 (overtime in college football didn't fully become a thing until 1996, so games could end in ties), winning their first and, so far, only outright Big 10 championship. Sadly, they didn't get to go to the Rose Bowl or any postseason bowl, because the Big 10 wouldn't sign the agreement to play in the Rose Bowl until… the next year.
Their other Big 10 championship was a strange one. Coached by John Pont, Indiana went 9-1 in the regular season in 1967, with their only loss being one against fellow conferencemate Minnesota. The conference would end with a three-way tie between Purdue, Minnesota, and Indiana, each of whom went 6-1 in Big 10 play. Indiana would be awarded the prestigious Rose Bowl berth, based on a tiebreaker. You see, Purdue had played in the Rose Bowl the year before, and the Rose Bowl had a rule where a team couldn't compete in the game two years in a row, so they were out. That just left Minnesota and Indiana. Now, had Indiana and Minnesota been the only co-Big 10 Champions, Minnesota would have been given the bowl berth, but, since it was a three-way tie, the Big 10 moved on to the third tiebreaker rule, which granted the Rose Bowl to the team with the longest Rose Bowl drought. Since Indiana had never gone to the Rose Bowl before (or since), they were given the berth. They would then go on to lose at the Rose Bowl against the University of Southern California, too!
To demonstrate just how bad of a record this is, in contrast to Indiana's lack of success, the Chicago Maroons, who haven't been in the Big 10 since 1946, have seven Big 10 championships. The Penn State Nittany Lions, who've only been in the Big 10 since 1990, have four Big 10 Championships. Easily the least successful member of the Big 10, the Indiana Hoosiers haven't won a bowl game since 1990, and, when this game released, they had only had seven winning seasons in twenty-four years! In fact, the year this game released, they had gone 3-9! Such is Indiana's lack of success that they've only played in 13 bowl games, with a 3-10 record. And the last time a head coach of Indiana left with a winning record was Bo McMillin, who last coached Indiana in 1947! So, as you can see, we've got our work cut out for us! With that uphill struggle in mind, join me as I show you some tips and tricks of the dynasty mode as we attempt to turn Indiana from basement-dweller to Big 10 powerhouse!
Setting Up Our Season
The goal of this is to not only make Indiana into a national powerhouse, but to outright win the national championship! Now, it's possible that we won't be able to do that at Indiana. In fact, it's possible they'll fire us the first year! But if that happens, we'll just move on to a different team! Now, one important thing is that, taking rule number two a little further, I will not be personally playing any major games. The goal of this is to build a team good enough to win outright without me needing to play. Oh, also, for extra fun, I'll track my season's success against that of Indiana's in real life. It's not that the two are comparable, mind you, but just for a little added fun.
The first thing we have to do is design our coach, and I'm thinking we go for a classic coach feel. I'm talking glasses, balding, and seemingly both young and old at the same time. Now as for the name of our future hall of famer, I'm thinking something classy, something sophisticated, something that epitomizes what I stand for… I'VE GOT IT!
As part of this little experiment (can you call it an experiment?), I'm going to try and keep the schedule as close to Indiana's 2002 schedule as possible (the 2003 game would come right after the 2002 schedule). Unfortunately, for some reason I can't schedule my week one against William & Mary, so, instead I'm going to schedule Miss Valley State, because I like their team logo!
With our schedule set, we can now move onto looking at redshirting players. For those of you that don't follow college football, basically, a college player can only be at one team for (usually) four years. That's when they graduate college and are no longer eligible to play. However, college sports have a thing called "redshirting," and what that means is that you designate a player as part of your team but say he's not going to play in the season. There are two types of redshirting, a preseason redshirt and a medical redshirt. A medical redshirt would be something you use if a player got a season-ending injury early enough in the season. You can redshirt them so that they don't lose a year of eligibility. Preseason redshirts are mostly for promising freshman players or decent players who aren't going to get a lot of playing time. You redshirt them so that they don't lose a year of eligibility before they become a prime asset to the team, because, again, after four years of playing, they're gone!
Now this won't be particularly important this season. We're a pretty bad team with a composition that's pretty heavy on seniors and juniors, most of whom have already been redshirted. So, instead, we'll move onto our coach options. This is where we can set up our playbook as well as our coaching philosophies. Eventually, I'm going to set us up to be a more pass-heavy offense, but for right now, we don't particularly have great wide receivers (WR), with our best one being only ranked a 66/100 overall. So, for this season, we're going to do 60% run and 40% pass. We're also going to switch out playbook to Oregon's playbook, because… go Ducks! As for our defensive gameplay, being in the Big 10, we're going to plan to call plays defending the run 56% of the time, as opposed to defending the pass 44% of the time. We're also going to really crank up the aggression, because I want blitzes and ball hawks! With that, we're ready to start our season!
Our First Season
Now, for this first season, I'm just going to simulate it all and not worry about playing any games. This is because the first year is going to be rough! In fact, the first few years are going to be rough! And boy was it! The season actually started out okay, with us splitting our four non-conference games 2-2 before losing our first Big 10 game against Ohio State by 7-38. Unfortunately, after that, the wheels fell off, as we would lose every game from then to finish 2-10 overall and 0-8 in Big 10 play!
In real life, Indiana would finish the 2002 season 3-9, with the biggest differences being that, while we beat Kentucky and lost to the Central Michigan team, the real Indiana flipped that. In addition, Indiana beat Wisconsin, while we lost to them 10-41. With that, we move onto the offseason, where it's time to put our first marks on the team as a coach!
Offseason Basics: Recruiting
The biggest and most important part of the offseason is recruitment. Because this isn't the NFL, as stated earlier, you can only have a player for a maximum of five years. Assessing our needs, what we want to do is click "x", which will bring up a list of needs.
Now, as you can see, we have quite a few needs, and, unsurprisingly, we're not getting a lot of interest from blue chip prospects (prospects rated between four and five stars). What we're going to do is target the few blue chip prospects that are interested in us while attempting to pick off some of the lower-tier prospects that don't care for us.
Recruiting is kind of the meat of dynasty mode, and there are quite a few dynamics to it. All the recruits across the country are split into multiple categories. First, you've got "State Prospects," those being people from the state your school is in (in this case, Indiana). Then you've got "National Top 100 Prospects," and we're just going to ignore them for now, because they won't return our calls (lol). Next, we have "all prospects," which is every prospect in the country sorted by position and re-sorted by star rating. Finally, there are "interested prospects". Those are prospects who list our university in their top three choices.
Now, actually looking at our prospects, first we look at our needs, and that's based on players leaving our team. Filling your needs is going to be the top priority of recruiting, so our best bet is to first look at the interested prospects list, because they will be the easiest to recruit. As you can guess based on our 2-10 record, there weren't a lot of blue chip prosects that wanted to play for us. In fact, it was mostly 1-2 star prospects on the list. To be honest, I mostly ignore 1-2 star prospects unless I'm in desperate need of players, especially when coaching a Big 10 school like Indiana where a team of 1-2 star players would be eaten alive.
Now, luckily, we did get a couple of 4 star recruits, with one at corner back and another at middle linebacker. So, basically, we're going to take a look at all the 3 and 4 star players that are interested in us and see if we can fill our needs with them. Luckily for us, yes, we can fill our needs primarily with interested prospects, although many of them are 2 star prospects, which will come in handy if things get truly desperate.
When you find a prospect you'd like to convince to join your team, you click on them and then you're given four options to help convince them. Those options are depicted in the image below:
As you can see, each option costs points, and you only get so many points per week. Now, you can actually use multiple options for each prospect. Say you had a 5 star quarterback recruit you really wanted and you were his third choice; you could do everything on that list to increase the odds of him playing for your team. Be cautious, because if you do that too many times, you're going to quickly burn up your points. In certain years, that wouldn't be so bad. You might be able to get away with it if you have a young team, for example. Generally, though, I wouldn't recommend it.
The way the point system works is pretty self-explanatory. Basically, the more interested a prospect is in your team, the less points it'll cost to convince them to come. Referencing the above picture, the interest bar is almost full, so visiting them only costs eight points. If the interest bar was, say, almost empty, that same visit would cost thirty-two points. It's not really worth it to go after prospects without at least half of their interest bar filled, because, really, no matter what you do, you're not going to convince them and you're just going to burn points. This process goes on for five weeks, and each week, you're given a new number of points. Each week, you have the chance of a prospect committing to play for your school, but, at the same time, each week, there will be fewer and fewer players to recruit from as they sign with new schools.
But what if you can't make a team just from interested prospects? What then? Well, here's where I made a mistake! I ended up trying to recruit from QB, HB, and WR prospects that weren't really interested in our program, hoping I could convince them. What I didn't realize until the third week was what I should have done, which was checking the State Prospects. You see, while the prospects from Indiana might not have had us in their top three picks, they are all, by and large, still fairly interested in our program! Had I gone to them from the first week, I'd have probably gotten better recruits and gotten better use out of my points. Sadly, I didn't, and so I didn't have as good of a recruiting class as I could have, and, to make matters worse, I didn't even fill all my needs! But don't worry if you, say, fail to recruit a single FS (free safety) and don't have any on your roster. The game will generate a walk-on player for that position to join your team. They'll be pretty bad, but they'll at least get you by!
Offseason Basics: Training
After you finish recruiting, you can move on to training players. Training players trains all of your returning players and allows them to improve as players. In later installments in the series, you have more direct control over this, with NCAA Football 2005 giving you the ability to increase the training budget at the expense of either recruiting or discipline. For the record, the pro strat is just getting rid of discipline in general, because what do I care if my star quarterback gets in a fight at the local GameStop! Then you put all that saved money into recruiting and training. Of course, this eventually can backfire when the NCAA decides to punish your team because "your players keep tipping over firetrucks after wins" or whatever, but whenever that happens you just leave for a better job! Then NCAA 2010 has minigames you can play to make players better.
This game doesn't have any of that, though, and, instead, training is generated off a combination of a player's overall rating (with a max of 99) and their star rating (the same 1-5 scale as before). Training only affects current players, not players you've just recruited. Our results are kind of mixed. It looks like, on offense, we're going to want to stay pretty run-heavy, because we've got a HB (HB #3) with an 81 overall and a FB (FB #91) with a 91 overall, whereas our returning quarterback (QB #10) is only 59 overall, and we only have 1 WR with a 70 overall or higher. On defense, our biggest worry is going to be our passing defense, because we don't have a strong safety or free safety with a rating over 60, and that's no good!
The next thing on our list is cutting players. Luckily for us, we don't need to worry about that right now. This would be needed if we recruited more players then the NCAA lets us have on a roster, so we don't need to cut any players. If you do need to cut players, cut the worst people in the positions you have excess of (duh, lol). The final offseason requirement is setting your depth chart, but you really don't have to look at this one because the game assigns it automatically based on who's the best at each position.
Second Preseason: Schedule Setting (Again)
With that, we're ready to start our season 2 preseason. We start by setting our schedule. Unfortunately, I had to deviate once again from the real Indiana, because I couldn't schedule Connecticut or Indiana State. Instead, I scheduled fellow New England school Boston College, as well as the Midwest's own Norfolk State. Other than that, the non-conference schedule is the same, although the games are obviously in a different order than they were really played, because it's not like EA sports could see the future!
Now that we have freshmen players, redshirting is actually something we can legitimately consider, so what we're going to do is, any position where we have freshmen with lower overall ratings than our senior starters, we're going to redshirt them if possible. Sadly, some positions, such as our tackles and guards (offensive line positions), as well as cornerback, aren't going to let us redshirt anybody, because we don't have enough people at those positions in general. This time around, we only ended up redshirting three players.
As discussed during training, because our best players are easily our HB and FB, we're going to adjust our offensive strategy to be even more run-focused. We're also going to tone down our offensive aggression and instead focus more on time of possession and playing solid football.
With those changes, we're ready to start our second year as head coach of the Indiana Hoosiers, but I think this is a good stopping point for now! Join me next month as we begin our second year!
The Anatomy of a Pikmin
Hello, and welcome back to The Anatomy of a Pikmin, The 'Shroom's number one Pikmin species resource. Last month, we covered the first of the expanded Pikmin types, the bulky, strong, and outright broken Purple Pikmin. This month, we cover Strategy Wing Director Hooded Pitohui's favorite Pikmin, the poisonous little White Pikmin.
First appearing in the aptly-named Pikmin 2 cave "White Flower Garden," White Pikmin have the most distinct Pikmin design we've seen so far. Smaller than the other Pikmin and possessing glowing, red, bug-like eyes, the White Pikmin have a number of useful abilities and traits not shared with other Pikmin. For starters, White Pikmin have the fastest carrying and movement speed, so they're the best Pikmin to use to carry standard treasures back to the ship. Their glowing red eyes just aren't for show; instead, they give White Pikmin infrared sight!
What that means is that White Pikmin can actually see treasures that are buried under ground, and when they find them they'll start digging them up! White Pikmin are the only Pikmin who can detect underground treasures. Meaning that you should always keep at least a handful of White Pikmin on hand when you explore caves. Since you never know when there might be buried treasure that needs to be dug up!
While those powers are nice and useful, the White Pikmin have only one truly defining power. White Pikmin are apparently filled with poison! When enemies eat them, they take damage! This is a pretty unique skill, with White Pikmin being the only Pikmin type to cause damage to an enemy after being eaten! The amount of damage they do varies by enemy, of course. Eating a single White Pikmin will kill a smaller enemy like a Dwarf Orange Bulborb, but larger enemies will be able to withstand eating a number of White Pikmin. But it is totally possible to kill a boss just by having them eat wave after wave of White Pikmin (ask Blocky, he'll tell you). This is a pretty cool power, but, if I'm being honest, I don't really know if it works in Pikmin 2. See, in Pikmin 2, White Pikmin, much like the Purple Pikmin, don't have an Onion, so you can't reproduce them easily like you can Red, Blue, and Yellow Pikmin. Instead, White Pikmin can only be reproduced by throwing other Pikmin inside an Ivory Candypop bud. I already don't like losing Pikmin, my precious little flower buddies, but I'm even more strongly inclined to avoid losing Pikmin I can't easily reproduce. So while enemies taking damage from eating them is cool in theory, I don't really think it works that well in gameplay. Luckily, that's not White Pikmins' only poison-based power. White Pikmin are completely immune to poison, allowing them to destroy poisonous gas pipes, protecting the rest of our army from the impact of chemical warfare! This also makes White Pikmin the best choice to defeat enemies such as the Doodlebug and the Munge Dweevil.
I think White Pikmin are kind of low-tier Pikmin in their debut game. They've got cool ideas, what with them having a sort of suicide-bomb style attacking system, as well as the ability to carry things faster than any other Pikmin. But because they're such a limited resource compared to the Red, Blue, and Yellow Pikmin, and because they're not completely broken like the Purple Pikmin, I find myself really only keeping a handful of them at any given time to destroy the occasional gap pipe or to dig up buried treasures.
Things don't get better for White Pikmin in Pikmin 3. First, White Pikmin, like Purple Pikmin, were cut from the main game and only appear in certain levels of the Mission Mode and Bingo Battle. Here, White Pikmin lose two of their most distinct powers. They are no longer the only Pikmin that can dig up buried treasures (or in this game's case, fruits). Now every Pikmin can do this because the fruits are buried in fruit-based lumps! White Pikmin also aren't immune to poison? Well, actually, they probably are still, but poison isn't a thing in Pikmin 3. The closest thing to poison would probably be ink, which White Pikmin are not immune to! White Pikmin still do damage when they're eaten, but don't worry, Nintendo decided that feature was broken so they decided to "balance" it! The way the game "balances" it is that White Pikmin now only attack at half strength, so they have the same attacking strength as the Winged Pikmin! This is a nerf from Pikmin 2, where they had the same attacking power as Blue and Yellow Pikmin and Bulbmin! Not only that, but the amount of poison damage they do when eaten also takes a hit! In Pikmin 2, a single White Pikmin would kill a Red Bulborb. In Pikmin 3, it takes five White Pikmin to kill a single Red Bulborb! It's mind boggling that they, much like Purple Pikmin, go so nerfed when they only appear in side modes!
So what do White Pikmin have going for them in Pikmin 3? Well, they're fast! Yes, the extra speed of White Pikmin is their main feature in Pikmin 3. They're the perfect Pikmin for those piles of gold nuggets and smaller treasures because they carry them the fastest. That's basically it! They're basically only useful because they take fruit faster, which, admittedly is pretty good for the timed Mission Mode where every second counts.
But man is it lameeeeeeeee. Of all the Pikmin in Pikmin 3, White Pikmin feel the most like an afterthought. With their two main gimmicks eliminated, they're kind of just left as boring quick Pikmin. Because they attack at half strength, they're really only good in combat from, again, a suicide attacker usage, but thanks to their poison damage being nerfed, they aren't even good as that anymore! In Pikmin 3, White Pikmin basically exist to bring piles of gold nuggets back quickly and nothing else.
So far, White Pikmin have been a pretty low-tier Pikmin, all things considered. They've had a handful of neat gimmicks, but they've been constantly held back by the inability to easily produce more of them. Pikmin 4 is a mixture of good and bad news for White Pikmin. Some of the bad news is that, once again, White Pikmin are weak attackers, still only attacking as well as a Winged Pikmin. But to compensate for that, White Pikmins' poison is restored to be nearly as powerful as it was in Pikmin 2' and certainly more powerful than in Pikmin 3. White Pikmin are also once again not the only Pikmin that can dig up underground treasure, and, to make matters worse, they aren't even the fastest diggers! That honor goes to the big-eared Yellow Pikmin. But White Pikmin are still the fastest Pikmin, which finally gets actual main gameplay use, because they're one of the best Pikmin for the Dandori modes because their high speed makes them perfect for quickly taking items back to your base.
White Pikmin do have two things that kind of help elevate them in this game. For starters, poison is back as a hazard and it's more prominent then ever. Not only are there expansive poison mushroom fields that must be destroyed by White Pikmin, but there are a pretty decent amount of enemies that have poison as an effect, such as the Moldy Dwarf Bulborb and the Moldy Slooch. These enemies are best fought with White Pikmin, because any other type of Pikmin will flee on contact after being poisoned. White Pikmin even have their own boss fight! The enemy-resurrecting Toxstool is a boss made for them! White Pikmin are the only Pikmin (outside of Glow) that are immune to the Toxstool's poisons, making White Pikmin the obvious choice to take on a Toxstool.
The biggest bit of good news, though, is that, for the first time in the series, White Pikmin gain an Onion! Completing the Sage Leaf's 5th challenge, "The White Key" unlocks the White Onion. This means that, for the first time, you can actually use White Pikmin's main gimmick of causing damage to enemies that eat them effectively, because you can actually create an army of White Pikmin efficiently, as opposed to them only being able to make them in caves or find them in certain Mission Mode levels. This gives them greater utility, because instead of being a precious commodity, they're just like any other Pikmin, an easily replenishable resource. But there's still a problem with that, and that is that they just don't hit very hard. I don't want to bring them to combat situations because, outside of sacrificing them for the greater good, they don't really bring much to the table! Sadly, once agai,n White Pikmin are relegated to the lower portion of the Pikmin tierlist, with their best abilities being how fast they carry treasures and enemies and the fact that they can wipe out poison obstacles.
White Pikmin are an odd Pikmin. They've got a lot of gimmicks, like poison immunity, running faster then any Pikmin, and damaging enemies who eat them. Yet they've never managed to really climb out of that low Pikmin tier. Even if you throw out Pikmin 3, where they're the most throwaway Pikmin of all time, even in Pikmin 2 and Pikmin 4 they just aren't that great. I think a lot of it comes down to the fact that I just don't really care for their main gimmick. I don't want to lose Pikmin! Losing Pikmin is a bad thing! So the fact that White Pikmin are at their best when they're eaten just doesn't jive with how I play the game. Because of that and the fact that their other gimmick, the ability to detect underground treasures, got stripped away from them, I just don't think they're that useful as presently constructed. Like, they're great in Dandori battles, and they clear out poison obstacles, but other than that they just don't have a lot going for them. Well, except for the fact that they're really cute with their adorable infrared-seeing eyes.
That's going to be all for this month, Join us next month when we take a look at the best type of Pikmin, the Bulbmin.
Koops, Your Emblem is on Fire
Welp... that was fast. One month after the FE7 run is closed off, we have one issue focusing on bonus content, and already one month after we're starting off with the next game, FE6.
Fire Emblem: The Binding Blade is the sixth main entry in the Fire Emblem series, predating FE7 by a year or two. FE7 being a prequel, and an unplanned one at that, there will be some discrepancies between the two game, because IntSys was particularly silly around that time. With that said, there's still quite a few familiar elements, and in a sense FE7 can serve as a sort of prelude to how the different nations of Elibe are. But enough of that. Let's just start off proper, shall we?
Two chapters, and already a large number of playable units. Let's go over all of them.
Roy
The next heir to Pherae. The protagonist of this story.
Level 1 Lord.
HP: 18 (80%)
Str: 5 (40%)
Skl: 5 (50%)
Spd: 7 (40%)
Luck: 7 (60%)
Def: 5 (25%)
Res: 0 (30%)
Con: 6 (+2 Upon promotion)
Move: 5 (+1 Upon promotion)
Weapon Ranks: D Swords.
Roy. Our boy. Where do I begin.
He's ass.
He's the lord and available for the entire game, that much is true. Does he have the stats to make his omnipresence worthwhile? Definitely not. 5 strength and 7 speed could probably be excusable on a mounted unit or something, but Roy is a footie with very little durability. He also deals very little damage and doubles basically nothing that others cannot. Even with a weapon triangle advantage against axes which are rampant in FE6's early game, and in spite of my luck, Roy still constantly faces threats of death when pit against an enemy axe, and their hit-rates on him are a bit on the uncomfortable side, unless of course you give him some terrain advantage.
Unlike in FE7, however, being swordlocked is not an issue for him. This is because FE6 is a game that prioritizes more offense on Player phase, and swords being the most accurate melee weapons helps cement them as a reliable weapon type, given the low hit-rates of Lances and Axes this time around. Roy's rapier on its own boasts a massive 95 hit, making it one of the most accurate weapons in the game, if not the most. The rapier also is effective on horse units and armors, and also unlike FE7, weapon might is tripled instead of doubled when it comes to that now. Although the unfortunate 5 mt instead of FE7's... 7, prevents him from fully taking advantage of that, especially given most of the enemies you're using the rapier on can wield lances. To further compound this small inconvenience, Nomads and Troubadours, two horse-riding classes, are not vulnerable to the rapier, or any other horse-slayer weapons for the matter, as a result of an oversight. So even with the rapier, being Roy's biggest claim to fame, he still struggles to contribute much. But he is a forced unit who is able to do something every turn, so I guess you might as well make use of him when you can. Just make sure to keep him safe, given the lord status + his frailty.
More on him, another issue Roy faces is an extremely late promotion. Lord promotions tend to come later than most as is, but Roy takes it to the extreme, being able to promote a measly 3 chapters (effectively 2) before endgame. Then, and only then, will he receive a pretty great tool that will help him tremendously, but for 21 whole chapters, Roy will have to contend with just being another mediocre unit, surrounded by better units who also use swords. This is especially true for Hard mode, as enemies are bulkier and stronger, and he will find himself very quickly unable to hold himself together if he doesn't get good levels early on, and even that's not enough to save him most of the time.
What more can I say. He sucks. But he's here. We'll use him when the situation calls for it.
Marcus
A paladin serving House Pherae. A skilled veteran.
Level 1 Paladin.
HP: 32 (60%)
Str: 9 (25%)
Skl: 14 (20%)
Spd: 11 (25%)
Luck: 10 (20%)
Def: 9 (15%)
Res: 8 (20%)
Con: 11
Move: 8
Weapon Ranks: D Swords, A Lances, E Axes.
THE KING IS BACK! AND HE WILL CONTINUE TO BE GOD'S GIFT TO US!
The very same man who carried the campaign against Nergal returns to carry our early game, you'd think he'd have severe back problems by now the way he just has both games on it. Strictly looking at stats, this Marcus is much weaker than the one we see in FE7, the one who was in his prime, but make no mistake about it, this man is every bit the man he was prior, arguably even moreso. Unlike in FE7, these bases will not be able to carry Marcus for the entire game. There will come a point where his combat prowess will make it so he's best used for horse shenanigans, but early on, Marcus has a decent 9 strength, more than capable of dishing out decent damage with an iron sword. He's not killing anything with it, but instead leaving enemies just low enough to where other can pick them off and reap the benefits. And in case you absolutely do need him to kill something, his current monopoly on the Silver Lance (TM) more than makes up for any possible strength deficiency. His base 32 HP and 9 and 8 in Defense and Resistance respectively also make him the most durable unit you have for quite a while. And of course, high skill is good as it means his hit-rates will be more reliable than most, and weapon triangle control allows him to make use of the potential qualities of all melee weapon types.
All in all, Marcus is still our most important unit. Especially on hard mode, where most others will struggle. Even this far into his life, he is still ready to always give us everything he has. We cannot ask for a better companion or friend.
Wolt
An archer serving Pherae. Was raised like a brother to Roy.
Level 1 Archer.
HP: 18 (80%)
Str: 4 (40%)
Skl: 4 (50%)
Spd: 5 (40%)
Luck: 2 (40%)
Def: 4 (20%)
Res: 0 (10%)
Con: 7 (+1 Upon promotion)
Move: 5 (+1 Upon promotion)
Weapon Ranks: D Bows.
Alright, here's another doozy. Wolt really was raised like a brother to Roy, because they both kinda suck. In different ways, though.
Wolt's bases are laughable. His highest non-HP stat is Speed, at a mere 5. He's only doubling soldiers, and even then some have a small chance of having 2 AS. He's barely doing any damage, and unlike Roy, doesn't have a really good weapon like the rapier to help him. He's also similarly frail. His growths are nowhere near enough to compensate within a reasonable timeframe. So where does that leave us?
Wolt has a single advantage over Roy. And most other people we have, actually. That being, access to bows. Again, unlike FE7, bows are a good weapon type now, also thanks to FE6's stronger focus on player phase. The ability to attack from a distance with an existent chance to hit is also very welcome, as Alen very graciously demonstrated 1-2 range is a bit hard to use this time around. Every little bit of damage counts, and Wolt can deliver it mostly free of charge, as most of the time he will avoid being countered. He could also always serve as a meat shield for like one hit, potentially, as even just one enemy being distracted can be a good thing.
Wolt sucks, but he has uses. All you need to know.
Alen | Lance
A knight serving Pherae. Passionate and hot-headed. | A knight serving Pherae. Calm and cool-headed.
Level 1 Cavalier.
HP: 21 (85%) | 20 (80%)
Str: 7 (45%) | 5 (40%)
Skl: 4 (40%) | 6 (45%)
Spd: 6 (45%) | 8 (50%)
Luck: 3 (40%) | 2 (35%)
Def: 6 (25%) | 6 (20%)
Res: 0 (10%) | 0 (15%)
Con: 9 (+2 Upon promotion)
Move: 7 (+1 Upon promotion)
Weapon Ranks: E Swords, D Lances.
First joint analysis on the section, and likely not the last (not even within this issue).
Alen and Lance are this game's duo of red/green cavaliers, or as the fandom calls them, Christmas Cavs. One is stronger and bulkier, the other faster and more skilled, respectively. Their bases are pretty solid, a bit weak on their own, but with Marcus here to help, they really don't have too much to worry about. Their growths will eventually allow them to catch up and contribute a lot more, both in different ways. Lance in particular however has a speed advantage of 2 points, meaning he can start doubling much earlier, giving him a bit of an edge over Alen. However, Alen's lead in strength means that in the event where he gets enough speed to double, he outclasses Lance quite comfortably. Regardless, both are pretty good units, boasting decent enough bulk and offenses, well worth training long-term, and their supports give them some highly appreciated accuracy, making them even more reliable. Clearly, Marcus is a good teacher.
Bors
A knight serving Ostia. Loyal and dutiful.
Level 1 Knight.
HP: 20 (90%)
Str: 7 (30%)
Skl: 4 (30%)
Spd: 3 (40%)
Luck: 4 (50%)
Def: 11 (35%)
Res: 0 (10%)
Con: 14 (+2 Upon promotion)
Move: 4 (+1 Upon promotion)
Weapon Ranks: C Lances.
Bors, or "Balls", if you will, is an armor knight. This game has worse lances due to accuracy issues, and also this guy has 4 movement. I don't really need to go into extensive detail as to why he's bad. To add to that, his base 7 strength isn't really anything special and his bulk is horrendous for someone who's meant to specialize in defense. 20 HP with 11 Def simply doesn't cut it, especially when his 3 speed means most enemies on hard mode double him. He might be able to hold his own on normal mode, but it's definitely not the case here. His growths are also very mediocre, if not comically higher in speed than anything else that isn't HP or Luck.
Will that stop me from maybe using him? No, not really. I will if I feel like it, lol.
Merlinus
A servant of Pherae in charge of the army's inventory.
Level 1 Transporter.
HP: 15 (90%)
Str: 0 (30%)
Skl: 3 (30%)
Spd: 3 (40%)
Luck: 10 (50%)
Def: 3 (35%)
Res: 0 (10%)
Con: 25
Move: 5
Another returning character from FE7, and well he functions much the same, save for one crucial difference: you can deposit items into the convoy even if he's not physically present on the map. Otherwise though, you still need him to access said convoy mid-map, so do keep that in mind.
Hard mode enemies being what they are, it's always nice to have one extra meatshield in case you can't deal with the entire onslaught. And Merlinus possesses the distinction of always coming back the next map after his HP drops to 0, so if it's between him or someone else, usually it's gonna be him. Don't worry about him, he will literally never die.
Elen
A young cleric serving Guinevere. Serene and gracious.
Level 2 Priest.
HP: 16 (45%)
Mag: 1 (50%)
Skl: 6 (30%)
Spd: 8 (20%)
Luck: 8 (70%)
Def: 0 (5%)
Res: 6 (60%)
Con: 4 (+1 Upon promotion)
Move: 5 (+1 Upon promotion)
Weapon Ranks: D Staves.
There really is not much to say about Elen other than that she has literally 0 defense so anything that does 16 damage will just make her explode no question. She heals. She does a good enough job. The 1 magic is funny but realistically 11 HP isn't a bad amount to heal.she has a decent magic growth and has pretty good res too, but although her speed base is decent her growth is hilariously low at 20%. She won't be an insane combat unit or anything by the time she promotes but she can probably do some good one-hit damage. D staves isn't anything to wow at but given some time she'll be able to use some good staves. Literally every other staff user is better but a staff user is a staff user, can't go wrong with using any of em really. NEXT!
Dieck
A former arena fighter from Eturia. Leads a band of mercenaries.
Level 5 Mercenary.
HP: 26 (90%)
Str: 9 (40%)
Skl: 12 (40%)
Spd: 10 (30%)
Luck: 5 (35%)
Def: 6 (20%)
Res: 1 (15%)
Con: 13 (+1 Upon promotion)
Move: 5 (+1 Upon promotion)
Weapon Ranks: C Swords.
Dieck's pretty good. Like I said in the video already, he's basically Marcus without a horse. And also less bulky. And also swordlocked (not an issue). Pretty good base strength, doubles a fair amount of people, C rank in swords is good too, and he has 13 Con, allowing him to use some of the heaviest swords without penalty. Unlike Marcus, Dieck has significantly higher room to grow, with pretty average growths and also a potential promotion, which will grant him access to axes, a weapon type he can make good use of thanks to his high skill. He's a pretty good long-term investment, though he faces competition from a certain future swordsman on hard mode. But we;ll cross that bridge when we get there. For now, Dieck is still another godsend, really.
Lot | Ward
A young man fighting alongside Dieck. Calculating and cautious. | A young man fighting alongside Dieck. Brash and impulsive.
Level 3 Fighter | Level 2 Fighter.
HP: 29 (80%) | 28 (75%)
Str: 7 (30%) | 8 (50%)
Skl: 6 (30%) | 3 (45%)
Spd: 7 (35%) | 5 (20%)
Luck: 2 (30%) | 4 (45%)
Def: 4 (40%) | 3 (30%)
Res: 1 (15%) | 0 (5%)
Con: 12 (+2 Upon promotion)
Move: 5 (+1 Upon promotion)
Weapon Ranks: D Axes.
Another duo joins the fray, and their names are Lot and Ward (I'm used to calling him Wade tho). Much like the Christmas Cavs earlier, they differ in what they "excel" at, but their case is much... weirder. For starters, Lot is probably one of the most bizzare units I know, seemingly not focusing on any stat, but having a weirdly high defense growth at 40%, the highest in the game, in fact. And that's his highest growth altogether, even if he doesn't look like he's even built to be tanky, base-wise. As for Ward, he's very clearly geared towards pure offense, which should be pretty obvious to see too.
The biggest common issue both of them face is their exclusive use of axes as they are now. Lot's not very stellar with them himself, but Ward's abysmal 3 skill is absolutely never gonna let him benefit from his strength stat to its full potential. Lot otherwise is I guess solid enough stat-wise? He can take care of himself a little bit, but Ward is another story altogether. His low speed of 5 makes him liable to be doubled by a lot of things, and it's unlikely he's getting out of that soon with a growth of 20%. Not to mention he's deceptively frail too, boasting only 3 base defense compared to his friend's +1 HP and +1 defense, which don't sound like much on paper, but when you're getting doubled by things, it kinda does matter.
Unlike FE7, Warrior promotion bonuses are actually good now (as are pretty much all promotion bonuses), and promoting gives both access to bows, a significantly better weapon type for them to use. So I guess if you can get either to level 10, it shouldn't be that bad. You could always get them to support each other to patch up their bad accuracy somewhat, even if that's by no means a hard fix, but it does help a little bit. Neither are really good units at all, but hey man, this is Fire Emblem, literally anyone can be made good if you just believe hard enough. Go wild.
Shanna
A pegasus knight in training traveling the world to hone her skills.
Level 1 Pegasus Knight.
HP: 17 (45%)
Str: 4 (30%)
Skl: 6 (55%)
Spd: 12 (60%)
Luck: 5 (60%)
Def: 6 (10%)
Res: 5 (25%)
Con: 4 (+1 Upon promotion)
Move: 7 (+1 Upon promotion)
Weapon Ranks: D Lances.
Phew... our last unit of the day... enter Shanna, our first pegasus knight.
It's about what you'd expect, really. Although 6 defense is not bad, 17 HP and this kinda HP growth means she's pretty squishy, low strength with a low growth, but good skill and speed, as well as more resistance than the average unit. And much like Florina in FE7, Shanna's usefulness as a unit comes pretty much almost exclusively from the fact that she can fly. Low con of 4 means that on one hand, she can't use anything other than a slim lance without losing some AS, but on the other, it means 16 aid, which can carry pretty much everyone on the team right now. Once she promotes (usually advised to be done as early as possible), she'll be able to use swords, making her a reliable dodge-tank against enemy axe users, something that's compounded by her high speed. Odds are, she'll never really become an amazing combat unit if you don't get lucky with strength, but don't let that distract you from the fact that she's still a pretty damn good unit. Not one I'm much of a fan of personally, but she's competent. She does her job well enough, really can't complain.
Alright! We did it! We started FE6. Roy game. Woooooo! Here's to maybe another four years of delays and missed months (or not!), and most of all, here's to a fun time! Peace.


