The 'Shroom:Issue 204/Strategy Wing
Director's Notes
Written by: Hooded Pitohui (talk)
Hello, all you readers of The 'Shroom! Daylight saving time has started here and spring is beginning to burgeon. Now, I'm a noted winter-liker, but even I will admit there are some things that this time of year brings that are enjoyable. Not among those things, however, is a week of disrupted sleep due to the time change. Suffice to say, I'm tired.
On the bright side, I have a fresh new edition of Strategy Wing to perk me up! We're extending our reach to all the domains this month, covering the land, the sea, the atmosphere, and cyberspace this month! How so? Well, Four Steps for a 3D World is going underground this month, Shine Get sees Waluigi Time (er, well, Luigi) diving into the water's depths, Winged Pikmin and an Altaria take flight this month, and, after clearing a couple questlines, Shoey moves into a foreboding land made of raw data in File City Files. See? We're a team unrestricted, going anywhere and everywhere in pursuit of bringing you fun reads and new perspectives on your favorite (and not-so-favorite) games!
We're not stopping there, either! Alongside our usual slate of sections, this month sees the debut of An Octet Gazette! See, I went all the way down to the Overlook Mountain Auction House earlier this month only to find they were closed for an extended holiday break! I suppose that does explain the lack of advertisements in Fake News... but I digress. On my way back, I found a merchant who had what looked to be a very old notebook for sale. It was cheap, so I thought I'd buy it and maybe use it to write down my answers to those Connections games in Fun Stuff, or maybe BBQ Turtle's Anagrams, but, well, wouldn't you know it? There was already writing in there! Ah, but I'm going on too much. If you want to see what that journal had to say about the differences between Octopath Traveler and Octopath Traveler 2, you can check out the section!
In the meantime, with all this talk of Strategy Wing expanding its reach, have you ever considered joining our team? Maybe there's an old gem of a game near and dear to you that you'd like to turn into a written playthrough, like Waluigi Time with Shine Get or Shoey with File City Files? Or maybe a video-based playthrough with commentary, as Koops presents in Koops, Your Emblem is on Fire, better suits you? Perhaps that sounds like a bit much to you? If so, that's okay! There are plenty of other ways to get involved with the team, too! Why not compare the differences in two games you like, as An Octet Gazette or The Anatomy of a Pikmin do? As the latter shows, you can even focus on a single specific element of a game! Or you can make like Getting That Payday and focus on describing a mechanic or gameplay element in a specific game! Give us challenge ideas like Digging Deeper (our Archives can help you find these sections easily), or small collections of tips and tricks. If you want something small-scale, you can even, say, focus on a single level of a platformer at a time, breaking down what it does well or poorly or what makes it memorable!
The point is, there are plenty of ways for you to get involved with the team, so don't ever think you have to be capable of writing a whole strategy guide or anything remotely like that! For this exact moment, though, it will suffice to ponder what you might want to do sometime while you read on and see what our dedicated writers have prepared for you this month!
Section of the Month
My thanks go out to all of you for voting Pokémon Academy section of the month last month! Perhaps Luvdisc can rise above its reputation in some ways! The return of our chief tactician in Koops, Your Emblem is on Fire clearly did not go unnoticed, either. Helping Lady Clarine, watching Marcus destroy his foes, and battling onwards, Koops (talk) keeps Fire Emblem: The Binding Blade a game worth following!
Thanks for voting and showing support for our writers! Please do keep it up, and and feel free to nominate a writer for Poochy's Picks if you've got something specific you'd like to share!
| STRATEGY WING SECTION OF THE MONTH | ||||
|---|---|---|---|---|
| Place | Section | Votes | % | Writer |
| 1st | Pitohui's Pokémon Academy | 4 | 33.33% | Hooded Pitohui (talk) |
| 2nd | 4 Steps for a 3D World | 3 | 25.00% | Hooded Pitohui (talk) |
| 3rd | Koops, Your Emblem is on Fire | 2 | 16.67% | Koops (talk) |
An Octet Gazette
Written by: Museful Traveler (talk)
In undertaking this long and difficult journey from my homeland of Orsterra to these great continents of Solistia, I find I am unable but to take keen notice of the subtle differences between our lands. Much in these unfamiliar continents has about it a comforting air of familiarity. Many traditions here, their guilds, and even the techniques wielded by their finest and most erudite resemble closely our own. Yet, so near to them, observing them in their animated forms in the day-to-day, subtle yet critical differences emerge. For the benefit of all seekers of knowledge, and for the practical purpose of aiding those travelers who may yet embark upon this journey, I shall attempt within these pages to record a detailed comparison of the ways and methods of Solistia and how they differ from our own.
It is in the techniques of the Scholars in which the most easily observed gulf is apparent, and thus that is where I shall begin my treatment. It would appear the Scholars of Solistia learn fewer incantations than our own, but this does not limit them, for they possess methods of augmenting those incantations they do study...
Welcome, readers of The 'Shroom, to a section in which I'll be covering a number of mechanical differences between Square Enix's and Acquire's 2018 RPG Octopath Traveler and its 2023 follow-up, Octopath Traveler II. Now, it'd make for an extraordinarily lengthy section if I tried to go over every single difference in one edition, and, truthfully, accounting for equipment such as armor and weapons, I don't know that I could write in detail about every change. Instead, we're going to break this up into far smaller bits, and take it one area of change at a time. For these first eight editions, we'll be covering the eight in-battle skillsets of the base eight job classes. From there, another eight editions will cover the skills and abilities unique to specific playable travelers, such Path Actions, the Hunter's Beast Lore, and the Latent Power mechanics of the second set of eight travelers. After that, we'll get into changes to how jobs are actually acquired, the addition of the day-night system, new methods of solving sidequests and the absence of certain varieties of sidequests, and other miscellany that might come up.
If all of that jargon confused you, don't worry because we'll have primers as we go along. Today, all we're covering is the skillset of one job, so let's talk briefly about what a job is.
Jobs? What Are They?
Jobs in the Octopath duology are basically RPG character classes. You've got jobs like the Thief which correspond one-to-one with classes from other games, and classes like the Cleric and the Scholar which, despite their idiosyncratic names, are recognizable as a classic White Mage and Black Mage role, respectively offering an emphasis on healing and an emphasis on high magical damage output.
Jobs influence the travelers' stats, determine what weapons they can use, determine what sets of skills they can use in battles, and what Support Skills they can access. Every traveler can have two jobs at once. Their base job, which they start their story with, cannot be changed, but their second job can be changed as often as you want to change it.
When we talk about in-battle skills in this section, you can think of them as "spells," special techniques that cost some mana (here called "SP") to use. When first starting out with a job, a traveler will have two skills already unlocked. The others must be purchased by spending Job Points (JP) accumulated by winning battles. Each new skill for a given job costs more JP; unlocking a third skill only takes thirty, but a fourth takes one-hundred, a fifth takes five-hundred, and so on. These are tracked separately for every traveler, so Traveler A could unlock every skill for the Scholar job, but once it was moved to Traveler B, Traveler B would have to spend their JP to unlock all of those skills themself. If a traveler's job is removed from them, they can no longer use those skills in battle until the job is re-equipped, and any skills already unlocked remain unlocked when the job is re-equipped. Weapons, which are used for physical attacks and come in six types (swords, daggers, bows, polearms, staves, and axes), work similarly. If a character gains the ability to use a weapon type due to their secondary job, then has that secondary job removed, they can no longer use that weapon type until it is re-equipped (or until they are equipped with a different job with access to the same weapon).
Support Skills function differently, and interface with the job system a bit differently as well. Support Skills are passive buffs, often modifying stats or granting travelers some positive attribute. Every job has four associated Support Skills, and these are unlocked by unlocking the job's skills. One is earned when four skills are unlocked, one when five are unlocked, one when six are unlocked, and the final when seven skills are unlocked. Access to Support Skills is retained even if a traveler changes jobs, so any Support Skills a traveler has earned will stay available to that traveler forever. However, only four Support Skills can be equipped and, thus, active, at one time. Still, this lets you pick and choose Support Skills from different jobs!
That's been a whirlwind of information, I'm certain, but if you've kept up so far, you can breathe easy knowing just one more piece of information. Just as there are six weapon types for physical attacks, there are also six magic types for offensive spells: fire, ice, lightning, wind, light, and dark. With that added, that's the entire basic framework you'll need to follow along with the rest of this month's section and the seven to follow.
Analyzing the Scholar
With that preamble out of the way, then, let's peek at the weapons, skills, and Support Skills of the Scholar in the two games.
Starting off as simply as possible, in both Octopath Traveler and Octopath Traveler 2, Scholars have only staves available to them as a weapon type. The emphasis that Scholars put on magical attacks comes with the trade-off of having few physical attacking options. Although, since the stat boosts of the Scholar job are geared towards magic as well, it's fine, really. A Scholar isn't likely to have high physical damage output.
Moving on then, we find our first differences in the in-battle skills of the Scholar job, and the difference is readily apparent! Let's take the games one at a time for this stretch, though.
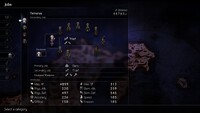
In the first game, it's obvious what the Scholar job is all about, and that's high damage output with herd-hitting elemental magic! Offensive elemental spells take a whopping six of the Scholar's eight slots for skills. We also see that, unlike most of the basic jobs, the Scholar doesn't get an element of their own, instead getting access to three elements. Here, there are two tiers of spells for those three elements, creating a classic "more power and more hits versus higher cost" scenario. You can save SP by using the tier-one spells, but lose out on damage output and a hit that could knock an extra shield point (we'll get there - don't worry about it for this issue) off an enemy, or spend extra for more power.
In those two remaining slots is one basic utility skill and one unique status-granting skill. Analyze is quite useful, though it's a little easier to justify spending a turn revealing a foe's weaknesses with a traveler who has taken the Scholar as a secondary job, since it's otherwise taking up a turn that the Scholar could be using to dish out heavy damage. Alephan's Enlightenment has a straightforward description (don't worry about boosting yet, either) and some fairly straightforward use cases. Facing a boss that has already had its supporting enemies eliminated and want to get the most bang for your (SP) buck from the Scholar's attacks? Use Alephan's Enlightenment and get a power boost, since you only need to target one foe. That said, that particular skill greatly benefits from having a supporting framework around it and being able to do things like top off the Scholar's BP after using it.
Overall, everything here except Analyze is geared towards dishing out elemental damage. Even Alephan's Enlightenment is mostly there to modify those offensive spells so more power can be wrung out from them.
The second game, however, reworks the Scholar somewhat, still emphasizing high elemental damage output, but expanding upon what the Scholar offers.
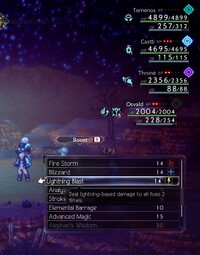
Immediately, you'll notice that the second-tier offensive spells are no more, freeing up three slots for new skills. Yet, while it's certainly striking, a closer analysis reveals that, sans Analyze, this entire skillset is still built around maximizing offensive magic damage output, with the key difference being that this skillset provides more flexible routes to doing so and adds a bit more utility to the Scholar.
First though, on the note of Analyze, it has returned unchanged, and just as before, it's more useful when used by a traveler who has made Scholar their secondary job. The three returning offensive spells have had their SP costs increased, it's worth noting, though in practice I didn't find it much harder to deal with this.
One of the three now-open slots gets filled by Elemental Barrage, a new offensive spell that hits enemies at random with a random number (within a certain range which depends on boost level) of strikes that are randomly assigned to one of the three elements the Scholar wields. This mixes good damage output with a bit of utility. Obviously, the multiple elemental strikes lift those damage numbers, but it can also be useful for revealing (or ruling out) weaknesses without spending a turn on the non-damaging Analyze. Additionally, it can make for a great way to whittle down the shield points of a boss or solo foe who has two (or all three) of the Scholar's elements as weaknesses.
Stroke of Genius, while not the most reliable option, likewise tries to gel with the Scholar's focus on dealing heavy damage with magic while offering the Scholar a bit of utility. With great luck, the traveler who uses it might get an elemental attack buff and have their spells do more damage. If not, they'll at least get some kind of boon, and increased elemental defense or something might be useful for a traveler who has taken Scholar as a secondary job.
Advanced Magic and Alephan's Wisdom, like the other new skills, offer utility while serving to bolster the strengths of the Scholar, but they do it in a peculiar way. They are, in fact, the crux of this job's rejiggering. They're also quite poorly explained, if you ask me! You might think that "[raising] the intensity" of a spell simply means making it more powerful, but "intense spells" in fact result from a unique buff that these skills provide! Advanced Magic actually transforms applicable spells into their second-tier form, giving the Scholar the chance to once again wield Firestorm, Blizzard, and Lightning Blast! Once again, these hit twice! Alephan's Wisdom transforms applicable spells into their third-tier form, making the Scholar's core trio of spells into Ignis Ardere, Glacius Claudere, and Tonitrus Canere, all hitting three times. This obviously ties into the goal of maximizing the Scholar's damage output, but it provides its dose of utility by letting travelers with the Scholar job raise the intensity of an ally's spell as necessary, too.
That, then, is the heart of the matter. The Scholar job retains all of its skills from the first game, but accessing some of those skills requires a bit of strategizing and reaching for some of the new skills in the job's arsenal. This bit of reworking opened up a great deal of room for new skills that added a bit of an extra utility role for the job while still meshing with its core Black Mage-style role.
With that all covered, let's take a brief look at the Support Skills of the Scholar job in both games.
| Name | Effect |
|---|---|
| Evasive Maneuvers | Reduces the frequency of random encounters |
| Elemental Augmentation | Adds 50 points to the character's elemental attack stat. |
| Percipience | The party will not get caught by surprise in random encounters if the equipping character is active |
| Vim and Vigor | Restores the HP of the equipping character by a small amount each turn |
This is a fairly straightforward set of support skills, with two that are meant to make wandering about the wilderness a little safer and two with in-battle benefits. Elemental Augmentation fits the Scholar well, further raising their magical damage output. Vim and Vigor is a little strange, comparatively, but it could help somewhat in making the Scholar (not at all a defensively-aligned job) last a little longer in battle. Remember, though, Support Skills can be mixed and matched, so Vim and Vigor, while a Scholar Support Skill, might actually do better on characters with other jobs, and there may be some Support Skills from other jobs better suited for the Scholar.
| Name | Effect |
|---|---|
| Evasive Maneuvers | Reduces the frequency of random encounters |
| Elemental Augmentation | Adds 50 points to the character's elemental attack stat. |
| Extra Experience | Extra experience is received after battles. |
| Advanced Magic Master | Allows travelers with this skill equipped to use intensified spells one additional time |
The second game keeps the two Support Skills you would expect it to keep, but replaces the somewhat situational Percipience with an ability that's pretty much constantly useful (until other Support Skills with similar effects come along). It also swaps out the seemingly ill-fitted Vim and Vigor for a skill more closely tailored to Scholars, and one that even directly interfaces with the new method of using higher-tier spells. Advanced Magic Master means that the equipping character can use higher-tier spells thrice after receiving the buff from Advanced Magic and four times after receiving the buff from Alephan's Wisdom.
The final difference between the Scholar job of the first game and the Scholar job of the second? That is, of course, what character starts with the job. In the first, that would be Cyrus Albright, and in the second the base Scholar job belongs to Osvald V. Vanstein. We shall discuss them more in detail in a future edition, though. For now, we've covered all the changes to the job itself, so join in next month as we look at the Dancer job!
File City Files
Hello again, and welcome to File City Files, the signature source for all things Digimon World on the PlayStation straight out of the home of 31st president Herbert Hoover. With Factorial Town out of the way, we're on the downhill stretch. I estimate we've only got probably three or four more issues left and then we'll be completely done (where does the time go?). Unfortunately, this month we're going to be doing a couple of the more annoying-to-obtain Digimon, and we'll specifically be starting out with one of my least favorite quest lines in the game.
A Hostage Situation in Toy Town
With our Monzaemon in tow, we return to the whimsical Toy Town. Entering the Robot House, we find that those snotty Tinmon will now talk to us (why are all the robots so bad in this game?). This is a little off-topic, but Tinmon is one of my least favorite Digimon. It's just a wind-up robot! Very bland! Very bad! Luckily, even the Digimon people agree with me and Tinmon would basically be cast out of the franchise after Digimon World 2.
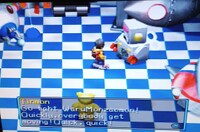
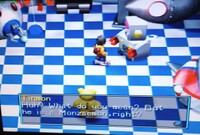
But anyways, you need to have Monzaemon for this quest because when we start talking to Tinmon it mistakes our Monzaemon for its master Monzaemon. Tinmon tells us that the terrible no-good scoundrel WaruMonzaemon is up to no good! Despite our attempts to tell it that this isn't its master, apparently all Monzaemon look alike to Tinmon, who then tells us that WaruMonzaemon kidnapped his friends. Because apparently we're the only people on this whole island that can fix literally anything, we agree to help Tinmon, to defeat WaruMonzaemon, and to recuse Tinmon's friends!
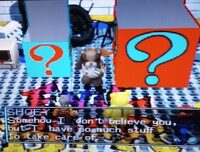
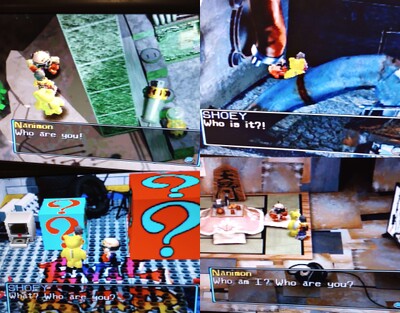
Thanking us for our assistance, Tinmon opens the seal that kept the Toy Mansion locked. We head into the Toy Mansion, which apparently has LEGO bricks for flooring, which just sounds awful! We approach a big ? Panel, and pressing X opens the panel, allowing us to descend into the floors of Toy Mansion.
So at its core, Toy Mansion is a pretty easy dungeon. In fact, calling it a dungeon is pretty generous. Toy Mansion consists of three floors containing nothing but enemies guarding three ? Panel doors. The first floor has three ToyAgumon guarding it, the second has two Tankmon, and the third has three more ToyAgumon. That doesn't sound like a lot, right? Well, here's the thing! I don't like fighting pointless battles. I find them tedious and annoying
Unfortunately, the way the enemies are placed (especially the Tankmon), it's very hard to get around them without engaging them, meaning that you're more than likely going to have to fight tedious pointless battles. Even the exit doors are annoying. Only one door is correct, and, if you get one of the incorrect doors, a pan drops from the ceiling and hits you, causing damage. There's no way to tell which door is correct, by the way. It's just pure chance. Toy Mansion is a level designed to be frustrating. It's short, but every floor is full of annoyances designed specifically to frustrate the player. You don't feel rewarded when you get to the final floor; you only feel relief that you're done.
But don't consider yourself out of the woods just because you reached the top of Toy Mansion! At the top of Toy Mansion sit two boxes, a big one and a little one. A voice calls out, asking us to pick a box. We declare that it sounds like WaruMonzaemon's voice… Which, uh, I don't know how we came to that conclusion? We've never met this Digimon before, so I don't know why we think we're an expert on Digimon voices, but whatever, I guess.
There's another very odd textbox and then we're given the choice of choosing between the two boxes. If you chose correctly, WaruMonzaemon will pop out to fight you. If you chose incorrectly, a bomb will pop out instead, doing massive damage. And before you ask, no, there's no way to know which box WaruMonzaemon is in. It's once again totally random! After the bomb explodes WaruMonzaemon reveals himself, asking us if we're looking for a job. When we instead demand he returns the Digimon he has kidnapped, he claims innocence, proclaiming that he would never do such a thing.
When we bluntly say that, yes, he does in fact look like a kidnapper, he responds by laughing and declaring that he did indeed kidnap the Digimon! He refuses to hand them over and, with that, it's time to throw down!
An Ultimate Digimon, WaruMonzaemon knows four moves: Thunder Justice, Megaton Punch, Buster Dive, and Muscle Charge. All of his moves are quite powerful and are made even more dangerous because he spams Muscle Charge, giving himself stat boosts which make him even more powerful. Luckily, you can't fight WaruMonzaemon without using an Ultimate Digimon yourself. But be warned that you can technically do this quest as soon as you get Monzaemon, and that's a bad idea! I would recommend skipping the quest until you've gotten a chance to train your Monzaemon first, because WaruMonzaemon can be fairy difficult to fight with the base stats you'll have from the average Numemon to Monzaemon Digivolution.
Upon being defeated WaruMonzaemon drops an HP Chip (and I happened to learn Thunder Justice in the process!). We then demand he return our friends to us… Which, uh, our friends? We've never even met this Digimon!
WaruMonzaemon reluctantly agrees to hand over his captives… BUT IT WAS A TRICK! Instead, WaruMonzaemon throws a bomb on the ground and, oh no, we'll never get out of the blast radius in time!!!
Oh… never mind. Yeah, it turns out the bomb was a dud. It's just another classic sick WaruMonzaemon prank, bro. WaruMonzaemon then hands over the real Digimon… which is a… gear? This is all very confusing, but WaruMonzaemon swears that he didn't take anything else. With great reluctance, we decide to trust him and agree to take the gear. We then tell WaruMonzaemon not to commit anymore crimes and he says he won't.
We don't really believe him, but by now we're sick of this sidequest, so we just decide to move past it. Oh, and as if I didn't have enough reason to dislike this questline, WaruMonzaemon collapsed in the wrong spot, so I can't actually get the HP Chip he dropped. Luckily there's another HP Chip in the PC next to him. Usually I'd reset and do this all again, but, you know what? I really don't want to redo this awful quest. Plus, Thunder Justice kicks ass and the chances of my learning it again is exactly 9% (thanks again grindosaur.com).
BUT DON'T WORRY! THERE'S EVEN MORE BAD! Because now we have to leave Toy Mansion, which means we have to fight or flee from the enemies again! Now, if you really don't want to do that you can instead use an Autopilot to go back to File City and then use Birdramon to return to Misty Trees and enter Toy Town. But that's complicated and I don't want to do that. Once we finally get out of the horrible mansion of pain we return to the robot house. We then give Tinmon the gear and it turns out that it's not just any gear! It's actually a Digimon named Hagurumon! Without saying a word, Hagurumon enters a monitor.
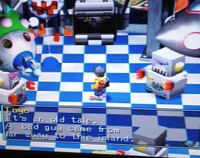
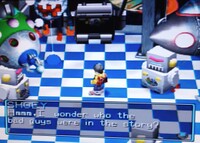
As we stand there, baffled by what's going on, multiple Tinmon enter the room and begin to sing an old tale. The tale they sing is of a time long ago when bad guys entered the island. The bad guys told the Digimon that the island belonged to them now. The Digimon refused to accept this and joined together and defeated the bad guys. But before the bad guys left, they vowed that they would return for revenge. With this, we now have the full story of the island. We can now completely 100% confirm that it is in fact somebody from our world who is attacking the island.
So this is actually a really cool lore point in the game, but the way we did it is a little wonky. It's supposed to go Cherrymon, then Toy Town, then Factorial Town, with each one giving another piece of the mystery, ending with the reveal that the bad guys from the story were actually humans. But since we did Cherrymon, then Factorial Town, then Toy Town, it's not as good because we already know who the bad guys in Tinmon's tale are. But, hey, at least after all that Monzaemon's Stuffed Animal joined the city… Wait, what?
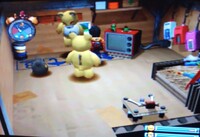
Purpose in the City: Yes readers, you read that correctly! Monzaemon doesn't join the city, but instead his stuffed animal does! The unnerving Monzaemon sits in the backroom of Jijimon's house, lifelessly hanging on a hanger.
So you're probably thinking "oh this is pretty cool; if we get another Numemon we can use the Monzaemon costume to get another quick and easy Monzaemon!" HAHAHAHAHA, no! The costume does nothing. It just hangs lifelessly forever! That's right! Your reward after all that nonsense is nothing! In fact, it's the opposite of a reward because you can no longer snag a free Ultimate Digimon! And that, my friends, is why Toy Town is probably my second-least favorite part of the game!
Hide and Go Nanimon
So you may recall that back in Issue 197 we met a strange sunglasses-wearing Digimon, and that when we tried to talk to him he ran off. And remember how I said he had a story yet to yell? Well, now it's finally time to tell that story! So Nanimon has one of the more interesting recruitment mechanics. Nanimon is basically playing a game of hide-and-seek. There are five locations where Nanimon can be found, each a location you've already traveled to. Those locations are:
- Ancient Speed Zone, where you fought Meteormon.
- Toy Mansion, where you fought WaruMonzaemon (which unfortunately means you have to do that fucking mansion again).
- Ogremon's Fortress, where you fought Ogremon.
- The Factorial Town Sewers, where you fought Numemon.
- Leomon's family cave in the Drill Tunnel.
There are a few requirements before he can be found in each location. For starters, Nanimon can't be found until the boss of the room has been defeated. But it can go a little deeper than that. In the Toy Mansion, he can't be found until you recruit Monzaemon to the city. In Ogremon's Fortress, he can't be found until the entire Ogremon questline is done. And in Leomon's cave, he can't be found until you give Leomon the tablet.
At this point, you might be asking how you;re supposed to know to come back to these places to find Nanimon. The answer is, of course, as it usually is in Digimon World, a nice big "fuck you, just figure it out"! Or it's possible that Angemon gives a hint on it and I just haven't seen it. But I'm pretty sure the answer is "fuck you".
Now Nanimon is a shy Digimon, and all he ever does is ask who you are before running off. But this little quest is actually one of the most useful in the entire game, strangely enough. The first time you talk to Nanimon he drops the Digital Keychain, which allows you to carry up to twenty unique items.
Then the fifth time you talk to Nanimon he drops the Dimensional Keychain, which allows you to carry up to thirty unique items. This is the only way to increase personal item storage, so you'll want to start the Nanimon sidequest as soon as possible and finish it as soon as possible. After you see Nanimon for the fifth time, he once again runs off, but this time he joins the city! Not that you'd know, because the game neither tells you nor plays the little recruitment jingle. But if you talk to Jijimon he will confirm that Nanimon did indeed join the city by running in and running out immediately.
Purpose in the City: Nanimon takes a job helping Agumon in the item bank, but, because of his shyness, Nanimon doesn't take a job dealing with customers. Rather, he takes a job as a clerk working in the back and helping Agumon keep all the items organized.
When you enter the item bank after recruiting Nanimon, you'll sometimes see him back there working diligently to make sure everything is organized in the proper order! So, yes, while Nanimon doesn't serve any practical function in File City, the fact that you triple your item storage through his quest makes it more than worth it.
The Devil in the Mountain
So now we're going to do something a little strange. We're going to begin the trek over the final area, Mt. Infinity. Now, technically this is a sub-optimal play, because we're not going to complete Mt. Infinity. Instead, I'm only going here for one specific recruitable Digimon. So unfortunately that means that, when we come back to Mt. Infinity to finish the game, we're going to have to do all the floors again. Usually I try to avoid doing things in a repetitive sequence like this, but as you'll see by the end of this, the Digimon we're going to recruit is worth a little future inconvenience.
As the final area of the game, Mt. Infinity is a very strange area. It's a glitched area made up of only data. Mt. Infinity is almost incomplete in nature.
Strange Digimon scour the mountain, such as Rockmon, a Digimon made up of wireframe data. The mountain itself has no detail, instead being raw data platforms. Finally, the exit and entrances to the floors of Mt. Infinity are warp zones, warping us throughout the mountain. Powerful Champion Digimon are scattered throughout the mountain. It's not uncommon for floors to have upwards of six enemies in each level.
In short, this is dangerous place where enemies ambush you as soon as you enter room. The enemies profess loyalty to some sort of higher power. It's as if this level isn't complete yet, as if somebody had created it, created everything within it, even. Each floor contains palette swaps of powerful Digimon, palette swaps not found in the "natural" Digital World. Each floor also contains a computer guarded by Mt. Infinity's humans' loyal subjects. Most of them aren't exactly worth it, being decent recovery items, but the 6th floor computer contains an MP Chip, which kicks ass.
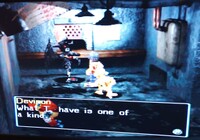
Going deeper into the depths of Mt. Infinity, a black figure stops us, laughing at us before vowing to defeat us. This is Devimon (who, depending on if you've done something that we haven't done yet, you might have already met), a high-level servant of the humans. Devimon is a Champion Digimon with 6,800 HP. For moves, Devimon knows Megalo Spark, Megaton Punch, War Cry, and Muscle Charge. War Cry and Muscle Charge are both buff moves while Megaton Punch is a move of average power. Megalo Spark is Devimon's most powerful move, but it's not an overwhelmingly powerful move, having a base power of 382. For this late in the game, Devimon really isn't that hard of a fight. His moves don't hit very hard and, while his access to multiple buffing moves can make him quite powerful, he really shouldn't be a problem with an adequate Champion and plenty of healing items.
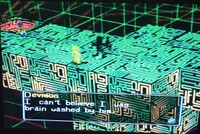
Upon being defeated, Devimon drops a Quick Chip. He then bitterly laments the fact that he was brainwashed by "him". Devimon then tells us that "he's" strong before questioning why we're doing this.
We tell him that we're here to save the island. Devimon bitterly curses something, saying that the Digimon don't want a ruler before telling us that we're the island's only hope. Devimon then flies away and, while much like with Nanimon, the game doesn't say anything, Devimon does indeed join the city.
Purpose in the City: Devimon takes a job in the secret item shop, working from 6 PM to 12 AM. Devimon sells totally legit and not super-illegal performance-enhancing Devil Chips (the best items in the game) for 5,000 bits a pop!
Devil Chips operate a lot like the various chip items we've been picking up throughout the game, but there are a few key differences. For starters, each Devil Chip works on multiple stats, and the stat boosts are double what you get from a regular chip. Devil Chip A boosts Offense and Brains by 100, Devil Chip B boosts Defense and Speed by 100, and, finally, Devil Chip C boosts HP and MP by 1,000. At this point, you're probably asking "what's the catch?". The catch is that every chip you use lowers your Digimon's max lifespan by twenty hours. So that basically means that each Devil Chip is going to cost your Digimon a day of life. But despite that, especially for the late game, I think they're totally worth it. The stat boosts are just so high that you really only need like four or five chips and you've got a Digimon that's going to kick a ton of ass, especially if you've already trained them up a bit. Even if you give them five chips, that still means they'll live for ten days or seven days after Digivolving into a champion. On top of that, because you're boosting their stats so much, there's a good chance they're going to become an Ultimate anyways, which will boost their lifespan even more.
The attempt to balance the Devil Chips is there, but honestly they're super busted because they just let you effortlessly get these kick-ass Digimon for a cost that really isn't that high in monetary terms. This is the reason why I went a little out of optimal order to get Devimon early, because what he brings to the city is just so useful for Digimon training that I think it's best to get Devimon as soon as possible.
OR SO I THOUGHT! It turns out that I misremembered Devimon in File City. I thought he joined after you beat him. Well, turns out he doesn't! Instead, he only joins after you beat the final boss! Because of that, my original plans have changed, so join us next month when we finish the plunge into the depths of Mt. Infinity and stop this crisis once and for all!
Four Steps for a 3D World
Written by: Hooded Pitohui (talk)
Hello, all you readers of The 'Shroom, and welcome back to Four Steps for a 3D World, a section we look at levels from a selection of 3D Super Mario titles through the lens of a design philosophy Koichi Hayashida talked about in an interview at least one time.
In brief, 3D Mario game levels in certain titles are designed around an introduction that lets a player learn a mechanic in a safe environment, further development that builds on what the player is learning and introduces more complicated aspects of a mechanic, a twist that adds some kind of significant wrinkle or challenge to force players to consider the mechanic from a new angle, and a conclusion which gives players one final satisfying chance to show they've mastered the mechanic. We look at 3D Mario levels and see if they conform to this model while trying to get some insight on how a good level is constructed.
This month, we're returning to the game that inspired this section's title, Super Mario 3D World. I briefly considered covering "The Great Goal Pole" this month, which anyone familiar with the game will recognize as a gimmick level (and a short one at that! I would have had an easy job this month). Ultimately, I opted to cover a more traditional level, though I'd like you to keep gimmick levels in Mario platformers in the back of your head as we go along, and we'll return to the subject near the end.
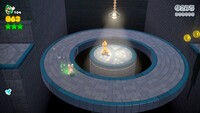
As for what level we're actually covering this month, that would be "Bob-ombs Below" from World 5 of Super Mario 3D World. It's certainly a more traditional level than The Great Goal Pole, but just how closely does Bob-ombs Below hew to our established four steps? If the level is fairly formula-standard, is there anything at all we can take from it? Let's jump in and see!
So, stepping back and looking at the level as a whole, I'd say we have a fairly textbook example of a level with Hayashida's four steps, wouldn't you? There's a clear progression here, with the stage going from offering lessons to offering new challenges (moving floors and projectiles) before throwing something unexpected in (Dash Panels) and finally giving players a chance to prove their mastery over Bob-ombs by making their own flagpole staircase. In fact, I'd say the conclusion step here has been the most satisfying we've seen in any level yet.
That said, I did have a few extra notes about this stage. First off, the rabbit chase in the middle of the level seemed rather out of place. The spinning ring platform matched up with the moving floors which can be found around it, but why have a random rabbit here? I would think you could have, say, some Green Star-activating switch behind the ring platform and a wall of Brick Blocks in front of it, necessitating that players throw a Bob-omb from the spinning ring to access it. It seems like a missed opportunity, since it would tie directly into the challenge the development stage adds to the stage and it would make Bob-ombs useful for all three Green Stars (the third is in a bonus area where Bob-ombs can be used to light tiles, with the Green Star appearing when all tiles are lit up). This is one of those places where I would really like to know the thought process of the developers! Was a Bob-omb challenge here too difficult for some players? Did they feel that players needed a break from Bob-ombs for some reason? Did they just think it was fun to chase the rabbit on a moving ring and get that sense of running with and against the momentum imparted by the platform? I mean, it is fun, so I'm hesitant to say this is bad design, but it does stick out and it would be interesting to know why the level's designers built it this way.
The other note I had concerns the final stretch of the level, the one I've labeled the twist step. What struck me about this portion of the level is that... there's not really much challenge? Keep straight, jump over a gap, don't let the Piranha Plants in the way scare you; that's all the challenge there really is, if you do this the intended way. At first, I was hesitant to label this the twist step, even, because it didn't feel like it was really challenging in any way. So let's talk a bit about that. Does a twist stage need to be challenging? Are there ever times where challenge doesn't need to be a priority?
Challenge and Spectacle in Tandem
As I was pondering what to make of the Dash Panel stretch of the level, I started thinking about The Great Goal Pole, and then I started thinking about Super Mario World. More specifically, I thought of a few levels from the Star World in that game. Star World 1 is an exercise in spin jumping down through Rotating Blocks and nothing else. Star World 2 has basically no challenge, since the Baby Yoshi in that level makes swimming easier and will swallow enemies. Star World 3 would barely qualify as a level if not for the secret exit. Now, granted, these are special cases, made to be easy so that a player can easily get the Red, Yellow, and Blue Yoshis. Even so, as a kid? They were loads of fun. Thinking about them, in turn, got me thinking about the pipe that shoots Mario out in an early Super Mario World level, soaring past obstacles, and the Forest of Illusion level that expects a player to use the cape to soar under parts of the level to the secret exit. Then I began to reminisce on the Princess' Secret Slide from Super Mario 64 and the Turbo Nozzle course in Delfino Plaza in Super Mario Sunshine, and I realized that gimmick levels and gimmicky segments of levels have always been a part of the Super Mario experience.
Sometimes there's more to it than breezing through a level, as with the aforementioned Forest of Illusion level taking some creative thinking or, and sometimes the gimmick adds to the difficulty, as with Fuzzy Time Mine. At other times, though, the gimmicks and details emphasize spectacle. Be it a running segment full of Firebars that seem dangerous but are timed precisely to let a player through unharmed if they go full speed ahead, jumping across massive gaps fearlessly with the Turbo Nozzle, chasing down an unexpectedly-fleeing flagpole, shooting out of a pipe, or even just flying away from an erupting volcano, those wow! moments without real danger and minimal challenge still form an important part of the Super Mario experience. They can stick in a player's memory just as well as tense gameplay and the relief of overcoming a difficult obstacle. Plus, for young players, they can offer a reason to keep engaging with the game even when it gets difficult. You don't want a game that's all spectacle and no challenge, but a dash of spectacle here and there can certainly help make a game more memorable and add some fun of its own!
The twist section here is an exercise in spectacle. It may be breezy, but it still introduces something new and unexpected to the level by adding in Dash Panels, and it uses that new element to create a memorable spectacle with that long chain reaction of POW Blocks and the feeling of racing ahead, unafraid of obstacles and enemies in the player's path.
Would you look at that? Even while looking at a level that follows these four steps, we're finding new lessons. Well, with four games directly mentioned in this edition, three segments of the level with moving floors, two Green Stars involving Bob-ombs, and one extra lesson pulled out of this level, this has been Four Steps for a 3D World!
Shine Get
Written by: Waluigi Time (talk)
Hello there 'Shroom readers, and welcome back to Shine Get, the section where we clean out the clutter in Princess Peach's basement because no one else has bothered to do it! Assuming you can define very important magical artifacts trapped in pocket dimensions as "clutter", anyway. What I'm trying to say is that it's time for some more Super Mario 63. This month I'll be tackling the next mini course, Wet-Dry World! Since it'll be shorter than usual as a result, I'll also be checking out the basement's last secret level as a treat.
Also, shoutout to the Toad in front of the painting who claims to be drowning when we first encounter him, but then he says that he's just kidding and reveals that he's actually a platypus in a Toad costume who was sent by the Aquatics Sanitary Society to investigate the castle's water quality. Good luck, my dude.
Mission 1: The Top of the Town
The goal here is to reach the top of the level. Easy enough, right? Well, the paintings in this game act more like doors, so jumping at specific heights to change the water level is out of the question. Gotta do it the old-fashioned way by activating switches to change the water level instead! There's one right at spawn though - except not really, because this just makes some blocks temporarily appear. Everyone knows that orange switches can't have anything to do with water, we need to find the blue switches! So I follow the blocks and it leads to a blue switch pretty quickly, ignoring a Silver Star on the way. The objective didn't involve Silver Stars, so Luigi will have a one-track mind today whether he likes it or not. Anyway, pushing the switch raises the water level as high as it can be. At this point I went on an accidental detour that involved going to the downtown area, despite how counterintuitive that sounds, but at least I got the Turbo Nozzle and a Star Coin down there before exiting the level. Shhh... The second time around, I discovered that you can just break the game a little bit with Luigi by triple jumping from the spawn platform to the blue switch.
So, yeah, turns out my failure to go the right way was an inability to realize you can walk offscreen to the left to get to another area. Whoops! With the water level raised (or, not raised - once again something that you can cheese with Luigi!), the upper portion of this area is accessible, and it's just a simple platforming section to the Shine Sprite and/or a Star Coin. Naturally, I turboed for the Star Coin because I'm not coming back here otherwise, and I missed! Thankfully I landed on a platform with the Hover Nozzle. Hovering back up to grab the Star Coin was easy, and once again using the power of Luigi, I was able to hover straight up to the platform with the Shine Sprite instead of having to do any extra work to get back there. Seriously, Luigi completely outclasses Mario from this point onward.
Oh, and remember the glitch in Shifting Sand Land where the Star Coin count doesn't update on the mission select screen? Yeah, that happens here too... Must be something with mini courses?
Mission 2: Red Coins in the Underwater City
Downtown for real! Or perhaps I should use the proper 63 terminology of underwater city. Unlike 64 (as far as I'm aware), we actually get some lore for why there's a city underneath the level. Apparently, Wet-Dry World was affected by global warming in the past, and the rising water levels caused the city to sink. Makes you wonder if the blue switches were installed afterwards as countermeasures, although that begs the question of why you can raise the water so high if that's the case... Maybe I'm overthinking the lore of this game.
Just to the right of the spawn platform, there's a cannon floating on the water. Before shooting too far and heading to the city again, I pull it back a little to make sure I grab the Star Coin floating in the air. Once you land in the tunnel to the city, there's no going back, so better get it right! The cannon won't be able to reach the tunnel unless the water is raised, though, and of course it's easy cheesy with Luigi. I drop down to the screen below, and in the tunnel there's the Turbo Nozzle box. In the top left corner of the room is the Star Coin that I got earlier, and a Metal Cap nearby. This is helpful if the water is raised since you can ground pound underwater to break open crates, and it makes you not drown, which is nice. If you'd prefer, you can drain all the water and platform around to get the coins instead, but Turbo Nozzling is easier and more fun!
Speaking of which, the first one is just to the left of that Star Coin, hidden inside a breakable crate. Then I drop down to get the second Red Coin in another crate, and drop down again to the bottom where the third one is just out in the open! There's another one here just out of reach, but it's caged... Better make note of that for later. Thankfully, the Turbo Nozzle counteracts Metal Luigi's weight, so I head back up and grab the fourth Red Coin in the top rightish part of the city, and the fifth one is in sight from here in the middle of a circle of rotating platforms. Next, I turbo through a tunnel in the bottom right (the nearby orange switch spawns blocks through here which you'll need to reach the end if the water is lowered) and grab the sixth and seventh Red Coins right next to each other at the end. There's also an Invisibility Cap nearby, and unfortunately, my Metal Cap ran out and you need to ground pound this open. So one quick backtracking later and I grab the Invisibility Cap, quickly heading back towards the main area. Before grabbing the last Red Coin in that cage, I go back up to where the fourth Red Coin was and grab a caged Rocket Nozzle. You never know when you'll need it! I ended up having to make two trips to have enough time to get both, though. Anyway, all eight Red Coins collected and the Shine Sprite spawns in the middle of the city!
Mission 3: The Five Secrets of the Shallows and Sky
Oh hey, we can get those Silver Stars now! We already know where the first one is, but I crush the orange switch's hopes and dreams by just grabbing it with a Luigi triple jump and hover combo. I can't state this enough, Luigi is great in this game. The second Silver Star is in the bottom right corner behind some breakable crates. Then I grab a nearby Invisibility Cap and turbo to the left area with it, allowing me to grab the third Silver Star inside a cage. The fourth Silver Star is just up and to the left of that. Having the water level raised makes it really easy to just turbo over to, but even if the water's been lowered already, the platforming is really easy. The fifth one is just to the right of the cage, but it's underneath a crate that needs to be ground pounded, and there's no Metal Cap to save us here! It's no problem, though. I just head back to the right, hit a blue switch to lower the water to ground level, and then go get it. Then I go back to the right section where the Shine Sprite spawns, and as long as I'm on the ground level, I decided that I may as well justify the existence of the Rocket Nozzle in this level by using it to jump up to the spawn platform and grab the Shine Sprite. Look at that, a whole mission in one paragraph!
Secret level time! At the right end of the room, there's two switches which control the water level in this room. That means we can flood Peach's basement and ruin the artwork hanging on the walls! Apparently, this opens the drain in the castle lake - but this is probably a lie, because there's a door that leads to the lake and it looks the same if you go out there. Then again, the water level is back to normal once you go back in, so maybe some retcon fairies are at work here. The Toads don't seem to mind the room being completely submerged though, because they don't react at all. Anyway, this is important because raising the water lets you swim up to a lighter section of the ceiling at the very left of the room that you can pass through. (Yes, you can cheese this with Luigi's triple jump. You have to love this man.) There's some platforms up here, which leads up to the Shifting Sand Land room passage to the left, and a pipe to the right. Heading down the pipe goes to..
Secret Course: Thwomp's Castle
The game's Whomp's Fortress equivalent, perhaps? It doesn't feel much like it, but it's a fortified building with crushing rock enemies. Anyway, you probably know the drill with the secret levels at this point, it's just a lot of platforming that I can't really describe in written form very well without making a really dry section that you probably won't want to read. True to its name, the twist of this level is that there's also a lot of Thwomps that you have to avoid being crushed by, and a few points where you ride them to higher sections as they ascend. There's a section at the beginning where you have to run across collapsing bridges while Thwomps try to crush you, and it's pretty fun watching all the stuff fall into the abyss at once. After that, there's a Hover Nozzle before going upward. The end of the level features something kind of similar to the Thwomp elevator back in Bowser in the Dark World, where you have to jump on Thwomps and ride them up without being crushed by more Thwomps above you. That's the last test of your skill before being able to grab the Shine Sprite!
And no, there's no Star Coin in this level! I was a little suspicious after I didn't find one and did some doubling back to look, then I looked it up. I guess the Thwomps are poor.
With Wet-Dry World and Thwomp's Castle taken care of, that's almost everything in the basement completed! Next month, we'll wrap this section of the game up by taking the fight to Bowser once more. I bet he won't be expecting to see the man in green - and if I had to guess, he'll probably still call him Mario in all of his dialogue.
The Anatomy of a Pikmin
Hello again, and welcome back to The Anatomy of a Pikmin, a section where I look at the various Pikmin types from the Pikmin franchise! After a one-month break due to my own poor planning, we're back, and this month we're going to finish off looking at the Pikmin types which debuted in Pikmin 3. This month's subject is Hood's second-favorite Pikmin, the adorable little Winged Pikmin!
Pikmin 3 – A Strong Start
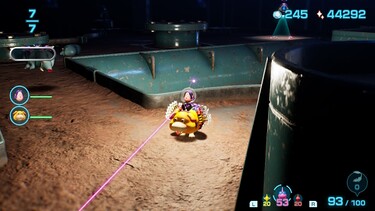
So, right off the bat, the most distinct feature of Winged Pikmin is, well, their wings! That's right! Winged Pikmin are the first Pikmin type that can fly! This flight is very useful. You see, in Pikmin 3, Winged Pikmin have vastly different pathing than the other Pikmin. Their wings allow them to take shortcuts not available to other Pikmin. For example, if there's something in the way of a path, instead of going around it and taking a longer route, Winged Pikmin will simply fly over it. However, there is an attempt to balance this; if there are over 66 Pikmin on the field, the Winged Pikmin will fly slower. This can cause what looks like little traffic jams in the air, which is pretty cute. In addition, Winged Pikmin are also naturally slower than other Pikmin types anyways.
Winged Pikmin also have an obstacle that's pretty much unique to them, that being the spider webs created by Arachnodes. If you aren't careful and you haven't killed the Arachnodes on the map, the Winged Pikmin will fly right into their webs, giving the devious spiders a nice free meal. So it's important that you take out all the Arachnodes if you're going to rely on Winged Pikmin to carry things!
One last little detail that I think is cute is that, if you attempt to have Winged Pikmin and regular Pikmin pick up the same thing, a couple different things can happen. First, this will cause Winged Pikmin to fly only a little bit off the ground and prevent them from taking advantage of their pathfinding, so I would say it's, how you say, sub-optimal to do this! But if you use enough Winged Pikmin to meet the weight requirement and like a single other Pikmin, that other Pikmin will briefly hold onto the item before dropping off as the Winged Pikmin take flight. Everything about Winged Pikmin is just so adorable!
Now as far as combat goes, Winged Pikmin are, in my opinion, deceptively useful. For starters, Winged Pikmin are the weakest Pikmin in terms of combat power, hitting for only half power. So you'd think that would make them bad, right? Well, if we were using Pikmin 1 or Pikmin 2 rules, then, yes, you'd be right. But Pikmin 3 introduced a new mechanic, that being the charge mechanic.
This mechanic sends all of your Pikmin of the selected type at an enemy at once. I'd argue that Winged Pikmin get the best use out of this mechanic because, when facing an enemy that takes flight, Winged Pikmin can easily swarm and destroy them without you having to sit there and chuck Pikmin at that them like in the old games. Your Flighty Joustmite, your Sheargrubs, and your Swooping Snitchbugs have no hope of defeating our winged armada. In addition, Winged Pikmin are one of the best Pikmin to help take out the Bug-Eyed Crawmad. In order to defeat the Bug-Eyed Crawmad, you have to bash its eyes in before it exposes its weak back, and, well, charge your Winged Pikmin at it and they'll all swarm one of its eyes, making Winged Pikmin the best Pikmin type with which to bash its eyes in. Winged Pikmin are also the best Pikmin to take on the Burrowing Snagret, because not only will they instantly charge its head, but they also can't even be eaten by the Snagret!
Basically, Winged Pikmin are some of the best Pikmin for any enemy you need to throw the Pikmin on top of because the charge mechanic makes that super easy. No longer do you need to aim Pikmin! Just send your air forces in! You can pretty easily use this in tandem with other Pikmin, too. By sending the Winged Pikmin in first and then using the other Pikmin, you can handily increase the damage you dish it! While Winged Pikmin might be weak, it's super easy to get like a million Ultra-Spicy Sprays, completely negating that problem!
Winged Pikmin, in my opinion, also have the coolest unique enemy. The aerial foes of Winged Pikmin are the swarming Scronets. The Winged Pikmin will actually engage in genuine air battles like they're the Royal Air Force taking on the Luftwaffe! Oh, also, for some reason I can't explain, they're immune to all crushing attacks except the one launched by the Plasm Wraith!
In Pikmin 3, Winged Pikmin are easily one of the best and the most unique Pikmin introduced to the series. Their pathfinding ability makes them super useful for carrying fruit back to the S.S Drake. In fact, they render Blue Pikmin almost completely irrelevant because, when you get to any area with water you need to cross, you can just take Winged Pikmin with you as long as what you need isn't completely submerged! Then you factor in their sneakily-good combat skills, and you can see how Winged Pikmin are truly a unique top-tier Pikmin!
Pikmin 4 – Clipped Wings
Unfortunately, Winged Pikmin are damn near worthless in Pikmin 4! But first, let's talk about some positives! Winged Pikmin do get some buffs, because they do have a few new utility functions! For starters, they are the only Pikmin immune to the sticky mold because they simply fly over it. The same goes for the new mud hazard. They also are the only Pikmin who can't have objects they're carrying get stolen from them by enemies such as the Breadbugs or Glow Pikmin during Dandori battles. This is because Winged Pikmin just fly over them! They also get a little bit of a boost to their combat abilities, gaining better targeting on weak points. On the flipside, they're no longer immune to be crushed, which, while unfortunate, makes sense because I'm guessing them being immune to being crushed in Pikmin 3 was an oversight anyways.
You can see Winged Pikmin did get some nice utility bonuses in Pikmin 4, so you're probably wondering what makes them so useless? Well, for starters, you barely get to use them at all! The Winged Pikmin Onion can't be unlocked until you reach the final area! Because of that, there's very little in the game that's designed around having Winged Pikmin (outside of a few caves). I get why this had to happen. The game can't guarantee you'll have them in a large enough quantity to be able to solve any puzzles with them, so it doesn't build much around them. In fact, according to Pikipedia there are only two treasures that require Winged Pikmin, those being the Straight-and-Narrow Track and the Telekinesis Detector.
The main gimmick Winged Pikmin had going for them has also been significantly nerfed, with their pathfinding being greatly diminished. They'll fly over small gaps such as the ones Oatchi can jump over, but otherwise they'll just take the same path as any other Pikmin. This significantly reduces their usefulness, because, while they also lose their speed disadvantage and are now as fast as the average Pikmin, the reality is there's no real reason to use Winged Pikmin to carry things because you don't gain any benefit from doing so. This becomes a big deterrent to using them since you can now only keep three types of Pikmin on the field at once and it's usually better to go with a more useful type.
The sad fact is, when you consider their pathfinding, their few necessary uses, and their very late appearance in the game, there just simply isn't enough for the Winged Pikmin to do. It's one of those things where there's so many types of Pikmin that at least one of them was going to end up lost in the shuffle. Sadly, Winged Pikmin, along with fellow Pikmin 3 alumnus Rock Pikmin, are the two that most get sidelined. Because of that, Winged Pikmin go from one of the best Pikmin in Pikmin 3 to one of the most forgettable in Pikmin 4.
That's all for this month. Join me next month when we start our coverage of Pikmin 4 by looking at the Ice Pikmin!
Pitohui's Pokémon Academy
Written by: Hooded Pitohui (talk)
Hello class, hello! Spring has sprung, it would seem! The greenery is returning, and the mornings are once again filled with birdsong. The perfect time for some spring cleaning, is it not? What's that? You don't care for the thought of dusting and sorting items into bins while the sun shines and the air begins to warm? You'd rather be out with those singing birds?
A vexing predicament indeed... Or, rather, it would be vexing, but, I've a suggestion. Why not listen to birdsong while you clean? "Preposterous," you say? Not so! For it just so happens that the fluffy Altaria is well-suited to clean and hum out its song for you all at once! Intrigued? I thought you may be. Let's get right to today's lesson, for if we hurry along, there might just be time enough for you all to feel Altaria's fluffy wings at the end of our session.
So as not to hold us up, allow me to remind those of you who are just joining us to take a look at our course policies in the first box below. If you need to review the most commonly-used terms in this class, open up the second box.
First, a Smogon University course, this course is not. No, this academy's lessons are designed to get trainers of any stripe thinking about how they can raise their Pokémon, and, as a result, aren't designed to keep up with the widely-accepted metagame for the series. In some cases, the way I've raised my Pokémon may even flies in the face of conventional wisdom. If you're looking for top-tier strategies, do check out Smogon, but if you merely want to get a little deeper into raising Pokémon while still doing things your own way, feel free to use this section as a reference.
Since we all know the importance of citing our sources, I also need to credit the design of some of the tables used in these lectures to Crocodile Dippy, author of the Pocket Handbook which can be found in early editions of Strategy Wing.Base Stats: Base stats are the values associated with a particular Pokémon species, and are the same across every individual Pokémon of a given species. You have no influence on them. You can think of them as traits tied to a species. A chimp isn't ever going to be able to get as good as digging as a mole will be, and, likewise, an Abra is never going to have the defensive prowess a Shuckle has.
Individual Values (IVs): Individual values, as their name implies, are associated with individual Pokémon. They range from 0 to 31 in each stat, with 31 being considered a "perfect" IV and higher numbers corresponding to different stats. Magikarp A and Magikarp B will have the same base stats, but they may very well have different IVs. To stick with the animal analogy, one mole may be born with larger claws than another mole, and that first mole is probably going to have an easier time digging through dirt than the latter. Individual values are set in stone, strictly speaking, but you can use Hyper Training (from Generation VII onwards) to functionally get a perfect IV in a stat.
Effort Values (EVs): Effort values are the one thing you can easily change. A Pokémon can earn, primarily through battling, but also through means like the use of certain items or mechanics like Super Training, up to a total of 510 effort values, with up to 252 in any given stat. To finish off the animal analogy, no matter what kind of claws a mole is born with, moles who have more experience digging are probably going to be better at digging than moles which have never dug.
Nature: A Pokémon's nature is, more or a less, a stat modifier with a name meant to make it sound like a Pokémon has some personality. Natures will raise one stat by ten percent and lower another stat by ten percent. Some natures raise and lower the same stat, canceling out the effect and leaving stats unchanged. Natures can be functionally changed with the use of special mint items from Generation VIII onwards.
STAB: STAB stands for Same-Type Attack Bonus, and refers to the boosted power of moves that match the type of the move's user. To illustrate this, consider the case of a Lombre, a dual-type Pokémon which is both a Water-type and a Grass-type. Any Water-type moves Lombre uses will have their power boosted by 1.5x, and any Grass-type moves Lombre uses will, likewise, have their power boosted by 1.5x. (There are circumstances where this does not apply, and, while the 1.5x multiplier is typical, some games use other multipliers.)
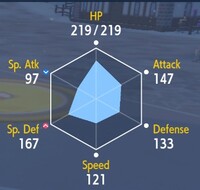
We begin, as always, by examining Altaria's base stats. You'll notice that Altaria is more defensively-inclined for the most part, with good special defense and decent defense. At a glance, you might think this makes Altaria a classic case of a defensively-oriented Pokémon with a middling HP we need to increase as much as possible. That's not exactly wrong, but take a closer look, and you'll notice Altaria has decent speed for a more defensive Pokémon. After that, you might notice that its offensive stats, while middling, aren't so low as to make working with them too remote a possibility. Viewed as a whole, Altaria is a fairly well-rounded Pokémon, and that means that we have a number of directions we could go in.
Now, if I were to go over multiple possible builds, we'd exceed our time together, and I'm certain nobody wants that, so we'll pick a route early, commit to it, and focus exclusively on it. I'll remind you, however, that this isn't necessarily the best route, but rather just a route, so don't be afraid to experiment or to try something completely different.
What I try to start with, in a situation like this, is asking if there's one offensive stat I should prefer over the other. After all, the easiest dump stat is almost always one of the two attacking stats. In this case, they're equal, and no other factor like typing or Abilities suggests one over the other, so, like Luvdisc last month, we're going to skip ahead a bit and pluck something from Altaria's moveset we can build around.
In this case, what we find are Dragon Dance and Roost. Now, Roost is an Egg Move, but we'll talk more about how we can handle that when we discuss moves in more detail. What's important to note here is that Dragon Dance raises Altaria's attack and speed by one stage with each use. With a couple of uses, Altaria is outspeeding most foes and hitting fairly hard with physical attacks, the stat boosts helping to offset its middling attack base stat. Of course, using the move takes up a few turns, reducing Altaria's longevity on the battlefield even with its solid defenses... unless it can heal itself. That's where Roost comes in, providing Altaria a way to patch up its injuries and, in conjunction with its defenses, stay out on the field longer so it can take full advantage of its increased attack.

|
Name: | Altaria | Base HP: | 75 | |
| Species: | Humming | Base Attack: | 70 | ||
| Type: | Dragon | Flying | Base Defense: | 90 | |
| Abilities: | Natural Cure | Base Special Attack: | 70 | ||
| Base Special Defense: | 105 | ||||
| Cloud Nine | Base Speed: | 80 | |||
With all of that said, we have our IV and EV distribution shaping up. We'd like to get maximum IVs in every stat except special attack (and, if you must sacrifice another, speed can make do with just being a high IV in general). For EVs, we'll still want maximum investment of 252 into HP to shore up Altaria's defenses. Then, we'll invest 252 EVs into attack to maximize the damage Altaria can inflict once it has danced its Dragon Dance a couple times. The remaining EVs, I'd suggest putting into special defense. It's better to give Altaria just a bit of reinforcement there and to try and bring it out primarily against special attackers than to try and split its defenses.
For the same reason, I recommend a Careful nature, giving its special defense that much more of a boost and lowering the stat we don't care about at all (special attack).
With that all worked out, the last thing to decide upon before we get into Altaria's moveset is what Ability it should have. Altaria has two options, those being Natural Cure and Cloud Nine. Cloud Nine has its uses, negating the effects of weather conditions, but it's fairly situational, seeing as how there needs to be some weather for Altaria to usefully negate. Natural Cure relieves Altaria of any status conditions it may have when it switches out. Now, the hope is that Altaria won't need to switch out, because that will erase its boosts from Dragon Dance, but there are many reason it could be forced to switch out, whether encountering a Steel-type with dual typing that resists it, encountering a dangerous Ice-type, or getting hit with a burn or something similar. Since burns will reduce Altaria's attack, Toxic can wear down Altaria's HP to offset its Roost recovery, and paralysis can be a general nuisance, it may be worthwhile at times to switch Altaria and let Natural Cure refresh it. It's more likely than Altaria usefully negating any weather, that's for certain, so we will go with Natural Cure.
Now that all of that is worked out, we can turn our eyes to Altaria's moveset. We already have two of its moves incorporated into this built, and they're both status moves, so we ought to look at some physical moves that can take advantage of Dragon Dance's boosts. As we usually do, we'll start by looking at STAB moves, and we'll find three Dragon-type options: Outrage, Dragon Claw, and Breaking Swipe. Breaking Swipe has too low a base power to be what we want here, so we'll rule it out. Outrage, while the best choice in terms of power, comes with the drawback of locking Altaria into using it for multiple turns. This could make it hard to get Roost in. Additionally, when the move ends, Altaria becomes confused, which can be cleared with a switch-out, but that isn't ideal since that erases the Dragon Dance boosts. Outrage is workable, but risky, so I'm going to go with the middle-of-the-road, reliable Dragon Claw.
Now, for Flying-type moves, we could look at Brave Bird and maybe even Dual Wingbeat. Fly taking two turns makes it hard to use effectively, Aerial Ace has too low a base power, and Acrobatics is going to be ruled out by a held item we'll discuss later, so those are our only two options. I'm going to tell you something unusual, though; I don't think it's worthwhile to put a Flying-type move on Altaria. It only adds coverage against Bug-types, Grass-types, and Fighting-types, all of which the rest of your team can probably cover effectively and none of which pose much threat to Altaria since it already resists all three types.
Instead, I recommend going with the offensively-reliable Ground-type, which is super effective against five types, including Rock, which does pose a threat to Altaria. Luckily, the standard-bearer of Ground-type moves, Earthquake, is available, so we will go with that as a secondary attacking move and complete Altaria's moveset.
| Dragon Claw | 
|
The user slashes the target with huge, sharp claws to inflict damage. |
| Earthquake | 
|
The user sets off an earthquake that strikes every Pokémon around it. |
| Dragon Dance | 
|
The user vigorously performs a mystic, powerful dance that raises its Attack and Speed stats. |
| Roost | 
|
The user lands and rests its body. This move restores the user's HP by up to half its max HP. |
Now, circling back to Roost, let's have that discussion about Egg Moves. Through breeding, many Pokémon can acquire moves that they cannot learn by leveling up or using TMs. If one of the desired Pokémon's parent Pokémon knows a move on the desired Pokémon's special list of "Egg Moves," the Pokémon will hatch knowing that move! In this case, pairing a female Altaria with, say, a male Noctowl which knows Roost will produce an egg containing a Swablu knowing Roost. I highly recommend looking up an external resource to find which Pokémon can pass down a given Egg Move.
Alternatively, if, say, you have a Ditto with numerous 31 IVs and you need to use it for breeding, rather than our hypothetical Noctowl, you may also use a Mirror Herb. First, have the Swablu or Altaria you are raising forget a move to open up one of its four moveslots. Then simply give a Mirror Herb to the Swablu or Altaria you are raising, and bring it on a picnic with the Noctowl (or other Pokémon) which knows Roost. At the end of the picnic, your Swablu or Altaria will know Roost!
This is where we would end off our discussion in a typical class session, but we have just a bit more to cover today. You see, there are two major threats Altaria faces. Ice-types are one, since it has a double weakness to them. You'll simply need to be sure to avoid Ice-type moves wherever possible. The other threat is the Rock-type. Now, we've mitigated this somewhat with Earthquake, but Rock-types still pose a significant threat via way of Stealth Rock. Stealth Rock can chip off a quarter of Altaria's HP every time it switches in, greatly reducing its longevity and its ability to fit in the Dragon Dance uses it needs to fit in.
For this reason, I highly recommend equipping Altaria with a pair of Heavy-Duty Boots, which will protect it from the effects of entry hazards like Stealth Rock. You wouldn't want your Altaria getting scuffed and dirty, now would you? Of course, if it did, a washing at a picnic might help...
Ah, well, look at that, we returned to the topic of cleaning after all that discussion, hm? Well, I did promise you all a chance to feel Altaria's fluffy feathers if we had time at the end, so why don't you go and do that? Oh, but be sure to wash your hands first! Don't get those feathers dirty! I'll see you for our next session in April. In the meantime, your homework assignment is to find your own methods of raising an Altaria. As we said near the top of class, it's a versatile, well-rounded Pokémon, so I'm sure you can find alternative movesets and stat distributions for it!
| The 'Shroom: Issue 204 | |
|---|---|
| Staff sections | Staff Notes • The 'Shroom Spotlight • Poochy's Picks • Poll Chairperson Address • Credits |
| Features | Fake News • Fun Stuff • Palette Swap • Pipe Plaza • Critic Corner • Strategy Wing |


