Special World 1 (Puzzle & Dragons: Super Mario Bros. Edition): Difference between revisions
m (→Gallery) |
mNo edit summary |
||
| Line 12: | Line 12: | ||
==Courses== | ==Courses== | ||
{|class= width=100% cellspacing=0 border= | {|class= width=100% cellspacing=0 border=1 cellpadding=3 class="wikitable" style="text-align: center; margin:auto" | ||
|-style="background: #ABC" | |-style="background: #ABC" | ||
!Course | !style="background: #ABC"|Course | ||
!Terrain | !style="background: #ABC"|Terrain | ||
!Course type | !style="background: #ABC"|Course type | ||
!? Block items | !style="background: #ABC"|? Block items | ||
!Enemies found here | !style="background: #ABC"|Enemies found here | ||
!Boss(es) | !style="background: #ABC"|Boss(es) | ||
!Teammate(s) unlocked | !style="background: #ABC"|Teammate(s) unlocked | ||
|- | |- | ||
|[[World 1-1 (Puzzle & Dragons: Super Mario Bros. Edition)#★World 1-1|★World 1-1]] | |[[World 1-1 (Puzzle & Dragons: Super Mario Bros. Edition)#★World 1-1|★World 1-1]] | ||
| Line 83: | Line 83: | ||
|rowspan=2|Castle | |rowspan=2|Castle | ||
|rowspan=2|Heartless Course<br/>[[File:PDSMBE-FireOrb.png|20px|Fire]][[File:PDSMBE-WaterOrb.png|20px|Water]][[File:PDSMBE-WoodOrb.png|20px|Wood]][[File:PDSMBE-LightOrb.png|20px|Light]][[File:PDSMBE-DarkOrb.png|20px|Dark]][[File:PDSMBE-HeartOrbD.png|20px|Heart]] | |rowspan=2|Heartless Course<br/>[[File:PDSMBE-FireOrb.png|20px|Fire]][[File:PDSMBE-WaterOrb.png|20px|Water]][[File:PDSMBE-WoodOrb.png|20px|Wood]][[File:PDSMBE-LightOrb.png|20px|Light]][[File:PDSMBE-DarkOrb.png|20px|Dark]][[File:PDSMBE-HeartOrbD.png|20px|Heart]] | ||
|rowspan=2|[[File:PDSMBE-BowsersShell.png|25px|Spiky Shell|link= | |rowspan=2|[[File:PDSMBE-BowsersShell.png|25px|Spiky Shell|link=Spiky Shell]] [[File:PDSMBE-StarGem.png|25px|Star Gem|link=Star Gem (Puzzle & Dragons: Super Mario Bros. Edition)]] [[File:PDSMBE-Coin.png|25px|Coin|link=Coin]] | ||
|rowspan=2|[[File:PDSMBE-GreenKoopaTroopaCard.png|Green Koopa Troopa|link=Koopa Troopa]] [[File:PDSMBE-RedKoopaTroopaCard.png|Red Koopa Troopa|link=Koopa Troopa]] [[File:PDSMBE-GreenKoopaParatroopaCard.png|Green Koopa Paratroopa|link=Koopa Paratroopa]] [[File:PDSMBE-RedKoopaParatroopaCard.png|Red Koopa Paratroopa|link=Koopa Paratroopa]] | |rowspan=2|[[File:PDSMBE-GreenKoopaTroopaCard.png|Green Koopa Troopa|link=Koopa Troopa]] [[File:PDSMBE-RedKoopaTroopaCard.png|Red Koopa Troopa|link=Koopa Troopa]] [[File:PDSMBE-GreenKoopaParatroopaCard.png|Green Koopa Paratroopa|link=Koopa Paratroopa]] [[File:PDSMBE-RedKoopaParatroopaCard.png|Red Koopa Paratroopa|link=Koopa Paratroopa]] | ||
|Before Larry joins the player: [[File:PDSMBE-LarryCard.png|Larry|link=Larry]] | |Before Larry joins the player: [[File:PDSMBE-LarryCard.png|Larry|link=Larry]] | ||
| Line 126: | Line 126: | ||
After fighting the second set of enemies, the player finds a branching path. To reach the secret exit, the player must clear more Wood Orbs than Fire Orbs. However, the course does not contain any Wood Orbs, so the player needs to bring an ally that can create Wood Orbs. Upon defeating the boss at the end of the secret path, the player unlocks [[World 1-5 (Puzzle & Dragons: Super Mario Bros. Edition)#★World 1-5|★World 1-5]]. | After fighting the second set of enemies, the player finds a branching path. To reach the secret exit, the player must clear more Wood Orbs than Fire Orbs. However, the course does not contain any Wood Orbs, so the player needs to bring an ally that can create Wood Orbs. Upon defeating the boss at the end of the secret path, the player unlocks [[World 1-5 (Puzzle & Dragons: Super Mario Bros. Edition)#★World 1-5|★World 1-5]]. | ||
== | ==Map gallery== | ||
<gallery> | <gallery> | ||
PDSMBE-SW1-1Map.png|★World 1-1 | PDSMBE-SW1-1Map.png|★World 1-1 | ||
Revision as of 10:23, June 28, 2016
- Not to be confused with Special 1.
Special World 1, known as ★World 1 in-game, is the first Special World in Puzzle & Dragons: Super Mario Bros. Edition that is unlocked by clearing the game. It is a more difficult version of World 1, with a blue tint in the background. Like World 1, Larry Koopa is the boss of this Special World and is fought in his castle and airship. Clearing ★World 1-![]() Airship unlocks Larry as an ally, and Statue Mario as a Leader.
Airship unlocks Larry as an ally, and Statue Mario as a Leader.
Courses
| Course | Terrain | Course type | ? Block items | Enemies found here | Boss(es) | Teammate(s) unlocked |
|---|---|---|---|---|---|---|
| ★World 1-1 | Grassland | Normal Course |
None | None | ||
| ★World 1-2 | Cavern | 3-Color Course |
None | None | ||
| ★World 1-3 | Grassland, Sky (Mushrooms) | Normal Course |
None | |||
| ★World 1-4 | Beach | 4-Color Course |
None | Normal exit: |
None | |
| Secret exit: | ||||||
| ★World 1-5 | Grassland | Heartless Course |
None | |||
| ★World 1- |
Fortress | Normal Course |
None | None | ||
| ★World 1-6 | Sky (Mushrooms), Grassland | 3-Color Course |
None | |||
| ★World 1- |
Castle | Heartless Course |
Before Larry joins the player: |
None | ||
| After Larry joins the player: | ||||||
| ★World 1- |
Airship | Normal Course |
None | Before Larry joins the player: |
||
| After Larry joins the player: |
Course maps
For a listing of course maps in ★World 1, see here.
Enemies
- Goombas
- Green Koopa Troopas
- Red Koopa Troopas
- Yellow Koopa Troopas
- Paragoombas
- Cheep Cheeps
- Green Koopa Paratroopas
- Red Koopa Paratroopas
- Yellow Koopa Paratroopas
- Hammer Bros
- Coin Coffers (can appear randomly)
- Boom Boom (Tower boss)
- Larry Koopa (Castle/Airship boss)
- Wiggler & Flame Chomp (replaces Larry as the castle boss, after Larry joins the player)
- 2-Goomba Tower (replaces Larry as the airship boss, after Larry joins the player)
Secret exit
★World 1-4
After fighting the second set of enemies, the player finds a branching path. To reach the secret exit, the player must clear more Wood Orbs than Fire Orbs. However, the course does not contain any Wood Orbs, so the player needs to bring an ally that can create Wood Orbs. Upon defeating the boss at the end of the secret path, the player unlocks ★World 1-5.
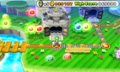
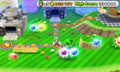
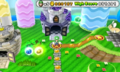
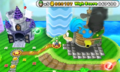
Map gallery
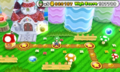
★World 1-1
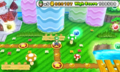
★World 1-2
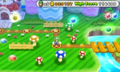
★World 1-3
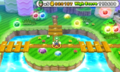
★World 1-4

★World 1-5
★World 1-
 Tower
Tower
★World 1-6
★World 1-
 Castle
★World 1-
 Airship


