The Colossal Hole: Difference between revisions
LinkTheLefty (talk | contribs) mNo edit summary |
LinkTheLefty (talk | contribs) (Sourced an English name (the old one was presumably a fan-translation from the Japanese guide).) |
||
| Line 1: | Line 1: | ||
[[File:TCHM.PNG|thumb|right|E4 The Colossal Hole]] | [[File:TCHM.PNG|thumb|right|E4 The Colossal Hole]] | ||
'''The Colossal Hole''' is a level located in the east part of the [[Music Box World]] which appeared in ''[[Wario Land 3]]''. It is only unlocked, along with [[The West Crater]], after [[Wario]] uses the three | '''The Colossal Hole''' is a level located in the east part of the [[Music Box World]] which appeared in ''[[Wario Land 3]]''. It is only unlocked, along with [[The West Crater]], after [[Wario]] uses the three Conch Artifacts to make the volcano erupt. | ||
The Colossal Hole is an underground level inhabited by | The Colossal Hole is an underground level inhabited by [[Omodon]] enemies who turns Wario into [[Flat Wario]] if they manage to crush him. In this case, Wario must simply get caught by a blue [[Omodonmeka]] to return to normal. In the bottom of the level, there are [[Jellybob (Wario Land 3)|Jellybob]]s that turn Wario into [[Puffy Wario]], allowing him to return to the top. A golf minigame and minigame block are found here as well. There is an area outside the hole, reachable via [[Owl (species)|owl]]. It has a [[Sun (Wario Land 3)|sun]]/[[Mr. Moon]], [[Brrr Bear]]s and a [[Spear-bot]]. | ||
Like all the levels in the eastern part, this level is only visitable at night time. However, after Wario restores the Sun | Like all the levels in the eastern part, this level is only visitable at night time. However, after Wario restores the Sun Medallion, he can visit it anytime. The only difference is the owls who sleep during the day, allowing Wario to use them. At night, those owls are flying in the air and it is impossible for Wario to catch them unless he has the High Jump Boots. This is also one of many levels that has bombs in it; when Wario blows them up with the Explosive Plunger Box found in [[Beneath the Waves]], new areas become accessible. One such area is full of [[Snake (Wario Land 3)|snake]]s, though they are not summoned by the Flute. | ||
==Treasures== | ==Treasures== | ||
===Gray Chest: Blue Snake Eye (right)=== | ===Gray Chest: Blue Snake Eye (right)=== | ||
[[File:Snakyb!.PNG|thumb|left|The blue Snake door with the blue snake's eyes]] | [[File:Snakyb!.PNG|thumb|left|The blue Snake door with the blue snake's eyes]] | ||
The {{conjectural|Blue Snake Eye}} in the [[treasure chest|Gray Chest]] is located at the left side of the level. Wario must first use his [[Puffy Wario|puffy form]] to get the [[key|Gray Key]]. | |||
After getting two of the snake's eyes, the blue snake door will open in the [[Tower of Revival]]. | After getting two of the snake's eyes, the blue snake door will open in the [[Tower of Revival]]. | ||
| Line 15: | Line 15: | ||
===Red Chest: Air-Pump=== | ===Red Chest: Air-Pump=== | ||
[[File:Pump!.PNG|thumb|The Air-Pump raising the ice blocks]] | [[File:Pump!.PNG|thumb|The Air-Pump raising the ice blocks]] | ||
The {{conjectural|Air-Pump}} in the Red Chest requires the Garlic treasure from the Tower of Revival. Wario must play a game of golf, then go down the ladder at the far left of the mini-game door. Then, he must avoid the [[Omodonmeka]], break the solid blocks, and enter the door at the far right. | |||
There, Wario must take the | There, Wario must take the [[Spearhead (enemy)|Spearhead]] and break the floor to reach the Red Key. After doing that, he must return to the area with the Omodonmeka and use his puffy form to avoid the [[Spike (Wario Land series)|spike]]s and head up. He then has to enter the door at the upper left, which was previously blocked off by a mini-game block. From there, he can break the solid blocks and open the chest. | ||
The Air-Pump makes the ice blocks rise in [[The Pool of Rain]] and [[Bank of the Wild River]]. | The Air-Pump makes the ice blocks rise in [[The Pool of Rain]] and [[Bank of the Wild River]]. | ||
===Green Chest: | ===Green Chest: High Jump Boots=== | ||
The High Jump Boots<ref>Brady, Matthew K., Nathan Beittenmiller, Debra McBride, and David Cassady. ''Game Boy Game Secrets, 2001 Edition'' Prima's Official Strategy Guide. Page 95.</ref> power-up in the Green Chest requires this level to be visited in daytime, which is only possible after restoring the Sun Medallion and clearing the darkness. Wario must use the first owl to reach the second one, which he must use to avoid the spikes and reach a door leading to an area outside the hole. | |||
Here, Wario must run until he finds two vertically placed | Here, Wario must run until he finds two vertically placed [[Bonfire Block]]s. To break them, he has to turn into [[Flaming Wario|Hot Wario]] using the sun in the area. Once broken, Wario can reach the Green Key. | ||
After getting the key, Wario must find two horizontally placed | After getting the key, Wario must find two horizontally placed Bonfire Blocks and break them the same way he did with the other ones. Then, Wario must simply open the chest to discover his new high jump power-up. | ||
===Blue Chest: Locomotive=== | ===Blue Chest: Locomotive=== | ||
[[File:Locomotive.PNG|thumb|left|Wario finds the Locomotive]] | [[File:Locomotive.PNG|thumb|left|Wario finds the Locomotive]] | ||
The {{conjectural|Locomotive}} in the Blue Chest requires blowing up the bomb found in this level using the Explosive Plunger Box from Beneath the Waves. Then, he has to use the first owl to get above the hole. The door is now accessible. Upon entering the door, Wario will find himself in an area full of snakes, which he can use to get the Blue Key and reach the area where the Blue Chest is. | |||
Getting the Locomotive does not affect the | Getting the Locomotive does not affect the world in any way. | ||
{{br}} | {{br}} | ||
==Reaction abilities in this level== | ==Reaction abilities in this level== | ||
*[[Electric Wario]] | |||
*[[Flat Wario]] | |||
*[[Flaming Wario|Hot Wario]] | |||
*[[Frozen Wario|Ice Skatin' Wario]] | |||
*[[Puffy Wario]] | *[[Puffy Wario]] | ||
==Gallery== | ==Gallery== | ||
| Line 45: | Line 46: | ||
TCH1.PNG|Wario and an owl | TCH1.PNG|Wario and an owl | ||
TCH2.PNG|Outside the hole | TCH2.PNG|Outside the hole | ||
TCH3.PNG|The | TCH3.PNG|The snakes area | ||
TCH4.PNG|The bottom of the hole | TCH4.PNG|The bottom of the hole | ||
</gallery> | </gallery> | ||
| Line 53: | Line 54: | ||
|Jap=巨大な穴 | |Jap=巨大な穴 | ||
|JapR=Kyodai na Ana | |JapR=Kyodai na Ana | ||
|JapM=The | |JapM=The Colossal Hole | ||
}} | |||
==References== | |||
<references/> | |||
{{WL3}} | {{WL3}} | ||
[[Category:Subterranean Areas]] | [[Category:Subterranean Areas]] | ||
[[Category:Wario Land 3 Levels]] | [[Category:Wario Land 3 Levels]] | ||
Revision as of 14:52, April 4, 2020

The Colossal Hole is a level located in the east part of the Music Box World which appeared in Wario Land 3. It is only unlocked, along with The West Crater, after Wario uses the three Conch Artifacts to make the volcano erupt.
The Colossal Hole is an underground level inhabited by Omodon enemies who turns Wario into Flat Wario if they manage to crush him. In this case, Wario must simply get caught by a blue Omodonmeka to return to normal. In the bottom of the level, there are Jellybobs that turn Wario into Puffy Wario, allowing him to return to the top. A golf minigame and minigame block are found here as well. There is an area outside the hole, reachable via owl. It has a sun/Mr. Moon, Brrr Bears and a Spear-bot.
Like all the levels in the eastern part, this level is only visitable at night time. However, after Wario restores the Sun Medallion, he can visit it anytime. The only difference is the owls who sleep during the day, allowing Wario to use them. At night, those owls are flying in the air and it is impossible for Wario to catch them unless he has the High Jump Boots. This is also one of many levels that has bombs in it; when Wario blows them up with the Explosive Plunger Box found in Beneath the Waves, new areas become accessible. One such area is full of snakes, though they are not summoned by the Flute.
Treasures
Gray Chest: Blue Snake Eye (right)

The Blue Snake Eye in the Gray Chest is located at the left side of the level. Wario must first use his puffy form to get the Gray Key.
After getting two of the snake's eyes, the blue snake door will open in the Tower of Revival.
Red Chest: Air-Pump

The Air-Pump in the Red Chest requires the Garlic treasure from the Tower of Revival. Wario must play a game of golf, then go down the ladder at the far left of the mini-game door. Then, he must avoid the Omodonmeka, break the solid blocks, and enter the door at the far right.
There, Wario must take the Spearhead and break the floor to reach the Red Key. After doing that, he must return to the area with the Omodonmeka and use his puffy form to avoid the spikes and head up. He then has to enter the door at the upper left, which was previously blocked off by a mini-game block. From there, he can break the solid blocks and open the chest.
The Air-Pump makes the ice blocks rise in The Pool of Rain and Bank of the Wild River.
Green Chest: High Jump Boots
The High Jump Boots[1] power-up in the Green Chest requires this level to be visited in daytime, which is only possible after restoring the Sun Medallion and clearing the darkness. Wario must use the first owl to reach the second one, which he must use to avoid the spikes and reach a door leading to an area outside the hole.
Here, Wario must run until he finds two vertically placed Bonfire Blocks. To break them, he has to turn into Hot Wario using the sun in the area. Once broken, Wario can reach the Green Key.
After getting the key, Wario must find two horizontally placed Bonfire Blocks and break them the same way he did with the other ones. Then, Wario must simply open the chest to discover his new high jump power-up.
Blue Chest: Locomotive

The Locomotive in the Blue Chest requires blowing up the bomb found in this level using the Explosive Plunger Box from Beneath the Waves. Then, he has to use the first owl to get above the hole. The door is now accessible. Upon entering the door, Wario will find himself in an area full of snakes, which he can use to get the Blue Key and reach the area where the Blue Chest is.
Getting the Locomotive does not affect the world in any way.
Reaction abilities in this level
Gallery
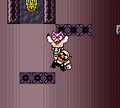
Wario and an owl
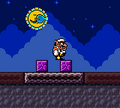
Outside the hole
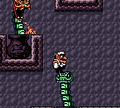
The snakes area
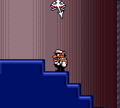
The bottom of the hole


Names in other languages
| Language | Name | Meaning |
|---|---|---|
| Japanese | 巨大な穴 Kyodai na Ana |
The Colossal Hole |
References
- ^ Brady, Matthew K., Nathan Beittenmiller, Debra McBride, and David Cassady. Game Boy Game Secrets, 2001 Edition Prima's Official Strategy Guide. Page 95.