Golden Temple: Difference between revisions
mNo edit summary |
(image template, we should have a screenshot of the hub area, including its exit sign, on the page.) |
||
| (61 intermediate revisions by 29 users not shown) | |||
| Line 1: | Line 1: | ||
{{level | {{image|more=y|The level's starting point, including the sign that says "Exit".}} | ||
{{level infobox | |||
|image=[[File: | |image=[[File:DKCR Golden Temple 1.png|260px]] | ||
|code=9 - 1 (Wii)<br> | |code=9-1 (Wii)<br> | ||
9 - 9 ( | 9-9 (''3D''/''HD'') | ||
|world=[[Cloud (world)|Cloud]] | |world=Golden Temple (Wii)<br>[[Cloud (world)|Cloud]] (''3D''/''HD'') | ||
|game=''[[Donkey Kong Country Returns]]'' (''[[Donkey Kong Country Returns 3D|3D]]'') | |game=''[[Donkey Kong Country Returns]]'' (''[[Donkey Kong Country Returns 3D|3D]]''/''[[Donkey Kong Country Returns HD|HD]]'') | ||
| | |previous=[[Tiki Tong Terror]] (Wii)<br>[[Lavawheel Volcano]] (''3D''/''HD'') | ||
|directory=[[Donkey Kong Country Returns#Worlds and levels|''Donkey Kong Country Returns'' levels]] | |||
}} | }} | ||
{{quote|They say there is a [[Golden Banana|banana]] out there that not only tastes great, but warps you to an alternate dimension. I say, yes please!|[[Cranky Kong]]|[[Donkey Kong Country Returns]]}} | |||
The '''Golden Temple''' is the ninth world and final level in ''[[Donkey Kong Country Returns]]''. The building for the level first appears in the post credits cutscene [[List of extras in Donkey Kong Country Returns#Movie gallery|Golden Temple]], where the [[banana]]s from the volcano on [[Donkey Kong Island]] erupting after defeating [[Tiki Tong Tower]] activate a monkey statue that sets off a chain reaction with three other statues which unearths the temple. [[Cranky Kong]] alludes to elements of the Golden Temple in [[Cranky Kong's Shop|his shop]] over the course of the game. | |||
The | Golden Temple consists of two portions. The first is a hub section in a jungle before the level proper where the [[Kong]]s enter the titular temple. However, the door will not open unless the player has all eight of the [[Rare Orb]]s from the game's [[Key Temple]]s. Unlike other levels, the player can leave by walking back past the starting point. With the Rare Orbs, the player can open the door and proceed into a cutscene where [[Donkey Kong]] and [[Diddy Kong]] find the [[Golden Banana]] in the temple and taste it. This warps them into the actual level, a sky realm with giant floating [[fruit]]s that is unlike any other level in the game. There are two enemies unique to this level: [[Kowalee]] and [[Tiki Seeker]]. Between the small platforms, lack of [[DK Barrel]]s and [[checkpoint]]s, and a very large [[pit]] spanning the entire level, the Golden Temple is very difficult. There are no [[KONG Letters]] in the level. The [[Slot Machine Barrel]] in this level grants the player a [[Banana Mirror]] instead of any of the normal prizes, unlocking [[Donkey Kong Country Returns#Mirror Mode|Mirror Mode]]. | ||
The loading screen for the Golden Temple is the same one used in the game's secret temple levels. The music that plays in the sky area is an arranged medley of ''[[Donkey Kong Jr. (game)|Donkey Kong Jr.]]''{{'}}s ending, stage, timer warning, and title themes. Being defeated in this level. The transition for being defeated in this level, except in [[Donkey Kong Country Returns#Time Attack|Time Attack]], depicts a silhouette of one of the four statues that activated the Golden Temple. | |||
The Golden Temple reappears in ''[[Mario Kart 7]]'', being on the last part of the [[DK Jungle ( | [[File:DKCR - Golden Temple.png|thumb|250px|left|The Golden Temple world]] | ||
If Golden Temple is played in Time Attack mode, the hub area is skipped, with the run starting directly in the sky area. A time of 1:02:00 is needed for a shiny gold medal, a time of 1:04:00 for gold, a time of 1:30:00 for silver, and a time of 2:14:00 for bronze. | |||
''[[Donkey Kong Country Returns 3D]]'' and ''[[Donkey Kong Country Returns HD]]'' change the position of the Golden Temple in the game, and thus its structure, though it remains the final level of the game. It initially appears as it does in the original game, although without its level code. After the cutscene inside the temple, the player unlocks the [[Cloud (world)|Cloud]] world and is immediately sent to its World Map. Cloud is added as the ninth world in these releases, with the sky section of the Golden Temple level becoming the final level of the Cloud world and therefore the seventy-second level of the game. The Golden Temple on the Island Map turns into the '''Cloud Gateway''', which is not a level. Leaving Cloud brings the player to the Cloud Gateway. The Cloud Gateway's sole menu option is to enter it, returning to Cloud. As such, the hub section of Golden Temple cannot be replayed in these versions of the game. Meta elements of Cloud draw from the Golden Temple, namely the background used for the loading screen for each level and the the transition of being defeated in each level. | |||
The Golden Temple reappears in ''[[Mario Kart 7]]'', being on the last part of the [[DK Jungle (Mario Kart 7)|DK Jungle]] course, which is based on ''Donkey Kong Country Returns''. Here, it has a much more simplistic interior, containing a single route with a giant [[Golden Banana]] statue near the exit. The Golden Temple reappears in ''[[Mario Kart 8]]'' and ''[[Mario Kart 8 Deluxe]]'' with the [[anti-gravity]] section on the inside. In [[Super Nintendo World#Donkey Kong Country|Donkey Kong Country]] at [[Super Nintendo World]], the Golden Temple is a major setpiece of the park. It is also host to the [[Super Nintendo World#Mine-Cart Madness|Mine-Cart Madness]] ride. | |||
==Overview== | ==Overview== | ||
[[File: | [[File:Golden Banana DKCR.png|left|250px|thumb|Donkey and Diddy begin to glow from eating the Golden Banana]] | ||
The | The hub section starts on a flat space in a lightly forested jungle, with one of the monkey statues in the background. Walking past the exit sign to the left allows the player to leave the hub section without having to quit using the pause menu. To the right are the stairs to the entrance of the Golden Temple. The door is closed, but there is a raised button in front of the door. Moving into the button starts a cutscene where the Kongs weigh down the button, activating the Rare Orbs if they have any. The Rare Orbs will float about, but return to the Kongs if they lack all eight. If the player does not have all eight Rare Orbs, using the button prompts a message to collect the (remaining) Rare Orbs. With all eight though, the orbs plug themselves into the slots on the door. The door rolls into the background as a fanfare plays, and the player is allowed access into the temple. When replaying the level after having opened the door once, the door will remain open. | ||
Entering the doorway initiates the [[List of extras in Donkey Kong Country Returns#Movie gallery|Inside Temple]] cutscene. Donkey Kong and Diddy Kong walk through the hallway, which opens up into a grand space with palm trees growing indoors. The walkway leads up to a staircase that ends on a raised platform with two giant golden Kong statues and a Golden Banana floating between them. Donkey Kong and Diddy Kong excitedly run up to take the banana. DK tears off one side of the peel, and both of them run a finger through the fruit before tasting it. This causes Donkey Kong and Diddy Kong to flash a few times before turning into golden sparkles and warping away. In ''Donkey Kong Country Returns'', this cutscene leads directly into the sky portion of the level. In ''Donkey Kong Country Returns 3D'' and ''Donkey Kong Country Returns HD'', the level ends to bring the player to Cloud, and because of how the Golden Temple on the Island Map becomes the Cloud Gateway, the hub section and the Inside Temple cutscene cannot be accessed again. The sky section, accessed as a level within Cloud, still opens as though it follows from Inside Temple. | |||
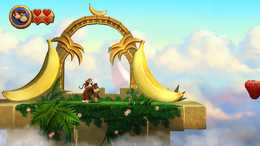
The game cuts to a sky section, where a purple portal appears on a floating platform that sways slightly. The portal is flanked by a golden arch, two golden palm trees, and two giant golden bananas, such that is is as though this platform is part of the temple's interior. a puprle and yellow spark floats out of the portal, and when it lands it transforms back into Donkey Kong and Diddy Kong. The portal vanishes soon afterward. | |||
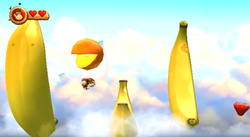
A wide abyss is ahead with a giant banana platform and two strawberries to help the primates progress to a smaller platform with a [[Tiki Doom]] and [[banana]]s on it. Half of a banana platform floats nearby with two [[strawberry|strawberries]] following it that must lead the heroes towards another banana platform covered in collectible bananas. [[Tiki Seeker]]s attack the Kongs here. A long, stone platform is after this place with a raised area in the center of it. An urn sits here, and a [[Kowalee]] also attacks from the raised section. Bananas and [[Banana|Banana Bunch]]es form straight, vertical lines around the raised area. | |||
[[File:Kowalee | [[File:DKCR Golden Temple Kowalee.png|thumb|250px|The first Kowalee in the level]] | ||
A floating blueberry platform nearby helps the duo reach another giant banana to help them cross an abyss. The banana is cut in half but is immediately followed by another blueberry platform that has a Tiki Tork and a strawberry platform after it. Once Donkey and Diddy hop across these platforms and enemies, they can access a solid platform with a Rawk on it. A row a blueberries are placed ahead, and Tiki Seekers attack around them. Another row of blueberries is also above this first row, and if the Kongs jump on the strawberry located just before the first blueberry in the top row, they are given a [[Puzzle Piece (Donkey Kong Country Returns)|Puzzle Piece]]. Another solid platform is placed after all of the blueberries. A Tiki Doom and | A floating blueberry platform nearby helps the duo reach another giant banana to help them cross an abyss. The banana is cut in half but is immediately followed by another blueberry platform that has a [[Tiki Tork]] and a strawberry platform after it. Once Donkey and Diddy hop across these platforms and enemies, they can access a solid platform with a [[Rawk]] on it. A row a blueberries are placed ahead, and Tiki Seekers attack around them. Another row of blueberries is also above this first row, and if the Kongs jump on the strawberry located just before the first blueberry in the top row, they are given a [[Puzzle Piece (Donkey Kong Country Returns)|Puzzle Piece]]. Another solid platform is placed after all of the blueberries. A Tiki Doom and a Rawk are on it. There is a longer platform following this with a [[Tiki Buzz]] flying in a gap just before it. When the heroes reach the center of this platform, two Kowalees attack them, with one in front of them and another behind. A Tiki Doom and some bananas are between the Kowalees. If the Kongs manage to pass the koala enemies, they are able to reach a blueberry platform and another large banana platform with many bananas circling above it. [[cherry|Cherries]] on tipping rod-like pillars are ahead after a strawberry platform. The cherries explode shortly after the Kongs stand on them. A strawberry and a Tiki Buzz are between the first two cherries to help the primates avoid falling into a gap. | ||
Two Tiki Buzzes and a Tiki Doom float in a gap after the fourth cherry, and Donkey and Diddy must jump on them to avoid falling. A solid platform is near them with another Tiki Doom and a Rawk on it. Three rods with cherries on them are in the gap ahead. Tiki Seekers shoot at the Kongs here. Another platform with bananas and a Tiki Doom appear again after this area, with three strawberry platforms in a gap following them. Banana Bunches fall onto the trio of strawberries. A Tiki Seeker shoots spikes at the duo as they approach the platform ahead that has two Rawks on it. A larger platform is after a gap nearby with three Kowalees on it. The Kongs must pass all of the foes to reach a blueberry platform, followed by a strawberry platform. A turned-over banana floats nearby and has banana items moving around it. Three Tiki Seekers also surround it. Shortly after jumping off of the banana platform, the primates reach a pair a blueberry platforms. Oranges fall between them. | Two Tiki Buzzes and a Tiki Doom float in a gap after the fourth cherry, and Donkey and Diddy must jump on them to avoid falling. A solid platform is near them with another Tiki Doom and a Rawk on it. Three rods with cherries on them are in the gap ahead. Tiki Seekers shoot at the Kongs here. Another platform with bananas and a Tiki Doom appear again after this area, with three strawberry platforms in a gap following them. Banana Bunches fall onto the trio of strawberries. A Tiki Seeker shoots spikes at the duo as they approach the platform ahead that has two Rawks on it. A larger platform is after a gap nearby with three Kowalees on it. The Kongs must pass all of the foes to reach a blueberry platform, followed by a strawberry platform. A turned-over banana floats nearby and has banana items moving around it. Three Tiki Seekers also surround it. Shortly after jumping off of the banana platform, the primates reach a pair a blueberry platforms. Oranges fall between them. | ||
[[File: | [[File:DKCR Golden Temple 2.png|thumb|250px|left|The Kongs head towards an upside-down banana]] | ||
More oranges fall ahead between the nearby strawberry and banana platforms. A Tiki Tork and a Tiki Buzz follow the banana, with several blueberry platforms after them. Oranges fall between each of the blueberries. Eventually, the heroes can reach an area with banana platforms moving in a circular motion from the background. As they curve into the foreground, the Kongs must jump on them to avoid falling. Oranges shoot downwards between these bananas as well. A nearby strawberry platform can then help the duo reach a [[Barrel Cannon]] that blasts them to | More oranges fall ahead between the nearby strawberry and banana platforms. A Tiki Tork and a Tiki Buzz follow the banana, with several blueberry platforms after them. Oranges fall between each of the blueberries. Eventually, the heroes can reach an area with banana platforms moving in a circular motion from the background. As they curve into the foreground, the Kongs must jump on them to avoid falling. Oranges shoot downwards between these bananas as well. A nearby strawberry platform can then help the duo reach a [[Barrel Cannon]] that blasts them to the level's final platform. | ||
The last platform, which is adorned with two giant golden bananas and two golden palm trees just as with the starting platform, has three Barrel Cannons in a triangle formation in front of a gear in the background. The top two Barrel Cannons point to the next one in the formation going counterclockwise. Only the bottommost one is close enough to jump into, and while it initially points straight up entering it makes the cannon point to the top right Barrel Cannon. This creates a loop of Barrel Cannons, and the player must repeatedly launch through that loop. As they do, the gear in the background will spin counterclockwise and the Barrel Cannons move closer together. Several platforms in the background rise from the clouds, each one with golden palm trees and the center one having a giant monkey statue with golden bananas behind it. Once complete, the Barrel Cannons send the Kongs back to the ground and vanish. The gear explodes as the statue dispenses a [[Slot Machine Barrel]] with a [[Banana Mirror]] from its mouth. Hitting the barrel completes the level and grants the player the mirror. | |||
{{br|left}} | {{br|left}} | ||
== | ==Enemies== | ||
{| class="wikitable dk" | |||
!Image | |||
!Name | |||
!Count | |||
|- | |||
|align="center"|[[File:Kowalee.png|x50px]] | |||
|align="center"|[[Kowalee]] | |||
|6 | |||
|- | |||
|align="center"|[[File:Rawk.png|x50px]] | |||
|align="center"|[[Rawk]] | |||
|6 | |||
|- | |||
|align="center"|[[File:TikiBuzz.png|x50px]] | |||
|align="center"|[[Tiki Buzz]] | |||
|5 | |||
|- | |||
|align="center"|[[File:TikiDoom.png|x50px]] | |||
|align="center"|[[Tiki Doom]] | |||
|6 | |||
|- | |||
|align="center"|[[File:TikiSeeker.png|x50px]] | |||
|align="center"|[[Tiki Seeker]] | |||
|16 | |||
|- | |||
|align="center"|[[File:Tiki_Tork_DKCR.png|x50px]] | |||
|align="center"|[[Tiki Tork]] | |||
|3 | |||
|} | |||
==Items== | |||
{|class="wikitable dk" width=15% | |||
|- | |||
!Image | |||
!Name | |||
!Count | |||
|- | |||
|align="center"|[[File:BananacoinDKCR.png|x50px]] | |||
|align="center"|[[Banana Coin]] | |||
|5 | |||
|- | |||
|align="center"|[[File:Heart.png|x50px]] | |||
|align="center"|[[Heart (item)|Heart]] | |||
|2 | |||
|} | |||
===Puzzle Pieces=== | ===Puzzle Pieces=== | ||
[[File: | {|class="wikitable dk" width=70% | ||
|- | |||
!Image | |||
!Number | |||
!Location | |||
|- | |||
|align="center"|[[File:DKCR Golden Temple Puzzle Piece 1.png|250px]] | |||
|align="center"|1 | |||
|An urn is placed at the bottom of the second solid platform at the beginning of the level, which has a Tiki Doom on it. If the Kongs pound on the top of the platform above where the urn is, a Puzzle Piece falls from the sky for them to grab. | |||
|- | |||
|align="center"|[[File:DKCR Golden Temple Puzzle Piece 2.png|250px]] | |||
|align="center"|2 | |||
|In the area full of floating blueberries, the primates must climb to the top row of blueberries by jumping from the platform after the floating fruits. If they manage to jump along all of the foods, they can reach a strawberry, which a Puzzle Piece appears on as they approach. | |||
|- | |||
|align="center"|[[File:DKCR Golden Temple Puzzle Piece 3.png|250px]] | |||
|align="center"|3 | |||
|There is a large floating banana platform after a pair of Kowalees with many bananas circling above it. If the primates collect all of the bananas, a Puzzle Piece appears high in the air. They must stand on the edge of the banana platform as it rises and then jump to the item to reach it. | |||
|- | |||
|align="center"|[[File:DKCR Golden Temple Puzzle Piece 4.png|250px]] | |||
|align="center"|4 | |||
|As Donkey and Diddy Kong progress, they come up to a group of three strawberries floating above a gap. When the Kongs collect a Banana Bunch on one of them, another appears on a different strawberry in the trio. The Kongs must collect all of the Banana Bunches that appear to make a Puzzle Piece fall onto the middle strawberry. | |||
|- | |||
|align="center"|[[File:DKCR Golden Temple Puzzle Piece 5.png|250px]] | |||
|align="center"|5 | |||
|The duo should wait on the final banana platform in the level just before a Barrel Cannon to grab the final Puzzle Piece. They then have to jump off of it quickly to continue unharmed. | |||
|} | |||
==Gallery== | |||
<gallery> | |||
Golden Temple icon.png|Silhouette appearing when the player loses a life in the Golden Temple | |||
</gallery> | |||
==Names in other languages== | ==Names in other languages== | ||
{{foreign names | {{foreign names | ||
| | |Jpn={{hover|黄金|おうごん}}のしんでん | ||
| | |JpnR=Ōgon no Shinden | ||
| | |JpnM=Golden Temple | ||
|ChiS=黄金神殿 | |||
|ChiSR=Huángjīn Shéndiàn | |||
|ChiSM=Golden Temple | |||
|ChiT=黃金神殿 | |||
|ChiTR=Huángjīn Shéndiàn | |||
|ChiTM=Golden Temple | |||
|Fre=Temple d'Or | |||
|FreM=Golden Temple | |||
|Ger=Goldener Tempel | |||
|GerM=Golden Temple | |||
|Ita=Piramide scintillante | |||
|ItaM=Sparkling Pyramid | |||
|Spa=Templo Dorado | |Spa=Templo Dorado | ||
|SpaM=Golden Temple | |SpaM=Golden Temple | ||
}} | }} | ||
== | ==Notes== | ||
*The tablet at the entrance of the temple where the Rare Orbs are placed resembles the [[wikipedia:Aztec calendar|Aztec calendar]]. | *The tablet at the entrance of the temple where the Rare Orbs are placed resembles the [[wikipedia:Aztec calendar|Aztec calendar]]. | ||
* | *The Golden Temple section of the [[List of extras in Donkey Kong Country Returns|Image Gallery]], which is almost entirely unlocked by collecting all five Puzzle Pieces in this level, contains concept art for the Golden Temple level. The building takes after the "Temple Exterior and "Temple Entrance" images, the interior builds from the "Golden Temple" image, and the sky portion uses elements from the "Golden Bananas" and "Pudding Wonderland" images. | ||
* | **Many of the remaining pieces appear to be unused ideas, including "Banana Coaster" (which, as the name implies, involves Donkey Kong riding a mine cart through a level with several banana structures), "Paper Cutouts", "Wacky Blocks" (including blocks from ''[[Super Mario Bros. 3]]''), and "Virtual Boy Tracks" (a mine cart level rendered entirely in red outlines on black, as a homage to the [[Virtual Boy]]), and "Crackers and Pudding". It is not known if this concept art was originally intended to be finalized in levels included in addition to the Golden Temple level in the final game, or were alternate ideas for the Golden Temple level. | ||
{{DKCR}} | {{DKCR}} | ||
[[Category: | [[Category:Food areas]] | ||
[[Category: | [[Category:Sky areas]] | ||
[[Category: | [[Category:Temples]] | ||
[[Category: | [[Category:Donkey Kong Island]] | ||
[[Category: | [[Category:Donkey Kong Country Returns levels]] | ||
[[Category:Donkey Kong Country Returns worlds]] | |||
Latest revision as of 12:56, August 7, 2025
It has been requested that more images be uploaded for this article. Remove this notice only after the additional images have been added. Specifics: The level's starting point, including the sign that says "Exit".
| Level | |||||||
|---|---|---|---|---|---|---|---|
| Golden Temple | |||||||
| |||||||
| Level code | 9-1 (Wii) 9-9 (3D/HD) | ||||||
| World | Golden Temple (Wii) Cloud (3D/HD) | ||||||
| Game | Donkey Kong Country Returns (3D/HD) | ||||||
| |||||||
- “They say there is a banana out there that not only tastes great, but warps you to an alternate dimension. I say, yes please!”
- —Cranky Kong, Donkey Kong Country Returns
The Golden Temple is the ninth world and final level in Donkey Kong Country Returns. The building for the level first appears in the post credits cutscene Golden Temple, where the bananas from the volcano on Donkey Kong Island erupting after defeating Tiki Tong Tower activate a monkey statue that sets off a chain reaction with three other statues which unearths the temple. Cranky Kong alludes to elements of the Golden Temple in his shop over the course of the game.
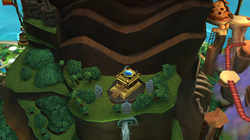
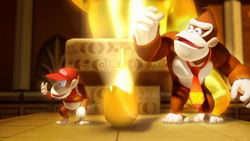
Golden Temple consists of two portions. The first is a hub section in a jungle before the level proper where the Kongs enter the titular temple. However, the door will not open unless the player has all eight of the Rare Orbs from the game's Key Temples. Unlike other levels, the player can leave by walking back past the starting point. With the Rare Orbs, the player can open the door and proceed into a cutscene where Donkey Kong and Diddy Kong find the Golden Banana in the temple and taste it. This warps them into the actual level, a sky realm with giant floating fruits that is unlike any other level in the game. There are two enemies unique to this level: Kowalee and Tiki Seeker. Between the small platforms, lack of DK Barrels and checkpoints, and a very large pit spanning the entire level, the Golden Temple is very difficult. There are no KONG Letters in the level. The Slot Machine Barrel in this level grants the player a Banana Mirror instead of any of the normal prizes, unlocking Mirror Mode.
The loading screen for the Golden Temple is the same one used in the game's secret temple levels. The music that plays in the sky area is an arranged medley of Donkey Kong Jr.'s ending, stage, timer warning, and title themes. Being defeated in this level. The transition for being defeated in this level, except in Time Attack, depicts a silhouette of one of the four statues that activated the Golden Temple.
If Golden Temple is played in Time Attack mode, the hub area is skipped, with the run starting directly in the sky area. A time of 1:02:00 is needed for a shiny gold medal, a time of 1:04:00 for gold, a time of 1:30:00 for silver, and a time of 2:14:00 for bronze.
Donkey Kong Country Returns 3D and Donkey Kong Country Returns HD change the position of the Golden Temple in the game, and thus its structure, though it remains the final level of the game. It initially appears as it does in the original game, although without its level code. After the cutscene inside the temple, the player unlocks the Cloud world and is immediately sent to its World Map. Cloud is added as the ninth world in these releases, with the sky section of the Golden Temple level becoming the final level of the Cloud world and therefore the seventy-second level of the game. The Golden Temple on the Island Map turns into the Cloud Gateway, which is not a level. Leaving Cloud brings the player to the Cloud Gateway. The Cloud Gateway's sole menu option is to enter it, returning to Cloud. As such, the hub section of Golden Temple cannot be replayed in these versions of the game. Meta elements of Cloud draw from the Golden Temple, namely the background used for the loading screen for each level and the the transition of being defeated in each level.
The Golden Temple reappears in Mario Kart 7, being on the last part of the DK Jungle course, which is based on Donkey Kong Country Returns. Here, it has a much more simplistic interior, containing a single route with a giant Golden Banana statue near the exit. The Golden Temple reappears in Mario Kart 8 and Mario Kart 8 Deluxe with the anti-gravity section on the inside. In Donkey Kong Country at Super Nintendo World, the Golden Temple is a major setpiece of the park. It is also host to the Mine-Cart Madness ride.
Overview[edit]
The hub section starts on a flat space in a lightly forested jungle, with one of the monkey statues in the background. Walking past the exit sign to the left allows the player to leave the hub section without having to quit using the pause menu. To the right are the stairs to the entrance of the Golden Temple. The door is closed, but there is a raised button in front of the door. Moving into the button starts a cutscene where the Kongs weigh down the button, activating the Rare Orbs if they have any. The Rare Orbs will float about, but return to the Kongs if they lack all eight. If the player does not have all eight Rare Orbs, using the button prompts a message to collect the (remaining) Rare Orbs. With all eight though, the orbs plug themselves into the slots on the door. The door rolls into the background as a fanfare plays, and the player is allowed access into the temple. When replaying the level after having opened the door once, the door will remain open.
Entering the doorway initiates the Inside Temple cutscene. Donkey Kong and Diddy Kong walk through the hallway, which opens up into a grand space with palm trees growing indoors. The walkway leads up to a staircase that ends on a raised platform with two giant golden Kong statues and a Golden Banana floating between them. Donkey Kong and Diddy Kong excitedly run up to take the banana. DK tears off one side of the peel, and both of them run a finger through the fruit before tasting it. This causes Donkey Kong and Diddy Kong to flash a few times before turning into golden sparkles and warping away. In Donkey Kong Country Returns, this cutscene leads directly into the sky portion of the level. In Donkey Kong Country Returns 3D and Donkey Kong Country Returns HD, the level ends to bring the player to Cloud, and because of how the Golden Temple on the Island Map becomes the Cloud Gateway, the hub section and the Inside Temple cutscene cannot be accessed again. The sky section, accessed as a level within Cloud, still opens as though it follows from Inside Temple.
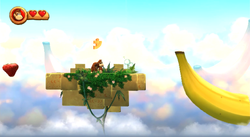
The game cuts to a sky section, where a purple portal appears on a floating platform that sways slightly. The portal is flanked by a golden arch, two golden palm trees, and two giant golden bananas, such that is is as though this platform is part of the temple's interior. a puprle and yellow spark floats out of the portal, and when it lands it transforms back into Donkey Kong and Diddy Kong. The portal vanishes soon afterward.
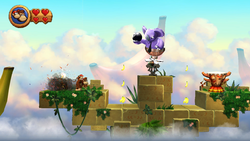
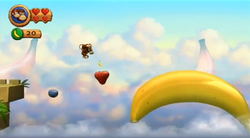
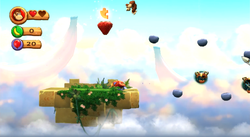
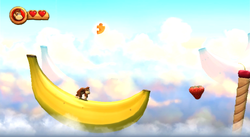
A wide abyss is ahead with a giant banana platform and two strawberries to help the primates progress to a smaller platform with a Tiki Doom and bananas on it. Half of a banana platform floats nearby with two strawberries following it that must lead the heroes towards another banana platform covered in collectible bananas. Tiki Seekers attack the Kongs here. A long, stone platform is after this place with a raised area in the center of it. An urn sits here, and a Kowalee also attacks from the raised section. Bananas and Banana Bunches form straight, vertical lines around the raised area.
A floating blueberry platform nearby helps the duo reach another giant banana to help them cross an abyss. The banana is cut in half but is immediately followed by another blueberry platform that has a Tiki Tork and a strawberry platform after it. Once Donkey and Diddy hop across these platforms and enemies, they can access a solid platform with a Rawk on it. A row a blueberries are placed ahead, and Tiki Seekers attack around them. Another row of blueberries is also above this first row, and if the Kongs jump on the strawberry located just before the first blueberry in the top row, they are given a Puzzle Piece. Another solid platform is placed after all of the blueberries. A Tiki Doom and a Rawk are on it. There is a longer platform following this with a Tiki Buzz flying in a gap just before it. When the heroes reach the center of this platform, two Kowalees attack them, with one in front of them and another behind. A Tiki Doom and some bananas are between the Kowalees. If the Kongs manage to pass the koala enemies, they are able to reach a blueberry platform and another large banana platform with many bananas circling above it. Cherries on tipping rod-like pillars are ahead after a strawberry platform. The cherries explode shortly after the Kongs stand on them. A strawberry and a Tiki Buzz are between the first two cherries to help the primates avoid falling into a gap.
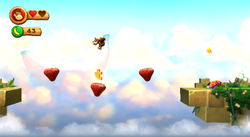
Two Tiki Buzzes and a Tiki Doom float in a gap after the fourth cherry, and Donkey and Diddy must jump on them to avoid falling. A solid platform is near them with another Tiki Doom and a Rawk on it. Three rods with cherries on them are in the gap ahead. Tiki Seekers shoot at the Kongs here. Another platform with bananas and a Tiki Doom appear again after this area, with three strawberry platforms in a gap following them. Banana Bunches fall onto the trio of strawberries. A Tiki Seeker shoots spikes at the duo as they approach the platform ahead that has two Rawks on it. A larger platform is after a gap nearby with three Kowalees on it. The Kongs must pass all of the foes to reach a blueberry platform, followed by a strawberry platform. A turned-over banana floats nearby and has banana items moving around it. Three Tiki Seekers also surround it. Shortly after jumping off of the banana platform, the primates reach a pair a blueberry platforms. Oranges fall between them.
More oranges fall ahead between the nearby strawberry and banana platforms. A Tiki Tork and a Tiki Buzz follow the banana, with several blueberry platforms after them. Oranges fall between each of the blueberries. Eventually, the heroes can reach an area with banana platforms moving in a circular motion from the background. As they curve into the foreground, the Kongs must jump on them to avoid falling. Oranges shoot downwards between these bananas as well. A nearby strawberry platform can then help the duo reach a Barrel Cannon that blasts them to the level's final platform.
The last platform, which is adorned with two giant golden bananas and two golden palm trees just as with the starting platform, has three Barrel Cannons in a triangle formation in front of a gear in the background. The top two Barrel Cannons point to the next one in the formation going counterclockwise. Only the bottommost one is close enough to jump into, and while it initially points straight up entering it makes the cannon point to the top right Barrel Cannon. This creates a loop of Barrel Cannons, and the player must repeatedly launch through that loop. As they do, the gear in the background will spin counterclockwise and the Barrel Cannons move closer together. Several platforms in the background rise from the clouds, each one with golden palm trees and the center one having a giant monkey statue with golden bananas behind it. Once complete, the Barrel Cannons send the Kongs back to the ground and vanish. The gear explodes as the statue dispenses a Slot Machine Barrel with a Banana Mirror from its mouth. Hitting the barrel completes the level and grants the player the mirror.
Enemies[edit]
| Image | Name | Count |
|---|---|---|
| Kowalee | 6 | |

|
Rawk | 6 |

|
Tiki Buzz | 5 |

|
Tiki Doom | 6 |

|
Tiki Seeker | 16 |

|
Tiki Tork | 3 |
Items[edit]
| Image | Name | Count |
|---|---|---|
| Banana Coin | 5 | |

|
Heart | 2 |
Puzzle Pieces[edit]
Gallery[edit]
Names in other languages[edit]
| Language | Name | Meaning | Notes |
|---|---|---|---|
| Japanese | 黄金のしんでん[?] Ōgon no Shinden |
Golden Temple | |
| Chinese (simplified) | 黄金神殿[?] Huángjīn Shéndiàn |
Golden Temple | |
| Chinese (traditional) | 黃金神殿[?] Huángjīn Shéndiàn |
Golden Temple | |
| French | Temple d'Or[?] | Golden Temple | |
| German | Goldener Tempel[?] | Golden Temple | |
| Italian | Piramide scintillante[?] | Sparkling Pyramid | |
| Spanish | Templo Dorado[?] | Golden Temple |
Notes[edit]
- The tablet at the entrance of the temple where the Rare Orbs are placed resembles the Aztec calendar.
- The Golden Temple section of the Image Gallery, which is almost entirely unlocked by collecting all five Puzzle Pieces in this level, contains concept art for the Golden Temple level. The building takes after the "Temple Exterior and "Temple Entrance" images, the interior builds from the "Golden Temple" image, and the sky portion uses elements from the "Golden Bananas" and "Pudding Wonderland" images.
- Many of the remaining pieces appear to be unused ideas, including "Banana Coaster" (which, as the name implies, involves Donkey Kong riding a mine cart through a level with several banana structures), "Paper Cutouts", "Wacky Blocks" (including blocks from Super Mario Bros. 3), and "Virtual Boy Tracks" (a mine cart level rendered entirely in red outlines on black, as a homage to the Virtual Boy), and "Crackers and Pudding". It is not known if this concept art was originally intended to be finalized in levels included in addition to the Golden Temple level in the final game, or were alternate ideas for the Golden Temple level.
| show Donkey Kong Country Returns / Donkey Kong Country Returns 3D / Donkey Kong Country Returns HD |
|---|
