Terra Flora: Difference between revisions
(→Bosses) |
m (→Roaming enemies: Run-on) |
||
| (16 intermediate revisions by 8 users not shown) | |||
| Line 19: | Line 19: | ||
After the heroes arrive on Terra Flora, they are greeted by Sullivan, the engineer of the [[Wiggler Train]]. Sullivan tells the heroes that he can take them on the Wiggler Train to cleanse the [[Darkmess Tentacle]] on the tracks, as well to reach [[Mt. Spout]], but the vine bridges have dried up, and the heroes must reach to the [[Everbloom Tree]] for a solution. The heroes remove a [[Darkmess Puddle]] blocking the path, and reach to the Everbloom Tree, where a voice from within tells them that they should reach to the top of the Everbloom Tree - should they be worthy. The heroes then enter the Everbloom Tree. Inside, they make their way to the top, but another Darkmess Puddle blocks the way, and the heroes clear it out in a battle, rescuing the Spark [[Aquaquake]] in the process. The heroes finally reach the top of the Everbloom, and they meet Warden [[Bea]], and her Spark companion [[Drizzle]]. Bea tells the heroes that Mt. Spout has run dry, and that the heroes must restore Mt. Spout to its former self. She then lets Drizzle grant Beep-0 an upgrade to his [[Wave Power]], allowing him to make vine bridges grow. With this ability, the heroes set out to the Wiggler Train. Once they arrive, Sullivan takes them aboard and they head to Mt. Spout. A Wiggler sees the train and becomes angry, and chases after it. To avoid the Wiggler, Sullivan speeds up the train, and enter the Darkmess Tentacle on the tracks. Inside the [[Darkmess Dimension]], the Wiggler enters as well, and attacks the train. The heroes then have to stop the Wiggler from destroying the Wiggler Train by destroying all of the [[Darkmess Eye]]s on it. After the heroes do so, they obtain a Purified Darkmess Energy Crystal, and the Wiggler calms back down. The heroes escape the Darkmess Dimension, and arrive at Mt. Spout. Sullivan then bids the heroes farewell. | After the heroes arrive on Terra Flora, they are greeted by Sullivan, the engineer of the [[Wiggler Train]]. Sullivan tells the heroes that he can take them on the Wiggler Train to cleanse the [[Darkmess Tentacle]] on the tracks, as well to reach [[Mt. Spout]], but the vine bridges have dried up, and the heroes must reach to the [[Everbloom Tree]] for a solution. The heroes remove a [[Darkmess Puddle]] blocking the path, and reach to the Everbloom Tree, where a voice from within tells them that they should reach to the top of the Everbloom Tree - should they be worthy. The heroes then enter the Everbloom Tree. Inside, they make their way to the top, but another Darkmess Puddle blocks the way, and the heroes clear it out in a battle, rescuing the Spark [[Aquaquake]] in the process. The heroes finally reach the top of the Everbloom, and they meet Warden [[Bea]], and her Spark companion [[Drizzle]]. Bea tells the heroes that Mt. Spout has run dry, and that the heroes must restore Mt. Spout to its former self. She then lets Drizzle grant Beep-0 an upgrade to his [[Wave Power]], allowing him to make vine bridges grow. With this ability, the heroes set out to the Wiggler Train. Once they arrive, Sullivan takes them aboard and they head to Mt. Spout. A Wiggler sees the train and becomes angry, and chases after it. To avoid the Wiggler, Sullivan speeds up the train, and enter the Darkmess Tentacle on the tracks. Inside the [[Darkmess Dimension]], the Wiggler enters as well, and attacks the train. The heroes then have to stop the Wiggler from destroying the Wiggler Train by destroying all of the [[Darkmess Eye]]s on it. After the heroes do so, they obtain a Purified Darkmess Energy Crystal, and the Wiggler calms back down. The heroes escape the Darkmess Dimension, and arrive at Mt. Spout. Sullivan then bids the heroes farewell. | ||
After the heroes reach to Mt. Spout via Wiggler Train, they enter Mt. Spout in order to reach to the Darkmess Tentacle located within. They scale Mt. Spout, and as they travel upward, a [[Darkmess Puddle]] blocks the way. They heroes clear it out, and the trek continues. As the heroes travel higher, a giant rock blocks the path. The only way to remove it is to block several holes in the ground that cause small geysers of water to fountain upward. Using rocks and several blocks, the heroes plug up all of the holes, causing a giant geyser to break the rock. The heroes then proceed onwards, and find the Darkmess Tentacle. The heroes clear it out in a battle, saving the Spark [[Pulser]] in the process, and obtain a [[Purified Darkmess Energy Crystal]]. With the Darkmess Tentacle inside Mt. Spout removed, Mt. Spout is active again, and waters all of the plants on Terra Flora. The heroes are enclosed in bubbles, which then pop, causing the heroes to fall to the ground. Warden Bea thanks the heroes for saving Terra Flora, and Beep-0 and JEANIE tell both Bea and Sullivan that they need a mechanic to provide heavy firepower to break the barrier around Cursa's stronghold. Sullivan then tells the heroes that they need to find [[Momma]], Warden of [[Barrendale Mesa]], as she is the only one who could provide the firepower needed. The heroes then set out for Barrendale Mesa, as they have the Purified Darkmess Energy Crystals needed to warp there. | After the heroes reach to Mt. Spout via Wiggler Train, they enter Mt. Spout in order to reach to the Darkmess Tentacle located within. They scale Mt. Spout, and as they travel upward, a [[Darkmess Puddle]] blocks the way. They heroes clear it out, and the trek continues. As the heroes travel higher, a giant rock blocks the path. The only way to remove it is to block several holes in the ground that cause small geysers of water to fountain upward. Using rocks and several blocks, the heroes plug up all of the holes, causing a giant geyser to break the rock. The heroes then proceed onwards, and find the Darkmess Tentacle. The heroes clear it out in a battle, saving the Spark [[Pulser]] in the process, and obtain a [[Purified Darkmess Energy Crystal]]. With the Darkmess Tentacle inside Mt. Spout removed, Mt. Spout is active again, and waters all of the plants on Terra Flora. The heroes are enclosed in [[Bubble|bubbles]], which then pop, causing the heroes to fall to the ground. Warden Bea thanks the heroes for saving Terra Flora, and Beep-0 and JEANIE tell both Bea and Sullivan that they need a mechanic to provide heavy firepower to break the barrier around Cursa's stronghold. Sullivan then tells the heroes that they need to find [[Momma]], Warden of [[Barrendale Mesa]], as she is the only one who could provide the firepower needed. The heroes then set out for Barrendale Mesa, as they have the Purified Darkmess Energy Crystals needed to warp there. | ||
==Quests== | ==Quests== | ||
| Line 102: | Line 102: | ||
|- | |- | ||
|[[File:Wildwood Bowzooka icon MRSOH.png]]<br>Wildwood Bowzooka | |[[File:Wildwood Bowzooka icon MRSOH.png]]<br>Wildwood Bowzooka | ||
||In a chest guarded by a Squashette in Terra Flora's [[Everbloom Tree]]; clear [[Corps de Battle]] | ||In a chest guarded by a Squashette in Terra Flora's [[Everbloom Tree]]; clear [[Corps de Battle]] | ||
|- | |- | ||
|[[File:Steampunk Blade icon MRSOH.png]]<br>Steampunk Blade | |[[File:Steampunk Blade icon MRSOH.png]]<br>Steampunk Blade | ||
| Line 117: | Line 117: | ||
|} | |} | ||
== | ==Collectible items== | ||
{|width=100% cellspacing=0 border=2 cellpadding=3 style="border-collapse:collapse;text-align:center;" | {|width=100% cellspacing=0 border=2 cellpadding=3 style="border-collapse:collapse;text-align:center;" | ||
!width=15%"|Item | !width=15%"|Item | ||
! | !Where to find | ||
|- | |- | ||
|[[File:Super Mushroom Chest DX icon.png|50px]]<br>[[Super Mushroom Chest DX]] | |[[File:Super Mushroom Chest DX icon.png|50px]]<br>[[Super Mushroom Chest DX]] | ||
|On the left side of [[Metalheads]]. It must be scanned with [[Beep-0]] for it to appear. | |[[File:MRSOH dxterra1a.jpg|200px]][[File:MRSOH dxterra1b.jpg|200px]]<br>On the left side of [[Metalheads]]. It must be scanned with [[Beep-0]] for it to appear. A trail of footsteps to the right of Metalheads leads to the item. | ||
|- | |- | ||
|[[File:POW Block icon MRSOH.png|50px]]<br>[[POW Block]] | |[[File:POW Block icon MRSOH.png|50px]]<br>[[Red POW Block|POW Block]] | ||
|Behind | |[[File:MRSOH powterra1a.jpg|200px]][[File:MRSOH powterra1b.jpg|200px]]<br>Behind the fourth set of Darkmess Vines in [[Mt. Spout]]. | ||
|- | |- | ||
|[[File:Move Boost icon.png|50px]]<br>[[Move Boost]] | |[[File:Move Boost icon.png|50px]]<br>[[Move Boost]] | ||
|Near the [[Armored Goomba]] | |[[File:MRSOH moveterra1a.jpg|200px]][[File:MRSOH moveterra1b.jpg|200px]]<br>Near the [[Armored Goomba]] close to [[SALESBOT 9.99+TX]] on the main map. The heroes have to grow a vine bridge using Beep-0's [[Wave Power]] to access it. | ||
|- | |- | ||
|[[File:Immunity Charm icon.png|50px]]<br>[[Immunity Charm]] | |[[File:Immunity Charm icon.png|50px]]<br>[[Immunity Charm]] | ||
| | |[[File:MRSOH immunityterra1.jpg|200px]]<br>On a branch near [[Album Cover]]. | ||
|- | |- | ||
|rowspan=2|[[File:Cleansing Elixir icon.png|50px]]<br>[[Cleansing Elixir]] | |rowspan=2|[[File:Cleansing Elixir icon.png|50px]]<br>[[Cleansing Elixir]] | ||
| | |[[File:MRSOH cleanterra1a.jpg|200px]][[File:MRSOH cleanterra1b.jpg|200px]]<br>Beside a rock in the main Terra Flora Area. It must be scanned with Beep-0 for it to appear. A trail of footsteps leads to it. | ||
|- | |- | ||
|Behind | |[[File:MRSOH cleanterra2a.jpg|200px]][[File:MRSOH cleanterra2b.jpg|200px]]<br>Behind the third set of Darkmess Vines in [[Mt. Spout]]. | ||
|} | |} | ||
==Shops== | ==Shops== | ||
{{main|SALESBOT 9.99+TX# | {{main|SALESBOT 9.99+TX#List of shops}} | ||
Shops on Terra Flora are located near the [[WM ARC]] and inside [[Mt. Spout]]. | Shops on Terra Flora are located near the [[WM ARC]] and inside [[Mt. Spout]]. | ||
| Line 165: | Line 165: | ||
*[[Wiggler]] | *[[Wiggler]] | ||
*[[Giant Magikoopa]] (optional) | *[[Giant Magikoopa]] (optional) | ||
==Roaming enemies== | |||
{|cellspacing=0 border=2 cellpadding=3 style="border-collapse:collapse;text-align:center;" | |||
!width=20%"|Enemy type | |||
!width=20%"|Level range | |||
!width=20%"|Battle objective | |||
!width=20%"|Enemies fought in battle | |||
!width=20%"|Where to find | |||
|- | |||
|rowspan=2|[[File:Armored Goomba icon MRSOH.png|50px]][[Armored Goomba]] | |||
|18-25 | |||
|Defeat all | |||
|[[Armored Goomba]]s | |||
|[[File:MRSOH armorgoomba roaming 1.jpg|200px]]<br>To the left of [[SALESBOT 9.99+TX]] in the main section of the planet. Can also be reached through a vine bridge leading from a collectible [[Move Boost]]. | |||
|- | |||
|18-21 | |||
|Defeat [[Lone Wolf|Lone Wolves]] | |||
|[[Armored Goomba]]s<br>[[Lone Wolf|Lone Wolves]] | |||
|[[File:MRSOH armorgoomba roaming 2.jpg|200px]]<br>[[Everbloom Tree]]. Guards the [[Bea|Bea the Busy Bee]] [[Memory]]. | |||
|- | |||
|rowspan=3|[[File:Magnafowl icon MRSOH.png|50px]][[Magnafowl]] | |||
|rowspan=2|20-23 | |||
|Defeat all | |||
|[[Magnafowl]]s<br>[[Armored Goomba]]s | |||
|[[File:MRSOH magnafowl roaming 1.jpg|200px]]<br>Near the [[Mt. Spout]] Entrance Flag and [[Magnafowl Hunt]]. | |||
|- | |||
|Defeat [[Magnafowl]]s | |||
|[[Magnafowl]]s<br>[[Lone Wolf|Lone Wolves]] | |||
|[[File:MRSOH magnafowl roaming 2.jpg|200px]]<br>After the puzzle with the [[Darkmess Eye]] and the Darkmess Thorn inside Mt. Spout. | |||
|- | |||
|21-24 | |||
|Defeat 3 enemies | |||
|[[Magnafowl]]s<br>[[Squashette]]s | |||
|[[File:MRSOH magnafowl roaming 3.jpg|200px]]<br>Mt. Spout, right after [[Metalheads]]. Guards a large pile of [[Coin]]s. | |||
|- | |||
|rowspan=3|[[File:Oozer icon MRSOH.png|50px]][[Oozer (Mario + Rabbids Sparks of Hope)|Oozer]] | |||
|18-21 | |||
|Defeat [[Oozer (Mario + Rabbids Sparks of Hope)|Oozers]] | |||
|[[Oozer (Mario + Rabbids Sparks of Hope)|Oozers]]<br>[[Armored Goomba]]s | |||
|[[File:MRSOH oozer roaming 1.jpg|200px]]<br>Near the [[Everbloom Tree]] Flag. Guards a passage to the [[Green Coin Challenge]]. | |||
|- | |||
|rowspan=2|19-22 | |||
|Defeat [[Depleter]]s | |||
|[[Oozer (Mario + Rabbids Sparks of Hope)|Oozers]]<br>[[Depleter]]s | |||
|[[File:MRSOH oozer roaming 2.jpg|200px]]<br>On the Terra Flora Meadows, in front of [[In Full Gloom]]. | |||
|- | |||
|Defeat [[Lone Wolf|Lone Wolves]] | |||
|[[Oozer (Mario + Rabbids Sparks of Hope)|Oozers]]<br>[[Lone Wolf|Lone Wolves]] | |||
|[[File:MRSOH oozer roaming 3.jpg|200px]]<br>On the Terra Flora Meadows. Guards a hill with a pile of Coins at the top. | |||
|} | |||
==Stone spiral locations== | |||
<gallery> | |||
Swirl 4A.jpg | |||
Swirl 4B.jpg | |||
Swirl 4C.jpg | |||
Swirl 4D.jpg | |||
Swirld 4E.jpg | |||
Swirl 4F.jpg | |||
Swirl 4G.jpg | |||
Swirl 4H.jpg | |||
Swirl 4I.jpg | |||
</gallery> | |||
==Profiles== | ==Profiles== | ||
| Line 193: | Line 256: | ||
==Names in other languages== | ==Names in other languages== | ||
{{foreign names | {{foreign names | ||
| | |Jpn=テラ・フロラ | ||
| | |JpnR=Tera Furora | ||
| | |JpnM=Terra Flora | ||
|Chi=鮮花大地 | |||
|ChiR=Xiānhuā Dàdì | |||
|ChiM=Land of Flowers | |||
|Dut=Terraflora | |Dut=Terraflora | ||
|DutM=Terra Flora | |DutM=Terra Flora | ||
| Line 202: | Line 268: | ||
|Ita=Terra Flora | |Ita=Terra Flora | ||
|ItaM=- | |ItaM=- | ||
|Rus=Цветущая Земля | |||
|RusR=Tsvetuschaya Zeml'a | |||
|RusM=Blooming Land | |||
|Spa=Terraflora | |Spa=Terraflora | ||
|SpaM=Terra Flora | |SpaM=Terra Flora | ||
Latest revision as of 06:49, May 24, 2025
| Terra Flora | |
| |
| Warden | Bea |
| Spark Quests | 3 |
| Side Quests | 23 |
| Enemy levels | 18-25 |
| << >> | |
- “We're approaching Terra Flora
 . Home to naturally sparkling mineral water springs, perennial flower prairies - not to mention the Everblossom Tree! Surely, JEANIE, even YOU can't spoil my enthusiasm for visiting the garden of the galaxy.”
 - —Beep-0, Mario + Rabbids Sparks of Hope
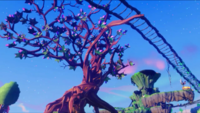
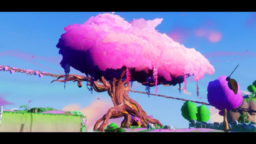
Terra Flora is the fourth planet the player visits in Mario + Rabbids Sparks of Hope, accessible after having collected two Purified Darkmess Energy Crystals from the previous planet Palette Prime. There are twelve Memories that the player can unlock.
History
Prior to arriving on Terra Flora, JEANIE tells the group that there is a barrier surrounding Cursa's stronghold, and thus the heroes cannot get there, even after obtaining two Purified Darkmess Energy Crystals. Beep-0 then asks Edge if she knows a way, as she knows both Midnite and Bedrock, as they were a part of Cursa's Spark Hunters. Edge angrily replies that the heroes don't want any of her business to become theirs.
After the heroes arrive on Terra Flora, they are greeted by Sullivan, the engineer of the Wiggler Train. Sullivan tells the heroes that he can take them on the Wiggler Train to cleanse the Darkmess Tentacle on the tracks, as well to reach Mt. Spout, but the vine bridges have dried up, and the heroes must reach to the Everbloom Tree for a solution. The heroes remove a Darkmess Puddle blocking the path, and reach to the Everbloom Tree, where a voice from within tells them that they should reach to the top of the Everbloom Tree - should they be worthy. The heroes then enter the Everbloom Tree. Inside, they make their way to the top, but another Darkmess Puddle blocks the way, and the heroes clear it out in a battle, rescuing the Spark Aquaquake in the process. The heroes finally reach the top of the Everbloom, and they meet Warden Bea, and her Spark companion Drizzle. Bea tells the heroes that Mt. Spout has run dry, and that the heroes must restore Mt. Spout to its former self. She then lets Drizzle grant Beep-0 an upgrade to his Wave Power, allowing him to make vine bridges grow. With this ability, the heroes set out to the Wiggler Train. Once they arrive, Sullivan takes them aboard and they head to Mt. Spout. A Wiggler sees the train and becomes angry, and chases after it. To avoid the Wiggler, Sullivan speeds up the train, and enter the Darkmess Tentacle on the tracks. Inside the Darkmess Dimension, the Wiggler enters as well, and attacks the train. The heroes then have to stop the Wiggler from destroying the Wiggler Train by destroying all of the Darkmess Eyes on it. After the heroes do so, they obtain a Purified Darkmess Energy Crystal, and the Wiggler calms back down. The heroes escape the Darkmess Dimension, and arrive at Mt. Spout. Sullivan then bids the heroes farewell.
After the heroes reach to Mt. Spout via Wiggler Train, they enter Mt. Spout in order to reach to the Darkmess Tentacle located within. They scale Mt. Spout, and as they travel upward, a Darkmess Puddle blocks the way. They heroes clear it out, and the trek continues. As the heroes travel higher, a giant rock blocks the path. The only way to remove it is to block several holes in the ground that cause small geysers of water to fountain upward. Using rocks and several blocks, the heroes plug up all of the holes, causing a giant geyser to break the rock. The heroes then proceed onwards, and find the Darkmess Tentacle. The heroes clear it out in a battle, saving the Spark Pulser in the process, and obtain a Purified Darkmess Energy Crystal. With the Darkmess Tentacle inside Mt. Spout removed, Mt. Spout is active again, and waters all of the plants on Terra Flora. The heroes are enclosed in bubbles, which then pop, causing the heroes to fall to the ground. Warden Bea thanks the heroes for saving Terra Flora, and Beep-0 and JEANIE tell both Bea and Sullivan that they need a mechanic to provide heavy firepower to break the barrier around Cursa's stronghold. Sullivan then tells the heroes that they need to find Momma, Warden of Barrendale Mesa, as she is the only one who could provide the firepower needed. The heroes then set out for Barrendale Mesa, as they have the Purified Darkmess Energy Crystals needed to warp there.
Quests
Main Quests
- Stay on Track
- Foul Attraction
- Ooze Inside the Everbloom
- One Angry Wiggler (Boss battle quest)
- Uncork the Volcano
- Metalheads
- Spout Forth (Boss battle quest)
Spark Quests
Side Quests
- Red Coin Challenge
- Green Coin Challenge
- Blue Coin Challenge
- Bottlenecked
- Corps de Battle
- The Sluggish and the Puckish
- The Warrior and the Windbag
- Oozer Hunt
- In Full Gloom
- Treasure Hunters
- Magnafowl Hunt
- Album Cover
- Obstacles to Victor(y)
- Swallowing Sound
- Bridges and Blinkers
- Efflorescent Gateway
- Clandestine Cliffs
- Dive Into Darkmess
- Over the Hills and Far Away
- Victor's Terra Flora Invitational
- Toad Trouble on Terra Flora
- The Riddle of the Engineer's Guild
- Magikoopa the Magnificent
Sparks encountered
| Spark | How to obtain |
|---|---|
Aquaquake |
Clear Ooze Inside the Everbloom battle. |
Drizzle |
Meet Bea inside Everbloom Tree. Grants Beep-0 an upgrade to his Wave Power ability instead of being usable in battle. |
Pulser |
Clear Spout Forth battle. |
Oozer Master |
Clear Sullivan's Despair Spark quest. Optional. |
Toxicomet |
Clear The Quest for Courage Spark quest. Optional. |
Cryogeddon |
Clear Terra Flora Secret Zone. Optional. |
Weapon Skins found
| Weapon Skin | How to obtain |
|---|---|
Speedway Discruptor |
SALESBOT 9.99+TX; purchase for two Terra Flora Planet Coins each |
Speedway Boom-Brella | |
The Wildwood Dukes | |
Vintage Bowzooka | |
Wildwood Bowzooka |
In a chest guarded by a Squashette in Terra Flora's Everbloom Tree; clear Corps de Battle |
Steampunk Blade |
Clear The Warrior and the Windbag in Terra Flora |
Steampunk Kaboomer |
Clear The Sluggish and the Puckish in Terra Flora |
Gleaming Sharpshooter |
Clear the Terra Flora Secret Zone time trial |
Gleaming Triple Troll |
Reach 100% completion for Terra Flora |
Collectible items
| Item | Where to find |
|---|---|
Super Mushroom Chest DX |
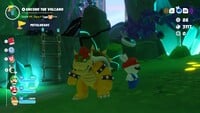 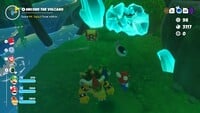 On the left side of Metalheads. It must be scanned with Beep-0 for it to appear. A trail of footsteps to the right of Metalheads leads to the item. |
POW Block |
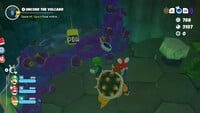 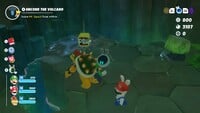 Behind the fourth set of Darkmess Vines in Mt. Spout. |
Move Boost |
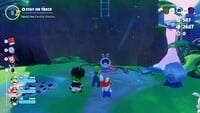  Near the Armored Goomba close to SALESBOT 9.99+TX on the main map. The heroes have to grow a vine bridge using Beep-0's Wave Power to access it. |
Immunity Charm |
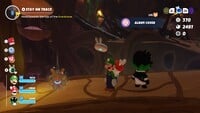 On a branch near Album Cover. |
Cleansing Elixir |
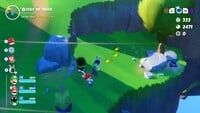 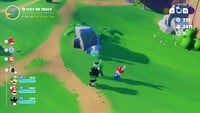 Beside a rock in the main Terra Flora Area. It must be scanned with Beep-0 for it to appear. A trail of footsteps leads to it. |
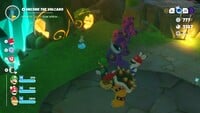 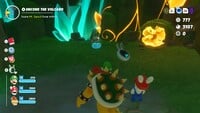 Behind the third set of Darkmess Vines in Mt. Spout. |
Shops
- Main article: SALESBOT 9.99+TX § List of shops
Shops on Terra Flora are located near the WM ARC and inside Mt. Spout.
Enemies
- Goombas
- Armored Goombas (new)
- Stooges
- Flamin' Stooges
- Sea Stooges
- Bob-ombs
- Wildclaws
- Magnafowls (new)
- Lone Wolves
- Squashers
- Squashettes
- Ghostly Walkers
- Depleters
- Medicians
- Oozers (new)
Bosses
- Darkmess Eyes
- Darkmess Dams
- Wiggler
- Giant Magikoopa (optional)
Roaming enemies
| Enemy type | Level range | Battle objective | Enemies fought in battle | Where to find |
|---|---|---|---|---|
| 18-25 | Defeat all | Armored Goombas | 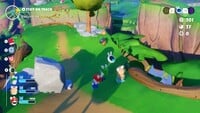 To the left of SALESBOT 9.99+TX in the main section of the planet. Can also be reached through a vine bridge leading from a collectible Move Boost. | |
| 18-21 | Defeat Lone Wolves | Armored Goombas Lone Wolves |
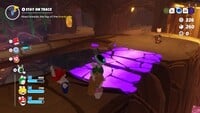 Everbloom Tree. Guards the Bea the Busy Bee Memory. | |
| 20-23 | Defeat all | Magnafowls Armored Goombas |
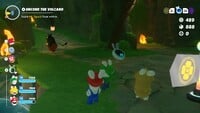 Near the Mt. Spout Entrance Flag and Magnafowl Hunt. | |
| Defeat Magnafowls | Magnafowls Lone Wolves |
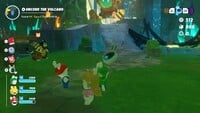 After the puzzle with the Darkmess Eye and the Darkmess Thorn inside Mt. Spout. | ||
| 21-24 | Defeat 3 enemies | Magnafowls Squashettes |
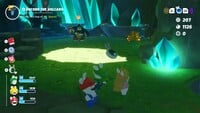 Mt. Spout, right after Metalheads. Guards a large pile of Coins. | |
| 18-21 | Defeat Oozers | Oozers Armored Goombas |
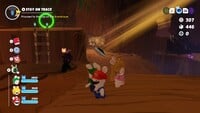 Near the Everbloom Tree Flag. Guards a passage to the Green Coin Challenge. | |
| 19-22 | Defeat Depleters | Oozers Depleters |
 On the Terra Flora Meadows, in front of In Full Gloom. | |
| Defeat Lone Wolves | Oozers Lone Wolves |
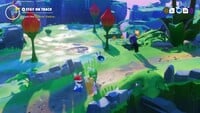 On the Terra Flora Meadows. Guards a hill with a pile of Coins at the top. |
Stone spiral locations
Profiles
Memory bio
GALACTIC ATLAS: TERRA FLORA
Terra Flora's beauty is almost overwhelming, and the way the Rabbids here have cooperated and collaborated with nature rather than bend it to their will is the reason why. The railroad tracks are made from plants and vines, the warden resides in the Everbloom Tree, and everything is irrigated using a natural spring. The effort expended must have been extraordinary, but it was well worth it.
Musical themes
"Planet in Pre-Bloom" is the background music theme for Terra Flora before clearing the Uncork the Volcano Quest; once cleared, "Sights and Scents of Terra Flora" plays instead. "Galaxy Encounter" plays during regular and "enemy hunt" Quest battles.
Gallery
Mario and Princess Peach in bubbles
Rabbid Peach in a bubble
Luigi and Rabbid Mario in bubbles, with Rabbid Luigi on the bubble Luigi is in
Edge and Bowser inside a bubble, with Rabbid Rosalina on top
Terra Flora Teleport Flag
Terra Flora Planet Coin
Efflorescent Key, a Planet Key used to unlock the door to the Terra Flora Secret Zone
Names in other languages
| Language | Name | Meaning | Notes |
|---|---|---|---|
| Japanese | テラ・フロラ[?] Tera Furora |
Terra Flora | |
| Chinese | 鮮花大地[?] Xiānhuā Dàdì |
Land of Flowers | |
| Dutch | Terraflora[?] | Terra Flora | |
| German | Terraflora[?] | Terra Flora | |
| Italian | Terra Flora[?] | - | |
| Russian | Цветущая Земля[?] Tsvetuschaya Zeml'a |
Blooming Land | |
| Spanish | Terraflora[?] | Terra Flora |
| show Mario + Rabbids Sparks of Hope |
|---|
