The 'Shroom:Issue 129/Strategy Wing: Difference between revisions
mNo edit summary |
|||
| Line 240: | Line 240: | ||
<h4>Bowser Minigame 4: Bowser's Wicked Wheel</h4> | <h4>Bowser Minigame 4: Bowser's Wicked Wheel</h4> | ||
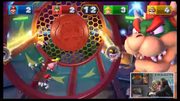
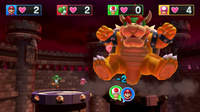
[[File: | [[File:Bowser's Wicked Wheel E3 2014.png|thumb|right|180px|Bowser is making everyone run like rats.]] | ||
Long time ''Mario Party'' veterans will recognize this as [[Shock, Drop, or Roll]] from ''[[Mario Party 2]]'', or even [[Rotisserie Rampage]] from ''[[Mario Party DS]]''. The concept is exactly the same. Bowser swipes the touch screen on the Gamepad with the stylus to spin the wheel. The other players have to run on the wheel and try to not get zapped. If you're Bowser, spin the wheel quickly, but also don't be too predictable. If you're spinning it one way and it isn't working, switch it the other way to catch your opponents off guard. If you're not Bowser, stay on your toes and be prepared for when Bowser switches the wheel. Try to stay in the center of the wheel, far away from either side where you can get zapped. Be careful not to shake the Wii Remote too quickly, as you can easily be thrown into the other side. A lot of the strategies for these minigames are the opposite of each other depending on what side you're on. | Long time ''Mario Party'' veterans will recognize this as [[Shock, Drop, or Roll]] from ''[[Mario Party 2]]'', or even [[Rotisserie Rampage]] from ''[[Mario Party DS]]''. The concept is exactly the same. Bowser swipes the touch screen on the Gamepad with the stylus to spin the wheel. The other players have to run on the wheel and try to not get zapped. If you're Bowser, spin the wheel quickly, but also don't be too predictable. If you're spinning it one way and it isn't working, switch it the other way to catch your opponents off guard. If you're not Bowser, stay on your toes and be prepared for when Bowser switches the wheel. Try to stay in the center of the wheel, far away from either side where you can get zapped. Be careful not to shake the Wii Remote too quickly, as you can easily be thrown into the other side. A lot of the strategies for these minigames are the opposite of each other depending on what side you're on. | ||
Revision as of 15:30, August 8, 2018


Director Notes
Written by: Meta Knight (talk)
Merry Christmas and Happy Holidays everyone! 2017 is coming to an end, and this month there's a few announcements. GPM1000 (talk) has brought back Mario Calendar! This section was one of the foundations of Strategy Wing, and it's good to see fresh blood at the helm of it. That's not all, I've brought back Robotic Rush which was a one-time section I did last year. It's a one-time submission this year too unless someone else wants to pick it up! I mean, I did Pokédex Power last year and now Yoshi876 (talk) has been doing it for a year! It makes me smile to see how much this team has grown in the past year. Happy Holidays everyone, so long Wii U, and hello 2018! Thanks everyone for sticking with us for all this time. Please enjoy this issue!
Section of the Month
Congratulations to YoshiFlutterJump (talk) for winning Section of the Month with his first submission! Thanks to everyone else that submitted a section as well!
| STRATEGY WING SECTION OF THE MONTH | ||||
|---|---|---|---|---|
| Place | Section | Votes | % | Writer |
| 1st | YoshiFlutterJump's Tips and Tricks | 10 | 31.25% | YoshiFlutterJump |
| 2nd | Pokédex Power | 9 | 28.13% | Yoshi876 |
| 3rd | Party Trick! | 8 | 25% | Meta Knight |
YoshiFlutterJump's Tips and Tricks
Written By: YoshiFlutterJump (talk)
Welcome to the second edition of YoshiFlutterJump's Tips & Tricks! For those of you who didn't read my first section (spoiler alert!), this is the place where I give tips and tricks for some rather tricky Mario levels.
So we are in the month of December now! It is quite an eventful month with my birthday, winter solstice, and the winter holidays! Most of you probably spend the holidays next to a fireplace inside the house, outside the freezing outdoors. But here's a tricky question: would you rather spend the holidays outside or in the flame of the fireplace? I am well aware that neither one is a pleasant option; would you rather freeze or burn? This month we will cover Freezeflame Galaxy from Super Mario Galaxy, where you can finally decide...in a rather unique way.
For those of you who don't know, Freezeflame Galaxy is a cross between the harshest of blizzards and the deadliest volcano. You walk on ice with puddles of lava, and you must make use of both the Fire Flower and Ice Flower. It can be found in the Bedroom and is unlocked by collecting 26 Power Stars. It contains six missions: three regular missions, two Prankster Comets, and one Secret Star.
The first mission is called The Frozen Peak of Baron Brrr, and takes place on the cold planets of the galaxy. The objective of this mission is to beat the boss, Baron Brrr. This mission starts on an icy ring, called the Starting Planet, with a penguin. This penguin asks Mario to chase him. A lot of spins will speed you up while skating and help you catch him. Additionally, beware the boulders rolling along the sides of the planet; they will only reduce your health and slow you down! On a side note, while chasing him, he taunts you by singing “How could one penguin be SO fast?!”, so you'd better catch him quickly before you throw down the controller in annoyance. After you catch him, a Launch Star will appear, but there are quite a few Crystals on the planet with Coins and Star Bits; be sure to break them with a spin before you leave! The next planet, the Frozen Peak Planet, is another icy place with Goombas and more crystals. Break the crystals and hop onto the wooden platform and two ice platforms on the left. Be careful to dodge the Goombas! Remember that you get a Coin if you stomp a Goomba and three Star Bits if you defeat it with a spin; so be sure to stomp it if you're low on HP, and spin if you're low on lives. Collect the ? Coin to make an Ice Flower appear, then collect it by hopping onto the four platforms to your left and TRANSFORM! You are now Ice Mario and can walk on water! Skate across water to the snow-covered platforms, and watch out for the Li'l Brr waiting for you there! It can be defeated with a spin, but not with a jump, so be careful! While still transformed, freeze the two geysers to reach higher ground. Defeat the Goombas, and watch out for the Bomps! Walk into the space between the two Bomps and wait for them to extend out of the wall. Then take advantage and use the Bomps to reach even higher ground. Punch the ? Block, break the crystal, and traverse the icy seesaw! Then punch the next ? Block, defeat the Li'l Brr, and jump across the three wooden crates like stepping stones. Then break the Crystal and collect the Ice Flower inside and...TRAAAAAAAANSFORM!! (I hope that sounded grander than last time...) As Ice Mario, long jump onto the platform to your right. Wait for the Bomp to extend, then use it to your advantage to traverse the gap! Wait for the next two Bomps to extend, then walk across the first one, jump onto the second one, and run to the Sling Star before they can retract! After freezing the next two geysers, the battle with Baron Brrr commences! Dodging his attacks is pretty easy; just move fast. Also, his attacks do not grow stronger when you deal damage. To defeat him, jump across the platforms to your left and break the Crystals to get another Ice Flower; then...TRAAAAAAAAAAAAANSFORM!!!!!!!!! (even grander now, right?) Skate across the water to the area underneath the boss, then wall jump, spin jump, and kick to deal damage. Repeat twice more, and Baron Brrr is dead meat. Collect the Star Bits and Coins that he dropped, the collect the Power Star. Congratulations! You have completed this mission. Head back into the galaxy to start the next mission!
The second mission is Freezeflame's Blistering Core, and requires you to traverse the hot planets. You start on the same icy planet as the first mission, but this time, you mist collect Star Chips from the Crystals. Just like last time, beware the boulders! If you take damage, simply break the Crystal holding a Goomba, then stomp it and retreive the coin. Once you collect all five Star Chips, the Launch Star will appear...in a different place than last time. Now it appears in the center of the ring. You can reach it using the five surrounding Pull Stars, but you may want to collect the ? Coin before leaving. The next planet is where the climate really starts to change. I mean, it's called Freezeflame Galaxy for a reason, right? Now you have landed on the Lava Core Planet, where everything is covered in lava. The first things you see on this planet (besides the lava, of course) are some nasty Red Urchins. They cannot be defeated right now, so just do your best to dodge them. There is a ? Block nearby, but a Red Urchin is guarding it, so come back to it later and continue on the left path. Then jump to the right, punch the ? Block, and beat the Red Urchin nearby. Then collect the Life Mushroom to bring your health up to 6! Climb the pole and jump to the platforms nearby. Then go up the ramp and collect the ? Coin to your left. A Fire Flower has now appeared on the right path, so go there, collect it and...TRAAAAAAAAAAAAAAAAAAAAAAAAAAANSFORM!!!!!!!!!!!!!!!!!!!! (Yeah, I'm just gonna stop there....) You can now shoot fireballs...and destroy Red Urchins with them! Light the torch to your left, and the gate will lift! Light both torches to your left, and destroy the Red Urchin under the first ? Block you saw if you have time. After that, a staircase will emerge from the lava. Once you get to the top, you'll turn upside-down! Traverse the platforms, then punch the ? Block to your right. You should see a bubble containing a Fire Flower. Pop it and transform! (Yeah, I stopped.) Burn all the Red Urchins and crates with fireballs. Light the unlit torches to your right and left, and the wall should reveal a strange shape. Wall jump in the direction of the arrows, and collect the Coins! Then the gravity will turn again! Walk on the platforms to your left (Mario's right), and you should see platforms floating on the lava, moving to the right. Ride one, but watch out for the Li'l Cinders that pop out of the lava! Just like Li'l Brrs, they can be defeated with a spin. Collect the Fire Flower in the bubble nearby, and transform. Then go to the left to ride more floating platforms. While riding, light the two torches, and if your time runs out, simply collect the flower again. After lighting the torches, the gate to the Power Star will open, and a platform will extend. Use the platform to safely collect the Power Star and complete the mission. Return to the galaxy to play the next mission.
The third mission is called Hot and Cold Collide and focuses on—you guessed it—hot and cold together. The mission starts on the same icy ring as last time, but now, instead of boulders, the planet is covered with huge balls of lava! Traverse the ring counter-clockwise, and break all Crystals and collect any Star Bits and Coins along the way. You should see a HUGE Crystal to your right. Break it to go to the other side of the planet! Travel counter-clockwise around the ring again, break the Crystal at the end, and use the Launch Star! Then you'll land on the cold side of the Hot and Cold Planet. Dodge the enemies, and spin on top of the wheel to the left of the door. The door will open into deep space, but trust your gut and long jump through it! You should now find yourself on the hot side of the planet. Travel along the left path until you reach a bump, the only safe place when the platform sinks. When the platform rises again, run to the ramp to your right. Climb the ramp to reach a platform with three Red Urchins. When the platforms rise, spin the wheel in front of you, and another door will open. Break the Crystal containing a Fire Flower, collect it, and transform. Trust your gut and long-jump into deep space. You're back on the cold side of the planet. As Fire Mario, light the two torches. The Launch Star will appear, and it will take you to the Ice and Lava Platforms. This is fairly difficult, as you must move quickly. Collect the Ice Flower in a bubble and transform into Ice Mario. Skate across the lava platforms. Keep transforming with more Ice Flowers. Move quickly, but collect the Star Bits and 1-Up Mushrooms and break the Crystals if you have time. Start skating toward the end, as you'll need the extra speed. Collect the Power Star to complete the mission.
When the Cosmic Comet is in orbit, return to the galaxy again to play the fourth mission, Frosty Cosmic Mario Race. Then race Cosmic Mario to the Power Star. Skate along the icy platforms to gain speed. Be aware that halfway through the level, the gravity will flip, and later, the gravity will flip again. Reach the Power Star before Cosmic Mario to win. And, while you can go as fast as you want, don't fall. That will make you lose a life (obviously). And in Super Luigi Galaxy, you will play Frosty Cosmic Luigi Race instead. Cosmic Luigi is even harder to beat, so you must do some serious skating. However, take the same precaution as last time: don't fall. However, you may need to take more risks than you did before. Collect the Power Star before Cosmic Luigi to beat this mission!
Once you beat the game and the Purple Comet is in orbit, return to the galaxy to play the fifth mission, Purple Coins on the Summit. Purple Comets were always so annoying, and they may be the hardest comets in the game. You must collect 100 to win. However, there's no time limit, so you can take your time as long as you don't die. None of them are too well hidden, and it would take a looooooooooooooooooooong time to list all of their locations, so I'll leave it up to you! :) Collect all 100 to make the Power Star appear.
The sixth and final mission is the Secret Star, Conquering the Summit. To get this Power Star, you must revisit The Frozen Peak of Baron Brrr. I won't walk you through the whole level again; I'll just tell you where the Secret Star is. After freezing the first two geysers, go right. Collect the 1-Up Mushroom as you climb two more geysers and use the Sling Star. Break the Crystals and become Fire Mario. Burn the snowmen and collect the Star Bits. Avoid the Bomps as you climb the stairs. Burn another snowman to make a Sling Star appear. Break the Crystal containing another Fire Flower, and burn the boulder and snowman. Dodge the three Bomps, rotate the camera, and use the next Bomp to reach higher ground. Go up the stairs and collect the next Fire Flower. Dodge the incoming boulders by burning it, backflipping over it, or going to a ledge. Burn the snowman to make another Sling Star appear. Continue to climb the mountain until you see three Bomps ready to destroy all your progress! Wait for them to extend, then use the Bomps to wall jump and reach higher ground. Climb up the steps and retrieve the Secret Star.
Well, folks, that’s it for today. I've created a forum thread for feedback on my sections, as well as suggestions for future subjects of my guide. And, hopefully, you’ll see me next month. So long for now!
Galactic Expedition
Written By: Meta Knight (talk)
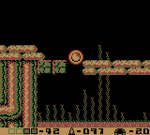
Metroid II Walkthrough
Current Inventory: 4 Energy Tanks, 210 Missiles, Morph Ball, Bombs, Spider Ball, Ice Beam or Wave Beam or Spazer Beam or Plasma Beam, High-Jump Boots, Varia Suit, Spring Ball,Space Jump
Metroid Counter: 17 killed, 22 left
Hello everyone and welcome to this month's Galactic Expedition! I hope you all are enjoying your holiday season. We're once again returning to SR388 to have Samus commit Metroid genocide in our walkthrough of Metroid II. Last time, we acquired some power-ups, defeated some Metroids, and progressed through Area 3. This time, we're going to finish off the area!
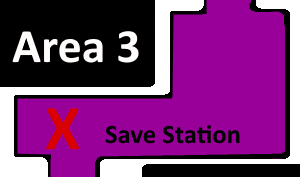
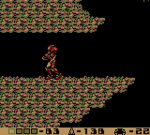
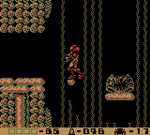
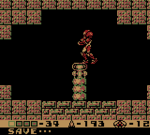
At the moment you're in a Save Station in Area 3. Space Jump on the right side and you'll be able to climb out of the pit that you're currenly in. You'll have to shoot some of the sand out of the way in order to get past it. When you move to the next screen you'll be in the huge cavern. Make your way all the way to the left, and be careful not to take too many hits. If you come across a wall, Space Jump to gain some height. You want to go left until you cannot move left anymore, and go through the passageway. You'll be in a couple long corridors. Move past them and shoot any enemies that are in the way.
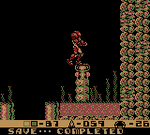
You'll come across a tall chamber eventually. Drop down and veer yourself over to the right wall, so that you can see an opening. Take the first one that comes across. You'll come across the Save Station next to a pit. You might recall we've ended here in the past. At the time, I said to not fall in the pit. Now it's finally time to explore this deep chasm. I highly recommend you save here though, because what awaits next is a gauntlet. Feel free to come back here whenever you feel like you're about to die. If you ever need more Missiles, go back to the large caverns and immediately drop. Shoot some of the sand and there will be a Missile Station that will allow you to replenish your ammunition. When you're ready for the large battle, drop down into the pit.
Drop down in the pit, and as you fall keep to the left. There will be an opening for you to enter. Head through and there will be a Gamma Metroid! If you need a refresher on how to get rid of him, check back here. This room has some spikes and not a lot of space to jump around in, so be careful to not get trapped by the Gamma Metroid. When he's beaten, go back right into the big pit. This time, drop down some more and jump to the right. There will be another opening for you to take. Another Gamma Metroid will ambush you as soon as you enter the door! He will come after you as soon as you step in, so stay on your guard and get rid of him. When he's defeated, bomb some of the blocks on the left to get to the lower level. Proceed right to enter the next room.
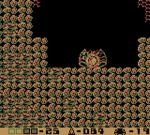
You'll be in another tall chamber. Space Jump or use the platforms to get all the way to the top. Be careful not to fall and touch the spikes that damage you. You can shoot them to get rid of them if you wish, but they give you no reward. When you're at the top, you will see a Metroid shell, which means you're in the right place. Jump up into the next room. Here you'll see several honeycomb-like figures. They don't block you, and they don't do damage, but you can still shoot them. Get rid of them because there's an Alpha Metroid here to the right! Shooting Missiles will end up getting rid of the webbing, wasting a Missile, so get as much of that out of the way so you can get rid of the Alpha Metroid. When he's defeated, use the Spider Ball on one of the walls to get through an opening in the ceiling. Follow the tunnel and when you see another Metroid shell, go into Morph Ball mode and drop inside the shell. You'll find a hidden passage there. Move right into the next room.
As soon as you enter, you'll see another Gamma Metroid that will attack as soon as you show yourself! As soon as you get out of the tunnel it will come after you, so get out and prepare your Missiles right away. However, there's also a bunch of more webbing ready to block your attacks. Move around the room and shoot the webbing with your regular beam, and when you have a clear shot, take out the Gamma Metroid. When you've defeated the Gamma Metroid, go back left out of this room. Go back from where you defeated the Alpha Metroid as well. When you're in the tall chamber, drop down to the left of the Metroid shell, but keep yourself to the right after that. There will be an opening to the right for you to proceed through.
You'll be in a small corridor. There's blocks that make you think you have to go down there, but there's nothing. Don't bother bombing them and continue heading to the right. There will be another tall chasm that you'll just drop down. However, stay on the platforms in the center, and shoot them to go down lower. The reason for this is there's several slug things along the wall that harm you if you touch them. When you land on a Metroid shell, head left to the next room. It will be a similar-looking chamber, but this time with another Gamma Metroid! Drop down to trigger the fight. There's a lot of room to get around, so draw him to you and fire.
By this point, you're probably exhausted, and low on health, as well as ammunition. Fortunately, there's an Energy Recharge here! Drop down the pit, and keep shooting down so you don't take damage from any of the spiked things. When you're on the ground, bomb or shoot the spikes and move to the right in Morph Ball. Jump up and grab that sweet health. Space Jump or use the platforms to climb the chamber, and take the opening to the left. You'll be in yet another chamber that looks exactly the same, and it's moments like this that make you realize how cryptic Metroid II can be. Nevertheless, climb up and take the passage on the left.
There'll be another Gamma Metroid! By now you should be good at getting rid of these. Be careful though, when you walk left it can drop through the fake platform below the Metroid shell. Get up out of the pit before he gets down, and you'll be in good shape to take him out. When he's down, you'll hear the lava drop to the next level. Head left to the next room. It won't appear to be a clear passage, but there will be a rock-like wall you can simply walk through. Move left and climb up. You'll be in the same pit you dropped down where the Save Station is. You might be wondering, if we went in a big circle, why not go down where the health is first? Well, you can't. You can go up into this tunnel, but you can't go back down. Climb all the way back up to the Save Station.
When you're back at the Save Station, you should definitely save. You just took out 6 Gamma Metroids in one clean gauntlet, along with an Alpha Metroid. Head left out of this room and you'll be a tall chamber. You probably need more Missiles as well, so before we head to the next area I'll explain how to do that again. Go left from the Save Station, and climb up the chamber. Keep moving right through the small corridors and you'll be back in the huge caverns. Drop down and veer to the left. Shoot the sand so that you fall down even more, and there's a Missile Recharge on the left. Space Jump back up and exit the caverns on the left. Procceed to the left and you're back in the tall chamber you were in before again.
Drop down the chamber all the way to the bottom. When you're on the floor, there's a passage on the left that you can easily get through. In this corridor, you'll notice that there's still lava on the ground, which means that this is not the area where lava dropped. You'll have to continue to the left for now, but remember this room. When you're in the next room, you'll see a tunnel for you to Morph Ball in. Use the Spring Ball to jump up through the tunnels quickly, and be careful not to jump up into any spikes. When you're at the top, you can head left to get to the next room.
You'll hear that glorious Main Tunnel theme that is honestly the best song in the game. Head left through the corridor to get to the next room. You'll be in another small chamber. Move left and follow the tunnels that lead down. There will be some lava on the ground, so be careful not to fall in it, but there will be a Metroid shell to let you know that you are on the right track. Head left into the next room. Here there will be several octopus-like creatures. They are easy to dodge, and I recommend killing them because they tend to drop a lot of health. Keep moving left to the next screen. There will be a quiet room with nothing in it, so just climb up and move right. There will be another long corridor with more octopus-like creatures. Get through the corridor and enter the passageway on the right. There will be another Gamma Metroid! There's no way around it other than to destroy it.
When he's gone, you'll hear the lava drop again. Pretty short area, but that's fine. Head to the left back through the corridor, then down the chamber, and to the right. You'll be back in that one long corridor with octopus-like creatures again, and notice that there's still lava on the ground. This is not where the lava dropped. Remember when I said remember that one room with the lava that didn't quite drop yet? That's where we want to go to now. Head right through this corridor into the next room.
You'll hear the Main Tunnel theme again. Continue right and climb back up the tunnel. Follow the pathway and go right to the next room as soon as you find an opening. Make sure you are on the bottom level when you do so. Continue right through this corridor and you'll be back in the room with a lot of Morph Ball tunnels. There isn't much new here, climb back down and head right. You'll see that the lava is indeed no longer there, so drop down and follow the tunnel. Be careful not to jump up into any spikes, or fall down onto any. Eventually, the tunnel will let you proceed left to the next room. Here will be another conveniently shaped tunnel that heads upwards. There will be two Metroid shells here. Take the pathway on the left.
Follow the tunnel and it will take you past some blobs over lava. Space Jump to get to the other side of the room. The blobs don't actually do any damage, so you can just stand on them and jump across them if you wish. Either way, head left into the next room. You'll be in a large room that goes in a circle with spikes all around. If you go left, you'll see another Energy Recharge that you can take if you want. Loop around and you'll come across an Alpha Metroid! He shouldn't be too hard. Leave this room and go forward until you're back where those two Metroid shells were.
When you're back where the Metroid shells are, head up! Follow the tunnel and take the passage on the right. You'll be in another tunnel. Simply follow the groove, as there's no branching paths here. When you're in the next room, you'll notice that it's another corridor with several blob things. Jump across to the right and you'll be in identical room as the one where you just defeated that Alpha Metroid. This time however, it's a Gamma Metroid! Take him down and refuel your ammunition with a Missile Recharge on the right. When you're done, you'll hear the lava rumble again. Follow the tunnels back the way you came to get back to the Metroid shells. If you need more health, feel free to grab the Energy Recharge to the left again.
From the Metroid shells, drop back down. We're going to go all the way back to where those octopus-like creatures were. Follow the tunnels to the right and make your way back to where that large room with all the Morph Ball tunnels is. You'll just have to go left when there's a split path after following the tunnels you're currently in. If you find yourself deeper in Area 3, you probably went too far to the right. In this case, just turn around and go the other way. When you're in the Morph Ball tunnel room, jump up to the top and head left back into the Main Tunnel.
Once again, head left and follow the tunnels that lead downward. This time though, keep going all the way to the bottom. There's no longer any lava preventing you from getting deeper. You'll start seeing some mole-like things digging in the walls. When you're at the bottom, you can head left to the next screen. Here you'll see more lava, and some bat-like creatures. Proceed left through this corridor. Be careful of enemies that pop out of the lava to attack. When you're in the next room, you'll see a couple large blocks that stand out. They cannot be bombed, or broken with a normal shot. You'll have to use a Missile to get rid of it. Destroy the block with a Missile and move left. Jump over the lava pit and head up through the tunnel.
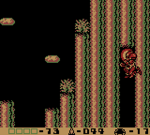
Continue through the path by navigating the tunnels, and you'll be confronted by another Gamma Metroid! This is a fairly standard room, but there isn't a lot of height, so be careful when you try to get rid of him. When he's done, enter the next room. You'll now be in a large tower-like area. For now, stay on the ground and move left. Shoot any vegetation out of the way, and enter the passage. You'll be in a large chamber. Space Jump to the top and head left, and you'll see a Save Station. Right here is where we'll end our journey for this month, but congratulations, you're in Area 6! Next time we'll get further in our adventure, but for now I'll see you all next time!
Party Trick!
Written By: ![]() Meta Knight (talk)
Meta Knight (talk)
![]() Hello and welcome everyone to this month's edition to Party Trick! I hope you all are enjoying the holidays and are able to immerse in some relaxation. For this month, since the issue is focusing on the Wii U as a tribute, this month will feature Mario Party 10. Mario Party 10 introduced Bowser as a playable character, with a new Bowser Party mode. There are ten Bowser Minigames, so we're going to take a look at all of them in this special!
Hello and welcome everyone to this month's edition to Party Trick! I hope you all are enjoying the holidays and are able to immerse in some relaxation. For this month, since the issue is focusing on the Wii U as a tribute, this month will feature Mario Party 10. Mario Party 10 introduced Bowser as a playable character, with a new Bowser Party mode. There are ten Bowser Minigames, so we're going to take a look at all of them in this special!
Bowser Minigames feature, well, Bowser. Like Bowser Minigames in previous Mario Party games, Bowser is against the other players. However, in Mario Party 10, Bowser can be controlled by an actual player. The person playing as Bowser uses the Wii U Gamepad and has a first-person view directly through Bowser's eyes, while everyone else uses Wii Remotes. The goal for Bowser is to hit the other players as much as possible. Unsurprisingly, the goal for the non-Bowser players is to survive, and if possible to not get hit. It's possible for both Bowser and the non-Bowser players to win. If Bowser hits two players, but one player survives, then both sides win. Ideally Bowser to eliminate everyone's HP. In a Bowser Party they would then be eliminated, and there'd be fewer players on the non-Bowser team to be against.
Bowser Minigame 1: Bowser's Bad Breath
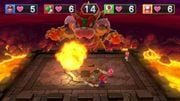
First up is Bowser's Bad Breath. In this game, Bowser holds the Gamepad, and moves it to aim fireballs that can be shot by blowing into the microphone. The other players have to simply move around to dodge the fireballs. It's fairly straightforward. Since the player with Bowser is seeing with a first-person view, you'll have to move the Gamepad around quickly to get a target, and then fire. You could also technically just look at the TV to see where everyone else is, but don't blame me if the other people in the room say you're cheating! The Gamepad's microphone isn't the most reliable either, so getting a feel for that may be handy. For the players that aren't Bowser, watch where Bowser's head is facing, as that is where a fireball will be shot. The fireballs are fairly huge, so be careful to not underestimate the amount of space you have.
Bowser Minigame 2: Bowser's Hammer Slammer
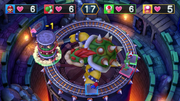
In this minigame, Bowser uses the analog on the Gamepad to turn left and right, and the A button to smash the hammer. The other players tilt the Wii Remote to move their cart on a circle. Once again, Bowser only has a first-person view, so move quickly and as soon as you see someone slam the hammer on them. There is a brief cooldown between hammer strikes, but it isn't too bad so if you feel the need to rapidly slam there's nothing stopping you. Another helpful tip is to try to hit two people at once if possible. That way there isn't a lot of room for people to get away. If you're on the non-Bowser team, split up! You can't move past another cart, so if you try to pass them you'll end up bumping into them. I've seen CPUs trap a middle person that ended up just being fodder to Bowser. Bowser doesn't have a good view (unless they're a human looking at the TV), so it's best to stay behind him. Move quickly because the hammer falls quick. There's a shadow when Bowser has the hammer up that you can use to tell exactly where he will strike, so use it to your advantage.
Bowser Minigame 3: Bowser's Fire Bar Fury
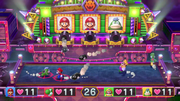
This minigame is also straightforward. Bowser tilts the Gamepad to move the platform, and the Fire Bars move accordingly. The goal for Bowser is to hit people, while everyone else has to survive. If you're Bowser, try to corner people to trap them in a barrage of attacks. Also, try to keep both of your Fire Bars really close to people. It's tougher for them to dodge both of your Fire Bars at once. You can also try to trick them, by having them jump over it and quickly stop the Fire Bar or move it the other way so they land on it. If you're not Bowser, pay close attention to the way the platform is being tilted so that you can tell where the Fire Bars are going to move. If the platform tilts left or right, the vertical Fire Bar will move. If the platform is tilted up or down, the horizontal Fire Bar will move. Don't let yourself get cornered, and try not to let yourself get trapped.
Bowser Minigame 4: Bowser's Wicked Wheel
Long time Mario Party veterans will recognize this as Shock, Drop, or Roll from Mario Party 2, or even Rotisserie Rampage from Mario Party DS. The concept is exactly the same. Bowser swipes the touch screen on the Gamepad with the stylus to spin the wheel. The other players have to run on the wheel and try to not get zapped. If you're Bowser, spin the wheel quickly, but also don't be too predictable. If you're spinning it one way and it isn't working, switch it the other way to catch your opponents off guard. If you're not Bowser, stay on your toes and be prepared for when Bowser switches the wheel. Try to stay in the center of the wheel, far away from either side where you can get zapped. Be careful not to shake the Wii Remote too quickly, as you can easily be thrown into the other side. A lot of the strategies for these minigames are the opposite of each other depending on what side you're on.
Bowser Minigame 5: Bowser's Bonus Bingo 
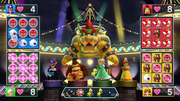
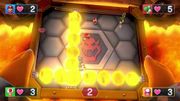
For this minigame, people that aren't Bowser pick a Bingo card. Bowser then throws dice. The enemy that appears will be punched on the non-Bowser's Bingo cards. For example, if Bowser rolls a Koopa Troopa, all the spaces on the Bingo cards with Koopa Troopas are punched out. Bowser gets one hit for every Bingo line. So if someone has 3 lines on their Bingo card, they will take 3 points of damage. If you're Bowser, pray you get Bingos. If you're not Bowser, pray that Bowser doesn't roll Bingos. There really isn't any strategy, it's literally just luck. As a result, it is my personal least favorite Bowser minigame in Mario Party 10.
Bowser Minigame 6: Bowser's Painball
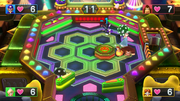
It's a game of pinball! Bowser uses ZL and ZR to control the flippers, while everyone else has to try to survive. There is a wall in the center that moves around, but does not harm anyone if they touch it. If you're Bowser, try to hit the balls in such a way that the angle hits into the players. When more spiked balls are dropped, possibly hit more than one at once. Try to get everyone else to be cluttered together, so that one ball can hit multiple people. If you're not Bowser, you can try to use the wall to shield yourself from the ball. However, don't allow yourself to be cornered! Keep an eye where the ball will ricochet along the walls so that you can dodge accordingly. After 30 seconds, the minigame will be over.
Bowser Minigame 7: Bowser's High Dive
This minigame is quick. It's similar in concept to Track Star from Mario Party DS. Bowser taps the left or right arrow to crush a platform, and anyone standing on it gets crushed as well. The players that aren't Bowser have to pick a side to try and survive. If you're Bowser, tap back and forth so that your shadow is in the middle of the platforms. This will make it harder for everyone else to predict where you will strike. If you're not Bowser, move back and forth between the platforms, but be prepared to stop if the timer is down and Bowser is on the other side. You wouldn't want to jump into the platform he's about to squish. Watch the silhouette to try and determine where he'll land as well. You'll have to repeat the process 3 times no matter what side you're on.
Bowser Minigame 8: Bowser's Clawful Climb
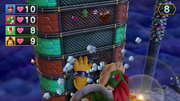
What would a Mario Party game be if it didn't have button mashing? In this minigame Bowser is climbing a tower and everyone else is trying to outrun his wrath. If you're Bowser, you alternate between pressing ZL five times, and ZR five times. If you're not Bowser, you alternate between the 1 and 2 buttons. There really isn't anything else to this minigame just mash the intended sequence as fast as possible. You may not even need to look at the screen if you're better off tapping without it. If you're Bowser you can listen to the roar and crash of his hand landing on the building to know when you switch but that's about all there is to this minigame.
Bowser Minigame 9: Bowser's Sinister Slots
This minigame is certainly interesting. There are three slots for Bowser to stop. A Bullet Bill is fired and targets in on that character for each slot. For example, if the slot is stopped on Mario, Luigi, and Yoshi, then one Bullet Bill is fired toward each of them. However, if Bowser happens to get three in a row of a character, then there will be a barrage going to that character. If you're Bowser, you want to try and get three in a row of a character as fast as possible. It's tougher to dodge 9 Bullet Bills from all angles than 1. However, you only have 30 seconds, so don't spend too much time stopping the slots. If you're not Bowser, make large circles when a Bullet Bill is targeting you. Be careful not to walk into someone else's Bullet Bill either, because it will hurt you instead. There is no invincibility frames, so you could be hit with a load of Bullet Bills and have a bunch of damage instantly.
Bowser Minigame 10: Bowser's Roulette Rage
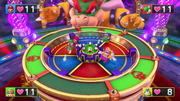
Lastly is Bowser's Roulette Rage. In this minigame, Bowser has six sections of a wheel that he can place bombs in. He has 3 bombs, and can either split them up, or stack bombs in one sector. Then, he spins the wheel. When he decides to stop, the bombs fall into whatever section they are over, and anyone inside is bombed. Everyone else has to try to avoid getting caught in Bowser's trap. This is a game of risk vs. reward. If you're Bowser, you could try to stack three bombs in one section, but that wouldn't give you as much of a range. There's a whole bunch of different combinations that you're able to use. You can either have three bombs all together to have half of the area bombed, or split it up so it is more difficult to predict where a safe spot will be. The possibilities are endless, so do your best to bomb as many people as you can. If you're not Bowser, split up! Don't be grouped together because then all of your team will be bombed, and in a Bowser Party this would put you at a disadvantage. Watch the wheel and stay to a safe zone the best you can.
That's all for this month's Party Trick! Have a minigame or board you'd like me to do? Send me a message on my talk page or message me on the forums and you could be mentioned in next month's edition!
Robotic Rush
Written by: Meta Knight (talk)
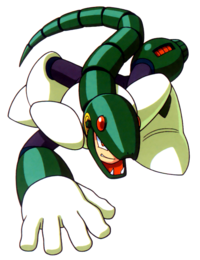
| Snake Man | |
|---|---|
| |
| Name | Snake Man |
| First Appearance | Mega Man 3 |
| Weakness | Needle Cannon |
| HP | 28 |
| Weapon | Search Snake |
Hello everyone and welcome to Robotic Rush! I'm bringing this section back as another guest submission like it was last year. Man, what a good time it is to be a Mega Man fan. There's so much coming to the Switch. It's also the Blue Bomber's 30th Anniversary, so I figured it was a perfect time to do this section again. This time, let's take a look at Snake Man!
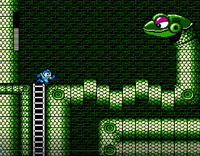
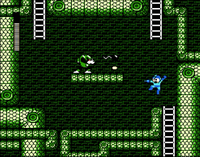
The first half of Snake Man's stage takes place on, well, snakes! The whole stage looks beautiful, the floor looks exactly like a snake. There's several enemies that jump around, and small snake heads that will shoot at you. From where you start, walk to the right. There's no bottomless pits, just the enemies that jump around. Be careful not to have them hit you and slide under them if necessary. When you climb the ladder to the next room, there's three small snake heads. Quickly jump and shoot the bottom one to get it out of the way. Shoot the other two as well and climb up the next ladder. You'll be in a room with a giant snake head. It will shoot large bullets at you, and the body moves up and down like a snake. Dodge the bullets by sliding under them or jumping over them, and shoot the snake in the head.
When the snake head is defeated, continue right to the next screen. You'll see a bottomless pit, some small snake heads, and a bomb enemy. Shoot the top snake head, and jump on the platform. Wait for the other snake head to shoot at you before jumping over the pit. If you jump too soon, you could get hit by the snake's bullet and fall back into a bottomless pit. Walk a little bit forward and there will be some health that you can use to recover at the top of the stage. You can climb the ladder to get it. Keep moving right and climb down the ladder. Follow the pathway from here and there will be several more enemies that bomb you, as well as enemies that jump behind you. For the latter, when they jump, stand completely still and quickly turn around. Then fire rapidly. That usually takes care of them. For the bomb enemies, just get out of the way. Keep going and you'll find another ladder that you can climb. Here there will be a Hammer Joe. Stand on the ground below the platform to the left. When he opens his eye, jump and fire, but don't go on the platform. You'll end up being back on the ground and he'll throw the hammer over your head. Continue until he's defeated.
Climb the ladder on the right and there will be another Hammer Joe. You can repeat the process as before by standing on the right platform. When he's defeated, if you climb the right ladder you can recieve two mystery boxes of goodies. These can be either health, ammo, lives, or energy tanks. It's worth checking even if you get something you don't want. Climb back down and get rid of the Hammer Joe again, and take the ladder on the left. Keep climbing and there will be another giant snake head. Use the same strategy as before and it'll go down in no time. When you move to the right, you'll be at the halfway point. There will be another long horizontal room with enemies that jump over you. Use the same patten as before to get them out of the way. You'll eventually see some health so go ahead and grab it if you want. Climb up the ladder to the next section.
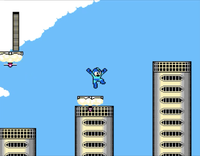
There isn't much in this room. Shoot the pest on the ladder and climb up it. You'll be in another long horizontal room, with several pillars. Each pillar will have cloud platforms that come out, and you can use these to get up higher. When you're standing on a pillar, make sure you jump just before the cloud comes out. For the most part if you don't it's fine, but for whatever reason, sometimes if you stand there you'll randomly get pushed off the side to your death, and it is very frustrating. Anyway, ride the cloud platforms and carefully jump across throughout the room. At some point, there will be cloud enemies. They move slow, but if you shoot them, the cloud goes away and they become a bullet that will fly faster towards you. Be prepared to jump over them, and whatever you do, don't get hit. The knockback can easily send you to your death. When you make it to the end of the room, you'll be able to fight Snake Man himself.
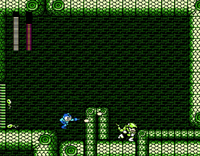
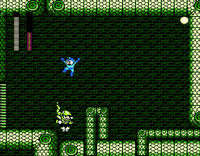
Snake Man really isn't that hard. His pattern is predictable. He walks back and forth, shoots some small snakes, repeat. You can easily defeat him. Stay on the opposite edge and shoot at him. When he gets closer to the middle platform, jump on the middle platform yourself and jump over him. He will continue walking the other way and you will be able to get some more clear shots. He will throw small search snakes, but you can just quickly shoot those as well. There really isn't much more to him, but there is a neat rhythm. You kind of walk in a figure-8 pattern, where you walk on the platform and jump, then turn around and repeat. After his HP is down, you will earn the Search Snake, which can be used to take out Gemini Man. That's all for this Robotic Rush, and unless someone else picks up this section I probably won't have another one until next year! Until then, long live the Blue Bomber!
Mario Calendar
Hello, and welcome to Mario Calendar! This section lists all the games that have come out in history during the month of publication. This means that today, I'll be listing the Mario games that have come out in December! So without further ado, let's just jump right in!
Region Abbreviations
| Abb. | Region |
|---|---|
| JP | Japan |
| NA | North America |
| EU | Europe |
| AU | Oceania/Australia |
| SK | South Korea |
Console Abbreviations
| Abb. | Console |
|---|---|
| NES | Nintendo Entertainment System |
| Famicom | Nintendo Family Computer |
| SNES | Super Nintendo Entertainment System |
| N64 | Nintendo 64 |
| GC | Nintendo GameCube |
| Wii | Nintendo Wii |
| Wii U | Nintendo Wii U |
| GB | Game Boy |
| GBC | Game Boy Color |
| GBA | Game Boy Advance |
| DS | Nintendo DS |
| 3DS | Nintendo 3DS |
| Wii VC | Nintendo Wii Virtual Console |
| 3DS VC | Nintendo 3DS Virtual Console |
| Wii U VC | Nintendo Wii U Virtual Console |
| Wii U eShop | Nintendo Wii U eShop |
| DSiWare | Nintendo DSiWare |
| VB | Virtual Boy |
| G&W | Game and Watch |
| 64DD | Nintendo 64 Disk Drive |
| MS-DOS | Microsoft Disk Operating System |
| Satellaview | Satellaview |
| CD-i | Philips CD-i |
- December 1st
- 1991 (EU): Mario Teaches Typing (MS-DOS)
- 1995 (JP): Virtual Boy Wario Land (VB)
- 2005 (JP): Donkey Kong Country 3: Dixie Kong's Double Trouble! (GBA)
- 2006:
- (EU): Yoshi's Island DS (DS)
- (AU): Mario Tennis: Power Tour (GBA)
- 2011 (JP):
- Fortune Street (Wii)
- Mario Kart 7 (3DS)
- 2016 (JP): Super Mario Maker for Nintendo 3DS (3DS)
- December 2
- 1998 (JP): Mario no Photopi (N64)
- 2001 (NA): Super Smash Bros. Melee (GC)
- 2004 (JP):
- Super Mario 64 DS (DS)
- WarioWare: Touched! (DS)
- 2006 (JP):
- WarioWare: Smooth Moves (Wii)
- Donkey Kong (NES - Wii VC)
- Donkey Kong Jr. (NES - Wii VC)
- Pinball (NES - Wii VC)
- Super Mario 64 (N64 - Wii VC)
- Super Mario Bros. (NES - Wii VC)
- Super Mario World (SNES - Wii VC)
- 2010
- (JP): Mario vs. Donkey Kong: Mini-Land Mayhem! (DS)
- (AU):
- 2011 (EU): Mario Kart 7 (3DS)
- 2016 (NA/EU): Super Mario Maker for Nintendo 3DS (3DS)
- December 3
- 2009 (JP): New Super Mario Bros. Wii (Wii)
- 2010 (EU):
- 2011 (AU): Mario Kart 7 (3DS)
- 2015 (JP): Mario & Luigi: Paper Jam (3DS)
- 2016 (AU): Super Mario Maker for Nintendo 3DS (3DS)
- December 4
- 1991 (JP): Yoshi (NES)
- 2006 (NA): Donkey Kong Jr. (NES - Wii VC)
- 2011 (NA): Mario Kart 7 (3DS)
- 2016 (EU): Mario and Luigi: Paper Jam (3DS)
- December 5
- 2003 (EU/AU): Mario Party 5 (GC)
- 2005 (NA):
- Mario Tennis: Power Tour (GBA)
- Super Mario Strikers (GC)
- 2011 (NA): Fortune Street (Wii)
- 2013:
- (JP): Mario & Sonic at the Sochi 2014 Olympic Winter Games (Wii U)
- (NA): Donkey Kong 3 (NES - 3DS VC)
- 2014 (NA):
- NES Remix Pack (Wii U)
- Captain Toad: Treasure Tracker (Wii U)
- Ultimate NES Remix (3DS)
- December 6
- 1982 (NA): Greenhouse (G&W)
- 1999 (EU/AU): Donkey Kong 64 (N64)
- 2004 (NA): Mario Party 6 (GC)
- 2007 (AU): Mario Party DS (DS)
- 2012:
- (JP): Paper Mario: Sticker Star (3DS)
- (EU/AU): Wario Land 3 (GBC - 3DS VC)
- 2014 (JP): Super Smash Bros. for Wii U (Wii U)
- December 7
- 2000 (JP): Mario Party 3 (N64)
- 2006 (AU):
- Donkey Kong (NES - Wii VC)
- Donkey Kong Country (SNES - Wii VC)
- Mario Bros. (NES - Wii VC)
- Super Mario 64 (N64 - Wii VC)
- Wario's Woods (NES - Wii VC)
- 2012 (EU): Paper Mario: Sticker Star (3DS)
- December 8
- 2005 (JP): Mario Kart DS (DS)
- 2006 (EU):
- Donkey Kong (NES - Wii VC)
- Donkey Kong Country (SNES - Wii VC)
- Mario Bros. (NES - Wii VC)
- Super Mario 64 (N64 - Wii VC)
- Wario's Woods (NES - Wii VC)
- 2011 (JP): Mario & Sonic at the London 2012 Olympic Games (Wii)
- 2012:
- (JP):
- New Super Mario Bros. U (Wii U)
- Nintendo Land (Wii U)
- (AU): Paper Mario: Sticker Star (3DS)
- (JP):
- December 9
- 2004 (JP): Yoshi Topsy-Turvy (GBA)
- 2010 (JP): Donkey Kong Country Returns (Wii)
- December 10
- 1992 (EU): Mario Paint (SNES)
- 1994 (NA):
- Wario's Woods (NES)
- Wario's Woods (SNES
- 1999 (JP): Donkey Kong 64 (N64)
- 2010 (AU): Mario & Luigi: Paper Jam (3DS)
- 2015 (EU): Game & Watch Gallery 4 (GBA - 3DS VC)
- December 11
- 1999 (JP): Mario Artist: Paint Studio (64DD)
- 2007 (JP): Super Mario Bros. 3 (NES - Wii VC)
- 2008 (JP): New Play Control! Donkey Kong Jungle Beat (Wii)
- 2013 (JP): Tetris Attack (GB - 3DS VC)
- 2015 (AU): Game & Watch Gallery 4 (GBA - 3DS VC)
- December 12
- 1983 (JP): Donkey Kong Jr. Math (NES)
- 2003 (JP):
- Donkey Konga (GC)
- Donkey Kong Country (GBA)
- 2006 (JP):
- Donkey Kong Country (SNES - Wii VC)
- Mario Bros. (NES - Wii VC)
- Wario's Woods (NES - Wii VC)
- 2010 (NA): Super Mario All-Stars Limited Edition (Wii)
- 2013 (EU/AU): Donkey Kong 3 (NES - 3DS VC)
- December 14
- 1991 (JP): Yoshi (GB)
- 1995 (EU): Donkey Kong Country 2: Diddy's Kong Quest (SNES)
- 1996 (JP): Mario Kart 64 (N64)
- 2001 (JP): Super Mario World: Super Mario Advance 2 (GBA)
- 2011 (JP): Wario Land: Super Mario Land 3 (GB - 3DS VC)
- December 15
- 2006 (EU/AU): Pinball (NES - Wii VC)
- 2008 (NA): Game & Watch Collection (DS)
- 2016 (JP/NA/EU/AU): Super Mario Run (iOS)
- December 16
- 1993 (EU/AU): Super Mario All-Stars (SNES)
- 2004 (JP): Donkey Kong Jungle Beat (GC)
- December 17
- 1992 (EU): Yoshi (NES)
- 1999:
- (JP): Mario Party 2 (N64)
- (AU): Super Smash Bros. (N64)
- 2015:
- (JP/NA): Minecraft: Wii U Edition (Wii U)
- (EU):
- Mario Tennis (N64 - Wii U VC)
- [New Super Mario Bros.]] (DS - Wii U VC)
- December 18
- 1998 (JP): Mario Party (N64)
- 2013 (NA/EU/AU) - NES Remix (Wii U eShop)
- 2015 (AU):
- Mario Tennis (N64 - Wii U VC)
- New Super Mario Bros. (DS - Wii U VC)
- December 19
- 1996 (EU/AU): Donkey Kong Country 3: Dixie Kong's Double Trouble! (SNES)
- 2006 (JP): Mario's Super Picross (SNES - Wii VC)
- 2013 (JP): NES Remix (Wii U eShop)
- December 20
- 2010 (NA): Mario Party 2 (N64 - Wii VC)
- 2013 (NA): Wario Land II (GBC - 3DS VC)
- December 21
- 1997 (JP): Yoshi's Story (N64)
- 2009 (NA): Super Smash Bros. (N64 - Wii VC)
- December 22
- 1988 (JP): Tetris (NES)
- 2006 (EU/AU): Donkey Kong Jr. (NES - Wii VC)
- 2016 (NA): Mario Party 2 (N64 - Wii U VC)
- December 24
- 2007 (NA): Donkey Kong Country 3: Dixie Kong's Double Trouble! (SNES - Wii VC)
- 2008 (JP):
- Bird & Beans (DSiWare)
- Dr. Mario Express (DSiWare)
- Paper Airplane Chase (DSiWare)
- WarioWare: Snapped (DSiWare)
- 2010 (EU/AU): Mario Party 2 (N64 - Wii VC)
- 2015 (EU):
- Super Mario 64 DS (DS - Wii U VC)
- Super Mario RPG: Legend of the Seven Stars (SNES - Wii U VC)
- December 25
- 2006 (NA): Super Mario Bros. (NES - Wii VC)
- 2007 (EU/AU): Donkey Kong Country 3: Dixie Kong's Double Trouble! (SNES - Wii VC)
- 2013 (JP): Super Mario Bros. 3 (NES - Wii U VC)
- 2014:
- (NA):
- Super Mario Bros. Deluxe (GBC - 3DS VC)
- Super Mario World: Super Mario Advance 2 (GBA - Wii U VC)
- (NA/EU): Mario Party Advance (GBA - Wii U VC)
- (NA):
- 2015 (AU):
- Super Mario 64 DS (DS - Wii U VC)
- Super Mario RPG: Legend of the Seven Stars (SNES - Wii U VC)
- December 26
- 2013:
- (NA): Mario Tennis (GBC - 3DS VC)
- (EU/AU):
- Super Mario Bros. 3 (NES - 3DS VC)
- Super Mario Bros. 3 (NES - Wii U VC)
- 2014 (AU): Mario Party Advance (GBA - Wii U VC)
- 2013:
- December 27
- 2012 (NA/EU/AU): Super Mario Bros.: The Lost Levels (NES - 3DS VC)
- December 28
- 1997 (JP): BS Super Mario Collection (Satellaview)
- 2011 (EU): Fortune Street (Wii)
- UPCOMING: 2017 (JP): Mario Party: The Top 100 (3DS)
- December 29
- 2005 (JP): [[Mario & Luigi: Partners in Time (DS)
- 2015 (JP): Super Mario Advance 4: Super Mario Bros. 3 (GBA - Wii U VC)
- 2016 (NA): Mario Kart 64 (N64 - Wii U VC)
- December 30
- 2008 (SK): Mario Bros. (NES - Wii VC)
- December 31
- 1994 (NA): Hotel Mario (CD-i)
- 1995 (NA): Mario's Game Gallery (MS-DOS)
- 2000 (JP): Super Mario Bros. Deluxe (GBC)
- 2013 (NA): Dr. Luigi (Wii U eShop)
- Unknown
- 1986 (JP): All Night Nippon Super Mario Bros. (Famicom)
- 1990 (NA): Dr. Mario (GB)
- 1993 (NA): Mario's Time Machine (SNES)
- 1994 (NA):
- Super Mario All-Stars + Super Mario World (SNES)
- Tetris & Dr. Mario (SNES)
- 1999 (NA): Game & Watch Gallery 3 (GBC)
- 2009 (EU): Game & Watch Collection (DS)
Well, that's all for this month! See ya in January!
Pokédex Power
Hello everyone, it's me, Yoshi876 again with a new edition of Pokédex Power, the section written by the person who thought they'd only have a small section to write this month, but instead has quite possibly his largest. UltraSun and UltraMoon have been released in the past month, and they've brought with them a whole load of new Pokédex entries for all of the Pokémon in the Alola region, and some more that weren't.
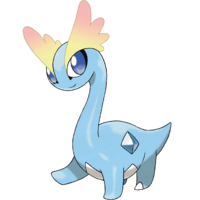
However, the main focus for this month is Amaura, one of the fossil Pokémon. As cool as the fossil Pokémon are, they never really appear on my radar, I don't think any of them have ever made it onto a team that I've used, not even Aerodactyl. This is mainly because, as cool as they are, I don't really feel anything for them, but when this cute little dinosaur popped up carrying one of my favourite types, I knew I had to make an exception.
I've used Amaura and its evolution quite a few times in Pokémon Y, and I've found it extremely useful, especially for taking on the T-Rex fossil Pokémon in the Rock Gym. However, Amaura will forever hold a special place in my heart, as it is the first Pokémon I've ever had that caught Pokérus, sadly it was the version that lasted a day, so I didn't make full use of it, but some of my PC Pokémon still carry the virus, so it's not dead yet.
Generation VI
| Pokémon X | This ancient Pokémon was restored from part of its body that had been frozen in ice for over 100 million years. |
| Pokémon Y | This calm Pokémon lived in a cold land where there were no violent predators like Tyrantrum. |
| Pokémon Omega Ruby | This ancient Pokémon was restored from part of its body that had been frozen in ice for over 100 million years. |
| Pokémon Alpha Sapphire | This calm Pokémon lived in a cold land where there were no violent predators like Tyrantrum. |
Generation VI does a good job at introducing Amaura. The entry for X does run the risk of being a generic fossil Pokémon entry by focusing on its restoration, but it's partly redeemed by referring to real-life science with frozen specimens. Now, as far as I know we haven't restored any actual animals from frozen body parts, but it's theorised that we could. The entry for Y focuses on its actual life, and it's nice to see that they play on its Ice typing by having the Pokémon in an icy environment, it's also nice that they refer to the other fossil Pokémon introduced in the generation, and say how it wasn't an issue for Amura. Plus, I'd hate the thought of anything hunting this cute little Pokémon.
Generation VII
| Pokémon Ultra Sun | It lived in cold areas in ancient times. It's said that when Amaura whinnies, auroras appear in the night sky. |
| Pokémon Ultra Moon | Amaura was restored successfully, but it's not expected to live long because of the heat of the current environment. |
UltraSun continues the theme of its icy environment, but also brings up a neat little fact about Amaura. However, bringing real-life science back into this section, the real auroras are caused by particles from the Sun hitting the atmosphere, so I wonder whether Amaura can sense when this event is going to happen, and whinnies to coincide with it. The entry for UltraMoon is a little sad, but again it brings up a few questions. What does it mean by the environment? If it's just the Alola region then I'd understand, although it does raise the question as to why they'd restore it there if this was an issue. The other thing is that the Pokédex is referring to global warming and climate change, and if it is, then that's just another good reason to stabilise our carbon emission, because I want an Amaura, and I want it for a long time.
Conclusion
Amaura has really good Pokédex entries. The UltraMoon one is quite thought-provoking, and all of the other entries do a good job at setting out what Amaura is and how it lived, as well as providing genuinely interesting facts about the Pokémon. For future entries, it would be nice to know why the Pokémon can only evolve at night, is it something to do with the auroras? And as it's away from predators, it'd also be nice to know what impact on its environment the booming population of Amaura and Aurorus had.
Anyway, now that we're finished with Amaura, it's time to move onto the new Pokédex entries for all the Alola region Pokémon, and the ones that UltraSun and UltraMoon brought in.
Vulpix
| Pokémon Ultra Sun | Its beautiful tails have made it very popular. However, it's not brushed diligently, it will be a mass of tangles before you know it. |
| Pokémon Ultra Moon | It manipulates balls of fire to catch its prey. If you raise one from when it's young, it will grow close to you like a puppy Pokémon. |
It's nice to see the sequels to Sun and Moon reference their previous game's entries. UltraSun talks a little about the tails, but mainly focuses on the coat of Vulpix, and it's interesting to see how high maintenance the Pokémon is. But is this more for home life? Does the fur got all knotted when it's inside its Poké Ball, or is fine. UltraMoon is the first time that Vulpix's predatory nature is brought up, but seeing how it is a Fox Pokémon, this should have been assumed. I would like to know what its prey is though. The nod to Growlithe is pretty cute as well, considering how that's the Puppy Pokémon. But Meta Knight's main complaint from his analysis still hasn't been answered, what is up with those tails?
Alolan Vulpix'
| Pokémon Ultra Sun | If you carelessly approach it because it's cute, the boss of the pack, Ninetales, will appear and freeze you. |
| Pokémon Ultra Moon | They live together in a skulk, helping one another. Before eating their prey, they freeze it solid with their -58 degree Fahrenheit breath. |
Unlike normal Vulpix, the new entries make no reference to the previous games' entries, instead choosing to focus on new and interesting facts about Alolan Vulpix. It's nice to see a pack aspect introduced to the Pokémon, but it does beg the question about what happens when an Alolan Vulpix evolves. Yes, it may be through an Ice Stone, but let's be honest considering how they live in icy climates, it's not out of reason for a Vulpix to stumble across one. The second fact focuses again on Vulpix's predatory nature, but again, it would be nice to know what prey they hunt. And also, how sharp are their fangs? If they're freezing their prey solid, then they must have some pretty tough teeth to gnaw through that.
Snorunt
| Pokémon Ultra Sun | It feeds mainly on ice and snow. It's only able to survive in a limited number of places in the warm Alola region. |
| Pokémon Ultra Moon | Rich people from cold areas all share childhood memories of playing with Snorunt. |
Snorunt's new Pokédex entries are sadly not that interesting. We already know that Snorunt eat ice and snow, and given how Snorunt makes a house prosperous, it can easily be assumed that rich people have many memories of them. That said, it is a nice little inference. However, at least UltraSun does clarify the population boom aspect, by saying that they only live in limited places in the Alola region. So maybe the conditions in those icy places are great for a population boom.
Magby
| Pokémon Ultra Sun | When flames drip from its nose, that means it has a cold. Have it lie down for a nice rest in some magma. |
| Pokémon Ultra Moon | Its body temperature is always around 1,100 degrees Fahrenheit. If Magby falls into a small-enough pond, the whole thing will dry up. |
Magby's new entries are relatively interesting. With UltraSun it's nice to see the Pokédex actually function as a guide, and give some advice on how to look after your Pokémon should it fall ill. That said, good luck not burning yourself when lying your Magby down in the magma. UltraMoon slightly contradicts previous entries, which state that Magby's internal temparture is above 1,100 Fahrenheit, but it doesn't fully contradict it as it does state that it's generally around. The final point is interesting, although what a Magby would be doing that close to a pond is anyone's guess.
Leafeon
| Pokémon Ultra Sun | Although it doesn't like disputes, it will sharpen the leaf on its tail into a blade and fight if it has to protect its friends. |
| Pokémon Ultra Moon | It gets its nutrition from photosynthesis. It lives a quiet life deep in forests where clean rivers flow. |
With Leafeon we do get the photosynthesis for what seems like the millionth time, alright already we get that it uses photosynthesis for food, give us something else! It is, however, nice to get some information on Leafeon's general habitat, as amazingly none of the previous entries had given us that. What I also like is how UltraSun brings attention to previous entries by stating Leafeon's preferred avoidance of violence, but mentions how it will resort to it as a last defence.
Klefki
| Pokémon Ultra Sun | Although it's unclear why it collects keys, giving it a key makes Klefki very happy. However, it apparently only likes master keys. |
| Pokémon Ultra Moon | Long ago it lived in mines, but once the minerals that make up its diet became scarcer, Klefki began appearing in human settlements. |
Maybe someone at Nintendo reads this section, because my main questions from Klefki's original entries have been answered. Well, sort of. UltraSun mentions how no one knows why it collects keys, now making this a mystery rather than a potential oversight, but it does now bring up the new question as to why it favours master keys. Obviously, master keys are more important, but how does the Klefki know this? As for the absorbing metal ions from a previous entry, UltraMoon answers this by explaining that Klefki feed on minerals, hence why it inserts itself into the ions.
Toxapex
| Pokémon Ultra Sun | To attack, this Pokémon sends toxic spikes flying at its enemies. Ones that come close get mown down by the claws on its feet. |
| Pokémon Ultra Moon | With its 12 legs, it creates a dome to shelter within. The flow of the tides doesn't affect Toxapex in there, so it's very comfortable. |
Sadly, I don't get any answers as to what the after-effects of Toxapex's poison is, but we do get some facts on how it lives its general day to day life. The hunting aspect is a lot clearer now, as it fire homing spikes, this probably means that it can eat the Corsola at its own leisure, rather than having to fight to eat it. It's also interesting to see how the tide has no effect on Toxapex, especially as the current is a very dangerous thing, at least for us humans. But as Toxapex uses its legs as a dome, I now want to know how strong they are, and whether they're used to deflect attacks.
Ledyba
| Pokémon Ultra Sun | This Pokémon is very sensitive to cold. In the warmth of Alola, it appears quite lively. |
| Pokémon Ultra Moon | These very cowardly Pokémon join together and use Reflect to protect their nest. |
Ledyba's new entries aren't massively great, but they're still better than what we had before. I like how the Alola region is mentioned in the UltraSun entry, and how Ledyba has adapted well in this region. It's also interesting to see that learning the move Reflect is something to do with its timidness, rather than a random move the developers decided to throw in.
Trapinch
| Pokémon Ultra Sun | Its jaws are strong enough to crush rocks but so heavy that it can't get up if it flips over. Sandile seize those moments as their chance. |
| Pokémon Ultra Moon | It builds nests that double as traps, lying in wait for its prey to get caught. When night falls, it digs itself a spot beneath the sand to sleep. |
Sadly, Trapinch's new entries are pretty boring. We already know all of the information that they give across, apart from the fact that they are the prey of Sandile. I never thought of Sandile preying on a Trapinch, but it makes sense, and it shows how Sandile is quite the opportunistic hunter.
Drifblim
| Pokémon Ultra Sun | There's a rumor that if you catch a Drifblim floating on the wind at dusk, you'll be carried away to the afterlife. |
| Pokémon Ultra Moon | The raw material for the gas inside its body is souls. When its body starts to deflate, it's thought to carry away people and Pokémon. |
The mystery of Drifblim has finally been answered, although let's be honest, as it's a Ghost Pokémon, the fact that it flies into the afterlife isn't that much of a surprise. As for UltraMoon it does raise the idea of why people disappear when they're on a Drifblim, and that's because they have their soul sucked out of them, and used for Drifblim's gas. So, pretty standard Ghost Pokémon entries in the end.
| The 'Shroom: Issue 129 | |
|---|---|
| Staff sections | Staff Notes • The 'Shroom Spotlight • End-of-the-Year Awards • Director Election |
| Features | Fake News • Fun Stuff • Palette Swap • Pipe Plaza • Critic Corner • Strategy Wing |
| Specials | Spla-tune in for Splatoon • The 'Shroom Holiday Scavenger |
