User:YoYo/Los Angeles Laps: Difference between revisions
mNo edit summary |
m (Shokora moved page User:RealStuffMister/Los Angeles Laps to User:YoYo/Los Angeles Laps: Automatically moved page while renaming the user "RealStuffMister" to "YoYo") |
||
| (7 intermediate revisions by 3 users not shown) | |||
| Line 1: | Line 1: | ||
{{DISPLAYTITLE:<small>Tour </small>Los Angeles Laps}} | |||
{{race course infobox | {{race course infobox | ||
|title=Los Angeles Laps | |title=Los Angeles Laps | ||
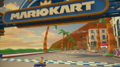
|image=[[File: | |image=[[File:MKT Los Angeles Laps View.png|300px]] | ||
|appears_in=''[[Mario Kart Tour]]'' (2020 <small>(1)</small>, 2021 <small>(3)</small>, 2022 <small>(2)</small>) | |appears_in=''[[Mario Kart Tour]]'' (2020 <small>(1)</small>, 2021 <small>(3)</small>, 2022 <small>(2)</small>)<br>''[[Mario Kart 8 Deluxe]]'' ([[Mario Kart 8 Deluxe – Booster Course Pass|Booster Course Pass]]) (Wave 4) (2023) | ||
|based_on={{wp|Los Angeles}} | |cups={{fake link|Boomerang Cup}} | ||
|tours= | |based_on={{wp|Los Angeles}} and {{wp|Santa Monica, California|Santa Monica}}, [[United States of America|United States]] | ||
|tours='''Los Angeles Laps:'''<br>[[Los Angeles Tour (2020)]]<br>[[2nd Anniversary Tour]]<br>[[Autumn Tour (2022)]]<br>'''Los Angeles Laps 2:'''<br>[[Los Angeles Tour (2022)]]<br>[[Autumn Tour (2022)]]<br>'''Los Angeles Laps 3:'''<br>[[Los Angeles Tour (2021)]]<br>[[Los Angeles Tour (2022)]]<br>[[Anniversary Tour]]<br>[[Autumn Tour (2022)]] | |||
|sample=[[File:MKT Los Angeles Laps Theme.oga]] | |sample=[[File:MKT Los Angeles Laps Theme.oga]] | ||
|map= | |map=Los Angeles Laps<br>[[File:MKT Map LosAngelesLaps.png|140px]]<br>Los Angeles Laps 2<br>[[File:MKT Map LosAngelesLaps2.png|140px]]<br>Los Angeles Laps 3<br>[[File:MKT Map LosAngelesLaps3.png|140px]] | ||
}} | }} | ||
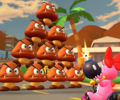
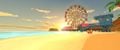
'''Los Angeles Laps''' is a race course in ''[[Mario Kart Tour]]''. It is named and based | '''Los Angeles Laps''' is a race course in ''[[Mario Kart Tour]]''. It is named after and based on {{wp|Los Angeles}}, {{wp|California}}, [[United States of America|United States]], and as such it makes its debut in the city's namesake tour, the [[Los Angeles Tour (2020)|2020 Los Angeles Tour]]. However, the course itself also includes landmarks from the greater {{wp|Los Angeles County, California|Los Angeles County}}, such as the {{wp|Santa Monica Pier}} and the {{wp|Inglewood Oil Field}}. Los Angeles Laps has three separate routes called Los Angeles Laps, '''Los Angeles Laps 2''', and '''Los Angeles Laps 3'''. The second route debuted in the [[Los Angeles Tour (2022)|2022 Los Angeles Tour]] while the third route debuted in the [[Los Angeles Tour (2021)|2021 Los Angeles Tour]]. The first route features the {{wp|Santa Monica Pier}} and {{wp|Venice Beach}}, the second route focuses on the {{wp|Inglewood Oil Field}}, while the third route takes racers through various landmarks in central Los Angeles. Unlike other city courses, each route of Los Angeles Laps takes place in an entirely different part of the overall track, thus every route has its own [[Finish Line (object)|finish line]] position. So far, this is the only city course where the finish line is at a different location in each layout. The inclusion of this track makes the United States the only country to be represented by more than one city track, being this along with the [[Tour New York Minute|New York Minute]] tracks. | ||
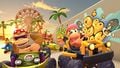
The first route of this course is a favorite of [[Pauline|Pauline (Party Time)]], [[Toad|Toad (Party Time)]], [[Mario|Mario (Swimwear)]], [[Mario|Mario (Sunshine)]], [[Fire Mario|Fire Rosalina]], [[Princess Daisy|Daisy (Swimwear)]], | The first route of this course is a favorite of [[Pauline|Pauline (Party Time)]], [[Toad|Toad (Party Time)]], [[Mario|Mario (Swimwear)]], [[Mario|Mario (Sunshine)]], [[Fire Mario|Fire Rosalina]], [[Princess Daisy|Daisy (Swimwear)]], [[Mario|Mario (Baseball)]], [[Princess Daisy|Daisy (Thai Dress)]], and the [[Mii|Dolphin Mii Racing Suit]]. The second route is a favorite of [[Mario|Mario (Swimwear)]], [[Mario|Mario (Baseball)]], [[Mario|Mario (Golf)]], [[King Bob-omb|King Bob-omb (Gold)]], [[Waluigi|Waluigi (Vampire)]], and [[Chargin' Chuck]], and the third route is a favorite of [[Yoshi (species)|Pink Yoshi]], [[Fire Mario|Fire Rosalina]], [[Pauline|Pauline (Rose)]], [[Mario|Mario (Baseball)]], [[Luigi|Luigi (Vacation)]], [[Mario|Mario (Golf)]], [[Donkey Kong Jr.|Donkey Kong Jr. (SNES)]], [[Birdo|Birdo (Black)]], [[Petey Piranha]], and the [[Mii|Pastry Chef and Ice-Cream Mii Racing Suits]]. It is also a favorite of Chargin' Chuck if he is at level 6. | ||
Despite being labeled as the second route, Los Angeles Laps 2 released seven months after Los Angeles Laps 3 did. This marks the second time a city course's layouts have been released out of numerical order, the first being [[Tour Berlin Byways|Berlin Byways 2]], which released more than a year before Berlin Byways. | |||
Los Angeles Laps appears as the fourth and final course in the {{fake link|Boomerang Cup}} in ''[[Mario Kart 8 Deluxe]]'' via the [[Mario Kart 8 Deluxe – Booster Course Pass|Booster Course Pass]]. | |||
{{ | |||
| | |||
==Course layouts== | ==''Mario Kart Tour''== | ||
===Course layouts=== | |||
{{multiframe | {{multiframe | ||
|align=right | |align=right | ||
|1=<div style=background:#999999>[[File:MKT FullMap LosAngelesLaps.png|130px]][[File:MKT FullMap LosAngelesLaps2.png|130px]]</div><div style=background:#999999>[[File:MKT FullMap LosAngelesLaps3.png|130px]]</div> | |1=<div style=background:#999999>[[File:MKT FullMap LosAngelesLaps.png|130px]][[File:MKT FullMap LosAngelesLaps2.png|130px]]</div><div style=background:#999999>[[File:MKT FullMap LosAngelesLaps3.png|130px]]</div> | ||
|2=The city course's | |2=The city course's routes in relation to each other. | ||
}} | }} | ||
===Los Angeles Laps=== | ====Los Angeles Laps==== | ||
In the standard layout, all of the racers start the course on the {{wp|Santa Monica Pier}}. Just after the starting line, the road curves to the left through a couple shops and onto the beach, then makes a slight left through a blue lifeguard tower. After continuing left, the course shifts right into a skatepark with multiple paths and graffiti of a [[Bill Blaster]], some [[Bullet Bill]]s, [[Banana]]s, [[Blooper]]s, two Bob-omb Plugs icons, two [[Red Shell]]s, a [[Bowser]] icon and some [[Piranha Plant]]s in a [[Warp Pipe]]. After that, the course shifts left underneath an elongated lifeguard tower bridge; the course then curves to the left where the rest of the beach is littered with a few [[Sidestepper]]s and an [[Underwater driving|underwater section]] at the side. On the second lap, most of the water will disappear. Players can then make a slight S-motion into a double-lane road through the street, where they can alternate between the two lanes at will. After a wide turn left, the player then drives straight and back onto the pier, where the finish line awaits. | In the standard layout, all of the racers start the course on the {{wp|Santa Monica Pier}}. Just after the starting line, the road curves to the left through a couple shops and onto the beach, then makes a slight left through a blue lifeguard tower. After continuing left, the course shifts right into a skatepark with multiple paths and graffiti of a [[Bill Blaster]], some [[Bullet Bill]]s, [[Banana]]s, [[Blooper]]s, two Bob-omb Plugs icons, two [[Red Shell]]s, a [[Bowser]] icon and some [[Piranha Plant]]s in a [[Warp Pipe]]. After that, the course shifts left underneath an elongated lifeguard tower bridge; the course then curves to the left where the rest of the beach is littered with a few [[Sidestepper]]s and an [[Underwater driving|underwater section]] at the side. On the second lap, most of the water will disappear. Players can then make a slight S-motion into a double-lane road through the street, where they can alternate between the two lanes at will. After a wide turn left, the player then drives straight and back onto the pier, where the finish line awaits. | ||
| Line 34: | Line 32: | ||
The course also appears as '''Los Angeles Laps R''' (reverse), '''Los Angeles Laps T''' (with ramps), and '''Los Angeles Laps R/T''' (reverse and with ramps). | The course also appears as '''Los Angeles Laps R''' (reverse), '''Los Angeles Laps T''' (with ramps), and '''Los Angeles Laps R/T''' (reverse and with ramps). | ||
===Los Angeles Laps 2=== | ====Los Angeles Laps 2==== | ||
The course begins in a different location from [[Los Angeles Laps]], this time, the starting line is located on a road far away from the {{wp|Santa Monica Pier}}, this is due to this route's layout not involving the pier nor the beach in any way, unlike the first route. Following a left turn, racers drive towards the {{wp|Inglewood Oil Field}}. Taking a slight left turn brings them into the oil field, where there are multiple forks in the road. Each route features pumpjacks as obstacles. Players take a U-turn to the left to continue through the oil field, avoiding two more pumpjacks and a large water tower. A sharp right takes the racers back into the main city streets, where they cross a bridge on a long straightaway, before taking one last left turn back to the starting line. | The course begins in a different location from [[Los Angeles Laps]], this time, the starting line is located on a road far away from the {{wp|Santa Monica Pier}}, this is due to this route's layout not involving the pier nor the beach in any way, unlike the first route. Following a left turn, racers drive towards the {{wp|Inglewood Oil Field}}. Taking a slight left turn brings them into the oil field, where there are multiple forks in the road. Each route features pumpjacks as obstacles. Players take a U-turn to the left to continue through the oil field, avoiding two more pumpjacks and a large water tower. A sharp right takes the racers back into the main city streets, where they cross a bridge on a long straightaway, before taking one last left turn back to the starting line. | ||
The course also appears as '''Los Angeles Laps 2R''' (reverse), '''Los Angeles Laps 2T''' (with ramps), and '''Los Angeles Laps 2R/T''' (reverse and with ramps). | The course also appears as '''Los Angeles Laps 2R''' (reverse), '''Los Angeles Laps 2T''' (with ramps), and '''Los Angeles Laps 2R/T''' (reverse and with ramps). | ||
===Los Angeles Laps 3=== | ====Los Angeles Laps 3==== | ||
In the standard layout, players start on a street that runs perpendicular to the {{wp|Santa Monica Pier}}. Just after the starting line, the road curves to the left in front of {{wp|Tongva Park}}, then makes a slight right as it goes under a bridge (which is part of a road in [[Los Angeles Laps 2]]), and then curves left again to go through the {{wp|Los Angeles Convention Center}}. The road curves to the right as it goes under the canopy of the convention center, and then curves left shortly before a [[Glide Ramp]] which sends the player over {{wp|Dodger Stadium}}. After landing on the other side of the stadium, the player immediately makes two left turns before continuing down a curvy road towards {{wp|Rodeo Drive|Two Rodeo Drive}}. After going through Rodeo Drive, the player makes a sharp left turn to return to the finish line. In the reverse and trick variant, racers drive on top of the convention center. At the start of the curvy road towards {{wp|Rodeo Drive|Two Rodeo Drive}}, there's a small corner that can only be traversed through with the use of a [[Dash Mushroom]]. | In the standard layout, players start on a street that runs perpendicular to the {{wp|Santa Monica Pier}}. Just after the starting line, the road curves to the left in front of {{wp|Tongva Park}}, then makes a slight right as it goes under a bridge (which is part of a road in [[Los Angeles Laps 2]]), and then curves left again to go through the {{wp|Los Angeles Convention Center}}. The road curves to the right as it goes under the canopy of the convention center, and then curves left shortly before a [[Glide Ramp]] which sends the player over {{wp|Dodger Stadium}}. After landing on the other side of the stadium, the player immediately makes two left turns before continuing down a curvy road towards {{wp|Rodeo Drive|Two Rodeo Drive}}. After going through Rodeo Drive, the player makes a sharp left turn to return to the finish line. In the reverse and trick variant, racers drive on top of the convention center. At the start of the curvy road towards {{wp|Rodeo Drive|Two Rodeo Drive}}, there's a small corner that can only be traversed through with the use of a [[Dash Mushroom]]. | ||
The course also appears as '''Los Angeles Laps 3R''' (reverse), '''Los Angeles Laps 3T''' (with ramps), and '''Los Angeles Laps 3R/T''' (reverse and with ramps). | The course also appears as '''Los Angeles Laps 3R''' (reverse), '''Los Angeles Laps 3T''' (with ramps), and '''Los Angeles Laps 3R/T''' (reverse and with ramps). | ||
==Appearances== | ===Appearances=== | ||
For this course's tour appearances, see [[List of Los Angeles Laps tour appearances in Mario Kart Tour|List of Los Angeles Laps tour appearances in ''Mario Kart Tour'']]. | For this course's tour appearances, see [[List of Los Angeles Laps tour appearances in Mario Kart Tour|List of Los Angeles Laps tour appearances in ''Mario Kart Tour'']]. | ||
==''Mario Kart 8 Deluxe''== | |||
Los Angeles Laps returns in ''[[Mario Kart 8 Deluxe]]'' as the fourth and final course of the {{fake link|Boomerang Cup}}, as part of the fourth wave of the [[Mario Kart 8 Deluxe – Booster Course Pass|Booster Course Pass]] downloadable content. | |||
==Sponsors== | ==Sponsors== | ||
| Line 59: | Line 60: | ||
====Course icons==== | ====Course icons==== | ||
<gallery> | <gallery> | ||
MKT Icon LosAngelesLaps.png| | MKT Icon LosAngelesLaps MarioSunshine.png|The course icon with Mario (Sunshine) | ||
MKT Icon LosAngelesLaps MarioBaseball.png| | MKT Icon LosAngelesLaps MarioBaseball.png|The course icon with Mario (Baseball) | ||
MKT Icon LosAngelesLapsR.png| | MKT Icon LosAngelesLaps DaisySwimwear.png|The course icon with Daisy (Swimwear) | ||
MKT Icon LosAngelesLapsR DonkeyKongJrSNES.png| | MKT Icon LosAngelesLapsR Wario.png|The course icon of the Reverse variant with Wario | ||
MKT Icon LosAngelesLapsT.png| | MKT Icon LosAngelesLapsR DonkeyKongJrSNES.png|The course icon of the Reverse variant with Donkey Kong Jr. (SNES) | ||
MKT Icon LosAngelesLapsT HammerBro.png| | MKT Icon LosAngelesLapsR HammerBro.png|The course icon of the Reverse variant with Hammer Bro | ||
MKT Icon LosAngelesLapsRT.png|Course icon of | MKT Icon LosAngelesLapsT Waluigi.png|The course icon of the Trick variant with Waluigi | ||
MKT Icon LosAngelesLapsRT Nabbit.png| | MKT Icon LosAngelesLapsT HammerBro.png|The course icon of the Trick variant with Hammer Bro | ||
MKT Tour27 WendyCupChallenge.png|The icon of the [[Ring Race]] bonus challenge | MKT Icon LosAngelesLapsT BuilderMario.png|The course icon of the Trick variant with Builder Mario | ||
MKT Tour27 PaulineCupChallenge.png|The icon of the [[Goomba Takedown]] bonus challenge | MKT Icon LosAngelesLapsRT FunkyKong.png|Course icon of the Reverse/Trick variant with Funky Kong | ||
MKT Tour27 LarryCupChallenge.png|The icon of the [[Vs. Mega | MKT Icon LosAngelesLapsRT Nabbit.png|The course icon of the Reverse/Trick variant with Nabbit | ||
MKT Tour27 WendyCupChallenge.png|The course icon of the [[Ring Race]] bonus challenge held on this course | |||
MKT Tour27 PaulineCupChallenge.png|The course icon of the [[Goomba Takedown]] bonus challenge held on this course | |||
MKT Tour27 LarryCupChallenge.png|The course icon of the [[Vs. Mega]] [[Bowser]] bonus challenge held on Los Angeles Laps R/T | |||
</gallery> | </gallery> | ||
====Screenshots==== | ====Screenshots==== | ||
<gallery> | <gallery> | ||
LosAngelesLapsscreenshot.jpg|View of {{wp|Santa Monica Pier}} from {{wp|Muscle Beach}} | |||
Los Angeles Laps Grafitti.jpg|The graffiti on the course | Los Angeles Laps Grafitti.jpg|The graffiti on the course | ||
MKT Los Angeles Tour Drivers.jpg|[[Bowser Jr.]], [[Funky Kong]], [[Mario|Mario (Sunshine)]], [[Princess Daisy|Daisy]], and [[Dixie Kong]] on the course | MKT Los Angeles Tour Drivers.jpg|[[Bowser Jr.]], [[Funky Kong]], [[Mario|Mario (Sunshine)]], [[Princess Daisy|Daisy]], and [[Dixie Kong]] on the course | ||
| Line 88: | Line 93: | ||
====Course icons==== | ====Course icons==== | ||
<gallery> | <gallery> | ||
MKT Icon LosAngelesLaps2.png| | MKT Icon LosAngelesLaps2 MarioSwimwear.png|The course icon with Mario (Swimwear) | ||
MKT Icon LosAngelesLaps2 DonkeyKong.png| | MKT Icon LosAngelesLaps2 DonkeyKong.png|The course icon with Donkey Kong | ||
MKT Icon LosAngelesLaps2R.png| | MKT Icon LosAngelesLaps2 YellowMiiRacingSuit.png|The course icon with the Yellow Mii Racing Suit | ||
MKT Icon LosAngelesLaps2R Toad.png| | MKT Icon LosAngelesLaps2R LuigiGolf.png|The course icon of the Reverse variant with Luigi (Golf) | ||
MKT Icon LosAngelesLaps2T.png| | MKT Icon LosAngelesLaps2R Toad.png|The course icon of the Reverse variant with Toad | ||
MKT Icon LosAngelesLaps2T PaulineRose.png| | MKT Icon LosAngelesLaps2T CharginChuck.png|The course icon of the Trick variant with Chargin' Chuck | ||
MKT Icon LosAngelesLaps2RT.png| | MKT Icon LosAngelesLaps2T PaulineRose.png|The course icon of the Trick variant with Pauline (Rose) | ||
MKT Tour63 RoyCupChallenge.png|The icon of the [[Steer Clear of Obstacles]] bonus challenge | MKT Icon LosAngelesLaps2RT MarioGolf.png|The course icon of the Reverse/Trick variant with Mario (Golf) | ||
MKT Tour63 WaluigiCupChallenge.png|The icon of the [[Big Reverse Race]] bonus challenge | MKT Icon LosAngelesLaps2RT ToadetteSailor.png|The course icon of the Reverse/Trick variant with Toadette (Sailor) | ||
MKT Tour63 RoyCupChallenge.png|The course icon of the [[Steer Clear of Obstacles]] bonus challenge held on this course | |||
MKT Tour63 WaluigiCupChallenge.png|The course icon of the [[Big Reverse Race]] bonus challenge held on this course | |||
MKT Tour82 HammerBroCupChallenge.png|The course icon of the [[Time Trial (Mario Kart Tour)|Time Trial]] bonus challenge held on this course | |||
MKT Tour82 BirdoCupChallenge.png|The course icon of the [[Smash Small Dry Bones]] bonus challenge held on this course | |||
</gallery> | </gallery> | ||
====Screenshots==== | ====Screenshots==== | ||
<gallery> | <gallery> | ||
MKT Los Angeles Laps 2 | MKT Los Angeles Laps 2 View.png|View of {{wp|Inglewood Oil Field}} | ||
MKT Los Angeles Laps 2 Scene.jpg|Another view of Inglewood Oil Field | |||
MKT Chargin' Chuck.jpg|[[Chargin' Chuck]] driving on the course with the [[Combo Cruiser]] | MKT Chargin' Chuck.jpg|[[Chargin' Chuck]] driving on the course with the [[Combo Cruiser]] | ||
</gallery> | </gallery> | ||
| Line 108: | Line 118: | ||
====Course icons==== | ====Course icons==== | ||
<gallery> | <gallery> | ||
MKT Icon LosAngelesLaps3.png| | MKT Icon LosAngelesLaps3 MarioBaseball.png|The course icon with Mario (Baseball) | ||
MKT Icon LosAngelesLaps3 FunkyKong.png| | MKT Icon LosAngelesLaps3 FunkyKong.png|The course icon with Funky Kong | ||
MKT Icon LosAngelesLaps3 BirdoBlack.png| | MKT Icon LosAngelesLaps3 BirdoBlack.png|The course icon with Birdo (Black) | ||
MKT Icon LosAngelesLaps3R.png| | MKT Icon LosAngelesLaps3 PaulineRose.png|The course icon with Pauline (Rose) | ||
MKT Icon LosAngelesLaps3R WhiteYoshi.png| | MKT Icon LosAngelesLaps3R CatPeach.png|The course icon of the Reverse variant with Cat Peach | ||
MKT Icon LosAngelesLaps3T.png| | MKT Icon LosAngelesLaps3R WhiteYoshi.png|The course icon of the Reverse variant with White Yoshi | ||
MKT Icon LosAngelesLaps3T DaisySwimwear.png| | MKT Icon LosAngelesLaps3T MarioBaseball.png|The course icon of the Trick variant with Mario (Baseball) | ||
MKT Icon LosAngelesLaps3RT.png| | MKT Icon LosAngelesLaps3T DaisySwimwear.png|The course icon of the Trick variant with Daisy (Swimwear) | ||
MKT Tour48 FireBroCupChallenge.png|The icon of the [[Snap a Photo]] bonus challenge | MKT Icon LosAngelesLaps3T BirdoBlack.png|The course icon of the Trick variant with Birdo (Black) | ||
MKT Tour48 LemmyCupChallenge.png|The icon of the [[Break Item Boxes]] bonus challenge | MKT Icon LosAngelesLaps3RT MarioSunshine.png|The course icon of the Reverse/Trick variant with Mario (Sunshine) | ||
MKT Tour63 FunkyKongCupChallenge.png|The icon of the [[Do Jump Boosts]] bonus challenge | MKT Icon LosAngelesLaps3RT MarioBaseball.png|The course icon of the Reverse/Trick variant with Mario (Baseball) | ||
MKT Tour48 FireBroCupChallenge.png|The course icon of the [[Snap a Photo]] bonus challenge held on this course | |||
MKT Tour48 LemmyCupChallenge.png|The course icon of the [[Break Item Boxes]] bonus challenge held on this course | |||
MKT Tour63 FunkyKongCupChallenge.png|The course icon of the [[Do Jump Boosts]] bonus challenge held on this course | |||
MKT Tour82 NabbitCupChallenge.png|The course icon of the [[Time Trial (Mario Kart Tour)|Time Trial]] bonus challenge held on this course | |||
</gallery> | </gallery> | ||
| Line 134: | Line 148: | ||
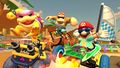
MKT Los Angeles Tour 2021 Teaser.jpg|[[Mario|Mario (Sunshine)]], [[Funky Kong]], and Mario (Baseball) tricking on the course | MKT Los Angeles Tour 2021 Teaser.jpg|[[Mario|Mario (Sunshine)]], [[Funky Kong]], and Mario (Baseball) tricking on the course | ||
MKT Mario Baseball.jpg|Mario (Baseball) drifting in the [[Pinch Hitter]] | MKT Mario Baseball.jpg|Mario (Baseball) drifting in the [[Pinch Hitter]] | ||
MKT Peach & Daisy Pipe.jpg|Various costumes for [[Princess Daisy]] and [[Princess Peach]] racing on the course | |||
</gallery> | </gallery> | ||
| Line 142: | Line 157: | ||
|JapM=Los Angeles Coast | |JapM=Los Angeles Coast | ||
|ChiS=洛杉矶环圈 | |ChiS=洛杉矶环圈 | ||
|ChiSR= | |ChiSR=Luòshānjī Huánquān | ||
|ChiSM=Los Angeles Loop | |ChiSM=Los Angeles Loop | ||
|ChiT=洛杉磯環圈 | |ChiT=洛杉磯環圈 | ||
|ChiTR= | |ChiTR=Luòshānjī Huánquān | ||
|ChiTM=Los Angeles Loop | |ChiTM=Los Angeles Loop | ||
|Fre=Road-trip à Los Angeles | |Fre=Road-trip à Los Angeles | ||
| Line 159: | Line 174: | ||
|PorM=Los Angeles' Coast | |PorM=Los Angeles' Coast | ||
|Spa=A tope en los Ángeles | |Spa=A tope en los Ángeles | ||
|SpaM= | |SpaM=A stop in Los Angeles | ||
}} | }} | ||
Latest revision as of 05:54, September 27, 2023
| Los Angeles Laps | |||
|---|---|---|---|

| |||
| Information | |||
| Appears in | Mario Kart Tour (2020 (1), 2021 (3), 2022 (2)) Mario Kart 8 Deluxe (Booster Course Pass) (Wave 4) (2023) | ||
| Cup(s) | Boomerang Cup | ||
| Tour(s) |
Los Angeles Laps:
Los Angeles Tour (2020) 2nd Anniversary Tour Autumn Tour (2022) Los Angeles Laps 2: Los Angeles Tour (2022) Autumn Tour (2022) Los Angeles Laps 3: Los Angeles Tour (2021) Los Angeles Tour (2022) Anniversary Tour Autumn Tour (2022) | ||
| Based on | Los Angeles and Santa Monica, United States | ||
| |||
| |||


Los Angeles Laps is a race course in Mario Kart Tour. It is named after and based on Los Angeles, California, United States, and as such it makes its debut in the city's namesake tour, the 2020 Los Angeles Tour. However, the course itself also includes landmarks from the greater Los Angeles County, such as the Santa Monica Pier and the Inglewood Oil Field. Los Angeles Laps has three separate routes called Los Angeles Laps, Los Angeles Laps 2, and Los Angeles Laps 3. The second route debuted in the 2022 Los Angeles Tour while the third route debuted in the 2021 Los Angeles Tour. The first route features the Santa Monica Pier and Venice Beach, the second route focuses on the Inglewood Oil Field, while the third route takes racers through various landmarks in central Los Angeles. Unlike other city courses, each route of Los Angeles Laps takes place in an entirely different part of the overall track, thus every route has its own finish line position. So far, this is the only city course where the finish line is at a different location in each layout. The inclusion of this track makes the United States the only country to be represented by more than one city track, being this along with the New York Minute tracks.
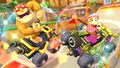
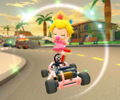
The first route of this course is a favorite of Pauline (Party Time), Toad (Party Time), Mario (Swimwear), Mario (Sunshine), Fire Rosalina, Daisy (Swimwear), Mario (Baseball), Daisy (Thai Dress), and the Dolphin Mii Racing Suit. The second route is a favorite of Mario (Swimwear), Mario (Baseball), Mario (Golf), King Bob-omb (Gold), Waluigi (Vampire), and Chargin' Chuck, and the third route is a favorite of Pink Yoshi, Fire Rosalina, Pauline (Rose), Mario (Baseball), Luigi (Vacation), Mario (Golf), Donkey Kong Jr. (SNES), Birdo (Black), Petey Piranha, and the Pastry Chef and Ice-Cream Mii Racing Suits. It is also a favorite of Chargin' Chuck if he is at level 6.
Despite being labeled as the second route, Los Angeles Laps 2 released seven months after Los Angeles Laps 3 did. This marks the second time a city course's layouts have been released out of numerical order, the first being Berlin Byways 2, which released more than a year before Berlin Byways.
Los Angeles Laps appears as the fourth and final course in the Boomerang Cup in Mario Kart 8 Deluxe via the Booster Course Pass.
Mario Kart Tour
Course layouts


Los Angeles Laps
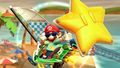
In the standard layout, all of the racers start the course on the Santa Monica Pier. Just after the starting line, the road curves to the left through a couple shops and onto the beach, then makes a slight left through a blue lifeguard tower. After continuing left, the course shifts right into a skatepark with multiple paths and graffiti of a Bill Blaster, some Bullet Bills, Bananas, Bloopers, two Bob-omb Plugs icons, two Red Shells, a Bowser icon and some Piranha Plants in a Warp Pipe. After that, the course shifts left underneath an elongated lifeguard tower bridge; the course then curves to the left where the rest of the beach is littered with a few Sidesteppers and an underwater section at the side. On the second lap, most of the water will disappear. Players can then make a slight S-motion into a double-lane road through the street, where they can alternate between the two lanes at will. After a wide turn left, the player then drives straight and back onto the pier, where the finish line awaits.
When configured for Coin Rush, signs will direct Gold Mario up the highest skate ramp while cars and buses will block off a lane in the double-lane road, making the collection of coins easier.
The course also appears as Los Angeles Laps R (reverse), Los Angeles Laps T (with ramps), and Los Angeles Laps R/T (reverse and with ramps).
Los Angeles Laps 2
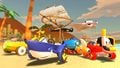
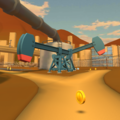
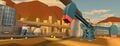
The course begins in a different location from Los Angeles Laps, this time, the starting line is located on a road far away from the Santa Monica Pier, this is due to this route's layout not involving the pier nor the beach in any way, unlike the first route. Following a left turn, racers drive towards the Inglewood Oil Field. Taking a slight left turn brings them into the oil field, where there are multiple forks in the road. Each route features pumpjacks as obstacles. Players take a U-turn to the left to continue through the oil field, avoiding two more pumpjacks and a large water tower. A sharp right takes the racers back into the main city streets, where they cross a bridge on a long straightaway, before taking one last left turn back to the starting line.
The course also appears as Los Angeles Laps 2R (reverse), Los Angeles Laps 2T (with ramps), and Los Angeles Laps 2R/T (reverse and with ramps).
Los Angeles Laps 3
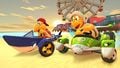
In the standard layout, players start on a street that runs perpendicular to the Santa Monica Pier. Just after the starting line, the road curves to the left in front of Tongva Park, then makes a slight right as it goes under a bridge (which is part of a road in Los Angeles Laps 2), and then curves left again to go through the Los Angeles Convention Center. The road curves to the right as it goes under the canopy of the convention center, and then curves left shortly before a Glide Ramp which sends the player over Dodger Stadium. After landing on the other side of the stadium, the player immediately makes two left turns before continuing down a curvy road towards Two Rodeo Drive. After going through Rodeo Drive, the player makes a sharp left turn to return to the finish line. In the reverse and trick variant, racers drive on top of the convention center. At the start of the curvy road towards Two Rodeo Drive, there's a small corner that can only be traversed through with the use of a Dash Mushroom.
The course also appears as Los Angeles Laps 3R (reverse), Los Angeles Laps 3T (with ramps), and Los Angeles Laps 3R/T (reverse and with ramps).
Appearances
For this course's tour appearances, see List of Los Angeles Laps tour appearances in Mario Kart Tour.
Mario Kart 8 Deluxe
Los Angeles Laps returns in Mario Kart 8 Deluxe as the fourth and final course of the Boomerang Cup, as part of the fourth wave of the Booster Course Pass downloadable content.
Sponsors
- 100% Organic Antifreeze (signs)
- Bob-omb Plugs (signs)
- Burning DK (trucks)
- Dream Gliders (signs)
- Princess Orange (shops)
- Tropical Grocery (signs)
Gallery
Los Angeles Laps
Course icons
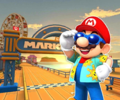
The course icon with Mario (Sunshine)
The course icon with Mario (Baseball)
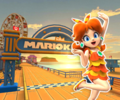
The course icon with Daisy (Swimwear)
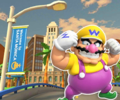
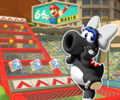
The course icon of the Reverse variant with Wario
The course icon of the Reverse variant with Donkey Kong Jr. (SNES)
The course icon of the Reverse variant with Hammer Bro
The course icon of the Trick variant with Waluigi
The course icon of the Trick variant with Hammer Bro
The course icon of the Trick variant with Builder Mario
Course icon of the Reverse/Trick variant with Funky Kong
The course icon of the Reverse/Trick variant with Nabbit
The course icon of the Ring Race bonus challenge held on this course
The course icon of the Goomba Takedown bonus challenge held on this course


Screenshots
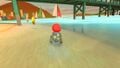
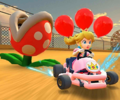
View of Santa Monica Pier from Muscle Beach
The graffiti on the course
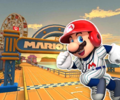
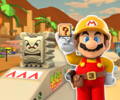
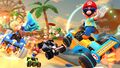
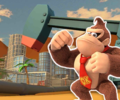
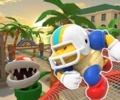
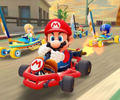
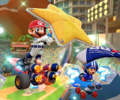
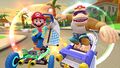
Bowser Jr., Funky Kong, Mario (Sunshine), Daisy, and Dixie Kong on the course
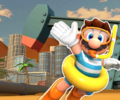
Mario (Sunshine) gliding in the Surf Sailer with the Starchute
The High-End items of the Beachside Pipe in-game in Los Angeles Laps R
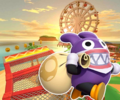
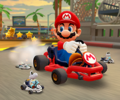
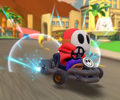
Red Koopa (Freerunning) in the Sushi Racer and Hammer Bro in the Green Circuit
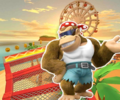
Funky Kong tricking in the Bolt Buggy and Dixie Kong tricking in the Offroader
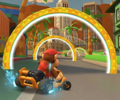
Roy, Funky Kong, and Mario (Sunshine) tricking
Baby Mario racing in the underwater section of the course
Mario (Sunshine), Rosalina (Aurora), Luigi (Lederhosen), and Baby Mario (Koala) tricking on the course


Los Angeles Laps 2
Course icons
The course icon with Mario (Swimwear)
The course icon with Donkey Kong
The course icon with the Yellow Mii Racing Suit
The course icon of the Reverse variant with Luigi (Golf)
The course icon of the Reverse variant with Toad
The course icon of the Trick variant with Chargin' Chuck
The course icon of the Trick variant with Pauline (Rose)
The course icon of the Reverse/Trick variant with Mario (Golf)
The course icon of the Reverse/Trick variant with Toadette (Sailor)
The course icon of the Steer Clear of Obstacles bonus challenge held on this course
The course icon of the Big Reverse Race bonus challenge held on this course
The course icon of the Time Trial bonus challenge held on this course
The course icon of the Smash Small Dry Bones bonus challenge held on this course


Screenshots
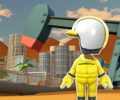
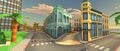
View of Inglewood Oil Field
Another view of Inglewood Oil Field
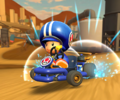
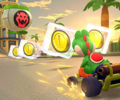
Chargin' Chuck driving on the course with the Combo Cruiser


Los Angeles Laps 3
Course icons

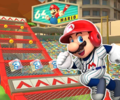
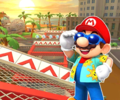
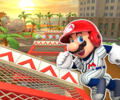
The course icon with Mario (Baseball)
The course icon with Funky Kong

The course icon with Birdo (Black)
The course icon with Pauline (Rose)
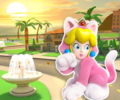
The course icon of the Reverse variant with Cat Peach
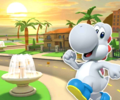
The course icon of the Reverse variant with White Yoshi
The course icon of the Trick variant with Mario (Baseball)
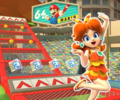
The course icon of the Trick variant with Daisy (Swimwear)
The course icon of the Trick variant with Birdo (Black)
The course icon of the Reverse/Trick variant with Mario (Sunshine)
The course icon of the Reverse/Trick variant with Mario (Baseball)
The course icon of the Snap a Photo bonus challenge held on this course
The course icon of the Break Item Boxes bonus challenge held on this course
The course icon of the Do Jump Boosts bonus challenge held on this course
The course icon of the Time Trial bonus challenge held on this course


Sprites
Full sprite of a Bowser-themed image seen on a screen in the Dodger Stadium section of the course. Mario Super Sluggers artwork is used


Screenshots
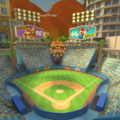
View of the Dodger Stadium
View of the finish line area
View of the Two Rodeo Drive section
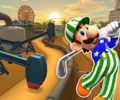
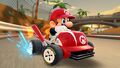
Mario (Sunshine), Funky Kong, and Mario (Baseball) tricking on the course
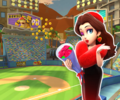
Mario (Baseball) drifting in the Pinch Hitter
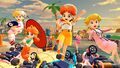
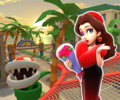
Various costumes for Princess Daisy and Princess Peach racing on the course


Names in other languages
| Language | Name | Meaning | Notes |
|---|---|---|---|
| Japanese | ロサンゼルスコースト Ros Anzerusu Kōsuto |
Los Angeles Coast | |
| Chinese (simplified) | 洛杉矶环圈 Luòshānjī Huánquān |
Los Angeles Loop | |
| Chinese (traditional) | 洛杉磯環圈 Luòshānjī Huánquān |
Los Angeles Loop | |
| French | Road-trip à Los Angeles | Los Angeles Road-trip | |
| German | Los-Angeles-Strandpartie | Los Angeles' Beach | |
| Italian | Panorama di Los Angeles | Los Angeles' Panorama | |
| Korean | 로스앤젤레스 랩 Loseu Aenjelleseu Laeb |
Los Angeles Laps | |
| Portuguese | Litoral de Los Angeles | Los Angeles' Coast | |
| Spanish | A tope en los Ángeles | A stop in Los Angeles |