
Tour Sydney Sprint: Difference between revisions
Tag: Mobile edit |
(→Mario Kart 8 Deluxe: Added the course icon sprite) |
||
| (130 intermediate revisions by 58 users not shown) | |||
| Line 2: | Line 2: | ||
{{race course infobox | {{race course infobox | ||
|title=Sydney Sprint | |title=Sydney Sprint | ||
|image=[[File:MKT Sydney Sprint Scene2.png|300px]]<br>View of the | |image=[[File:MKT Sydney Sprint Scene2.png|300px]]<br>View of the [[Sydney Opera House]] | ||
|appears_in=''[[Mario Kart Tour]]'' (2021 <small>(1, 2)</small>, 2022 <small>(3)</small>)<br>''[[Mario Kart 8 Deluxe]]'' ([[Mario Kart 8 Deluxe – Booster Course Pass|Booster Course Pass]]) (2022) | |appears_in=''[[Mario Kart Tour]]'' (2021 <small>(1, 2)</small>, 2022 <small>(3)</small>)<br>''[[Mario Kart 8 Deluxe]]'' (''[[Mario Kart 8 Deluxe – Booster Course Pass|Booster Course Pass]]'', Wave 2) (2022) | ||
|based_on=[[Sydney]], [[Australia]] | |based_on=[[Sydney]], [[Australia]] | ||
|cups=[[Propeller Cup]] | |cups=[[Propeller Cup]] | ||
|tours='''Sydney Sprint:'''<br>[[Sydney Tour (April–May 2021)]]<br>[[Sydney Tour (September 2021)]]<br>[[2nd Anniversary Tour]]<br>'''Sydney Sprint 2:'''<br>[[Sydney Tour (September 2021)]]<br>[[Anniversary Tour]]<br>'''Sydney Sprint 3:'''<br>[[Anniversary Tour]] | |tours='''Sydney Sprint:'''<br>[[Sydney Tour (April–May 2021)]]<br>[[Sydney Tour (September 2021)]]<br>[[2nd Anniversary Tour]]<br>[[Sunshine Tour]]<br>'''Sydney Sprint 2:'''<br>[[Sydney Tour (September 2021)]]<br>[[Anniversary Tour (2022)]]<br>[[Sunshine Tour]]<br>'''Sydney Sprint 3:'''<br>[[Anniversary Tour (2022)]]<br>[[Anniversary Tour (2023)]] | ||
|ghost=2:16.617 | |ghost={{ghost|8DX <small>150cc</small>|Nin★Rie|2:16.617|[[File:MK8 BabyMario Icon.png|32px|link=Baby Mario]][[File:BiddybuggyBodyMK8.png|32px|link=BiddyBuggy]][[File:StandardTiresMK8.png|32px|link=Standard (tire)|Standard]][[File:SuperGliderMK8.png|32px|link=Super Glider]]}}{{ghost|8DX <small>200cc</small>|Nin★Giulia|1:37.367|[[File:MK8 Bowser Jr Icon.png|32px|link=Bowser Jr.]][[File:MK8DX Koopa Clown.png|32px|link=Koopa Clown]][[File:StandardTiresMK8.png|32px|link=Standard (tire)|Standard]][[File:MK8DThumbBowserJrSG.png|32px|link=Super Glider]]}} | ||
| | |online_play=Available ([[Nintendo Switch|Switch]]) | ||
|sample=''Mario Kart Tour''[[File:MKT Sydney Sprint Theme.oga]]''Mario Kart 8 Deluxe''[[File:Switch_Tour_SydneySprint_BCP.oga]]''Mario Kart 8 Deluxe'' (frontrunning)[[File:Switch_Tour_SydneySprint_Frontrunning_BCP.oga]] | |sample=''Mario Kart Tour''<br>[[File:MKT Sydney Sprint Theme.oga]]<br>''Mario Kart 8 Deluxe''<br>[[File:Switch_Tour_SydneySprint_BCP.oga]]<br>''Mario Kart 8 Deluxe'' (frontrunning)<br>[[File:Switch_Tour_SydneySprint_Frontrunning_BCP.oga]] | ||
|map=''Mario Kart Tour''<br><small>Sydney Sprint</small><br>[[File:MKT Map SydneySprint.png|120px]]<br><small>Sydney Sprint 2</small><br>[[File:MKT Map SydneySprint2.png|120px]]<br><small>Sydney Sprint 3</small><br>[[File:MKT Map SydneySprint3.png|120px]]<br>''Mario Kart 8 Deluxe''<br>[[File:MK8DX Tour Sydney Sprint Map.png|160px]] | |map=''Mario Kart Tour''<br><small>Sydney Sprint</small><br>[[File:MKT Map SydneySprint.png|120px]]<br><small>Sydney Sprint 2</small><br>[[File:MKT Map SydneySprint2.png|120px]]<br><small>Sydney Sprint 3</small><br>[[File:MKT Map SydneySprint3.png|120px]]<br>''Mario Kart 8 Deluxe''<br>[[File:MK8DX Tour Sydney Sprint Map.png|160px]] | ||
}} | }} | ||
'''Sydney Sprint''' is a race course featured in ''[[Mario Kart Tour]]''. It is | '''Sydney Sprint''' is a race course featured in ''[[Mario Kart Tour]]''. It is set in [[Sydney]], {{wp|New South Wales}}, [[Australia]], and made its debut in the [[Sydney Tour (April–May 2021)|April–May 2021 Sydney Tour]], the city's namesake tour. Like a majority of the other city courses, there are three routes for this course, which are named Sydney Sprint, '''Sydney Sprint 2''', and '''Sydney Sprint 3'''. The second route debuted in the [[Sydney Tour (September 2021)|September 2021 Sydney Tour]], and the third route debuted in the [[Anniversary Tour (2022)|2022 Anniversary Tour]]. The course visits various landmarks of Sydney, with the first route taking racers through the [[Sydney Opera House]] and {{wp|Luna Park Sydney|Luna Park}}, the second route featuring the Mary Booth Lookout Reserve, and the third route focusing on {{wp|Barangaroo, New South Wales#Barangaroo Reserve|Barangaroo Reserve}}. The first and second routes also feature the [[Sydney Harbor Bridge]], where passengers in a nearby {{wp|Sydney Trains T set|Tangara train}} throw items onto the road. Additionally, the second route starts in the opposite direction compared to the other two. Unlike most other city courses (with the exception of [[Tour Singapore Speedway|Singapore Speedway]] and [[Tour Athens Dash|Athens Dash]]), which generally condense landmarks down, every landmark featured in the varying routes of Sydney Sprint (except for {{wp|Uluru}}) is from the general area of the Sydney Opera House and Sydney Harbor Bridge; unlike Singapore Speedway, though, no routes closely approximate roads or paths featured in the actual city. | ||
Sydney Sprint returns as the first course of the [[Propeller Cup]] in the ''[[Mario Kart 8 Deluxe – Booster Course Pass]]''. | |||
Sydney Sprint returns as the first course | |||
==''Mario Kart Tour''== | ==''Mario Kart Tour''== | ||
{{multiframe | {{multiframe | ||
|align=right | |align=right | ||
| Line 25: | Line 22: | ||
|2=The city course's routes in relation to each other. | |2=The city course's routes in relation to each other. | ||
}} | }} | ||
===Sydney Sprint=== | |||
In the standard layout, the course begins within an area in {{wp|Port Jackson}}. After a reverse curve to the right, the player enters the [[ | In the standard layout, the course begins within an area in {{wp|Port Jackson}}. After a reverse curve to the right, the player enters the [[Sydney Opera House]] and makes a slight left amidst a cheering crowd to a [[Glide Ramp]] across the water. After passing under the {{wp|Bradfield Highway (Sydney)|Bradfield Highway}}, the player will make a 270-degree loop right amidst some {{wp|Luna Park Sydney|Luna Park}} fairgrounds on the left to join the highway and cross the [[Sydney Harbor Bridge]]; while on the bridge, passengers from the {{wp|Sydney Trains T set|Tangara train}} operating on the {{wp|North Shore railway line|North Shore Line}} will throw random [[Dash Mushroom|Mushroom]]s, [[Banana]]s and [[Bob-omb]]s onto the central span. The player then takes a long winding left through downtown Sydney before reaching the finish line. | ||
At the start of the course, there is a fountain at the side of the course. If the player uses a [[Mushroom]] to hit the fountain, they will be able to perform several [[Jump Boost]]s. | |||
The course also appears as '''Sydney Sprint R''' (reversed), '''Sydney Sprint T''' (with ramps), and '''Sydney Sprint R/T''' (reversed with ramps). In the T variant, several stationary vehicles appear on the Sydney Harbor Bridge, including a [[Car (obstacle)|car]], a [[Truck|pickup truck]], and a [[dash panel ramp truck]]. | |||
====Appearances==== | |||
For this course's tour appearances, see [[List of Sydney Sprint tour appearances in Mario Kart Tour#Sydney Sprint|List of Sydney Sprint tour appearances in ''Mario Kart Tour'' § Sydney Sprint]]. | |||
====Top-tier and middle-tier items==== | |||
{{MKT favored table|new|Sydney Sprint}} | |||
====Bonus challenges==== | |||
<div class="contentbox mw-collapsible mw-collapsed> | |||
{{MKT bonus challenge table|Ring Race|Sydney Sprint}} | |||
{{MKT bonus challenge table|Do Jump Boosts|Sydney Sprint}} | |||
{{MKT bonus challenge table|Smash Small Dry Bones|Sydney Sprint}} | |||
{{MKT bonus challenge table|Time Trial|Sydney Sprint}} | |||
{{MKT bonus challenge table|Combo Attack|Sydney Sprint T}} | |||
{{MKT bonus challenge table|Snap a Photo|Sydney Sprint T}} | |||
</div> | |||
===Sydney Sprint 2=== | |||
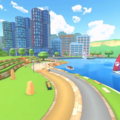
This layout is driven in the opposite direction compared to the previous layout. Like the original Sydney Sprint, the course's standard layout starts out at an area in {{wp|Port Jackson}}. After that, there is a long winding turn through downtown [[Sydney]]. After a turn to the left, the player can reach the highway and cross the [[Sydney Harbor Bridge]], where passengers from the {{wp|Sydney Trains T set|Tangara train}} operating on the {{wp|North Shore railway line|North Shore Line}} will throw random items onto the central span, just like Sydney Sprint. Next, there is a turn to the right which leads to the Mary Booth Lookout Reserve. After another turn to the left, there is a [[Glide Ramp|glide ramp]] which takes the player across some water. Next, there is a small street with a single [[ramp]] at the end. After the ramp, the player returns back to the Port Jackson area. At this section, the player can choose to go on the upper route which contains some [[coin]]s, or the bottom route. The [[Sydney Opera House]] can also be seen at the background. After another turn to the left, the player reaches the [[Finish line (object)|finish line]]. | |||
The course also appears as '''Sydney Sprint 2R''' (reversed), '''Sydney Sprint 2T''' (with ramps), and '''Sydney Sprint 2R/T''' (reversed with ramps). In the R/T variant, the glide ramp is moved further down the track, appearing shortly before the Sydney Harbor Bridge. This change, in conjunction with several ramps, allows racers to potentially glide over the entire bridge section. | |||
====Appearances==== | |||
For this course's tour appearances, see [[List of Sydney Sprint tour appearances in Mario Kart Tour#Sydney Sprint 2|List of Sydney Sprint tour appearances in ''Mario Kart Tour'' § Sydney Sprint 2]]. | |||
====Top-tier and middle-tier items==== | |||
{{MKT favored table|new|Sydney Sprint 2}} | |||
====Bonus challenges==== | |||
<div class="contentbox mw-collapsible mw-collapsed> | |||
{{MKT bonus challenge table|Goomba Takedown|Sydney Sprint 2}} | |||
{{MKT bonus challenge table|Smash Small Dry Bones|Sydney Sprint 2}} | |||
{{MKT bonus challenge table|Break Item Boxes|Sydney Sprint 2}} | |||
{{MKT bonus challenge table|Combo Attack|Sydney Sprint 2T}} | |||
{{MKT bonus challenge table|Snap a Photo|Sydney Sprint 2T}} | |||
</div> | |||
===Sydney Sprint 3=== | |||
Like the other two variants, this variant begins within an area in {{wp|Port Jackson}}. The player drives in the same direction as Sydney Sprint, but instead of turning right, the player immediately makes a left turn, jumping into a {{wp|First Fleet-class ferry|First Fleet class ferry}}. After jumping out to a dock at Dawes Point, the path afterwards continues through {{wp|Barangaroo, New South Wales#Barangaroo Reserve|Barangaroo Reserve}} along a winding narrow path split down the middle, one half banking downwards into the turns while the other half remains level; the off-road portions in this area are strewn with [[boulder]]s that may impede drivers trying to cut across. From this area, players can see Uluru in the far background. At the end of this section, the player turns to the right before they reach the Sydney Harbor Bridge, and race through the downtown of Sydney, before turning left one last time and reaching the finish line. | |||
The course also appears as '''Sydney Sprint 3R''' (reversed), '''Sydney Sprint 3T''' (with ramps), and '''Sydney Sprint 3R/T''' (reversed with ramps). The former two debuted alongside the normal variant in the [[Anniversary Tour (2022)|2022 Anniversary Tour]], while the latter debuted in the [[Anniversary Tour (2023)|2023 Anniversary Tour]]. In the R and R/T variants, passengers from the {{wp|Sydney Trains T set|Tangara train}} throw items onto part of the track, just before racers reach the ferry. In the R/T variant, racers drive over the ferry and are able to briefly land on it for an extra [[Jump Boost]] off of a dash panel ramp. | |||
The | The T variant is also one of the three track variants (alongside [[Tour Berlin Byways#Berlin Byways 3|Berlin Byways 3T]] and [[Tour London Loop#London Loop 3|London Loop 3R/T]]) to not reappear in a future tour or tour rerun, appearing in only one [[Anniversary Tour (2022)|tour]]. | ||
==== | ====Appearances==== | ||
For this course's tour appearances, see [[List of Sydney Sprint tour appearances in Mario Kart Tour#Sydney Sprint 3|List of Sydney Sprint tour appearances in ''Mario Kart Tour'' § Sydney Sprint 3]]. | |||
====Top-tier and middle-tier items==== | |||
==== | {{MKT favored table|new|Sydney Sprint 3}} | ||
====Bonus challenges==== | |||
=== | <div class="contentbox mw-collapsible mw-collapsed> | ||
{{MKT bonus challenge table|Glider Challenge|Sydney Sprint 3}} | |||
{{MKT bonus challenge table|Steer Clear of Obstacles|Sydney Sprint 3}} | |||
</div> | |||
==''Mario Kart 8 Deluxe''== | ==''Mario Kart 8 Deluxe''== | ||
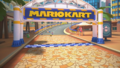
[[File:MK8-Course-Tour SydneySprint.jpg|250px|thumb| | [[File:MK8-Course-Tour SydneySprint.jpg|250px|thumb|{{classic|Tour|Sydney Sprint}} in ''Mario Kart 8 Deluxe'']] | ||
Sydney Sprint returns in the [[Mario Kart 8 Deluxe – Booster Course Pass|Booster Course Pass]] for ''[[Mario Kart 8 Deluxe]]''. It is the first course of the [[Propeller Cup]], and as such is one of two courses from ''Mario Kart Tour'' to appear in the second wave, alongside {{classic | Sydney Sprint returns in the ''[[Mario Kart 8 Deluxe – Booster Course Pass|Booster Course Pass]]'' for ''[[Mario Kart 8 Deluxe]]''. It is the first course of the [[Propeller Cup]], and as such is one of two courses from ''Mario Kart Tour'' to appear in the second wave, alongside {{classic link|Tour|New York Minute}}. This version of the course is an expanded and combined version of Sydney Sprint, Sydney Sprint 2, and Sydney Sprint 3 from ''[[Mario Kart Tour]]''. As Sydney Sprint 3 had yet to be released when this course was added in the Booster Course Pass, {{classic|Tour|Sydney Sprint}} is the one of the two ''Tour'' city courses alongside [[Tour Athens Dash|Athens Dash]] to be added to the pass before all three variants were released, and due to Sydney Sprint 3's presence in this course, it is also the first ''Tour'' city course to utilize roads that were unused in ''Mario Kart Tour'' at the time of it being added into ''Mario Kart 8 Deluxe''. It and Athens Dash are also the only two courses to use routes prior to them debuting in ''Tour'', as all other instances of unused roads being used in the Booster Course Pass did not get used within ''Tour''. The course has also received significant visual and musical upgrades. It is one of two ''Mario Kart Tour'' city tracks to not have its minimap rotated, the other being {{classic|Tour|New York Minute}}. | ||
The first lap follows the layout of the first Sydney Sprint route, starting in {{wp|Port Jackson}} and facing the [[ | The first lap follows the layout of the first Sydney Sprint route, starting in {{wp|Port Jackson}} and facing the [[Sydney Opera House]]. The fountain next to the starting line is now surrounded by grass, is much smaller, and is level with the track instead of slightly raised up, acting as an off-road shortcut. Racers drive through the Sydney Opera House, glide out of it, take a 270-degree right turn through {{wp|Luna Park Sydney|Luna Park}}, and cross the [[Sydney Harbour Bridge|Sydney Harbor Bridge]]. While on the bridge, [[Toad (species)|Toads]] throw coins from the {{wp|Sydney Trains T set|Tangara train}}, replacing the [[Dash Mushroom|Mushroom]]s, [[Banana]]s and [[Bob-omb]]s they could throw in the original. The bridge now has ramps on it (in a similar vain to Sydney Sprint 2T, but not in the same arrangement) - however, these ramps are facing the opposite direction and cannot be used on this lap. [[Coin]]s are located in small alcoves at the end of each ramp. At the end of the bridge, racers turn left and take a highway back to the starting line. | ||
The second lap is a combination of Sydney Sprint 3 and Sydney Sprint 2. When the second lap starts, an [[arrow field]] points to the left taking players down Sydney Sprint 3's route, where the player jumps into a {{wp|First Fleet-class ferry|First Fleet class ferry}} before jumping out and onto a dock at {{wp|Dawes Point, New South Wales|Dawes Point}} under the bridge. The path afterwards continues through {{wp|Barangaroo, New South Wales#Barangaroo Reserve|Barangaroo Reserve}} along a winding narrow path split down the middle, one half banking downwards into the turns while the other half remains level. At the end of that section, the layout transitions into Sydney Sprint 2's route, crossing the Sydney Harbour Bridge from the opposite direction to the first lap, allowing racers to use the ramps in the middle. After, an arrow field directs players to the right through the Mary Booth Lookout Reserve, which they exit with a Glide Ramp to a road between the shells of the Sydney Opera House. From there, racers drive past the starting line from the opposite direction of how they started the lap. | The second lap is a combination of Sydney Sprint 3 and Sydney Sprint 2. When the second lap starts, an [[arrow field]] points to the left taking players down Sydney Sprint 3's route, where the player jumps into a {{wp|First Fleet-class ferry|First Fleet class ferry}} before jumping out and onto a dock at {{wp|Dawes Point, New South Wales|Dawes Point}} under the bridge. The path afterwards continues through {{wp|Barangaroo, New South Wales#Barangaroo Reserve|Barangaroo Reserve}} along a winding narrow path split down the middle, one half banking downwards into the turns while the other half remains level. At the end of that section, the layout transitions into Sydney Sprint 2's route, crossing the Sydney Harbour Bridge from the opposite direction to the first lap, allowing racers to use the ramps in the middle. After, an arrow field directs players to the right through the Mary Booth Lookout Reserve, which they exit with a Glide Ramp to a road between the shells of the Sydney Opera House. From there, racers drive past the starting line from the opposite direction of how they started the lap. | ||
The third lap is based on Sydney Sprint R. As such, it follows the same layout as the first lap, | The third and final lap is based on Sydney Sprint R. As such, it follows the same layout as the first lap, though it goes in reverse, with the player first crossing the Sydney Harbour Bridge (which again allows players to use the ramps), followed by taking a large turn through Luna Park, then gliding into the Sydney Opera House, and finally returning to the Circular Quay area where the race ends. This is the second city course in ''Mario Kart 8 Deluxe'' to feature a lap based on an R variation. | ||
Official posts made by [[Nintendo]] have misspelled the course's name twice: once in a [[Play Nintendo]] article, in which it is misspelled as "Sydney Spring",<ref>[https://play.nintendo.com/news-tips/news/mario-kart-8-deluxe-second-dlc/ Wave 2 is here!] ''Play Nintendo''. Retrieved August 6, 2022. ([https://web.archive.org/web/20220806023536/https://play.nintendo.com/news-tips/news/mario-kart-8-deluxe-second-dlc/ Archived] August 6, 2022, 02:35:36 UTC via Wayback Machine.) "''You can speed through location-based courses like Tour Sydney Spring and nostalgic classics like [[DS Waluigi Pinball]]''"</ref> and again in the Nintendo Switch News feed, where the "Tour" prefix was misspelled as "Tourney".{{ref needed}} Official posts on Nintendo of America's social media accounts have jokingly called Sydney Sprint the [[Boomerang Flower]]'s "native habitat",<ref>NintendoAmerica (October 18, 2022). [https://twitter.com/NintendoAmerica/status/1582431440301883393?s=20&t=RTNDU7qNAUoE8XV-TOKrpA Visit the native habitat of the Boomerang Flower in the Sydney Sprint course! Take a trip down under with Wave 2 of the #MarioKart 8 Deluxe – Booster Course Pass today!] ''Twitter''. Retrieved March 4, 2023. ([https://web.archive.org/web/20221019161326/https://twitter.com/NintendoAmerica/status/1582431440301883393 Archived] October 19, 2022, 16:13:26 UTC via Wayback Machine.)</ref><ref>MarioKartEN (October 18, 2022). [https://www.facebook.com/watch/?v=832707438164368 Visit the native habitat of the Boomerang Flower in the Sydney Sprint course! Take a trip down under with Wave 2 of the Mario Kart 8 Deluxe – Booster Course Pass today!] ''Facebook''. Retrieved March 4, 2023.</ref> referencing the fact that boomerangs are strongly associated with [[Australia]], where Sydney is located. | |||
==Sponsors== | ==Sponsors== | ||
*[[List of sponsors debuting in Mario Kart 8 and Mario Kart 8 Deluxe#1-Up Mushroom Car Insurance Group|1-Up Mushroom Car Insurance Group]] | *[[List of sponsors debuting in Mario Kart 8 and Mario Kart 8 Deluxe#1-Up Mushroom Car Insurance Group|1-Up Mushroom Car Insurance Group]] | ||
*[[List of sponsors debuting in Mario Kart 8 and Mario Kart 8 Deluxe#100% Organic Antifreeze|100% Organic Antifreeze]] | *[[List of sponsors debuting in Mario Kart 8 and Mario Kart 8 Deluxe#100% Organic Antifreeze|100% Organic Antifreeze]] | ||
*[[List of sponsors debuting in Mario Kart 8 and Mario Kart 8 Deluxe#BaNaNa Boy|BaNaNa Boy]] | *[[List of sponsors debuting in Mario Kart 8 and Mario Kart 8 Deluxe#BaNaNa Boy|BaNaNa Boy]] | ||
*[[List of sponsors debuting in Mario Kart Tour#Blooper's Seafood Bar|Blooper's Seafood Bar]] | *[[List of sponsors debuting in Mario Kart Tour#Blooper's Seafood Bar|Blooper's Seafood Bar]] | ||
*[[Mario Kart TV]] | *[[Mario Kart TV]] (''Mario Kart 8 Deluxe'' only) | ||
*[[List of sponsors debuting in Mario Kart 8 and Mario Kart 8 Deluxe#Princess Orange|Princess Orange]] | *[[List of sponsors debuting in Mario Kart 8 and Mario Kart 8 Deluxe#Princess Orange|Princess Orange]] | ||
*[[List of sponsors debuting in Mario Kart 8 and Mario Kart 8 Deluxe#Propeller Toad Transport|Propeller Toad Transport]] | *[[List of sponsors debuting in Mario Kart 8 and Mario Kart 8 Deluxe#Propeller Toad Transport|Propeller Toad Transport]] | ||
*[[List of sponsors debuting in Mario Kart Wii#Tropical Grocery|Tropical Grocery]] | *[[List of sponsors debuting in Mario Kart Wii#Tropical Grocery|Tropical Grocery]] | ||
*[[List of sponsors debuting in Mario Kart 8 and Mario Kart 8 Deluxe#Yoshi's Egg Market|Yoshi's Egg Market]] | *[[List of sponsors debuting in Mario Kart 8 and Mario Kart 8 Deluxe#Yoshi's Egg Market|Yoshi's Egg Market]] | ||
==Profiles== | |||
===''Mario Kart 8 Deluxe''=== | |||
*'''Nintendo Switch News app (US)''': | |||
**''This course first appeared in the Mario Kart Tour game.'' | |||
**''Modelled after Sydney, Australia, and you can see some of the city's famous landmarks while racing.'' | |||
**''While the course layout changes every lap, the third lap follows the layout of the first lap, but in reverse!'' | |||
*'''Nintendo Switch News app (UK)''': '''''Race down under in Sydney Sprint!'''<br>Now, we'd like to present to you a course released as part of the second wave, which is available now: Sydney Sprint.<br>This course had its first outing in the smart device app Mario Kart Tour, and takes you swerving and dashing past the many famous landmarks of the Australian metropolis of Sydney. The route changes depending on the number of laps, and the third go-round will have you retracing your past tracks, so you might even see other racers going the "wrong" way - how's that for inverting expectations? Be sure to greet them with a hearty "G'day!" as you zoom past!'' | |||
*'''''Nintendo Magazine 2023 Summer''''': ''A summery course filled with sunshine, set in Sydney, Australia. Across the bay, you can see Uluru/Ayers Rock.''<ref>[https://www.nintendo.co.jp/software/feature/magazine_2023summer/index_en.html?page=22 Nintendo Magazine 2023 Summer (Digital English edition)]. nintendo.co.jp. Retrieved July 15, 2023. ([https://web.archive.org/web/20230715104855/https://www.nintendo.co.jp/software/feature/magazine_2023summer/index_en.html?page=22&device=pc Archived] July 15, 2023, 10:48:55 UTC via Wayback Machine.)</ref> | |||
==Gallery== | ==Gallery== | ||
===''Mario Kart Tour''=== | ===''Mario Kart Tour''=== | ||
<gallery> | <gallery> | ||
Sydney Pictures.png| | Sydney Pictures.png|Pictures of the various Sydney Sprint courses | ||
Sydney Pictures 2.png| | Sydney Pictures 2.png|Pictures of the various Sydney Sprint courses | ||
</gallery> | </gallery> | ||
====Sydney Sprint==== | ====Sydney Sprint==== | ||
=====Course icons===== | =====Course icons===== | ||
{{main-gallery|Mario Kart Tour race course icons (original courses)#Sydney Sprint|Mario Kart Tour race course icons (original courses) § Sydney Sprint}} | |||
<gallery> | <gallery> | ||
MKT Icon SydneySprint.png| | MKT Icon SydneySprint BabyMarioKoala.png|The course icon | ||
MKT Icon SydneySprintR MarioSwimwear.png|The course icon of the R variant | |||
MKT Icon SydneySprintT YoshiKangaroo.png|The course icon of the T variant | |||
MKT Icon SydneySprintRT Ludwig.png|The course icon of the R/T variant | |||
MKT Icon SydneySprintR MarioSwimwear.png| | |||
MKT Icon SydneySprintT YoshiKangaroo.png| | |||
MKT Icon SydneySprintRT Ludwig.png| | |||
</gallery> | </gallery> | ||
| Line 98: | Line 137: | ||
MKT Sydney Sprint Scene.jpg|View of the starting line | MKT Sydney Sprint Scene.jpg|View of the starting line | ||
Sydney View.png|View of the starting line from the other side | Sydney View.png|View of the starting line from the other side | ||
MKT Sydney Sprint Opera House.jpg|View of the [[Sydney Opera House]] | |||
MKT Sydney Sprint Bridge & Park.jpg|View of the [[Sydney Harbor Bridge]] & {{wp|Luna Park Sydney|Luna Park}} | |||
MKT SydneySprint Scene 1.png|View of Luna Park | |||
MKT SydneySprint Scene 2.jpg|Alternative view of Luna Park | |||
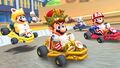
MKT Baby Mario Koala.jpg|[[Baby Mario|Baby Mario (Koala)]] drifting in the [[Jet Cruiser]] | MKT Baby Mario Koala.jpg|[[Baby Mario|Baby Mario (Koala)]] drifting in the [[Jet Cruiser]] | ||
MKT SydneyOpera.png|[[Shy Guy|Shy Guy (Gold)]], [[Dry Bowser]] and [[Pauline|Pauline (Rose)]] driving inside the [[Sydney Opera]] | MKT SydneyOpera.png|[[Shy Guy|Shy Guy (Gold)]], [[Dry Bowser]] and [[Pauline|Pauline (Rose)]] driving inside the [[Sydney Opera House]] | ||
MKT Sydney Tour September 2021 Week 2 Drivers.jpg|[[Baby Mario|Baby Mario (Koala)]] and [[Cat Mario|Cat Toad]] tricking near the entrance to {{wp|Luna Park}} | MKT Sydney Tour September 2021 Week 2 Drivers.jpg|[[Baby Mario|Baby Mario (Koala)]] and [[Cat Mario|Cat Toad]] tricking near the entrance to {{wp|Luna Park}} | ||
</gallery> | </gallery> | ||
| Line 105: | Line 148: | ||
====Sydney Sprint 2==== | ====Sydney Sprint 2==== | ||
=====Course icons===== | =====Course icons===== | ||
{{main-gallery|Mario Kart Tour race course icons (original courses)#Sydney Sprint 2|Mario Kart Tour race course icons (original courses) § Sydney Sprint 2}} | |||
<gallery> | <gallery> | ||
MKT Icon SydneySprint2.png| | MKT Icon SydneySprint2 YoshiKangaroo.png|The course icon | ||
MKT Icon SydneySprint2R WarioCowboy.png|The course icon of the R variant | |||
MKT Icon SydneySprint2T WhiteYoshi.png|The course icon of the T variant | |||
MKT Icon SydneySprint2RT CatToad.png|The course icon of the R/T variant | |||
MKT Icon SydneySprint2R WarioCowboy.png| | |||
MKT Icon | |||
MKT Icon SydneySprint2RT.png| | |||
</gallery> | </gallery> | ||
| Line 125: | Line 160: | ||
MKT Sydney Tour September 2021 Teaser.jpg|[[Baby Mario|Baby Mario (Koala)]], [[Cat Mario|Cat Toad]] and [[Yoshi|Yoshi (Kangaroo)]] driving on the course | MKT Sydney Tour September 2021 Teaser.jpg|[[Baby Mario|Baby Mario (Koala)]], [[Cat Mario|Cat Toad]] and [[Yoshi|Yoshi (Kangaroo)]] driving on the course | ||
MKT Sydney Sprint 2 Scene.png|View of the [[Finish Line (object)|finish line]] area | MKT Sydney Sprint 2 Scene.png|View of the [[Finish Line (object)|finish line]] area | ||
MKT Sydney Sprint 2 Starting Line.jpg|Alternate view of the finish line | |||
MKT Sydney Sprint 2 Scene 2.png|View leading up to the [[Sydney Harbor Bridge]] | |||
MKT Sydney Sprint 2 Bridge.jpg|View of the Sydney Harbor Bridge | |||
MKT SydneySprint Scene 3.jpg|View of {{wp|Luna Park Sydney|Luna Park}} | |||
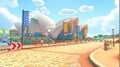
MKT Sydney Sprint 2 Apartments.jpg|View of the Mary Booth Lookout Reserve section | |||
MaryBoothView.png|The Sydney Opera house seen from the Mary Booth Reserve section | |||
MKT Yoshi Kangaroo.jpg|Yoshi (Kangaroo) driving in the Mary Booth Lookout Reserve section | MKT Yoshi Kangaroo.jpg|Yoshi (Kangaroo) driving in the Mary Booth Lookout Reserve section | ||
</gallery> | </gallery> | ||
| Line 130: | Line 171: | ||
====Sydney Sprint 3==== | ====Sydney Sprint 3==== | ||
=====Course icons===== | =====Course icons===== | ||
{{main-gallery|Mario Kart Tour race course icons (original courses)#Sydney Sprint 3|Mario Kart Tour race course icons (original courses) § Sydney Sprint 3}} | |||
<gallery> | <gallery> | ||
MKT Icon SydneySprint3 DaisySwimwear.png|The course icon | |||
MKT Icon SydneySprint3 DaisySwimwear.png| | MKT Icon SydneySprint3R Mario.png|The course icon of the R variant | ||
MKT Icon SydneySprint3R | MKT Icon SydneySprint3T PeachExplorer.png|The course icon of the T variant | ||
MKT Icon SydneySprint3RT LuigiGoldKnight.png|The course icon of the R/T variant | |||
MKT Icon SydneySprint3T | |||
MKT | |||
</gallery> | </gallery> | ||
| Line 145: | Line 183: | ||
FirstClassFerry.png|View of the First Fleet class ferry | FirstClassFerry.png|View of the First Fleet class ferry | ||
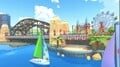
BarangarooReserve.png|View of the Barangaroo Reserve | BarangarooReserve.png|View of the Barangaroo Reserve | ||
MKT Anniversary Tour Mario Pipe.jpg|Various Mario costumes driving on the T variant of the course | |||
</gallery> | </gallery> | ||
| Line 150: | Line 189: | ||
<gallery> | <gallery> | ||
MK8D Tour Sydney Sprint Course Icon.png|The course icon | MK8D Tour Sydney Sprint Course Icon.png|The course icon | ||
MK8D Tour Sydney Sprint Course Icon Full.png|The full course icon | |||
MK8-mob_Sydney-Ending.png|Results screen | |||
MK8D Tour Sydney Sprint Scene.png|View of the {{wp|Sydney Harbour Bridge}} and {{wp|Luna Park Sydney|Luna Park}} | |||
MK8D Sydney Sprint Starting Line.jpg|View of the starting line | MK8D Sydney Sprint Starting Line.jpg|View of the starting line | ||
MK8D Sydney Sprint Screenshot1.jpg|[[Toadette]] gliding out of the Sydney Opera House | MK8D Sydney Sprint Screenshot1.jpg|[[Toadette]] gliding out of the Sydney Opera House | ||
MK8D_Sydney_Sprint_Screenshot_2.jpg|[[Bowser Jr.]] gliding on the final lap | MK8D_Sydney_Sprint_Screenshot_2.jpg|[[Bowser Jr.]] gliding on the final lap | ||
| Line 159: | Line 200: | ||
==Names in other languages== | ==Names in other languages== | ||
{{foreign names | {{foreign names | ||
| | |Jpn=シドニーサンシャイン | ||
| | |JpnR=Shidonī Sanshain | ||
| | |JpnM=Sydney Sunshine | ||
|ChiS=悉尼冲刺 | |ChiS=悉尼冲刺 | ||
|ChiSR=Xīní Chōngcì | |ChiSR=Xīní Chōngcì | ||
| Line 177: | Line 218: | ||
|ItaM=Sprint in Sydney | |ItaM=Sprint in Sydney | ||
|Kor=시드니 스프린트 | |Kor=시드니 스프린트 | ||
|KorR=Sideuni | |KorR=Sideuni Seupeurinteu | ||
|KorM=Sydney Sprint | |KorM=Sydney Sprint | ||
|PorA=Volta em Sydney | |PorA=Volta em Sydney | ||
|PorAM=Lap in Sydney | |PorAM=Lap in Sydney | ||
|PorE=Acelerações em Sydney | |PorE=Acelerações em Sydney | ||
|PorEM= | |PorEM=Accelerations in Sydney | ||
|Rus=Сиднейский спринт | |Rus=Сиднейский спринт | ||
|RusR=Sidneyskiy sprint | |RusR=Sidneyskiy sprint | ||
|RusM=Sydney Sprint | |RusM=Sydney Sprint | ||
|Spa=Sídney sin Pausa | |Spa=Sídney sin Pausa | ||
|SpaM=Sydney | |SpaM=Non-stop Sydney | ||
}} | }} | ||
==References== | ==References== | ||
| Line 203: | Line 239: | ||
[[it:Sprint a Sydney]] | [[it:Sprint a Sydney]] | ||
[[Category:Cities]] | [[Category:Cities]] | ||
[[Category: | [[Category:Amusement parks]] | ||
[[Category:Classic courses]] | |||
[[Category:Mario Kart 8 Deluxe – Booster Course Pass race courses]] | [[Category:Mario Kart 8 Deluxe – Booster Course Pass race courses]] | ||
[[Category:Mario Kart Tour race courses]] | [[Category:Mario Kart Tour race courses]] | ||
Latest revision as of 17:04, March 11, 2025
| Sydney Sprint | |||||||||||
|---|---|---|---|---|---|---|---|---|---|---|---|
 View of the Sydney Opera House | |||||||||||
| Information | |||||||||||
| Appears in | Mario Kart Tour (2021 (1, 2), 2022 (3)) Mario Kart 8 Deluxe (Booster Course Pass, Wave 2) (2022) | ||||||||||
| Cup(s) | Propeller Cup | ||||||||||
| Tour(s) | |||||||||||
| Based on | Sydney, Australia | ||||||||||
| Online play | Available (Switch) | ||||||||||
| |||||||||||
| |||||||||||
| |||||||||||


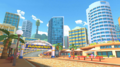
Sydney Sprint is a race course featured in Mario Kart Tour. It is set in Sydney, New South Wales, Australia, and made its debut in the April–May 2021 Sydney Tour, the city's namesake tour. Like a majority of the other city courses, there are three routes for this course, which are named Sydney Sprint, Sydney Sprint 2, and Sydney Sprint 3. The second route debuted in the September 2021 Sydney Tour, and the third route debuted in the 2022 Anniversary Tour. The course visits various landmarks of Sydney, with the first route taking racers through the Sydney Opera House and Luna Park, the second route featuring the Mary Booth Lookout Reserve, and the third route focusing on Barangaroo Reserve. The first and second routes also feature the Sydney Harbor Bridge, where passengers in a nearby Tangara train throw items onto the road. Additionally, the second route starts in the opposite direction compared to the other two. Unlike most other city courses (with the exception of Singapore Speedway and Athens Dash), which generally condense landmarks down, every landmark featured in the varying routes of Sydney Sprint (except for Uluru) is from the general area of the Sydney Opera House and Sydney Harbor Bridge; unlike Singapore Speedway, though, no routes closely approximate roads or paths featured in the actual city.
Sydney Sprint returns as the first course of the Propeller Cup in the Mario Kart 8 Deluxe – Booster Course Pass.
Mario Kart TourEdit


Sydney SprintEdit
In the standard layout, the course begins within an area in Port Jackson. After a reverse curve to the right, the player enters the Sydney Opera House and makes a slight left amidst a cheering crowd to a Glide Ramp across the water. After passing under the Bradfield Highway, the player will make a 270-degree loop right amidst some Luna Park fairgrounds on the left to join the highway and cross the Sydney Harbor Bridge; while on the bridge, passengers from the Tangara train operating on the North Shore Line will throw random Mushrooms, Bananas and Bob-ombs onto the central span. The player then takes a long winding left through downtown Sydney before reaching the finish line.
At the start of the course, there is a fountain at the side of the course. If the player uses a Mushroom to hit the fountain, they will be able to perform several Jump Boosts.
The course also appears as Sydney Sprint R (reversed), Sydney Sprint T (with ramps), and Sydney Sprint R/T (reversed with ramps). In the T variant, several stationary vehicles appear on the Sydney Harbor Bridge, including a car, a pickup truck, and a dash panel ramp truck.
AppearancesEdit
For this course's tour appearances, see List of Sydney Sprint tour appearances in Mario Kart Tour § Sydney Sprint.
Top-tier and middle-tier itemsEdit
Select "show" to reveal the drivers, karts, and gliders for which Sydney Sprint and its variants are always favored or favorite courses. For instances in which additional drivers, karts, and gliders temporarily had this course and its variants as favored or favorite courses, see List of Sydney Sprint tour appearances in Mario Kart Tour.
| Course | Three-item drivers | Bonus points ×2 karts | Combo bonus ×3 gliders | Two-item drivers | Bonus points ×1.5 karts | Combo bonus ×2 gliders |
|---|---|---|---|---|---|---|
Normal variant |
||||||
R variant |
||||||
T variant |
||||||
R/T variant |
||||||
| * indicates a favored course upgraded to a favorite course after reaching level 3. ** indicates a favored course upgraded to a favorite course after reaching level 6. *** indicates a favored course upgraded to a favorite course after reaching level 8 for High-End items. | ||||||
Bonus challengesEdit
| Ring Race | |||||||
|---|---|---|---|---|---|---|---|
| Icon | Course variant | Chosen driver |
Chosen kart |
Chosen glider |
Grand Star scores | Tour appearances | Cup |

|
Regular | Baby Mario |
Pipe Frame |
Super Glider |
|
Sydney Tour (April–May 2021) | Baby Mario Cup |
| Do Jump Boosts | |||||||
|---|---|---|---|---|---|---|---|
| Icon | Course variant | Chosen driver |
Chosen kart |
Chosen glider |
Grand Star scores | Tour appearances | Cup |

|
Regular | Baby Mario |
Pipe Frame |
Super Glider |
|
Sydney Tour (September 2021) | Yoshi Cup |
|
Sunshine Tour | Monty Mole Cup | |||||
| Smash Small Dry Bones | |||||||
|---|---|---|---|---|---|---|---|
| Icon | Course variant | Chosen driver |
Chosen kart |
Chosen glider |
Grand Star scores | Tour appearances | Cup |

|
Regular | Yoshi |
Pipe Frame |
Super Glider |
|
2nd Anniversary Tour | Mario Cup |
| Time Trial | |||||||
|---|---|---|---|---|---|---|---|
| Icon | Course variant | Chosen driver |
Chosen kart |
Chosen glider |
Grand Star scores | Tour appearances | Cup |

|
Regular | Baby Mario |
Pipe Frame |
Super Glider |
|
2nd Anniversary Tour | Daisy Cup |
| Combo Attack | |||||||
|---|---|---|---|---|---|---|---|
| Icon | Course variant | Chosen driver |
Chosen kart |
Chosen glider |
Highest combo counts | Tour appearances | Cup |

|
T | Baby Luigi |
Pipe Frame |
Super Glider |
|
Sunshine Tour | King Bob-omb Cup |
| Snap a Photo | ||||||||||
|---|---|---|---|---|---|---|---|---|---|---|
| Icon | Course variant | Chosen driver |
Chosen kart |
Chosen glider |
Other driver information | Objectives | Tour appearances | Cup | ||
| Driver | Kart | Glider | ||||||||

|
T | Baby Mario (Koala) |
Sushi Racer |
Manta Glider |
Baby Peach |
Birthday Girl |
Peach Parasol |
|
Sydney Tour (April–May 2021) | Bowser Jr. Cup |
Baby Daisy |
Birthday Girl Daisy |
Flower Glider | ||||||||
Baby Rosalina |
Birthday Girl Rosalina |
Droplet Glider | ||||||||
Sydney Sprint 2Edit
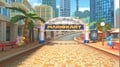
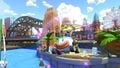
This layout is driven in the opposite direction compared to the previous layout. Like the original Sydney Sprint, the course's standard layout starts out at an area in Port Jackson. After that, there is a long winding turn through downtown Sydney. After a turn to the left, the player can reach the highway and cross the Sydney Harbor Bridge, where passengers from the Tangara train operating on the North Shore Line will throw random items onto the central span, just like Sydney Sprint. Next, there is a turn to the right which leads to the Mary Booth Lookout Reserve. After another turn to the left, there is a glide ramp which takes the player across some water. Next, there is a small street with a single ramp at the end. After the ramp, the player returns back to the Port Jackson area. At this section, the player can choose to go on the upper route which contains some coins, or the bottom route. The Sydney Opera House can also be seen at the background. After another turn to the left, the player reaches the finish line.
The course also appears as Sydney Sprint 2R (reversed), Sydney Sprint 2T (with ramps), and Sydney Sprint 2R/T (reversed with ramps). In the R/T variant, the glide ramp is moved further down the track, appearing shortly before the Sydney Harbor Bridge. This change, in conjunction with several ramps, allows racers to potentially glide over the entire bridge section.
AppearancesEdit
For this course's tour appearances, see List of Sydney Sprint tour appearances in Mario Kart Tour § Sydney Sprint 2.
Top-tier and middle-tier itemsEdit
Select "show" to reveal the drivers, karts, and gliders for which Sydney Sprint 2 and its variants are always favored or favorite courses. For instances in which additional drivers, karts, and gliders temporarily had this course and its variants as favored or favorite courses, see List of Sydney Sprint 2 tour appearances in Mario Kart Tour.
| Course | Three-item drivers | Bonus points ×2 karts | Combo bonus ×3 gliders | Two-item drivers | Bonus points ×1.5 karts | Combo bonus ×2 gliders |
|---|---|---|---|---|---|---|
Normal variant |
||||||
R variant |
||||||
T variant |
||||||
R/T variant |
||||||
| * indicates a favored course upgraded to a favorite course after reaching level 3. ** indicates a favored course upgraded to a favorite course after reaching level 6. *** indicates a favored course upgraded to a favorite course after reaching level 8 for High-End items. | ||||||
Bonus challengesEdit
| Goomba Takedown | |||||||||
|---|---|---|---|---|---|---|---|---|---|
| Icon | Course variant | Chosen driver |
Chosen kart |
Chosen glider |
Item Box type found |
Number of item slots | Grand Star scores | Tour appearances | Cup |

|
Regular | Birdo (Yellow) |
Pipe Frame |
Super Glider |
Bob-omb Mega Mushroom |
1 |
|
Sydney Tour (September 2021) | Waluigi Cup |
|
Anniversary Tour (2022) | Pink Gold Peach Cup | |||||||
| Smash Small Dry Bones | |||||||
|---|---|---|---|---|---|---|---|
| Icon | Course variant | Chosen driver |
Chosen kart |
Chosen glider |
Grand Star scores | Tour appearances | Cup |

|
Regular | Wendy |
Pipe Frame |
Super Glider |
|
Sunshine Tour | Larry Cup |
| Break Item Boxes | |||||||||
|---|---|---|---|---|---|---|---|---|---|
| Icon | Course variant | Chosen driver |
Chosen kart |
Chosen glider |
Item Box type found |
Number of item slots | Grand Star scores | Tour appearances | Cup |

|
Regular | Toad (Pit Crew) |
Pipe Frame |
Super Glider |
Mega Mushroom Coin Frenzy (Mega Mushroom) |
3 |
|
Sunshine Tour | Koopa Troopa Cup |
| Combo Attack | |||||||
|---|---|---|---|---|---|---|---|
| Icon | Course variant | Chosen driver |
Chosen kart |
Chosen glider |
Highest combo counts | Tour appearances | Cup |

|
T | Boomerang Bro |
Pipe Frame |
Super Glider |
|
Anniversary Tour (2022) | Toadette Cup |
| Snap a Photo | ||||||||||
|---|---|---|---|---|---|---|---|---|---|---|
| Icon | Course variant | Chosen driver |
Chosen kart |
Chosen glider |
Other driver information | Objectives | Tour appearances | Cup | ||
| Driver | Kart | Glider | ||||||||

|
T | Yoshi (Kangaroo) |
Green Double-Decker |
Sunset Balloons |
Yoshi |
Turbo Yoshi |
Cloud Glider |
|
Sydney Tour (September 2021) | Wario Cup |
Red Yoshi |
Red Turbo Yoshi |
Rainy Balloons | ||||||||
Blue Yoshi |
Blue Turbo Yoshi |
Blizzard Balloons | ||||||||
Sydney Sprint 3Edit
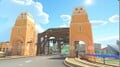
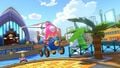
Like the other two variants, this variant begins within an area in Port Jackson. The player drives in the same direction as Sydney Sprint, but instead of turning right, the player immediately makes a left turn, jumping into a First Fleet class ferry. After jumping out to a dock at Dawes Point, the path afterwards continues through Barangaroo Reserve along a winding narrow path split down the middle, one half banking downwards into the turns while the other half remains level; the off-road portions in this area are strewn with boulders that may impede drivers trying to cut across. From this area, players can see Uluru in the far background. At the end of this section, the player turns to the right before they reach the Sydney Harbor Bridge, and race through the downtown of Sydney, before turning left one last time and reaching the finish line.
The course also appears as Sydney Sprint 3R (reversed), Sydney Sprint 3T (with ramps), and Sydney Sprint 3R/T (reversed with ramps). The former two debuted alongside the normal variant in the 2022 Anniversary Tour, while the latter debuted in the 2023 Anniversary Tour. In the R and R/T variants, passengers from the Tangara train throw items onto part of the track, just before racers reach the ferry. In the R/T variant, racers drive over the ferry and are able to briefly land on it for an extra Jump Boost off of a dash panel ramp.
The T variant is also one of the three track variants (alongside Berlin Byways 3T and London Loop 3R/T) to not reappear in a future tour or tour rerun, appearing in only one tour.
AppearancesEdit
For this course's tour appearances, see List of Sydney Sprint tour appearances in Mario Kart Tour § Sydney Sprint 3.
Top-tier and middle-tier itemsEdit
Select "show" to reveal the drivers, karts, and gliders for which Sydney Sprint 3 and its variants are always favored or favorite courses. For instances in which additional drivers, karts, and gliders temporarily had this course and its variants as favored or favorite courses, see List of Sydney Sprint 3 tour appearances in Mario Kart Tour.
| Course | Three-item drivers | Bonus points ×2 karts | Combo bonus ×3 gliders | Two-item drivers | Bonus points ×1.5 karts | Combo bonus ×2 gliders |
|---|---|---|---|---|---|---|
Normal variant |
||||||
R variant |
||||||
T variant |
||||||
R/T variant |
||||||
| * indicates a favored course upgraded to a favorite course after reaching level 3. ** indicates a favored course upgraded to a favorite course after reaching level 6. *** indicates a favored course upgraded to a favorite course after reaching level 8 for High-End items. | ||||||
Bonus challengesEdit
| Glider Challenge | |||||||
|---|---|---|---|---|---|---|---|
| Icon | Course variant | Chosen driver |
Chosen kart |
Chosen glider |
Grand Star distances | Tour appearances | Cup |

|
Regular | Baby Rosalina |
Pipe Frame |
Super Glider |
|
Anniversary Tour (2022) Anniversary Tour (2023) |
Mii Cup |
| Steer Clear of Obstacles | |||||||
|---|---|---|---|---|---|---|---|
| Icon | Course variant | Chosen driver |
Chosen kart |
Chosen glider |
Obstacles | Tour appearances | Cup |

|
Regular | Wario |
Pipe Frame |
Super Glider |
 Sidestepper Piranha Plant (aggressive) |
Anniversary Tour (2022) | Kamek Cup |
Mario Kart 8 DeluxeEdit

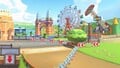
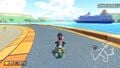
Sydney Sprint returns in the Booster Course Pass for Mario Kart 8 Deluxe. It is the first course of the Propeller Cup, and as such is one of two courses from Mario Kart Tour to appear in the second wave, alongside Tour New York Minute. This version of the course is an expanded and combined version of Sydney Sprint, Sydney Sprint 2, and Sydney Sprint 3 from Mario Kart Tour. As Sydney Sprint 3 had yet to be released when this course was added in the Booster Course Pass, Tour Sydney Sprint is the one of the two Tour city courses alongside Athens Dash to be added to the pass before all three variants were released, and due to Sydney Sprint 3's presence in this course, it is also the first Tour city course to utilize roads that were unused in Mario Kart Tour at the time of it being added into Mario Kart 8 Deluxe. It and Athens Dash are also the only two courses to use routes prior to them debuting in Tour, as all other instances of unused roads being used in the Booster Course Pass did not get used within Tour. The course has also received significant visual and musical upgrades. It is one of two Mario Kart Tour city tracks to not have its minimap rotated, the other being Tour New York Minute.
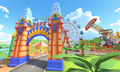
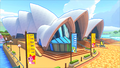
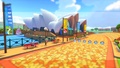
The first lap follows the layout of the first Sydney Sprint route, starting in Port Jackson and facing the Sydney Opera House. The fountain next to the starting line is now surrounded by grass, is much smaller, and is level with the track instead of slightly raised up, acting as an off-road shortcut. Racers drive through the Sydney Opera House, glide out of it, take a 270-degree right turn through Luna Park, and cross the Sydney Harbor Bridge. While on the bridge, Toads throw coins from the Tangara train, replacing the Mushrooms, Bananas and Bob-ombs they could throw in the original. The bridge now has ramps on it (in a similar vain to Sydney Sprint 2T, but not in the same arrangement) - however, these ramps are facing the opposite direction and cannot be used on this lap. Coins are located in small alcoves at the end of each ramp. At the end of the bridge, racers turn left and take a highway back to the starting line.
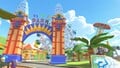
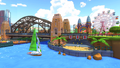
The second lap is a combination of Sydney Sprint 3 and Sydney Sprint 2. When the second lap starts, an arrow field points to the left taking players down Sydney Sprint 3's route, where the player jumps into a First Fleet class ferry before jumping out and onto a dock at Dawes Point under the bridge. The path afterwards continues through Barangaroo Reserve along a winding narrow path split down the middle, one half banking downwards into the turns while the other half remains level. At the end of that section, the layout transitions into Sydney Sprint 2's route, crossing the Sydney Harbour Bridge from the opposite direction to the first lap, allowing racers to use the ramps in the middle. After, an arrow field directs players to the right through the Mary Booth Lookout Reserve, which they exit with a Glide Ramp to a road between the shells of the Sydney Opera House. From there, racers drive past the starting line from the opposite direction of how they started the lap.
The third and final lap is based on Sydney Sprint R. As such, it follows the same layout as the first lap, though it goes in reverse, with the player first crossing the Sydney Harbour Bridge (which again allows players to use the ramps), followed by taking a large turn through Luna Park, then gliding into the Sydney Opera House, and finally returning to the Circular Quay area where the race ends. This is the second city course in Mario Kart 8 Deluxe to feature a lap based on an R variation.
Official posts made by Nintendo have misspelled the course's name twice: once in a Play Nintendo article, in which it is misspelled as "Sydney Spring",[1] and again in the Nintendo Switch News feed, where the "Tour" prefix was misspelled as "Tourney".[citation needed] Official posts on Nintendo of America's social media accounts have jokingly called Sydney Sprint the Boomerang Flower's "native habitat",[2][3] referencing the fact that boomerangs are strongly associated with Australia, where Sydney is located.
SponsorsEdit
ProfilesEdit
Mario Kart 8 DeluxeEdit
- Nintendo Switch News app (US):
- This course first appeared in the Mario Kart Tour game.
- Modelled after Sydney, Australia, and you can see some of the city's famous landmarks while racing.
- While the course layout changes every lap, the third lap follows the layout of the first lap, but in reverse!
- Nintendo Switch News app (UK): Race down under in Sydney Sprint!
Now, we'd like to present to you a course released as part of the second wave, which is available now: Sydney Sprint.
This course had its first outing in the smart device app Mario Kart Tour, and takes you swerving and dashing past the many famous landmarks of the Australian metropolis of Sydney. The route changes depending on the number of laps, and the third go-round will have you retracing your past tracks, so you might even see other racers going the "wrong" way - how's that for inverting expectations? Be sure to greet them with a hearty "G'day!" as you zoom past! - Nintendo Magazine 2023 Summer: A summery course filled with sunshine, set in Sydney, Australia. Across the bay, you can see Uluru/Ayers Rock.[4]
GalleryEdit
Mario Kart TourEdit
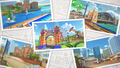
Pictures of the various Sydney Sprint courses

Pictures of the various Sydney Sprint courses


Sydney SprintEdit
Course iconsEdit
- For this subject's image gallery, see Gallery:Mario Kart Tour race course icons (original courses) § Sydney Sprint.
The course icon
The course icon of the R variant

The course icon of the T variant
The course icon of the R/T variant
ScreenshotsEdit
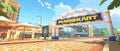
View of the starting line
View of the starting line from the other side
View of the Sydney Opera House
View of the Sydney Harbor Bridge & Luna Park
View of Luna Park
Alternative view of Luna Park
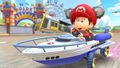
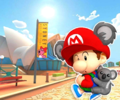
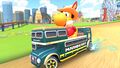
Baby Mario (Koala) drifting in the Jet Cruiser

Shy Guy (Gold), Dry Bowser and Pauline (Rose) driving inside the Sydney Opera House
Baby Mario (Koala) and Cat Toad tricking near the entrance to Luna Park


Sydney Sprint 2Edit
Course iconsEdit
- For this subject's image gallery, see Gallery:Mario Kart Tour race course icons (original courses) § Sydney Sprint 2.

The course icon
The course icon of the R variant
The course icon of the T variant
The course icon of the R/T variant
ScreenshotsEdit
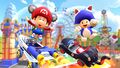
Baby Mario (Koala), Cat Toad and Yoshi (Kangaroo) driving on the course
View of the finish line area
Alternate view of the finish line

View leading up to the Sydney Harbor Bridge
View of the Sydney Harbor Bridge
View of Luna Park

View of the Mary Booth Lookout Reserve section

The Sydney Opera house seen from the Mary Booth Reserve section
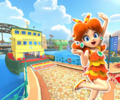
Yoshi (Kangaroo) driving in the Mary Booth Lookout Reserve section


Sydney Sprint 3Edit
Course iconsEdit
- For this subject's image gallery, see Gallery:Mario Kart Tour race course icons (original courses) § Sydney Sprint 3.
The course icon
The course icon of the R variant
The course icon of the T variant
The course icon of the R/T variant
ScreenshotsEdit
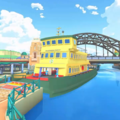
View of the First Fleet class ferry
View of the Barangaroo Reserve
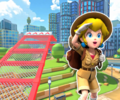
Various Mario costumes driving on the T variant of the course


Mario Kart 8 DeluxeEdit
The course icon
The full course icon
Results screen
View of the Sydney Harbour Bridge and Luna Park
View of the starting line
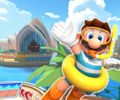
Toadette gliding out of the Sydney Opera House
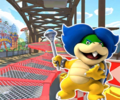
Bowser Jr. gliding on the final lap
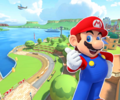
View of Uluru


Names in other languagesEdit
| Language | Name | Meaning | Notes |
|---|---|---|---|
| Japanese | シドニーサンシャイン[?] Shidonī Sanshain |
Sydney Sunshine | |
| Chinese (simplified) | 悉尼冲刺[?] Xīní Chōngcì |
Sydney Sprint | |
| Chinese (traditional) | 雪梨衝刺[?] Xuělí Chōngcì |
Sydney Sprint | |
| Dutch | Sydney-Sprint[?] | Sydney Sprint | |
| French | Sprint à Sydney[?] | Sprint in Sydney | |
| German | Sydney-Spritztour[?] | Sydney Joyride | |
| Italian | Sprint a Sydney[?] | Sprint in Sydney | |
| Korean | 시드니 스프린트[?] Sideuni Seupeurinteu |
Sydney Sprint | |
| Portuguese (NOA) | Volta em Sydney[?] | Lap in Sydney | |
| Portuguese (NOE) | Acelerações em Sydney[?] | Accelerations in Sydney | |
| Russian | Сиднейский спринт[?] Sidneyskiy sprint |
Sydney Sprint | |
| Spanish | Sídney sin Pausa[?] | Non-stop Sydney |
ReferencesEdit
- ^ Wave 2 is here! Play Nintendo. Retrieved August 6, 2022. (Archived August 6, 2022, 02:35:36 UTC via Wayback Machine.) "You can speed through location-based courses like Tour Sydney Spring and nostalgic classics like DS Waluigi Pinball"
- ^ NintendoAmerica (October 18, 2022). Visit the native habitat of the Boomerang Flower in the Sydney Sprint course! Take a trip down under with Wave 2 of the #MarioKart 8 Deluxe – Booster Course Pass today! Twitter. Retrieved March 4, 2023. (Archived October 19, 2022, 16:13:26 UTC via Wayback Machine.)
- ^ MarioKartEN (October 18, 2022). Visit the native habitat of the Boomerang Flower in the Sydney Sprint course! Take a trip down under with Wave 2 of the Mario Kart 8 Deluxe – Booster Course Pass today! Facebook. Retrieved March 4, 2023.
- ^ Nintendo Magazine 2023 Summer (Digital English edition). nintendo.co.jp. Retrieved July 15, 2023. (Archived July 15, 2023, 10:48:55 UTC via Wayback Machine.)