|
|
| (7 intermediate revisions by 6 users not shown) |
| Line 1: |
Line 1: |
| {{distinguish|1st Anniversary Tour|2nd Anniversary Tour}}
| |
| {{tour infobox | | {{tour infobox |
| |title=Anniversary Tour | | |title=Anniversary Tour |
| Line 9: |
Line 8: |
| |coin=[[Tour Tokyo Blur|Tokyo Blur]] | | |coin=[[Tour Tokyo Blur|Tokyo Blur]] |
| |before=[[Mario vs. Luigi Tour (2022)|<<]] | | |before=[[Mario vs. Luigi Tour (2022)|<<]] |
| |after=[[Battle Tour (2022)|>>]] | | |after=[[Battle Tour|>>]] |
| }} | | }} |
|
| |
|
| Line 16: |
Line 15: |
| This tour marked the end of the two-tour event celebrating the third anniversary of ''Mario Kart Tour'' that started in the [[Mario vs. Luigi Tour (2022)|previous tour]]. This tour featured an upgraded [[#Token Shop|Token Shop]] that included items like [[Metal Mario]], [[Pink Gold Peach]], the [[Wild Wing]], and three golden pipes. This tour also introduced the second set of two [[List of challenge cards in Mario Kart Tour#3rd Anniversary Challenges|3rd Anniversary Challenges]] cards in addition to continuing the [[#3 Year Anniv. Log-In Bonus|3 Year Anniv. Log-In Bonus]] and the 3rd Anniversary Challenges 1 card from the previous tour.<ref>@mariokarttourEN (September 7, 2022). [https://twitter.com/mariokarttourEN/status/1567438522092486657 "''#MarioKartTour will soon reach its 3rd anniversary since release! Some events to express our gratitude to everyone and to celebrate the 3rd anniversary have now begun and will go on for two tours in a row! Check the image for details!''"] ''Twitter''. Retrieved September 12, 2022.</ref> | | This tour marked the end of the two-tour event celebrating the third anniversary of ''Mario Kart Tour'' that started in the [[Mario vs. Luigi Tour (2022)|previous tour]]. This tour featured an upgraded [[#Token Shop|Token Shop]] that included items like [[Metal Mario]], [[Pink Gold Peach]], the [[Wild Wing]], and three golden pipes. This tour also introduced the second set of two [[List of challenge cards in Mario Kart Tour#3rd Anniversary Challenges|3rd Anniversary Challenges]] cards in addition to continuing the [[#3 Year Anniv. Log-In Bonus|3 Year Anniv. Log-In Bonus]] and the 3rd Anniversary Challenges 1 card from the previous tour.<ref>@mariokarttourEN (September 7, 2022). [https://twitter.com/mariokarttourEN/status/1567438522092486657 "''#MarioKartTour will soon reach its 3rd anniversary since release! Some events to express our gratitude to everyone and to celebrate the 3rd anniversary have now begun and will go on for two tours in a row! Check the image for details!''"] ''Twitter''. Retrieved September 12, 2022.</ref> |
|
| |
|
| Like the 2nd Anniversary Tour and [[Metropolitan Tour]], only [[New course|city courses]] appeared in the tour. This tour also introduced new routes for both [[Tour Sydney Sprint|Sydney Sprint]] and [[Tour Berlin Byways|Berlin Byways]], named Sydney Sprint 3 and Berlin Byways 3 respectively, the former of which was previously seen in the course's appearance in the [[Mario Kart 8 Deluxe – Booster Course Pass|Booster Course Pass]] for ''[[Mario Kart 8 Deluxe]]''. It also introduced the R/T variants of both [[Tour Amsterdam Drift|Amsterdam Drift 2]] and [[Tour Singapore Speedway|Singapore Speedway 2]], which debuted in the Metropolitan Tour and [[Ocean Tour]], respectively. With the introduction of these courses, this was the first tour since the [[Samurai Tour]] thirteen tours prior to introduce new R/T variants, the first tour in the game to introduce the R/T variants of multiple city courses, and the first tour since the [[Ice Tour]] seventy tours prior to introduce both multiple new courses and multiple R/T variants simultaneously. It also features the return of [[Tour Tokyo Blur|Tokyo Blur]], Berlin Byways 2, [[Tour Los Angeles Laps|Los Angeles Laps 3]], and Sydney Sprint 2. | | Like the 2nd Anniversary Tour and [[Metropolitan Tour]], only [[New course|city courses]] appeared in the tour. This tour also introduced new routes for both [[Tour Sydney Sprint|Sydney Sprint]] and [[Tour Berlin Byways|Berlin Byways]], named Sydney Sprint 3 and Berlin Byways 3 respectively, the former of which was previously seen in the course's appearance in the ''[[Mario Kart 8 Deluxe – Booster Course Pass|Booster Course Pass]]'' for ''[[Mario Kart 8 Deluxe]]''. It also introduced the R/T variants of both [[Tour Amsterdam Drift|Amsterdam Drift 2]] and [[Tour Singapore Speedway|Singapore Speedway 2]], which debuted in the Metropolitan Tour and [[Ocean Tour]], respectively. With the introduction of these courses, this was the first tour since the [[Samurai Tour]] thirteen tours prior to introduce new R/T variants, the first tour in the game to introduce the R/T variants of multiple city courses, and the first tour since the [[Ice Tour]] seventy tours prior to introduce both multiple new courses and multiple R/T variants simultaneously. It also features the return of [[Tour Tokyo Blur|Tokyo Blur]], Berlin Byways 2, [[Tour Los Angeles Laps|Los Angeles Laps 3]], and Sydney Sprint 2. This was also the only tour to feature the T variants of Berlin Byways 3 and Sydney Sprint 3. |
|
| |
|
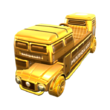
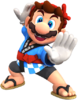
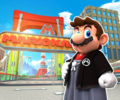
| Despite the new courses not being related to [[London]] or Britain, and the tour not including returning [[Tour London Loop|London Loop]] tracks, the new vehicles are a variant of the [[Double-Decker]] and a kart based on a {{wp|Hackney carriage}}, in addition to a new variant of [[Mario]], where he is in his [[Crazy Cap#King's Crown|King's Crown]] and [[Crazy Cap#King's Outfit|King's Outfit]] from ''[[Super Mario Odyssey]]''. | | Despite the new courses not being related to [[London]] or Britain, and the tour not including returning [[Tour London Loop|London Loop]] tracks, the new vehicles are a variant of the [[Double-Decker]] and a kart based on a {{wp|Hackney carriage}}, in addition to a new variant of [[Mario]], where he is in his [[Crazy Cap#King's Crown|King's Crown]] and [[Crazy Cap#King's Outfit|King's Outfit]] from ''[[Super Mario Odyssey]]''. |
|
| |
|
| This was the last tour to feature the regular week pipes which would be fired with [[Ruby|rubies]] and contain spotlight items, as they were removed after this tour in favor of a Spotlight Shop that was implemented in the [[Battle Tour|following tour]]. In addition to the removal of ruby pipes, this was the last tour where the spotlight items from the first and second week were raised to a higher shelf on the second and third course of every cup, respectively, restricting shelf boosts after this tour to driver cups and the first course in a cup for [[Mii|Mii Racing Suits]] and commemorative items. This was also the last tour to have only twelve cups as the next tour would have fifteen. | | This was the last tour to feature the regular week pipes which would be fired with [[Ruby|rubies]] and contain spotlight items, as they were removed after this tour in favor of a Spotlight Shop that was implemented in the [[Battle Tour|following tour]]. In addition to the removal of ruby pipes, this was the last tour where commemorative items and the spotlight items from the first and second week were raised to a higher shelf on the first, second, and third course of every cup, respectively, restricting shelf boosts after this tour to driver cups and the first course in a cup for [[Mii|Mii Racing Suits]]. This was also the last tour to have only twelve cups as the next tour would have fifteen. |
|
| |
|
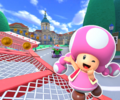
| This tour's [[Coin Rush (Mario Kart Tour)|Coin Rush]] course was Tokyo Blur, and the menu's background featured the {{wp|Sydney Harbour Bridge}} as the landmark for this tour, which was reused from the [[Sydney Tour (April–May 2021)|April–May 2021]] and [[Sydney Tour (September 2021)|September 2021 Sydney Tours]]. | | This tour's [[Coin Rush (Mario Kart Tour)|Coin Rush]] course was Tokyo Blur, and the menu's background featured the {{wp|Sydney Harbour Bridge}} as the landmark for this tour, which was reused from the [[Sydney Tour (April–May 2021)|April–May 2021]] and [[Sydney Tour (September 2021)|September 2021 Sydney Tours]]. |
| Line 494: |
Line 493: |
| ===Courses=== | | ===Courses=== |
| <gallery heights=50px> | | <gallery heights=50px> |
| | MKT Icon Berlin Byways 3.png|[[Tour Berlin Byways|Berlin Byways 3]] (N, R, T) |
| MKT Icon Sydney Sprint 3.png|[[Tour Sydney Sprint|Sydney Sprint 3]] (N, R, T) | | MKT Icon Sydney Sprint 3.png|[[Tour Sydney Sprint|Sydney Sprint 3]] (N, R, T) |
| MKT Icon Berlin Byways 3.png|[[Tour Berlin Byways|Berlin Byways 3]] (N, R, T)
| |
| MKT Icon Amsterdam Drift 2RT.png|[[Amsterdam Drift|Amsterdam Drift 2]] (R/T) | | MKT Icon Amsterdam Drift 2RT.png|[[Amsterdam Drift|Amsterdam Drift 2]] (R/T) |
| MKT Icon Singapore Speedway 2RT.png|[[Singapore Speedway|Singapore Speedway 2]] (R/T) | | MKT Icon Singapore Speedway 2RT.png|[[Singapore Speedway|Singapore Speedway 2]] (R/T) |
| Line 575: |
Line 574: |
| |TCR1=[[File:MKT Icon CoinRushTicket.png|70px]] [[Coin Rush ticket]] ×1 | | |TCR1=[[File:MKT Icon CoinRushTicket.png|70px]] [[Coin Rush ticket]] ×1 |
| |T1.1=175-1 | | |T1.1=175-1 |
| |T1.1E=Land 5 hits with {{Color-link|Red Shell|#A1A1FF|Red Shells}}. | | |T1.1E=Land 5 hits with {{Color-link|#A1A1FF|Red Shell|Red Shells}}. |
| |T1.1S=1 | | |T1.1S=1 |
| |T1.2=018 | | |T1.2=018 |
| |T1.2E=Land 3 hits with {{Color-link|Green Shell|#A1A1FF|Green Shells}}. | | |T1.2E=Land 3 hits with {{Color-link|#A1A1FF|Green Shell|Green Shells}}. |
| |T1.2S=1 | | |T1.2S=1 |
| |T1.3=327 | | |T1.3=327 |
| Line 593: |
Line 592: |
| |T1.6S=2 | | |T1.6S=2 |
| |T1.7=119-1 | | |T1.7=119-1 |
| |T1.7E=Do 50 {{Color-link|Mini-Turbo|#A1A1FF}} boosts. | | |T1.7E=Do 50 {{Color-link|#A1A1FF|Mini-Turbo}} boosts. |
| |T1.7S=2 | | |T1.7S=2 |
| |T1.8=404 | | |T1.8=404 |
| |T1.8E=Cause opponents to crash using a {{Color-link|Mega Mushroom|#A1A1FF}}. | | |T1.8E=Cause opponents to crash using a {{Color-link|#A1A1FF|Mega Mushroom}}. |
| |T1.8S=2 | | |T1.8S=2 |
| |T1.9=5001 | | |T1.9=5001 |
| Line 603: |
Line 602: |
| |TCR2=[[File:MKT Icon QuickTicket.png|70px]] [[Quick ticket]] ×1 | | |TCR2=[[File:MKT Icon QuickTicket.png|70px]] [[Quick ticket]] ×1 |
| |T2.1=392 | | |T2.1=392 |
| |T2.1E=Use 10 {{Color-link|Mushroom|#A1A1FF|Mushrooms}}. | | |T2.1E=Use 10 {{Color-link|#A1A1FF|Mushroom|Mushrooms}}. |
| |T2.1S=1 | | |T2.1S=1 |
| |T2.2=069 | | |T2.2=069 |
| |T2.2E=Land 3 hits with {{Color-link|Bob-omb|#A1A1FF|Bob-ombs}}. | | |T2.2E=Land 3 hits with {{Color-link|#A1A1FF|Bob-omb|Bob-ombs}}. |
| |T2.2S=1 | | |T2.2S=1 |
| |T2.3=101 | | |T2.3=101 |
| Line 624: |
Line 623: |
| |T2.7S=2 | | |T2.7S=2 |
| |T2.8=178 | | |T2.8=178 |
| |T2.8E=Earn a total score of 20,000 or higher in the {{Color-link|Peach Cup|#A1A1FF}}. | | |T2.8E=Earn a total score of 20,000 or higher in the {{Color-link|#A1A1FF|Peach Cup}}. |
| |T2.8S=2 | | |T2.8S=2 |
| |T2.9=057 | | |T2.9=057 |
| |T2.9E=Use {{Color-link|point-boost ticket|#A1A1FF|point-boost tickets}} 3 times. | | |T2.9E=Use {{Color-link|#A1A1FF|point-boost ticket|point-boost tickets}} 3 times. |
| |T2.9S=2 | | |T2.9S=2 |
| |GCR=[[File:MKT Icon 1Ruby.png|70px]] [[Ruby|Rubies]] ×5 | | |GCR=[[File:MKT Icon 1Ruby.png|70px]] [[Ruby|Rubies]] ×5 |
| |G.1=117 | | |G.1=117 |
| |G.1E=Do a total of 5 {{Color-link|Slipstream|#A1A1FF}} boosts. | | |G.1E=Do a total of 5 {{Color-link|#A1A1FF|Slipstream}} boosts. |
| |G.1S=1 | | |G.1S=1 |
| |G.2=067 | | |G.2=067 |
| |G.2E=Land 15 hits with {{Color-link|Banana|#A1A1FF|Bananas}}. | | |G.2E=Land 15 hits with {{Color-link|#A1A1FF|Banana|Bananas}}. |
| |G.2S=1 | | |G.2S=1 |
| |G.3=5001 | | |G.3=5001 |
| |G.3E=Activate {{Color-link|Frenzy|#A1A1FF}} mode 3 times. | | |G.3E=Activate {{Color-link|#A1A1FF|Frenzy}} mode 3 times. |
| |G.3S=1 | | |G.3S=1 |
| |G.4=372 | | |G.4=372 |
| |G.4E=Use a {{Color-link|points-cap ticket|#A1A1FF}}. | | |G.4E=Use a {{Color-link|#A1A1FF|points-cap ticket}}. |
| |G.4S=2 | | |G.4S=2 |
| |G.5=216 | | |G.5=216 |
| Line 649: |
Line 648: |
| |G.6S=2 | | |G.6S=2 |
| |G.7=111 | | |G.7=111 |
| |G.7E=Use {{Color-link|Lightning|#A1A1FF}}. | | |G.7E=Use {{Color-link|#A1A1FF|Lightning}}. |
| |G.7S=2 | | |G.7S=2 |
| |G.8=161 | | |G.8=161 |
| |G.8E=Earn a total score of 15,000 or higher in the {{Color-link|Donkey Kong Cup|#A1A1FF}}. | | |G.8E=Earn a total score of 15,000 or higher in the {{Color-link|#A1A1FF|Donkey Kong Cup}}. |
| |G.8S=2 | | |G.8S=2 |
| |G.9=121 | | |G.9=121 |
| |G.9E=Complete {{Color-link|Coin Rush (Mario Kart Tour)|#A1A1FF|Coin Rush}} 1 time. | | |G.9E=Complete {{Color-link|#A1A1FF|Coin Rush (Mario Kart Tour)|Coin Rush}} 1 time. |
| |G.9S=2 | | |G.9S=2 |
| }} | | }} |
| Line 681: |
Line 680: |
| |width=10% style="background:linear-gradient(#F2E18F,#B9800F)"|[[File:MKT Icon Point-boostticket3.png|70px]] | | |width=10% style="background:linear-gradient(#F2E18F,#B9800F)"|[[File:MKT Icon Point-boostticket3.png|70px]] |
| |-style="color: #FFF" | | |-style="color: #FFF" |
| |style="background:linear-gradient(#864D00,#A26000); border-top:1px solid #B9800F;"|{{Color-link|Toad (species)|#A1A1FF|Toad (Pit Crew)}} ×1 | | |style="background:linear-gradient(#864D00,#A26000); border-top:1px solid #B9800F;"|{{Color-link|#A1A1FF|Toad (species)|Toad (Pit Crew)}} ×1 |
| |style="background:linear-gradient(#864D00,#A26000); border-top:1px solid #B9800F;"|{{Color-link|Blue Royale|#A1A1FF}} ×1 | | |style="background:linear-gradient(#864D00,#A26000); border-top:1px solid #B9800F;"|{{Color-link|#A1A1FF|Blue Royale}} ×1 |
| |style="background:linear-gradient(#864D00,#A26000); border-top:1px solid #B9800F;"|{{Color-link|Lightning Oilpaper|#A1A1FF}} ×1 | | |style="background:linear-gradient(#864D00,#A26000); border-top:1px solid #B9800F;"|{{Color-link|#A1A1FF|Lightning Oilpaper}} ×1 |
| |style="background:linear-gradient(#864D00,#A26000); border-top:1px solid #B9800F;"|Point-boost ticket (Driver) ×5 | | |style="background:linear-gradient(#864D00,#A26000); border-top:1px solid #B9800F;"|Point-boost ticket (Driver) ×5 |
| |style="background:linear-gradient(#864D00,#A26000); border-top:1px solid #B9800F;"|Point-boost ticket (Kart) ×5 | | |style="background:linear-gradient(#864D00,#A26000); border-top:1px solid #B9800F;"|Point-boost ticket (Kart) ×5 |
| Line 702: |
Line 701: |
| |width=10% style="background:linear-gradient(#F2E18F,#B9800F)"|[[File:MKT Icon Level-boostticket9.png|70px]] | | |width=10% style="background:linear-gradient(#F2E18F,#B9800F)"|[[File:MKT Icon Level-boostticket9.png|70px]] |
| |-style="color: #FFF" | | |-style="color: #FFF" |
| |style="background:linear-gradient(#864D00,#A26000); border-top:1px solid #B9800F;"|{{Color-link|Coins|#A1A1FF}} ×3,000 | | |style="background:linear-gradient(#864D00,#A26000); border-top:1px solid #B9800F;"|{{Color-link|#A1A1FF|Coins}} ×3,000 |
| |style="background:linear-gradient(#864D00,#A26000); border-top:1px solid #B9800F;"|{{Color-link|Ruby|#A1A1FF|Rubies}} ×10 | | |style="background:linear-gradient(#864D00,#A26000); border-top:1px solid #B9800F;"|{{Color-link|#A1A1FF|Ruby|Rubies}} ×10 |
| |style="background:linear-gradient(#864D00,#A26000); border-top:1px solid #B9800F;"|{{Color-link|Point-boost ticket|#A1A1FF}} (Glider) ×3 | | |style="background:linear-gradient(#864D00,#A26000); border-top:1px solid #B9800F;"|{{Color-link|#A1A1FF|Point-boost ticket}} (Glider) ×3 |
| |style="background:linear-gradient(#864D00,#A26000); border-top:1px solid #B9800F;"|Level-boost ticket (High-End driver) ×1 | | |style="background:linear-gradient(#864D00,#A26000); border-top:1px solid #B9800F;"|Level-boost ticket (High-End driver) ×1 |
| |style="background:linear-gradient(#864D00,#A26000); border-top:1px solid #B9800F;"|Level-boost ticket (High-End kart) ×1 | | |style="background:linear-gradient(#864D00,#A26000); border-top:1px solid #B9800F;"|Level-boost ticket (High-End kart) ×1 |
| Line 723: |
Line 722: |
| |width=10% style="background:linear-gradient(#F2E18F,#B9800F)"|[[File:MKT Icon Points-capticket9.png|70px]] | | |width=10% style="background:linear-gradient(#F2E18F,#B9800F)"|[[File:MKT Icon Points-capticket9.png|70px]] |
| |-style="color: #FFF" | | |-style="color: #FFF" |
| |style="background:linear-gradient(#864D00,#A26000); border-top:1px solid #B9800F;"|{{Color-link|Level-boost ticket|#A1A1FF}} (Normal glider) ×1 | | |style="background:linear-gradient(#864D00,#A26000); border-top:1px solid #B9800F;"|{{Color-link|#A1A1FF|Level-boost ticket}} (Normal glider) ×1 |
| |style="background:linear-gradient(#864D00,#A26000); border-top:1px solid #B9800F;"|Level-boost ticket (Super glider) ×1 | | |style="background:linear-gradient(#864D00,#A26000); border-top:1px solid #B9800F;"|Level-boost ticket (Super glider) ×1 |
| |style="background:linear-gradient(#864D00,#A26000); border-top:1px solid #B9800F;"|Level-boost ticket (High-End glider) ×1 | | |style="background:linear-gradient(#864D00,#A26000); border-top:1px solid #B9800F;"|Level-boost ticket (High-End glider) ×1 |
The Anniversary Tour was the seventy-ninth tour of Mario Kart Tour, which began on September 21, 2022 and ended on October 4, 2022. This tour celebrated three years since the release of Mario Kart Tour on September 25, 2019; however, unlike the 1st and 2nd Anniversary Tours, this tour's name did not contain a number representing the anniversary it celebrated.
This tour marked the end of the two-tour event celebrating the third anniversary of Mario Kart Tour that started in the previous tour. This tour featured an upgraded Token Shop that included items like Metal Mario, Pink Gold Peach, the Wild Wing, and three golden pipes. This tour also introduced the second set of two 3rd Anniversary Challenges cards in addition to continuing the 3 Year Anniv. Log-In Bonus and the 3rd Anniversary Challenges 1 card from the previous tour.[1]
Like the 2nd Anniversary Tour and Metropolitan Tour, only city courses appeared in the tour. This tour also introduced new routes for both Sydney Sprint and Berlin Byways, named Sydney Sprint 3 and Berlin Byways 3 respectively, the former of which was previously seen in the course's appearance in the Booster Course Pass for Mario Kart 8 Deluxe. It also introduced the R/T variants of both Amsterdam Drift 2 and Singapore Speedway 2, which debuted in the Metropolitan Tour and Ocean Tour, respectively. With the introduction of these courses, this was the first tour since the Samurai Tour thirteen tours prior to introduce new R/T variants, the first tour in the game to introduce the R/T variants of multiple city courses, and the first tour since the Ice Tour seventy tours prior to introduce both multiple new courses and multiple R/T variants simultaneously. It also features the return of Tokyo Blur, Berlin Byways 2, Los Angeles Laps 3, and Sydney Sprint 2. This was also the only tour to feature the T variants of Berlin Byways 3 and Sydney Sprint 3.
Despite the new courses not being related to London or Britain, and the tour not including returning London Loop tracks, the new vehicles are a variant of the Double-Decker and a kart based on a Hackney carriage, in addition to a new variant of Mario, where he is in his King's Crown and King's Outfit from Super Mario Odyssey.
This was the last tour to feature the regular week pipes which would be fired with rubies and contain spotlight items, as they were removed after this tour in favor of a Spotlight Shop that was implemented in the following tour. In addition to the removal of ruby pipes, this was the last tour where commemorative items and the spotlight items from the first and second week were raised to a higher shelf on the first, second, and third course of every cup, respectively, restricting shelf boosts after this tour to driver cups and the first course in a cup for Mii Racing Suits. This was also the last tour to have only twelve cups as the next tour would have fifteen.
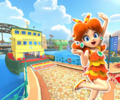
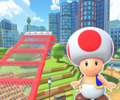
This tour's Coin Rush course was Tokyo Blur, and the menu's background featured the Sydney Harbour Bridge as the landmark for this tour, which was reused from the April–May 2021 and September 2021 Sydney Tours.
Despite the tenth set of Expert Challenges ending in the last tour, the eleventh set was not made available at the start of this tour and was instead made available at the start of the Battle Tour.
Starting from this tour, the Platinum Taxi and Clanky Kart are available in regular tour pipes, including the All-Clear Pipe.
Spotlights[edit]
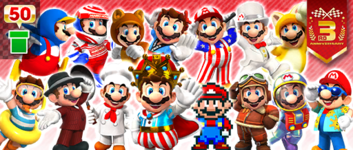
Anniversary Pipe 1
September 20, 2022, 11:00 p.m. (PT) –
October 4, 2022, 10:59 p.m. (PT)
|
Anniversary Pipe 2
September 27, 2022, 11:00 p.m. (PT) –
October 4, 2022, 10:59 p.m. (PT)
|
|
|
| Drivers
|
Karts
|
Gliders
|
Drivers
|
Karts
|
Gliders
|
|
|
|
|
|
|
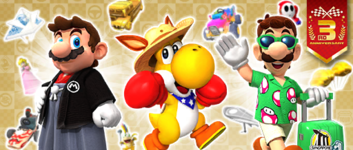
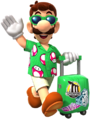
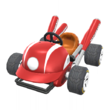
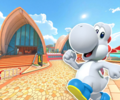
| Mario (Hakama), Yoshi (Kangaroo) and Luigi (Vacation)
|
Gold Double-Decker, Kabuki Dasher, and Tropical Truck
|
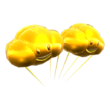
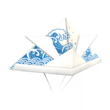
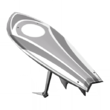
Gold Cloud Balloons, White Waves Origami Glider, and Silver Surf Master
|
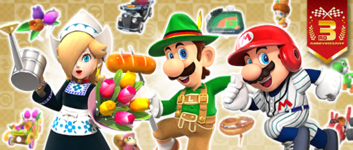
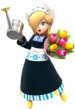
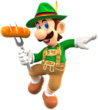
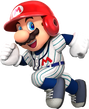
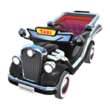
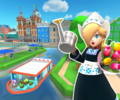
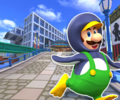
Rosalina (Volendam), Luigi (Lederhosen) and Mario (Baseball)
|
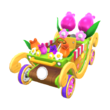
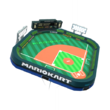
Black Carriage, Pinch Hitter, and Flower Kart
|
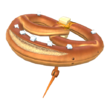
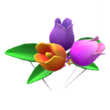
Pretzel Glider, Home-Field Glider, and Tulip Corsage
|
Special pipes[edit]
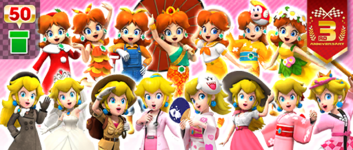
Mario Pipe
September 24, 2022, 11:00 p.m. (PT) –
October 4, 2022, 10:59 p.m. (PT)
|
Peach & Daisy Pipe
September 24, 2022, 11:00 p.m. (PT) –
October 4, 2022, 10:59 p.m. (PT)
|
|
|
| Drivers
|
Drivers
|
|
|
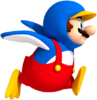
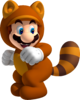
| Mario (Swimwear), Mario (Musician), Mario (Chef), Mario (King), Mario (SNES), Mario (Aviator), Mario (Satellaview), Mario (Sunshine), Penguin Mario, Mario (Racing), Tanooki Mario, Mario (Happi), Mario (Golf), Mario (Tuxedo), and Cat Mario
|
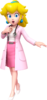
Peach (Wintertime), Peach (Wedding), Peach (Explorer), Dr. Peach, Peach (Yukata), Peach (Vacation), Peach (Kimono), Peach (Happi), Daisy (Holiday Cheer), Daisy (Swimwear), Daisy (Farmer), Daisy (Thai Dress), Daisy (Sailor), Daisy (Yukata) and Daisy (Fairy)
|
- Names in other languages
- Mario Pipe
| Language
|
Name
|
Meaning
|
Notes
|
| Japanese
|
マリオドカン[?]
Mario Dokan
|
Mario Pipe
|
|
| Chinese (simplified)
|
马力欧水管[?]
Mǎlìōu Shuǐguǎn
|
Mario Pipe
|
|
| Chinese (traditional)
|
瑪利歐水管[?]
Mǎlìōu Shuǐguǎn
|
Mario Pipe
|
|
| French
|
Tuyau de Mario[?]
|
Mario Pipe
|
|
| German
|
Mario-Röhre[?]
|
Mario Pipe
|
|
| Italian
|
Tubo di Mario[?]
|
Mario Pipe
|
|
| Korean
|
마리오 토관[?]
Mario Togwan
|
Mario Pipe
|
|
| Portuguese
|
Cano Mario[?]
|
Mario Pipe
|
|
| Spanish
|
Tubería de Mario[?]
|
Mario Pipe
|
|
- Peach & Daisy Pipe
| Language
|
Name
|
Meaning
|
Notes
|
| Japanese
|
ビーチ&デイジードカン[?]
Pīchi & Deijī Dokan
|
Peach & Daisy Pipe
|
|
| Chinese (simplified)
|
桃花公主&菊花公主水管[?]
Táohuā Gōngzhǔ & Júhuā Gōngzhǔ Shuǐguǎn
|
Princess Peach & Princess Daisy Pipe
|
|
| Chinese (traditional)
|
碧姬公主&黛西公主水管[?]
Bìjī Gōngzhǔ & Dàixī Gōngzhǔ Shuǐguǎn
|
Princess Peach & Princess Daisy Pipe
|
|
| French
|
Tuyau de Peach et Daisy[?]
|
Peach and Daisy Pipe
|
|
| German
|
Peach-&-Daisy-Röhre[?]
|
Peach & Daisy Pipe
|
|
| Italian
|
Tubo di Peach e Daisy[?]
|
Peach and Daisy Pipe
|
|
| Korean
|
피치&데이지 토관[?]
Pichi & Deiji Togwan
|
Peach & Daisy Pipe
|
|
| Portuguese
|
Cano Peach e Daisy[?]
|
Peach and Daisy Pipe
|
|
| Spanish
|
Tubería de Peach y Daisy[?]
|
Peach and Daisy Pipe
|
|

Dixie Kong Cup
Ranked cup
(week 1)
|
Sydney Sprint 3
|
 1,200 1,200
|
Tokyo Blur R/T
|
1,200
|
Singapore Speedway 2R/T
|
2,300
|
Ring Race
|
| 1,800
|
1,800
|
3,400
|
Berlin Byways 2
|
Pink Shy Guy
|
| 2,100
|
2,100
|
4,000
|
12
|
| 2,400
|
2,400
|
4,500
|
20
|
| 6,100
|
6,100
|
11,300
|
26
|

Mii Cup
|
Los Angeles Laps 3T
|
2,000
|
Berlin Byways 3
|
1,100
|
Sydney Sprint 2R
|
1,400
|
Glider Challenge
|
| 3,100
|
1,700
|
2,200
|
Sydney Sprint 3
|
Baby Rosalina
|
| 3,600
|
2,000
|
2,600
|
300
|
| 4,200
|
2,300
|
3,000
|
600
|
| 10,100
|
5,500
|
7,200
|
800
|

Metal Mario Cup
Ranked cup
(week 2)
|
Berlin Byways 3T
|
1,800
|
Amsterdam Drift 2R/T
|
1,800
|
Los Angeles Laps 3R/T
|
2,200
|
Time Trial
|
| 2,900
|
2,900
|
3,500
|
Singapore Speedway 2
|
Koopa Troopa
|
| 3,300
|
3,400
|
4,000
|
1:47.00
|
| 3,900
|
3,900
|
4,600
|
1:42.00
|
| 9,000
|
9,100
|
10,800
|
1:37.00
|

Cat Peach Cup
|

Sydney Sprint 2
|
1,500
|
Berlin Byways 2
|
1,800
|
Los Angeles Laps 3R
|
1,400
|
Smash Small Dry Bones
|
| 2,400
|
3,000
|
2,400
|
Amsterdam Drift 2
|
Mario
|
| 2,800
|
3,500
|
2,700
|
4
|
| 3,200
|
4,100
|
3,200
|
6
|
| 7,300
|
9,200
|
7,200
|
8
|

Donkey Kong Cup
|
Berlin Byways 3R
|
1,300
|
Sydney Sprint 3T
|
2,100
|
Tokyo Blur R
|
1,200
|
Do Jump Boosts
|
| 2,200
|
3,600
|
2,000
|
Los Angeles Laps 3
|
Baby Peach
|
| 2,500
|
4,200
|
2,300
|
10
|
| 3,000
|
4,900
|
2,700
|
14
|
| 6,500
|
10,700
|
5,800
|
17
|

Kamek Cup
|

Sydney Sprint 2T
|
2,200
|
Singapore Speedway 2R
|
1,900
|
Los Angeles Laps 3
|
1,500
|
Steer Clear of Obstacles
|
| 3,800
|
3,400
|
2,600
|
Sydney Sprint 3
|
Wario
|
| 4,400
|
3,900
|
2,900
|
1
|
| 5,200
|
4,600
|
3,500
|
2
|
| 10,900
|
9,700
|
7,300
|
3
|

Pink Gold Peach Cup
|
Amsterdam Drift 2
|
1,500
|
Sydney Sprint 3
|
1,400
|
Berlin Byways 2T
|
2,300
|
Goomba Takedown
|
| 2,700
|
2,500
|
4,100
|
Sydney Sprint 2
|
Birdo (Yellow)
|
| 3,000
|
2,900
|
4,600
|
30
|
| 3,600
|
3,400
|
5,500
|
50
|
| 7,400
|
7,000
|
11,300
|
70
|

Mario Cup
|
Sydney Sprint 3R
|
1,400
|

Singapore Speedway 2
|
1,900
|
Berlin Byways 3
|
1,300
|
Ring Race
|
| 2,700
|
3,600
|
2,400
|
Tokyo Blur
|
Lakitu
|
| 3,000
|
4,100
|
2,700
|
15
|
| 3,600
|
4,900
|
3,300
|
25
|
| 7,200
|
9,700
|
6,500
|
30
|

Luigi Cup
|
Sydney Sprint 2R
|
1,600
|
Berlin Byways 2R
|
2,000
|
Amsterdam Drift 2R
|
1,600
|
Time Trial
|
| 3,000
|
3,900
|
3,100
|

Berlin Byways 3
|
Luigi
|
| 3,400
|
4,400
|
3,500
|
1:40.00
|
| 4,100
|
5,300
|
4,300
|
1:34.00
|
| 7,900
|
10,200
|
8,200
|
1:27.00
|

Toadette Cup
|

Singapore Speedway 2T
|
2,600
|
Sydney Sprint 3R
|
1,600
|
Berlin Byways 3T
|
2,100
|
Combo Attack
|
| 5,100
|
3,100
|
4,200
|
Sydney Sprint 2T
|
Boomerang Bro
|
| 5,800
|
3,500
|
4,700
|
10
|
| 7,000
|
4,300
|
5,700
|
15
|
| 13,100
|
8,000
|
10,700
|
20
|

Peach Cup
|
Tokyo Blur
|
1,700
|
Berlin Byways 3R
|
1,700
|
Sydney Sprint 2T
|
2,600
|
Break Item Boxes
|
| 3,400
|
3,300
|
5,100
|
Los Angeles Laps 3
|
Yoshi
|
| 3,900
|
3,700
|
5,800
|
10
|
| 4,700
|
4,600
|
7,000
|
15
|
| 8,600
|
8,300
|
12,800
|
20
|

Toad Cup
|
Amsterdam Drift 2T
|
2,500
|
Los Angeles Laps 3T
|
2,600
|
Sydney Sprint 3T
|
2,700
|
Big Reverse Race
|
| 5,200
|
5,400
|
5,500
|

Singapore Speedway 2
|
Any character
|
| 5,800
|
6,100
|
6,200
|
50cc
|
| 7,200
|
7,500
|
7,600
|
100cc
|
| 12,700
|
13,200
|
13,500
|
150cc
|
Signature kart sets[edit]
Drivers with a corresponding cup are bumped one rank up in every course of their cup.
| Cup
|
Driver
|
Kart
|
Glider
|
| First course of every cup
|

|

|
|
| Second course of every cup
|
  
|
  
|
  
|
| Third course of every cup
|
  
|
  
|
  
|

|

|
—
|
—
|

|
|
—
|
—
|

|

|
—
|
—
|

|

|
—
|
—
|

|

|
—
|
—
|

|

|
—
|
—
|

|

|
—
|
—
|

|

|
—
|
—
|

|

|
—
|
—
|

|

|
—
|
—
|

|

|
—
|
—
|

|

|
—
|
—
|
Today's Challenge[edit]
Players' most recently used kart and glider are chosen, and favorite and favored ones have extra priority. Opponents are arranged randomly. On day 1 of this tour, players finish a race in Los Angeles Laps 3T in the Mii Cup using Birdo (Black) for a free pipe launch. Starting from day 2, players have to finish a race in the earliest incomplete course that is not in any of the ranked cups using the driver shown on the course's thumbnail every day to obtain the corresponding reward in the table below. Once all of the courses are completed, the courses are selected at random.
| Day(s)
|
Reward
|
| 1-4, 6-9, 11-13
|

Free pipe launch
|
| 5, 10
|

Rubies ×5
|
| 14
|

Badge
|
| Today's Challenge Pipe
|
|
| Pipe contents
|
| Rubies, coins, driver (Normal/Super/High-End), kart (Normal/Super/High-End), glider (Normal/Super/High-End), item tickets
|
Rewards[edit]
Gold cells indicate rewards that are exclusive to Gold Pass members.
| Grand Stars |
 |
15 |
20 |
25 |
30 |
35 |
40 |
42 |
50 |
60 |
70 |
75 |
80 |
85 |
90 |
100 |
110 |
115 |
125 |
145 |
165 |
185 |
205 |
225 |
245 |
255 |
265 |
Total |
Grand total
|
| Free pipe launch
|
|
|
1 |
|
|
|
|
1 |
|
|
1 |
|
|
|
1 |
|
|
1 |
|
1 |
|
|
|
|
|
|
|
6
|
| Coins
|

|
|
500 |
|
|
|
|
|
500 |
|
1000 |
|
1000 |
|
|
|
|
|
1000 |
|
|
|
|
1000 |
|
|
|
5000
|
15000
|
|
5000 |
|
|
|
|
|
5000 |
|
|
|
|
|
|
|
|
|
|
|
|
|
|
|
|
|
|
10000
|
| Rubies
|

|
10 |
|
|
|
|
5 |
|
|
|
|
|
|
3 |
|
|
|
|
3 |
|
|
|
|
|
|
|
|
21
|
56
|
| 15 |
|
|
|
|
10 |
|
|
|
|
|
|
10 |
|
|
|
|
|
|
|
|
|
|
|
|
|
35
|
| Item tickets
|

|
|
|
|
|
|
|
|
|
5 |
|
|
|
|
|
|
|
|
|
5 |
|
|
|
|
|
|
|
10
|
30
|
|
|
|
|
|
|
|
|
10 |
|
|
|
|
|
|
|
|
|
10 |
|
|
|
|
|
|
|
20
|
| Star tickets
|

|
|
|
|
|
|
|
|
|
|
|
4 |
|
|
|
|
|
|
|
|
|
|
|
|
|
|
|
4
|
4
|
|
|
|
|
|
|
|
|
|
|
|
|
|
|
|
|
|
|
|
|
|
|
|
|
|
|
0
|
| Point-boost tickets
|

|
|
|
|
|
1 |
|
|
|
|
|
|
|
|
|
|
1 |
|
|
|
|
|
1 |
|
|
|
|
3
|
8
|
|
|
|
|
|
|
|
|
|
|
|
|
|
|
|
|
|
|
|
|
|
5 |
|
|
|
|
5
|

|
|
|
|
1 |
|
|
|
|
|
|
|
|
|
|
1 |
|
|
|
|
|
1 |
|
|
|
|
|
3
|
8
|
|
|
|
|
|
|
|
|
|
|
|
|
|
|
|
|
|
|
|
|
5 |
|
|
|
|
|
5
|

|
|
|
1 |
|
|
|
|
|
|
|
|
|
|
1 |
|
|
|
|
|
1 |
|
|
|
|
|
|
3
|
8
|
|
|
|
|
|
|
|
|
|
|
|
|
|
|
|
|
|
|
|
5 |
|
|
|
|
|
|
5
|
| Level-boost tickets
|
|
|
|
|
|
|
|
|
|
|
|
|
|
|
|
|
|
|
|
|
|
|
|
 |
 |
 |
3
|
19
|
|
|
(3) |

(3) |

(3) |
|
|
|
|
|
 |
 |
|
|
 |
 |
|
|
|
|
|
|
|
|
|
|
16
|
3 Year Anniv. Log-In Bonus[edit]
A 14-day "3 Year Anniv. Log-In Bonus" continued from the previous tour and served as the log-in bonus for the 3rd anniversary event from September 7, 2022 to October 4, 2022.
| Day
|
Reward
|
| 1
|
Rubies ×5
|
| 2
|
Coins ×3,000
|
| 3
|
Coins ×3,000
|
| 4
|
Coins ×3,000
|
| 5
|
Rubies ×5
|
| 6
|
Coins ×3,000
|
| 7
|
Coins ×3,000
|
| 8
|
Coins ×3,000
|
| 9
|
Coins ×3,000
|
| 10
|
Rubies ×10
|
| 11
|
Coins ×3,000
|
| 12
|
Coins ×3,000
|
| 13
|
Coins ×3,000
|
| 14
|
Rubies ×10
|
New content[edit]
Drivers[edit]
Mii Racing Suits[edit]
Gliders[edit]
Courses[edit]
Paid banners[edit]
| Name
|
Availability
|
Cost
|
Contents
|
Banner image
|
| Value Pack
|
September 21, 2022 – October 4, 2022
|
US$1.99
|
 Rubies ×5 Rubies ×5
 Star ticket ×2 Star ticket ×2
 Item ticket ×3 Item ticket ×3
|
|
| Driver Point-Boost Tickets 10 Ticket Set
|
September 21, 2022 – October 4, 2022
|
US$3.99
|
 Driver point-boost ticket ×10 Driver point-boost ticket ×10
|
|
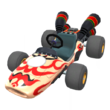
| Celebrate the Anniversary Tour with the Daikon Rocket!
|
September 21, 2022 – October 4, 2022
|
US$3.99
|
 Daikon Rocket ×1 Daikon Rocket ×1
|
|
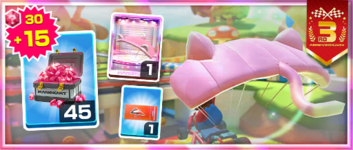
| Cat Parafoil Pack
|
September 21, 2022 – October 4, 2022
|
US$19.99
|
 Cat Parafoil ×1 Cat Parafoil ×1
 Glider point-boost ticket ×1
Rubies ×45 Glider point-boost ticket ×1
Rubies ×45
|
|
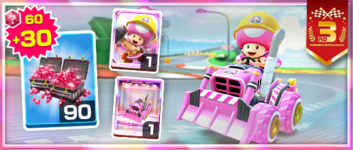
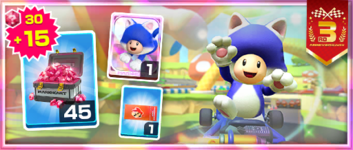
| Builder Toadette Pack
|
September 21, 2022 – October 4, 2022
|
US$39.99
|
 Builder Toadette ×1 Builder Toadette ×1
 Pink Dozer ×1 Pink Dozer ×1
Rubies ×90
|
|
| Mario's Mustache Pack
|
September 21, 2022 – October 4, 2022
|
US$39.99
|
 Mario's Mustache ×1 Mario's Mustache ×1
Driver point-boost ticket ×5
Glider point-boost ticket ×5
Rubies ×90
|
|
| Cat Toad Pack
|
September 28, 2022 – October 4, 2022
|
US$19.99
|
 Cat Toad ×1 Cat Toad ×1
Driver point-boost ticket ×1
Rubies ×45
|
|
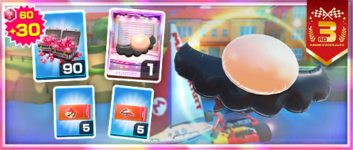
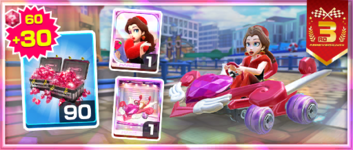
| Pauline (Rose) Pack
|
September 28, 2022 – October 4, 2022
|
US$39.99
|
 Pauline (Rose) ×1 Pauline (Rose) ×1
 Cupid's Arrow ×1 Cupid's Arrow ×1
Rubies ×90
|
|
Challenges[edit]
| Tour Challenges 1
|
|
Tour Challenges 2
|
|
Gold Challenges
|
Completion reward:  Coin Rush ticket ×1 Coin Rush ticket ×1
|
Completion reward:  Quick ticket ×1 Quick ticket ×1
|
Completion reward:  Rubies ×5 Rubies ×5
|

|

|

|

|

|

|

|

|

|
| Land 5 hits with Red Shells.
|
Land 3 hits with Green Shells.
|
Get 1st place in a 100cc or higher race 2 times in a row.
|
Use 10 Mushrooms.
|
Land 3 hits with Bob-ombs.
|
Get a Fantastic combo a total of 5 times.
|
Do a total of 5 Slipstream boosts.
|
Land 15 hits with Bananas.
|
Activate Frenzy mode 3 times.
|

|

|

|

|

|

|

|

|

|
| Get an item from the Tier Shop.
|
Get 3rd place or higher 30 times.
|
Cause an opponent to crash while gliding.
|
Get 1 item from the Daily Selects section of the Shop.
|
Cause opponents to crash a total of 3 times using a driver wearing gloves.
|
Earn a score of 7,000 or higher on 3 T or R/T courses.
|
Use a points-cap ticket.
|
Cause opponents to crash 5 times in a single race using a driver with a hat.
|
Earn a score of 10,000 or higher on 5 courses.
|

|

|

|

|

|

|

|

|

|
| Do 50 Mini-Turbo boosts.
|
Cause opponents to crash using a Mega Mushroom.
|
Race in every course of every cup, including bonus challenges.
|
Drive a distance of 20,000 or more on a city course.
|
Earn a total score of 20,000 or higher in the Peach Cup.
|
Use point-boost tickets 3 times.
|
Use Lightning.
|
Earn a total score of 15,000 or higher in the Donkey Kong Cup.
|
Complete Coin Rush 1 time.
|
| Premium Challenges
|
|
Premium Challenges+
|
| Cost: US$4.99
|
Cost: US$14.99
|
Three in a row reward:  Coins ×300 Coins ×300
|
Three in a row reward: Coins ×300
|
Completion reward:  Penguin Luigi ×1 Penguin Luigi ×1
|
Completion reward:  Rubies ×20 Rubies ×20
|

|

|

|

|

|

|
| Toad (Pit Crew) ×1
|
Blue Royale ×1
|
Lightning Oilpaper ×1
|
Point-boost ticket (Driver) ×5
|
Point-boost ticket (Kart) ×5
|
Point-boost ticket (Glider) ×5
|
| Land 5 hits with Green Shells.
|
Land 10 hits with Bananas.
|
Land 10 hits with Bob-ombs.
|
Land 10 hits with Green Shells.
|
Land 20 hits with Bananas.
|
Use 30 Mushrooms.
|

|

|
|

|

|

|
| Coins ×3,000
|
Rubies ×10
|
Point-boost ticket (Glider) ×3
|
Level-boost ticket (High-End driver) ×1
|
Level-boost ticket (High-End kart) ×1
|
Level-boost ticket (High-End glider) ×1
|
| Do 50 Jump Boosts.
|
Participate in a race.
|
Do 100 Mini-Turbo boosts.
|
Do 100 Jump Boosts.
|
Do 150 Mini-Turbo boosts.
|
Collect a total of 300 coins in races.
|

|

|
|

|

|

|
| Level-boost ticket (Normal glider) ×1
|
Level-boost ticket (Super glider) ×1
|
Level-boost ticket (High-End glider) ×1
|
Points-cap ticket (High-end driver) ×1
|
Points-cap ticket (High-end kart) ×1
|
Points-cap ticket (High-end glider) ×1
|
| Get 1st place in a race 10 times.
|
Get 1st place in a race 15 times.
|
Get 1st place in a race 20 times.
|
Get 1st place in a race 15 times.
|
Get 1st place in a race 20 times.
|
Get 1st place in a race 30 times.
|
| Tour Multiplayer Challenges
|
Three in a row reward:  Coins ×300 Coins ×300
|
Completion reward:  Rubies ×5 Rubies ×5
|

|

|

|
| Do 10 Jump Boosts in multiplayer.
|
Land 3 hits with Red Shells in multiplayer.
|
Land 3 hits with Bananas in multiplayer.
|

|

|

|
| Join 3 multiplayer races.
|
Join 5 multiplayer races.
|
Join 10 multiplayer races.
|

|

|

|
| Get 3rd place or higher in a multiplayer race.
|
Get 3rd place or higher 3 times in a multiplayer race.
|
Get 3rd place or higher 5 times in a multiplayer race.
|
Initial pipe appearance rates[edit]
All-Clear Pipe[edit]
The All-Clear Pipe randomly shoots out one of the following regular High-End items. The appearance rate can be viewed via the "Pipe content" link on the Gold Pass purchase screen.
| High-End items obtainable from the All-Clear Pipe during the Anniversary Tour
|
Rate (each)
|
| High-End drivers
|
Dry Bowser, Metal Mario, Pink Gold Peach, Cat Peach, Pauline, Peach (Explorer), Nabbit, Captain Toad, King Bob-omb, Peachette, Black Yoshi, White Yoshi, Peach (Wintertime), Chargin' Chuck, Cat Toad, Wario (Cowboy), Birdo (Black), Penguin Luigi, Dixie Kong, Funky Kong, Bowser Jr. (Pirate), Daisy (Swimwear), Ice Mario
|
0.9615%
|
| High-End karts
|
B Dasher, Badwagon, Carrot Kart, Cat Cruiser, Sneeker, Sports Coupe, Circuit Special, Bruiser, Wild Wing, Bumble V, Steel Driver, Macharon, Wildfire Flyer, Red B Dasher, Platinum Taxi, Wild Pink, Choco Macharon, P-Wing, Black Turbo Birdo, Green Apple Kart, Poison Apple Kart, Dozer Dasher, Clanky Kart, Banana Master, Offroader, Dreamy Egg, Head Honcho, Pink Wing, Koopa King, Cact-X, Sushi Racer, Green Circuit, Crawly Kart, Black Dozer, Iron Cucumber, Cact-Ice, Pink Dozer, Lime Tea Coupe, Sunny Surf Sailer, Kamek's Zoom Broom, Black Cat Cruiser, Vampire Flyer, White Snow Skimmer, Gray Cat Cruiser
|
| High-End gliders
|
Swooper, Cloud Glider, Gold Glider, Pink Gold Paper Glider, Royal Parachute, Dry Bowser Umbrella, Blizzard Balloons, Sunset Balloons, Strawberry Crêpe, Wonderful Wings, Starchute, Silver Starchute, Daisy Glider, Butterfly Wings, Butterfly Sunset, Butterfly Prism, Meteor Balloons, Crimson Crane, Springtime Crane, Strawberry Donut, Heart Balloons, Great Sail, Black Great Sail, Dragon Wings, Black Toe-Bean Balloons, Toe-Bean Balloons, Tropical Glider, 8-Bit Star, Manta Glider, Silver Bells, Treasure Map, Cheep Cheep Masks, Calico Parafoil, Snow Crystals, Silver Surf Master, Starry Great Sail, Candlelight Flight
|
Anniversary Pipe 1[edit]
| Items obtained from a new Anniversary Pipe 1
|
| Item
|

Normal
|

Super
|

High-End
|
Featured High-End
|
| Driver
|
Kart
|
Glider
|
Driver
|
Kart
|
Glider
|
Driver
|
Kart
|
Glider
|
Driver
|
Kart
|
Glider
|
| Amount
|
30
|
24
|
14
|
9
|
7
|
4
|
1
|
1
|
1
|
3
|
3
|
3
|
| Class
|
Parts
|
Rate (each)
|
| High-End Spotlight Drivers
|
Yoshi (Kangaroo), Mario (Hakama), Luigi (Vacation)
|
1.0000%
|
| High-End Spotlight Karts
|
Gold Double-Decker, Kabuki Dasher, Tropical Truck
|
1.0000%
|
| High-End Spotlight Gliders
|
Gold Cloud Balloons, White Waves Origami Glider, Silver Surf Master
|
1.0000%
|
| High-End drivers
|
Dry Bowser, Metal Mario, Pink Gold Peach, Cat Peach, Pauline, Peach (Explorer), Nabbit, Captain Toad, King Bob-omb, Peachette, Black Yoshi, White Yoshi, Peach (Wintertime), Chargin' Chuck, Cat Toad, Wario (Cowboy), Birdo (Black), Penguin Luigi, Mario (Baseball), Dixie Kong, Funky Kong, Bowser Jr. (Pirate), Daisy (Swimwear), Luigi (Lederhosen), Ice Mario, Rosalina (Volendam)
|
0.0385%
|
| High-End karts
|
B Dasher, Badwagon, Carrot Kart, Cat Cruiser, Sneeker, Sports Coupe, Circuit Special, Bruiser, Wild Wing, Bumble V, Steel Driver, Macharon, Wildfire Flyer, Red B Dasher, Platinum Taxi, Wild Pink, Choco Macharon, P-Wing, Black Turbo Birdo, Green Apple Kart, Poison Apple Kart, Dozer Dasher, Clanky Kart, Banana Master, Offroader, Dreamy Egg, Head Honcho, Pink Wing, Koopa King, Cact-X, Sushi Racer, Green Circuit, Crawly Kart, Black Dozer, Iron Cucumber, Cact-Ice, Pink Dozer, Lime Tea Coupe, Sunny Surf Sailer, Pinch Hitter, Kamek's Zoom Broom, Black Cat Cruiser, Vampire Flyer, White Snow Skimmer, Gray Cat Cruiser, Flower Kart, Black Carriage
|
0.0213%
|
| High-End gliders
|
Swooper, Cloud Glider, Gold Glider, Pink Gold Paper Glider, Royal Parachute, Dry Bowser Umbrella, Blizzard Balloons, Sunset Balloons, Strawberry Crêpe, Wonderful Wings, Starchute, Silver Starchute, Daisy Glider, Butterfly Wings, Butterfly Sunset, Butterfly Prism, Meteor Balloons, Crimson Crane, Strawberry Donut, Heart Balloons, Great Sail, Black Great Sail, Dragon Wings, Black Toe-Bean Balloons, Toe-Bean Balloons, Tropical Glider, 8-Bit Star, Manta Glider, Silver Bells, Treasure Map, Cheep Cheep Masks, Pretzel Glider, Calico Parafoil, Snow Crystals, Starry Great Sail, Home-Field Glider, Candlelight Flight, Tulip Corsage
|
0.0256%
|
| Super drivers
|
Donkey Kong, Toad, Bowser, Luigi, Mario, Peach, Yoshi, Daisy, Lakitu, King Boo, Toadette, Bowser Jr., Waluigi, Wario, Rosalina, Birdo, Diddy Kong, Hammer Bro, Boomerang Bro, Fire Bro, Ice Bro, Red Yoshi, Black Shy Guy, Pink Shy Guy, Toad (Pit Crew), Monty Mole, Birdo (Light Blue), Birdo (Yellow), Red Koopa (Freerunning)
|
0.3103%
|
| Super karts
|
Cucumber, Zucchini, Egg 1, Daytripper, Mach 8, Cloud 9, Soda Jet, Koopa Clown, Poltergust 4000, Royale, Barrel Train, Turbo Yoshi, Blue Seven, Flame Flyer, Para-Wing, Super Blooper, Turbo Birdo, Streamliner, DK Jumbo, Red Turbo Yoshi, Light-blue Turbo Birdo, Yellow Turbo Birdo
|
0.3182%
|
| Super gliders
|
Flower Glider, Peach Parasol, BaNaNa Parafoil, Bob-omb Parafoil, Wario Wing, Oilpaper Umbrella, Mushroom Glider, Shell Parachute, Lightning Oilpaper, Blue Flower Glider, Pink Flower Glider, Waluigi Wing, ? Block, 8-Bit Jumping Mario, Eggshell Glider
|
0.2667%
|
| Normal drivers
|
Koopa Troopa, Shy Guy, Dry Bones, Baby Daisy, Baby Luigi, Baby Mario, Baby Peach, Baby Rosalina, Iggy, Larry, Lemmy, Ludwig, Morton, Roy, Wendy
|
2.0000%
|
| Normal karts
|
Birthday Girl, Landship, Bullet Blaster, Mushmellow, Biddybuggy, Pipe Frame, Pipe Buggy, Cheep Charger, Red Kiddie Kart, Koopa Dasher, Green Kiddie Kart
|
2.1818%
|
| Normal gliders
|
Super Glider, Paper Glider, Parachute, Parafoil, Piston Glider, Droplet Glider, BBIA Parafoil, Piranha Plant Parafoil, Minion Paper Glider
|
1.5556%
|
Anniversary Pipe 2[edit]
| Items obtained from a new Anniversary Pipe 2
|
| Item
|
Normal
|
Super
|
High-End
|
Featured High-End
|
| Driver
|
Kart
|
Glider
|
Driver
|
Kart
|
Glider
|
Driver
|
Kart
|
Glider
|
Driver
|
Kart
|
Glider
|
| Amount
|
30
|
24
|
14
|
9
|
7
|
4
|
1
|
1
|
1
|
3
|
3
|
3
|
| Class
|
Parts
|
Rate (each)
|
| High-End Spotlight Drivers
|
Luigi (Lederhosen), Rosalina (Volendam), Mario (Baseball)
|
1.0000%
|
| High-End Spotlight Karts
|
Black Carriage, Flower Kart, Pinch Hitter
|
1.0000%
|
| High-End Spotlight Gliders
|
Pretzel Glider, Tulip Corsage, Home-Field Glider
|
1.0000%
|
| High-End drivers
|
Dry Bowser, Metal Mario, Pink Gold Peach, Cat Peach, Pauline, Peach (Explorer), Mario (Hakama), Nabbit, Captain Toad, King Bob-omb, Peachette, Black Yoshi, White Yoshi, Peach (Wintertime), Chargin' Chuck, Cat Toad, Wario (Cowboy), Birdo (Black), Yoshi (Kangaroo), Penguin Luigi,Dixie Kong, Funky Kong, Bowser Jr. (Pirate), Daisy (Swimwear), Luigi (Lederhosen), Ice Mario, Luigi (Vacation)
|
0.0385%
|
| High-End karts
|
B Dasher, Badwagon, Carrot Kart, Cat Cruiser, Sneeker, Sports Coupe, Circuit Special, Bruiser, Kabuki Dasher, Wild Wing, Bumble V, Steel Driver, Macharon, Wildfire Flyer, Red B Dasher, Platinum Taxi, Wild Pink, Choco Macharon, P-Wing, Black Turbo Birdo, Green Apple Kart, Poison Apple Kart, Dozer Dasher, Clanky Kart, Banana Master, Offroader, Dreamy Egg, Head Honcho, Pink Wing, Koopa King, Cact-X, Sushi Racer, Green Circuit, Crawly Kart, Black Dozer, Iron Cucumber, Cact-Ice, Pink Dozer, Lime Tea Coupe, Sunny Surf Sailer, Kamek's Zoom Broom, Gold Double-Decker, Black Cat Cruiser, Vampire Flyer, White Snow Skimmer, Gray Cat Cruiser, Tropical Truck
|
0.0213%
|
| High-End gliders
|
Swooper, Cloud Glider, Gold Glider, Pink Gold Paper Glider, Royal Parachute, Dry Bowser Umbrella, Blizzard Balloons, Sunset Balloons, Strawberry Crêpe, Wonderful Wings, Starchute, Silver Starchute, Daisy Glider, Butterfly Wings, Butterfly Sunset, Butterfly Prism, Meteor Balloons, Crimson Crane, Strawberry Donut, Heart Balloons, Great Sail, Black Great Sail, Dragon Wings, Black Toe-Bean Balloons, Toe-Bean Balloons, Tropical Glider, 8-Bit Star, Manta Glider, Silver Bells, Treasure Map, Cheep Cheep Masks, White Waves Origami Glider, Calico Parafoil, Snow Crystals, Silver Surf Master, Starry Great Sail, Candlelight Flight, Gold Cloud Balloons
|
0.0256%
|
| Super drivers
|
Donkey Kong, Toad, Bowser, Luigi, Mario, Peach, Yoshi, Daisy, Lakitu, King Boo, Toadette, Bowser Jr., Waluigi, Wario, Rosalina, Birdo, Diddy Kong, Hammer Bro, Boomerang Bro, Fire Bro, Ice Bro, Red Yoshi, Black Shy Guy, Pink Shy Guy, Toad (Pit Crew), Monty Mole, Birdo (Light Blue), Birdo (Yellow), Red Koopa (Freerunning)
|
0.3103%
|
| Super karts
|
Cucumber, Zucchini, Egg 1, Daytripper, Mach 8, Cloud 9, Soda Jet, Koopa Clown, Poltergust 4000, Royale, Barrel Train, Turbo Yoshi, Blue Seven, Flame Flyer, Para-Wing, Super Blooper, Turbo Birdo, Streamliner, DK Jumbo, Red Turbo Yoshi, Light-blue Turbo Birdo, Yellow Turbo Birdo
|
0.3182%
|
| Super gliders
|
Flower Glider, Peach Parasol, BaNaNa Parafoil, Bob-omb Parafoil, Wario Wing, Oilpaper Umbrella, Mushroom Glider, Shell Parachute, Lightning Oilpaper, Blue Flower Glider, Pink Flower Glider, Waluigi Wing, ? Block, 8-Bit Jumping Mario, Eggshell Glider
|
0.2667%
|
| Normal drivers
|
Koopa Troopa, Shy Guy, Dry Bones, Baby Daisy, Baby Luigi, Baby Mario, Baby Peach, Baby Rosalina, Iggy, Larry, Lemmy, Ludwig, Morton, Roy, Wendy
|
2.0000%
|
| Normal karts
|
Birthday Girl, Landship, Bullet Blaster, Mushmellow, Biddybuggy, Pipe Frame, Pipe Buggy, Cheep Charger, Red Kiddie Kart, Koopa Dasher, Green Kiddie Kart
|
2.1818%
|
| Normal gliders
|
Super Glider, Paper Glider, Parachute, Parafoil, Piston Glider, Droplet Glider, BBIA Parafoil, Piranha Plant Parafoil, Minion Paper Glider
|
1.5556%
|
Mario Pipe[edit]
| Items obtained from a new Mario Pipe
|
| Item
|
Normal
|
Super
|
High-End
|
| Driver
|
Kart
|
Glider
|
Driver
|
Kart
|
Glider
|
Driver
|
Kart
|
Glider
|
| Amount
|
9
|
13
|
9
|
5
|
4
|
4
|
6
|
0
|
0
|
| Class
|
Parts
|
Rate (each)
|
| High-End drivers
|
Tanooki Mario, Mario (Musician), Mario (Swimwear), Mario (Happi, Mario (Sunshine, Mario (Tuxedo), Mario (Chef), Mario (Aviator), Mario (SNES), Mario (Satellaview), Cat Mario, Mario (Racing), Penguin Mario, Mario (Golf), Mario (King)
|
0.8000%
|
| Super drivers
|
Donkey Kong, Toad, Bowser, Luigi, Mario, Peach, Yoshi, Daisy, Lakitu, King Boo, Toadette, Bowser Jr., Waluigi, Wario, Rosalina, Birdo, Diddy Kong, Hammer Bro, Boomerang Bro, Fire Bro, Ice Bro, Red Yoshi, Black Shy Guy, Pink Shy Guy, Toad (Pit Crew), Monty Mole, Birdo (Light Blue), Birdo (Yellow), Red Koopa (Freerunning)
|
0.3448%
|
| Super karts
|
Cucumber, Zucchini, Egg 1, Daytripper, Mach 8, Cloud 9, Soda Jet, Koopa Clown, Poltergust 4000, Royale, Barrel Train, Turbo Yoshi, Blue Seven, Flame Flyer, Para-Wing, Super Blooper, Turbo Birdo, Streamliner, DK Jumbo, Red Turbo Yoshi, Light-blue Turbo Birdo, Yellow Turbo Birdo
|
0.3636%
|
| Super gliders
|
Flower Glider, Peach Parasol, BaNaNa Parafoil, Bob-omb Parafoil, Wario Wing, Oilpaper Umbrella, Mushroom Glider, Shell Parachute, Lightning Oilpaper, Blue Flower Glider, Pink Flower Glider, Waluigi Wing, ? Block, 8-Bit Jumping Mario, Eggshell Glider
|
0.5333%
|
| Normal drivers
|
Koopa Troopa, Shy Guy, Dry Bones, Baby Daisy, Baby Luigi, Baby Mario, Baby Peach, Baby Rosalina, Iggy, Larry, Lemmy, Ludwig, Morton, Roy, Wendy
|
1.2000%
|
| Normal karts
|
Birthday Girl, Landship, Bullet Blaster, Mushmellow, Biddybuggy, Pipe Frame, Pipe Buggy, Cheep Charger, Red Kiddie Kart, Koopa Dasher, Green Kiddie Kart
|
2.3636%
|
| Normal gliders
|
Super Glider, Paper Glider, Parachute, Parafoil, Piston Glider, Droplet Glider, BBIA Parafoil, Piranha Plant Parafoil, Minion Paper Glider
|
2.0000%
|
Peach & Daisy Pipe[edit]
| Items obtained from a new Peach & Daisy Pipe
|
| Item
|
Normal
|
Super
|
High-End
|
| Driver
|
Kart
|
Glider
|
Driver
|
Kart
|
Glider
|
Driver
|
Kart
|
Glider
|
| Amount
|
9
|
13
|
9
|
5
|
4
|
4
|
6
|
0
|
0
|
| Class
|
Parts
|
Rate (each)
|
| High-End drivers
|
Peach (Explorer), Peach (Kimono), Peach (Vacation), Peach (Wintertime), Daisy (Holiday Cheer), Daisy (Sailor), Daisy (Swimwear), Dr. Peach, Daisy (Fairy), Daisy (Farmer), Peach (Wedding), Daisy (Yukata), Peach (Yukata), Daisy (Thai Dress), Peach (Happi)
|
0.8000%
|
| Super drivers
|
Donkey Kong, Toad, Bowser, Luigi, Mario, Peach, Yoshi, Daisy, Lakitu, King Boo, Toadette, Bowser Jr., Waluigi, Wario, Rosalina, Birdo, Diddy Kong, Hammer Bro, Boomerang Bro, Fire Bro, Ice Bro, Red Yoshi, Black Shy Guy, Pink Shy Guy, Toad (Pit Crew), Monty Mole, Birdo (Light Blue), Birdo (Yellow), Red Koopa (Freerunning)
|
0.3448%
|
| Super karts
|
Cucumber, Zucchini, Egg 1, Daytripper, Mach 8, Cloud 9, Soda Jet, Koopa Clown, Poltergust 4000, Royale, Barrel Train, Turbo Yoshi, Blue Seven, Flame Flyer, Para-Wing, Super Blooper, Turbo Birdo, Streamliner, DK Jumbo, Red Turbo Yoshi, Light-blue Turbo Birdo, Yellow Turbo Birdo
|
0.3636%
|
| Super gliders
|
Flower Glider, Peach Parasol, BaNaNa Parafoil, Bob-omb Parafoil, Wario Wing, Oilpaper Umbrella, Mushroom Glider, Shell Parachute, Lightning Oilpaper, Blue Flower Glider, Pink Flower Glider, Waluigi Wing, ? Block, 8-Bit Jumping Mario, Eggshell Glider
|
0.5333%
|
| Normal drivers
|
Koopa Troopa, Shy Guy, Dry Bones, Baby Daisy, Baby Luigi, Baby Mario, Baby Peach, Baby Rosalina, Iggy, Larry, Lemmy, Ludwig, Morton, Roy, Wendy
|
1.2000%
|
| Normal karts
|
Birthday Girl, Landship, Bullet Blaster, Mushmellow, Biddybuggy, Pipe Frame, Pipe Buggy, Cheep Charger, Red Kiddie Kart, Koopa Dasher, Green Kiddie Kart
|
2.3636%
|
| Normal gliders
|
Super Glider, Paper Glider, Parachute, Parafoil, Piston Glider, Droplet Glider, BBIA Parafoil, Piranha Plant Parafoil, Minion Paper Glider
|
2.0000%
|
Mii Racing Suit Shop[edit]
Banner items[edit]
| Name
|
Starting date
|
Cost
|
Contents
|
Banner image
|
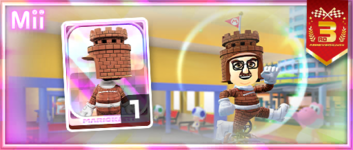
| Castle Mii Racing Suit
|
September 21, 2022
|
70  rubies for 1st purchase; rubies for 1st purchase;
100 rubies for 2nd and 3rd purchases respectively
|

Castle Mii Racing Suit ×1
|
|
Other items[edit]
Token Shop[edit]
The limited-time event where event tokens appear began on September 21, 2022 and ended on October 4, 2022. Event tokens could be earned by causing opponents to crash.
Tier Shop[edit]
The shop features a variety of set and randomized items available for purchase. The item slots in the shop are unlocked based on the highest tier of players.
| Items available in Tier Shop (September 21, 2022 - September 27, 2022)
|

|

|

|
Dixie Kong
 12,000 12,000
Amount: 1
|
Bolt Buggy
2,000
Amount: 1
|
Crimson Crane
10,000
Amount: 1
|
| Items available in Tier Shop (September 28, 2022 - October 4, 2022)
|

|

|

|
Metal Mario
12,000
Amount: 1
|
Cact-Ice
10,000
Amount: 1
|
Star-Spangled Glider
10,000
Amount: 1
|
| Items available in Tier Shop (September 21, 2022 - October 4, 2022)
|

|

|

|
Level-boost ticket (Normal)
1,000
Amount: 3 per week
|
Level-boost ticket (Normal)
800
Amount: 3 per week
|
Level-boost ticket (Normal)
800
Amount: 3 per week
|

OR

|

OR

|

OR

|
Level-boost ticket (Super)
4,000
Amount: 2 per week
OR
Level-boost ticket (High-End)
15,000
Amount: 1 per week
|
Level-boost ticket (Super)
3,000
Amount: 2 per week
OR
Level-boost ticket (High-End)
13,000
Amount: 1 per week
|
Level-boost ticket (Super)
3,000
Amount: 2 per week
OR
Level-boost ticket (High-End)
13,000
Amount: 1 per week
|

OR

OR

|

OR

OR

|

OR

OR

|
Points-cap ticket (Normal)
2,000
Amount: 1 per week
|
Points-cap ticket (Super)
5,000
Amount: 1 per week
|
Points-cap ticket (High-End)
20,000
Amount: 1 per week
|
|
|
|
|
Level-boost ticket (High-End)
13,000
Amount: 1 per week
|
Level-boost ticket (High-End)
13,000
Amount: 1 per week
|
Level-boost ticket (High-End)
15,000
Amount: 1 per week
|
Names in other languages[edit]
| Language
|
Name
|
Meaning
|
Notes
|
| Japanese
|
アニバーサリーツアー[?]
Anibāsarī Tsuā
|
Anniversary Tour
|
|
| Chinese (simplified)
|
周年巡回赛[?]
Zhōunián Xúnhuí sài
|
Anniversary Tour
|
|
| Chinese (traditional)
|
週年巡迴賽[?]
Zhōunián Xúnhuí sài
|
Anniversary Tour
|
|
| French
|
Saison anniversaire[?]
|
Anniversary Season
|
|
| German
|
Jubiläums-Tour-Saison[?]
|
Anniversary Tour Season
|
|
| Italian
|
Tour anniversario[?]
|
Anniversary Tour
|
|
| Korean
|
주년 기념 투어[?]
Junyeon Ginyeom Tueo
|
Anniversary Tour
|
|
| Portuguese
|
Temporada de aniversário[?]
|
Anniversary Season
|
|
| Spanish
|
Temporada de aniversario[?]
|
Anniversary Season
|
|
- This was the first tour since the Valentine's Tour sixty-nine tours prior to feature an addition to the list of favorite courses for a Normal driver, as well as the first since the Marine Tour fifty-eight tours prior to feature an addition to the list of favorite courses for any Normal item, with Koopa Troopa getting Sydney Sprint 3R as a favorite course.
- This was the first tour to include the normal and R variants, but not the T variant, of a track (namely Tokyo Blur). To accommodate this, Los Angeles Laps 3T repeats.
- It was also the first normal tour to exclude one of the three aforementioned variants of any track.
- Including R, T, and R/T variants, this tour featured eight courses, the least out of any tour.
External links[edit]
References[edit]
| Mario Kart Tour
|
| Drivers
|
| Normal
|
Baby Mario • Baby Peach • Baby Daisy • Baby Rosalina • Baby Luigi • Koopa Troopa • Shy Guy • Dry Bones • Iggy • Larry • Lemmy • Ludwig • Morton • Roy • Wendy
|
| Super
|
Mario • Peach • Yoshi • Daisy • Toad • Toadette • Rosalina • Luigi • Toad (Pit Crew) • Red Yoshi • Blue Yoshi • Pink Yoshi • Yellow Toad (Pit Crew) • Light-blue Toad (Pit Crew) • Red Toad (Pit Crew) • Orange Yoshi • Green Toad (Pit Crew) • Pink Toad (Pit Crew) • Light-blue Yoshi • Yellow Yoshi • Purple Toad (Pit Crew) • Bowser • Donkey Kong • Diddy Kong • Lakitu • Bowser Jr. • Wario • Waluigi • King Boo • Black Shy Guy • Red Koopa (Freerunning) • Birdo • Pink Shy Guy • Birdo (Light Blue) • Hammer Bro • Boomerang Bro • Ice Bro • Fire Bro • Birdo (Yellow) • Monty Mole • Green Shy Guy • Blue Koopa (Freerunning) • Birdo (Blue) • Purple Koopa (Freerunning) • Light-blue Shy Guy • Blue Shy Guy • Birdo (Orange) • White Shy Guy • Koopa (Freerunning) • Orange Shy Guy • Birdo (Red) • Yellow Shy Guy • Birdo (Green)
|
| High-End
|
Metal Mario • Peachette • Pauline • Mario (Musician) • Peach (Kimono) • Mario (Hakama) • Rosalina (Halloween) • Peach (Vacation) • Mario (Santa) • Pink Gold Peach • Daisy (Holiday Cheer) • Yoshi (Reindeer) • Pauline (Party Time) • Mario (Happi) • Toad (Party Time) • Peach (Wintertime) • Penguin Luigi • Ice Mario • Baby Peach (Cherub) • Rosalina (Aurora) • Mario (Classic) • Luigi (Classic) • Baby Rosalina (Detective) • Yoshi (Egg Hunt) • Black Yoshi • Builder Mario • Builder Toad • Daisy (Fairy) • Mario (Chef) • Peach (Wedding) • Rosalina (Swimwear) • Mario (Swimwear) • Captain Toad • Toadette (Explorer) • Daisy (Yukata) • Mario (SNES) • Mario (Sunshine) • Mario (Halloween) • Peach (Halloween) • Peach (Explorer) • Builder Luigi • Fire Rosalina • Luigi (Lederhosen) • Cat Peach • Cat Toad • Pauline (Rose) • Penguin Toad • Mario (Racing) • White Yoshi • Baby Mario (Koala) • Builder Toadette • Mario (Tuxedo) • Luigi (Painter) • Daisy (Swimwear) • Mario (Baseball) • Peach (Happi) • Penguin Mario • Yoshi (Kangaroo) • Tanooki Mario • Tanooki Rosalina • Mario (Satellaview) • Penguin Toadette • Cat Rosalina • Luigi (Vacation) • Mario (Golf) • Luigi (Golf) • Mario (Aviator) • Mario (Samurai) • Peach (Yukata) • Yoshi (Gold Egg) • Rosalina (Volendam) • Daisy (Farmer) • Dr. Mario • Dr. Luigi • Dr. Peach • Cat Mario • Cat Luigi • Rosalina (Chef) • Daisy (Thai Dress) • Daisy (Sailor) • Toadette (Sailor) • White Tanooki Mario • Luigi (Knight) • Mario (King) • Luigi (Chef) • Kitsune Luigi • Toad (Astronaut) • Toadette (Astronaut) • Poochy • Toad (Tourist) • Luigi (Gold Knight) • Pauline (Cowgirl) • Mario (Black Suit) • Gold Mario • Dry Bowser • King Boo (Luigi's Mansion) • Shy Guy (Pastry Chef) • Waluigi (Bus Driver) • Gold Koopa (Freerunning) • Wario (Hiker) • Dry Bones (Gold) • Funky Kong • Dixie Kong • Dry Bowser (Gold) • Wario (Cowboy) • Nabbit • Bowser Jr. (Pirate) • King Bob-omb • Donkey Kong Jr. (SNES) • Shy Guy (Gold) • King Boo (Gold) • Bowser (Santa) • Lakitu (Party Time) • Birdo (Black) • Shy Guy (Ninja) • King Bob-omb (Gold) • Kamek • Waluigi (Vampire) • Meowser • Chargin' Chuck • Pink Shy Guy (Ninja) • Birdo (White) • Dr. Bowser • Petey Piranha • Chargin' Chuck (Gold) • Petey Piranha (Gold) • Larry (Wintertime) • Light-blue Shy Guy (Explorer) • Yellow Shy Guy (Explorer) • Donkey Kong (Gladiator) • Wiggler • Wiggler (Gold) • Mii Racing Suits
|
| Vehicle parts
|
| Karts |
Normal
|
Pipe Frame • Birthday Girl • Mushmellow • Koopa Dasher • Biddybuggy • Blue Biddybuggy • Cheep Charger • Pink Mushmellow • Birthday Girl Rosalina • Green Kiddie Kart • Red Kiddie Kart • Bullet Blaster • Bull's-Eye Banzai • Landship • Pipe Buggy • Warship • Green Cheep Charger
|
| Super
|
Mach 8 • Daytripper • Turbo Yoshi • Soda Jet • Super Blooper • Gold Blooper • Royale • Cloud 9 • Poltergust 4000 • Streamliner • White Royale • Zucchini • Red Streamliner • Red Turbo Yoshi • Blue Seven • Super 1 • Dasher II • Tea Coupe • Yellow Turbo Birdo • Egg 1 • Birthday Girl Daisy • Red Standard 8 • Green Standard 8 • Cucumber • Blue Royale • Blue Turbo Yoshi • Orange Turbo Yoshi • Pink Turbo Yoshi • Light-blue Turbo Yoshi • Yellow Turbo Yoshi • Flame Flyer • Barrel Train • DK Jumbo • Chrome DK Jumbo • Koopa Clown • Dark Clown • Para-Wing • Turbo Birdo • Light-blue Turbo Birdo • Bolt Buggy • Rambi Rider • Blue Turbo Birdo • Orange Turbo Birdo • Red Turbo Birdo • Green Turbo Birdo
|
| High-End
|
B Dasher • Black B Dasher • Yellow Taxi • Quickshaw • Kabuki Dasher • Circuit Special • Black Circuit • Bumble V • Queen Bee • Trickster • Ghost Ride • Macharon • Carrot Kart • Cheermellow • Wild Wing • Radish Rider • Wildfire Flyer • Ribbon Rider • Double-Decker • Swift Jack • Red B Dasher • Jingle Bells • Platinum Taxi • Glam Bruiser • Gilded Prancer • Ice-blue Poltergust • P-Wing • Apple Kart • Comet Tail • Bright Bunny • Dozer Dasher • Clanky Kart • Wild Black • Karp Kart • Prancer • Rose Queen • Green Apple Kart • Choco Macharon • Gold Egg • Sweet Daytripper • Red Taxi • Pink Wing • Happy Ride • Blue Soda • Clackety Kart • Gold Clanky Kart • Festival Girl • Black Kabuki Dasher • 8-Bit Pipe Frame • Gold Pipe Frame • Surf Sailer • Star-Spangled Flyer • Green Circuit • Sports Coupe • Pumpkin Kart • Dark Trickster • Sunset Cloud • Steel Driver • Holiday King • Gold Snow Skimmer • Dreamy Egg • Fast Frank • Iron Cucumber • Cat Cruiser • Wild Pink • Rose Taxi • B Dasher Mk. 2 • Decal Streamliner • Orange Streamliner • White Turbo Yoshi • Sakura Quickshaw • Jet Cruiser • Inferno Flyer • Rambi Runner • Pink Dozer • Grand Badwagon • Paintster • Lime Tea Coupe • Sunny Surf Sailer • Pinch Hitter • Cleanup Hitter • Ice Dozer • Green Double-Decker • Black Cat Cruiser • Red B Dasher Mk. 2 • Pink B Dasher Mk. 2 • Classic B Dasher Mk. 2 • Sky-Blue B Dasher Mk. 2 • Metal B Dasher Mk. 2 • Cream B Dasher Mk. 2 • Green B Dasher Mk. 2 • Tanooki Kart • Gold Pumpkin Kart • Lunar Cruiser • Sleigh Rider • White Snow Skimmer • Frosty Bells • Frost Wing • Gray Cat Cruiser • Sports Coupe 2022 • Roaring Racer • Jukebox Buggy • Sneeker • Green Lightning • Cupid's Arrow • Wild Slugger • Prop Kart • Magma Broom • Star Broom • Yellow 8-Bit Pipe Frame • Warrior Wagon • Armored Rider • Black Turbo Yoshi • Gold Bunny • Flower Kart • Dragonfly • Firefly • Daikon Rocket • Capsule Kart • Blue-Green Capsule Kart • White Bruiser • Coconut 1 • Pink Capsule Kart • Cream Cat Cruiser • Green Cat Cruiser • Goo-Goo Buggy • Goo-Goo Pink • Gold Kiddie Kart • Sweet Ride • White Fast Frank • Tuk-Tuk Kart • Tropical Truck • Gold Zucchini • Lightning Streamliner • Flowery Badwagon • Coral Jet Cruiser • Watermelon Kart • Ice-Cream Minibus • Chocolate Banana Minibus • Strawberry Soft Swerve • Shielded Speedster • Gold Standard • Gold Double-Decker • Black Carriage • Green Speeder • Flaming Speeder • Gold Sweet Ride • Streetle • Blue Speeder • Swift Talon • Gold Eagle • Blazing Eagle • Camo Tanooki Kart • Gold Rambi Rider • Moo Moo Offroader • Pink Speeder • Pink Sneeker • Gold Jingle Bell • Holiday Speeder • Wild Gold • Rainbow Taxi • Blooper Shuttle • Gold Lunar Cruiser • Gold Quickshaw • Pineapple 1 • Hot Pot Hot Rod • Rainbow Streetle • Gold Capsule Kart • Gold 8-Bit Pipe Frame • Taiko Drum Dasher • Sakura Sports Coupe • Bright Girl • Huffin Puffin Egg • Jumbo Jetter • Gold Paintster • Silver Flower Kart • Bronze Cucumber • Cream Classic • Red Comet • Pink Comet • Green Comet • Gold Comet • Mach 8-R • Gold Cupid's Arrow • Silver Cupid's Arrow • Silver Warrior Wagon • Gold Warrior Wagon • Black Shielded Speedster • Gold Shielded Speedster • Yeehaw Wagon • Desert Rose Wagon • Yellow Sub Scooter • Blue Sub Scooter • Gold Driver • Dolphin Drifter • Purple Rattle Buggy • Goo-Goo Gold • Gold Wild Slugger • Spicy Zucchini • Chocolate Mint Soft Swerve • Gold Soft Swerve • Monarch Kart • Gold Monarch Kart • Black B Dasher Mk. 2 • Gold B Dasher • Badwagon • Blue Badwagon • Gold Train • Bruiser • Snow Skimmer • Offroader • Banana Master • Poison Apple Kart • Cheep Snorkel • Gold Cheep Snorkel • Gold Cheep Charger • Dark Buggy • Koopa King • Brown Offroader • Cact-X • Pirate Sushi Racer • Silver Bullet Blaster • Head Honcho • DK Maximum • Sushi Racer • Gilded King • Crawly Kart • Black Dozer • Party-Wing • Penguin Slider • Black Penguin Slider • Cact-Ice • Black Turbo Birdo • Purple Bunny • Jade Hop Rod • Crimson Hop Rod • Dark Hop Rod • Kamek's Zoom Broom • Silver King • Vampire Flyer • Red Crawly Kart • Yellow Offroader • Cact-R • Cheership • Candy Clown • Tiger Bruiser • Combo Cruiser • Sakura Hop Rod • White Turbo Birdo • Green-Yellow Capsule Kart • Piranha Pipes • Red Offroader • Goo-Goo Black • Cact-B • Gold Bullet Blaster • Red Vampire Flyer • Gold Trickster • Gold Bruiser • Black Sneeker • Purple Dozer • Blue Crawly Kart • Rainbow Pipe Buggy • Gold Hop Rod • Black Jingle Bell • Gold Sushi Racer • Dry Bones Dasher • Waluigi Racer Mk. 2 • Chain Chomp Chariot • Fish Bone Ferry • Gold Fish Bone Ferry • Wiggler Egg • Boo Pipes • Gold Pipes • Wild Wiggler
|
| Gliders |
Normal
|
Super Glider • Parachute • Parafoil • Paper Glider • Droplet Glider • BBIA Parafoil • Minion Paper Glider • Piston Glider • Piranha Plant Parafoil
|
| Super
|
Peach Parasol • Flower Glider • Oilpaper Umbrella • Lightning Oilpaper • Pink Flower Glider • 8-Bit Jumping Mario • ? Block • Plaid Ribbon • Eggshell Glider • 8-Bit Jumping Luigi • Mushroom Glider • Bob-omb Parafoil • Shell Parachute • Wario Wing • Waluigi Wing • BaNaNa Parafoil • Blue Flower Glider
|
| High-End
|
Gold Glider • Fare Flier • Purple Oilpaper Umbrella • Full Flight • Strawberry Crêpe • Le Tricolore • Starchute • Royal Parachute • Glitter Glider • Soaring Jack • Gift Glider • New Year's 2020 • New Year's Kite • Fireworks Parachute • Crimson Crane • Blizzard Parasol • Blizzard Balloons • Sweetheart Glider • Heart Balloons • Luma Parafoil • Rainbow Starchute • Bright Glider • Safety Glider • Daisy Glider • Pink Gold Paper Glider • Butterfly Sunset • Chocolate Donut • Gold Crane • Chocolate Banana Crêpe • Strawberry Donut • Silver Bells • Silver-and-Gold Hearts • Manta Glider • Treasure Map • Butterfly Wings • Great Sail • Festival Wings • 8-Bit Star • Super Mario Kart Glider • Star-Spangled Glider • Spider Glider • Sunset Balloons • Silver Starchute • Jolly Bells • Butterfly Prism • Planet Glider • New Year's 2021 • Gold New Year's Kite • Toe-Bean Balloons • Calico Parafoil • Black Great Sail • Silver Manta Glider • Rose Parasol • Snow Crystals • 8-Bit Fire Flower • Surf Master • Starry Great Sail • Black Toe-Bean Balloons • 8-Bit Bullet Bill • Glinting Glider • Flying Easel • Sunny Surf Master • Polka-Dot Manta Glider • Home-Field Glider • Gold Home-Field Glider • Springtime Crane • Yukata Ribbon • Silver Surf Master • Ship's Wheel • Tanooki Parafoil • Gold Tanooki Parafoil • Magic Parasol • 8-Bit Super Mushroom • Meteor Balloons • Pink Gold Meteors • Galaxy Glider • Candlelight Flight • Gold Penguin Wingtip • Aurora Balloons • New Year's 2022 • Black Cat Parafoil • Cat Parafoil • Gold Toe-Bean Balloons • Glittering Parasol • Luigi Parafoil • Sky-High Flyer • Record Setter • Mario's Mustache • Luigi's Mustache • Origami Glider • Sakura Origami Glider • Gold Eggshell Glider • Green Sprout • Magniflying Glass • Flybrary Book • Pink Magniflying Glass • Cream Toe-Bean Balloons • Green Cat Parafoil • Candlelight Flight Cake • Pretzel Glider • Tulip Corsage • Red and Gold Umbrella • 8-Bit 1-Up Mushroom • Tropical Balloons • Fire Manta Glider • Mint & Berry Balloons • Vanilla & Chocolate Balloons • Icy Mario's Mustache • Flying Flappers • Silver Luigi's Mustache • Mario's Hat Balloon • Luigi's Hat Balloon • Gold Cloud Balloons • White Waves Origami Glider • Chocolate Pretzel • Para-Panini • Silver Candlelight Flight • Autumn Leaves • Calico Toe-Bean Balloons • Wonderful Garnet • Festive Holly • Yellow Hard Hat Balloon • Fuzzy Kite • Gold Hard Hat Balloon • New Year's 2023 • Gold Meteors • Rainbow Fare Flier • Stealth Glider • Gold Umbrella • Wonderful Diamond • Gold Candlelight Flight • 8-Bit Super Glider • Gold 8-Bit Glider • 8-Bit Block Glider • 8-Bit Goomba • Bright Ribbon • Yoshi's Cookies • Smiley Flower Glider • Golden Glider • Gold Tulips • Gold Manta Glider • Red Checkered Glider • Pink Checkered Glider • Green Checkered Glider • Gold Checkered Glider • Gold Origami Glider • Gold Bells • Glittering Glider • Red Emblem • Green Emblem • Mario Bros. Parafoil • Mosaic Starchute • Jellychute • Wavy Great Sail • Dolphin Great Sail • Pink Bubble Balloon • Mario Golf Cap • Luigi Golf Cap • Gold Mario Golf Cap • Melon & Banana Balloons • Spooky Sprinkle Balloons • Gold Chocolate Balloons • Royal Flush • Rainbow Bells • Gold Mario's Hat Balloon • Swooper • Bullet Bill Parachute • Cloud Glider • Rainy Balloons • Wicked Wings • Gold Swooper • Banana Wingtip • Tropical Glider • Dragon Wings • Blooper Wingtip • Nabbit Oilpaper Umbrella • Cheep Cheep Masks • Dry Bowser Umbrella • Penguin Wingtip • Bright Balloons • Ninja Scroll • Dream Glider • Vampire Wings • Golden Wings • Wario's Mustache • Waluigi's Mustache • Wonderful Wings • Wicked Topaz • Piranha Plant Balloons • Secret Scroll • Lava Rocks • Black Starchute • Boo Masks • Nabbit Parachute • Gold Boo Masks • Roy Oilpaper • Rainbow Flappy Wings • Gold Flappy Wings • Wiggler Parachute • Gold Piranha Plant Balloons • Baby Mario Hanafuda • Yoshi's Egg Hanafuda • Peach Hanafuda • Barrel Hanafuda • Blooper Hanafuda • Cape Mario Hanafuda • Bullet Bill Hanafuda • Boo Hanafuda • Piranha Plant Hanafuda • Goomba Hanafuda • Jumping Mario Hanafuda • Bowser Hanafuda
|
| Tires
|
Blue Standard • Cyber Slick • Gold Tires • Metal • Monster • Mushroom • Off-Road • Red Monster • Retro Off-Road • Roller • Slick • Slim • Sponge • Standard • Wood
|
| Courses
|
| New courses |
City courses
|
New York Minute (R, T, R/T, 2, 2R, 2T, 2R/T, 3, 3R, 3T, 3R/T, 4, 4R, 4T, 4R/T) (tour appearances) • Tokyo Blur (R, T, R/T, 2, 2R, 2T, 2R/T, 3, 3R, 3T, 3R/T, 4, 4R, 4T, 4R/T) (tour appearances) • Paris Promenade (R, T, R/T, 2, 2R, 2T, 2R/T, 3, 3R, 3T, 3R/T) (tour appearances) • London Loop (R, T, R/T, 2, 2R, 2T, 2R/T, 3, 3R, 3T, 3R/T) (tour appearances) • Vancouver Velocity (R, T, R/T, 2, 2R, 2T, 2R/T, 3, 3R, 3T, 3R/T) (tour appearances) • Los Angeles Laps (R, T, R/T, 2, 2R, 2T, 2R/T, 3, 3R, 3T, 3R/T) (tour appearances) • Berlin Byways (R, T, R/T, 2, 2R, 2T, 2R/T, 3, 3R, 3T, 3R/T) (tour appearances) • Sydney Sprint (R, T, R/T, 2, 2R, 2T, 2R/T, 3, 3R, 3T, 3R/T) (tour appearances) • Singapore Speedway (R, T, R/T, 2, 2R, 2T, 2R/T, 3, 3R, 3T, 3R/T) (tour appearances) • Amsterdam Drift (R, T, R/T, 2, 2R, 2T, 2R/T, 3, 3R, 3T, 3R/T) (tour appearances) • Bangkok Rush (R, T, R/T, 2, 2R, 2T, 2R/T, 3, 3R, 3T, 3R/T) (tour appearances) • Athens Dash (R, T, R/T, 2, 2R, 2T, 2R/T, 3, 3R, 3T, 3R/T) (tour appearances) • Rome Avanti (R, T, R/T, 2, 2R, 2T, 2R/T, 3, 3R, 3T, 3R/T) (tour appearances) • Madrid Drive (R, T, R/T, 2, 2R, 2T, 2R/T, 3, 3R, 3T, 3R/T) (tour appearances)
|
| Other
|
Merry Mountain (R, T, R/T) (tour appearances) • Ninja Hideaway (R, T, R/T) (tour appearances) • Sky-High Sundae (R, T, R/T) (tour appearances) • Piranha Plant Cove (R, T, R/T, 2, 2R, 2T, 2R/T, 3, 3R, 3T, 3R/T) (tour appearances) • Yoshi's Island (R, T, R/T) (tour appearances) • Piranha Plant Pipeline (R, T, R/T) (tour appearances) • Squeaky Clean Sprint (R, T, R/T) (tour appearances)
|
| Remix courses
|
RMX Mario Circuit 1 (R, T, R/T) (tour appearances) • RMX Choco Island 1 (R, T, R/T) (tour appearances) • RMX Rainbow Road 1 (R, T, R/T) (tour appearances) • RMX Rainbow Road 2 (R, T, R/T) (tour appearances) • RMX Choco Island 2 (R, T, R/T) (tour appearances) • RMX Vanilla Lake 1 (R, T, R/T) (tour appearances) • RMX Ghost Valley 1 (R, T, R/T) (tour appearances) • RMX Bowser's Castle 1 (R, T, R/T) (tour appearances) • RMX Donut Plains 1 (R, T, R/T) (tour appearances) • RMX Vanilla Lake 2 (R, T, R/T) (tour appearances)
|
| Classic courses |
SNES courses
|
Mario Circuit 1 (R, T, R/T) (tour appearances) • Donut Plains 1 (R, T, R/T) (tour appearances) • Ghost Valley 1 (R, T, R/T) (tour appearances) • Mario Circuit 2 (R, T, R/T) (tour appearances) • Choco Island 1 (R, T, R/T) (tour appearances) • Ghost Valley 2 (R, T, R/T) (tour appearances) • Donut Plains 2 (R, T, R/T) (tour appearances) • Mario Circuit 3 (R, T, R/T) (tour appearances) • Choco Island 2 (R, T, R/T) (tour appearances) • Vanilla Lake 1 (R, T, R/T) (tour appearances) • Bowser Castle 3 (R, T, R/T) (tour appearances) • Donut Plains 3 (R, T, R/T) (tour appearances) • Koopa Troopa Beach 2 (R, T, R/T) (tour appearances) • Vanilla Lake 2 (R, T, R/T) • (tour appearances) • Rainbow Road (R, T, R/T) (tour appearances)
|
| N64 courses
|
Luigi Raceway (R, T, R/T) (tour appearances) • Koopa Troopa Beach (R, T, R/T) (tour appearances) • Kalimari Desert (R, T, R/T, 2, 2R, 2T, 2R/T) (tour appearances) • Frappe Snowland (R, T, R/T) (tour appearances) • Choco Mountain (R, T, R/T) (tour appearances) • Mario Raceway (R, T, R/T) (tour appearances) • Royal Raceway (R, T, R/T) (tour appearances) • Yoshi Valley (R, T, R/T) (tour appearances)
|
| GBA courses
|
Peach Circuit (R, T, R/T) (tour appearances) • Riverside Park (R, T, R/T) (tour appearances) • Bowser's Castle 1 (R, T, R/T) (tour appearances) • Boo Lake (R, T, R/T) (tour appearances) • Bowser's Castle 2 (R, T, R/T) (tour appearances) • Luigi Circuit (R, T, R/T) (tour appearances) • Sky Garden (R, T, R/T) (tour appearances) • Cheep-Cheep Island (R, T, R/T) (tour appearances) • Sunset Wilds (R, T, R/T) (tour appearances) • Snow Land (R, T, R/T) (tour appearances) • Yoshi Desert (R, T, R/T) (tour appearances) • Bowser's Castle 3 (R, T, R/T) (tour appearances) • Lakeside Park (R, T, R/T) (tour appearances) • Bowser's Castle 4 (R) (tour appearances)
|
| GCN courses
|
Baby Park (R, T, R/T) (tour appearances) • Mushroom Bridge (R, T, R/T) (tour appearances) • Daisy Cruiser (R, T, R/T) (tour appearances) • Waluigi Stadium (R, T, R/T) (tour appearances) • Yoshi Circuit (R, T, R/T) (tour appearances) • DK Mountain (R, T, R/T) (tour appearances) • Dino Dino Jungle (R, T, R/T) (tour appearances)
|
| DS courses
|
Luigi's Mansion (R, T, R/T) (tour appearances) • Waluigi Pinball (R, T, R/T) (tour appearances) • Shroom Ridge (R, T, R/T) (tour appearances) • DK Pass (R, T, R/T) (tour appearances) • Mario Circuit (R, T, R/T) (tour appearances) • Airship Fortress (R, T, R/T) (tour appearances) • Peach Gardens (R, T, R/T) (tour appearances)
|
| Wii courses
|
Mushroom Gorge (R, T, R/T) (tour appearances) • Coconut Mall (R, T, R/T) (tour appearances) • DK Summit (R, T, R/T) (tour appearances) • Daisy Circuit (R, T, R/T) (tour appearances) • Koopa Cape (R, T, R/T) (tour appearances) • Maple Treeway (R, T, R/T) (tour appearances) • Dry Dry Ruins (R, T, R/T) (tour appearances) • Moonview Highway (R, T, R/T) (tour appearances) • Rainbow Road (R, T, R/T) (tour appearances)
|
| 3DS courses
|
Toad Circuit (R, T, R/T) (tour appearances) • Daisy Hills (R, T, R/T) (tour appearances) • Cheep Cheep Lagoon (R, T, R/T) (tour appearances) • Shy Guy Bazaar (R, T, R/T) (tour appearances) • Mario Circuit (R, T, R/T) (tour appearances) • Rock Rock Mountain (R, T) (tour appearances) • Piranha Plant Slide (R, T, R/T) (tour appearances) • Wario Shipyard (R, T, R/T) (tour appearances) • Neo Bowser City (R, T, R/T) (tour appearances) • Rosalina's Ice World (R, T, R/T) (tour appearances) • Bowser's Castle (R, T, R/T) (tour appearances) • Rainbow Road (R, T, R/T) (tour appearances)
|
| Battle courses |
New courses
|
New York Minute B (tour appearances) • Paris Promenade B (tour appearances)
|
| Classic courses
|
GBA Battle Course 1 (tour appearances) • GCN Cookie Land (tour appearances) • DS Twilight House (tour appearances)
|
| Other
|
| Bonus challenges
|
Ready, Set, Rocket Start • Ring Race • Do Jump Boosts • Big Reverse Race • Goomba Takedown • Glider Challenge • Steer Clear of Obstacles • Vs. Mega • Smash Small Dry Bones • Break Item Boxes • Time Trial • Combo Attack • Take them out quick! • Snap a Photo • Precision Gliding • Big Reverse Race vs. 100
|
| Cups
|
Baby Daisy Cup • Baby Luigi Cup • Baby Mario Cup • Baby Peach Cup • Baby Rosalina Cup • Birdo Cup • Boomerang Bro Cup • Bowser Cup • Bowser Jr. Cup • Cat Peach Cup • Chargin' Chuck Cup • Daisy Cup • Diddy Kong Cup • Dixie Kong Cup • Donkey Kong Cup • Dry Bones Cup • Dry Bowser Cup • Fire Bro Cup • Fire Rosalina Cup • Funky Kong Cup • Gold Mario Cup • Hammer Bro Cup • Ice Bro Cup • Ice Mario Cup • Iggy Cup • Kamek Cup • King Bob-omb Cup • King Boo Cup • Koopa Troopa Cup • Lakitu Cup • Larry Cup • Lemmy Cup • Ludwig Cup • Luigi Cup • Mario Cup • Metal Mario Cup • Mii Cup • Monty Mole Cup • Morton Cup • Nabbit Cup • Pauline Cup • Peach Cup • Peachette Cup • Pink Gold Peach Cup • Poochy Cup • Rosalina Cup • Roy Cup • Shy Guy Cup • Tanooki Mario Cup • Toad Cup • Toadette Cup • Waluigi Cup • Wario Cup • Wendy Cup • Yoshi Cup
|
| Tours |
2019
|
New York Tour • Tokyo Tour • Halloween Tour • Paris Tour • Winter Tour • London Tour • Holiday Tour
|
| 2020
|
New Year's Tour • Ice Tour • Valentine's Tour • Vancouver Tour • Mario Bros. Tour • Baby Rosalina Tour • Hammer Bro Tour • Yoshi Tour • Trick Tour • Flower Tour • Jungle Tour • Cooking Tour • Peach Tour • Marine Tour • Exploration Tour • Wild West Tour • Pirate Tour • Summer Festival Tour • Super Mario Kart Tour • Los Angeles Tour • 1st Anniversary Tour • Halloween Tour • Sunset Tour • Mario vs. Luigi Tour • Winter Tour • Rosalina Tour • New Year's 2021 Tour
|
| 2021
|
Berlin Tour • Cat Tour • Peach vs. Daisy Tour • Snow Tour • Mario Tour • Yoshi Tour • Ninja Tour • Sydney Tour (April–May) • Bowser vs. DK Tour • Trick Tour • Wedding Tour • Paris Tour • Summer Tour • Los Angeles Tour • Mario vs. Peach Tour • Frost Tour • Kamek Tour • Sydney Tour (September) • 2nd Anniversary Tour • Autumn Tour • Halloween Tour • Toad vs. Toadette Tour • Space Tour • Holiday Tour • Penguin Tour • New Year's 2022 Tour
|
| 2022
|
Singapore Tour • Wario vs. Waluigi Tour • Los Angeles Tour • Sky Tour • Mii Tour • Samurai Tour • Yoshi Tour • Amsterdam Tour • Doctor Tour • Peach vs. Bowser Tour (May) • Cat Tour • Metropolitan Tour • Bangkok Tour • Piranha Plant Tour • Ocean Tour • Sundae Tour • Bowser Tour • Mario vs. Luigi Tour • Anniversary Tour • Battle Tour • Halloween Tour • Autumn Tour • Animal Tour • Peach vs. Bowser Tour (November–December) • Holiday Tour • New Year's Tour
|
| 2023
|
Space Tour • Winter Tour • Exploration Tour • Doctor Tour • Mario Tour • Ninja Tour • Yoshi Tour • Spring Tour • Bowser Tour • Mii Tour • Princess Tour • Mario vs. Luigi Tour • Night Tour • Pipe Tour • Sunshine Tour • Vacation Tour • Summer Tour • Sundae Tour • Anniversary Tour
|
| Items |
Regular items
|
Banana • Green Shell • Red Shell • Spiny Shell • Bob-omb • Mushroom • Mega Mushroom • Bullet Bill • Blooper • Lightning • Super Horn • Coin • Star • Feathera
|
| Special items
|
Triple Bananas • Giant Banana • Triple Green Shells • Bowser's Shell • Double Bob-ombs • Triple Mushrooms • Fire Flower • Boomerang Flower • Ice Flower • Heart • Yoshi's Egg • Birdo's Egg • Bubble • Banana Barrels • Mushroom Cannon • Bob-omb Cannon • Lucky Seven • Dash Ring • Coin Box • Hammer • Giga Bob-omb • Super Bell • Super Leaf • Capsule
|
| Inventory items
|
Coin • Coin Rush ticket • Event tokena • Grand Star • Item ticket • Level-boost ticket • Point-boost ticket • Points-cap ticketa • Ruby • Star ticket • Team tokena • Quick ticket
|
| Course elements |
Interactable
|
Banzai Bill • Barrel • Barrel Bomb • Bath Bomb • Barrel Cannon • Beach Ball • Big egg • Blimp • Bob-omb Car • Bone Piranha Plant • Boulder • Burner • Bus • Cannon • Car • Cargo truck • Ceiling Needle • Chain Chomp • Cheep Cheep • Clampy • Crate • Dash Panel • Dash panel ramp truck • Exploring Shy Guy • Falling Pillar • Festive tree • Fire Piranha Plant • Flipper • Floaty • Flying Shy Guy • Fuzzy • Glide Ramp • Goal Ring • Goat • Goomba • Goomba Tower • Half-pipe • Hoop • Hot-air balloon • Inky Piranha Plant • Jack-o'-lantern • Jar • Jellybeam • Jump Boost field • Kadomatsu • Kanaami Road • Lava Bubble • Lava Geyser • Leaf pile • Maw-Ray • Mecha Cheep • Metal ball • Mud • Mushroom Platform • Mushroom Trampoline • Noshi • Oil slick • Penguin • Pickup truck • Pipe • Piranha Plant • Pokey • Puddle • Ramp • Rocky Wrench • Rolling rock • Shoe • Sidestepper • Skating Shy Guy • Snow block • Snowball • Snowboarding Shy Guy • Snowperson • Soccer Ball • Spider Web • Spring egg • Star Ring • Star Thwomp • Stilt Guy • Swoop • Table • Thwomp • Toy Duck • Toy Goomba • Traffic cone • Train • Walking Tree • Water Geyser • Wiggler • Wiggler Wagon • Whomp • Winged Cloud • Wooden cutout
|
| Non-interactable
|
Big Cheep Cheep • Boo • Boo Buddies • Bulber • Goonie • Huffin Puffin • Incoming Chomp • Nep-Enut • Note Block • Painting • Petal Guy • Shy Guy Tent • Star Bit • Vase
|
| Techniques
|
Drift • Hop • Jump Boost • Mini-Turbo • Rocket Start • Slipstream
|
| Favored and favorite courses
|
New (Amsterdam Drift · Athens Dash · Bangkok Rush · Berlin Byways · London Loop · Los Angeles Laps · New York Minute · Paris Promenade · Piranha Plant Cove · Rome Avanti · Singapore Speedway · Sydney Sprint · Tokyo Blur · Vancouver Velocity) • Remix • Super Mario Kart (SNES) • Mario Kart 64 (N64) • Mario Kart: Super Circuit (GBA) • Mario Kart: Double Dash!! (GCN) • Mario Kart DS (DS) • Mario Kart Wii (Wii) • Mario Kart 7 (3DS) • Battle
|
| Notable areas, landmarks, and sightings |
City courses
|
Amsterdam (Canal) • Athens (Hadrian's Arch · Parthenon) • Bangkok • Berlin (Berlin Wall · Brandenburg Gate · Charlottenburg Palace) • London (Big Ben · Tower Bridge · Tower of London) • Madrid (Prado Museum · Ventas Bullring) • New York (Empire State Building · Statue of Liberty · Rockefeller Center) • Paris (Arc de Triomphe · Cathedral of Notre Dame · Eiffel Tower · Louvre) • Rome (Colosseum · Spanish Steps · Trevi Fountain) • Sydney • Tokyo • Vancouver
|
| Other
|
Boo Woods • Bowser's Castle • Daisy Cruiser • Hammer Bros. Sphinx • Luigi's Mansion • Peach's Castle
|
| Galleries |
Miscellaneous
|
Artwork • Badges • Screenshots • Sprites and models
|
| Course icons
|
Original courses • Remix courses • SNES courses • N64 courses • GBA courses • GCN courses • DS courses • Wii courses • 3DS courses • Battle courses
|
| Related content on social media
|
"I Love Mario Kart Tour" • #MKTPerfectShot • MKT Report
|
| Miscellaneous
|
Action names in other languages • Badges (Common badges) • Challenge cards • Coin Rush • Emblem • Experience Point • Finish line • Frenzy • In-game statistics • Item probability distributions • Media • Mii Racing Suit profiles and statistics (Red–Dolphin · Cheep Cheep–Pokey · Piranha Plant–Koopa Clown) • Pipe • Pre-release and unused content • Race points system • Special pipe • Special skill • Sponsors • Trick animations • Underwater driving • Update history
|
|
|


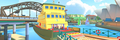
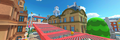
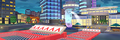


 Penguin Luigi ×1


