
Tour Tokyo Blur: Difference between revisions
Tag: Mobile edit |
m (Text replacement - "{{([Cc]olor|[Cc]olor-link|[Cc]olor-link-external)\|(1=)?([^\|{}\n]+)\|(2=)?([^\|{}\n]+)([\|}])" to "{{$1|$5|$3$6") |
||
| (101 intermediate revisions by 38 users not shown) | |||
| Line 2: | Line 2: | ||
{{race course infobox | {{race course infobox | ||
|title=Tokyo Blur | |title=Tokyo Blur | ||
|image=[[File:MKT Tokyo Blur Scene.jpg| | |image= {{tabber|title1=''Mario Kart Tour''|content1=[[File:MKT Tokyo Blur Scene.jpg|250px]]|title2=''Mario Kart 8 Deluxe''|content2=[[File:MK8-Course-Tour TokyoBlur.jpg|250px]]}} | ||
|appears_in=''[[Mario Kart Tour]]'' ([[List of games by date#2019|2019]] <small>(1)</small>, 2020 <small>(2, 3)</small>, 2021 <small>(4)</small>)<br>''[[Mario Kart 8 Deluxe]]'' ([[Mario Kart 8 Deluxe – Booster Course Pass|Booster Course Pass]], Wave 1) (2022) | |appears_in=''[[Mario Kart Tour]]'' ([[List of games by date#2019|2019]] <small>(1)</small>, 2020 <small>(2, 3)</small>, 2021 <small>(4)</small>)<br>''[[Mario Kart 8 Deluxe]]'' (''[[Mario Kart 8 Deluxe – Booster Course Pass|Booster Course Pass]]'', Wave 1) (2022) | ||
|based_on={{wp|Tokyo}}, [[Japan]] | |||
|cups=[[Lucky Cat Cup]] | |cups=[[Lucky Cat Cup]] | ||
|tours='''Tokyo Blur:'''<br>[[Tokyo Tour]]<br>[[New Year's Tour (2020)]] (challenge only)<br>[[Summer Festival Tour]]<br>[[1st Anniversary Tour]]<br>[[Mario vs. Peach Tour]]<br>[[2nd Anniversary Tour]]<br>[[Anniversary Tour]]<br>[[Winter Tour (2023)]]<br>'''Tokyo Blur 2:'''<br>[[New Year's Tour (2020)]]<br>[[Summer Festival Tour]]<br>[[Mario vs. Peach Tour]]<br>[[Winter Tour (2023)]]<br>'''Tokyo Blur 3:'''<br>[[Summer Festival Tour]]<br>[[Mario vs. Peach Tour]]<br>[[Winter Tour (2023)]]<br>'''Tokyo Blur 4:'''<br>[[Mario Tour]]<br>[[Yoshi Tour (2021)]]<br>[[Mario vs. Peach Tour]]<br>[[Winter Tour (2023)]] | |tours='''Tokyo Blur:'''<br>[[Tokyo Tour]]<br>[[New Year's Tour (2020)]] (challenge only)<br>[[Summer Festival Tour]]<br>[[1st Anniversary Tour]]<br>[[Mario vs. Peach Tour]]<br>[[2nd Anniversary Tour]]<br>[[Anniversary Tour (2022)]]<br>[[Winter Tour (2023)]]<br>[[Summer Tour (2023)]]<br>'''Tokyo Blur 2:'''<br>[[New Year's Tour (2020)]]<br>[[Summer Festival Tour]]<br>[[Mario vs. Peach Tour]]<br>[[Winter Tour (2023)]]<br>[[Summer Tour (2023)]]<br>'''Tokyo Blur 3:'''<br>[[Summer Festival Tour]]<br>[[Mario vs. Peach Tour]]<br>[[Winter Tour (2023)]]<br>[[Anniversary Tour (2023)]]<br>'''Tokyo Blur 4:'''<br>[[Mario Tour (2021)]]<br>[[Yoshi Tour (2021)]]<br>[[Mario vs. Peach Tour]]<br>[[Winter Tour (2023)]] | ||
|ghost=1:36.317 | |ghost={{ghost|8DX <small>150cc</small>|Nin★Yuya|1:36.317|[[File:MK8DX Male Inkling Icon.png|32px|link=Inkling]][[File:SplatBuggyMK8D InklingBoyBlue.png|32px|link=Splat Buggy]][[File:Blue Standard.png|32px|link=Blue Standard]][[File:MK8DThumbInklingBoySG.png|32px|link=Super Glider]]}}{{ghost|8DX <small>200cc</small>|Nin★Aracel|1:07.560|[[File:MK8DX Female Inkling Icon.png|32px|link=Inkling]][[File:InkstrikerMK8D InklingGirlOrange.png|32px|link=Inkstriker]][[File:MetalTiresMK8.png|32px|link=Metal]][[File:MK8DThumbInklingGirlSG.png|32px|link=Super Glider]]}} | ||
|online_play=Available ([[Nintendo Switch|Switch]]) | |online_play=Available ([[Nintendo Switch|Switch]]) | ||
|sample=''Mario Kart Tour''[[File:MKT Tokyo Blur Theme.oga]] ''Mario Kart 8 Deluxe''[[File:TourTokyoBlur_MK8DXBCP.oga]] ''Mario Kart 8 Deluxe'' (frontrunning)[[File:Switch_Tour_TokyoBlur_Frontrunning.oga]] | |sample=''Mario Kart Tour''<br>[[File:MKT Tokyo Blur Theme.oga]]<br>''Mario Kart 8 Deluxe''<br>[[File:TourTokyoBlur_MK8DXBCP.oga]]<br>''Mario Kart 8 Deluxe'' (frontrunning)<br>[[File:Switch_Tour_TokyoBlur_Frontrunning.oga]] | ||
|map=''Mario Kart Tour''<br><small>Tokyo Blur</small><br>[[File:MKT Map TokyoBlur.png|120px]]<br><small>Tokyo Blur 2</small><br>[[File:MKT Map TokyoBlur2.png|120px]]<br><small>Tokyo Blur 3</small><br>[[File:MKT Map TokyoBlur3.png|120px]]<br><small>Tokyo Blur 4</small><br>[[File:MKT Map TokyoBlur4.png|140px]]<br>''Mario Kart 8 Deluxe''<br>[[File:MK8DX Tour Tokyo Blur Map.png|120px]] | |map=''Mario Kart Tour''<br><small>Tokyo Blur</small><br>[[File:MKT Map TokyoBlur.png|120px]]<br><small>Tokyo Blur 2</small><br>[[File:MKT Map TokyoBlur2.png|120px]]<br><small>Tokyo Blur 3</small><br>[[File:MKT Map TokyoBlur3.png|120px]]<br><small>Tokyo Blur 4</small><br>[[File:MKT Map TokyoBlur4.png|140px]]<br>''Mario Kart 8 Deluxe''<br>[[File:MK8DX Tour Tokyo Blur Map.png|120px]] | ||
}} | }} | ||
'''Tokyo Blur''' is a race course in ''[[Mario Kart Tour]]''. It takes place in [[Tokyo]], Japan and makes its debut in the city's namesake tour, the [[Tokyo Tour]]. The course's music is based on the theme of [[3DS Toad Circuit]] and [[3DS Mario Circuit]]. This course has four different routes, the most out of any city course alongside [[Tour New York Minute|New York Minute]]: Tokyo Blur, '''Tokyo Blur 2''', '''Tokyo Blur 3''', and '''Tokyo Blur 4''', with the last three being introduced in the [[New Year's Tour (2020)|2020 New Year's Tour]], [[Summer Festival Tour]], and the [[Mario Tour (2021)|2021 Mario Tour]], respectively. The fourth iteration of this course differs from the others, in that it is two sections as opposed to two laps. From versions 1.2.0 to 1.4.0, the first layout was called '''Tokyo Blur 1'''. | |||
Tokyo Blur reappears in the [[Mario Kart 8 Deluxe – Booster Course Pass|Booster Course Pass]] DLC for ''[[Mario Kart 8 Deluxe]]'' as the first course in the [[Lucky Cat Cup]]. The course combines the first three versions of Tokyo Blur together, with a lap dedicated to each variant. | Tokyo Blur reappears in the ''[[Mario Kart 8 Deluxe – Booster Course Pass|Booster Course Pass]]'' DLC for ''[[Mario Kart 8 Deluxe]]'' as the first course in the [[Lucky Cat Cup]]. The course combines the first three versions of Tokyo Blur together, with a lap dedicated to each variant. Its theme was arranged for the ''Booster Course Pass'' end credits. | ||
==''Mario Kart Tour''== | ==''Mario Kart Tour''== | ||
{{multiframe | {{multiframe | ||
|align=right | |align=right | ||
| Line 27: | Line 26: | ||
In the standard layout, all of the racers start the course on the central span of the {{wp|Rainbow Bridge (Tokyo)|Rainbow Bridge}}. Just after the starting line, the road curves to the right through {{wp|Ginza}}, then makes a slight left before the {{wp|Wako (retailer)|Wako}} store. Not long after, the course makes a right U-turn near the {{wp|National Diet Building}} and the {{wp|Miraikan}}, then goes through a tunnel. As the {{wp|Tokyo Skytree}}, {{wp|Asahi Beer Hall}}, and {{wp|Tokyo Big Sight}} come into view, the road makes a wide right turn back onto the Rainbow Bridge. {{wp|Fuji TV}}'s headquarters can be seen on the left. The minimap for this route resembles that of [[DS Yoshi Falls|Yoshi Falls]] from ''[[Mario Kart DS]]'' and [[Luigi Circuit (Mario Kart Wii)|Luigi Circuit]] from ''[[Mario Kart Wii]]''. | In the standard layout, all of the racers start the course on the central span of the {{wp|Rainbow Bridge (Tokyo)|Rainbow Bridge}}. Just after the starting line, the road curves to the right through {{wp|Ginza}}, then makes a slight left before the {{wp|Wako (retailer)|Wako}} store. Not long after, the course makes a right U-turn near the {{wp|National Diet Building}} and the {{wp|Miraikan}}, then goes through a tunnel. As the {{wp|Tokyo Skytree}}, {{wp|Asahi Beer Hall}}, and {{wp|Tokyo Big Sight}} come into view, the road makes a wide right turn back onto the Rainbow Bridge. {{wp|Fuji TV}}'s headquarters can be seen on the left. The minimap for this route resembles that of [[DS Yoshi Falls|Yoshi Falls]] from ''[[Mario Kart DS]]'' and [[Luigi Circuit (Mario Kart Wii)|Luigi Circuit]] from ''[[Mario Kart Wii]]''. | ||
The course also appears as '''Tokyo Blur R''' ( | The course also appears as '''Tokyo Blur R''' (reversed), '''Tokyo Blur T''' (with ramps), and '''Tokyo Blur R/T''' (reversed with ramps). In the R/T variant, there are [[Swoop]]s and [[Noshi]]s on the course; two Noshis appear outside the track while one is standing on the track towards the end. | ||
;Appearances | Before the [[Summer Festival Tour]], no kart had Tokyo Blur R listed as a favorite course; instead, its appearances in the Mario Cup and Toadette Cup relied on the spotlight bonus to raise the [[Kabuki Dasher]] and the [[Quickshaw]], respectively, to the top tier. | ||
The first layout of Tokyo Blur is currently the only course based on a real world city to have appeared in seven different tours: the Tokyo Tour, the Summer Festival Tour, the 1st Anniversary Tour, the Mario vs. Peach Tour, the 2nd Anniversary Tour, the Anniversary Tour, and the 2023 Winter Tour. It also made a minor appearance in the [[New Year's Tour]] as the location of a bonus challenge and in the [[Mario Tour]] as the third and final race in the [[Mario Tour#2-Player Challenge|2-Player Challenge]] mode. | |||
====Appearances==== | |||
The first layout of Tokyo Blur is currently the only course based on a real world city to have appeared in seven different tours: the Tokyo Tour, the Summer Festival Tour, the 1st Anniversary Tour, the Mario vs. Peach Tour, the 2nd Anniversary Tour, the 2022 Anniversary Tour, and the 2023 Winter Tour. It also made a minor appearance in the [[New Year's Tour (2020)|2020 New Year's Tour]] as the location of a bonus challenge and in the [[Mario Tour (2021)|2021 Mario Tour]] as the third and final race in the [[Mario Tour (2021)#2-Player Challenge|2-Player Challenge]] mode. | |||
For this course's tour appearances, see [[List of Tokyo Blur tour appearances in Mario Kart Tour#Tokyo Blur|List of Tokyo Blur tour appearances in ''Mario Kart Tour'' § Tokyo Blur]]. | For this course's tour appearances, see [[List of Tokyo Blur tour appearances in Mario Kart Tour#Tokyo Blur|List of Tokyo Blur tour appearances in ''Mario Kart Tour'' § Tokyo Blur]]. | ||
====Top-tier and middle-tier items==== | |||
{{MKT favored table|new|Tokyo Blur}} | |||
====Bonus challenges==== | |||
<div class="contentbox mw-collapsible mw-collapsed> | <div class="contentbox mw-collapsible mw-collapsed> | ||
{| | {{MKT bonus challenge table|Ring Race|Tokyo Blur}} | ||
{{MKT bonus challenge table|Do Jump Boosts|Tokyo Blur}} | |||
| | {{MKT bonus challenge table|Glider Challenge|Tokyo Blur}} | ||
{{MKT bonus challenge table|Goomba Takedown|Tokyo Blur}} | |||
{{MKT bonus challenge table|Steer Clear of Obstacles|Tokyo Blur}} | |||
{{MKT bonus challenge table|Combo Attack|Tokyo Blur T}} | |||
{{ | |||
{| | |||
| | |||
{{ | |||
</div> | </div> | ||
| Line 65: | Line 51: | ||
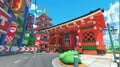
In the standard layout, all of the racers start the course on the central span of the {{wp|Rainbow Bridge (Tokyo)|Rainbow Bridge}}. Just after the starting line, the road curves to the right through {{wp|Ginza}}, then makes a slight right before the {{wp|Wako (retailer)|Wako}} store. After passing by two [[Thwomp]]s, the course shifts left at a roundabout and continues straight (with a {{wp|Tokyo subway|subway}} entrance and {{wp|Akihabara}} shops visible on the left), then goes under the {{wp|Kaminarimon}} left of the {{wp|Sensō-ji}}. As the player slights right then turns left at a signalized intersection, the road makes a wide right turn back onto the Rainbow Bridge. {{wp|Fuji TV}}'s headquarters can be seen on the left. | In the standard layout, all of the racers start the course on the central span of the {{wp|Rainbow Bridge (Tokyo)|Rainbow Bridge}}. Just after the starting line, the road curves to the right through {{wp|Ginza}}, then makes a slight right before the {{wp|Wako (retailer)|Wako}} store. After passing by two [[Thwomp]]s, the course shifts left at a roundabout and continues straight (with a {{wp|Tokyo subway|subway}} entrance and {{wp|Akihabara}} shops visible on the left), then goes under the {{wp|Kaminarimon}} left of the {{wp|Sensō-ji}}. As the player slights right then turns left at a signalized intersection, the road makes a wide right turn back onto the Rainbow Bridge. {{wp|Fuji TV}}'s headquarters can be seen on the left. | ||
Tokyo Blur 2 is the first city course that has been featured more than once in [[Coin Rush (Mario Kart Tour)|Coin Rush]]. | |||
Tokyo Blur | The course also appears as '''Tokyo Blur 2R''' (reversed), '''Tokyo Blur 2T''' (with ramps), and '''Tokyo Blur 2R/T''' (reversed with ramps). In the T variant, both [[Thwomp]]s are gone. In the R/T variant, the Thwomps are now side-by-side and there is a [[Glide Ramp|glide ramp]] at the end of the track. | ||
====Appearances==== | |||
For this course's tour appearances, see [[List of Tokyo Blur tour appearances in Mario Kart Tour#Tokyo Blur 2|List of Tokyo Blur tour appearances in ''Mario Kart Tour'' § Tokyo Blur 2]]. | For this course's tour appearances, see [[List of Tokyo Blur tour appearances in Mario Kart Tour#Tokyo Blur 2|List of Tokyo Blur tour appearances in ''Mario Kart Tour'' § Tokyo Blur 2]]. | ||
====Top-tier and middle-tier items==== | |||
{{MKT favored table|new|Tokyo Blur 2}} | |||
====Bonus challenges==== | |||
<div class="contentbox mw-collapsible mw-collapsed> | |||
{{MKT bonus challenge table|Steer Clear of Obstacles|Tokyo Blur 2}} | |||
{{MKT bonus challenge table|Vs. Mega|Tokyo Blur 2|char=Donkey Kong}} | |||
{{MKT bonus challenge table|Goomba Takedown|Tokyo Blur 2}} | |||
{{MKT bonus challenge table|Break Item Boxes|Tokyo Blur 2}} | |||
</div> | |||
===Tokyo Blur 3=== | ===Tokyo Blur 3=== | ||
| Line 77: | Line 74: | ||
When configured for Coin Rush, cars and buses will block off a lane in the highway and toll booth, making the collection of coins easier. | When configured for Coin Rush, cars and buses will block off a lane in the highway and toll booth, making the collection of coins easier. | ||
The course also appears as '''Tokyo Blur 3R''' (reverse), '''Tokyo Blur 3T''' (with ramps), and '''Tokyo Blur 3R/T''' (reverse and with ramps). | The course also appears as '''Tokyo Blur 3R''' (reverse), '''Tokyo Blur 3T''' (with ramps), and '''Tokyo Blur 3R/T''' (reverse and with ramps). The former two debuted alongside the normal variant in the [[Summer Festival Tour]], while the latter debuted in the [[Mario vs. Peach Tour]]. In the R and T variants, all [[Thwomp]]s are gone. In the R variant, there are instead [[Warp Pipe|pipes]] and an [[oil slick]] on the course as obstacles. In the T variant, the glide ramp is gone. In the R/T variant, there are additional Thwomps which are larger and appear in different locations, and there is an additional glide ramp where racers exit the Shuto Expressway. | ||
====Appearances==== | |||
For this course's tour appearances, see [[List of Tokyo Blur tour appearances in Mario Kart Tour#Tokyo Blur 3|List of Tokyo Blur tour appearances in ''Mario Kart Tour'' § Tokyo Blur 3]]. | |||
====Top-tier and middle-tier items==== | |||
{{MKT favored table|new|Tokyo Blur 3}} | |||
====Bonus challenges==== | |||
<div class="contentbox mw-collapsible mw-collapsed> | <div class="contentbox mw-collapsible mw-collapsed> | ||
{| | {{MKT bonus challenge table|Ring Race|Tokyo Blur 3}} | ||
{{MKT bonus challenge table|Combo Attack|Tokyo Blur 3T}} | |||
| | {{MKT bonus challenge table|Big Reverse Race|Tokyo Blur 3}} | ||
{{MKT bonus challenge table|Snap a Photo|Tokyo Blur 3R/T}} | |||
{{ | |||
|} | |||
</div> | </div> | ||
===Tokyo Blur 4=== | ===Tokyo Blur 4=== | ||
In the standard layout, the track starts out following the same path as Tokyo Blur. All of the racers start the course on the central span of the {{wp|Rainbow Bridge (Tokyo)|Rainbow Bridge}}. Just after the starting line, the road curves to the right through {{wp|Ginza}}, then makes a slight left before the {{wp|Wako (retailer)|Wako}} store. Not long after, the course makes a right U-turn near the {{wp|National Diet Building}} and the {{wp|Miraikan}}, then goes through a tunnel. The course then makes a sharp left to follow a small portion of Tokyo Blur 2 in reverse, going under the {{wp|Kaminarimon}} next to the {{wp|Sensō-ji}}, where the second segment of the course begins. The track then immediately makes a U-turn toward the {{wp|Shuto Expressway}}; the remainder of the course follows the path of Tokyo Blur 3, entering the expressway through a set of toll gates before rounding the spiral loop around the {{wp|Tokyo Big Sight}}. A [[Glide Ramp]] sends the player back onto the Rainbow Bridge, where a set of | In the standard layout, the track starts out following the same path as Tokyo Blur. All of the racers start the course on the central span of the {{wp|Rainbow Bridge (Tokyo)|Rainbow Bridge}}. Just after the starting line, the road curves to the right through {{wp|Ginza}}, then makes a slight left before the {{wp|Wako (retailer)|Wako}} store. Not long after, the course makes a right U-turn near the {{wp|National Diet Building}} and the {{wp|Miraikan}}, then goes through a tunnel. The course then makes a sharp left to follow a small portion of Tokyo Blur 2 in reverse, going under the {{wp|Kaminarimon}} next to the {{wp|Sensō-ji}}, where the second segment of the course begins. The track then immediately makes a U-turn toward the {{wp|Shuto Expressway}}; the remainder of the course follows the path of Tokyo Blur 3, entering the expressway through a set of toll gates before rounding the spiral loop around the {{wp|Tokyo Big Sight}}. Unlike in Tokyo Blur 3, the first part of the expressway is divided down the middle by fences, and there are [[oil slick]]s as obstacles instead of [[Thwomp]]s. A [[Glide Ramp|glide ramp]] sends the player back onto the Rainbow Bridge, where a set of Thwomps on either side threatens the players just before the finish line. | ||
The course also appears as '''Tokyo Blur 4R''' (reversed), '''Tokyo Blur 4T''' (with ramps), and '''Tokyo Blur 4R/T''' (reversed with ramps). In the R and R/T variants, the Shuto Expressway portion is mostly reverted back to how it was in Tokyo Blur 3. In the T variant, the glide ramp is gone. In the R/T variant, racers start and end the race on [[Kanaami Road]] above the starting line. Additionally, an extra pair of Thwomps appears just after the second U-turn. | |||
====Appearances==== | |||
For this course's tour appearances, see [[List of Tokyo Blur tour appearances in Mario Kart Tour#Tokyo Blur 4|List of Tokyo Blur tour appearances in ''Mario Kart Tour'' § Tokyo Blur 4]]. | |||
====Top-tier and middle-tier items==== | |||
{{MKT favored table|new|Tokyo Blur 4}} | |||
====Bonus challenges==== | |||
<div class="contentbox mw-collapsible mw-collapsed> | <div class="contentbox mw-collapsible mw-collapsed> | ||
{| | {{MKT bonus challenge table|Time Trial|Tokyo Blur 4|Tokyo Blur 4R}} | ||
{{MKT bonus challenge table|Combo Attack|Tokyo Blur 4T}} | |||
{{ | |||
</div> | </div> | ||
==''Mario Kart 8 Deluxe''== | ==''Mario Kart 8 Deluxe''== | ||
Tokyo Blur makes its console debut in ''[[Mario Kart 8 Deluxe]]'' via the ''[[Mario Kart 8 Deluxe – Booster Course Pass|Booster Course Pass]]''. It is the first course of the [[Lucky Cat Cup]], and as such was added as part of the first wave of the DLC. Similarly to Tokyo Blur 4, it is an expanded and combined version of the first three routes for this course; however, this version dedicates one lap to each variation through the use of changing [[arrow field]]s. | |||
Tokyo Blur makes its console debut in ''[[Mario Kart 8 Deluxe]]'' via the [[Mario Kart 8 Deluxe – Booster Course Pass|Booster Course Pass]]. It is the first course of the [[Lucky Cat Cup]], and as such was added as part of the first wave of the DLC. Similarly to Tokyo Blur 4, it is an expanded and combined version of the first three routes for this course; however, this version dedicates one lap to each variation through the use of changing [[arrow field]]s. | |||
The first lap is based on Tokyo Blur, turning left at the {{wp|Wako}} store and making a U-turn past the {{wp|National Diet Building}}. The second lap is based on Tokyo Blur 2, turning right at the Wako store and then left underneath the {{wp|Kaminarimon}}. The third lap is based on Tokyo Blur 3, turning right at the Wako store and then onto the {{wp|Shuto Expressway}}. The minimap has been rotated 90 degrees compared to the equivalent minimaps for the variants in ''Tour''. Unlike {{classic-link|Tour|Paris Promenade}}, its hazards - [[Thwomp]]s - have been retained. | The first lap is based on Tokyo Blur, turning left at the {{wp|Wako (retailer)|Wako}} store and making a U-turn past the {{wp|National Diet Building}}. The second lap is based on Tokyo Blur 2, turning right at the Wako store and then left underneath the {{wp|Kaminarimon}}. The third and final lap is based on Tokyo Blur 3, turning right at the Wako store and then onto the {{wp|Shuto Expressway}}. The minimap has been rotated 90 degrees clockwise compared to the equivalent minimaps for the variants in ''Tour''. Unlike {{classic-link|Tour|Paris Promenade}}, its hazards - [[Thwomp]]s - have been retained (albeit with slightly different arrangements). One additional traffic cone was added at the expressway entrance. | ||
Tokyo Blur is one of three courses to originate from ''[[Mario Kart Tour]]'' to appear in the first wave of the DLC, alongside Paris Promenade and [[Ninja Hideaway]]. This is also one of five tracks in ''Mario Kart 8 Deluxe'' where players can hit the banner (causing it to spin), like [[Mario Circuit (Mario Kart 8)|Mario Circuit]], {{classic-link|DS|Wario Stadium}}, {{classic-link|3DS|Neo Bowser City}} and {{classic-link|3DS|Rock Rock Mountain}}. Unlike the other courses mentioned, this is only possible during the final lap. | Tokyo Blur is one of three courses to originate from ''[[Mario Kart Tour]]'' to appear in the first wave of the DLC, alongside Paris Promenade and [[Ninja Hideaway]]. This is also one of five tracks in ''Mario Kart 8 Deluxe'' where players can hit the banner (causing it to spin), like [[Mario Circuit (Mario Kart 8)|Mario Circuit]], {{classic-link|DS|Wario Stadium}}, {{classic-link|3DS|Neo Bowser City}} and {{classic-link|3DS|Rock Rock Mountain}}. Unlike the other courses mentioned, this is only possible during the final lap. | ||
| Line 153: | Line 134: | ||
*'''''Mario Kart Tour'' Twitter:''' ''Japan's most famous city is back for for another lap with the Tokyo Blur 2 course. Those traditional kadomatsu decorations aren't just for show—hitting them with an item is a great way to rack up some extra points!''<ref>mariokarttourEN (January 1, 2020). [https://twitter.com/mariokarttourEN/status/1212523902674583553 ''Twitter'']. Retrieved March 13, 2020.</ref> | *'''''Mario Kart Tour'' Twitter:''' ''Japan's most famous city is back for for another lap with the Tokyo Blur 2 course. Those traditional kadomatsu decorations aren't just for show—hitting them with an item is a great way to rack up some extra points!''<ref>mariokarttourEN (January 1, 2020). [https://twitter.com/mariokarttourEN/status/1212523902674583553 ''Twitter'']. Retrieved March 13, 2020.</ref> | ||
*'''''Mario Kart Tour'' Twitter:''' ''It's time for the Summer Festival Tour! Return to the sizzling streets of Tokyo for some sunny fun. Blaze new paths in the Tokyo Blur course, but don't overheat!''<ref>mariokarttourEN (August 26, 2020). [https://twitter.com/mariokarttourEN/status/1298502938587955200 ''Twitter'']. Retrieved August 26, 2020.</ref> | *'''''Mario Kart Tour'' Twitter:''' ''It's time for the Summer Festival Tour! Return to the sizzling streets of Tokyo for some sunny fun. Blaze new paths in the Tokyo Blur course, but don't overheat!''<ref>mariokarttourEN (August 26, 2020). [https://twitter.com/mariokarttourEN/status/1298502938587955200 ''Twitter'']. Retrieved August 26, 2020.</ref> | ||
*'''''Mario Kart Tour'' Twitter:''' ''The Snow Tour is wrapping up in {{color|#MarioKartTour | *'''''Mario Kart Tour'' Twitter:''' ''The Snow Tour is wrapping up in {{color|blue|#MarioKartTour}}. Next up is the Mario Tour featuring Tokyo Blur 4, a brand-new variant of the existing Tokyo-based course!''<ref>mariokarttourEN (March 4, 2021). [https://twitter.com/mariokarttourEN/status/1367724372765642753 ''Twitter'']. Retrieved March 4, 2021.</ref> | ||
===''Mario Kart 8 Deluxe''=== | ===''Mario Kart 8 Deluxe''=== | ||
*'''''Nintendo Magazine 2022 Summer'':''' ''This is a course inspired by Tokyo, and you will be able race{{sic}} past some famous tourist sites. You can also see Mt. Fuji, which has been registered as a World Heritage Site, off in the distance.''<ref>[https://www.nintendo.co.jp/software/feature/magazine_2022summer/index_en.html?page=10 Nintendo Magazine 2022 Summer (Digital English edition)]. | *'''Nintendo Switch News app (US):''' | ||
**''This course first appeared in the Mario Kart Tour game.'' | |||
**''Some famous tourist locations in Tokyo were included in this course. Keep your eyes peeled while you're racing!'' | |||
**''The route changes depending on the lap―you may want to put in some practice so you don't get surprised.'' | |||
*'''Nintendo Switch News app (UK):''' '''''Race the streets of Tokyo in Tokyo Blur!'''<br>Now, we'd like to present to you a course released as part of the first wave, which is available now: Tokyo Blur.<br>This course, which debuted in the smart device game Mario Kart Tour, is modelled after the great Japanese metropolis of Tokyo and features many of the city's famous landmarks for you to zoom past. The exact route changes depending on the lap, so you'll have to get a firm grip on the road's many twists and turns if you want to achieve the best time possible!'' | |||
*'''''Nintendo Magazine 2022 Summer'':''' ''This is a course inspired by Tokyo, and you will be able race{{sic}} past some famous tourist sites. You can also see Mt. Fuji, which has been registered as a World Heritage Site, off in the distance.''<ref>[https://www.nintendo.co.jp/software/feature/magazine_2022summer/index_en.html?page=10 Nintendo Magazine 2022 Summer (Digital English edition)]. nintendo.co.jp. Retrieved August 16, 2022. ([https://web.archive.org/web/20220729082352/https://www.nintendo.co.jp/software/feature/magazine_2022summer/index_en.html?page=10&device=pc Archived] July 29, 2022, 08:23:52 UTC via Wayback Machine.)</ref> | |||
*'''''Nintendo Magazine 2023 Summer'':''' ''Here, you might recognize the familiar landmarks of Tokyo. Mt. Fuji can be seen in the distance.''<ref>[https://www.nintendo.co.jp/software/feature/magazine_2023summer/index_en.html?page=22 Nintendo Magazine 2023 Summer (Digital English edition)]. ''nintendo.co.jp.'' Retrieved July 15, 2023. ([https://web.archive.org/web/20230715104855/https://www.nintendo.co.jp/software/feature/magazine_2023summer/index_en.html?page=22&device=pc Archived] July 15, 2023, 10:48:55 UTC via Wayback Machine.)</ref> | |||
==Gallery== | ==Gallery== | ||
===''Mario Kart Tour''=== | ===''Mario Kart Tour''=== | ||
<gallery> | <gallery> | ||
Tokyo Pictures.png|Pictures of the Tokyo Blur courses | Tokyo Pictures.png|Pictures of the various Tokyo Blur courses | ||
Tokyo Pictures 2.png|Pictures of the Tokyo Blur courses | Tokyo Pictures 2.png|Pictures of the various Tokyo Blur courses | ||
</gallery> | </gallery> | ||
====Tokyo Blur==== | |||
=====Course icons===== | =====Course icons===== | ||
{{main-gallery|Mario Kart Tour race course icons (original courses)#Tokyo Blur|Mario Kart Tour race course icons (original courses) § Tokyo Blur}} | |||
<gallery> | <gallery> | ||
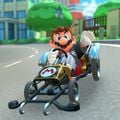
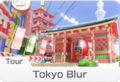
MKT Icon TokyoBlur MarioHakama.png|The course icon | MKT Icon TokyoBlur MarioHakama.png|The course icon | ||
MKT Icon TokyoBlurR PeachYukata.png|The course icon of the R variant | |||
MKT Icon TokyoBlurT PeachKimono.png|The course icon of the T variant | |||
MKT Icon TokyoBlurRT DiddyKong.png|The course icon of the R/T variant | |||
MKT Icon TokyoBlurR | |||
MKT Icon TokyoBlurT PeachKimono.png|The course icon of the T variant | |||
MKT Icon TokyoBlurRT DiddyKong.png|The course icon of the R/T variant | |||
</gallery> | </gallery> | ||
=====Screenshots===== | =====Screenshots===== | ||
<gallery> | <gallery> | ||
MKT Tokyo Blur Scene 2.jpg| | MKT Tokyo Blur Starting Line.jpg|View of the starting line | ||
MKT Tokyo Blur Scene 2.jpg|Alternate view of the starting line | |||
Tokyo View.png|View of the finish line area | Tokyo View.png|View of the finish line area | ||
MKT Tokyo Blur Website Scene.png|View of the {{wp|Tokyo Tower}} and some buildings | MKT Tokyo Blur Website Scene.png|View of the {{wp|Tokyo Tower}} and some buildings | ||
MKT Tokyo Blur R.jpg|View of the National Diet Building | MKT Tokyo Blur R.jpg|View of the National Diet Building | ||
MKT Tokyo Blur Rainbow Bridge.jpg|View of the {{wp|Rainbow Bridge (Tokyo)|Rainbow Bridge}} | |||
MKT Tokyo Blur Sponsors 1.jpg|View of various [[Gallery:Sponsors in the Mario Kart series|sponsors]] | MKT Tokyo Blur Sponsors 1.jpg|View of various [[Gallery:Sponsors in the Mario Kart series|sponsors]] | ||
MKT Tokyo Blur Sponsors 2.jpg|Ginza section | MKT Tokyo Blur Sponsors 2.jpg|Ginza section | ||
| Line 207: | Line 181: | ||
====Tokyo Blur 2==== | ====Tokyo Blur 2==== | ||
=====Course icons===== | =====Course icons===== | ||
{{main-gallery|Mario Kart Tour race course icons (original courses)#Tokyo Blur 2|Mario Kart Tour race course icons (original courses) § Tokyo Blur 2}} | |||
<gallery> | <gallery> | ||
MKT Icon TokyoBlur2 MarioHappi.png|The course icon | MKT Icon TokyoBlur2 MarioHappi.png|The course icon | ||
MKT Icon TokyoBlur2R ToadPartyTime.png|The course icon of the R variant | |||
MKT Icon TokyoBlur2R ToadPartyTime.png|The course icon of the R variant | MKT Icon TokyoBlur2T PeachKimono.png|The course icon of the T variant | ||
MKT Icon TokyoBlur2RT Iggy.png|The course icon of the R/T variant | |||
MKT Icon TokyoBlur2T PeachKimono.png|The course icon of the T variant | |||
MKT Icon TokyoBlur2RT Iggy.png|The course icon of the R/T variant | |||
</gallery> | </gallery> | ||
| Line 231: | Line 192: | ||
<gallery> | <gallery> | ||
MKT Tokyo Blur 2 Website Scene.png|View of a [[Thwomp]] near a shortcut and the {{wp|Sensō-ji}} | MKT Tokyo Blur 2 Website Scene.png|View of a [[Thwomp]] near a shortcut and the {{wp|Sensō-ji}} | ||
MKT Tokyo Blur 2 Senso-Ji.jpg|Closer view of the Sensō-ji | |||
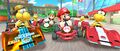
MKT New Year's Tour Racers.jpg|[[Toad|Toad (Party Time)]] and [[Mario|Mario (Happi)]] driving | MKT New Year's Tour Racers.jpg|[[Toad|Toad (Party Time)]] and [[Mario|Mario (Happi)]] driving | ||
MKT Mario Happi.jpg|Mario (Happi) tricking in the [[Quickshaw]] | MKT Mario Happi.jpg|Mario (Happi) tricking in the [[Quickshaw]] | ||
| Line 240: | Line 202: | ||
====Tokyo Blur 3==== | ====Tokyo Blur 3==== | ||
=====Course icons===== | =====Course icons===== | ||
{{main-gallery|Mario Kart Tour race course icons (original courses)#Tokyo Blur 3|Mario Kart Tour race course icons (original courses) § Tokyo Blur 3}} | |||
<gallery> | <gallery> | ||
MKT Icon TokyoBlur3 | MKT Icon TokyoBlur3 MarioSunshine.png|The course icon | ||
MKT Icon TokyoBlur3R PeachHappi.png|The course icon of the R variant | |||
MKT Icon TokyoBlur3T DaisyYukata.png|The course icon of the T variant | |||
MKT Icon TokyoBlur3RT ShyGuyNinja.png|The course icon of the R/T variant | |||
MKT Icon TokyoBlur3R | |||
MKT Icon TokyoBlur3T DaisyYukata.png|The course icon of the T variant | |||
MKT Icon TokyoBlur3RT ShyGuyNinja.png|The course icon of the R/T variant | |||
</gallery> | </gallery> | ||
| Line 261: | Line 213: | ||
<gallery> | <gallery> | ||
MKT Tokyo Blur 3 Scene.jpg|View of the course | MKT Tokyo Blur 3 Scene.jpg|View of the course | ||
MKT Tokyo Blur 3 Welcome Sign.jpg|View of the welcome sign before the highway | |||
MKT Tokyo Blur 3 Scene 2.jpg|View of the highway | MKT Tokyo Blur 3 Scene 2.jpg|View of the highway | ||
MKT Tokyo Blur 3 Highway.jpg|View of a [[Thwomp]] on the highway | |||
MKT Tokyo Blur 3 Highway 2.jpg|Alternate view of the highway | |||
MKT Tokyo Blur 3 Rainbow Bridge.jpg|View of the {{wp|Rainbow Bridge (Tokyo)|Rainbow Bridge}} | |||
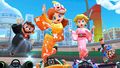
MKT Summer Festival Tour Drivers.jpg|[[Mario|Mario (Happi)]], [[Princess Peach|Peach (Kimono)]], [[Mario|Mario (Hakama)]], and [[Princess Daisy|Daisy (Yukata)]] gliding in Tokyo Blur 3R | MKT Summer Festival Tour Drivers.jpg|[[Mario|Mario (Happi)]], [[Princess Peach|Peach (Kimono)]], [[Mario|Mario (Hakama)]], and [[Princess Daisy|Daisy (Yukata)]] gliding in Tokyo Blur 3R | ||
MKT Daisy Yukata.jpg|Daisy (Yukata) tricking in the [[Festival Girl]] | MKT Daisy Yukata.jpg|Daisy (Yukata) tricking in the [[Festival Girl]] | ||
| Line 270: | Line 226: | ||
====Tokyo Blur 4==== | ====Tokyo Blur 4==== | ||
=====Course icons===== | =====Course icons===== | ||
{{main-gallery|Mario Kart Tour race course icons (original courses)#Tokyo Blur 4|Mario Kart Tour race course icons (original courses) § Tokyo Blur 4}} | |||
<gallery> | <gallery> | ||
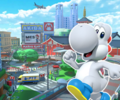
MKT Icon TokyoBlur4 WhiteYoshi.png|The course icon | |||
MKT Icon TokyoBlur4R MarioSamurai.png|The course icon of the R variant | |||
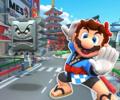
MKT Icon TokyoBlur4 WhiteYoshi.png|The course icon | MKT Icon TokyoBlur4T MarioHappi.png|The course icon of the T variant | ||
MKT Icon TokyoBlur4RT CatPeach.png|The course icon of the R/T variant | |||
MKT Icon TokyoBlur4R MarioSamurai.png|The course icon of the R variant | |||
MKT Icon TokyoBlur4T MarioHappi.png|The course icon of the T variant | |||
MKT Icon TokyoBlur4RT CatPeach.png|The course icon of the R/T variant | |||
</gallery> | </gallery> | ||
| Line 298: | Line 245: | ||
<gallery> | <gallery> | ||
MK8D Tour Tokyo Blur Course Icon.png|The course icon | MK8D Tour Tokyo Blur Course Icon.png|The course icon | ||
MK8D Tokyo Blur Scene 1.jpg|View of {{wp|Mount Fuji}}, the {{wp|Tokyo Tower}} and the {{wp|Kabuki-za}} theater | |||
MK8D Tokyo Blur Scene 2.jpg|View of the starting line on the {{wp|Rainbow Bridge (Tokyo)|Rainbow Bridge}} | |||
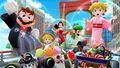
MK8D Tokyo Blur Racing.png|Rosalina, Princess Daisy, Wario, Yoshi, Mario and Bowser on the course | |||
MK8D Tokyo Blur Early Arrow Field.png|The course with an early design for the [[Arrow field|arrow field]] | |||
</gallery> | </gallery> | ||
| Line 334: | Line 285: | ||
*The presence of [[Noshi]]s in the R/T variant of Tokyo Blur references the {{wp|kaiju}}.<ref name="dinosaur"/> | *The presence of [[Noshi]]s in the R/T variant of Tokyo Blur references the {{wp|kaiju}}.<ref name="dinosaur"/> | ||
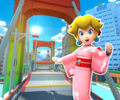
*In the trailer for the [[Tokyo Tour]], [[Princess Peach|Peach (Kimono)]] can be seen driving in the {{wp|Sensō-ji}} section, which is only accessible in Tokyo Blur 2 and Tokyo Blur 4.<ref>[https://www.youtube.com/shorts/lKsgYxTXoCI Tokyo Tour trailer]</ref> | *In the trailer for the [[Tokyo Tour]], [[Princess Peach|Peach (Kimono)]] can be seen driving in the {{wp|Sensō-ji}} section, which is only accessible in Tokyo Blur 2 and Tokyo Blur 4.<ref>[https://www.youtube.com/shorts/lKsgYxTXoCI Tokyo Tour trailer]</ref> | ||
*Tokyo Blur is the first city course and course in general to have its | *Tokyo Blur is the first city course and course in general to have its regular and R variants appear in a tour, but not its T variant. | ||
*Tokyo Blur is one of two city courses in ''Mario Kart Tour'' to have all four routes travel in the same direction, the other being [[Tour New York Minute|New York Minute]]. | |||
==References== | ==References== | ||
| Line 343: | Line 295: | ||
{{MK8}} | {{MK8}} | ||
[[Category:Cities]] | [[Category:Cities]] | ||
[[Category:Classic courses]] | |||
[[Category:Mario Kart 8 Deluxe – Booster Course Pass race courses]] | [[Category:Mario Kart 8 Deluxe – Booster Course Pass race courses]] | ||
[[Category:Mario Kart Tour race courses]] | [[Category:Mario Kart Tour race courses]] | ||
[[it:Neon di Tokyo]] | [[it:Neon di Tokyo]] | ||
Latest revision as of 12:03, June 6, 2024
| Tokyo Blur | |||||||||||
|---|---|---|---|---|---|---|---|---|---|---|---|
  | |||||||||||
| Information | |||||||||||
| Appears in | Mario Kart Tour (2019 (1), 2020 (2, 3), 2021 (4)) Mario Kart 8 Deluxe (Booster Course Pass, Wave 1) (2022) | ||||||||||
| Cup(s) | Lucky Cat Cup | ||||||||||
| Tour(s) |
Tokyo Blur:
Tokyo Tour New Year's Tour (2020) (challenge only) Summer Festival Tour 1st Anniversary Tour Mario vs. Peach Tour 2nd Anniversary Tour Anniversary Tour (2022) Winter Tour (2023) Summer Tour (2023) Tokyo Blur 2: New Year's Tour (2020) Summer Festival Tour Mario vs. Peach Tour Winter Tour (2023) Summer Tour (2023) Tokyo Blur 3: Summer Festival Tour Mario vs. Peach Tour Winter Tour (2023) Anniversary Tour (2023) Tokyo Blur 4: Mario Tour (2021) Yoshi Tour (2021) Mario vs. Peach Tour Winter Tour (2023) | ||||||||||
| Based on | Tokyo, Japan | ||||||||||
| Online play | Available (Switch) | ||||||||||
| |||||||||||
| |||||||||||
| |||||||||||


Tokyo Blur is a race course in Mario Kart Tour. It takes place in Tokyo, Japan and makes its debut in the city's namesake tour, the Tokyo Tour. The course's music is based on the theme of 3DS Toad Circuit and 3DS Mario Circuit. This course has four different routes, the most out of any city course alongside New York Minute: Tokyo Blur, Tokyo Blur 2, Tokyo Blur 3, and Tokyo Blur 4, with the last three being introduced in the 2020 New Year's Tour, Summer Festival Tour, and the 2021 Mario Tour, respectively. The fourth iteration of this course differs from the others, in that it is two sections as opposed to two laps. From versions 1.2.0 to 1.4.0, the first layout was called Tokyo Blur 1.
Tokyo Blur reappears in the Booster Course Pass DLC for Mario Kart 8 Deluxe as the first course in the Lucky Cat Cup. The course combines the first three versions of Tokyo Blur together, with a lap dedicated to each variant. Its theme was arranged for the Booster Course Pass end credits.
Mario Kart TourEdit


Tokyo BlurEdit
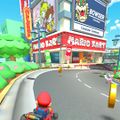
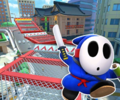
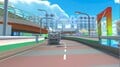
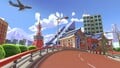
In the standard layout, all of the racers start the course on the central span of the Rainbow Bridge. Just after the starting line, the road curves to the right through Ginza, then makes a slight left before the Wako store. Not long after, the course makes a right U-turn near the National Diet Building and the Miraikan, then goes through a tunnel. As the Tokyo Skytree, Asahi Beer Hall, and Tokyo Big Sight come into view, the road makes a wide right turn back onto the Rainbow Bridge. Fuji TV's headquarters can be seen on the left. The minimap for this route resembles that of Yoshi Falls from Mario Kart DS and Luigi Circuit from Mario Kart Wii.
The course also appears as Tokyo Blur R (reversed), Tokyo Blur T (with ramps), and Tokyo Blur R/T (reversed with ramps). In the R/T variant, there are Swoops and Noshis on the course; two Noshis appear outside the track while one is standing on the track towards the end.
Before the Summer Festival Tour, no kart had Tokyo Blur R listed as a favorite course; instead, its appearances in the Mario Cup and Toadette Cup relied on the spotlight bonus to raise the Kabuki Dasher and the Quickshaw, respectively, to the top tier.
AppearancesEdit
The first layout of Tokyo Blur is currently the only course based on a real world city to have appeared in seven different tours: the Tokyo Tour, the Summer Festival Tour, the 1st Anniversary Tour, the Mario vs. Peach Tour, the 2nd Anniversary Tour, the 2022 Anniversary Tour, and the 2023 Winter Tour. It also made a minor appearance in the 2020 New Year's Tour as the location of a bonus challenge and in the 2021 Mario Tour as the third and final race in the 2-Player Challenge mode.
For this course's tour appearances, see List of Tokyo Blur tour appearances in Mario Kart Tour § Tokyo Blur.
Top-tier and middle-tier itemsEdit
Select "show" to reveal the drivers, karts, and gliders for which Tokyo Blur and its variants are always favored or favorite courses. For instances in which additional drivers, karts, and gliders temporarily had this course and its variants as favored or favorite courses, see List of Tokyo Blur tour appearances in Mario Kart Tour.
| Course | Three-item drivers | Bonus points ×2 karts | Combo bonus ×3 gliders | Two-item drivers | Bonus points ×1.5 karts | Combo bonus ×2 gliders |
|---|---|---|---|---|---|---|
Normal variant |
||||||
R variant |
||||||
T variant |
||||||
R/T variant |
||||||
| * indicates a favored course upgraded to a favorite course after reaching level 3. ** indicates a favored course upgraded to a favorite course after reaching level 6. *** indicates a favored course upgraded to a favorite course after reaching level 8 for High-End items. | ||||||
Bonus challengesEdit
| Ring Race | |||||||
|---|---|---|---|---|---|---|---|
| Icon | Course variant | Chosen driver |
Chosen kart |
Chosen glider |
Grand Star scores | Tour appearances | Cup |

|
Regular | Lakitu |
Pipe Frame |
Super Glider |
|
Tokyo Tour | Lakitu Cup |
|
Anniversary Tour (2022) | Mario Cup | |||||
| Do Jump Boosts | |||||||
|---|---|---|---|---|---|---|---|
| Icon | Course variant | Chosen driver |
Chosen kart |
Chosen glider |
Grand Star scores | Tour appearances | Cup |

|
Regular | Peachette |
Pipe Frame |
Super Glider |
|
Tokyo Tour | Peachette Cup |
|
Winter Tour (2023) | Wario Cup | |||||
| Glider Challenge | |||||||
|---|---|---|---|---|---|---|---|
| Icon | Course variant | Chosen driver |
Chosen kart |
Chosen glider |
Grand Star distances | Tour appearances | Cup |

|
Regular | Mario (Hakama) |
Kabuki Dasher |
New Year's Kite |
|
New Year's Tour (2020) | Daisy Cup |
| 2nd Anniversary Tour | Hammer Bro Cup | ||||||
| Winter Tour (2023) | Lakitu Cup | ||||||
| Goomba Takedown | |||||||||
|---|---|---|---|---|---|---|---|---|---|
| Icon | Course variant | Chosen driver |
Chosen kart |
Chosen glider |
Item Box type found |
Number of item slots | Grand Star scores | Tour appearances | Cup |

|
Regular | Mario |
Pipe Frame |
Super Glider |
Bob-omb |
1 |
|
1st Anniversary Tour | Lakitu Cup |
| 2 | Mario vs. Peach Tour | Mario Cup | |||||||
| Steer Clear of Obstacles | |||||||
|---|---|---|---|---|---|---|---|
| Icon | Course variant | Chosen driver |
Chosen kart |
Chosen glider |
Obstacles | Tour appearances | Cup |

|
Regular | Baby Daisy |
Pipe Frame |
Super Glider |
 Thwomp |
Summer Tour (2023) | Nabbit Cup |
| Combo Attack | |||||||
|---|---|---|---|---|---|---|---|
| Icon | Course variant | Chosen driver |
Chosen kart |
Chosen glider |
Highest combo counts | Tour appearances | Cup |

|
T | Mario |
Pipe Frame |
Super Glider |
|
Summer Tour (2023) | Pink Gold Peach Cup |
Tokyo Blur 2Edit
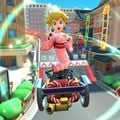
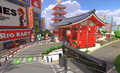
In the standard layout, all of the racers start the course on the central span of the Rainbow Bridge. Just after the starting line, the road curves to the right through Ginza, then makes a slight right before the Wako store. After passing by two Thwomps, the course shifts left at a roundabout and continues straight (with a subway entrance and Akihabara shops visible on the left), then goes under the Kaminarimon left of the Sensō-ji. As the player slights right then turns left at a signalized intersection, the road makes a wide right turn back onto the Rainbow Bridge. Fuji TV's headquarters can be seen on the left.
Tokyo Blur 2 is the first city course that has been featured more than once in Coin Rush.
The course also appears as Tokyo Blur 2R (reversed), Tokyo Blur 2T (with ramps), and Tokyo Blur 2R/T (reversed with ramps). In the T variant, both Thwomps are gone. In the R/T variant, the Thwomps are now side-by-side and there is a glide ramp at the end of the track.
AppearancesEdit
For this course's tour appearances, see List of Tokyo Blur tour appearances in Mario Kart Tour § Tokyo Blur 2.
Top-tier and middle-tier itemsEdit
Select "show" to reveal the drivers, karts, and gliders for which Tokyo Blur 2 and its variants are always favored or favorite courses. For instances in which additional drivers, karts, and gliders temporarily had this course and its variants as favored or favorite courses, see List of Tokyo Blur 2 tour appearances in Mario Kart Tour.
| Course | Three-item drivers | Bonus points ×2 karts | Combo bonus ×3 gliders | Two-item drivers | Bonus points ×1.5 karts | Combo bonus ×2 gliders |
|---|---|---|---|---|---|---|
Normal variant |
||||||
R variant |
||||||
T variant |
||||||
R/T variant |
||||||
| * indicates a favored course upgraded to a favorite course after reaching level 3. ** indicates a favored course upgraded to a favorite course after reaching level 6. *** indicates a favored course upgraded to a favorite course after reaching level 8 for High-End items. | ||||||
Bonus challengesEdit
| Steer Clear of Obstacles | |||||||
|---|---|---|---|---|---|---|---|
| Icon | Course variant | Chosen driver |
Chosen kart |
Chosen glider |
Obstacles | Tour appearances | Cup |

|
Regular | Peach (Kimono) |
Quickshaw |
Purple Oilpaper Umbrella |
Goomba  Goomba Tower |
New Year's Tour (2020) | Peach Cup |
| Summer Tour (2023) | Baby Peach Cup | ||||||
| Vs. Mega Donkey Kong | |||||||
|---|---|---|---|---|---|---|---|
| Icon | Course variant | Mega opponent information | Tour appearances | Cup | |||
| Driver | Kart | Glider | Items used | ||||

|
Regular | Donkey Kong |
Kabuki Dasher |
Super Glider |
Bananas[1] Giant Bananas[1] 100cc and higher only Mushrooms 200cc only |
New Year's Tour (2020) | Pauline Cup |
| Winter Tour (2023) | Pink Gold Peach Cup | ||||||
| Summer Tour (2023) | Dixie Kong Cup | ||||||
| Goomba Takedown | |||||||||
|---|---|---|---|---|---|---|---|---|---|
| Icon | Course variant | Chosen driver |
Chosen kart |
Chosen glider |
Item Box type found |
Number of item slots | Grand Star scores | Tour appearances | Cup |

|
Regular | Peach |
Pipe Frame |
Super Glider |
Super Horn |
1 |
|
Winter Tour (2023) | Mii Cup |
| Break Item Boxes | |||||||||
|---|---|---|---|---|---|---|---|---|---|
| Icon | Course variant | Chosen driver |
Chosen kart |
Chosen glider |
Item Box type found |
Number of item slots | Grand Star scores | Tour appearances | Cup |

|
Regular | Mario (Hakama) |
Quickshaw |
Purple Oilpaper Umbrella |
Mushroom Mega Mushroom Coin |
2 |
|
New Year's Tour (2020) | Baby Rosalina Cup |
|
Mario vs. Peach Tour | Rosalina Cup | |||||||
| Winter Tour (2023) | Mario Cup | ||||||||
Tokyo Blur 3Edit
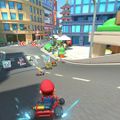
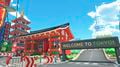
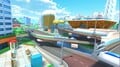
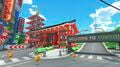
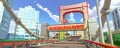
In the standard layout, all of the racers start the course on the central span of the Rainbow Bridge. Just after the starting line, the road curves to the right through Ginza, then makes a slight right before the Wako store. After passing by some Thwomps, the course shifts left at a roundabout and continues straight to the Shuto Expressway, which is built along the Nihonbashi River. The toll plaza bar only opens when a driver passes through; the course then curves to the right. After passing by two Thwomps and after a wide turn up the spiral loop around the Tokyo Big Sight, a Glide Ramp enables the driver to fly out of Shuto Expressway and back onto Rainbow Bridge. Fuji TV's headquarters can be seen on the left.
When configured for Coin Rush, cars and buses will block off a lane in the highway and toll booth, making the collection of coins easier.
The course also appears as Tokyo Blur 3R (reverse), Tokyo Blur 3T (with ramps), and Tokyo Blur 3R/T (reverse and with ramps). The former two debuted alongside the normal variant in the Summer Festival Tour, while the latter debuted in the Mario vs. Peach Tour. In the R and T variants, all Thwomps are gone. In the R variant, there are instead pipes and an oil slick on the course as obstacles. In the T variant, the glide ramp is gone. In the R/T variant, there are additional Thwomps which are larger and appear in different locations, and there is an additional glide ramp where racers exit the Shuto Expressway.
AppearancesEdit
For this course's tour appearances, see List of Tokyo Blur tour appearances in Mario Kart Tour § Tokyo Blur 3.
Top-tier and middle-tier itemsEdit
Select "show" to reveal the drivers, karts, and gliders for which Tokyo Blur 3 and its variants are always favored or favorite courses. For instances in which additional drivers, karts, and gliders temporarily had this course and its variants as favored or favorite courses, see List of Tokyo Blur 3 tour appearances in Mario Kart Tour.
| Course | Three-item drivers | Bonus points ×2 karts | Combo bonus ×3 gliders | Two-item drivers | Bonus points ×1.5 karts | Combo bonus ×2 gliders |
|---|---|---|---|---|---|---|
Normal variant |
||||||
R variant |
||||||
T variant |
||||||
R/T variant |
||||||
| * indicates a favored course upgraded to a favorite course after reaching level 3. ** indicates a favored course upgraded to a favorite course after reaching level 6. *** indicates a favored course upgraded to a favorite course after reaching level 8 for High-End items. | ||||||
Bonus challengesEdit
| Ring Race | |||||||
|---|---|---|---|---|---|---|---|
| Icon | Course variant | Chosen driver |
Chosen kart |
Chosen glider |
Grand Star scores | Tour appearances | Cup |

|
Regular | Lakitu |
Pipe Frame |
Super Glider |
|
Summer Festival Tour | Morton Cup |
| Winter Tour (2023) | Waluigi Cup | ||||||
| Combo Attack | |||||||
|---|---|---|---|---|---|---|---|
| Icon | Course variant | Chosen driver |
Chosen kart |
Chosen glider |
Highest combo counts | Tour appearances | Cup |

|
T | Toad (Pit Crew) |
Pipe Frame |
Super Glider |
|
Mario vs. Peach Tour | Bowser Cup |
| Anniversary Tour (2023) | Toadette Cup | ||||||
| Big Reverse Race | ||||||||||||
|---|---|---|---|---|---|---|---|---|---|---|---|---|
| Icon | Course variant | Opponents | Tour appearances | Cup | ||||||||
| 7th | 6th | 5th | 4th | 3rd | 2nd | 1st | Extra | |||||

|
Regular | Driver | Summer Festival Tour | Peachette Cup | ||||||||
| Kart | Same kart and glider as the ones used by the replaced driver | |||||||||||
| Glider | ||||||||||||
| Snap a Photo | ||||||||||
|---|---|---|---|---|---|---|---|---|---|---|
| Icon | Course variant | Chosen driver |
Chosen kart |
Chosen glider |
Other driver information | Objectives | Tour appearances | Cup | ||
| Driver | Kart | Glider | ||||||||

|
R/T | Mario (Happi) |
Quickshaw |
Oilpaper Umbrella |
Peach (Happi) |
Sakura Quickshaw |
Purple Oilpaper Umbrella |
|
Mario vs. Peach Tour | Diddy Kong Cup |
Nabbit |
Head Honcho |
Nabbit Oilpaper Umbrella | ||||||||
Dry Bowser |
Black Dozer |
Dry Bowser Umbrella | ||||||||
Tokyo Blur 4Edit
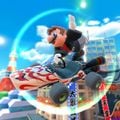
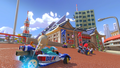
In the standard layout, the track starts out following the same path as Tokyo Blur. All of the racers start the course on the central span of the Rainbow Bridge. Just after the starting line, the road curves to the right through Ginza, then makes a slight left before the Wako store. Not long after, the course makes a right U-turn near the National Diet Building and the Miraikan, then goes through a tunnel. The course then makes a sharp left to follow a small portion of Tokyo Blur 2 in reverse, going under the Kaminarimon next to the Sensō-ji, where the second segment of the course begins. The track then immediately makes a U-turn toward the Shuto Expressway; the remainder of the course follows the path of Tokyo Blur 3, entering the expressway through a set of toll gates before rounding the spiral loop around the Tokyo Big Sight. Unlike in Tokyo Blur 3, the first part of the expressway is divided down the middle by fences, and there are oil slicks as obstacles instead of Thwomps. A glide ramp sends the player back onto the Rainbow Bridge, where a set of Thwomps on either side threatens the players just before the finish line.
The course also appears as Tokyo Blur 4R (reversed), Tokyo Blur 4T (with ramps), and Tokyo Blur 4R/T (reversed with ramps). In the R and R/T variants, the Shuto Expressway portion is mostly reverted back to how it was in Tokyo Blur 3. In the T variant, the glide ramp is gone. In the R/T variant, racers start and end the race on Kanaami Road above the starting line. Additionally, an extra pair of Thwomps appears just after the second U-turn.
AppearancesEdit
For this course's tour appearances, see List of Tokyo Blur tour appearances in Mario Kart Tour § Tokyo Blur 4.
Top-tier and middle-tier itemsEdit
Select "show" to reveal the drivers, karts, and gliders for which Tokyo Blur 4 and its variants are always favored or favorite courses. For instances in which additional drivers, karts, and gliders temporarily had this course and its variants as favored or favorite courses, see List of Tokyo Blur 4 tour appearances in Mario Kart Tour.
| Course | Three-item drivers | Bonus points ×2 karts | Combo bonus ×3 gliders | Two-item drivers | Bonus points ×1.5 karts | Combo bonus ×2 gliders |
|---|---|---|---|---|---|---|
Normal variant |
||||||
R variant |
||||||
T variant |
||||||
R/T variant |
||||||
| * indicates a favored course upgraded to a favorite course after reaching level 3. ** indicates a favored course upgraded to a favorite course after reaching level 6. *** indicates a favored course upgraded to a favorite course after reaching level 8 for High-End items. | ||||||
Bonus challengesEdit
| Time Trial | |||||||
|---|---|---|---|---|---|---|---|
| Icon | Course variant | Chosen driver |
Chosen kart |
Chosen glider |
Grand Star scores | Tour appearances | Cup |

|
Regular | Red Koopa (Freerunning) |
Pipe Frame |
Super Glider |
|
Mario Tour (2021) | Baby Rosalina Cup |
| Winter Tour (2023) | Metal Mario Cup | ||||||

|
R | Toadette |
Pipe Frame |
Super Glider |
|
Yoshi Tour (2021) | Waluigi Cup |
| Combo Attack | |||||||
|---|---|---|---|---|---|---|---|
| Icon | Course variant | Chosen driver |
Chosen kart |
Chosen glider |
Highest combo counts | Tour appearances | Cup |

|
T | Diddy Kong |
Pipe Frame |
Super Glider |
|
Mario Tour (2021) | Baby Peach Cup |
Mario Kart 8 DeluxeEdit
Tokyo Blur makes its console debut in Mario Kart 8 Deluxe via the Booster Course Pass. It is the first course of the Lucky Cat Cup, and as such was added as part of the first wave of the DLC. Similarly to Tokyo Blur 4, it is an expanded and combined version of the first three routes for this course; however, this version dedicates one lap to each variation through the use of changing arrow fields.
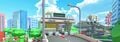
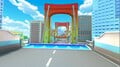
The first lap is based on Tokyo Blur, turning left at the Wako store and making a U-turn past the National Diet Building. The second lap is based on Tokyo Blur 2, turning right at the Wako store and then left underneath the Kaminarimon. The third and final lap is based on Tokyo Blur 3, turning right at the Wako store and then onto the Shuto Expressway. The minimap has been rotated 90 degrees clockwise compared to the equivalent minimaps for the variants in Tour. Unlike Tour Paris Promenade, its hazards - Thwomps - have been retained (albeit with slightly different arrangements). One additional traffic cone was added at the expressway entrance.
Tokyo Blur is one of three courses to originate from Mario Kart Tour to appear in the first wave of the DLC, alongside Paris Promenade and Ninja Hideaway. This is also one of five tracks in Mario Kart 8 Deluxe where players can hit the banner (causing it to spin), like Mario Circuit, DS Wario Stadium, 3DS Neo Bowser City and 3DS Rock Rock Mountain. Unlike the other courses mentioned, this is only possible during the final lap.
As with all other courses from Wave 1, this course's icon and lighting were adjusted slightly in the 2.1.0 update.
SponsorsEdit
- Mario Electrical Support (posters)
- Bowser Technology (posters)
- Shell Books (posters)
- Kingdom Café (posters)
- Galaxy Air (signs)
- Mario Work Gear (signs)
- Bullet Bill Speed Trial (signs)
- Mushroom Piston (signs)
- Princess Orange (signs, vending machines)
- Boomerang Bros. International Airlines (signs)
ProfilesEdit
Mario Kart TourEdit
- Mario Kart Tour Twitter: Take a tour of a Japanese city in the Tokyo Blur course! Enjoy the sights as you take in iconic landmarks, including Mt. Fuji off in the distance![4]
- Mario Kart Tour Twitter: A giant dinosaur stomping around in the middle of a city? The Tokyo Blur course is like something straight out of a movie! The tricked-out Tokyo Blur R/T is waiting for you in the Peachette Cup![5]
- Mario Kart Tour Twitter: Japan's most famous city is back for for another lap with the Tokyo Blur 2 course. Those traditional kadomatsu decorations aren't just for show—hitting them with an item is a great way to rack up some extra points![6]
- Mario Kart Tour Twitter: It's time for the Summer Festival Tour! Return to the sizzling streets of Tokyo for some sunny fun. Blaze new paths in the Tokyo Blur course, but don't overheat![7]
- Mario Kart Tour Twitter: The Snow Tour is wrapping up in #MarioKartTour. Next up is the Mario Tour featuring Tokyo Blur 4, a brand-new variant of the existing Tokyo-based course![8]
Mario Kart 8 DeluxeEdit
- Nintendo Switch News app (US):
- This course first appeared in the Mario Kart Tour game.
- Some famous tourist locations in Tokyo were included in this course. Keep your eyes peeled while you're racing!
- The route changes depending on the lap―you may want to put in some practice so you don't get surprised.
- Nintendo Switch News app (UK): Race the streets of Tokyo in Tokyo Blur!
Now, we'd like to present to you a course released as part of the first wave, which is available now: Tokyo Blur.
This course, which debuted in the smart device game Mario Kart Tour, is modelled after the great Japanese metropolis of Tokyo and features many of the city's famous landmarks for you to zoom past. The exact route changes depending on the lap, so you'll have to get a firm grip on the road's many twists and turns if you want to achieve the best time possible! - Nintendo Magazine 2022 Summer: This is a course inspired by Tokyo, and you will be able race[sic] past some famous tourist sites. You can also see Mt. Fuji, which has been registered as a World Heritage Site, off in the distance.[9]
- Nintendo Magazine 2023 Summer: Here, you might recognize the familiar landmarks of Tokyo. Mt. Fuji can be seen in the distance.[10]
GalleryEdit
Mario Kart TourEdit
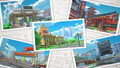
Pictures of the various Tokyo Blur courses
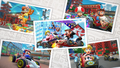
Pictures of the various Tokyo Blur courses


Tokyo BlurEdit
Course iconsEdit
- For this subject's image gallery, see Gallery:Mario Kart Tour race course icons (original courses) § Tokyo Blur.
The course icon
The course icon of the R variant
The course icon of the T variant
The course icon of the R/T variant
ScreenshotsEdit
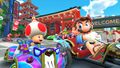
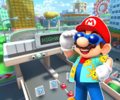
View of the starting line
Alternate view of the starting line
View of the finish line area
View of the Tokyo Tower and some buildings
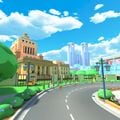
View of the National Diet Building
View of the Rainbow Bridge
View of various sponsors
Ginza section
Mario (Hakama) tricking in the Kabuki Dasher
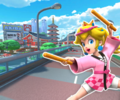
Peach (Kimono) tricking in the Quickshaw in Tokyo Blur R/T
Mario (Hakama) cheering in the Quickshaw
Mario, Luigi, Red Koopa (Freerunning), and Gold Koopa (Freerunning) racing on the course
Mario (Hakama), Peach (Kimono), Peach (Vacation), Luigi (Painter), and Pauline tricking in Tokyo Blur T


Tokyo Blur 2Edit
Course iconsEdit
- For this subject's image gallery, see Gallery:Mario Kart Tour race course icons (original courses) § Tokyo Blur 2.
The course icon
The course icon of the R variant
The course icon of the T variant
The course icon of the R/T variant
ScreenshotsEdit
Closer view of the Sensō-ji
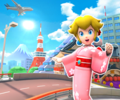
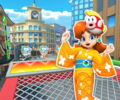
Toad (Party Time) and Mario (Happi) driving
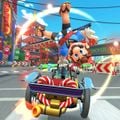
Mario (Happi) tricking in the Quickshaw
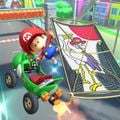
Mario (Hakama) gliding in the Kabuki Dasher with the New Year's Kite
Baby Mario gliding in the Turbo Yoshi with the Baby Mario Hanafuda
Mario (Happi) gliding in the Quickshaw with the New Year's Kite


Tokyo Blur 3Edit
Course iconsEdit
- For this subject's image gallery, see Gallery:Mario Kart Tour race course icons (original courses) § Tokyo Blur 3.
The course icon
The course icon of the R variant
The course icon of the T variant
The course icon of the R/T variant
ScreenshotsEdit
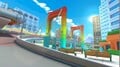
View of the course
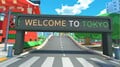
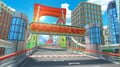
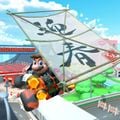
View of the welcome sign before the highway
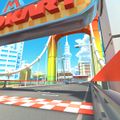
View of the highway
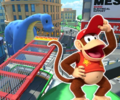
View of a Thwomp on the highway
Alternate view of the highway
View of the Rainbow Bridge
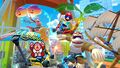
Mario (Happi), Peach (Kimono), Mario (Hakama), and Daisy (Yukata) gliding in Tokyo Blur 3R
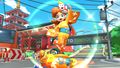
Daisy (Yukata) tricking in the Festival Girl
Peach (Kimono), Mario (Happi), and Mario (Hakama) gliding
Mario (Hakama), Daisy (Yukata), Peach (Kimono), and Mario (Happi) tricking


Tokyo Blur 4Edit
Course iconsEdit
- For this subject's image gallery, see Gallery:Mario Kart Tour race course icons (original courses) § Tokyo Blur 4.
The course icon
The course icon of the R variant
The course icon of the T variant
The course icon of the R/T variant
ScreenshotsEdit
View of the course
Mario (SNES), Mario (Hakama), and Mario (Happi) tricking, with Mario (Racing) driving ahead
Mario (Racing) drifting in the B Dasher Mk. 2
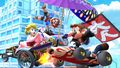
Dixie Kong, Mario (Sunshine), Donkey Kong Jr. (SNES), and Funky Kong gliding in Pipe Frames


Mario Kart 8 DeluxeEdit
The course icon
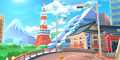
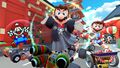
View of Mount Fuji, the Tokyo Tower and the Kabuki-za theater
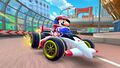
View of the starting line on the Rainbow Bridge
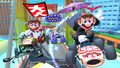
Rosalina, Princess Daisy, Wario, Yoshi, Mario and Bowser on the course
The course with an early design for the arrow field


Names in other languagesEdit
| Language | Name | Meaning |
|---|---|---|
| Japanese | トーキョースクランブル Tōkyō Sukuranburu |
Tokyo Scramble |
| Chinese (simplified) | 东京赛道 Dōngjīng Sàidào |
Tokyo Speedway |
| Chinese (traditional) | 東京賽道 Dōngjīng Sàidào |
Tokyo Speedway |
| Dutch | Tokio-Toer |
Tokyo Tour |
| French | Traversée de Tokyo |
Crossing Tokyo |
| German | Tokio-Tempotour Tokyo-Tempotour (before the Summer Festival Tour) |
Tokyo Speed Tour |
| Italian | Neon di Tokyo |
Tokyo Neon |
| Korean | 도쿄 블러 Dokyo Beulleo |
Tokyo Blur |
| Portuguese | Velocidade em Tóquio |
Speed in Tokyo |
| Russian | Токийское ралли Tokiyskoye ralli |
Tokyo Rally |
| Spanish | Circuito Tokio |
Tokyo Circuit |
TriviaEdit
- The presence of Noshis in the R/T variant of Tokyo Blur references the kaiju.[5]
- In the trailer for the Tokyo Tour, Peach (Kimono) can be seen driving in the Sensō-ji section, which is only accessible in Tokyo Blur 2 and Tokyo Blur 4.[11]
- Tokyo Blur is the first city course and course in general to have its regular and R variants appear in a tour, but not its T variant.
- Tokyo Blur is one of two city courses in Mario Kart Tour to have all four routes travel in the same direction, the other being New York Minute.
ReferencesEdit
- ^ a b Pottary (January 14, 2020). Mario Kart Tour Pauline Cup 150cc - New Year's Tour. YouTube. Retrieved December 21, 2020.
- ^ a b c d e f g TheMadWeazel (August 27, 2020). Summer Festival Tour “Peachette Cup” - Mario Kart Tour. YouTube. Retrieved January 30, 2021.
- ^ Infer no u (August 30, 2020). Mario Kart Tour - Peachette Cup & All Clear Pipe (Summer Festival Tour). YouTube. Retrieved August 30, 2020.
- ^ mariokarttourEN (October 15, 2019). Twitter. Retrieved March 16, 2020.
- ^ a b mariokarttourEN (October 19, 2019). Twitter. Retrieved December 7, 2019.
- ^ mariokarttourEN (January 1, 2020). Twitter. Retrieved March 13, 2020.
- ^ mariokarttourEN (August 26, 2020). Twitter. Retrieved August 26, 2020.
- ^ mariokarttourEN (March 4, 2021). Twitter. Retrieved March 4, 2021.
- ^ Nintendo Magazine 2022 Summer (Digital English edition). nintendo.co.jp. Retrieved August 16, 2022. (Archived July 29, 2022, 08:23:52 UTC via Wayback Machine.)
- ^ Nintendo Magazine 2023 Summer (Digital English edition). nintendo.co.jp. Retrieved July 15, 2023. (Archived July 15, 2023, 10:48:55 UTC via Wayback Machine.)
- ^ Tokyo Tour trailer