RMX Mario Circuit 1: Difference between revisions
m (→Cooking Tour) |
|||
| Line 16: | Line 16: | ||
==Appearances== | ==Appearances== | ||
===Mario Bros. Tour=== | ===Mario Bros. Tour=== | ||
In the [[Mario Bros. Tour]], RMX Mario Circuit 1 | In the [[Mario Bros. Tour]], RMX Mario Circuit 1 appeared as the first course in the [[Mario Cup]], the second course in the [[Baby Mario Cup]], and the location of the bonus challenges in the [[Wendy Cup]], the [[Toadette Cup]], the [[Peachette Cup]], and the [[Pauline Cup]], as well as the location of the tour's Coin Rush. Its T variant appeared as the third course in the [[Luigi Cup]] and the second course in the [[Dry Bowser Cup]], while its R variant appeared as the third course in the [[Dry Bones Cup]] and the first course in the [[Ludwig Cup]]. Despite the Mario Bros. Tour mainly focusing on this course, [[Mario Circuit (3DS)|3DS Mario Circuit]] served as the tour's signature course. | ||
<div class="contentbox mw-collapsible mw-collapsed" data-expandtext="Show stats" data-collapsetext="Hide stats"> | <div class="contentbox mw-collapsible mw-collapsed" data-expandtext="Show stats" data-collapsetext="Hide stats"> | ||
{| class="wikitable" style="text-align: center" | {| class="wikitable" style="text-align: center" | ||
!colspan=4|[[File:MKT Icon Mario Cup.png|32px]] Mario Cup<br>RMX Mario Circuit 1 | !colspan=4|[[File:MKT Icon Mario Cup.png|32px]] [[Mario Cup]]<br>RMX Mario Circuit 1 | ||
|- | |- | ||
| | | | ||
| Line 37: | Line 37: | ||
|[[File:MKT Icon QuestionMarkBlock.png|32px|link=? Block (glider)|? Block]][[File:MKT Icon CrimsonCrane.png|32px|link=Crimson Crane]][[File:MKT Icon YoshisEggHanafuda.png|32px|link=Yoshi's Egg Hanafuda]][[File:MKT Icon BlizzardParasol.png|32px|link=Blizzard Parasol]][[File:MKT Icon LumaParafoil.png|32px|link=Luma Parafoil]] | |[[File:MKT Icon QuestionMarkBlock.png|32px|link=? Block (glider)|? Block]][[File:MKT Icon CrimsonCrane.png|32px|link=Crimson Crane]][[File:MKT Icon YoshisEggHanafuda.png|32px|link=Yoshi's Egg Hanafuda]][[File:MKT Icon BlizzardParasol.png|32px|link=Blizzard Parasol]][[File:MKT Icon LumaParafoil.png|32px|link=Luma Parafoil]] | ||
|- | |- | ||
!colspan=4|[[File:MKT Icon Luigi Cup.png|32px]] Luigi Cup<br>RMX Mario Circuit 1T | !colspan=4|[[File:MKT Icon Luigi Cup.png|32px]] [[Luigi Cup]]<br>RMX Mario Circuit 1T | ||
|- | |- | ||
| | | | ||
| Line 54: | Line 54: | ||
|[[File:MKT Icon QuestionMarkBlock.png|32px|link=? Block (glider)|? Block]][[File:MKT Icon YoshisEggHanafuda.png|32px|link=Yoshi's Egg Hanafuda]][[File:MKT Icon BlizzardBalloons.png|32px|link=Blizzard Balloons]][[File:MKT Icon SweetheartGlider.png|32px|link=Sweetheart Glider]] | |[[File:MKT Icon QuestionMarkBlock.png|32px|link=? Block (glider)|? Block]][[File:MKT Icon YoshisEggHanafuda.png|32px|link=Yoshi's Egg Hanafuda]][[File:MKT Icon BlizzardBalloons.png|32px|link=Blizzard Balloons]][[File:MKT Icon SweetheartGlider.png|32px|link=Sweetheart Glider]] | ||
|- | |- | ||
!colspan=4|[[File:MKT Icon Dry Bones Cup.png|32px]] Dry Bones Cup<br>RMX Mario Circuit 1R | !colspan=4|[[File:MKT Icon Dry Bones Cup.png|32px]] [[Dry Bones Cup]]<br>RMX Mario Circuit 1R | ||
|- | |- | ||
| | | | ||
| Line 71: | Line 71: | ||
|[[File:MKT Icon 8BitJumpingMario.png|32px|link=8-Bit Jumping Mario]][[File:MKT Icon YoshisEggHanafuda.png|32px|link=Yoshi's Egg Hanafuda]][[File:MKT Icon BlizzardBalloons.png|32px|link=Blizzard Balloons]] | |[[File:MKT Icon 8BitJumpingMario.png|32px|link=8-Bit Jumping Mario]][[File:MKT Icon YoshisEggHanafuda.png|32px|link=Yoshi's Egg Hanafuda]][[File:MKT Icon BlizzardBalloons.png|32px|link=Blizzard Balloons]] | ||
|- | |- | ||
!colspan=4|[[File:MKT Icon Baby Mario Cup.png|32px]] Baby Mario Cup<br>RMX Mario Circuit 1 | !colspan=4|[[File:MKT Icon Baby Mario Cup.png|32px]] [[Baby Mario Cup]]<br>RMX Mario Circuit 1 | ||
|- | |- | ||
| | | | ||
| Line 88: | Line 88: | ||
|[[File:MKT Icon QuestionMarkBlock.png|32px|link=? Block (glider)|? Block]][[File:MKT Icon CrimsonCrane.png|32px|link=Crimson Crane]][[File:MKT Icon YoshisEggHanafuda.png|32px|link=Yoshi's Egg Hanafuda]][[File:MKT Icon BlizzardParasol.png|32px|link=Blizzard Parasol]][[File:MKT Icon LumaParafoil.png|32px|link=Luma Parafoil]] | |[[File:MKT Icon QuestionMarkBlock.png|32px|link=? Block (glider)|? Block]][[File:MKT Icon CrimsonCrane.png|32px|link=Crimson Crane]][[File:MKT Icon YoshisEggHanafuda.png|32px|link=Yoshi's Egg Hanafuda]][[File:MKT Icon BlizzardParasol.png|32px|link=Blizzard Parasol]][[File:MKT Icon LumaParafoil.png|32px|link=Luma Parafoil]] | ||
|- | |- | ||
!colspan=4|[[File:MKT Icon Ludwig Cup.png|32px]] Ludwig Cup<br>RMX Mario Circuit 1R | !colspan=4|[[File:MKT Icon Ludwig Cup.png|32px]] [[Ludwig Cup]]<br>RMX Mario Circuit 1R | ||
|- | |- | ||
| | | | ||
| Line 105: | Line 105: | ||
|[[File:MKT Icon 8BitJumpingMario.png|32px|link=8-Bit Jumping Mario]][[File:MKT Icon YoshisEggHanafuda.png|32px|link=Yoshi's Egg Hanafuda]][[File:MKT Icon BlizzardBalloons.png|32px|link=Blizzard Balloons]] | |[[File:MKT Icon 8BitJumpingMario.png|32px|link=8-Bit Jumping Mario]][[File:MKT Icon YoshisEggHanafuda.png|32px|link=Yoshi's Egg Hanafuda]][[File:MKT Icon BlizzardBalloons.png|32px|link=Blizzard Balloons]] | ||
|- | |- | ||
!colspan=4|[[File:MKT Icon Dry Bowser Cup.png|32px]] Dry Bowser Cup<br>RMX Mario Circuit 1T | !colspan=4|[[File:MKT Icon Dry Bowser Cup.png|32px]] [[Dry Bowser Cup]]<br>RMX Mario Circuit 1T | ||
|- | |- | ||
| | | | ||
| Line 126: | Line 126: | ||
===Baby Rosalina Tour=== | ===Baby Rosalina Tour=== | ||
In the [[Baby Rosalina Tour]], RMX Mario Circuit 1 | In the [[Baby Rosalina Tour]], RMX Mario Circuit 1 appeared as the first course in the [[Wario Cup]] and the location of the bonus challenge in the [[Toadette Cup]]. Its R variant appeared as the second course in the [[Iggy Cup]], while its T variant appeared as the third course in the Ludwig Cup. | ||
<div class="contentbox mw-collapsible mw-collapsed" data-expandtext="Show stats" data-collapsetext="Hide stats"> | <div class="contentbox mw-collapsible mw-collapsed" data-expandtext="Show stats" data-collapsetext="Hide stats"> | ||
{| class="wikitable" style="text-align: center" | {| class="wikitable" style="text-align: center" | ||
!colspan=4|[[File:MKT Icon Iggy Cup.png|32px]] Iggy Cup<br>RMX Mario Circuit 1R | !colspan=4|[[File:MKT Icon Iggy Cup.png|32px]] [[Iggy Cup]]<br>RMX Mario Circuit 1R | ||
|- | |- | ||
| | | | ||
| Line 147: | Line 147: | ||
|[[File:MKT Icon 8BitJumpingMario.png|32px|link=8-Bit Jumping Mario]][[File:MKT Icon PlaidRibbon.png|32px|link=Plaid Ribbon]][[File:MKT Icon YoshisEggHanafuda.png|32px|link=Yoshi's Egg Hanafuda]][[File:MKT Icon BlizzardBalloons.png|32px|link=Blizzard Balloons]] | |[[File:MKT Icon 8BitJumpingMario.png|32px|link=8-Bit Jumping Mario]][[File:MKT Icon PlaidRibbon.png|32px|link=Plaid Ribbon]][[File:MKT Icon YoshisEggHanafuda.png|32px|link=Yoshi's Egg Hanafuda]][[File:MKT Icon BlizzardBalloons.png|32px|link=Blizzard Balloons]] | ||
|- | |- | ||
!colspan=4|[[File:MKT Icon Wario Cup.png|32px]] Wario Cup<br>RMX Mario Circuit 1 | !colspan=4|[[File:MKT Icon Wario Cup.png|32px]] [[Wario Cup]]<br>RMX Mario Circuit 1 | ||
|- | |- | ||
| | | | ||
| Line 164: | Line 164: | ||
|[[File:MKT Icon QuestionMarkBlock.png|32px|link=? Block (glider)|? Block]][[File:MKT Icon CrimsonCrane.png|32px|link=Crimson Crane]][[File:MKT Icon YoshisEggHanafuda.png|32px|link=Yoshi's Egg Hanafuda]][[File:MKT Icon BlizzardParasol.png|32px|link=Blizzard Parasol]][[File:MKT Icon LumaParafoil.png|32px|link=Luma Parafoil]] | |[[File:MKT Icon QuestionMarkBlock.png|32px|link=? Block (glider)|? Block]][[File:MKT Icon CrimsonCrane.png|32px|link=Crimson Crane]][[File:MKT Icon YoshisEggHanafuda.png|32px|link=Yoshi's Egg Hanafuda]][[File:MKT Icon BlizzardParasol.png|32px|link=Blizzard Parasol]][[File:MKT Icon LumaParafoil.png|32px|link=Luma Parafoil]] | ||
|- | |- | ||
!colspan=4|[[File:MKT Icon Ludwig Cup.png|32px]] Ludwig Cup<br>RMX Mario Circuit 1T | !colspan=4|[[File:MKT Icon Ludwig Cup.png|32px]] [[Ludwig Cup]]<br>RMX Mario Circuit 1T | ||
|- | |- | ||
| | | | ||
| Line 185: | Line 185: | ||
===Yoshi Tour=== | ===Yoshi Tour=== | ||
In the [[Yoshi Tour]], RMX Mario Circuit 1 appeared as the location of the challenge in the [[King Boo Cup]]. Its | In the [[Yoshi Tour]], RMX Mario Circuit 1 appeared as the location of the bonus challenge in the [[King Boo Cup]]. Its R/T variant appeared as the first course in the [[Hammer Bro Cup]] and the third course in the [[Bowser Cup]]. | ||
<div class="contentbox mw-collapsible mw-collapsed" data-expandtext="Show stats" data-collapsetext="Hide stats"> | <div class="contentbox mw-collapsible mw-collapsed" data-expandtext="Show stats" data-collapsetext="Hide stats"> | ||
{| class="wikitable" style="text-align: center" | {| class="wikitable" style="text-align: center" | ||
!colspan=4|[[File:MKT Icon Hammer Bro Cup.png|32px]] Hammer Bro Cup<br>RMX Mario Circuit 1R/T | !colspan=4|[[File:MKT Icon Hammer Bro Cup.png|32px]] [[Hammer Bro Cup]]<br>RMX Mario Circuit 1R/T | ||
|- | |- | ||
| | | | ||
| Line 206: | Line 206: | ||
|[[File:MKT Icon PiranhaPlantParafoil.png|32px|link=Piranha Plant Parafoil]][[File:MKT Icon YoshisEggHanafuda.png|32px|link=Yoshi's Egg Hanafuda]][[File:MKT Icon RainyBalloons.png|32px|link=Rainy Balloons]][[File:MKT Icon LeTricolore.png|32px|link=Le Tricolore]][[File:MKT Icon Starchute.png|32px|link=Starchute]][[File:MKT Icon RainbowStarchute.png|32px|link=Rainbow Starchute]] | |[[File:MKT Icon PiranhaPlantParafoil.png|32px|link=Piranha Plant Parafoil]][[File:MKT Icon YoshisEggHanafuda.png|32px|link=Yoshi's Egg Hanafuda]][[File:MKT Icon RainyBalloons.png|32px|link=Rainy Balloons]][[File:MKT Icon LeTricolore.png|32px|link=Le Tricolore]][[File:MKT Icon Starchute.png|32px|link=Starchute]][[File:MKT Icon RainbowStarchute.png|32px|link=Rainbow Starchute]] | ||
|- | |- | ||
!colspan=4|[[File:MKT Icon Bowser Cup.png|32px]] Bowser Cup<br>RMX Mario Circuit 1R/T | !colspan=4|[[File:MKT Icon Bowser Cup.png|32px]] [[Bowser Cup]]<br>RMX Mario Circuit 1R/T | ||
|- | |- | ||
| | | | ||
| Line 227: | Line 227: | ||
===Trick Tour=== | ===Trick Tour=== | ||
In the [[Trick Tour]], RMX Mario Circuit 1 | In the [[Trick Tour]], the R/T variant of RMX Mario Circuit 1 appeared as the first course in the [[Wendy Cup]]. | ||
<div class="contentbox mw-collapsible mw-collapsed" data-expandtext="Show stats" data-collapsetext="Hide stats"> | <div class="contentbox mw-collapsible mw-collapsed" data-expandtext="Show stats" data-collapsetext="Hide stats"> | ||
{| class="wikitable" style="text-align: center" | {| class="wikitable" style="text-align: center" | ||
!colspan=4|[[File:MKT Icon Wendy Cup.png|32px]] Wendy Cup<br>RMX Mario Circuit 1R/T | !colspan=4|[[File:MKT Icon Wendy Cup.png|32px]] [[Wendy Cup]]<br>RMX Mario Circuit 1R/T | ||
|- | |- | ||
| | | | ||
| Line 252: | Line 252: | ||
===Cooking Tour=== | ===Cooking Tour=== | ||
In the [[Cooking Tour]], RMX Mario Circuit 1 | In the [[Cooking Tour]], RMX Mario Circuit 1 appeared as the second course in the [[Shy Guy Cup]]. Its R variant appeared as the second course in the Ludwig Cup, while its T variant appeared as the first course in the [[Birdo Cup]] and the location of the challenge in the Mario Cup. | ||
<div class="contentbox mw-collapsible mw-collapsed" data-expandtext="Show stats" data-collapsetext="Hide stats"> | <div class="contentbox mw-collapsible mw-collapsed" data-expandtext="Show stats" data-collapsetext="Hide stats"> | ||
{| class="wikitable" style="text-align: center" | {| class="wikitable" style="text-align: center" | ||
!colspan=4|[[File:MKT Icon Ludwig Cup.png|32px]] Ludwig Cup<br>RMX Mario Circuit 1R | !colspan=4|[[File:MKT Icon Ludwig Cup.png|32px]] [[Ludwig Cup]]<br>RMX Mario Circuit 1R | ||
|- | |- | ||
| | | | ||
| Line 273: | Line 273: | ||
|[[File:MKT Icon 8BitJumpingMario.png|32px|link=8-Bit Jumping Mario]][[File:MKT Icon BlizzardBalloons.png|32px|link=Blizzard Balloons]][[File:MKT Icon ChocolateDonut.png|32px|link=Chocolate Donut]][[File:MKT Icon GoldCrane.png|32px|link=Gold Crane]][[File:MKT Icon YoshisEggHanafuda.png|32px|link=Yoshi's Egg Hanafuda]] | |[[File:MKT Icon 8BitJumpingMario.png|32px|link=8-Bit Jumping Mario]][[File:MKT Icon BlizzardBalloons.png|32px|link=Blizzard Balloons]][[File:MKT Icon ChocolateDonut.png|32px|link=Chocolate Donut]][[File:MKT Icon GoldCrane.png|32px|link=Gold Crane]][[File:MKT Icon YoshisEggHanafuda.png|32px|link=Yoshi's Egg Hanafuda]] | ||
|- | |- | ||
!colspan=4|[[File:MKT Icon Birdo Cup.png|32px]] Birdo Cup<br>RMX Mario Circuit 1T | !colspan=4|[[File:MKT Icon Birdo Cup.png|32px]] [[Birdo Cup]]<br>RMX Mario Circuit 1T | ||
|- | |- | ||
| | | | ||
| Line 290: | Line 290: | ||
|[[File:MKT Icon QuestionMarkBlock.png|32px|link=? Block (glider)|? Block]][[File:MKT Icon PinkGoldPaperGlider.png|32px|link=Pink Gold Paper Glider]][[File:MKT Icon BlizzardBalloons.png|32px|link=Blizzard Balloons]][[File:MKT Icon SweetheartGlider.png|32px|link=Sweetheart Glider]][[File:MKT Icon YoshisEggHanafuda.png|32px|link=Yoshi's Egg Hanafuda]] | |[[File:MKT Icon QuestionMarkBlock.png|32px|link=? Block (glider)|? Block]][[File:MKT Icon PinkGoldPaperGlider.png|32px|link=Pink Gold Paper Glider]][[File:MKT Icon BlizzardBalloons.png|32px|link=Blizzard Balloons]][[File:MKT Icon SweetheartGlider.png|32px|link=Sweetheart Glider]][[File:MKT Icon YoshisEggHanafuda.png|32px|link=Yoshi's Egg Hanafuda]] | ||
|- | |- | ||
!colspan=4|[[File:MKT Icon Shy Guy Cup.png|32px]] Shy Guy Cup<br>RMX Mario Circuit 1 | !colspan=4|[[File:MKT Icon Shy Guy Cup.png|32px]] [[Shy Guy Cup]]<br>RMX Mario Circuit 1 | ||
|- | |- | ||
| | | | ||
| Line 311: | Line 311: | ||
===Peach Tour=== | ===Peach Tour=== | ||
In the [[Peach Tour]], RMX Mario Circuit 1 | In the [[Peach Tour]], RMX Mario Circuit 1 appeared as the second course in the [[Pink Gold Peach Cup]] and the location of the bonus challenge in the [[Peach Cup]]. Its R variant appeared as the second course in the Dry Bones Cup, while its T variant appeared as the first course in the Birdo Cup. | ||
<div class="contentbox mw-collapsible mw-collapsed" data-expandtext="Show stats" data-collapsetext="Hide stats"> | <div class="contentbox mw-collapsible mw-collapsed" data-expandtext="Show stats" data-collapsetext="Hide stats"> | ||
{| class="wikitable" style="text-align: center" | {| class="wikitable" style="text-align: center" | ||
!colspan=4|[[File:MKT Icon Dry Bones Cup.png|32px]] Dry Bones Cup<br>RMX Mario Circuit 1R | !colspan=4|[[File:MKT Icon Dry Bones Cup.png|32px]] [[Dry Bones Cup]]<br>RMX Mario Circuit 1R | ||
|- | |- | ||
| | | | ||
| Line 332: | Line 332: | ||
|[[File:MKT Icon 8BitJumpingMario.png|32px|link=8-Bit Jumping Mario]][[File:MKT Icon BlizzardBalloons.png|32px|link=Blizzard Balloons]][[File:MKT Icon GoldCrane.png|32px|link=Gold Crane]][[File:MKT Icon SilverBells.png|32px|link=Silver Bells]][[File:MKT Icon YoshisEggHanafuda.png|32px|link=Yoshi's Egg Hanafuda]] | |[[File:MKT Icon 8BitJumpingMario.png|32px|link=8-Bit Jumping Mario]][[File:MKT Icon BlizzardBalloons.png|32px|link=Blizzard Balloons]][[File:MKT Icon GoldCrane.png|32px|link=Gold Crane]][[File:MKT Icon SilverBells.png|32px|link=Silver Bells]][[File:MKT Icon YoshisEggHanafuda.png|32px|link=Yoshi's Egg Hanafuda]] | ||
|- | |- | ||
!colspan=4|[[File:MKT Icon Birdo Cup.png|32px]] Birdo Cup<br>RMX Mario Circuit 1T | !colspan=4|[[File:MKT Icon Birdo Cup.png|32px]] [[Birdo Cup]]<br>RMX Mario Circuit 1T | ||
|- | |- | ||
| | | | ||
| Line 349: | Line 349: | ||
|[[File:MKT Icon QuestionMarkBlock.png|32px|link=? Block (glider)|? Block]][[File:MKT Icon PinkGoldPaperGlider.png|32px|link=Pink Gold Paper Glider]][[File:MKT Icon BlizzardBalloons.png|32px|link=Blizzard Balloons]][[File:MKT Icon SweetheartGlider.png|32px|link=Sweetheart Glider]][[File:MKT Icon YoshisEggHanafuda.png|32px|link=Yoshi's Egg Hanafuda]] | |[[File:MKT Icon QuestionMarkBlock.png|32px|link=? Block (glider)|? Block]][[File:MKT Icon PinkGoldPaperGlider.png|32px|link=Pink Gold Paper Glider]][[File:MKT Icon BlizzardBalloons.png|32px|link=Blizzard Balloons]][[File:MKT Icon SweetheartGlider.png|32px|link=Sweetheart Glider]][[File:MKT Icon YoshisEggHanafuda.png|32px|link=Yoshi's Egg Hanafuda]] | ||
|- | |- | ||
!colspan=4|[[File:MKT Icon Pink Gold Peach Cup.png|32px]] Pink Gold Peach Cup<br>RMX Mario Circuit 1 | !colspan=4|[[File:MKT Icon Pink Gold Peach Cup.png|32px]] [[Pink Gold Peach Cup]]<br>RMX Mario Circuit 1 | ||
|- | |- | ||
| | | | ||
| Line 370: | Line 370: | ||
===Marine Tour=== | ===Marine Tour=== | ||
In the [[Marine Tour]], RMX Mario Circuit 1 | In the [[Marine Tour]], the R/T variant of RMX Mario Circuit 1 appeared as the third course in the [[Pauline Cup]]. | ||
<div class="contentbox mw-collapsible mw-collapsed" data-expandtext="Show stats" data-collapsetext="Hide stats"> | <div class="contentbox mw-collapsible mw-collapsed" data-expandtext="Show stats" data-collapsetext="Hide stats"> | ||
{| class="wikitable" style="text-align: center" | {| class="wikitable" style="text-align: center" | ||
!colspan=4|[[File:MKT Icon Pauline Cup.png|32px]] Pauline Cup<br>RMX Mario Circuit 1R/T | !colspan=4|[[File:MKT Icon Pauline Cup.png|32px]] [[Pauline Cup]]<br>RMX Mario Circuit 1R/T | ||
|- | |- | ||
| | | | ||
| Line 395: | Line 395: | ||
===Wild West Tour=== | ===Wild West Tour=== | ||
In the [[Wild West Tour]], RMX Mario Circuit 1 | In the [[Wild West Tour]], RMX Mario Circuit 1 appeared as the third course in the [[Lakitu Cup]] and the location of the bonus challenge in the [[Diddy Kong Cup]]. Its T variant appeared as the second course in the [[Donkey Kong Cup]], while its R variant appeared as the first course in the Dry Bones Cup. | ||
<div class="contentbox mw-collapsible mw-collapsed" data-expandtext="Show stats" data-collapsetext="Hide stats"> | <div class="contentbox mw-collapsible mw-collapsed" data-expandtext="Show stats" data-collapsetext="Hide stats"> | ||
{| class="wikitable" style="text-align: center" | {| class="wikitable" style="text-align: center" | ||
!colspan=4|[[File:MKT Icon Donkey Kong Cup.png|32px]] Donkey Kong Cup<br>RMX Mario Circuit 1T | !colspan=4|[[File:MKT Icon Donkey Kong Cup.png|32px]] [[Donkey Kong Cup]]<br>RMX Mario Circuit 1T | ||
|- | |- | ||
| | | | ||
| Line 416: | Line 416: | ||
|[[File:MKT Icon QuestionMarkBlock.png|32px|link=? Block (glider)|? Block]][[File:MKT Icon PinkGoldPaperGlider.png|32px|link=Pink Gold Paper Glider]][[File:MKT Icon BlizzardBalloons.png|32px|link=Blizzard Balloons]][[File:MKT Icon SweetheartGlider.png|32px|link=Sweetheart Glider]][[File:MKT Icon RainbowStarchute.png|32px|link=Rainbow Starchute]][[File:MKT Icon YoshisEggHanafuda.png|32px|link=Yoshi's Egg Hanafuda]] | |[[File:MKT Icon QuestionMarkBlock.png|32px|link=? Block (glider)|? Block]][[File:MKT Icon PinkGoldPaperGlider.png|32px|link=Pink Gold Paper Glider]][[File:MKT Icon BlizzardBalloons.png|32px|link=Blizzard Balloons]][[File:MKT Icon SweetheartGlider.png|32px|link=Sweetheart Glider]][[File:MKT Icon RainbowStarchute.png|32px|link=Rainbow Starchute]][[File:MKT Icon YoshisEggHanafuda.png|32px|link=Yoshi's Egg Hanafuda]] | ||
|- | |- | ||
!colspan=4|[[File:MKT Icon Lakitu Cup.png|32px]] Lakitu Cup<br>RMX Mario Circuit 1 | !colspan=4|[[File:MKT Icon Lakitu Cup.png|32px]] [[Lakitu Cup]]<br>RMX Mario Circuit 1 | ||
|- | |- | ||
| | | | ||
| Line 433: | Line 433: | ||
|[[File:MKT Icon QuestionMarkBlock.png|32px|link=? Block (glider)|? Block]][[File:MKT Icon CrimsonCrane.png|32px|link=Crimson Crane]][[File:MKT Icon BlizzardParasol.png|32px|link=Blizzard Parasol]][[File:MKT Icon LumaParafoil.png|32px|link=Luma Parafoil]][[File:MKT Icon NabbitOilpaperUmbrella.png|32px|link=Nabbit Oilpaper Umbrella]][[File:MKT Icon YoshisEggHanafuda.png|32px|link=Yoshi's Egg Hanafuda]] | |[[File:MKT Icon QuestionMarkBlock.png|32px|link=? Block (glider)|? Block]][[File:MKT Icon CrimsonCrane.png|32px|link=Crimson Crane]][[File:MKT Icon BlizzardParasol.png|32px|link=Blizzard Parasol]][[File:MKT Icon LumaParafoil.png|32px|link=Luma Parafoil]][[File:MKT Icon NabbitOilpaperUmbrella.png|32px|link=Nabbit Oilpaper Umbrella]][[File:MKT Icon YoshisEggHanafuda.png|32px|link=Yoshi's Egg Hanafuda]] | ||
|- | |- | ||
!colspan=4|[[File:MKT Icon Dry Bones Cup.png|32px]] Dry Bones Cup<br>RMX Mario Circuit 1R | !colspan=4|[[File:MKT Icon Dry Bones Cup.png|32px]] [[Dry Bones Cup]]<br>RMX Mario Circuit 1R | ||
|- | |- | ||
| | | | ||
| Line 454: | Line 454: | ||
===Pirate Tour=== | ===Pirate Tour=== | ||
In the [[Pirate Tour]], RMX Mario Circuit 1 | In the [[Pirate Tour]], RMX Mario Circuit 1 appeared as the third course in the Toadette Cup and the location of the bonus challenge in the Dry Bones Cup. Its R variant appeared as the third course in the Bowser Cup, while its T variant appeared as the second course in the Dry Bowser Cup. | ||
<div class="contentbox mw-collapsible mw-collapsed" data-expandtext="Show stats" data-collapsetext="Hide stats"> | <div class="contentbox mw-collapsible mw-collapsed" data-expandtext="Show stats" data-collapsetext="Hide stats"> | ||
{| class="wikitable" style="text-align: center" | {| class="wikitable" style="text-align: center" | ||
!colspan=4|[[File:MKT Icon Toadette Cup.png|32px]] Toadette Cup<br>RMX Mario Circuit 1 | !colspan=4|[[File:MKT Icon Toadette Cup.png|32px]] [[Toadette Cup]]<br>RMX Mario Circuit 1 | ||
|- | |- | ||
| | | | ||
| Line 475: | Line 475: | ||
|[[File:MKT Icon QuestionMarkBlock.png|32px|link=? Block (glider)|? Block]][[File:MKT Icon BobombParafoil.png|32px|link=Bob-omb Parafoil]][[File:MKT Icon CrimsonCrane.png|32px|link=Crimson Crane]][[File:MKT Icon BlizzardParasol.png|32px|link=Blizzard Parasol]][[File:MKT Icon LumaParafoil.png|32px|link=Luma Parafoil]][[File:MKT Icon YoshisEggHanafuda.png|32px|link=Yoshi's Egg Hanafuda]] | |[[File:MKT Icon QuestionMarkBlock.png|32px|link=? Block (glider)|? Block]][[File:MKT Icon BobombParafoil.png|32px|link=Bob-omb Parafoil]][[File:MKT Icon CrimsonCrane.png|32px|link=Crimson Crane]][[File:MKT Icon BlizzardParasol.png|32px|link=Blizzard Parasol]][[File:MKT Icon LumaParafoil.png|32px|link=Luma Parafoil]][[File:MKT Icon YoshisEggHanafuda.png|32px|link=Yoshi's Egg Hanafuda]] | ||
|- | |- | ||
!colspan=4|[[File:MKT Icon Bowser Cup.png|32px]] Bowser Cup<br>RMX Mario Circuit 1R | !colspan=4|[[File:MKT Icon Bowser Cup.png|32px]] [[Bowser Cup]]<br>RMX Mario Circuit 1R | ||
|- | |- | ||
| | | | ||
| Line 492: | Line 492: | ||
|[[File:MKT Icon 8BitJumpingMario.png|32px|link=8-Bit Jumping Mario]][[File:MKT Icon BobombParafoil.png|32px|link=Bob-omb Parafoil]][[File:MKT Icon BlizzardBalloons.png|32px|link=Blizzard Balloons]][[File:MKT Icon GoldCrane.png|32px|link=Gold Crane]][[File:MKT Icon MantaGlider.png|32px|link=Manta Glider]][[File:MKT Icon YoshisEggHanafuda.png|32px|link=Yoshi's Egg Hanafuda]] | |[[File:MKT Icon 8BitJumpingMario.png|32px|link=8-Bit Jumping Mario]][[File:MKT Icon BobombParafoil.png|32px|link=Bob-omb Parafoil]][[File:MKT Icon BlizzardBalloons.png|32px|link=Blizzard Balloons]][[File:MKT Icon GoldCrane.png|32px|link=Gold Crane]][[File:MKT Icon MantaGlider.png|32px|link=Manta Glider]][[File:MKT Icon YoshisEggHanafuda.png|32px|link=Yoshi's Egg Hanafuda]] | ||
|- | |- | ||
!colspan=4|[[File:MKT Icon Dry Bowser Cup.png|32px]] Dry Bowser Cup<br>RMX Mario Circuit 1T | !colspan=4|[[File:MKT Icon Dry Bowser Cup.png|32px]] [[Dry Bowser Cup]]<br>RMX Mario Circuit 1T | ||
|- | |- | ||
| | | | ||
| Line 512: | Line 512: | ||
===Super Mario Kart Tour=== | ===Super Mario Kart Tour=== | ||
In the [[Super Mario Kart Tour]], RMX Mario Circuit 1 | In the [[Super Mario Kart Tour]], RMX Mario Circuit 1 appeared as the first course in the Baby Mario Cup and the location of the bonus challenge in the Lakitu Cup. Its R variant appeared as the third course in the King Boo Cup, its T variant appeared as the first course in the Dry Bones Cup, and its R/T variant appeared as the third course in the Shy Guy Cup. | ||
<div class="contentbox mw-collapsible mw-collapsed" data-expandtext="Show stats" data-collapsetext="Hide stats"> | <div class="contentbox mw-collapsible mw-collapsed" data-expandtext="Show stats" data-collapsetext="Hide stats"> | ||
{| class="wikitable" style="text-align: center" | {| class="wikitable" style="text-align: center" | ||
!colspan=4|[[File:MKT Icon Baby Mario Cup.png|32px]] Baby Mario Cup<br>RMX Mario Circuit 1 | !colspan=4|[[File:MKT Icon Baby Mario Cup.png|32px]] [[Baby Mario Cup]]<br>RMX Mario Circuit 1 | ||
|- | |- | ||
| | | | ||
| Line 533: | Line 533: | ||
|[[File:MKT Icon QuestionMarkBlock.png|32px|link=? Block (glider)|? Block]][[File:MKT Icon BobombParafoil.png|32px|link=Bob-omb Parafoil]][[File:MKT Icon CrimsonCrane.png|32px|link=Crimson Crane]][[File:MKT Icon BlizzardParasol.png|32px|link=Blizzard Parasol]][[File:MKT Icon LumaParafoil.png|32px|link=Luma Parafoil]][[File:MKT Icon 8BitStar.png|32px|link=8-Bit Star]][[File:MKT Icon YoshisEggHanafuda.png|32px|link=Yoshi's Egg Hanafuda]] | |[[File:MKT Icon QuestionMarkBlock.png|32px|link=? Block (glider)|? Block]][[File:MKT Icon BobombParafoil.png|32px|link=Bob-omb Parafoil]][[File:MKT Icon CrimsonCrane.png|32px|link=Crimson Crane]][[File:MKT Icon BlizzardParasol.png|32px|link=Blizzard Parasol]][[File:MKT Icon LumaParafoil.png|32px|link=Luma Parafoil]][[File:MKT Icon 8BitStar.png|32px|link=8-Bit Star]][[File:MKT Icon YoshisEggHanafuda.png|32px|link=Yoshi's Egg Hanafuda]] | ||
|- | |- | ||
!colspan=4|[[File:MKT Icon King Boo Cup.png|32px]] King Boo Cup<br>RMX Mario Circuit 1R | !colspan=4|[[File:MKT Icon King Boo Cup.png|32px]] [[King Boo Cup]]<br>RMX Mario Circuit 1R | ||
|- | |- | ||
| | | | ||
| Line 550: | Line 550: | ||
|[[File:MKT Icon 8BitJumpingMario.png|32px|link=8-Bit Jumping Mario]][[File:MKT Icon BlizzardBalloons.png|32px|link=Blizzard Balloons]][[File:MKT Icon GoldCrane.png|32px|link=Gold Crane]][[File:MKT Icon MantaGlider.png|32px|link=Manta Glider]][[File:MKT Icon 8BitStar.png|32px|link=8-Bit Star]][[File:MKT Icon SuperMarioKartGlider.png|32px|link=Super Mario Kart Glider]][[File:MKT Icon YoshisEggHanafuda.png|32px|link=Yoshi's Egg Hanafuda]] | |[[File:MKT Icon 8BitJumpingMario.png|32px|link=8-Bit Jumping Mario]][[File:MKT Icon BlizzardBalloons.png|32px|link=Blizzard Balloons]][[File:MKT Icon GoldCrane.png|32px|link=Gold Crane]][[File:MKT Icon MantaGlider.png|32px|link=Manta Glider]][[File:MKT Icon 8BitStar.png|32px|link=8-Bit Star]][[File:MKT Icon SuperMarioKartGlider.png|32px|link=Super Mario Kart Glider]][[File:MKT Icon YoshisEggHanafuda.png|32px|link=Yoshi's Egg Hanafuda]] | ||
|- | |- | ||
!colspan=4|[[File:MKT Icon Dry Bones Cup.png|32px]] Dry Bones Cup<br>RMX Mario Circuit 1T | !colspan=4|[[File:MKT Icon Dry Bones Cup.png|32px]] [[Dry Bones Cup]]<br>RMX Mario Circuit 1T | ||
|- | |- | ||
| | | | ||
| Line 567: | Line 567: | ||
|[[File:MKT Icon QuestionMarkBlock.png|32px|link=? Block (glider)|? Block]][[File:MKT Icon PinkGoldPaperGlider.png|32px|link=Pink Gold Paper Glider]][[File:MKT Icon BlizzardBalloons.png|32px|link=Blizzard Balloons]][[File:MKT Icon SweetheartGlider.png|32px|link=Sweetheart Glider]][[File:MKT Icon 8BitStar.png|32px|link=8-Bit Star]][[File:MKT Icon SuperMarioKartGlider.png|32px|link=Super Mario Kart Glider]][[File:MKT Icon YoshisEggHanafuda.png|32px|link=Yoshi's Egg Hanafuda]] | |[[File:MKT Icon QuestionMarkBlock.png|32px|link=? Block (glider)|? Block]][[File:MKT Icon PinkGoldPaperGlider.png|32px|link=Pink Gold Paper Glider]][[File:MKT Icon BlizzardBalloons.png|32px|link=Blizzard Balloons]][[File:MKT Icon SweetheartGlider.png|32px|link=Sweetheart Glider]][[File:MKT Icon 8BitStar.png|32px|link=8-Bit Star]][[File:MKT Icon SuperMarioKartGlider.png|32px|link=Super Mario Kart Glider]][[File:MKT Icon YoshisEggHanafuda.png|32px|link=Yoshi's Egg Hanafuda]] | ||
|- | |- | ||
!colspan=4|[[File:MKT Icon Shy Guy Cup.png|32px]] Shy Guy Cup<br>RMX Mario Circuit 1R/T | !colspan=4|[[File:MKT Icon Shy Guy Cup.png|32px]] [[Shy Guy Cup]]<br>RMX Mario Circuit 1R/T | ||
|- | |- | ||
| | | | ||
| Line 588: | Line 588: | ||
===Mario vs. Luigi Tour=== | ===Mario vs. Luigi Tour=== | ||
In the [[Mario vs. Luigi Tour]], RMX Mario Circuit 1 | In the [[Mario vs. Luigi Tour]], RMX Mario Circuit 1 appeared as the location of the bonus challenge in the [[Metal Mario Cup]]. Its R/T variant appeared as the first course in the [[Monty Mole Cup]]. | ||
<div class="contentbox mw-collapsible mw-collapsed" data-expandtext="Show stats" data-collapsetext="Hide stats"> | <div class="contentbox mw-collapsible mw-collapsed" data-expandtext="Show stats" data-collapsetext="Hide stats"> | ||
{| class="wikitable" style="text-align: center" | {| class="wikitable" style="text-align: center" | ||
!colspan=4|[[File:MKT Icon Monty Mole Cup.png|32px]] Monty Mole Cup<br>RMX Mario Circuit 1R/T | !colspan=4|[[File:MKT Icon Monty Mole Cup.png|32px]] [[Monty Mole Cup]]<br>RMX Mario Circuit 1R/T | ||
|- | |- | ||
| | | | ||
| Line 612: | Line 612: | ||
===Winter Tour (2020)=== | ===Winter Tour (2020)=== | ||
In the 2020 [[Winter Tour (2020)|Winter Tour]], RMX Mario Circuit 1 appears as the first course in the Baby Mario Cup. Its | In the 2020 [[Winter Tour (2020)|Winter Tour]], RMX Mario Circuit 1 appears as the first course in the Baby Mario Cup. Its R variant appears as the first course in the [[Roy Cup]], while its T variant appears as the third course in the [[Baby Peach Cup]]. | ||
<div class="contentbox mw-collapsible mw-collapsed" data-expandtext="Show stats" data-collapsetext="Hide stats"> | <div class="contentbox mw-collapsible mw-collapsed" data-expandtext="Show stats" data-collapsetext="Hide stats"> | ||
{| class="wikitable" style="text-align: center" | {| class="wikitable" style="text-align: center" | ||
!colspan=4|[[File:MKT Icon Baby Mario Cup.png|32px]] Baby Mario Cup<br>RMX Mario Circuit 1 | !colspan=4|[[File:MKT Icon Baby Mario Cup.png|32px]] [[Baby Mario Cup]]<br>RMX Mario Circuit 1 | ||
|- | |- | ||
| | | | ||
| Line 633: | Line 633: | ||
|[[File:MKT Icon QuestionMarkBlock.png|32px|link=? Block (glider)|? Block]][[File:MKT Icon BobombParafoil.png|32px|link=Bob-omb Parafoil]][[File:MKT Icon 8BitJumpingLuigi.png|32px|link=8-Bit Jumping Luigi]][[File:MKT Icon CrimsonCrane.png|32px|link=Crimson Crane]][[File:MKT Icon BlizzardParasol.png|32px|link=Blizzard Parasol]][[File:MKT Icon LumaParafoil.png|32px|link=Luma Parafoil]][[File:MKT Icon 8BitStar.png|32px|link=8-Bit Star]][[File:MKT Icon YoshisEggHanafuda.png|32px|link=Yoshi's Egg Hanafuda]] | |[[File:MKT Icon QuestionMarkBlock.png|32px|link=? Block (glider)|? Block]][[File:MKT Icon BobombParafoil.png|32px|link=Bob-omb Parafoil]][[File:MKT Icon 8BitJumpingLuigi.png|32px|link=8-Bit Jumping Luigi]][[File:MKT Icon CrimsonCrane.png|32px|link=Crimson Crane]][[File:MKT Icon BlizzardParasol.png|32px|link=Blizzard Parasol]][[File:MKT Icon LumaParafoil.png|32px|link=Luma Parafoil]][[File:MKT Icon 8BitStar.png|32px|link=8-Bit Star]][[File:MKT Icon YoshisEggHanafuda.png|32px|link=Yoshi's Egg Hanafuda]] | ||
|- | |- | ||
!colspan=4|[[File:MKT Icon Roy Cup.png|32px]] Roy Cup<br>RMX Mario Circuit 1R | !colspan=4|[[File:MKT Icon Roy Cup.png|32px]] [[Roy Cup]]<br>RMX Mario Circuit 1R | ||
|- | |- | ||
| | | | ||
| Line 650: | Line 650: | ||
|[[File:MKT Icon 8BitJumpingMario.png|32px|link=8-Bit Jumping Mario]][[File:MKT Icon BlizzardBalloons.png|32px|link=Blizzard Balloons]][[File:MKT Icon GoldCrane.png|32px|link=Gold Crane]][[File:MKT Icon MantaGlider.png|32px|link=Manta Glider]][[File:MKT Icon 8BitStar.png|32px|link=8-Bit Star]][[File:MKT Icon SuperMarioKartGlider.png|32px|link=Super Mario Kart Glider]][[File:MKT Icon YoshisEggHanafuda.png|32px|link=Yoshi's Egg Hanafuda]] | |[[File:MKT Icon 8BitJumpingMario.png|32px|link=8-Bit Jumping Mario]][[File:MKT Icon BlizzardBalloons.png|32px|link=Blizzard Balloons]][[File:MKT Icon GoldCrane.png|32px|link=Gold Crane]][[File:MKT Icon MantaGlider.png|32px|link=Manta Glider]][[File:MKT Icon 8BitStar.png|32px|link=8-Bit Star]][[File:MKT Icon SuperMarioKartGlider.png|32px|link=Super Mario Kart Glider]][[File:MKT Icon YoshisEggHanafuda.png|32px|link=Yoshi's Egg Hanafuda]] | ||
|- | |- | ||
!colspan=4|[[File:MKT Icon Baby Peach Cup.png|32px]] Baby Peach Cup<br>RMX Mario Circuit 1T | !colspan=4|[[File:MKT Icon Baby Peach Cup.png|32px]] [[Baby Peach Cup]]<br>RMX Mario Circuit 1T | ||
|- | |- | ||
| | | | ||
| Line 670: | Line 670: | ||
===Rosalina Tour=== | ===Rosalina Tour=== | ||
In the [[Rosalina Tour]], RMX Mario Circuit 1 | In the [[Rosalina Tour]], RMX Mario Circuit 1 appeared as the first course in the Baby Mario Cup and the location of the bonus challenge in the Metal Mario Cup. Its R variant appeared as the second course in the Roy Cup, while its T variant appeared as the second course in the [[Baby Luigi Cup]]. | ||
<div class="contentbox mw-collapsible mw-collapsed" data-expandtext="Show stats" data-collapsetext="Hide stats"> | <div class="contentbox mw-collapsible mw-collapsed" data-expandtext="Show stats" data-collapsetext="Hide stats"> | ||
{| class="wikitable" style="text-align: center" | {| class="wikitable" style="text-align: center" | ||
!colspan=4|[[File:MKT Icon Baby Mario Cup.png|32px]] Baby Mario Cup<br>RMX Mario Circuit 1 | !colspan=4|[[File:MKT Icon Baby Mario Cup.png|32px]] [[Baby Mario Cup]]<br>RMX Mario Circuit 1 | ||
|- | |- | ||
| | | | ||
| Line 691: | Line 691: | ||
|[[File:MKT Icon QuestionMarkBlock.png|32px|link=? Block (glider)|? Block]][[File:MKT Icon 8BitJumpingLuigi.png|32px|link=8-Bit Jumping Luigi]][[File:MKT Icon CrimsonCrane.png|32px|link=Crimson Crane]][[File:MKT Icon BlizzardParasol.png|32px|link=Blizzard Parasol]][[File:MKT Icon LumaParafoil.png|32px|link=Luma Parafoil]][[File:MKT Icon 8BitStar.png|32px|link=8-Bit Star]][[File:MKT Icon NewYears2021.png|32px|link=New Year's 2021]][[File:MKT Icon YoshisEggHanafuda.png|32px|link=Yoshi's Egg Hanafuda]] | |[[File:MKT Icon QuestionMarkBlock.png|32px|link=? Block (glider)|? Block]][[File:MKT Icon 8BitJumpingLuigi.png|32px|link=8-Bit Jumping Luigi]][[File:MKT Icon CrimsonCrane.png|32px|link=Crimson Crane]][[File:MKT Icon BlizzardParasol.png|32px|link=Blizzard Parasol]][[File:MKT Icon LumaParafoil.png|32px|link=Luma Parafoil]][[File:MKT Icon 8BitStar.png|32px|link=8-Bit Star]][[File:MKT Icon NewYears2021.png|32px|link=New Year's 2021]][[File:MKT Icon YoshisEggHanafuda.png|32px|link=Yoshi's Egg Hanafuda]] | ||
|- | |- | ||
!colspan=4|[[File:MKT Icon Roy Cup.png|32px]] Roy Cup<br>RMX Mario Circuit 1R | !colspan=4|[[File:MKT Icon Roy Cup.png|32px]] [[Roy Cup]]<br>RMX Mario Circuit 1R | ||
|- | |- | ||
| | | | ||
| Line 708: | Line 708: | ||
|[[File:MKT Icon 8BitJumpingMario.png|32px|link=8-Bit Jumping Mario]][[File:MKT Icon BlizzardBalloons.png|32px|link=Blizzard Balloons]][[File:MKT Icon GoldCrane.png|32px|link=Gold Crane]][[File:MKT Icon MantaGlider.png|32px|link=Manta Glider]][[File:MKT Icon 8BitStar.png|32px|link=8-Bit Star]][[File:MKT Icon SuperMarioKartGlider.png|32px|link=Super Mario Kart Glider]][[File:MKT Icon ButterflyPrism.png|32px|link=Butterfly Prism]][[File:MKT Icon YoshisEggHanafuda.png|32px|link=Yoshi's Egg Hanafuda]] | |[[File:MKT Icon 8BitJumpingMario.png|32px|link=8-Bit Jumping Mario]][[File:MKT Icon BlizzardBalloons.png|32px|link=Blizzard Balloons]][[File:MKT Icon GoldCrane.png|32px|link=Gold Crane]][[File:MKT Icon MantaGlider.png|32px|link=Manta Glider]][[File:MKT Icon 8BitStar.png|32px|link=8-Bit Star]][[File:MKT Icon SuperMarioKartGlider.png|32px|link=Super Mario Kart Glider]][[File:MKT Icon ButterflyPrism.png|32px|link=Butterfly Prism]][[File:MKT Icon YoshisEggHanafuda.png|32px|link=Yoshi's Egg Hanafuda]] | ||
|- | |- | ||
!colspan=4|[[File:MKT Icon Baby Luigi Cup.png|32px]] Baby Luigi Cup<br>RMX Mario Circuit 1T | !colspan=4|[[File:MKT Icon Baby Luigi Cup.png|32px]] [[Baby Luigi Cup]]<br>RMX Mario Circuit 1T | ||
|- | |- | ||
| | | | ||
Revision as of 21:47, December 28, 2020
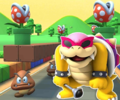
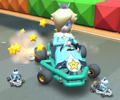
Template:Racecourse RMX Mario Circuit 1 is a race track in Mario Kart Tour. It is a remix version of the Mario Circuit courses from Super Mario Kart that debuted in the Mario Bros. Tour. The course also appears as RMX Mario Circuit 1R (reverse variant), RMX Mario Circuit 1T (trick variant; mislabeled as RMX Mario Circuit 1X on the main menu and favored courses lists prior to version 2.0.0, likely a translation error as trick courses are labeled "X" in some languages), and as RMX Mario Circuit 1R/T (reverse/trick variant), which debuted in the Yoshi Tour. This course is a favorite of Metal Mario, Mario (Classic), Mario (Chef), Peach (Wedding), and Mario (Swimwear). It is also a favorite of Peach (Wintertime) and Ice Mario if they are at level 6.
Like Mario Circuit 1, Mario Circuit 2 and Mario Circuit 3, it uses Mario Circuit 2's music from Mario Kart 7.
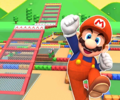
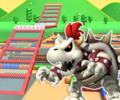
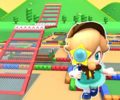
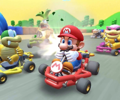
Course layout
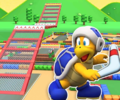
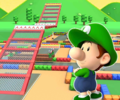
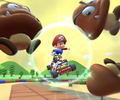
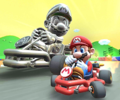
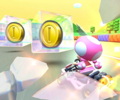
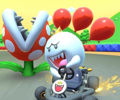
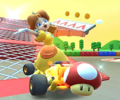
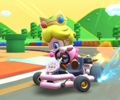
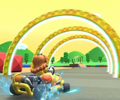
The course uses the same aesthetics as the Mario Circuit courses from Super Mario Kart, but has a different layout. The track starts with a right turn, passing under a set of Empty Blocks and ? Blocks with a Goomba on top. There is a straight path with a ramp on the left and a set of Item Boxes. After a right turn with a Pipe on the path, there is a ramp leading to a long set of Empty Blocks and ? Blocks which have Item Boxes on top. Oil slicks appear under the blocks. There is a left turn which leads to a straight path with Goombas on the ground and Piranha Plants on top of blocks. There is another left turn and a straight path with a ramp and blocks on the right. After a right turn with two Pipes on the track, there is a set of Item Blocks ramps, blocks, and Piranha Plants. After a right turn there are two Dash Panels which launch the player over parts of the track, leading to the Finish Line. The track has a reverse variation, a trick variation which adds more ramps and a reverse trick variation which adds ramps, additional floating platforms with Goombas, three Glide Ramps, traffic cones, and replaced the Piranha Plants with Big Piranha Plants.
Appearances
Mario Bros. Tour
In the Mario Bros. Tour, RMX Mario Circuit 1 appeared as the first course in the Mario Cup, the second course in the Baby Mario Cup, and the location of the bonus challenges in the Wendy Cup, the Toadette Cup, the Peachette Cup, and the Pauline Cup, as well as the location of the tour's Coin Rush. Its T variant appeared as the third course in the Luigi Cup and the second course in the Dry Bowser Cup, while its R variant appeared as the third course in the Dry Bones Cup and the first course in the Ludwig Cup. Despite the Mario Bros. Tour mainly focusing on this course, 3DS Mario Circuit served as the tour's signature course.
RMX Mario Circuit 1 | |||
|---|---|---|---|
| Drivers | Karts | Gliders | |
| Favorite of | |||
| Favored by | |||
RMX Mario Circuit 1T | |||
| Drivers | Karts | Gliders | |
| Favorite of | |||
| Favored by | |||
RMX Mario Circuit 1R | |||
| Drivers | Karts | Gliders | |
| Favorite of | |||
| Favored by | |||
RMX Mario Circuit 1 | |||
| Drivers | Karts | Gliders | |
| Favorite of | |||
| Favored by | |||
RMX Mario Circuit 1R | |||
| Drivers | Karts | Gliders | |
| Favorite of | |||
| Favored by | |||
RMX Mario Circuit 1T | |||
| Drivers | Karts | Gliders | |
| Favorite of | |||
| Favored by | |||
Baby Rosalina Tour
In the Baby Rosalina Tour, RMX Mario Circuit 1 appeared as the first course in the Wario Cup and the location of the bonus challenge in the Toadette Cup. Its R variant appeared as the second course in the Iggy Cup, while its T variant appeared as the third course in the Ludwig Cup.
RMX Mario Circuit 1R | |||
|---|---|---|---|
| Drivers | Karts | Gliders | |
| Favorite of | |||
| Favored by | |||
RMX Mario Circuit 1 | |||
| Drivers | Karts | Gliders | |
| Favorite of | |||
| Favored by | |||
RMX Mario Circuit 1T | |||
| Drivers | Karts | Gliders | |
| Favorite of | |||
| Favored by | |||
Yoshi Tour
In the Yoshi Tour, RMX Mario Circuit 1 appeared as the location of the bonus challenge in the King Boo Cup. Its R/T variant appeared as the first course in the Hammer Bro Cup and the third course in the Bowser Cup.
RMX Mario Circuit 1R/T | |||
|---|---|---|---|
| Drivers | Karts | Gliders | |
| Favorite of | |||
| Favored by | |||
RMX Mario Circuit 1R/T | |||
| Drivers | Karts | Gliders | |
| Favorite of | |||
| Favored by | |||
Trick Tour
In the Trick Tour, the R/T variant of RMX Mario Circuit 1 appeared as the first course in the Wendy Cup.
RMX Mario Circuit 1R/T | |||
|---|---|---|---|
| Drivers | Karts | Gliders | |
| Favorite of | |||
| Favored by | |||
Cooking Tour
In the Cooking Tour, RMX Mario Circuit 1 appeared as the second course in the Shy Guy Cup. Its R variant appeared as the second course in the Ludwig Cup, while its T variant appeared as the first course in the Birdo Cup and the location of the challenge in the Mario Cup.
RMX Mario Circuit 1R | |||
|---|---|---|---|
| Drivers | Karts | Gliders | |
| Favorite of | |||
| Favored by | |||
RMX Mario Circuit 1T | |||
| Drivers | Karts | Gliders | |
| Favorite of | |||
| Favored by | |||
RMX Mario Circuit 1 | |||
| Drivers | Karts | Gliders | |
| Favorite of | |||
| Favored by | |||
Peach Tour
In the Peach Tour, RMX Mario Circuit 1 appeared as the second course in the Pink Gold Peach Cup and the location of the bonus challenge in the Peach Cup. Its R variant appeared as the second course in the Dry Bones Cup, while its T variant appeared as the first course in the Birdo Cup.
RMX Mario Circuit 1R | |||
|---|---|---|---|
| Drivers | Karts | Gliders | |
| Favorite of | |||
| Favored by | |||
RMX Mario Circuit 1T | |||
| Drivers | Karts | Gliders | |
| Favorite of | |||
| Favored by | |||
RMX Mario Circuit 1 | |||
| Drivers | Karts | Gliders | |
| Favorite of | |||
| Favored by | |||
Marine Tour
In the Marine Tour, the R/T variant of RMX Mario Circuit 1 appeared as the third course in the Pauline Cup.
RMX Mario Circuit 1R/T | |||
|---|---|---|---|
| Drivers | Karts | Gliders | |
| Favorite of | |||
| Favored by | |||
Wild West Tour
In the Wild West Tour, RMX Mario Circuit 1 appeared as the third course in the Lakitu Cup and the location of the bonus challenge in the Diddy Kong Cup. Its T variant appeared as the second course in the Donkey Kong Cup, while its R variant appeared as the first course in the Dry Bones Cup.
RMX Mario Circuit 1T | |||
|---|---|---|---|
| Drivers | Karts | Gliders | |
| Favorite of | |||
| Favored by | |||
RMX Mario Circuit 1 | |||
| Drivers | Karts | Gliders | |
| Favorite of | |||
| Favored by | |||
RMX Mario Circuit 1R | |||
| Drivers | Karts | Gliders | |
| Favorite of | |||
| Favored by | |||
Pirate Tour
In the Pirate Tour, RMX Mario Circuit 1 appeared as the third course in the Toadette Cup and the location of the bonus challenge in the Dry Bones Cup. Its R variant appeared as the third course in the Bowser Cup, while its T variant appeared as the second course in the Dry Bowser Cup.
RMX Mario Circuit 1 | |||
|---|---|---|---|
| Drivers | Karts | Gliders | |
| Favorite of | |||
| Favored by | |||
RMX Mario Circuit 1R | |||
| Drivers | Karts | Gliders | |
| Favorite of | |||
| Favored by | |||
RMX Mario Circuit 1T | |||
| Drivers | Karts | Gliders | |
| Favorite of | |||
| Favored by | |||
Super Mario Kart Tour
In the Super Mario Kart Tour, RMX Mario Circuit 1 appeared as the first course in the Baby Mario Cup and the location of the bonus challenge in the Lakitu Cup. Its R variant appeared as the third course in the King Boo Cup, its T variant appeared as the first course in the Dry Bones Cup, and its R/T variant appeared as the third course in the Shy Guy Cup.
RMX Mario Circuit 1 | |||
|---|---|---|---|
| Drivers | Karts | Gliders | |
| Favorite of | |||
| Favored by | |||
RMX Mario Circuit 1R | |||
| Drivers | Karts | Gliders | |
| Favorite of | |||
| Favored by | |||
RMX Mario Circuit 1T | |||
| Drivers | Karts | Gliders | |
| Favorite of | |||
| Favored by | |||
RMX Mario Circuit 1R/T | |||
| Drivers | Karts | Gliders | |
| Favorite of | |||
| Favored by | |||
Mario vs. Luigi Tour
In the Mario vs. Luigi Tour, RMX Mario Circuit 1 appeared as the location of the bonus challenge in the Metal Mario Cup. Its R/T variant appeared as the first course in the Monty Mole Cup.
RMX Mario Circuit 1R/T | |||
|---|---|---|---|
| Drivers | Karts | Gliders | |
| Favorite of | |||
| Favored by | |||
Winter Tour (2020)
In the 2020 Winter Tour, RMX Mario Circuit 1 appears as the first course in the Baby Mario Cup. Its R variant appears as the first course in the Roy Cup, while its T variant appears as the third course in the Baby Peach Cup.
RMX Mario Circuit 1 | |||
|---|---|---|---|
| Drivers | Karts | Gliders | |
| Favorite of | |||
| Favored by | |||
RMX Mario Circuit 1R | |||
| Drivers | Karts | Gliders | |
| Favorite of | |||
| Favored by | |||
RMX Mario Circuit 1T | |||
| Drivers | Karts | Gliders | |
| Favorite of | |||
| Favored by | |||
Rosalina Tour
In the Rosalina Tour, RMX Mario Circuit 1 appeared as the first course in the Baby Mario Cup and the location of the bonus challenge in the Metal Mario Cup. Its R variant appeared as the second course in the Roy Cup, while its T variant appeared as the second course in the Baby Luigi Cup.
RMX Mario Circuit 1 | |||
|---|---|---|---|
| Drivers | Karts | Gliders | |
| Favorite of | |||
| Favored by | |||
RMX Mario Circuit 1R | |||
| Drivers | Karts | Gliders | |
| Favorite of | |||
| Favored by | |||
RMX Mario Circuit 1T | |||
| Drivers | Karts | Gliders | |
| Favorite of | |||
| Favored by | |||
Profiles
Mario Kart Tour
- Mario Kart Tour Twitter: "As tempted as you may be, don't try to hit those blocks—you're in a kart! This new take on an old favorite course is much better enjoyed from the driver's seat. Start your engines and go for a spin around RMX Mario Circuit!"[1]
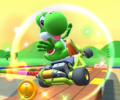
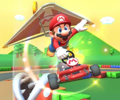
Gallery
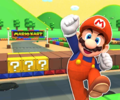
The course icon with Mario (Classic)
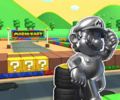
The course icon with Metal Mario
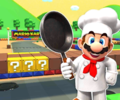
The course icon with Mario (Chef)
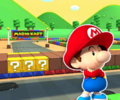
The course icon with Baby Mario
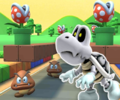
The course icon of the Reverse variant
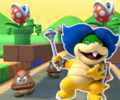
The course icon of the Reverse variant with Ludwig
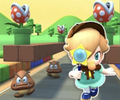
The course icon of the Reverse variant with Baby Rosalina (Detective)
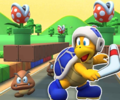
The course icon of the Reverse variant with Boomerang Bro
The course icon of the Reverse variant with Roy
The course icon of the Trick variant
The course icon of the Trick variant with Dry Bowser
The course icon of the Trick variant with Baby Rosalina (Detective)
The course icon of the Trick variant with Boomerang Bro
The course icon of the Trick variant with Baby Luigi
The course icon of the Reverse/Trick variant
The course icon of the Reverse/Trick variant with Yoshi (Egg Hunt)
The course icon of the challenge in the Wendy Cup (Mario Bros. Tour)
The course icon of the challenge in the Toadette Cup (Mario Bros. Tour) and the Metal Mario Cup (Rosalina Tour)
The course icon of the challenge in the Peachette Cup (Mario Bros. Tour) and the Metal Mario Cup (Mario vs. Luigi Tour)
The course icon of the challenge in the Pauline Cup (Mario Bros. Tour)
The course icon of the challenge in the Toadette Cup (Baby Rosalina Tour)
The course icon of the challenge in the King Boo Cup (Yoshi Tour)
The course icon of the challenge in the Mario Cup (Cooking Tour)
The course icon of the challenge in the Peach Cup (Peach Tour)
The course icon of the challenge in the Diddy Kong Cup (Wild West Tour)
The course icon of the challenge in the Dry Bones Cup (Pirate Tour)
The course icon of the challenge in the Lakitu Cup (Super Mario Kart Tour)
View of the Reverse/Trick variant
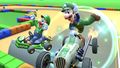
Luigi and Luigi (Classic) tricking on the course
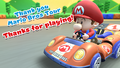
"Thank you" message for the end of the Mario Bros. Tour


