Mario Kart World: Difference between revisions
(Added "Waluigi Vintage Clothing", "Wario's Premium Scrap", and "Garlic Power" as new sponsors after spotting ads for them on Wario Stadium) |
(→References in other media: So it has a name.) |
||
| Line 1: | Line 1: | ||
{{italic title}} | {{italic title}} | ||
{{game infobox | {{game infobox | ||
|image=[[File:Mario Kart World Box NA.png|250px]]<br> | |image=[[File:Mario Kart World Box NA.png|250px]]<br>American box art | ||
|developer= | |developer=[[Nintendo Entertainment Planning and Development|Nintendo EPD]]<ref name=InterviewPart1/><br>[[Monolith Soft]]<br>[[1-UP Studio]]<br>[[Bandai Namco Holdings|Bandai Namco Studios]] | ||
|publisher=[[Nintendo]] | |publisher=[[Nintendo]] | ||
|platforms=[[Nintendo Switch 2]] | |platforms=[[Nintendo Switch 2]] | ||
|release={{flag list|World|June 5, 2025<ref name=Direct>{{cite|author=Nintendo of America|date=April 2, 2025|url=https://www.youtube.com/watch?v=3pE23YTYEZM|title=Mario Kart World – Nintendo Direct {{!}} Nintendo Switch 2|publisher=YouTube|accessdate=April 2, 2025}}</ref>}} | |release={{flag list|Australia|June 5, 2025<ref>{{cite|url=https://www.nintendo.com/au/games/nintendo-switch-2/mario-kart-world/|title=Mario Kart World - Nintendo Switch 2|publisher=Nintendo|language=en-au|accessdate=June 1, 2025}}</ref>|Japan|June 5, 2025<ref name=jpnwebsite/>|South Korea|June 5, 2025<ref name=korwebsite/>|HK|June 5, 2025<ref name=hkwebsite/>|Saudi Arabia|June 5, 2025<ref>{{cite|url=https://www.nintendo.sa/nintendo-switch-2-coming-june-5th|title=NINTENDO SWITCH 2 LAUNCHES JUNE 5TH, BRINGING NEW FORMS OF GAME COMMUNICATION TO LIFE|publisher=Nintendo Saudi Arabia|language=en|accessdate=June 1, 2025}}</ref>|Israel|June 5, 2025<ref>{{cite|url=https://www.facebook.com/photo?fbid=3926276237701496&set=a.2207234889605648|title=Photo of the Nintendo Switch 2 and ''Mario Kart World''{{'}}s release date|date=April 8, 2025|author=Nintendo Israel|publisher=Facebook|accessdate=June 1, 2025}}</ref>|Europe|June 5, 2025<ref name=eurwebsite/> |South Africa|June 5, 2025<ref>{{cite|url=https://www.nintendo.com/en-za/Games/Nintendo-Switch-2-games/Mario-Kart-World-2790000.html|title=Mario Kart World {{!}} Nintendo Switch 2 games {{!}} Games|publisher=Nintendo ZA|language=en|accessdate=June 1, 2025}}</ref>|Switzerland|June 5, 2025<ref>[https://www.nintendo.com/de-ch/Spiele/Nintendo-Switch-2-Spiele/Mario-Kart-World-2790000.html Mario Kart World]. ''Nintendo CH''. Retrieved September 20, 2025.</ref>|UK|June 5, 2025<ref>[https://www.nintendo.com/en-gb/Games/Nintendo-Switch-2-Spiele/Mario-Kart-World-2790000.html Mario Kart World]. ''Nintendo UK''. Retrieved September 20, 2025.</ref>|Brazil|June 5, 2025<ref>[https://www.nintendo.com/py-br/store/products/mario-kart-world-switch-2/ Mario Kart™ World para Nintendo Switch 2 - Site Oficial da Nintendo para Brasil]. ''Nintendo Brasil''. Retrieved September 20, 2025.</ref>|Argentina|June 5, 2025<ref>[https://www.nintendo.com/es-ar/store/products/mario-kart-world-switch-2/ Mario Kart™ World para Nintendo Switch 2 - Sitio Oficial de Nintendo para Argentina]. ''Nintendo Argentina''. Retrieved September 20, 2025.</ref>|Canada|June 5, 2025<ref>[https://www.nintendo.com/en-ca/store/products/mario-kart-world-switch-2/ Mario Kart™ World for Nintendo Switch 2 - Nintendo Official Site for Canada]. ''Nintendo Canada''. Retrieved September 20, 2025.</ref><ref>[https://www.nintendo.com/fr-ca/store/products/mario-kart-world-switch-2/ Mario Kart™ World pour Nintendo Switch 2 - Site Officiel Nintendo pour Canada]. ''Nintendo Canada''. Retrieved September 20, 2025.</ref>|Chile|June 5, 2025<ref>[https://www.nintendo.com/es-cl/store/products/mario-kart-world-switch-2/ Mario Kart™ World para Nintendo Switch 2 - Sitio Oficial de Nintendo para Chile]. ''Nintendo Chile''. Retrieved September 20, 2025.</ref>|Colombia|June 5, 2025<ref>[https://www.nintendo.com/es-co/store/products/mario-kart-world-switch-2/ Mario Kart™ World para Nintendo Switch 2 - Sitio Oficial de Nintendo para Colombia]. ''Nintendo Colombia''. Retrieved September 20, 2025.</ref>|Mexico|June 5, 2025<ref>[https://www.nintendo.com/es-mx/store/products/mario-kart-world-switch-2/ Mario Kart™ World para Nintendo Switch 2 - Sitio Oficial de Nintendo para Mexico]. ''Nintendo Mexico''. Retrieved September 20, 2025.</ref>|Peru|June 5, 2025<ref>[https://www.nintendo.com/es-pe/store/products/mario-kart-world-switch-2/ Mario Kart™ World para Nintendo Switch 2 - Sitio Oficial de Nintendo para Peru]. ''Nintendo Peru''. Retrieved September 20, 2025.</ref>|USA|June 5, 2025<ref name=Direct>{{cite|author=Nintendo of America|date=April 2, 2025|url=https://www.youtube.com/watch?v=3pE23YTYEZM|title=Mario Kart World – Nintendo Direct {{!}} Nintendo Switch 2|publisher=YouTube|accessdate=April 2, 2025}}</ref>|Philippines|June 26, 2025<ref>{{cite|url=https://www.nintendo.com/ph/games/switch2/aaaaa/index.html|title=Mario Kart World {{!}} Nintendo Switch 2 {{!}} Nintendo|publisher=Nintendo Philippines|language=en|accessdate=June 1, 2025}}</ref>|Singapore|June 26, 2025<ref>{{cite|url=https://www.nintendo.com/sg/games/switch2/aaaaa/index.html|title=Mario Kart World {{!}} Nintendo Switch 2 {{!}} Nintendo|publisher=Nintendo Singapore|language=en|accessdate=June 1, 2025}}</ref>|Thailand|June 26, 2025<ref>{{cite|url=https://www.nintendo.com/th/games/switch2/aaaaa/index.html|title=Mario Kart World {{!}} Nintendo Switch 2 {{!}} Nintendo|publisher=Nintendo|language=th|accessdate=June 1, 2025}}</ref>|Malaysia|July 3, 2025<ref>{{cite|url=https://www.nintendo.com/my/switch2/index.html|title=Nintendo Switch 2|publisher=Nintendo Malaysia|language=en|accessdate=June 1, 2025}}</ref>|ROC|July 10, 2025<ref name=twnwebsite/>|UAE|September 17, 2025<ref>{{cite|author=@NintendoMDE|date=September 17, 2025|url=https://x.com/NintendoMDE/status/1968294381150203914|title="Exciting news! 🎮 The official UAE version Nintendo Switch 2 console, with a wide range of accessories and games, is now available in all the major retail stores across UAE!"|publisher=X|language=en|accessdate=September 17, 2025}}</ref>}} | ||
|modes=Single | |modes=Single player<br>Multiplayer (2–4 players)<br>Local Wireless Play (2–8 players)<br> Online Play (2–24 players)<br>LAN Play (2–24 players) | ||
|languages={{languages|en_us=y|en_gb=y|es_es=y|es_latam=y|fr_ca=y|fr_fr=y|de=y|it=y|nl=y|pt_pt=y|pt_br=y|ru=y|jp=y|zh_simp=y|zh_trad=y|kr=y}} | |languages={{languages|en_us=y|en_gb=y|es_es=y|es_latam=y|fr_ca=y|fr_fr=y|de=y|it=y|nl=y|pt_pt=y|pt_br=y|ru=y|jp=y|zh_simp=y|zh_trad=y|kr=y}} | ||
|genre=[[Mario Kart (series)|Racing]] | |genre=[[Mario Kart (series)|Racing]] | ||
|ratings={{ratings|esrb=e|esrbC=<ref name=engwebsite/>|pegi=3|pegiC=<ref name=eurwebsite>[https://www.nintendo.com/en-gb/Games/Nintendo-Switch-2-games/Mario-Kart-World-2790000.html European website]</ref>|acb=g|acbC=<ref name=auswebsite>[https://www.nintendo.com/au/hardware/nintendo-switch-2/ Australian Nintendo Switch 2 website]</ref>|cero=a|ceroC=<ref name=jpnwebsite/>|usk=0|uskC=<ref name=gerwebsite>[https://www.nintendo.com/de-de/Spiele/Nintendo-Switch-2-Spiele/Mario-Kart-World-2790000.html German website]</ref>|classind=L|classindC=<ref name=brawebsite>[https://www.nintendo.com/pt-br/gaming-systems/switch-2/featured-games/mario-kart-world/ Brazilian website]</ref>|smeccv=A|smeccvC=<ref name=mexwebsite>[https://www.nintendo.com/es-mx/gaming-systems/switch-2/featured-games/mario-kart-world/ Mexican website]</ref>|gsrr=p|gsrrC=<ref name=twnwebsite>[https://www.nintendo.com/tw/games/switch2/aaaaa/ Taiwanese website]</ref>|rars=|fpb= | | |ratings={{ratings|esrb=e|esrbC=<ref name=engwebsite>[https://www.nintendo.com/us/gaming-systems/switch-2/featured-games/mario-kart-world/ English language website]</ref>|pegi=3|pegiC=<ref name=eurwebsite>[https://www.nintendo.com/en-gb/Games/Nintendo-Switch-2-games/Mario-Kart-World-2790000.html European website]</ref>|acb=g|acbC=<ref name=auswebsite>[https://www.nintendo.com/au/hardware/nintendo-switch-2/ Australian Nintendo Switch 2 website]</ref>|cero=a|ceroC=<ref name=jpnwebsite/>|usk=0|uskC=<ref name=gerwebsite>[https://www.nintendo.com/de-de/Spiele/Nintendo-Switch-2-Spiele/Mario-Kart-World-2790000.html German website]</ref>|classind=L|classindC=<ref name=brawebsite>[https://www.nintendo.com/pt-br/gaming-systems/switch-2/featured-games/mario-kart-world/ Brazilian website]</ref>|smeccv=A|smeccvC=<ref name=mexwebsite>[https://www.nintendo.com/es-mx/gaming-systems/switch-2/featured-games/mario-kart-world/ Mexican website]</ref>|grac=All|gracC=<ref name=korwebsite>[https://www.nintendo.com/kr/games/switch2/aaaaa/index.html Official Korean website]</ref>|gsrr=p|gsrrC=<ref name=twnwebsite>[https://www.nintendo.com/tw/games/switch2/aaaaa/ Taiwanese website]</ref>|rars=|fpb=PG|fpbC=<ref name=ZAFwebsite>[https://store.nintendo.co.za/products/bee-mario-kart-world-ukv Official Nintendo South Africa web store]</ref>|gmedia=3|gmediaC=<ref>[https://www.facebook.com/NintendoSaudi/photos/pb.61551907031843.-2207520000/593535033849337/?type=3 Nintendo Saudi Facebook page]</ref>|uaemc=3|uaemcC=<ref>[https://www.mariowiki.com/File:Mario_Kart_World_AE_box_art.jpg File:Mario Kart World AE box art.jpg]</ref>}} | ||
|format={{format|switch2=1|switch2dl=1}} | |format={{format|switch2=1|switch2dl=1}} | ||
|input= | |input={{input|joy-con2=1|joy-con1=1|joy-con2-horizontal=1|joy-con1-horizontal=1|switch2pro=1|switch1pro=1}} | ||
|serials= | |serials= | ||
}} | }} | ||
'''''Mario Kart World''''' is | {{quote|A world of racing awaits|Game tagline}} | ||
'''''Mario Kart World''''' is a racing game in the ''[[Mario Kart (series)|Mario Kart]]'' series, released worldwide for the [[Nintendo Switch 2]] on June 5, 2025. Initially teased during the Nintendo Switch 2's reveal trailer on January 16, 2025, the game was properly revealed during the Nintendo Switch 2 Direct presentation on April 2, 2025. It is the sixteenth entry in the ''Mario Kart'' series, the first new ''Mario Kart'' title since 2020's ''[[Mario Kart Live: Home Circuit]]'', as well as the first original flagship entry in the series for a console since 2014's ''[[Mario Kart 8]]''. It is also the first ''Mario Kart'' game to be a launch title for its console. | |||
The game's roster marked the playable debut of many enemies from across the series, including [[Cataquack]], [[Swoop]], and [[Conkdor]], among many more. Altogether, this game features the most brand new playable character additions to the ''Mario Kart'' series to date. Two new in-game modes were also added: Knockout Tour and Free Roam. The art style of the game's characters has changed to further resemble 2D illustrations drawn by [[Shigehisa Nakaue]], much like the in-game look of ''[[Super Mario Bros. Wonder]]''. | |||
The | The game was covered during the Nintendo Treehouse: Live events on April 3 and 4, 2025.<ref name=TreehouseDay1Pt1>{{cite|author=Nintendo of America|date=April 3, 2025|url=https://youtu.be/NWjkbAQOGY8|title=Mario Kart World – Grand Prix Gameplay – Nintendo Treehouse: Live {{!}} Nintendo Switch 2|publisher=YouTube|accessdate=April 6, 2025}}</ref><ref name=TreehouseDay2Pt1>{{cite|author=Nintendo of America|date=April 4, 2025|url=https://youtu.be/FLYm4K7WMUw|title=Mario Kart World – Knockout Tour & GameChat Gameplay – Nintendo Treehouse: Live {{!}} Nintendo Switch 2|publisher=YouTube|accessdate=April 6, 2025}}</ref> A dedicated Nintendo Direct for the game titled the "''Mario Kart World'' Direct" broadcast on April 17, 2025 at 6:00 a.m. PT / 9:00 a.m. ET / 2:00 p.m. BST.<ref name=MKWDirect>{{cite|author=Nintendo of America|date=April 17, 2025|title=Mario Kart World Direct 4.17.2025|url=https://youtu.be/mq4uCJDwO9U|publisher=YouTube|language=en|accessdate=April 17, 2025}}</ref> | ||
The game | ==Gameplay== | ||
===New features=== | |||
Races now have 24 racers, doubling from the 12 seen in ''[[Mario Kart Wii]]'', ''[[Mario Kart 8]]'', and ''[[Mario Kart 8 Deluxe]]'', tripling from the eight seen in the other entries, and quadrupling the six from the arcade series. Players receive points in racing as before, with some positions receiving the same number of points, making ''Mario Kart World'' the first ''Mario Kart'' game where racers who finished in different places received the same number of points since ''[[Mario Kart: Super Circuit]]'', when 5th-8th place were all awarded zero points. | |||
Although [[underwater driving]] (introduced in ''[[Mario Kart 7]]'') and [[anti-gravity]] (from ''Mario Kart 8'' and ''Mario Kart 8 Deluxe'') do not return, gliding does, with [[glider]]s being replaced by retractable wings on the vehicles. When going over water, the wheels of all vehicles change into water skis, allowing them to float on the surface of the water. Both of these mechanics create a comparable vehicle system to ''[[Diddy Kong Racing]]'' and ''[[Diddy Kong Racing DS]]''. | |||
Many new mechanics are introduced in this game: when holding down the button after a [[Hop (move)|hop]] without turning, players can charge up a [[Charge Jump]] instead of initiating a [[drift]]. After such a jump, the player is granted a small speed boost similar to a [[Mini-Turbo]]. The jumps can be charged, yielding blue, then yellow, then rainbow sparks, with longer charges granting a longer-lasting boost after landing, similarly to drifting. Vehicles now have the ability to [[Wall Ride]] by [[Jump Boost]]ing or Charge Jumping onto walls, and [[Rail Ride]] on [[grindrail]]s{{conjectural}} and other thin platforms to quickly charge up [[Mini-Turbo]]s. A new [[Rewind]] feature has also been added, which allows the player to rewind their position back to where they were before. However, this feature does not rewind the other racers and can only be used in Free Roam or in solo races. | |||
Unlike previous installments, all of the courses in the game take place in a large, open world, connected via the newly introduced [[route]]s, which are long, non-looping tracks filled with various hazards that connect from one course to another during races. | |||
Players are able to enter large vehicles scattered around the world marked with question marks, and temporarily control them from the inside. The vehicles available to control are [[cargo truck]]s, boats, helicopters, and [[UFO]]s. | |||
Visually, the game is the first entry in the series, and the first ''Super Mario'' game overall, that can be played in resolutions higher than 1080p. | |||
===Controls=== | |||
<center> | |||
{| class="wikitable spinoff mk alt"style="text-align:center" | |||
|- | |||
!rowspan=2|Action(s) | |||
|- | |||
!<span style="cursor:help">[[File:Joy-Con 2 Icon.svg|28px|link=|Joy-Con 2]] / [[File:Nintendo Switch 2 Pro Controller.png|42px|link=|Nintendo Switch 2 Pro Controller]]</span> | |||
!<span style="cursor:help">[[File:Joy-Con 2 Horizontal Icon.svg|45px|link=|Joy-Con 2 (horizontal)]]</span> | |||
|- | |||
|Steer | |||
|{{button|switch|leftstick}} | |||
|{{button|switch|stick}} | |||
|- | |||
|Accelerate / [[Rocket Start]] | |||
|{{button|switch|A}} | |||
|{{button|switch|jc-right}} | |||
|- | |||
|Brake / Reverse | |||
|{{button|switch|B}} | |||
|{{button|switch|jc-bottom}} | |||
|- | |||
|Item / Horn / Taunt | |||
|{{button|switch|L}} / {{button|switch|ZL}} | |||
|{{button|switch|SL}} | |||
|- | |||
|Drift / Hop / [[Jump Boost|Trick]] / [[Charge Jump]] | |||
|{{button|switch|R}} / {{button|switch|ZR}} | |||
|{{button|switch|SR}} | |||
|- | |||
|Rear view | |||
|{{button|switch|X}} | |||
|{{button|switch|jc-top}} | |||
|- | |||
|Pause menu | |||
|{{button|switch|plus}} | |||
|{{button|switch|plusminus}} | |||
|- | |||
|Photo Mode | |||
|{{button|switch|minus}} | |||
| | |||
|- | |||
|[[Rewind]] | |||
|{{button|switch|down}} | |||
| | |||
|- | |||
|Move camera | |||
|{{button|switch|rightstick}} | |||
| | |||
|- | |||
|Retry Mission <small>([[#Free Roam|Free Roam]])</small> | |||
|{{button|switch|leftstickbutton}} | |||
|{{button|switch|stickbutton}} | |||
|- | |||
|Open map <small>(Free Roam)</small> | |||
|{{button|switch|Y}} | |||
|{{button|switch|jc-left}} | |||
|} | |||
</center> | |||
==Game modes== | |||
===Grand Prix=== | |||
[[File:MKWorld Grand Prix icon.png|50px|left]] | |||
Grand Prix returns as the main game mode from previous games, where the player races through four courses of a cup in a chosen engine class (50cc, 100cc, 150cc, or the unlockable Mirror Mode) to attain the most points, with higher placements yielding more points. However, the format of the Grand Prix has been changed significantly from previous games. Now, only the first race of a cup follows the traditional multiple-lap format. The last three races follow a sectioned format instead, with the first two sections (or more in certain cases) of the race taking place across [[route]]s that transition from the previous course to the next, while the final section consists of one lap of that next course. | |||
Initially, only seven out of the eight cups are available in Grand Prix. Once a trophy has been obtained in all of them, a cutscene will play showing the seven trophies appearing at [[Acorn Heights]] and combining into the [[Special Cup]] trophy. The trophy will then fly across the sky with a rainbow trail behind it, much to the surprise of some of the racers. The trophy will then fly towards the Crown Bridge and immediately upwards, where it materializes into Rainbow Road offscreen. The Special Cup will then be unlocked for play. | |||
Like in past games, the player is able to get up to three stars in addition to a trophy in a Grand Prix. Like ''Mario Kart 8'', the stars are purely based on points, with the player getting all three stars by getting 60 points, which is done by getting first place in all four races. | |||
As officially confirmed by Nintendo in a "Thank you for playing!" email sent to players,<ref>{{cite|url=https://x.com/Genki_JPN/status/1933563020627882150|quote=Nintendo Japan sent a “Thank you for playing” email to Japanese players confirming how to unlock Mirror Mode in Mario Kart World!<br> | |||
- Play all 8 Grand Prix at 150cc<br> | |||
- Play all 8 Knockout Tours at 150cc<br> | |||
Free Roam:<br> | |||
- Clear 10 P-Switch Missions<br> | |||
- Find 10 ? Panels<br> | |||
- Find 10 Peach Medals<br> | |||
- Then clear the “Special Cup”Grand Prix at 150cc|author=Genki|publisher=Twitter|language=en|accessdate=June 14, 2025|archive=https://archive.ph/ufqSX|archivedate=14 Jun 2025 05:50:51 UTC}}</ref> Mirror Mode is unlocked by: | |||
* Playing the first seven cups in Grand Prix on 150cc (Nintendo's email however, erroneously states that all eight cups must be played in Grand Prix before replaying the Special Cup) | |||
* Playing all eight rallies in Knockout Tour on 150cc (with clearing checkpoints being optional) | |||
* Completing 10 [[List of Mario Kart World missions|P Switch missions]] in Free Roam | |||
* Activating 10 [[? Panel]]s in Free Roam | |||
* Collecting 10 [[Peach Medallion]]s in Free Roam | |||
* Only after all of the above have been completed, the player must finish the Special Cup to unlock it, including replaying the Special Cup if it has already been completed. | |||
Once all of the criteria have been fulfilled, a cutscene will play where a rainbow-colored light will travel into the stained glass on [[Peach's Castle|the castle]] in [[Peach Stadium]]. After a flash of light, the design on the stained glass will appear mirrored, and Mario will notice that the "L" on Luigi's cap is mirrored as well, in which the two will then celebrate. Mirror Mode will then be unlocked. | |||
Unlike ''Mario Kart 8'' and ''Mario Kart 8 Deluxe'', progress made on a cup in Mirror Mode counts it for other engine classes as well, a feature that only applied to 100cc and 150cc in the aforementioned two games. | |||
Due to the increased racer count, 7th, 8th, 9th, and 10th place are not considered losing places. Below is a chart of the point spread in ''Mario Kart World'': | |||
{|align=center class="wikitable"style="margin:auto;text-align:center;" width=80% | |||
|- | |||
!!style="width:2.5em"|1st | |||
!!style="width:2.5em"|2nd | |||
!!style="width:2.5em"|3rd | |||
!!style="width:2.5em"|4th | |||
!!style="width:2.5em"|5th | |||
!!style="width:2.5em"|6th | |||
!!style="width:2.5em"|7th | |||
!!style="width:2.5em"|8th | |||
!!style="width:2.5em"|9th | |||
!!style="width:2.5em"|10th | |||
!!style="width:2.5em"|11th | |||
!!style="width:2.5em"|12th | |||
!!style="width:2.5em"|13th | |||
!!style="width:2.5em"|14th | |||
!!style="width:2.5em"|15th | |||
!!style="width:2.5em"|16th | |||
!!style="width:2.5em"|17th | |||
!!style="width:2.5em"|18th | |||
!!style="width:2.5em"|19th | |||
!!style="width:2.5em"|20th | |||
!!style="width:2.5em"|21st | |||
!!style="width:2.5em"|22nd | |||
!!style="width:2.5em"|23rd | |||
!!style="width:2.5em"|24th | |||
|- | |||
|style="background:#096;--darkbg:#096;color:white;font-weight:bold"|15||style="background:#CF0;--darkbg:#CF0;--darkcolor:black;"|12||style="background:#CF0;--darkbg:#CF0;--darkcolor:black;"|10||style="background:#CF0;--darkbg:#CF0;--darkcolor:black;"|9||style="background:#CF0;--darkbg:#CF0;--darkcolor:black;"|9||style="background:#CF0;--darkbg:#CF0;--darkcolor:black;"|8||style="background:#CF0;--darkbg:#CF0;--darkcolor:black;"|8||style="background:#CF0;--darkbg:#CF0;--darkcolor:black;"|7||style="background:#CF0;--darkbg:#CF0;--darkcolor:black;"|7||style="background:#CF0;--darkbg:#CF0;--darkcolor:black;"|6||6||6||5||5||5||4||4||4||3||3||3||2||2||1 | |||
|- | |||
|colspan=25 style="text-align:justify;font-size:smaller;"|<span style="background:#096;color:white">A grove-green background signifies victory results (great clapping, character(s) cheering), unique finish music, and the best after-race music.</span><br><span style="background:#CF0;">A yellow-limegreen background signifies moderate results (mild clapping, moderate character reaction) and the same music in Wi-Fi as the winner (different in ''Mario Kart DS''{{'}}s Grand Prix).</span><br>A normal background signifies losing results (no clapping, character(s) showing a sad expression) and music. | |||
|} | |||
{{br}} | |||
===Knockout Tour=== | |||
[[File:MKWorld Knockout Tour icon.png|50px|left]] | |||
Knockout Tour is a new all-out battle mode where players race over consecutive tracks across the open world and are eliminated at a specific checkpoint if they are in the last four places. Unlike races, there are no breaks in between, as players who qualify for the next race will simply continue in it. | |||
Knockout Tour consists of [[Rally (event)|rallies]] rather than cups, with each of the eight rallies having six races within. Unlike the Grand Prix, Knockout Tour focuses primarily on the routes between the courses. The first five races take place on a continuous path of them, with each checkpoint eliminating the players that place in the bottom four of the group. For the final race, the last four players standing will race a lap around the final course. | |||
Like in Grand Prix, there are up to three stars that can be obtained in each rally. Similar to Grand Prix requiring a first place finish in every race to obtain three stars, the player must place first at every checkpoint of a rally to get three stars in it. | |||
====Names in other languages==== | |||
{{foreign names | |||
|Jpn=サバイバル | |||
|JpnC=<ref name=jpnwebsite/> | |||
|JpnR=Sabaibaru | |||
|JpnM=Survival | |||
|ChiT=生存賽 | |||
|ChiTC=<ref name=hkwebsite/> | |||
|ChiTR=Shēngcún sài | |||
|ChiTM=Survival Match | |||
|Dut=Knock-outrally | |||
|DutM=Knockout rally | |||
|DutC=<ref name=WebsiteNL>https://www.nintendo.com/nl-nl/Games/Nintendo-Switch-2-games/Mario-Kart-World-2790000.html</ref> | |||
|Fre=Survie | |||
|FreC=<ref name=WebsiteFRFR>https://www.nintendo.com/fr-fr/Jeux/Jeux-Nintendo-Switch-2/Mario-Kart-World-2790000.html</ref><ref name=WebsiteFRCA>https://www.nintendo.com/fr-ca/gaming-systems/switch-2/featured-games/mario-kart-world/</ref> | |||
|FreM=Survival | |||
|Ger=K.-o.-Tour | |||
|GerC=<ref name=WebsiteDE>https://www.nintendo.com/de-de/Spiele/Nintendo-Switch-2-Spiele/Mario-Kart-World-2790000.html</ref> | |||
|GerM=K.O. Tour | |||
|Ita=Sopravvivenza | |||
|ItaC=<ref name=WebsiteIT>https://www.nintendo.com/it-it/Giochi/Giochi-per-Nintendo-Switch-2/Mario-Kart-World-2790000.html?srsltid=AfmBOorXtsZGL8eBm7ILFkOvVHKDI2S-CKcfXWjyRPCqM20iGTGqjmW5</ref> | |||
|ItaM=Survival | |||
|Kor=서바이벌 | |||
|KorC=<ref name=korwebsite/> | |||
|KorR=Seobaibeol | |||
|KorM=Survival | |||
|Por=Eliminatória | |||
|PorC=<ref name=WebsitePTPT>https://www.nintendo.com/pt-pt/Jogos/Jogos-para-a-Nintendo-Switch-2/Mario-Kart-World-2790000.html</ref><ref name=WebsitePTBR>https://www.nintendo.com/pt-br/gaming-systems/switch-2/featured-games/mario-kart-world/</ref> | |||
|PorM=Knock Out | |||
|Rus=Марафон на выбывание | |||
|RusR=Marafon na vybyvaniye | |||
|RusM=Elimination Marathon | |||
|RusC=<ref>From the game. Retrieved June 5th, 2025.</ref> | |||
|Spa=Supervivencia | |||
|SpaC=<ref name=WebsiteESLAT>https://www.nintendo.com/es-cl/gaming-systems/switch-2/featured-games/mario-kart-world/</ref><ref name=WebsiteESES>https://www.nintendo.com/es-es/Juegos/Juegos-de-Nintendo-Switch-2/Mario-Kart-World-2790000.html?srsltid=AfmBOooa9V_Ek_wfP9aUriow6fp1lob5eBXEJkJU8HbcPVHH8xoh58bC</ref> | |||
|SpaM=Survival | |||
}} | |||
===Free Roam=== | |||
[[File:MKWorld Road map.png|300px|thumb|right|A map of all the roads used for courses, [[route]]s, and [[rally (event)|rallies]] (black), water areas used for routes ({{color|lightblue|light blue}}), roads exclusively used in Free Roam ({{color|lightgreen|light green}}), and [[train (obstacle)|train]] tracks ({{color|red|red}})]] | |||
Free Roam is an open-world adventure mode where one or multiple players can freely explore any course both on- and off-road. As displayed in the HUD when viewing the world map in this mode, [[P Switch]]es, [[? Panel]]s, and [[Peach Medallion]]s appear as discoverable objects, all of which award the player with stickers. P Switches activate [[List of Mario Kart World missions|missions]] reminiscent of the Missions mode from ''[[Mario Kart DS]]'' and bonus challenges from ''Mario Kart Tour''. In total, Free Roam contains 394 P Switches, 150 ? Panels, and 200 Peach Medallions. CPU drivers can also be encountered in Free Roam; the main characters drive around locations indicated by the map, and random NPC characters can be found driving around the race courses. CPUs also appear as challengers in certain P Switch missions. Once Mirror Mode is unlocked, the player can drive through the stained glass on the castle in [[Peach Stadium]] to mirror the entire world map in Free Roam. | |||
====Names in other languages==== | |||
{{foreign names | |||
|Jpn=フリーラン | |||
|JpnR=Furīran | |||
|JpnM=Free Run | |||
|JpnC=<ref name=jpnwebsite/> | |||
|ChiT=自由行駛 | |||
|ChiTC=<ref>{{cite|title=瑪利歐賽車世界|下載版軟體|任天堂|publisher=Nintendo|url=https://ec.nintendo.com/HK/zh/titles/70010000096808|language=zh-hk|accessdate=June 4, 2025}}</ref> | |||
|ChiTR=Zìyóu xíngshǐ | |||
|ChiTM=Free Drive | |||
|Dut=Rondrijden | |||
|DutC=<ref name=WebsiteNL/> | |||
|DutM=Driving around | |||
|Fre=Balade | |||
|FreM=Stroll | |||
|FreC=<ref name=WebsiteFRFR/><ref name=WebsiteFRCA/> | |||
|Ger=Freies Fahren | |||
|GerM=Free Drive | |||
|GerC=<ref name=WebsiteDE/> | |||
|Ita=Corsa libera | |||
|ItaM=Free run | |||
|ItaC=<ref name=WebsiteIT/> | |||
|Kor=프리 런 | |||
|KorC=<ref name=korwebsite/> | |||
|KorR=Peuri reon | |||
|KorM= Free Run | |||
|Por=Modo livre | |||
|PorC=<ref name=WebsitePTPT/><ref name=WebsitePTBR/> | |||
|PorM=Free mode | |||
|Rus=Свободная езда | |||
|RusR=Svobodnaya ezda | |||
|RusM=Free riding | |||
|RusC=<ref>From the game. Retrieved June 5th, 2025.</ref> | |||
|SpaA=Paseo libre | |||
|SpaAM=Free walk | |||
|SpaAC=<ref name=WebsiteESLAT/> | |||
|SpaE=Modo libre | |||
|SpaEM=Free mode | |||
|SpaEC=<ref name=WebsiteESES/> | |||
}} | |||
===Time Trials=== | |||
[[File:MKWorld Time Trial icon.png|50px|left]] | |||
Time Trials return and function the same as they have previously. Players drive through a selected course to complete it as fast as possible. Like in previous games, players can race against [[Ghost (Mario Kart series)|ghost times]] set by other players online. Staff ghosts return under the same name prefixes as in ''[[Mario Kart 8 Deluxe]]'', those being "Nin★". Like with ''Mario Kart Tour'', lap/section splits are no longer available on the results screen, and are only shown on the timer after each lap/section, with the final split never shown. | |||
===VS Race=== | |||
[[File:MKWorld VS icon.png|50px|left]] | |||
VS Race allows up to four players to play together locally and eight players to play wireless with custom rules. | |||
The settings available in VS Race are: | |||
{{br|left}} | |||
*'''Class:''' The engine class the races will be played in. | |||
*'''Teams:''' Determines whether races are played in teams or individually. Unlike previous games, it is now possible to play in three teams of eight racers each or four teams of six in addition to only two teams of 12. | |||
*'''Items:''' Sets the item balance, with "Normal" containing regular item balance and "Frantic" giving chaotic items more frequently. The version 1.2.0 update also added the "Mushrooms Only" option, which only gives Mushroom-based items. | |||
*'''COM Difficulty:''' Sets the difficulty of computer racers, with the available options being "Easy", "Normal", and "Hard", or "No COM", which removes all computer racers. The latter option was initially only available in multiplayer, but was made available for single player as well starting in version 1.2.0. | |||
*'''Course Selection:''' Determines how courses are selected: | |||
**"Open" allows the player to select any course, including whether to play with routes or not. | |||
**In "Connected", the first race is chosen similar to "Open", but after that, the player can only select from three courses that connect from the previous course, and the race will involve traversing the route to the next course. Occasionally, one to two of those options will be replaced by the option to play a track in the traditional lap-style. The player can also select a random course, which may pick from one of the previously given courses with routes, or select a random course without routes. | |||
**"Random" has racers playing on a random course, which will also randomly choose whether it is played with laps or routes. | |||
*'''Race Count:''' Select the number of races played. The player is able to select three, four, five, six, eight, 12, 16, or 32 races. | |||
Several of the routes in VS Race give the destination course unique layouts compared to Grand Prix, Knockout Tour, and Time Trials, such as reverse layouts, combined layouts, or completely new layouts. | |||
===Battle=== | |||
[[File:MKWRLD Battle Mode Icon.png|50px|left]] | |||
[[Battle]] modes return, though as in ''[[Mario Kart Wii]]'' and ''[[Mario Kart 7]]'', there are only two battle modes to choose from: [[Balloon Battle]] and [[Coin Runners]]. The settings for Battle mode are similar to VS Race, but engine class cannot be set (as all battles are played in 50cc), only "Open" and "Random" are available in course selection, and the number of rounds has a maximum of eight, as opposed to the 32 races in VS Race. Matches have a set three-minute timer present during battles, which is non-adjustable like in ''Mario Kart Wii''. | |||
====Balloon Battle==== | |||
[[File:MKWorld Balloon Battle icon.png|50px|left]] | |||
Balloon Battle has been reverted back to the elimination/point hybrid system used in ''[[Mario Kart 8]]'', where players gain points by hitting other opponents, and all of the points they gained will be added to their total score if they survive until the end. If the player loses all of their balloons, they are not only eliminated from the game, but their score is also nullified, meaning that they do not get any points for the round. | |||
Like in ''[[Mario Kart 8 Deluxe]]'', players start with five balloons rather than three like in other games. Defeated players do not continue being able to use items like in ''Mario Kart 8''. In local and online multiplayer, players can instead continue watching their opponents play, much like if they get eliminated in Knockout Tour. | |||
====Coin Runners==== | |||
[[File:MKWorld Coin Runners icon.png|50px|left]] | |||
Coin Runners functions similarly its previous appearances, where the objective is to collect the most coins when time limit expires while avoiding getting hit which will cause the player to lose coins. However, similar to ''[[Mario Kart 7]]''{{'}}s version of Coin Runners, there is a limit to the number of coins the player can collect, that being 20. Once the time is up, the number of coins the player collected will be added to their total point tally. | |||
{{br|left}} | |||
===Online Play=== | |||
Online multiplayer returns from previous ''Mario Kart'' games and allows one or two people to play with others over the Internet. Four modes are available, being Race, Knockout Tour, Battle, and Friends. Race, Knockout Tour, and Battle feature random match-ups with players from around the world. The player has a separate score (similar to [[Mario Kart 7#VR|Versus Rating]] from previous titles) for each mode, starting with 3000 and gaining points for their performance in each race or battle. If playing with two players, the second player will not have a score kept. | |||
*In Race, course selection is based on the "Connected" option seen in VS Race. After all players in the room have chosen a course, one player's choice is selected at random along with a random engine class. | |||
*In Knockout Tour, a random rally in a random engine class is chosen and played. | |||
*In Battle, the player can select from one of three battle courses, after which a course, along with either Balloon Battle or Coin Runners, is selected at random. | |||
====Friends==== | |||
{{redirect|Intermission|the routes between courses|[[Route]]}} | |||
The Friends mode allows the player(s) to create or join a room, or view their battle history with people in their friends list. When creating a friend room, the host is able to set the rules of the room, including whether the mode played is a VS Race, Knockout Tour, Balloon Battle, or Coin Runners. In the settings, there is an option known as '''Intermission''', which determines how long the players will wait on the free roam map between races/battles, with the options being 10 seconds, one minute, or five minutes. Course selection in VS Race will initially appear like in worldwide matches. However, pressing {{button|switch|plus}} on the course selection screen will instead toggle the "Open" course selection screen seen in offline VS Race. In Knockout Tour and Battle, the player is able to select any rally or battle course respectively they want to play on, which will then be chosen randomly among the players' choices. | |||
In all online modes, players can roam the world before and between matches. Unlike in the offline Free Roam mode, P Switches do not appear in these free roam lobbies, though players can still collect ? Panels and Peach Medallions, which will count towards their own totals. | |||
==Characters== | ==Characters== | ||
The game has a total of 50 racers, with 32 being available from the start and 18 being unlockable. Of the total racers, 30 return from past installments and 20 are new (labeled in '''bold'''), most of whom are also playable for the first time in a video game overall, excluding [[Goomba]], [[Piranha Plant]], [[Pianta]], [[Spike]], and [[Dolphin]], as well as [[Cheep Cheep]] and [[Coin Coffer]] if [[capture]]s in ''[[Super Mario Odyssey]]'' are counted, and [[Sidestepper]] if [[Mystery Mushroom]] [[Costume Mario|costumes]] in ''[[Super Mario Maker]]'' are counted. Additionally, [[Nabbit]], [[Hammer Bro]], [[Chargin' Chuck]], and [[Monty Mole]] are playable for the first time in a console ''Mario Kart'' game following their debuts in ''[[Mario Kart Tour]]''. Excluding arcade games and ''[[Mario Kart Live: Home Circuit]]'', this is the first game in the ''Mario Kart'' series since the introduction of [[Mii]] characters on the [[Wii]] to not feature them as playable characters. This is also the first game to feature [[Donkey Kong]]'s 2025 redesign outside of profile icons. | |||
Twenty-six drivers in this game are part of a sub-category of drivers referred to as "NPC drivers"<ref name=InterviewPart3/> during development. These consist of all twenty newcomers, as well as six returning characters: [[Dry Bones]], [[Wiggler]], Hammer Bro, Chargin' Chuck, Nabbit, and Monty Mole. All appear in the game as either background characters, obstacles during races, or hazards in Free Roam. During races, the [[Kamek (item)|Kamek]] item can transform drivers into various characters from this group, while in some cases many members of that species will appear on the race track. Unlike the main roster, NPC drivers lack any alternate outfits, with Dash Food only providing them with a speed boost. | |||
<gallery perrow=8> | ===Default drivers=== | ||
<gallery perrow=8 widths=100 heights=135> | |||
MarioMKworld.png|[[Mario]] | |||
LuigiMKworld.png|[[Luigi]] | |||
PeachMKworld.png|[[Princess Peach|Peach]] | |||
YoshiMKworld.png|[[Yoshi]] | |||
ToadMKworld.png|[[Toad]] | |||
KoopaMKworld.png|[[Koopa Troopa]] | |||
BowserMKworld.png|[[Bowser]] | |||
WarioMKworld.png|[[Wario]] | |||
WaluigiMKworld.png|[[Waluigi]] | |||
PaulineMKworld.png|[[Pauline]] | |||
babymariomkworld.png|[[Baby Mario]] | |||
babyluigimkworld.png|[[Baby Luigi]] | |||
babypeachmkworld.png|[[Baby Peach]] | |||
babydaisymkworld.png|[[Baby Daisy]] | |||
toadettemkworld.png|[[Toadette]] | |||
babyrosalinamkworld.png|[[Baby Rosalina]] | |||
shyguymkworld.png|[[Shy Guy]] | |||
nabbitmkworld.png|[[Nabbit]] | |||
MKWorld Piranha Plant Racer.png|'''[[Piranha Plant]]''' | |||
hammerbromkworld.png|[[Hammer Bro]] | |||
montymolemkworld.png|[[Monty Mole]]* | |||
MKworld Goomba.png|'''[[Goomba]]''' | |||
Mario Kart World Sidestepper.png|'''[[Sidestepper]]'''* | |||
Mario Kart World Cheep Cheep.png|'''[[Cheep Cheep]]'''* | |||
MK NS2 Dry Bones.png|[[Dry Bones]] | MK NS2 Dry Bones.png|[[Dry Bones]] | ||
Wiggler | MKWorld Wiggler.png|[[Wiggler]] | ||
Pokey MKWorld Select.png|'''[[Pokey]]'''* | |||
Cow MKWorld Select.png|'''[[Cow]]'''* | |||
Stingby MKWorld Select.png|'''[[Stingby]]'''* | |||
SnowmanSelect.png|'''[[Snowman]]'''* | |||
PenguinSelect.png|'''[[Penguin]]'''* | |||
bbmkworld.png|'''[[Para-Biddybud]]'''* | |||
</gallery> | </gallery> | ||
=== | <small>* - unlockable in Version 1.0.0 but made default starting in Version 1.1.0 </small> | ||
<gallery perrow= | ===Unlockable drivers=== | ||
<gallery perrow=6 widths=100 heights=135> | |||
DaisyMKworld.png|[[Daisy]] | |||
RosalinaMKworld.png|[[Rosalina]] | |||
lakitumkworld.png|[[Lakitu]] | |||
bowserjrmkworld.png|[[Bowser Jr.]] | |||
birdomkworld.png|[[Birdo]] | |||
Kingboomkworld.png|[[King Boo]] | |||
dkmkworld.png|[[Donkey Kong]] | |||
spikemkworld.png|'''[[Spike]]''' | |||
Mario Kart World | cataquackmkworld.png|'''[[Cataquack]]''' | ||
Mario Kart World | Mario Kart World Pianta.png|'''[[Pianta]]''' | ||
MKWorld | Mario Kart World Rocky Wrench.png|'''[[Rocky Wrench]]''' | ||
MKWorld Conkdor icon.png|'''[[Conkdor]]''' | |||
Peepa MKWorld Select.png|'''[[Peepa]]''' | |||
Swoop MKWorld Select.png|'''[[Swoop]]''' | |||
MKWorld Fishbone Select.png|'''[[Fish Bone]]''' | |||
Coin Coffer MKWorld Select.png|'''[[Coin Coffer]]''' | |||
Dolphin MKWorld Select.png|'''[[Dolphin]]''' | |||
Chargin' Chuck MKWorld Select.png|[[Chargin' Chuck]] | |||
</gallery> | </gallery> | ||
===Character outfits=== | |||
:''For a list of outfit names in other languages, see [[List of Mario Kart World outfit names in other languages]].'' | |||
Returning from ''[[Mario Kart Tour]]'' is the ability to equip the main 24 characters with various types of outfits. 103 total outfits are included in the game, with some outfits using designs seen previously in games such as ''Mario Kart Tour'' and ''[[Super Mario Odyssey]]''. Outfits are obtained after eating [[Dash Food]], with characters having up to nine outfits. Outfits have their own slot on the character selection screen, unlike in ''[[Mario Kart 8]]'' and its [[Mario Kart 8 Deluxe|port]] (except for [[Tanooki Mario]] and [[Cat Mario|Cat Peach]]). Consuming Dash Food unlocks outfits for use anytime, and the type of food the player uses determines the outfit the character wears. | |||
;Mario | ;Mario | ||
<gallery> | <gallery widths=100 heights=135> | ||
mariotourmkworld.png|Touring | |||
MKWorld Mario | MKWorld Mario Pro Racer Outfit.png|Pro Racer | ||
MKWorld Mario Costume | MKWorld Mechanic Mario.png|Mechanic | ||
MKWorld | MKWorld Mario Costume 6.png|Dune Rider | ||
Mario Cowboy MKWorld Select.png|Cowboy | |||
MKWorld Mario Costume | Sightseeing MarioSelect.png|Sightseeing | ||
MKWorld Mario Costume 3.png|Aviator | |||
mhmkworld.png|Happi | |||
Mario All Terrain.png|All-Terrain | |||
</gallery> | </gallery> | ||
;Luigi | ;Luigi | ||
<gallery> | <gallery widths=100 heights=135> | ||
luigitourmkworld.png|Touring | |||
MKWorld Luigi | Luigi Pro Racer.png|Pro Racer | ||
MKWorld Luigi | MKWorld Luigi Mechanic alt.png|Mechanic | ||
MKWorld | MKWorld Luigi Oasis alt.png|Oasis | ||
MKWorld Luigi | Luigi Farmer MKWorld Select.png|Farmer | ||
lhmkworld.png|Happi | |||
MKWorld Luigi All-Terrain alt.png|All-Terrain | |||
Luigi Gondolier.png|Gondolier | |||
</gallery> | </gallery> | ||
;Peach | ;Peach | ||
<gallery> | <gallery widths=100 heights=135> | ||
peachtourmkworld.png|Touring | |||
MKWorld Peach Costume 1.png|Pro Racer | MKWorld Peach Costume 1.png|Pro Racer | ||
MKWorld | Peach Farmer MKWorld Select.png|Farmer | ||
MKWorld Peach | MKWorld Peach Sightseeing alt.png|Sightseeing | ||
MKWorld Peach | MKWorld Peach Aviator alt.png|Aviator | ||
phmkworld.png|Yukata | |||
MKWorld Peach Costume 5.png|Aero | |||
MKWorld Peach Costume 4.png|Vacation | |||
</gallery> | </gallery> | ||
;Daisy | ;Daisy | ||
<gallery> | <gallery widths=100 heights=135> | ||
daisytourmkworld.png|Touring | |||
MK World Daisy black scarf costume.png|Pro Racer | |||
MKWorld Daisy Costume 3.png| | Daisy Oasis.png|Oasis | ||
MKWorld Daisy | Daisy Swimwear.png|Swimwear | ||
MKWorld Daisy Costume 3.png|Aero | |||
MKWorld Daisy Vacation alt.png|Vacation | |||
</gallery> | |||
;Yoshi | |||
<gallery widths=100 heights=135> | |||
yoshitourmkworld.png|Touring | |||
MKWorld Yoshi Pro Racer alt.png|Pro Racer | |||
MKW Purple Yoshi top hat.png|Aristocrat | |||
Yoshi Pink MKWorld Select.png|Soft Server | |||
YoshiBikerSelect.png|Biker | |||
MKW Orange Yoshi swim.png|Swimwear | |||
ymmkworld.png|Matsuri | |||
Yoshifood.png|Food Slinger | |||
</gallery> | </gallery> | ||
; | |||
<gallery | ;Donkey Kong | ||
<gallery widths=100 heights=135> | |||
Donkey Kong All Terrain.png|All-Terrain | |||
</gallery> | </gallery> | ||
;Bowser | ;Bowser | ||
<gallery> | <gallery widths=100 heights=135> | ||
MKWorld Bowser Costume 1.png| | MKWorld Bowser Pro Racer alt.png|Pro Racer | ||
Bowser Costume 1 MKWorld Select.png|Supercharged | |||
MKWorld Bowser Biker | Bowser Biker.png|Biker | ||
Bowser All Terrain.png|All-Terrain | |||
</gallery> | |||
;Bowser Jr. | |||
<gallery widths=100 heights=135> | |||
MKWorld Bowser Jr Pro Racer alt.png|Pro Racer | |||
Bowser Jr Biker.png|Biker Jr. | |||
Junior Explorer.png|Explorer | |||
</gallery> | |||
;Koopa Troopa | |||
<gallery widths=100 heights=135> | |||
krtourmkworld.png|Runner | |||
MKWorld Koopa Troopa Pro Racer alt.png|Pro Racer | |||
MKWorld Koopa Troopa Sailor alt.png|Sailor | |||
MKWorld Koopa Troopa All-Terrain alt.png|All-Terrain | |||
MKWorld Construction Koopa.png|Work Crew | |||
</gallery> | </gallery> | ||
;Toad | ;Toad | ||
<gallery> | <gallery widths=100 heights=135> | ||
MKWorld Toad Costume 1.png| | MKWorld Toad Costume 3.png|Pro Racer | ||
MKWorld | MKWorld Toad train outfit.png|Engineer | ||
MKWorld | ToadBurgerSelect.png|Burger Bud | ||
MKWorld | MKWorld Toad Costume 1.png|Explorer | ||
</gallery> | |||
;Toadette | |||
<gallery widths=100 heights=135> | |||
MKWorld New Toadette Costume.png|Pro Racer | |||
MKWorld Toadette Costume 2.png|Conductor | |||
Toadette Soft Server MKWorld Select.png|Soft Server | |||
MKWorld Toadette Costume 1.png|Explorer | |||
</gallery> | |||
;Lakitu | |||
<gallery widths=100 heights=135> | |||
MKWorld Lakitu Pit Crew alt.png|Pit Crew | |||
MK World Lakitu Fisherman char select.png|Fisherman | |||
</gallery> | |||
;King Boo | |||
<gallery widths=100 heights=135> | |||
MKWorld King Boo racing outfit.png|Pro Racer | |||
King Boo Aristocrat.png|Aristocrat | |||
MKWorld King Boo pirate outfit.png|Pirate | |||
</gallery> | |||
;Shy Guy | |||
<gallery widths=100 heights=135> | |||
Shy Guy Racer.png|Pit Crew | |||
Shy Guy Sloper.png|Slope Styler | |||
</gallery> | </gallery> | ||
;Wario | ;Wario | ||
<gallery> | <gallery widths=100 heights=135> | ||
Wario Racer.png|Pro Racer | |||
Wario Oasis.png|Oasis | |||
MKWorld Wario Biker.png|Biker | Wario Wicked Wasp MKWorld Select.png|Wicked Wasp | ||
Wario Biker.png|Biker | |||
Wario Pirate.png|Pirate | |||
Wario Road Ruffian.png|Road Ruffian | |||
Wario Construction.png|Work Crew | |||
</gallery> | </gallery> | ||
;Waluigi | ;Waluigi | ||
<gallery> | <gallery widths=100 heights=135> | ||
Waluigi Dune Rider.png|Pro Racer | |||
MKWorld Waluigi | Waluigi Wampire.png|Wampire | ||
Waluigi Mariachi MKWorld Select.png|Mariachi | |||
Waluigi Biker.png|Biker | |||
Waluigi Road Ruffian.png|Road Ruffian | |||
</gallery> | |||
;Birdo | |||
<gallery widths=100 heights=135> | |||
Birdo Racer.png|Pro Racer | |||
Birdo Vacation.png|Vacation | |||
</gallery> | </gallery> | ||
; | |||
<gallery | ;Pauline | ||
<gallery widths=100 heights=135> | |||
Pauline Aero.png|Aero | |||
</gallery> | </gallery> | ||
; | |||
<gallery> | ;Rosalina | ||
<gallery widths=100 heights=135> | |||
rtourmkworld.png|Touring | |||
Rosalina Racer.png|Pro Racer | |||
MKW Rosalina Aurora alt.png|Aurora | |||
Rosalina Biker.png|Aero | |||
</gallery> | </gallery> | ||
;Baby Mario | ;Baby Mario | ||
<gallery> | <gallery widths=100 heights=135> | ||
Baby Mario Racer.png|Pro Racer | |||
Baby Mario Swimwear.png|Swimwear | |||
Baby Mario Work Crew.png|Work Crew | |||
</gallery> | </gallery> | ||
;Baby Luigi | ;Baby Luigi | ||
<gallery> | <gallery widths=100 heights=135> | ||
Baby Luigi Racer.png|Pro Racer | |||
Baby Luigi Work Crew.png|Work Crew | |||
</gallery> | </gallery> | ||
;Baby Peach | ;Baby Peach | ||
<gallery> | <gallery widths=100 heights=135> | ||
bptourmkworld.png|Touring | |||
Baby Peach Racer.png|Pro Racer | |||
Baby Peach Sailor.png|Sailor | |||
bpermkworld.png|Explorer | |||
</gallery> | </gallery> | ||
;Baby Daisy | ;Baby Daisy | ||
<gallery> | <gallery widths=100 heights=135> | ||
bdtourmkworld.png|Touring | |||
Baby Daisy Racer.png|Pro Racer | |||
MKWorld Baby Daisy | MKWorld Baby Daisy alternate outfit.png|Sailor | ||
Bdermkworld.png|Explorer | |||
</gallery> | </gallery> | ||
;Baby Rosalina | ;Baby Rosalina | ||
<gallery> | <gallery widths=100 heights=135> | ||
brtourmkworld.png|Touring | |||
MKWorld Baby Rosalina | MKWorld Baby Rosalina Pro Racer alt.png|Pro Racer | ||
Baby Rosalina Sailor.png|Sailor | |||
Brermkworld.png|Explorer | |||
</gallery> | </gallery> | ||
;Lakitu | |||
===Unlock criteria=== | |||
{|class="wikitable spinoff mk" style="text-align: center; min-width: 40%; margin: 0 auto;" | |||
|- | |||
!style="width:8em"|Character | |||
!style="max-width:52em"|Criteria | |||
|- | |||
![[Donkey Kong]] | |||
|Clear the [[Mushroom Cup]] | |||
|- | |||
![[Daisy]] | |||
|Clear the [[Flower Cup]] | |||
|- | |||
![[Rosalina]] | |||
|Clear the [[Star Cup]] | |||
|- | |||
![[Lakitu]] | |||
|Clear the [[Shell Cup]] | |||
|- | |||
![[Birdo]] | |||
|Clear the [[Banana Cup]] | |||
|- | |||
![[King Boo]] | |||
|Clear the [[Leaf Cup]] | |||
|- | |||
![[Bowser Jr.]] | |||
|Clear the [[Lightning Cup]] | |||
|- | |||
![[Cataquack]] | |||
|rowspan=11|Be summoned by the [[Kamek (item)|Kamek]] item for the first time / Abduct using the [[UFO]] for the first time | |||
|- | |||
![[Chargin' Chuck]] | |||
|- | |||
![[Coin Coffer]] | |||
|- | |||
![[Conkdor]] | |||
|- | |||
![[Dolphin]] | |||
|- | |||
![[Fish Bone]] | |||
|- | |||
![[Peepa]] | |||
|- | |||
![[Pianta]] | |||
|- | |||
![[Rocky Wrench]] | |||
|- | |||
![[Spike]] | |||
|- | |||
![[Swoop]] | |||
|- | |||
!Character outfits | |||
|Consume corresponding [[Dash Food]] for the first time | |||
|} | |||
==Vehicles== | |||
[[File:LuigiMechanicMKW.png|thumb|left|A sticker on Luigi's [[Baby Blooper (kart)|Baby Blooper kart]]]] | |||
[[File:MKWorld stickers menu.png|thumb|The stickers menu]] | |||
[[Kart]]s, [[bike]]s, and [[All-Terrain Vehicle|ATV]]s all return in ''Mario Kart World'', the latter two following their absence in ''[[Mario Kart Tour]]''. In the case of bikes, [[standard bike (vehicle class)|standard bikes]] return while [[sport bike (vehicle class)|sport bikes]] do not. Kart customization as seen in ''[[Mario Kart 7]]'' and ''[[Mario Kart 8]]'' does not return, with the vehicles in this game instead sporting a unique wheel design, and some lacking wheels entirely in favor of {{wp|Continuous track|treads}} or {{wp|ski}}s. Like the aforementioned two games, however, vehicles are unlocked by collecting a certain number of coins. Despite ATVs returning, the [[Standard ATV]] does not. The [[Gold Standard]] from ''[[Mario Kart 7]]'', ''[[Mario Kart 8]]'', ''[[Mario Kart 8 Deluxe]]'', and ''[[Mario Kart Tour]]'' does not return. | |||
Players can also customize vehicles with [[List of stickers in Mario Kart World|stickers]], decals that can be earned by completing certain objectives and placed on a specific spot on their vehicle, indicated by a pair of checkered flags as depicted in the vehicle's selection icon. There are 1,056 stickers, 39 of which are available from the start. | |||
There are 40 vehicles in the game, including 23 karts, 11 bikes, and six ATVs. Vehicles returning from previous installments are marked with their corresponding game in parentheses. | |||
11 vehicles (six karts, four bikes, and one ATV) are available from the start while the rest, labeled in '''bold''', must be unlocked. | |||
{{br}} | |||
===Karts=== | |||
<gallery> | <gallery> | ||
MKWorld | MKWorld Kart Standard Kart.png|[[Standard Kart]] | ||
MKWorld | MKWorld Kart Rally Kart.png|[[Rally Kart]] | ||
MKWorld Kart Plushbuggy.png|[[Plushbuggy]] | |||
MKWorld Kart Baby Blooper.png|[[Baby Blooper (kart)|Baby Blooper]] | |||
MKWorld Kart Zoom Buggy.png|[[Zoom Buggy]] | |||
MKWorld Kart Chargin Truck.png|[[Chargin' Truck]] | |||
MKWorld Kart Hot Rod.png|'''[[Hot Rod (kart)|Hot Rod]]''' | |||
MKWorld Kart Ribbit Revster.png|'''[[Ribbit Revster]]''' | |||
MKWorld Kart Roadster Royale.png|'''[[Roadster Royale]]''' | |||
MKWorld Kart B Dasher.png|'''[[B Dasher]]'''<br>(''Mario Kart DS'') | |||
MKWorld Kart Biddybuggy.png|'''[[Biddybuggy]]'''<br><small>Buggybud</small><br>(''Mario Kart 8'') | |||
MKWorld Kart Tiny Titan.png|'''[[Tiny Titan]]'''<br><small>Rally Romper</small><br>(''Mario Kart Wii'') | |||
MKWorld Kart Stellar Sled.png|'''[[Stellar Sled]]''' | |||
MKWorld Kart Reel Racer.png|'''[[Reel Racer]]''' | |||
MKWorld Kart Bumble V.png|'''[[Bumble V]]'''<br>(''Mario Kart 7'') | |||
MKWorld Kart Carpet Flyer.png|'''[[Carpet Flyer]]''' | |||
MKWorld Kart Cloud 9.png|'''[[Cloud 9]]'''<br>(''Mario Kart 7'') | |||
MKWorld Kart Blastronaut III.png|'''[[Blastronaut III]]''' | |||
MKWorld Kart Big Horn.png|'''[[Big Horn]]''' | |||
MKWorld Kart Li'l Dumpy.png|'''[[Li'l Dumpy]]''' | |||
MKWorld Kart Mecha Trike.png|'''[[Mecha Trike]]''' | |||
MKWorld Kart Pipe Frame.png|'''[[Pipe Frame]]'''<br>(''Super Mario Kart'') | |||
MKWorld Kart Billdozer.png|'''[[Billdozer]]''' | |||
</gallery> | </gallery> | ||
===Bikes=== | |||
<gallery> | <gallery> | ||
MKWorld | MKWorld Bike Standard Bike.png|[[Standard Bike]] | ||
MKWorld | MKWorld Bike Rally Bike.png|[[Rally Bike]] | ||
MKWorld | MKWorld Bike Cute Scoot.png|[[Cute Scoot]] | ||
MKWorld Bike Mach Rocket.png|[[Mach Rocket]] | |||
MKWorld Bike Hyper Pipe.png|'''[[Hyper Pipe]]''' | |||
MKWorld Bike Tune Thumper.png|'''[[Tune Thumper]]''' | |||
MKWorld Bike W-Twin Chopper.png|'''[[W-Twin Chopper]]''' | |||
MKWorld Bike Fin Twin.png|'''[[Fin Twin]]''' | |||
MKWorld Bike ROB HOG Famicom.png|'''[[R.O.B. H.O.G.]]''' | |||
MKWorld Bike Dolphin Dasher.png|'''[[Dolphin Dasher]]'''<br>(''Mario Kart Wii'') | |||
MKWorld Bike Loco Moto.png|'''[[Loco Moto]]''' | |||
</gallery> | </gallery> | ||
===ATVs=== | |||
<gallery> | <gallery> | ||
MKWorld | MKWorld ATV Funky Dorrie.png|[[Funky Dorrie]] | ||
MKWorld | MKWorld ATV Junkyard Hog.png|'''[[Junkyard Hog]]''' | ||
MKWorld ATV Lobster Roller.png|'''[[Lobster Roller]]''' | |||
MKWorld ATV Dread Sled.png|'''[[Dread Sled]]''' | |||
MKWorld ATV Rallygator.png|'''[[Rallygator]]''' | |||
MKWorld | MKWorld ATV Bowser Bruiser.png|'''[[Bowser Bruiser]]''' | ||
MKWorld | |||
MKWorld | |||
MKWorld | |||
</gallery> | </gallery> | ||
=== | ===CPU combinations=== | ||
= | {{Construction|section=y}} | ||
All characters in the game, including character outfits, can be used by CPUs. Each of these characters have four different vehicles that they can use as CPUs, two of which are always the [[Standard Kart]] and [[Standard Bike]]. Here are the remaining two vehicles used by each character as a CPU. | |||
{|class="wikitable spinoff mk alt"style="text-align:center;margin:auto" | |||
!colspan=3|CPU combinations | |||
|- | |||
!width=400px|Driver | |||
!Vehicle 1 | |||
!Vehicle 2 | |||
|- | |||
|[[Mario]], [[Luigi]], [[Goomba]] | |||
|[[Hyper Pipe]] | |||
Boo | |[[B Dasher]] | ||
|- | |||
|[[Mario|Mario (Touring)]], [[Luigi|Luigi (Touring)]] | |||
|[[Rally Kart]] | |||
|[[R.O.B. H.O.G.]] | |||
|- | |||
MK | |[[Mario|Mario (Pro Racer)]], [[Luigi|Luigi (Pro Racer)]], [[Yoshi|Yoshi (Pro Racer)]], [[Baby Mario|Baby Mario (Pro Racer)]], [[Baby Luigi|Baby Luigi (Pro Racer)]] | ||
|[[Hot Rod (kart)|Hot Rod]] | |||
|[[Tiny Titan]] | |||
|- | |||
|[[Mario|Mario (Mechanic)]], [[Luigi|Luigi (Mechanic)]] | |||
|[[Hyper Pipe]] | |||
|[[R.O.B. H.O.G.]] | |||
|- | |||
|[[Mario|Mario (Dune Rider)]], [[Luigi|Luigi (Oasis)]], [[Daisy|Daisy (Oasis)]], [[Wario|Wario (Oasis)]], [[Pokey]] | |||
|[[Zoom Buggy]] | |||
|[[Carpet Flyer]] | |||
|- | |||
|[[Mario|Mario (Cowboy)]] | |||
|[[Loco Moto]] | |||
|[[Big Horn]] | |||
|- | |||
|[[Mario|Mario (Sightseeing)]], [[Dolphin]] | |||
|[[Funky Dorrie]] | |||
|[[Dolphin Dasher]] | |||
|- | |||
|[[Mario|Mario (Aviator)]] | |||
|[[Blastronaut III]] | |||
|[[Billdozer]] | |||
|- | |||
|[[Mario|Mario (Happi)]], [[Luigi|Luigi (Happi)]], [[Princess Peach|Peach (Yukata)]], [[Yoshi|Yoshi (Matsuri)]] | |||
|[[Lobster Roller]] | |||
|[[Fin Twin]] | |||
|- | |||
|[[Mario|Mario (All-Terrain)]], [[Pauline|Pauline (Aero)]] | |||
|[[Rally Bike]] | |||
|[[Mach Rocket]] | |||
|- | |||
|[[Luigi|Luigi (Farmer)]], [[Princess Peach|Peach (Farmer)]] | |||
|[[Ribbit Revster]] | |||
|[[Junkyard Hog]] | |||
|- | |||
|[[Luigi|Luigi (All-Terrain)]] | |||
|[[Rally Bike]] | |||
|[[Funky Dorrie]] | |||
|- | |||
|[[Luigi|Luigi (Gondolier)]] | |||
|[[Ribbit Revster]] | |||
|[[Dolphin Dasher]] | |||
|- | |||
|[[Princess Peach|Peach]] | |||
|[[Plushbuggy]] | |||
|[[Roadster Royale]] | |||
|- | |||
|[[Princess Peach|Peach (Touring)]] | |||
|[[Rally Bike]] | |||
|[[Cute Scoot]] | |||
|- | |||
|[[Princess Peach|Peach (Pro Racer)]], [[Daisy|Daisy (Pro Racer)]] | |||
|[[Roadster Royale]] | |||
|[[B Dasher]] | |||
|- | |||
|[[Princess Peach|Peach (Sightseeing)]] | |||
|[[Lobster Roller]] | |||
|[[Dolphin Dasher]] | |||
|- | |||
|[[Princess Peach|Peach (Aviator)]] | |||
|[[Loco Moto]] | |||
|[[Billdozer]] | |||
|- | |||
|[[Princess Peach|Peach (Aero)]], [[Daisy|Daisy (Aero)]] | |||
|[[Rally Bike]] | |||
|[[Roadster Royale]] | |||
|- | |||
|[[Princess Peach|Peach (Vacation)]], [[Birdo|Birdo (Vacation)]] | |||
|[[Plushbuggy]] | |||
|[[Dolphin Dasher]] | |||
|- | |||
|[[Daisy]] | |||
|[[Roadster Royale]] | |||
|[[Carpet Flyer]] | |||
|- | |||
|[[Daisy|Daisy (Touring)]], [[Bowser|Bowser (All-Terrain)]] | |||
|[[Rally Bike]] | |||
|[[Chargin' Truck]] | |||
|- | |||
|[[Daisy|Daisy (Swimwear)]], [[Yoshi|Yoshi (Swimwear)]], [[Koopa Troopa|Koopa Troopa (Runner)]], [[Baby Mario|Baby Mario (Swimwear)]] | |||
|[[Cute Scoot]] | |||
|[[Funky Dorrie]] | |||
|- | |||
|[[Daisy|Daisy (Vacation)]], [[Pianta]] | |||
|[[Cute Scoot]] | |||
|[[Dolphin Dasher]] | |||
|- | |||
|[[Yoshi]] | |||
|[[Cute Scoot]] | |||
|[[Ribbit Revster]] | |||
|- | |||
|[[Yoshi|Yoshi (Touring)]] | |||
|[[Rally Bike]] | |||
|[[Ribbit Revster]] | |||
|- | |||
|[[Yoshi|Yoshi (Aristocrat)]], [[King Boo|King Boo (Aristocrat)]], [[Waluigi|Waluigi (Wampire)]] | |||
|[[Reel Racer]] | |||
|[[Loco Moto]] | |||
|- | |||
|[[Yoshi|Yoshi (Soft Server)]], [[Toadette|Toadette (Soft Server)]], [[Swoop]] | |||
|[[Cute Scoot]] | |||
|[[Mach Rocket]] | |||
|- | |||
|[[Yoshi|Yoshi (Biker)]] | |||
|[[W-Twin Chopper]] | |||
|[[Billdozer]] | |||
|- | |||
|[[Yoshi|Yoshi (Food Slinger)]] | |||
|[[Cute Scoot]] | |||
|[[Tune Thumper]] | |||
|- | |||
|[[Donkey Kong]] | |||
|[[Cute Scoot]] | |||
|[[Big Horn]] | |||
|- | |||
|[[Donkey Kong|Donkey Kong (All-Terrain)]] | |||
|[[Mach Rocket]] | |||
|[[Blastronaut III]] | |||
|- | |||
|[[Bowser]], [[Bowser|Bowser (Supercharged)]] | |||
|[[Mecha Trike]] | |||
|[[Bowser Bruiser]] | |||
|- | |||
|[[Bowser|Bowser (Pro Racer)]], [[Bowser Jr.|Bowser Jr. (Pro Racer)]], [[Birdo|Birdo (Pro Racer)]] | |||
|[[Mach Rocket]] | |||
|[[Hot Rod (kart)|Hot Rod]] | |||
|- | |||
|[[Bowser|Bowser (Biker)]] | |||
|[[W-Twin Chopper]] | |||
|[[Bowser Bruiser]] | |||
|- | |||
|[[Bowser Jr.]], [[Monty Mole]] | |||
|[[Chargin' Truck]] | |||
|[[Mecha Trike]] | |||
|- | |||
|[[Bowser Jr.|Bowser Jr. (Biker Jr.)]], [[Dry Bones]], [[Hammer Bro]] | |||
|[[Cute Scoot]] | |||
|[[Mecha Trike]] | |||
|- | |||
|[[Bowser Jr.|Bowser Jr. (Explorer)]], [[Toad|Toad (Explorer)]], [[Toadette|Toadette (Explorer)]], [[Baby Peach|Baby Peach (Explorer)]], [[Baby Rosalina|Baby Rosalina (Explorer)]], [[Cow]] | |||
|[[Junkyard Hog]] | |||
|[[Big Horn]] | |||
|- | |||
|[[Koopa Troopa]], [[Cataquack]] | |||
|[[Cute Scoot]] | |||
|[[Zoom Buggy]] | |||
|- | |||
|[[Koopa Troopa|Koopa Troopa (Pro Racer)]] | |||
|[[Zoom Buggy]] | |||
|[[B Dasher]] | |||
|- | |||
|[[Koopa Troopa|Koopa Troopa (Sailor)]], [[Baby Peach|Baby Peach (Sailor)]], [[Baby Daisy|Baby Daisy (Sailor)]], [[Baby Rosalina|Baby Rosalina (Sailor)]] | |||
|[[Baby Blooper (kart)|Baby Blooper]] | |||
|[[Dolphin Dasher]] | |||
|- | |||
|[[Koopa Troopa|Koopa Troopa (All-Terrain)]] | |||
|[[Rally Bike]] | |||
|[[Zoom Buggy]] | |||
|- | |||
|[[Koopa Troopa|Koopa Troopa (Work Crew)]], [[Baby Mario|Baby Mario (Work Crew)]], [[Baby Luigi|Baby Luigi (Work Crew)]] | |||
|[[Li'l Dumpy]] | |||
|[[Pipe Frame]] | |||
|- | |||
|[[Toad]] | |||
|[[Cute Scoot]] | |||
|[[Li'l Dumpy]] | |||
|- | |||
|[[Toad|Toad (Pro Racer)]], [[Toadette|Toadette (Pro Racer)]], [[Shy Guy|Shy Guy (Pit Crew)]] | |||
|[[Hot Rod (kart)|Hot Rod]] | |||
|[[B Dasher]] | |||
|- | |||
|[[Toad|Toad (Engineer)]], [[Toadette|Toadette (Conductor)]] | |||
|[[Blastronaut III]] | |||
|[[Loco Moto]] | |||
|- | |||
|[[Toad|Toad (Burger Bud)]] | |||
|[[Hyper Pipe]] | |||
|[[Junkyard Hog]] | |||
|- | |||
|[[Toadette]], [[Birdo]] | |||
|[[Plushbuggy]] | |||
|[[Cute Scoot]] | |||
|- | |||
|[[Lakitu]] | |||
|[[Cute Scoot]] | |||
|[[Cloud 9]] | |||
|- | |||
|[[Lakitu|Lakitu (Pit Crew)]] | |||
|[[B Dasher]] | |||
|[[Cloud 9]] | |||
|- | |||
|[[Lakitu|Lakitu (Fisherman)]] | |||
|[[Fin Twin]] | |||
|[[Cloud 9]] | |||
|- | |||
|[[King Boo]], [[Conkdor]] | |||
|[[Cute Scoot]] | |||
|[[W-Twin Chopper]] | |||
|- | |||
|[[King Boo|King Boo (Pro Racer)]] | |||
|[[B Dasher]] | |||
|[[Rallygator]] | |||
|- | |||
|[[King Boo|King Boo (Pirate)]], [[Wario|Wario (Pirate)]] | |||
|[[Billdozer]] | |||
|[[Rallygator]] | |||
|- | |||
|[[Shy Guy]] | |||
|[[Cute Scoot]] | |||
|[[Carpet Flyer]] | |||
|- | |||
|[[Shy Guy|Shy Guy (Slope Styler)]] | |||
|[[Tiny Titan]] | |||
|[[Dread Sled]] | |||
|- | |||
|[[Wario]] | |||
|[[Cute Scoot]] | |||
|[[Chargin' Truck]] | |||
|- | |||
|[[Wario|Wario (Pro Racer)]] | |||
|[[Zoom Buggy]] | |||
|[[Bumble V]] | |||
|- | |||
|[[Wario|Wario (Wicked Wasp)]] | |||
|[[Bumble V]] | |||
|[[Cloud 9]] | |||
|- | |||
|[[Wario|Wario (Biker)]], [[Waluigi|Waluigi (Biker)]] | |||
|[[Dread Sled]] | |||
|[[W-Twin Chopper]] | |||
|- | |||
|[[Wario|Wario (Road Ruffian)]] | |||
|[[W-Twin Chopper]] | |||
|[[Mecha Trike]] | |||
|- | |||
|[[Wario|Wario (Work Crew)]] | |||
|[[Biddybuggy]] | |||
|[[Li'l Dumpy]] | |||
|- | |||
|[[Waluigi]] | |||
|[[Funky Dorrie]] | |||
|[[W-Twin Chopper]] | |||
|- | |||
|[[Waluigi|Waluigi (Pro Racer)]] | |||
|[[B Dasher]] | |||
|[[W-Twin Chopper]] | |||
|- | |||
|[[Waluigi|Waluigi (Mariachi)]] | |||
|[[W-Twin Chopper]] | |||
|[[Loco Moto]] | |||
|- | |||
|[[Waluigi|Waluigi (Road Ruffian)]] | |||
|[[W-Twin Chopper]] | |||
|[[Rallygator]] | |||
|- | |||
|[[Pauline]] | |||
|[[Reel Racer]] | |||
|[[Blastronaut III]] | |||
|- | |||
|[[Rosalina]], [[Rosalina|Rosalina (Pro Racer)]], [[Rosalina|Rosalina (Aurora)]] | |||
|[[Roadster Royale]] | |||
|[[Stellar Sled]] | |||
|- | |||
|[[Rosalina|Rosalina (Touring)]] | |||
|[[Rally Bike]] | |||
|[[Junkyard Hog]] | |||
|- | |||
|[[Rosalina|Rosalina (Aero)]] | |||
|[[Mach Rocket]] | |||
|[[Roadster Royale]] | |||
|- | |||
|[[Baby Mario]] | |||
|[[Hyper Pipe]] | |||
|[[Biddybuggy]] | |||
|- | |||
|[[Baby Luigi]] | |||
|[[Ribbit Revster]] | |||
|[[Biddybuggy]] | |||
|- | |||
|[[Baby Peach]] | |||
|[[Plushbuggy]] | |||
|[[Biddybuggy]] | |||
|- | |||
|[[Baby Peach|Baby Peach (Touring)]], [[Baby Rosalina|Baby Rosalina (Touring)]] | |||
|[[Plushbuggy]] | |||
|[[Tune Thumper]] | |||
|- | |||
|[[Baby Peach|Baby Peach (Pro Racer)]], [[Baby Daisy|Baby Daisy (Pro Racer)]], [[Baby Rosalina|Baby Rosalina (Pro Racer)]] | |||
|[[Roadster Royale]] | |||
|[[Biddybuggy]] | |||
|- | |||
|[[Baby Daisy]], [[Stingby]] | |||
|[[Biddybuggy]] | |||
|[[Bumble V]] | |||
|- | |||
|[[Baby Daisy|Baby Daisy (Touring)]] | |||
|[[Chargin' Truck]] | |||
|[[Tune Thumper]] | |||
|- | |||
|[[Baby Daisy|Baby Daisy (Explorer)]] | |||
|[[Zoom Buggy]] | |||
|[[Big Horn]] | |||
|- | |||
|[[Baby Rosalina]], [[Penguin]] | |||
|[[Biddybuggy]] | |||
|[[Stellar Sled]] | |||
|- | |||
|[[Nabbit]] | |||
|[[Cute Scoot]] | |||
|[[Pipe Frame]] | |||
|- | |||
|[[Piranha Plant]] | |||
|[[Cute Scoot]] | |||
|[[Hot Rod (kart)|Hot Rod]] | |||
|- | |||
|[[Spike]] | |||
|[[Biddybuggy]] | |||
|[[Mecha Trike]] | |||
|- | |||
|[[Wiggler]] | |||
|[[B Dasher]] | |||
|[[Bumble V]] | |||
|- | |||
|[[Sidestepper]] | |||
|[[Cute Scoot]] | |||
|[[Lobster Roller]] | |||
|- | |||
|[[Cheep Cheep]] | |||
|[[Biddybuggy]] | |||
|[[Fin Twin]] | |||
|- | |||
|[[Rocky Wrench]] | |||
|[[Billdozer]] | |||
|[[Bowser Bruiser]] | |||
|- | |||
|[[Peepa]] | |||
|[[Reel Racer]] | |||
|[[Billdozer]] | |||
|- | |||
|[[Fish Bone]] | |||
|[[Rallygator]] | |||
|[[Bowser Bruiser]] | |||
|- | |||
|[[Coin Coffer]] | |||
|[[Ribbit Revster]] | |||
|[[Hot Rod (kart)|Hot Rod]] | |||
|- | |||
|[[Snowman]] | |||
|[[Mach Rocket]] | |||
|[[Stellar Sled]] | |||
|- | |||
|[[Para-Biddybud]] | |||
|[[Biddybuggy]] | |||
|[[Pipe Frame]] | |||
|- | |||
|[[Chargin' Chuck]] | |||
|[[Mach Rocket]] | |||
|[[Chargin' Truck]] | |||
|} | |||
== Drivers' and vehicles' statistics == | |||
{{Construction|section=y}} | |||
Unlike ''[[Mario Kart 7]]'', ''[[Mario Kart 8]]'', and ''[[Mario Kart 8 Deluxe]]'', 1 statistic point equals 0.2 statistic bars in-game instead of 0.25 bars, making 5 points instead of 4 points equal 1 bar. The statistics below are listed in number of points. | |||
{|class="wikitable spinoff mk alt"style="text-align:center;margin:auto" | |||
!colspan=5|Drivers' statistics | |||
|- | |||
!width=400px|Driver | |||
!Speed | |||
!Acceleration | |||
!Weight | |||
!Handling | |||
|- | |||
|[[Baby Peach]]*, [[Baby Daisy]]*, [[Para-Biddybud]]*, [[Swoop]]* | |||
|3 | |||
|10 | |||
|2 | |||
|9 | |||
|- | |||
|[[Baby Mario]], [[Baby Luigi]], [[Baby Rosalina]], [[Goomba]], [[Dry Bones]], [[Sidestepper]], [[Spike]], [[Fish Bone]], [[Peepa]] | |||
|3 | |||
|9 | |||
|3 | |||
|9 | |||
|- | |||
|[[Toad]], [[Toadette]], [[Koopa Troopa]], [[Shy Guy]], [[Lakitu]], [[Nabbit]], [[Cheep Cheep]], [[Stingby]] | |||
|4 | |||
|8 | |||
|4 | |||
|8 | |||
|- | |||
|[[Princess Peach|Peach]], [[Daisy]], [[Yoshi]], [[Bowser Jr.]], [[Monty Mole]], [[Coin Coffer]], [[Dolphin]] | |||
|5 | |||
|7 | |||
|5 | |||
|7 | |||
|- | |||
|[[Mario]], [[Luigi]], [[Birdo]], [[Hammer Bro]], [[Penguin]], [[Rocky Wrench]], [[Pokey]] | |||
|6 | |||
|6 | |||
|6 | |||
|6 | |||
|- | |||
|[[Rosalina]], [[Pauline]], [[King Boo]], [[Piranha Plant]], [[Snowman]], [[Cataquack]], [[Conkdor]] | |||
|7 | |||
|5 | |||
|7 | |||
|5 | |||
|- | |||
|[[Wario]], [[Waluigi]], [[Donkey Kong]], [[Wiggler]], [[Cow]], [[Chargin' Chuck]], [[Pianta]] | |||
|8 | |||
|4 | |||
|8 | |||
|4 | |||
|- | |||
|[[Bowser]]* | |||
|9 | |||
|3 | |||
|9 | |||
|3 | |||
|- | |||
!colspan=5|Vehicles' statistics | |||
|- | |||
!Vehicle | |||
!Speed | |||
!Acceleration | |||
!Weight | |||
!Handling | |||
|- | |||
|[[Standard Bike]], [[Cute Scoot]], [[Tune Thumper]] | |||
|0 | |||
|9 | |||
|1 | |||
|6 | |||
|- | |||
|[[Rally Bike]], [[Hyper Pipe]], [[Fin Twin]], [[Dolphin Dasher]] | |||
|1 | |||
|8 | |||
|1 | |||
|6 | |||
|- | |||
|[[Pipe Frame]] | |||
|1 | |||
|8 | |||
|2 | |||
|5 | |||
|- | |||
|[[Mach Rocket]], [[R.O.B. H.O.G.]] | |||
|2 | |||
|7 | |||
|1 | |||
|6 | |||
|- | |||
|[[Biddybuggy]] | |||
|2 | |||
|7 | |||
|2 | |||
|5 | |||
|- | |||
|[[Baby Blooper (kart)|Baby Blooper]], [[Loco Moto]] | |||
|3 | |||
|6 | |||
|2 | |||
|5 | |||
|- | |||
|[[Standard Kart]], [[Plushbuggy]] | |||
|4 | |||
|5 | |||
|3 | |||
|4 | |||
|- | |||
|[[Blastronaut III]] | |||
|4 | |||
|6 | |||
|4 | |||
|2 | |||
|- | |||
|[[Dread Sled]] | |||
|5 | |||
|3 | |||
|4 | |||
|4 | |||
|- | |||
|[[Rally Kart]]*, [[Zoom Buggy]]*, [[Hot Rod (kart)|Hot Rod]]*, [[Ribbit Revster]]*, [[Roadster Royale]]*, [[B Dasher]]*, [[Bumble V]]*, [[Carpet Flyer]]*, [[Cloud 9]]* | |||
|5 | |||
|4 | |||
|4 | |||
|3 | |||
|- | |||
|[[Funky Dorrie]]* | |||
|5 | |||
|5 | |||
|5 | |||
|1 | |||
|- | |||
|[[Big Horn]], [[Billdozer]] | |||
|6 | |||
|2 | |||
|6 | |||
|2 | |||
|- | |||
|[[W-Twin Chopper]] | |||
|6 | |||
|3 | |||
|3 | |||
|4 | |||
|- | |||
|[[Rallygator]] | |||
|6 | |||
|3 | |||
|7 | |||
|0 | |||
|- | |||
|[[Chargin' Truck]], [[Tiny Titan]], [[Li'l Dumpy]], [[Mecha Trike]], [[Bowser Bruiser]] | |||
|7 | |||
|1 | |||
|6 | |||
|2 | |||
|- | |||
|[[Reel Racer]] | |||
|7 | |||
|2 | |||
|4 | |||
|3 | |||
|- | |||
|[[Lobster Roller]] | |||
|7 | |||
|2 | |||
|7 | |||
|0 | |||
|- | |||
|[[Junkyard Hog]] | |||
|7 | |||
|3 | |||
|5 | |||
|1 | |||
|- | |||
|[[Stellar Sled]]* | |||
|8 | |||
|0 | |||
|6 | |||
|2 | |||
|} | |||
<nowiki>*</nowiki>The lightest ([[Baby Peach]], [[Baby Daisy]], [[Para-Biddybud]], and [[Swoop]]) and heaviest ([[Bowser]]) driver weight classes receive adjustments to their statistics of -1 point (-0.2 bars) of speed and +1 point (+0.2 bars) of handling when using the [[Rally Kart]], [[Zoom Buggy]], [[Hot Rod (kart)|Hot Rod]], [[Ribbit Revster]], [[Roadster Royale]], [[B Dasher]], [[Bumble V]], [[Carpet Flyer]], [[Cloud 9]], [[Funky Dorrie]], or [[Stellar Sled]].<ref>{{cite|url=https://x.com/_theta_kappa/status/1930885525470417078|quote=It appears that only for characters in the lightest class and the heaviest class, certain machines receive adjustments of Speed -0.2 and Handling +0.2. The target machines are Funky Dorrie, Stellar Sled, and karts in the same class as Rally Kart.|author=theta_k|publisher=Twitter|language=en|accessdate=June 8, 2025|archive=https://archive.is/4NoX9|archiver=archive.is|archivedate=8 Jun 2025 04:32:28 UTC}}</ref> It is unknown if the aforementioned adjustments are applied to the driver and/or vehicle, but here are the adjustments applied to the vehicles: | |||
{|class="wikitable spinoff mk"style="text-align:center;margin:auto" | |||
|- | |||
!colspan=5|Vehicles' statistics ([[Baby Peach]], [[Baby Daisy]], [[Para-Biddybud]], [[Swoop]], [[Bowser]]) | |||
|- | |||
!width=400px|Vehicle | |||
!Speed | |||
!Acceleration | |||
!Weight | |||
!Handling | |||
|- | |||
|[[Rally Kart]], [[Zoom Buggy]], [[Hot Rod (kart)|Hot Rod]], [[Ribbit Revster]], [[Roadster Royale]], [[B Dasher]], [[Bumble V]], [[Carpet Flyer]], [[Cloud 9]] | |||
|4 | |||
|4 | |||
|4 | |||
|4 | |||
|- | |||
|[[Funky Dorrie]] | |||
|4 | |||
|5 | |||
|5 | |||
|2 | |||
|- | |||
|[[Stellar Sled]] | |||
|7 | |||
|0 | |||
|6 | |||
|3 | |||
|} | |||
==Courses== | |||
{{Mario Kart World map}} | |||
[[File:MK World map.png|thumb|right|250px|An overhead shot of the full map.]] | |||
Counting courses with multiple variants together, ''Mario Kart World'' has 30 courses, 16 of which are [[new course|new]], while 14 [[classic course|return]] from previous entries. In addition to the 30 courses, there are 202 [[route]]s connecting them all. Routes cause a track to function similarly to sectioned courses, driving two to four sections to the track before playing one lap of the destination course. The 14 returning courses consist of one course that debuted in both ''[[Mario Kart Tour]]'' and the ''[[Mario Kart 8 Deluxe – Booster Course Pass]]'', two courses each from ''[[Super Mario Kart]]'', ''[[Mario Kart 64]]'', ''[[Mario Kart: Double Dash!!]]'', ''[[Mario Kart Wii]]'', and ''[[Mario Kart 7]]'', and three courses from ''[[Mario Kart DS]]''. One of the courses from ''Super Mario Kart'', [[Mario Circuit (Mario Kart World)|Mario Circuit]], is a combined version of multiple courses from that game, which can be driven through individually from certain routes. No courses from either ''[[Mario Kart: Super Circuit]]'' or ''[[Mario Kart 8]]'' return, marking a series first for the former game, and the second instance for the latter game after ''Mario Kart Tour''. This is the first ''Mario Kart'' game since ''Mario Kart Wii'' to not have a classic Rainbow Road and the first game where Mario Circuit is only present as a classic course. | |||
Two new courses, [[Crown City]] and [[Peach Stadium]], are used twice in Grand Prix with different layouts; when played without routes, Crown City combines both of its Grand Prix layouts (with its Shell Cup and third layouts being significantly cut and the former driven in reverse), while Peach Stadium exclusively uses its Special Cup layout. Certain routes may cause Peach Stadium's Shell Cup layout to be mirrored. [[Shy Guy Bazaar]] and Crown City have additional layouts exclusive to VS Races when approaching from certain routes; approaching Shy Guy Bazaar from [[Wario Stadium (Mario Kart 64)|Wario Stadium]] or [[Airship Fortress]] will take players onto a layout featuring a palace with [[Daisy]]'s emblem adjacent to the bazaar, while Crown City has a third layout in the nearby water if approached from Peach Stadium, [[Moo Moo Meadows]], or [[Choco Mountain]]. | |||
[[Peach Beach]] returns as a three-section track with a new layout for sections 2 and 3; all routes leading to Peach Beach only utilize the new sections. Certain routes to [[Mario Bros. Circuit]], [[Desert Hills]], Wario Stadium, [[DK Pass]], [[Koopa Troopa Beach (Super Mario Kart)|Koopa Troopa Beach]], and Moo Moo Meadows lead to the course being driven backwards, similarly to reverse courses from ''Mario Kart Tour''; in these cases, the minimap for the destination course will be flipped upside-down. Unlike previous games having a set skybox for each course, each course in the game (except [[Rainbow Road (Mario Kart World)|Rainbow Road]]) has four different skyboxes for sunrise, daytime, sunset, and nighttime, which may progress when driving through routes and laps. | |||
Classic courses in this game (marked with their origin game's prefix below) have been revamped to an even greater extent than that of ''Mario Kart 8'', bearing even less resemblance to the original courses as they appeared in previous games. While most of the classic courses present had already appeared as such in previous games, Wario Stadium, [[Sky-High Sundae]], and Toad's Factory appear as classic courses for the first time in the series. Unlike in ''Mario Kart 8'' and ''Mario Kart Tour'', all classic courses use the modern ''Mario Kart'' logo for their finish lines, regardless of what game they originated from. This is the first ''Mario Kart'' game since ''Mario Kart: Super Circuit'' to not have prefixes appended to the names of any of the classic race courses, and the first for battle courses since ''Mario Kart DS''. | |||
While not playable as traditional race courses, seven more courses from ''Super Mario Kart'' can be seen or visited in Free Roam or during routes, including [[Ghost Valley 1]], [[Ghost Valley 2]], and [[Ghost Valley 3]] at the entrance to [[Boo Cinema]], [[Koopa Beach 1]] next to [[Koopa Troopa Beach (Super Mario Kart)|Koopa Beach 2]] (here known as "Koopa Troopa Beach"), [[Choco Island 1]] and [[Choco Island 2]] south-east and south-west of [[Choco Mountain]] respectively, and [[Vanilla Lake 1]] (referred to in-game as simply "Vanilla Lake") in an icy canyon north-east of [[Wario Shipyard]]. These courses can be raced in [[List of Mario Kart World missions|P Switch missions]], the titles of which refer to them as "tributes". If these are counted, then Koopa Beach 1 and Ghost Valley 3 increase the number of courses making their classic course debut to five. | |||
Courses with differing names between British English and American English (i.e. [[Wario Shipyard]]) once again use their respective name depending on the game's region, unlike in ''Mario Kart Tour''. | |||
===Grand Prix=== | ===Grand Prix=== | ||
The | The cups are ordered slightly differently compared to previous entries; the Special Cup is the eighth and last cup in the game, rather than the fourth. Unlike previous games since ''Mario Kart DS'', the cups are also not separated between new and classic courses and instead feature a varying amount of both types of courses, similar to ''Mario Kart 8'' and ''[[Mario Kart 8 Deluxe]]''{{'}}s DLC cups, making this the first ''Mario Kart'' game to lack the distinction between cups, excluding ''[[Mario Kart Live: Home Circuit]]''. Apart from the rotating cups in ''Mario Kart Tour'', this is the second ''Mario Kart'' game after ''Mario Kart 8 Deluxe'' to have cups with multiple courses from the same game, as the [[Flower Cup|Flower]], [[Banana Cup|Banana]], and [[Lightning Cup|Lightning]] Cups have two tracks from ''Mario Kart DS'', ''Mario Kart: Double Dash!!'', and ''Mario Kart Wii'', respectively, and it is the first entry to have this distinction from launch. | ||
In Grand Prix, the first course in each cup is driven for three laps, while the remaining three utilize routes from the previous course. The backgrounds of the cup icons correspond to the region that some of the cup's courses are located in; for example, the Star Cup's icon has an icy background, as its courses are near or within the snow region. Unlike in ''Mario Kart 7'' and ''8'', Grand Prix rivals are based off of the cup the player is racing on, rather than the character they chose, and they will always use a specific vehicle. If the player is playing as the cup's rival character, however, then a random character will serve as the primary rival instead. The rivals are unlocked as characters after receiving a trophy in their respective cups. | |||
{|width=80% class="wikitable spinoff mk" style="margin:auto;text-align:center" | |||
{|width=80% class=wikitable style="margin:auto;text-align:center" | |||
!width="10%"|Cup | !width="10%"|Cup | ||
!width="15%"|Course 1 | !width="15%"|Course 1 | ||
| Line 307: | Line 1,301: | ||
!width="15%"|Course 3 | !width="15%"|Course 3 | ||
!width="15%"|Course 4 | !width="15%"|Course 4 | ||
!width="10%"|Rival/unlockable character + Used vehicle | |||
|- | |- | ||
![[File:Mario Kart World Mushroom Cup Icon.png|80px]]<br> | ![[File:Mario Kart World Mushroom Cup Icon.png|80px]]<br>[[Mushroom Cup]] | ||
|[[File: | |[[File:MKWd Mario Bros Circuit Icon.png|180px]]<br>[[Mario Bros. Circuit]] | ||
|[[File: | |[[File:MKWd Crown City Icon.png|180px]]<br>[[Crown City]] | ||
|[[File: | |[[File:MKWd Whistlestop Summit Icon.png|180px]]<br>[[Whistlestop Summit]] | ||
|[[File: | |[[File:MKWd DK Spaceport Icon.png|180px]]<br>[[DK Spaceport]] | ||
|[[File:MKWorld DK unlock.png|150px]]<br>[[Donkey Kong]] + [[Big Horn]] | |||
|- | |- | ||
![[File:Mario Kart World Flower Cup Icon.png|80px]]<br> | ![[File:Mario Kart World Flower Cup Icon.png|80px]]<br>[[Flower Cup]] | ||
|[[File: | |[[File:MKWd Desert Hills Icon.png|180px]]<br>[[Desert Hills]] <small>(DS)</small> | ||
|[[File: | |[[File:MKWd Shy Guy Bazaar Icon.png|180px]]<br>[[Shy Guy Bazaar]] <small>(3DS)</small> | ||
|[[File: | |[[File:MKWd Wario Stadium Icon.png|180px]]<br>[[Wario Stadium (Mario Kart 64)|Wario Stadium]] <small>(N64)</small> | ||
|[[File: | |[[File:MKWd Airship Fortress Icon.png|180px]]<br>[[Airship Fortress]] <small>(DS)</small> | ||
|[[File:MKWorld Daisy unlock.png|150px]]<br>[[Daisy]] + [[Rally Bike]] | |||
|- | |- | ||
![[File:Mario Kart World Star Cup Icon.png|80px]]<br> | ![[File:Mario Kart World Star Cup Icon.png|80px]]<br>[[Star Cup]] | ||
|[[File: | |[[File:MKWd DK Pass Icon.png|180px]]<br>[[DK Pass]] <small>(DS)</small> | ||
|[[File: | |[[File:MKWd Starview Peak Icon.png|180px]]<br>[[Starview Peak]] | ||
|[[File: | |[[File:MKWd Sky-High Sundae Icon.png|180px]]<br>[[Sky-High Sundae]] <small>(Switch/Tour)</small> | ||
|[[File: | |[[File:MKWd Wario Shipyard Icon.png|180px]]<br>[[Wario Shipyard]] <small>(3DS)</small><br><small>Wario's Galleon</small> | ||
|[[File:MKWorld Rosalina unlock.png|150px]]<br>[[Rosalina]] + [[Stellar Sled]] | |||
|- | |- | ||
![[File:Mario Kart World Shell Cup Icon.png|80px]]<br> | ![[File:Mario Kart World Shell Cup Icon.png|80px]]<br>[[Shell Cup]] | ||
|[[File: | |[[File:MKWd Koopa Troopa Beach Icon.png|180px]]<br>[[Koopa Troopa Beach (Super Mario Kart)|Koopa Troopa Beach]] <small>(SNES)</small> | ||
|[[File: | |[[File:MKWd Faraway Oasis Icon.png|180px]]<br>[[Faraway Oasis]] | ||
|[[File: | |[[File:MKWd Crown City 2 Icon.png|180px]]<br>[[Crown City]] | ||
|[[File: | |[[File:MKWd Peach Stadium Icon.png|180px]]<br>[[Peach Stadium]] | ||
|[[File:MKWorld Lakitu unlock.png|150px]]<br>[[Lakitu]] + [[Cloud 9]] | |||
|- | |- | ||
![[File:Mario Kart World Banana Cup Icon.png|80px]]<br> | ![[File:Mario Kart World Banana Cup Icon.png|80px]]<br>[[Banana Cup]] | ||
|[[ | |[[File:Peach-Beach-MarioKartWorld.jpg|180px]]<br>[[Peach Beach]] <small>(GCN)</small> | ||
|[[Salty Salty Speedway]]< | |[[File:Salty Salty Speedway Mario Kart World.jpg|180px]]<br>[[Salty Salty Speedway]] | ||
|[[File:Dino Dino Jungle Mario Kart World.png|180px]]<br>[[Dino Dino Jungle]] <small>(GCN)</small> | |||
|[[File:MKWorld Question Ruins icon.png|180px]]<br>[[Great ? Block Ruins]] | |||
|[[File:MKWorld Birdo unlock.png|150px]]<br>[[Birdo]] + [[Plushbuggy]] | |||
|- | |- | ||
![[File:Mario Kart World Leaf Cup Icon.png|80px]]<br> | ![[File:Mario Kart World Leaf Cup Icon.png|80px]]<br>[[Leaf Cup]] | ||
| | |[[File:MKWorld Cheep Cheep Falls icon.png|180px]]<br>[[Cheep Cheep Falls (race course)|Cheep Cheep Falls]] | ||
|[[File:MKWorld_Dandelion_Depths_icon.png|180px]]<br>[[Dandelion Depths]] | |||
|[[Boo Cinema]]< | |[[File:MKWorld Boo Cinema icon.png|180px]]<br>[[Boo Cinema]] | ||
|[[File:MKWorld_Dry_Bones_Burnout_icon.png|180px]]<br>[[Dry Bones Burnout]] | |||
|[[File:MKWorld King Boo unlock.png|150px]]<br>[[King Boo]] + [[Reel Racer]] | |||
|- | |- | ||
![[File:Mario Kart World Lightning Cup Icon.png|80px]]<br> | ![[File:Mario Kart World Lightning Cup Icon.png|80px]]<br>[[Lightning Cup]] | ||
|[[ | |[[File:MKWorld Moo Moo Meadows icon.png|180px]]<br>[[Moo Moo Meadows]] <small>(Wii)</small> | ||
|[[ | |[[File:MKWorld Choco Mountain icon.png|180px]]<br>[[Choco Mountain]] <small>(N64)</small> | ||
|[[Toad's Factory]] (Wii)< | |[[File:MKWorld_Toads_Factory_icon.png|180px]]<br>[[Toad's Factory]] <small>(Wii)</small> | ||
|[[Bowser's Castle (Mario Kart World)|Bowser's Castle]] | |[[File:MKWorld Bowsers Castle icon.png|180px]]<br>[[Bowser's Castle (Mario Kart World)|Bowser's Castle]] | ||
|[[File:MKWorld Bowser Jr unlock.png|150px]]<br>[[Bowser Jr.]] + [[Mecha Trike]] | |||
|- | |- | ||
! | ![[File:Mario Kart World Special Cup no bg.png|80px]]<br>[[Special Cup]] | ||
|[[Acorn Heights]]< | |[[File:MKWorld Acorn Heights Icon.png|180px]]<br>[[Acorn Heights]] | ||
|[[File:MKWorld Mario Circuit icon.png|180px]]<br>[[Mario Circuit (Mario Kart World)|Mario Circuit]] <small>(SNES)</small> | |||
|[[Peach Stadium]]< | |[[File:MKWorld Peach Stadium icon 2.png|180px]]<br>[[Peach Stadium]] | ||
| | |[[File:MKWorld Rainbow Road icon.png|180px]]<br>[[Rainbow Road (Mario Kart World)|Rainbow Road]] | ||
|N/A | |||
|} | |} | ||
===Knockout Tour=== | ===Knockout Tour=== | ||
The icons for each of the rallies correspond to a cup in Grand Prix in order, such as the [[Ice Rally]] matching the Flower Cup using a flower, the [[Cherry Rally]] matching the Banana Cup using fruit items, and the [[Cloud Rally]] matching the Lightning Cup using sky-themed items. Apart from the Ice, Cloud, and [[Heart Rally|Heart Rallies]], the icons for the other rallies were previously used as cup icons in the ''[[Mario Kart 8 Deluxe – Booster Course Pass]]''. Of the courses available, Moo Moo Meadows, Cheep Cheep Falls, and Peach Stadium are visited the most frequently (three times each), while Rainbow Road is not visited at all. | |||
{|width=95% class="wikitable spinoff mk" style="margin:auto;text-align:center" | |||
{|width=95% class=wikitable style="margin:auto;text-align:center" | |||
!width="10%"|Rally | !width="10%"|Rally | ||
!width="25%"|Landmarks | !width="25%"|Landmarks | ||
| Line 373: | Line 1,372: | ||
!width="10%"|Final course | !width="10%"|Final course | ||
|- | |- | ||
![[File:Mario Kart World Golden Rally Icon.png|80px]]<br> | ![[File:Mario Kart World Golden Rally Icon.png|80px]]<br>[[Golden Rally]] | ||
|[[File:MKWorld Golden Rally Desert Hills Icon.png|100px]][[File:MKWorld Golden Rally Mario Bros Circuit Icon.png|100px]]<br>[[File:MKWorld Golden Rally Moo Moo Meadows Icon.png|100px]][[File:MKWorld Golden Rally Acorn Heights Icon.png|100px]] | |[[File:MKWorld Golden Rally Desert Hills Icon.png|100px]][[File:MKWorld Golden Rally Mario Bros Circuit Icon.png|100px]]<br>[[File:MKWorld Golden Rally Moo Moo Meadows Icon.png|100px]][[File:MKWorld Golden Rally Acorn Heights Icon.png|100px]] | ||
|[[File:MKWorld Icon Desert Hills.png|150px]]<br>'''[[ | |[[File:MKWorld Icon Desert Hills.png|150px]]<br>'''[[Desert Hills]]''' <small>(DS)</small> | ||
|[[File:MKWorld Icon Mario Bros Circuit.png|150px]]<br>'''[[Mario Bros. Circuit]]''' | |[[File:MKWorld Icon Mario Bros Circuit.png|150px]]<br>'''[[Mario Bros. Circuit]]''' | ||
|[[File:MKWorld Icon Choco Mountain.png|150px]]<br>'''[[ | |[[File:MKWorld Icon Choco Mountain.png|150px]]<br>'''[[Choco Mountain]]''' <small>(N64)</small> | ||
|[[File:MKWorld Icon Moo Moo Meadows.png|150px]]<br>'''[[ | |[[File:MKWorld Icon Moo Moo Meadows.png|150px]]<br>'''[[Moo Moo Meadows]]''' <small>(Wii)</small> | ||
|[[File:MKWorld Icon Mario Circuit.png|150px]]<br>'''[[Mario Circuit (Mario Kart World)|Mario Circuit]]''' (SNES) | |[[File:MKWorld Icon Mario Circuit.png|150px]]<br>'''[[Mario Circuit (Mario Kart World)|Mario Circuit]]''' <small>(SNES)</small> | ||
|[[File:MKWorld Icon Acorn Heights.png|150px]]<br>'''[[Acorn Heights]]''' | |[[File:MKWorld Icon Acorn Heights.png|150px]]<br>'''[[Acorn Heights]]''' | ||
|- | |- | ||
![[File:Mario Kart World Ice Rally Icon.png|80px]]<br> | ![[File:Mario Kart World Ice Rally Icon.png|80px]]<br>[[Ice Rally]] | ||
|[[File:MKWorld Ice Rally Sky-High Sundae Icon.png|100px]][[File:MKWorld Ice Rally Dandelion Depths Icon.png|100px]]<br>[[File:MKWorld Ice Rally Peach Stadium Icon.png|100px]][[File:MKWorld Ice Rally Crown City Icon.png|100px]] | |[[File:MKWorld Ice Rally Sky-High Sundae Icon.png|100px]][[File:MKWorld Ice Rally Dandelion Depths Icon.png|100px]]<br>[[File:MKWorld Ice Rally Peach Stadium Icon.png|100px]][[File:MKWorld Ice Rally Crown City Icon.png|100px]] | ||
|[[File:MKWorld Icon Sky-High Sundae.png|150px]]<br>'''[[Sky-High Sundae]]''' (Tour/ | |[[File:MKWorld Icon Sky-High Sundae.png|150px]]<br>'''[[Sky-High Sundae]]''' <small>(Switch/Tour)</small> | ||
|[[File:MKWorld Icon Starview Peak.png|150px]]<br>'''[[Starview Peak]]''' | |[[File:MKWorld Icon Starview Peak.png|150px]]<br>'''[[Starview Peak]]''' | ||
|[[File:MKWorld Icon Dandelion Depths.png|150px]]<br>'''[[Dandelion Depths]]''' | |[[File:MKWorld Icon Dandelion Depths.png|150px]]<br>'''[[Dandelion Depths]]''' | ||
|[[File:MKWorld Icon Cheep Cheep Falls.png|150px]]<br>''' | |[[File:MKWorld Icon Cheep Cheep Falls.png|150px]]<br>'''[[Cheep Cheep Falls (race course)|Cheep Cheep Falls]]''' | ||
|[[File:MKWorld Icon Peach Stadium.png|150px]]<br>'''[[Peach Stadium]]''' | |[[File:MKWorld Icon Peach Stadium.png|150px]]<br>'''[[Peach Stadium]]''' | ||
|[[File:MKWorld Icon Crown City.png|150px]]<br>'''[[Crown City]]''' | |[[File:MKWorld Icon Crown City.png|150px]]<br>'''[[Crown City]]''' | ||
|- | |- | ||
![[File:Mario Kart World Moon Rally Icon.png|80px]]<br>' | ![[File:Mario Kart World Moon Rally Icon.png|80px]]<br>[[Moon Rally]] | ||
| | |[[File:MKWorld Moon Rally Bowser's Castle Icon.png|100px]][[File:MKWorld Moon Rally Moo Moo Meadows Icon.png|100px]]<br>[[File:MKWorld Moon Rally Cheep Cheep Falls Icon.png|100px]][[File:MKWorld Moon Rally Faraway Oasis Icon.png|100px]] | ||
|[[File:MKWorld Icon Bowsers Castle.png|150px]]<br>'''[[Bowser's Castle (Mario Kart World)|Bowser's Castle]]''' | |[[File:MKWorld Icon Bowsers Castle.png|150px]]<br>'''[[Bowser's Castle (Mario Kart World)|Bowser's Castle]]''' | ||
|[[File:MKWorld Icon Toads Factory.png|150px]]<br>'''[[Toad's Factory]]''' (Wii) | |[[File:MKWorld Icon Toads Factory.png|150px]]<br>'''[[Toad's Factory]]''' <small>(Wii)</small> | ||
|[[File:MKWorld Icon Moo Moo Meadows.png|150px]]<br>'''[[ | |[[File:MKWorld Icon Moo Moo Meadows.png|150px]]<br>'''[[Moo Moo Meadows]]''' <small>(Wii)</small> | ||
|[[File:MKWorld Icon Dandelion Depths.png|150px]]<br>'''[[Dandelion Depths]]''' | |[[File:MKWorld Icon Dandelion Depths.png|150px]]<br>'''[[Dandelion Depths]]''' | ||
|[[File:MKWorld Icon Cheep Cheep Falls.png|150px]]<br>''' | |[[File:MKWorld Icon Cheep Cheep Falls.png|150px]]<br>'''[[Cheep Cheep Falls (race course)|Cheep Cheep Falls]]''' | ||
|[[File:MKWorld Icon Faraway Oasis.png|150px]]<br>'''[[Faraway Oasis]]''' | |[[File:MKWorld Icon Faraway Oasis.png|150px]]<br>'''[[Faraway Oasis]]''' | ||
|- | |- | ||
![[File:Mario Kart World Spiny Rally Icon.png|80px]]<br> | ![[File:Mario Kart World Spiny Rally Icon.png|80px]]<br>[[Spiny Rally]] | ||
| | |[[File:MKWorld Spiny Rally Boo Cinema Icon.png|100px]][[File:MKWorld Spiny Rally Starview Peak Icon.png|100px]]<br>[[File:MKWorld Spiny Rally Salty Salty Speedway Icon.png|100px]][[File:MKWorld Spiny Rally Wario Shipyard Icon.png|100px]] | ||
|[[File:MKWorld Icon Boo Cinema.png|150px]]<br>'''[[Boo Cinema]]''' | |[[File:MKWorld Icon Boo Cinema.png|150px]]<br>'''[[Boo Cinema]]''' | ||
|[[File:MKWorld Icon Starview Peak.png|150px]]<br>'''[[Starview Peak]]''' | |[[File:MKWorld Icon Starview Peak.png|150px]]<br>'''[[Starview Peak]]''' | ||
|[[File:MKWorld Icon DK Pass.png|150px]]<br>'''[[ | |[[File:MKWorld Icon DK Pass.png|150px]]<br>'''[[DK Pass]]''' <small>(DS)</small> | ||
|[[File:MKWorld Icon Salty Salty Speedway.png|150px]]<br>'''[[Salty Salty Speedway]]''' | |[[File:MKWorld Icon Salty Salty Speedway.png|150px]]<br>'''[[Salty Salty Speedway]]''' | ||
|[[File:MKWorld Icon Peach Beach.png|150px]]<br>'''[[ | |[[File:MKWorld Icon Peach Beach.png|150px]]<br>'''[[Peach Beach]]''' <small>(GCN)</small> | ||
|[[File:MKWorld Icon Wario Shipyard.png|150px]]<br>'''[[ | |[[File:MKWorld Icon Wario Shipyard.png|150px]]<br>'''[[Wario Shipyard]]''' <small>(3DS)</small> | ||
|- | |- | ||
![[File:Mario Kart World Cherry Rally Icon.png|80px]]<br> | ![[File:Mario Kart World Cherry Rally Icon.png|80px]]<br>[[Cherry Rally]] | ||
| | |[[File:MKWorld Cherry Rally Dino Dino Jungle Icon.png|100px]][[File:MKWorld Cherry Rally Koopa Troopa Beach Icon.png|100px]]<br>[[File:MKWorld Cherry Rally Whistlestop Summit Icon.png|100px]][[File:MKWorld Cherry Rally Desert Hills Icon.png|100px]] | ||
|[[File:MKWorld Icon Peach Beach.png|150px]]<br>'''[[ | |[[File:MKWorld Icon Peach Beach.png|150px]]<br>'''[[Peach Beach]]''' <small>(GCN)</small> | ||
|[[File:MKWorld Icon Dino Dino Jungle.png|150px]]<br>'''[[ | |[[File:MKWorld Icon Dino Dino Jungle.png|150px]]<br>'''[[Dino Dino Jungle]]''' <small>(GCN)</small> | ||
|[[File:MKWorld Icon Koopa Troopa Beach.png|150px]]<br>'''[[Koopa Troopa Beach (Mario Kart | |[[File:MKWorld Icon Koopa Troopa Beach.png|150px]]<br>'''[[Koopa Troopa Beach (Super Mario Kart)|Koopa Troopa Beach]]''' <small>(SNES)</small> | ||
|[[File:MKWorld Icon DK Spaceport.png|150px]]<br>'''[[DK Spaceport]]''' | |[[File:MKWorld Icon DK Spaceport.png|150px]]<br>'''[[DK Spaceport]]''' | ||
|[[File:MKWorld Icon Whistlestop Summit.png|150px]]<br>'''[[Whistlestop Summit]]''' | |[[File:MKWorld Icon Whistlestop Summit.png|150px]]<br>'''[[Whistlestop Summit]]''' | ||
|[[File:MKWorld Icon Desert Hills.png|150px]]<br>'''[[ | |[[File:MKWorld Icon Desert Hills.png|150px]]<br>'''[[Desert Hills]]''' <small>(DS)</small> | ||
|- | |- | ||
![[File:Mario Kart World Acorn Rally Icon.png|80px]]<br> | ![[File:Mario Kart World Acorn Rally Icon.png|80px]]<br>[[Acorn Rally]] | ||
| | |[[File:AcornRallyLandmark1.png|100px]][[File:AcornRallyLandmark2.png|100px]]<br>[[File:AcornRallyLandmark3.png|100px]][[File:AcornRallyDestination4.png|100px]] | ||
|[[File:MKWorld Icon Toads Factory.png|150px]]<br>'''[[Toad's Factory]]''' (Wii) | |[[File:MKWorld Icon Toads Factory.png|150px]]<br>'''[[Toad's Factory]]''' <small>(Wii)</small> | ||
|[[File:MKWorld Icon Wario Stadium.png|150px]]<br>'''[[Wario Stadium]]''' (N64) | |[[File:MKWorld Icon Wario Stadium.png|150px]]<br>'''[[Wario Stadium (Mario Kart 64)|Wario Stadium]]''' <small>(N64)</small> | ||
|[[File:MKWorld Icon Choco Mountain.png|150px]]<br>'''[[ | |[[File:MKWorld Icon Choco Mountain.png|150px]]<br>'''[[Choco Mountain]]''' <small>(N64)</small> | ||
|[[File:MKWorld Icon Peach Stadium.png|150px]]<br>'''[[Peach Stadium]]''' | |[[File:MKWorld Icon Peach Stadium.png|150px]]<br>'''[[Peach Stadium]]''' | ||
|[[File:MKWorld Icon Cheep Cheep Falls.png|150px]]<br>''' | |[[File:MKWorld Icon Cheep Cheep Falls.png|150px]]<br>'''[[Cheep Cheep Falls (race course)|Cheep Cheep Falls]]''' | ||
|[[File:MKWorld Icon DK Pass.png|150px]]<br>'''[[ | |[[File:MKWorld Icon DK Pass.png|150px]]<br>'''[[DK Pass]]''' <small>(DS)</small> | ||
|- | |- | ||
![[File:Mario Kart World Cloud Rally Icon.png|80px]]<br> | ![[File:Mario Kart World Cloud Rally Icon.png|80px]]<br>[[Cloud Rally]] | ||
| | |[[File:MKWorld Cloud Rally Shy Guy Bazaar Icon.png|100px]][[File:MKWorld Cloud Rally Mario Bros. Circuit Icon.png|100px]]<br>[[File:MKWorld Cloud Rally Crown City Icon.png|100px]][[File:MKWorld Cloud Rally Great Question Block Ruins Icon.png|100px]] | ||
|[[File:MKWorld Icon Airship Fortress.png|150px]]<br>'''[[ | |[[File:MKWorld Icon Airship Fortress.png|150px]]<br>'''[[Airship Fortress]]''' <small>(DS)</small> | ||
|[[File:MKWorld Icon Shy Guy Bazaar.png|150px]]<br>'''[[ | |[[File:MKWorld Icon Shy Guy Bazaar.png|150px]]<br>'''[[Shy Guy Bazaar]]''' <small>(3DS)</small> | ||
|[[File:MKWorld Icon Mario Bros Circuit.png|150px]]<br>'''[[Mario Bros. Circuit]]''' | |[[File:MKWorld Icon Mario Bros Circuit.png|150px]]<br>'''[[Mario Bros. Circuit]]''' | ||
|[[File:MKWorld Icon Crown City.png|150px]]<br>'''[[Crown City]]''' | |[[File:MKWorld Icon Crown City.png|150px]]<br>'''[[Crown City]]''' | ||
| Line 436: | Line 1,435: | ||
|[[File:MKWorld Icon Great Question Block Ruins.png|150px]]<br>'''[[Great ? Block Ruins]]''' | |[[File:MKWorld Icon Great Question Block Ruins.png|150px]]<br>'''[[Great ? Block Ruins]]''' | ||
|- | |- | ||
![[File:Mario Kart World Heart Rally Icon.png|80px]]<br> | ![[File:Mario Kart World Heart Rally Icon.png|80px]]<br>[[Heart Rally]] | ||
| | |[[File:MKWorld Heart Rally Shy Guy Bazaar Icon.png|100px]][[File:MKWorld Heart Rally Dry Bones Burnout Icon.png|100px]]<br>[[File:MKWorld Heart Rally Moo Moo Meadows Icon.png|100px]][[File:MKWorld Heart Rally Peach Stadium Icon.png|100px]] | ||
|[[File:MKWorld Icon Shy Guy Bazaar.png|150px]]<br>'''[[ | |[[File:MKWorld Icon Shy Guy Bazaar.png|150px]]<br>'''[[Shy Guy Bazaar]]''' <small>(3DS)</small> | ||
|[[File:MKWorld Icon Airship Fortress.png|150px]]<br>'''[[ | |[[File:MKWorld Icon Airship Fortress.png|150px]]<br>'''[[Airship Fortress]]''' <small>(DS)</small> | ||
|[[File:MKWorld Icon Dry Bones Burnout.png|150px]]<br>'''[[Dry Bones Burnout]]''' | |[[File:MKWorld Icon Dry Bones Burnout.png|150px]]<br>'''[[Dry Bones Burnout]]''' | ||
|[[File:MKWorld Icon Mario Circuit.png|150px]]<br>'''[[Mario Circuit (Mario Kart World)|Mario Circuit]]''' (SNES) | |[[File:MKWorld Icon Mario Circuit.png|150px]]<br>'''[[Mario Circuit (Mario Kart World)|Mario Circuit]]''' <small>(SNES)</small> | ||
|[[File:MKWorld Icon Moo Moo Meadows.png|150px]]<br>'''[[ | |[[File:MKWorld Icon Moo Moo Meadows.png|150px]]<br>'''[[Moo Moo Meadows]]''' <small>(Wii)</small> | ||
|[[File:MKWorld Icon Peach Stadium.png|150px]]<br>'''[[Peach Stadium]]''' | |[[File:MKWorld Icon Peach Stadium.png|150px]]<br>'''[[Peach Stadium]]''' | ||
|} | |} | ||
=== | ===Battle courses=== | ||
{{ | ''Mario Kart World'' features eight battle courses, six of which are named after and derived from race tracks. [[Moo Moo Meadows]] features a new layout compared to its appearance in ''Mario Kart 8''{{'}}s Battle mode. Two battle courses are not named after race courses: [[Big Donut]], returning from ''Mario Kart 64'', and [[Chain Chomp Desert]], a new course that functionally combines [[Thwomp Desert]] and [[Chain Chomp Wheel]] from ''Mario Kart Wii''. The top row of battle courses function like the B variants of courses from ''Mario Kart Tour'', taking place in the main race courses with additional pathways and areas opened up compared to their regular counterparts in order to be designed akin to older battle courses. [[DK Pass]] and [[Dino Dino Jungle]] instead take place on routes near their racing counterparts, and, alongside Big Donut and Chain Chomp Desert, also appear on the world map and are driven across during Grand Prix, marking the first time battle courses appear in a Grand Prix, though they are only driven across briefly. | ||
Rather than sharing their music with their racing counterparts, all of the battle courses use arrangements of battle themes from past games: [[Mario Bros. Circuit]] uses ''[[Super Mario Kart]]''{{'}}s battle theme; Big Donut, Dino Dino Jungle, and DK Pass use their respective games' (''64'', ''Double Dash!!'', and ''DS'' respectively) battle themes; Moo Moo Meadows, [[Salty Salty Speedway]], and Chain Chomp Desert respectively use Chain Chomp Wheel, [[Delfino Pier]], and Thwomp Desert's themes from ''[[Mario Kart Wii]]''; and Peach Stadium uses [[Battle Stadium]]'s theme from ''[[Mario Kart 8 Deluxe]]''. | |||
[[Kart]]s, [[ | |||
Unlike the battle courses in ''Mario Kart 8'', the battle courses in this game have unique icons, rather than sharing them with their racing counterparts. | |||
=== | <center> | ||
{|class="wikitable" style="text-align:center;width:80%" | |||
|- | |||
|width=25%|[[File:MKWorld Battle Mario Bros Circuit.png|180px]]<br>[[Mario Bros. Circuit]] | |||
|width=25%|[[File:MKWorld Battle Moo Moo Meadows.png|180px]]<br>[[Moo Moo Meadows]] | |||
|width=25%|[[File:MKWorld Battle Peach Stadium.png|180px]]<br>[[Peach Stadium]] | |||
|width=25%|[[File:MKWorld Battle Salty Salty Speedway.png|180px]]<br>[[Salty Salty Speedway]] | |||
|- | |||
|width=25%|[[File:MKWorld Battle Chain Chomp Desert.png|180px]]<br>[[Chain Chomp Desert]] | |||
|width=25%|[[File: MKWorld Battle Dino Dino Jungle.png|180px]]<br>[[Dino Dino Jungle]] | |||
< | |width=25%|[[File:MKWorld Battle Big Donut.png|180px]]<br>[[Big Donut]] <small>(N64)</small> | ||
|width=25%|[[File: MKWorld Battle DK Pass.png|180px]]<br>[[DK Pass]] | |||
|} | |||
MKWorld | </center> | ||
</ | |||
=== | ===Staff ghosts=== | ||
{|style="text-align:center"class="wikitable spinoff mk alt" | |||
|- | |||
!Course | |||
!Staff Name | |||
!Time | |||
!Character | |||
!Vehicle | |||
|- | |||
| [[Mario Bros. Circuit]] || Nin★Erick || 2:04.488 || Mario || B-Dasher | |||
|- | |||
| [[Crown City]] || Nin★Rui || 2:24.487 || Luigi || Tune Thumper | |||
|- | |||
| [[Whistlestop Summit]] || Nin★Yunyun || 2:09.443 || Yoshi || Loco Moto | |||
|- | |||
| [[DK Spaceport]] || Nin★Anna || 1:41.918 || Pauline || Blastronaut III | |||
|- | |||
| [[Desert Hills]] || Nin★Matt || 1:48.580 || Pokey || Rally Kart | |||
|- | |||
| [[Shy Guy Bazaar]] || Nin★Sophia || 2:12.875 || Daisy || Carpet Flyer | |||
|- | |||
| [[Wario Stadium (Mario Kart 64)|Wario Stadium]] || Nin★Steven || 2:21.272 || Waluigi || W-Twin Chopper | |||
|- | |||
| [[Airship Fortress]] || Nin★David || 2:15.972 || Bowser Jr. || Mecha Trike | |||
|- | |||
| [[DK Pass]] || Nin★Bowen || 2:24.033 || Shy Guy || Dread Sled | |||
|- | |||
| [[Starview Peak]] || Nin★Rie || 2:32.873 || Rosalina || Stellar Sled | |||
|- | |||
| [[Sky-High Sundae]]|| Nin★Clara || 2:08.490 || Snowman|| Cute Scoot | |||
|- | |||
| [[Wario Shipyard]] || Nin★Sho || 2:42.276 || Wario || Lobster Roller | |||
|- | |||
| [[Koopa Troopa Beach (Super Mario Kart)|Koopa Troopa Beach]] || Nin★Hiromi || 1:40.002 || Koopa Troopa || Zoom Buggy | |||
|- | |||
| [[Faraway Oasis]] || Nin★Maria || 2:15.096 || Donkey Kong || Big Horn | |||
|- | |||
| [[Peach Beach]] || Nin★Susie || 1:53.839 || Baby Peach || Baby Blooper | |||
|- | |||
| [[Salty Salty Speedway]] || Nin★Gerald || 2:17.065 || Birdo || Plushbuggy | |||
|- | |||
| [[Dino Dino Jungle]] || Nin★Paula || 2:01.040 || Baby Rosalina || Junkyard Hog | |||
|- | |||
| [[Great ? Block Ruins]] || Nin★Frank || 2:27.687 || Lakitu || Cloud 9 | |||
|- | |||
| [[Cheep Cheep Falls (race course)|Cheep Cheep Falls]] || Nin★Masako || 2:25.189 || Cheep Cheep || Fin Twin | |||
|- | |||
| [[Dandelion Depths]] || Nin★Joseph || 2:38.460 || Para-Biddybud|| Biddybuggy | |||
|- | |||
| [[Boo Cinema]] || Nin★Jeff || 2:21.551 || King Boo || Reel Racer | |||
|- | |||
| [[Dry Bones Burnout]] || Nin★Leonel || 2:24.264 || Dry Bones || Rallygator | |||
|- | |||
| [[Moo Moo Meadows]] || Nin★Chris || 2:15.382 || Cow || Rally Bike | |||
|- | |||
| [[Choco Mountain]] || Nin★Skip || 2:22.696 || Baby Mario|| Tiny Titan | |||
|- | |||
| [[Toad's Factory]] || Nin★Joana || 2:07.530 || Toad || Li'l Dumpy | |||
|- | |||
| [[Bowser's Castle (Mario Kart World)|Bowser's Castle]] || Nin★Carlo || 2:37.113 || Bowser || Bowser Bruiser | |||
|- | |||
| [[Acorn Heights]] || Nin★Alice || 2:14.534 || Baby Daisy|| Bumble V | |||
|- | |||
| [[Mario Circuit (Mario Kart World)|Mario Circuit]] || Nin★Elena || 1:15.312 || Baby Luigi || Pipe Frame | |||
|- | |||
| [[Peach Stadium]]|| Nin★John || 2:37.688 || Toadette|| Mach Rocket | |||
|- | |||
| [[Rainbow Road (Mario Kart World)|Rainbow Road]] || Nin★Akira || 4:21.295 || Peach || Roadster Royale | |||
|} | |||
==Course elements== | ==Course elements== | ||
''Mario Kart World'' has significantly more unique course elements compared to previous ''[[Mario Kart (series)|Mario Kart]]'' titles due to its interconnected, expanded world and new game mechanics. Several new course elements appear alongside a plethora of returning course elements taken from across the ''[[Super Mario (franchise)|Super Mario]]'' franchise. Some species, such as [[Stingby|Stingbies]], appear both as enemies and as background characters. | |||
===Enemies, animals, and other species=== | |||
{|class="wikitable col3left spinoff mk" style="text-align:center;margin-bottom:5px;width:100%;" | |||
!width="15%"|Species | |||
!width="20%"|Location | |||
!width="65%"|Description | |||
|- | |||
|[[File:MKWorld Armadillo.jpg|100px]]<br>[[Armadillo]]<ref>In-game mission "Evade the armadillos on your way to the goal"</ref> | |||
|Savanna and desert regions; mostly found on routes to Faraway Oasis | |||
|{{wp|Armadillo}}s that wander about in groups. They ball up and charge at racers as they approach. | |||
|- | |||
|[[File:MKWorld Batadon.png|100px]]<br>[[Batadon]] | |||
|Desert region; mostly found on Desert Hills | |||
MKW | |Large, winged {{wp|moai}} heads that slowly bounce around an area. | ||
|- | |||
|[[File:MKWorld Bob-omb Car.png|100px]]<br>[[Bob-omb Car]] | |||
|On roads | |||
|[[Mega Bob-omb]]s strapped to two-wheeled platforms resembling the ones seen in ''[[Mario Kart: Double Dash!!]]'' and the ''[[Mario Kart 8 Deluxe – Booster Course Pass|Booster Course Pass]]'' for ''Mario Kart 8 Deluxe''. They drive along the track and explode when something collides with them. | |||
|- | |||
|[[File:MKW Bomber Bill.png|100px]]<br>[[Bomber Bill]] | |||
|On roads | |||
|Large missiles that fly along straight paths and explode when something collides with them. They are shot from [[Banzai Bill Cannon]]s. | |||
|- | |||
|[[File:MKWorld Boom Boom.png|100px]]<br>[[Boom Boom]] | |||
|Near Bowser's Castle | |||
|Large [[Koopa clan|Koopa]]s that stand in place. They will spin wildly in an attempt to fist oncoming racers, as in ''[[Super Mario 3D Land]]'' and ''[[Super Mario 3D World]]''. Unlike in most previous appearances, multiple Boom Booms exist and can be found in a single area. | |||
|- | |||
|[[File:MKWorld Brachiosaurus.jpg|100px]]<br>[[Brachiosaurus]] | |||
|Dino Dino Jungle | |||
|A large {{wp|Brachiosauridae|brachiosaurid}} replacing [[Noshi]]. Racers driving under it risk getting stomped, but its back acts like a grindrail, aiding racers in reaching high platforms by driving on its back. | |||
|- | |||
|[[File:MKWorld Buffalo.jpg|100px]]<br>[[Buffalo]]<ref>In-game mission "Brave the buffalo stampedes from both sides!"</ref> | |||
|Savanna region, near Faraway Oasis | |||
|Buffalo that run along the track in herds. | |||
|- | |||
< | |[[File:MKWorld Bulber.png|100px]]<br>[[Bulber]] | ||
|Near Wario Shipyard | |||
|Large anglerfish enemies that slowly move in circles at the surface of water. | |||
|- | |||
|[[File:MKWorld Bully.jpg|100px]]<br>[[Bully]] | |||
|Certain roads and castle wall | |||
|Large, metallic enemies that walk in circles. They charge at oncoming racers. | |||
|- | |||
|[[File:MKWorld Butterfly.png|100px]]<br>[[Butterfly]] | |||
| | |||
|Large butterflies that carry [[Ring (Mario Kart series)|ring]]s. | |||
|- | |||
|[[File:Mario Kart World Camel.png|100px]]<br>[[Camel]]<br>{{conjectural}} | |||
|Desert region | |||
|[[Camel|Dromedaries]] that walk across the track in groups. | |||
|- | |||
|[[File:MKWorld Cataquack.png|100px]]<br>[[Cataquack]] | |||
|Peach Beach | |||
|Duck-like enemies that walk in circles. They charge at oncoming racers in an attempt to grab and toss them into the air. | |||
|- | |||
|[[File:MKWorld Chain Chomp.png|200px]]<br>[[Chain Chomp|Chain Chomp (chained)]] | |||
| | |||
|Hopping, metallic enemies bound by stakes that lunge at racers to attack. A free-roaming Chain Chomp can be found hopping in a circle outside [[Peach Stadium]], in reference to [[Peach Gardens (race course)|Peach Gardens]]. | |||
|- | |||
|[[File:MKWorld Chomp.png|100px]]<br>[[Chain Chomp|Chain Chomp (unchained)]] | |||
| | |||
|Unbound Chain Chomps that roll along set paths or aimlessly on the track. | |||
|- | |||
|[[File:MKW Chargin' Chuck.png|100px]]<br>[[Chargin' Chuck]] | |||
|Found mostly in Choco Mountain | |||
|Koopa {{wp|gridiron football|football}} players that charge back and forth between the sides of the track or at racers as they approach. | |||
|- | |||
|[[File:MKW Clappin' Chuck.png|100px]]<br>[[Chargin' Chuck#Super Mario World / Super Mario World: Super Mario Advance 2|Clappin' Chuck]] | |||
|Choco Mountain | |||
|Variants of Chargin' Chucks that jump horizontally between the sides of the track or jump in place, clapping in midair. | |||
|- | |||
|[[File:MKW Passin' Chuck.png|100px]]<br>[[Chargin' Chuck#Super Mario World / Super Mario World: Super Mario Advance 2|Passin' Chuck]] | |||
|Choco Mountain | |||
|Variants of Chargin' Chucks that stand past the edge of the track and periodically toss footballs at oncoming racers. | |||
|- | |||
|[[File:MKW Splittin' Chuck.png|100px]]<br>[[Chargin' Chuck#Super Mario World / Super Mario World: Super Mario Advance 2|Splittin' Chuck]] | |||
|Choco Mountain | |||
|Variants of Chargin' Chucks that stand in lines and jump out to charge at racers. | |||
|- | |||
|[[File:MKWorld Charvaargh.png|100px]]<br>[[Charvaargh]] | |||
|In lava; in Big Donut | |||
|Large, magmatic dragons that leap from [[lava]] in arcs. | |||
|- | |||
|[[File:MKWorld Cheep Cheep.png|100px]]<br>[[Cheep Cheep]] | |||
|Cheep Cheep Falls and Koopa Troopa Beach | |||
|Small fish that are typically found swimming in groups, either slowly in circles or along straight paths at the surface of [[water]]. If they are in water too shallow to swim in, they will flop like they do in ''[[Super Mario Kart]]'' and ''[[Mario Kart DS]]''. | |||
|- | |||
|[[File:MKWorld Cheep Chomp.png|100px]]<br>[[Cheep Chomp]] | |||
|Near Koopa Troopa Beach | |||
|Large variants of Cheep Cheeps that swim at the surface of water and periodically leap into the air to attack racers, akin to [[Big Cheep Cheep|Boss Bass]] from ''[[Super Mario Bros. 3]]''. They create waves upon landing that racers can [[Jump Boost|trick]] off of. | |||
|- | |||
|[[File:MKW Chill Bully.jpg|100px]]<br>[[Chill Bully]] | |||
|On routes near Starview Peak | |||
|Frozen variants of Bullies with identical behavior: walking in circles and charging at oncoming racers. | |||
|- | |||
|[[File:MKW Coin Coffer.png|100px]]<br>[[Coin Coffer]] | |||
| | |||
|Coin purse enemies that wander about. They evade oncoming racers. | |||
|- | |||
|[[File:MKWorld Conkdor.png|100px]]<br>[[Conkdor]] | |||
|Desert region; near Desert Hills | |||
|Bird enemies with long necks that stand at the edge of the track and periodically slam their heads into the ground to attack racers. | |||
|- | |||
|[[File:MKWorld Cow.png|100px]]<br>[[Cow]] | |||
|Meadow region; mostly in Moo Moo Meadows | |||
|Cows that stay in groups and walk across the track or stay in place and hop occasionally. | |||
|- | |||
|[[File:MKWorld Crocodile.png|100px]]<br>[[Crocodile]] | |||
|Between Faraway Oasis and Great ? Block Ruins | |||
|Large reptilians that bask in the sun. Racers can jump from them to receive a speed boost. | |||
|- | |||
|[[File:MKWorld Dolphin.png|100px]]<br>[[Dolphin]] | |||
|Oceans; mostly near Koopa Troopa Beach and Wario Shipyard | |||
|Dolphins that appear in groups and occasionally breach the water's surface. | |||
|- | |||
|[[File:MKW Dragoneel.png|200px]]<br>[[Dragoneel]] | |||
|Between Peach Beach and Wario Shipyard | |||
|Long, slender eels that repeatedly leap from the water along a sine-wave-like path. Their dorsal fins can be used in a similar fashion to a rail. | |||
|- | |||
|[[File:MKWorld DryBonesNPC.jpg|100px]]<br>[[Dry Bones]] | |||
|Near Dry Bones Burnout | |||
|Undead variants of [[Koopa Troopa]]s that rise from the ground as racers approach and walk onto the track. | |||
|- | |||
|[[File:MKWorld Bald Eagle.png|100px]] | |||
[[File:MKWorld Eagle.png|100px]]<br>Eagle<br>{{conjectural}} | |||
| | |||
|{{wp|Eagle}}s that soar through the air. | |||
|- | |||
|[[File:MKWorld ShyGuyElephant.jpg|100px]]<br>[[File:MKWorld Elephant.png|100px]]<br>[[Elephant]]<br>{{conjectural}} | |||
|Near Faraway Oasis (wild)<br>Near Shy Guy Bazaar (tamed) | |||
|{{wp|Elephant}}s that walk across the track in groups. Some are ridden by [[Shy Guy]]s. | |||
|- | |||
|[[File:MKWorld Fire Snake.png|100px]]<br>[[Fire Snake]] | |||
|DK Spaceport and near Desert Hills | |||
|Living chains of fireballs that hop around in an area. Their placement next to [[Donkey Kong (game)|Donkey Kong]]-styled [[oil drum]]s recalls [[Fireball (Donkey Kong)|Fireball]]s. | |||
|- | |||
|[[File:MKWorld Fish Bone.png|100px]]<br>[[Fish Bone]] | |||
|Hot springs near Dry Bones Burnout | |||
|Undead variants of Cheep Cheeps that behave identically to Cheep Chomps, swimming at the surface of water and periodically leaping into the air to attack racers. Unlike Cheep Chomps, they do not create waves upon landing. | |||
|- | |||
|[[File:Mario Kart World - Freezie.jpg|200px]]<br>[[Freezie]] | |||
|Snow region | |||
|Frozen, stationary enemies. | |||
|- | |||
|[[File:MKWorld Fuzzy.png|100px]]<br>[[Fuzzy]] | |||
| | |||
|Pulsating, inky enemies that ride along [[grindrail]]s. | |||
|- | |||
|[[File:MKWorld Giraffe.png|100px]]<br>[[Giraffe]]<ref>In-game mission "Mind the giraffes as you rocket toward blue coins!"</ref> | |||
|Savanna region; near Faraway Oasis | |||
|{{wp|Giraffe}}s that walk across the track. | |||
|- | |||
|[[File:MKWorld Goomba.jpg|100px]]<br>[[Goomba]] | |||
| | |||
|Mushroom enemies that stand in place, shuffling their feet as if sidestepping like in early ''[[Super Mario (series)|Super Mario]]'' titles and previous ''[[Mario Kart (series)|Mario Kart]]'' titles. They charge at oncoming racers. They are significantly larger than usual, like in ''[[Mario Kart 7]]''. | |||
|- | |||
|[[File:MKW Goomba Tower.png|100px]] | |||
[[File:MKWorld 15GoombaTower.jpg|100px]]<br>[[Goomba Tower]] | |||
| | |||
|Linear and triangular stacks of mushroom enemies that stand in place, shuffling their feet. | |||
|- | |||
|[[File:MKWorld Innertube Goomba.png|100px]]<br>[[Innertube Goomba]] | |||
|Certain rivers | |||
|Variants of Goombas that float motionlessly on the surface of water. They charge at oncoming racers. | |||
|- | |||
|[[File:MKWorld Shoe Goomba.png|100px]]<br>[[Shoe Goomba]] | |||
| | |||
|[[Goomba's Shoe]]-wearing variants of Goombas that hop in circles. Their shoes take the yellow coloration of Ice Skates, like in ''[[Mario Kart Tour]]'' and the ''Booster Course Pass'' for ''Mario Kart 8 Deluxe''. | |||
|- | |||
|[[File:MKWorld Skating Goomba.png|100px]]<br>[[Skating Goomba]] | |||
|Snow region | |||
|[[Ice Skate]]-wearing variants of Goombas that travel along the track. | |||
|- | |||
|[[File:MKW HammerBro Hazard.png|100px]]<br>[[Hammer Bro]] | |||
|Near Shy Guy Bazaar and Airship Fortress | |||
|Stationary, lanky Koopas that periodically throw [[hammer]]s that travel in arcs. These hammers break instantly upon touching the ground, unlike those racers can throw using the [[Hammer#Mario Kart World|Hammer]] item. | |||
|- | |||
|[[File:MKWorld BoomerangBro.jpg|100px]]<br>[[Boomerang Bro]] | |||
| | |||
|Stationary variants of Hammer Bros. that periodically throw [[boomerang]]s, which travel a short distance before returning to their thrower. | |||
|- | |||
|[[File:MKWorld FireBro.jpg|100px]]<br>[[Fire Bro]] | |||
| | |||
|Stationary variants of Hammer Bros. that periodically hurl [[Fireball (obstacle)|fireball]]s, which bounce along the track until they hit an obstacle. | |||
|- | |||
|[[File:MKWorld Ice Bro.png|100px]]<br>[[Ice Bro]] | |||
| | |||
|Stationary variants of Hammer Bros. that periodically hurl [[Ice Ball]]s, which bounce along the track until they hit an obstacle. | |||
|- | |||
|[[File:MKWorld Cone Creature.png|100px]]<br>[[Hermity Cone]] | |||
| | |||
|Small creatures that hide in [[traffic cone]]s, which they occasionally peek out from. | |||
|- | |||
|[[File:MKWorld Jellybeam.png|100px]]<br>[[Jellybeam]] | |||
|Near Peach Stadium | |||
|Glowing jellyfish that float motionlessly on the surface of water. They bounce racers who drive into them into the air and can be tricked off of, like [[Mushroom Trampoline]]s. | |||
|- | |||
|[[File:MKWorld Lava Bubble.jpg|100px]]<br>[[Lava Bubble]] | |||
| | |||
|Fireballs that periodically jump out of lava. Unlike in previous ''Mario Kart'' titles, they now possess eyes like they do in most other appearances. | |||
|- | |||
|[[File:MKWorld Yellow Manta.png|100px]]<br>[[Manta]]-like creature | |||
|Near Koopa Troopa Beach | |||
|Yellow {{wp|Mobula|Mobula rays}} resembling [[Jumbo Ray]]s that periodically breach from the surface of water. | |||
|- | |||
|[[File:MKWorld Monty Mole.jpg|100px]]<br>[[Monty Mole]] | |||
|Moo Moo Meadows | |||
|Fossorial enemies that burrow through the ground before leaping into the air to attack racers. The temporary dirt trails they leave behind by burrowing can be tricked off of. | |||
|- | |||
|[[File:MKWorld Moose.png|100px]]<br>[[Moose]]<ref>In-game mission "Maneuver through the leisurely moose herd!"</ref> | |||
|Near Acorn Heights and Boo Cinema | |||
|Bull {{wp|moose}} that walk across the track. | |||
|- | |||
|[[File:MKWorld Nabbit.png|100px]]<br>[[Nabbit]] | |||
|Free Roam in various regions | |||
|A rabbit-like entity that walks in circles. Nabbit evades approaching racers, running over land or water to keep his distance. He explodes into [[coin]]s when caught. | |||
|- | |||
|[[File:MKWorld Ostrich.jpg|100px]]<br>Ostrich<br>{{conjectural}} | |||
|Savanna region; near Faraway Oasis | |||
|{{wp|Ostrich}}es that run across the track. | |||
|- | |||
|[[File:MKWorld Para-Biddybud.png|100px]]<br>[[Para-Biddybud]] | |||
|Dandelion Depths and certain routes | |||
|Multicolored, low-flying, ladybug-like enemies that slowly cross the track in processions of three. | |||
|- | |||
|[[File:MKWorld Peepa.png|100px]]<br>[[Peepa]] | |||
|Near Boo Cinema | |||
|Incorporeal enemies that appear in groups and float in circles close to the ground. Rather than slowing racers down when hit, they instead drop a coin. | |||
|- | |||
|[[File:MKWorld Penguin.jpg|100px]]<br>[[Penguin]] | |||
|Snow region near Sky-High Sundae | |||
|Penguins that can be found tobogganing down [[ice|icy]] slopes or waddling together in groups. | |||
|- | |||
|[[File:MK World Piranha Plant obstacle.png|100px]] | |||
[[File:MKWorld Piranha Plant.png|100px]]<br>[[Piranha Plant]] | |||
| | |||
|Carnivorous plants of which two varieties exist: a variant that lunges at racers to attack, which can appear in [[Warp Pipe]]s and in holes in the ground, and a grounded, passive variant. | |||
|- | |||
|[[File:MKW Bone Piranha.png|100px]]<br>[[Bone Piranha Plant]] | |||
|Near Dry Bones Burnout | |||
|Warp Pipe-dwelling, undead variants of Piranha Plants with identical behavior: lunging at racers to attack. | |||
|- | |||
|[[File:MKWorld FirePiranhaPlant.jpg|100px]]<br>[[Fire Piranha Plant]] | |||
|Desert region | |||
|Warp Pipe-dwelling variants of Piranha Plants that periodically spit fireballs, which bounce along the track until they hit an obstacle. | |||
|- | |||
|[[File:MKWFrostPiranha.png|100px]]<br>[[Frost Piranha]] | |||
|Snow region | |||
|Warp Pipe-dwelling variants of Fire Piranha Plants that, in place of fireballs, periodically spit [[Ice Ball]]s, which bounce along the track until they hit an obstacle. | |||
|- | |||
|[[File:MKWorld Ptooie.png|100px]]<br>[[Ptooie]] | |||
|Meadow region | |||
|Legged variants of Piranha Plants that shuffle in place and suspend items and hazards above themselves with jets of air. | |||
|- | |||
|[[File:MKWorld plesiosaur.png|100px]]<br>{{wp|Plesiosaur}}<br>{{conjectural}} | |||
|Dino Dino Jungle | |||
|A large plesiosaur-like reptile that replaces one of the bridges in Dino Dino Jungle. Like the brachiosaurus, its back acts like a grindrail. | |||
|- | |||
|[[File:MKWorld PokeyNPC.jpg|100px]]<br>[[Pokey]] | |||
|Desert region | |||
|Tall, segmented cactus enemies that slide between the sides of the track while oscillating. | |||
|- | |||
|[[File:MKW-Snow Pokey.png|100px]]<br>[[Snow Pokey]] | |||
|Snow region | |||
|Tall, segmented, snowman variants of Pokeys that stand in place and oscillate. | |||
|- | |||
|[[File:MKWorld Porcupuffer.png|100px]]<br>[[Porcupuffer]] | |||
|Near Koopa Troopa Beach | |||
|Spherical porcupinefish that float motionlessly on the surface of water in groups. | |||
|- | |||
|[[File:MKWorld Pterodactyl.png|100px]]<br>[[Pterosaur]]s | |||
|Dino Dino Jungle | |||
|Large, winged reptiles that soar through the air. | |||
|- | |||
|[[File:MKWorld Robo DK.png|100px]]<br>[[Robo DK]] | |||
|DK Spaceport | |||
|A large, mechanized version of [[Donkey Kong]] who gestures angrily at racers and travels ahead of them to toss rolling [[barrel]]s onto the track. | |||
|- | |||
|[[File:MKWorld Rocky Wrench.jpg|100px]]<br>[[Rocky Wrench]] | |||
|Airship Fortress and certain roads | |||
|Mole-like Koopas that periodically pop out of [[manhole]] covers to ambush racers. | |||
|- | |||
|[[File:MKWorld SandCharvaargh In-Game.jpg|100px]]<br>[[Sandmaargh/Charvaargh hybrid]]{{conjectural}} | |||
|Found on the route between Desert Hills and Shy Guy Bazaar | |||
|Enormous, worm-like dragons made of sand, taking design elements from [[Charvaargh]]s and [[Sandmaargh]]s, that repeatedly dive in and out of the desert along sine-wave-like paths. | |||
|- | |||
|[[File:MKWorld Shy Guys on Jet Skis.png|100px]]<br>Shy Guys piloting jet skis | |||
|Peach Beach and certain rivers | |||
|Shy Guys riding Jet Skis across waterways. | |||
|- | |||
|[[File:MKWd DK Pass Icon.png|100px]]<br>[[Snowboarding Shy Guy]] | |||
|DK Pass | |||
|Shy Guys wearing winter clothing similar to the Slope Styler outfit that ride down snowy slopes on snowboards. | |||
|- | |||
|[[File:MKWorld FlyingShyGuy.jpg|100px]]<br>[[Flying Shy Guy]] | |||
|Shy Guy Bazaar | |||
|Shy Guys riding [[magic carpet]]s in the air.<ref name=jpnwebsite/> | |||
|- | |||
|[[File:MKWorld Sidestepper.png|100px]]<br>[[Sidestepper]] | |||
|Near Salty Salty Speedway and Peach Beach | |||
|Enemy [[crab]]s that scuttle sideways between the sides of the track, bouncing several times before switching directions. | |||
|- | |||
|[[File:MKWorld Signal Bug.jpg|100px]]<br>[[Signal Bug]] | |||
| | |||
|Metallic variants of [[Bramball]]s that flip across the road in a {{wp|Slinky}}-like fashion. They act like rings when they are motionless and their traffic light-esque faces are illuminated, providing racers that pass between their legs with a speed boost. | |||
|- | |||
|[[File:MKW Skeeter.png|100px]]<br>[[Skeeter]] | |||
|On water near Acorn Heights and Toad's Factory | |||
|Water skeeters that skim on the surface of water, momentarily staying in one spot before propelling themselves to a nearby location. Their design is based on how they appear in ''[[Super Mario Galaxy 2]]''. | |||
|- | |||
|[[File:MKWorld Jar Snake.png|100px]]<br>[[Snake (animal)|Snake]] | |||
|Shy Guy Bazaar | |||
|Green snakes that spring out of [[Jar|snake jar]]s that are driven into. They now take design elements from [[Cobrat]]s and [[Hisstocrat]]s. | |||
|- | |||
|[[File:MKWorld Snowman.png|100px]]<br>[[Snowman]] | |||
|Snow region | |||
|Large, stationary snowmen. | |||
|- | |||
|[[File:MKWorld Spike Hazard.jpg|100px]]<br>[[Spike]] | |||
| | |||
|Stout, stationary Koopas that periodically regurgitate [[Spike Ball]]s which they hurl at racers. | |||
|- | |||
|[[File:MKWorld Spiny.jpg|100px]]<br>[[Spiny]] | |||
| | |||
|Koopas that bear spikes on their shells and slowly walk across the track. | |||
|- | |||
|[[File:Star_Thwomp_-_Mario_Kart_World.jpg|100px]]<br>[[Star Thwomp]] | |||
|Rainbow Road | |||
|Rainbow variants of Thwomps with identical behavior: periodically shaking before crashing into the ground to squash racers underneath them. | |||
|- | |||
|[[File:MKWorld Stingby.jpg|100px]]<br>[[Stingby]] | |||
|Forest region; near Acorn Heights | |||
|Low-flying bee enemies that hover motionlessly. They charge at oncoming racers. | |||
|- | |||
|[[File:MKWorld Sumo Bro.jpg|100px]]<br>[[Sumo Bro]] | |||
|Castle wall between Airship Fortress and Dry Bones Burnout | |||
|Large, stationary Koopas that stand atop floating [[block]]s. They occasionally pound their feet to send balls of electricity onto the track below them. | |||
|- | |||
|[[File:MKWorld Super Koopa.png|150px]]<br>[[Super Koopa]] | |||
| | |||
|Caped [[unshelled Koopa]]s that fly above the track while periodically dropping [[Cape Feather|Feather]]s. | |||
|- | |||
|[[File:MKWorld Swoop.png|100px]]<br>[[Swoop]] | |||
|Near Boo Cinema | |||
|Low-flying bat enemies that follow set paths in groups. | |||
|- | |||
|[[File:MKW Thwomp.png|100px]]<br>[[Thwomp]] | |||
| | |||
|Grimacing stone enemies that are suspended in the air. They periodically begin shaking, crash into the ground to squash racers underneath them, and rise back to their original position. | |||
|- | |||
|[[File:TokotokoWorld.jpg|100px]]<br>[[Tokotoko]] | |||
|Desert region; mostly found on Desert Hills | |||
|Large, sunglasses-wearing moai heads that stand motionlessly. They run along the track as racers approach. | |||
|- | |||
|[[File:MKW Tire Grrrol.png|100px]]<br>[[Treaded Grrrol]] | |||
| | |||
|Tire-wearing, metallic [[Grrrol]]s that roll between the sides of the track. | |||
|- | |||
|[[File:MKWorld T-Rex.png|150px]]<br>[[T. rex]] | |||
|Dino Dino Jungle | |||
|Large ''{{wp|Tyrannosaurus|Tyrannosaurus rexes}}'' that run along the track to squash oncoming racers. | |||
|- | |||
|[[File:MKWorld Triceratops.jpg|120px]]<br>[[Triceratops]] | |||
|Dino Dino Jungle | |||
|A large {{wp|Ceratopsia|ceratopsian}} that slowly walks along the track. Racers can drive up its face and neck frill like a [[ramp]]. | |||
|- | |||
|[[File:MKWorld Ty-Foo.png|100px]]<br>[[Ty-foo]] | |||
|Near Starview Peak and Wario Shipyard | |||
|Large, floating cloud enemies that periodically blow powerful gusts of wind. | |||
|- | |||
|[[File:MKW Whale.jpg|100px]]<br>[[Whale]] | |||
|Between Koopa Troopa Beach and Peach Stadium | |||
|Large baleen whales that either float at the surface of water, periodically creating trickable spouts from their blowholes, or breach from the water, creating trickable waves upon landing. Their dorsal fins can be tricked off of. | |||
|- | |||
|[[File:MKWorld Whamp.png|100px]]<br>[[Whamp]] | |||
|Near Dry Bones Burnout and Bowser's Castle | |||
|Wedge-shaped [[Whomp]]s that stand in place, shuffling their feet. They fall over in an attempt to squash oncoming racers; while toppled over, racers can drive over them like ramps. | |||
|- | |||
|[[File:MKWorld Wiggler obstacle.png|100px]]<br>[[Wiggler]] | |||
|[[Acorn Heights]] and routes leading to/from it | |||
|Large caterpillar enemies that walk along the track. They may become angered, causing them to turn red and begin charging. | |||
|- | |||
|[[File:MKWorld Zebra.png|100px]]<br>[[Zebra]] | |||
|Savanna region; near Faraway Oasis | |||
|{{wp|Zebra}}s that run along the track in herds. They are visually similar to the [[horse]]s in ''[[Mario Sports Superstars]]''. | |||
|} | |||
===Obstacles=== | |||
{|class="wikitable col3left spinoff mk" style="text-align:center;margin-bottom:5px;width:100%;" | |||
!width="15%"|Obstacle | |||
!width="20%"|Location | |||
!width="65%"|Description | |||
|- | |||
|[[File:MKWorld Acorn.png|100px]]<br>Acorn<ref>In-game mission "Endure a storm of acorns!</ref> | |||
|Acorn Heights | |||
|Large acorns that fall out of the treetops and roll down the track. | |||
|- | |||
|[[File:MKWorld Anchor.png|100px]]<br>[[Anchor]] | |||
|Wario Shipyard | |||
|A large anchor suspended above the track that rocks from side to side like a [[pendulum]]. | |||
|- | |||
|[[File:MKW Banzai Bill Cannon.png|100px]]<br>[[Banzai Bill Cannon]] | |||
|On roads | |||
|Enlarged [[Bill Blaster]]s that periodically shoot [[Bomber Bill]]s. They often appear on the backs of trucks driving along roads. The Banzai Bill Cannon on [[Airship Fortress]] has the added ability to move side to side. | |||
|- | |||
|[[File:MKWorld Floating Barrel.png|100px]] | |||
[[File:MKWorld Barrel.png|100px]]<br>[[Barrel]] | |||
| | |||
|Barrels of which two varieties exist: a smaller, stationary variant found on land or floating in water, which breaks and may release various items when hit, and a larger, rolling variant thrown by [[Robo DK]] and dispensed by barrel cannons. | |||
|- | |||
|[[File:MKWorld Barrel-Dispensing Cannons.png|100px]]<br>Barrel-dispensing cannons<br>{{conjectural}} | |||
|DK Spaceport | |||
|{{wp|Rocket engine}}-esque [[Cannon]]s that dispense rolling barrels periodically in [[DK Spaceport]]. | |||
|- | |||
|[[File:MKWorld Boulder.png|100px]]<br>[[Boulder]] | |||
|Choco Mountain | |||
|Large, spherical rocks that roll down the track and break when they hit an obstacle. | |||
|- | |||
|[[File:MKWorld Bouncy Cloud.png|100px]]<br>[[Bouncy Cloud]] | |||
|Great ? Block Ruins | |||
|Flat, floating clouds that bounce racers who drive onto them into the air and can be [[Jump Boost|tricked]] off of, like Mushroom Trampolines. | |||
|- | |||
|[[File:MKW Bowser screenshot.jpg|100px]]<br>Giant Bowser cloud<br>{{Conjectural}} | |||
|Bowser's Castle | |||
|A cloud of volcanic ash resembling [[Lava Bowser]] that shoots Bowser's Flames from its mouth. | |||
|- | |||
|[[File:MKWorld Bowser's Flame.png|100px]]<br>[[Bowser's Flame]] | |||
|Bowser's Castle | |||
|Slow-moving [[Fireball]]s shot by the giant Bowser cloud that rain from the sky, akin to [[volcanic debris]]. Red cursors, like those seen during the [[Flying battleship (Wonder Effect)|flying battleship Wonder Effect]], indicate where they will crash into and break apart on the track. | |||
|- | |||
|[[File:MKWorld Brick Block.png|100px]]<br>[[Brick Block]] | |||
| | |||
|[[Block]]s that break instantly upon contact without slowing racers down, unlike crates. | |||
|- | |||
|[[File:MKWorld Bubble.png|100px]]<br>[[Bubble]] | |||
| | |||
|Floating bubbles that carry various items within them and drop them by popping randomly. | |||
|- | |||
|[[File:MKWorld Burner.png|100px]]<br>[[Burner]] | |||
|Airship Fortress | |||
|Flamethrowers hanging off [[Bolt Lift]]s that move between the sides of the track and constantly blast racers below with jets of [[Fire (phenomenon)|fire]]. | |||
|- | |||
|[[File:MKWorld Item Gashapon.png|100px]]<br>Capsule<br>{{conjectural}} | |||
|Toad's Factory | |||
|Giant ''{{wp|gashapon}}'' capsules that break and release various items when hit. | |||
|- | |||
|[[File:MKWorld Cloud Lift.png|100px]]<br>[[Cloud Lift]] | |||
| | |||
|Elongated, floating clouds that typically carry background characters and enemies but can also be summoned as platforms during [[List of Mario Kart World missions|missions]]. | |||
|- | |||
|[[File:MKWorld Conveyor Belt.png|100px]]<br>[[Conveyor Belt]] | |||
|Toad's Factory | |||
|Platforms that either move parallel or horizontal to the direction of the track, periodically flashing before switching directions. Depending on the direction of the Conveyor Belt, racers driving on top of them may receive a speed boost or speed reduction or be pushed off-course. | |||
|- | |||
|[[File:MKWorld Crate.png|100px]]<br>[[Crate]] | |||
| | |||
|Wooden boxes found on land or floating in water. They break and release various items when hit. | |||
|- | |||
|[[File:MKWorld Crusher.png|100px]]<br>[[Crusher (obstacle)|Crusher]] | |||
|Toad's Factory | |||
|Hydraulic presses used to transform [[Brick Block]]s into [[Item Box]]es. They can squash racers that get caught below them as they periodically lower. | |||
|- | |||
|[[File:MKWorld Flowing Water.png|100px]]<br>[[Current]] | |||
|Faraway Oasis; route between Salty Salty Speedway and Dino Dino Jungle | |||
|Flowing [[water]] that can push racers off-course if it moves perpendicular to the track or push racers forward if it moves with the track. | |||
|- | |||
|[[File:MKWorld Dinosaur Egg.png|100px]]<br>[[Dinosaur]] egg<br>{{conjectural}} | |||
|Dino Dino Jungle | |||
|Large colored [[dinosaur]] eggs that can be knocked around by racers | |||
|- | |||
|[[File:MKWorld Empty Block.png|100px]]<br>[[Empty Block]] | |||
| | |||
|Blocks that typically carry enemies but can also be summoned as platforms or as obstacles during missions. | |||
|- | |||
|[[File:MKWorld Football.png|100px]]<br>Football<br>{{conjectural}} | |||
| | |||
|{{wp|Ball (gridiron football)|Gridiron football}}s kicked by [[Chargin' Chuck#Super Mario World / Super Mario World: Super Mario Advance 2|Passin' Chuck]]s that bounce several times before coming to a stop and vanishing. | |||
|- | |||
|[[File:MKWorld Water Geyser.png|100px]] | |||
[[File:MKWorld Water Geyser 2.png|100px]]<br>[[Water Geyser|Geyser]]<ref>In-game mission "Ride geysers and shoot through rings to the goal!"</ref> | |||
| | |||
|Jets of water that periodically rise from fractures in the ground, which can be tricked off of, or from [[manhole]]s. | |||
|- | |||
|[[File:MKWorld Large Flower.png|100px]]<br>[[Hat Trampoline]]-esque flower | |||
| | |||
|Large flowers that bounce racers who drive onto them into the air and can be tricked off of, like Mushroom Trampolines. | |||
|- | |||
|[[File:MKWorld Ivy Piranha Plant Flowered.jpg|100px]]<br>[[Ivy Piranha Plant]] | |||
| | |||
|Bulbs that extend into vines when touched, acting as [[grindrail]]s. They flower when fully grown. They resemble the design Vines have commonly used since ''[[New Super Mario Bros. Wii]]'', though with twisted stems. | |||
|- | |||
|[[File:MKWorld Jar.png|100px]]<br>[[Jar]] | |||
|Shy Guy Bazaar | |||
|Jars with various designs, which are found in clusters. Green jars occasionally have [[Jar#Mario Kart series|snake jar]]s concealed among them. | |||
|- | |||
|[[File:MKWorld Lava.png|150px]]<br>[[Lava]] | |||
|Near Dry Bones Burnout and Bowser's Castle | |||
|A glowing, molten liquid hazard that forms puddles and lakes. In a similar fashion to deep water in ''[[Super Mario Kart]]'' and ''[[Mario Kart: Super Circuit]]'', racers that drive through lava are slowed and begin struggling; they are saved by [[Lakitu (Mario Kart referee)|Lakitu]] if they do not escape fast enough. | |||
|- | |||
|[[File:MKWorld Lava Geyser.png|100px]]<br>[[Lava Geyser]] | |||
|Bowser's Castle | |||
|Geysers that periodically rise from lava. | |||
|- | |||
|[[File:MKWorld Mud.png|100px]]<br>[[Mud]] | |||
|Choco Mountain | |||
|A liquid hazard of which two varieties exist: a light variant that merely slows racers that drive through it and a dark variant that, in a similar fashion to deep water in ''Super Mario Kart'' and ''Mario Kart: Super Circuit'', also causes racers to begin struggling and to be saved by [[Lakitu (Mario Kart referee)|Lakitu]] if they do not escape fast enough. | |||
|- | |||
|[[File:MKWorld Mushroom Trampoline.png|100px]]<br>[[Mushroom Trampoline]] | |||
|Acorn Heights | |||
|Flat mushrooms that bounce racers who drive onto them into the air and can be tricked off of. | |||
|- | |||
|[[File:MKW Note Blocks.png|100px]]<br>[[Note Block]] | |||
| | |||
|[[Block]]s floating close to the ground that bounce racers who drive onto them into the air. | |||
|- | |||
|[[File:MKWorld Poison.png|100px]]<br>[[Poison (obstacle)|Poison swamp]] | |||
|Near Boo Cinema | |||
|A purple liquid hazard. In a similar fashion to deep water in ''Super Mario Kart'' and ''Mario Kart: Super Circuit'', racers that drive through poison are slowed and begin struggling; they are saved by [[Lakitu (Mario Kart referee)|Lakitu]] if they do not escape fast enough. | |||
|- | |||
|[[File:MKWorld Quicksand Pit.png|150px]]<br>[[Quicksand]]<br>{{Conjectural}} | |||
|Chain Chomp Desert | |||
|Enormous, sandy depressions resembling {{wp|antlion}} pits that drag racers and other objects toward their central holes. | |||
|- | |||
|[[File:MKW-Snowball.png|100px]]<br>[[Snowball]] | |||
| | |||
|Variants of boulders with identical behavior: rolling down the track and breaking when they hit an obstacle. | |||
|- | |||
|[[File:MKWorld Spike Ball.png|100px]]<br>[[Spike Ball]] | |||
| | |||
|Metallic, spike-covered balls. They are regurgitated by [[Spike]]s and tumble down the track or exist separately and roll aimlessly, disappearing or getting knocked away when they hit an obstacle. | |||
|- | |||
|[[File:MKW Item Rain.png|100px]]<br>Storm | |||
| | |||
|Weather phenomena that shower racers with different items depending on the storm. They can occur randomly or during specific [[List of Mario Kart World missions|missions]]. | |||
|- | |||
|[[File:MKW Straw Bale.png|100px]]<br>Straw bale<br>{{conjectural}} | |||
|Meadow region; mostly in Moo Moo Meadows | |||
|Large bales of straw that appear alone or in heaps, which can be can be knocked around by racers. | |||
|- | |||
|[[File:MKWorld Tire Stack.png|100px]]<br>[[Tire stack]] | |||
| | |||
|Tires found in stacks, which can be toppled over. They knock back racers who drive into them. | |||
|- | |||
|[[File:MKW Tornado.png|100px]]<br>[[Tornado]] | |||
| | |||
|Enormous vortices that sweep up objects off the ground. Racers that drive into a tornado will be immobilized for a few seconds while they are moved around in the tornado before being released. When released, racers will start or retain their flying state. Flying just outside their wind will give gliding racers a boost upwards from the tailwinds. | |||
|- | |||
|[[File:MKWorld Trampoline.png|100px]] | |||
[[File:MKWorld Trampolines.png|100px]]<br>[[Trampoline]] | |||
| | |||
|Trampolines of multiple shapes and sizes that bounce racers and objects that touch them into the air and can be tricked off of, like Mushroom Trampolines. | |||
|- | |||
|[[File:MKWorld Tumbleweed.png|100px]]<br>Tumbleweed<br>{{conjectural}} | |||
| | |||
|Tumbling desert plants that can jump over obstacles. | |||
|- | |||
|[[File:MKWorld Turnip Uprooted.jpg|100px]]<br>[[Turnip]] | |||
|Central region | |||
|Plants that can be uprooted by driving into them. Occasionally, uprooting a turnip releases a Mushroom. | |||
|- | |||
|[[File:MKWorld Water.png|100px]]<br>[[Water]] | |||
| | |||
|A widespread liquid that interacts with its environment. Storms and disturbances cause waves to form in the water, which can be tricked off of. Unlike in previous ''[[Mario Kart (series)|Mario Kart]]'' titles, water can now be ridden on top of; doing so transforms the racer's wheels into water skis. | |||
|- | |||
|[[File:MKWorld Whirlpool.png|100px]]<br>[[Whirlpool]] | |||
| | |||
|Large vortices that appears on the surface of water and suck racers towards their centers. | |||
|} | |||
===Vehicles=== | |||
{|class="wikitable col3left spinoff mk" style="text-align:center;margin-bottom:5px;width:100%;" | |||
!width="15%"|Obstacle | |||
!width="20%"|Location | |||
!width="65%"|Description | |||
|- | |||
|[[File:MKWorld Bus.png|100px]]<br>[[Bus]] | |||
| | |||
|Large vehicles that drive along the track. | |||
|- | |||
|[[File:MKWorld Car.png|100px]]<br>[[Car (obstacle)|Car]] | |||
| | |||
|Common vehicles that drive along the track. | |||
|- | |||
|[[File:MKWorld Yoshi's Truck.png|100px]][[File:MKWorld Truck Ramp Blue.png|100px]]<br>[[Dash panel ramp truck]]<br>{{conjectural}} | |||
| | |||
|Trucks that drive along the track which bear ramps that end in [[Dash Panel]]s or [[Glide Ramp]]s. Some, resembling the hat-wearing [[Yoshi (species)|Yoshi]] employees of [[Yoshi's]], carry Dash Food bags. | |||
|- | |||
|[[File:MKWorld Gondola.png|150px]]<br>Gondola<br>{{conjectural}} | |||
| | |||
|{{wp|Gondola}}s manned and ridden by [[Toad (species)|Toad]]s on waterways. | |||
|- | |||
|[[File:MKWorld Item Car.png|100px]][[File:MKWorld Item Car Behind.png|100px]]<br>Item-dispensing car | |||
| | |||
|Swerving cars that rapidly dispense items and obstacles behind them. | |||
|- | |||
|[[File:MKWorld Mushroom Car.png|100px]]<br>[[Cargo truck#Mario Kart World|Mushroom truck]]<br>{{conjectural}} | |||
| | |||
|Mushroom-shaped {{Wp|Box truck|box trucks}} that periodically drop [[Dash Mushroom]]s behind them onto the track. | |||
|- | |||
|[[File:MKWorld Truck Lift.png|100px]]<br>[[Pickup truck]]<br>{{conjectural}} | |||
| | |||
|Smaller trucks that drive along the track. They typically carry an assortment of enemies and obstacles on their beds, a feature brought over from ''[[Mario Kart Tour]]''. Some carry surfboards, [[small pipe]]s, or [[Lift]]s based on their ''Super Mario 3D Land'' design, which act as [[ramp]]s. | |||
|- | |||
|[[File:MKWorld Toad Raft.png|100px]]<br>Raft<br>{{conjectural}} | |||
| | |||
|Small {{wp|Inflatable boat|rafts}} manned by Toads that float down waterways. | |||
|- | |||
|[[File:MKWorld Truck Red.png|150px]]<br>[[Cargo truck|Truck]]<br>{{conjectural}} | |||
| | |||
|Trucks with one or two containers that drive along the track. They are different from trucks that can be controlled. | |||
|- | |||
|[[File:MKWorld Seaplane.png|100px]]<br>Floatplane<br>{{conjectural}} | |||
| | |||
|Amphibious aircraft whose wings can be driven on, including when they fly. | |||
|- | |||
|[[File:MKWd Whistlestop Summit Icon.png|100px]]<br>[[Train (obstacle)|Train]] | |||
| | |||
|Steam locomotives that travel along railroads. Their rearmost cars are sometimes sloped, allowing racers to drive on top of them. | |||
|- | |||
|} | |||
===Utility objects=== | |||
{|class="wikitable col3left spinoff mk" style="text-align:center;margin-bottom:5px;width:100%;" align=center | |||
!width="15%"|Object | |||
!width="20%"|Location | |||
!width="65%"|Description | |||
|- | |||
|[[File:MKWorld - Block.png|100px]]<br>[[? Block]] | |||
| | |||
|[[Block]]s floating close to the ground. If a racer hits one from below, several [[coin]]s are added to their own coin counter while four additional coins will pop out of the top of the block. | |||
|- | |||
|[[File:MKWorld - Panel.png|100px]]<br>[[? Panel]] | |||
| | |||
|Hidden panels, resembling those from ''[[Super Mario Kart]]'', scattered across the map. | |||
|- | |||
|[[File:MKWorld WhistlestopSummit Arrow.png|100px]]<br>[[Arrow field]] | |||
| | |||
|Barriers that typically direct the player in the right direction, though they sometimes display [[Mario Kart World#Sponsors|advertisements]] instead. They are intangible to obstacles like [[Car (obstacle)|car]]s. | |||
|- | |||
|[[File:MKW Binoculars.png|100px]]<br>[[Binoculars]] | |||
| | |||
|Binoculars that, when touched, provide racers with a bird's eye view of their surroundings and allow them to zoom in on areas of interest. | |||
|- | |||
|[[File:MKWorld Boat.png|100px]]<br>Boat<br>{{conjectural}} | |||
| | |||
|{{wp|Boats}} that can be temporarily hijacked for a speed boost on [[water]] and to plow through obstacles. They are used on routes between [[Peach Beach]] and [[Wario Shipyard]], as well as the route from [[DK Spaceport]] to [[Peach Stadium]]. | |||
|- | |||
|[[File:MKWorld Cannon.png|100px]] | |||
[[File:MKWorld VehicleCannon.jpg|100px]]<br>[[Cannon (Mario Kart series)|Cannon]] | |||
| | |||
|Cannons of which two varieties exist: a more typical, larger variant that launches racers who enter it into the air over large distances and a smaller variant that launches racers over shorter distances which can be strapped to [[pickup truck]]s or float in the air like [[Barrel Cannon]]s. | |||
|- | |||
|[[File:MKWorld Cargo truck.png|100px]]<br>[[Cargo truck]] | |||
| | |||
|Large vehicles that can be temporarily hijacked for a speed boost on land and to plow through obstacles. They are used on three pairs of routes: between [[Crown City]] and [[Faraway Oasis]], Toad's Factory and Mario Bros. Circuit, and Peach Stadium and Toad's Factory. Smaller cargo trucks also appear as obstacles. | |||
|- | |||
|[[File:MKWorld Blue Ring.png|100px]] | |||
[[File:MKWorld Blue Ring 2.png|100px]]<br>Checkpoint ring<br>{{conjectural}} | |||
| | |||
|Rings that give the player more time to complete a [[Time Limit|timed]] [[List of Mario Kart World missions|mission]], like the [[+ Clock]]. | |||
|- | |||
|[[File:MKWorld Dash Panel.png|100px]]<br>[[Dash Panel]] | |||
| | |||
|Panels that provide racers that drive over them with a temporary speed boost. | |||
|- | |||
|[[File:MKWorld Yellow flying guide.png|100px]]<br>Flying guide<br>{{conjectural}} | |||
| | |||
|Yellow flying guides that direct racers as they glide. They resemble [[Flopter|Flopters]] and [[Topman Tribe|Topmen]]. | |||
|- | |||
|[[File:MKWorld Glide Ramp.png|100px]]<br>[[Glide Ramp]] | |||
| | |||
|Panels that deploy the wings of racers that drive over them, allowing them to glide. | |||
|- | |||
|[[File:MKWorld GoalPole.jpg|100px]]<br>[[Goal Pole]] | |||
| | |||
|A flagpole that marks the end goal of a timed mission, which is completed by touching the flagpole. | |||
|- | |||
|[[File:MKWorld Goal Ring.png|100px]]<br>Goal ring<br>{{conjectural}} | |||
| | |||
|Rings that mark the end goals of timed missions, which are completed by passing through the rings. | |||
|- | |||
|[[File:MKWorld Arrow Guide.png|100px]]<br>Guide<br>{{conjectural}} | |||
| | |||
|Traffic pylon-like guides that direct the player during missions. | |||
|- | |||
|[[File:MKWorld Helicopter.png|100px]]<br>Helicopter<br>{{conjectural}} | |||
| | |||
|{{wp|Helicopter}}s that can be temporarily hijacked to fly and to plow through obstacles. They are used on routes between [[Mario Bros. Circuit]] and [[Toad's Factory]], as well as the route from [[DK Spaceport]] to [[Peach Stadium]]. Racers leave helicopters in their gliding state. Text that is only visible on their rotating blades read "MARIOKART". | |||
|- | |||
|[[File:Item Ring (MKW).png|100px]]<br>Item Ring<br>{{conjectural}} | |||
|At the start of a lap section on routes leading to/from [[Starview Peak]]. | |||
|Large rainbow-colored rings, similar to the checkpoints in Knockout Tour, that summon large walls of [[Item Box]]es when approached. | |||
|- | |||
|[[File:MKWorld Cloud Block.png|100px]]<br>[[Lakitu's Cloud]] | |||
| | |||
|Small, floating clouds. Circling groups of Lakitu's Clouds can form rings, providing racers that pass through them with a speed boost. They can also be summoned during missions, holding [[Arrow Sign]]s to guide racers. | |||
|- | |||
|[[File:MKWorld Pipe Cannon.png|100px]]<br>[[Pipe Cannon]] | |||
| | |||
|L-shaped Warp Pipe junctions like those seen in ''[[Super Mario Bros.]]'' Racers enter through the lower opening and are launched into the air at an angle through the upper opening. | |||
|- | |||
|[[File:MK World P Switch.png|100px]] | |||
[[File:MKWorld Gray P Switch.png|100px]]<br>[[P Switch]] | |||
| | |||
|Switches scattered across the map that each provide a unique mission when pressed. After the mission is complete, it turns gray. | |||
|- | |||
|[[File:MK World Ring.png|100px]]<br>[[Ring (Mario Kart series)|Ring]] | |||
| | |||
|Circular, floating or grounded hoops with a wide variety of designs. They provide racers that pass through them with a speed boost. | |||
|- | |||
|[[File:MKWorld Road Flare.png|100px]]<br>Road flare<br>{{conjectural}} | |||
| | |||
|Road flares that release red smoke to alert racers at a distance. They mark areas of interest during missions. | |||
|- | |||
|[[File:MKWorld UFO.png|100px]]<br>[[UFO]] | |||
| | |||
|UFOs that can be temporarily hijacked to fly and abduct objects. Racers leave UFOs in their gliding state. They are exclusive to Free Roam. | |||
|- | |||
|[[File:MKWorld Vending Machine.png|100px]]<br>Vending machine<br>{{conjectural}} | |||
| | |||
|{{wp|Vending machine}}s that periodically cough up [[Dash Food]] bags. | |||
|- | |||
|[[File:MKWorld Warp Pipe.png|100px]]<br>[[Warp Pipe]] | |||
| | |||
|Giant and regularly-sized pipes. They are mainly used as obstacles, but some of them can warp the player to nearby locations or spit the player out in the opposite direction they entered. | |||
|} | |||
=== | ===Background characters=== | ||
<gallery> | <gallery perrow=8> | ||
MKWorld Bats.png|[[Bat (animal)|Bat]]s, in the background of [[Boo Cinema]] | |||
Boo crew.png|[[Boo Crew]]s, in the background of [[Boo Cinema]] | |||
MKW | MKW Boohemoth.png|[[Boohemoth]], in the background of [[Boo Cinema]] | ||
MKW Spiny Shell Drone.png|Drones resembling [[Koopa Shell]]s | |||
MK World | MKWorld Firefly.png|Fireflies{{conjectural}} | ||
MKWorld Flies.png|Flies{{conjectural}} | |||
MKWorld | MKW HeavyFireBro HighQuality.png|[[Heavy Fire Bro]]s. | ||
MK World Paratroopa audience.png|[[Koopa Paratroopa]]s | |||
MKWorld Lakitu.png|[[Lakitu (Mario Kart referee)|Lakitu]] | |||
MKW Knockout Tour Lakitu.png|A red Lakitu that leads Knockout Tour | |||
MKWorld Luma.png|[[Luma]]s | |||
MKWorld Para-Beetle.png|[[Para-Beetle]]s wearing blue shells with propellers instead of wings | |||
MK World Pianta audience.png|[[Pianta]]s | |||
Mariokartworld seagull.png|[[Seagull]]s, which fly in the air of beachfront courses | |||
MKWorld Shy Guys.png|[[Shy Guy]]s | |||
MKWorld Sledge Bro.jpg|[[Sledge Bro]]s. | |||
MKWorld Small Bird.png|[[Small bird]]s | |||
MKWorld Toads.png|[[Toad (species)|Toad]]s | |||
MKWorld Yoshi (Audience).png|[[Yoshi (species)|Yoshi]]s | |||
</gallery> | </gallery> | ||
==Items== | ==Items== | ||
As with ''[[Mario Kart Tour]]'', items are automatically held behind racers in this game.<ref name= | A total of 27 items appear in ''Mario Kart World'', 28 if including [[Dash Food]]. As with ''[[Mario Kart Tour]]'', items are automatically held behind racers in this game. | ||
Of the returning items, the Ice Flower and Hammer make their first appearance in a home console ''Mario Kart'' game following their initial debut in ''Mario Kart Tour''. The Mega Mushroom also makes its first home console appearance since its debut in ''Mario Kart Wii''. Additionally, the Feather is now usable during races like in ''Super Mario Kart'', rather than being exclusive to the [[Battle]] mode like in ''Mario Kart 8 Deluxe'' and ''Mario Kart Tour''. Despite being returning items, the Ice Flower, Hammer, Feather, and Mega Mushroom are all classified as new items on the game's website and/or in the ''Mario Kart World'' Direct.<ref>{{cite|url=https://www.nintendo.com/jp/games/switch2/aaaaa/item-techniques/index.html|title=マリオカート ワールド : アイテム&テクニック|language=ja|publisher=Nintendo|accessdate=April 23, 2025}}</ref><ref name=MKWDirect/> | |||
During Free Roam, the only available items outside of certain missions are the Mushroom, Triple Mushroom, Golden Mushroom, Star, Feather, and Dash Food. | |||
<center> | <center> | ||
{|class="wikitable" | {|class="wikitable spinoff mk" | ||
!colspan="2"| | !colspan="2"| | ||
===Items found on the track=== | ===Items found on the track=== | ||
|- | |- | ||
|align=center|[[File:MKW Item Box.png| | |align=center|[[File:MKW Item Box.png|75x75px]]<br>[[Item Box]] | ||
|Gives the player a random item. | |Gives the player a random item. Some are released from flying vehicles attached to [[Parachute (object)|parachute]]s. | ||
|- | |- | ||
|align=center|[[File:MKW Double Item Box.png| | |align=center|[[File:MKW Double Item Box.png|75x75px]]<br>[[Item Box|Double Item Box]] | ||
|Gives the player two random items as opposed to one. | |Gives the player two random items as opposed to one. | ||
|- | |- | ||
|align=center|[[File:MKWorld Coin.png| | |align=center|[[File:MKWorld Coin.png|75x75px]]<br>[[Coin]] | ||
|Gives the player a small boost and | |Gives the player a small boost and increases top speed when more are collected, up to a maximum of 20. | ||
|- | |||
|- | |- | ||
|align=center|[[File:MKWorld coin pile.jpg|75x75px]]<br>[[Coin pile]] | |||
|Piles of coins that can be found exclusively in Free Roam that provide a large amount of coins at once. | |||
|- | |- | ||
|align=center|[[File: | |align=center|[[File:MK World Blue Coin.png|75x75px]]<br>[[Blue Coin|Blue coin]] | ||
| | |Appears in certain areas upon pressing a [[P Switch]]. | ||
|- | |- | ||
|align=center|[[File:MKWorld | |align=center|[[File:MKWorld Dash Food bag.png|75x75px]]<br>[[Dash Food]] bag{{conjectural}} | ||
|A smiling, golden fast food bag that provides a random food item that changes the player's outfit when eaten, with a visual transformation effect similar to that of a [[Wonder Flower]]. | |A smiling, golden fast food bag that provides a random food item that changes the player's outfit when eaten, with a visual transformation effect similar to that of a [[Wonder Flower]]. | ||
|- | |||
|align=center|[[File:MKWorld Collectable.png|75x75px]]<br>[[Peach Medallion]] | |||
|New coin collectables imprinted with a portrait of Peach, resembling [[Dragon Coin#Super Mario World / Super Mario World: Super Mario Advance 2|Princess Coins]]. | |||
|- | |- | ||
!colspan="2"| | !colspan="2"| | ||
| Line 681: | Line 2,327: | ||
===New items=== | ===New items=== | ||
|- | |- | ||
|align=center|[[File:MKW Coin Shell Roulette.png| | |align=center|[[File:MKW Coin Shell Roulette.png|75x75px]]<br>[[Coin Shell]] | ||
|Travels along the track and leaves a trail of coins behind before exploding, leaving eight coins in a ring shape on the track.< | |Travels along the track and leaves a trail of coins behind before exploding, leaving eight coins in a ring shape on the track. Gold-colored shells previously appeared in ''[[Mario Kart Arcade GP DX]]'', though they functioned differently. | ||
|- | |||
|align=center|[[File:MKW Question Block Roulette.png|75x75px]]<br>[[? Block]] | |||
|Temporarily places a ? Block above the player's head, which they can repeatedly hit, giving them coins while also scattering more coins behind them. A similar item, the [[Coin Box]], previously appeared in ''[[Mario Kart Tour]]''. | |||
|- | |- | ||
|align=center|[[File:MKW Kamek Roulette.png| | |align=center|[[File:MKW Kamek Roulette.png|75x75px]]<br>[[Kamek (item)|Kamek]] | ||
|A crystal ball with [[Kamek]]'s magic symbols on it that summons him, who then proceeds to summon many of a certain type of enemy ahead of all the racers in front of the player who used it, as well as turning them into that enemy temporarily. | |A crystal ball with [[Kamek]]'s magic symbols on it that summons him, who then proceeds to summon many of a certain type of enemy ahead of all the racers in front of the player who used it, as well as turning them into that enemy temporarily. | ||
|- | |- | ||
|align=center|[[File: | |align=center|[[File:MKWorld Burger 2.jpg|75x75px]]<br>[[Dash Food]] | ||
|Various food items obtained from the smiling bags that give the player a speed boost and change the character's outfit | |Various food items obtained from the smiling bags that give the player a speed boost and may change the character's outfit. | ||
|- | |- | ||
!colspan="2"| | !colspan="2"| | ||
| Line 694: | Line 2,343: | ||
===Returning items=== | ===Returning items=== | ||
|- | |- | ||
|align=center|[[File:MKW Coin Roulette.png| | |align=center|[[File:MKW Coin Roulette.png|75x75px]]<br>[[Coin]] | ||
|Grants the player two extra coins and a small boost. | |Grants the player two extra coins and a small boost. | ||
|- | |- | ||
|align=center|[[File:MKW Green Shell Roulette.png|75x75px]]<br>[[Green Shell]] | |||
|align=center|[[File:MKW Green Shell Roulette.png| | |||
|Travels in a straight line and knocks over a kart it hits. | |Travels in a straight line and knocks over a kart it hits. | ||
|- | |- | ||
|align=center|[[File:MKW Triple Green Shell Roulette.png| | |align=center|[[File:MKW Triple Green Shell Roulette.png|75x75px]]<br>[[Triple Green Shells]] | ||
|Three Green Shells that orbit the player's kart, protecting them from incoming attacks. | |Three Green Shells that orbit the player's kart, protecting them from incoming attacks. | ||
|- | |- | ||
|align=center|[[File:MKW Red Shell Roulette.png| | |align=center|[[File:MKW Red Shell Roulette.png|75x75px]]<br>[[Red Shell]] | ||
|Homes in on the closest kart in front of the player and knocks it over. | |Homes in on the closest kart in front of the player and knocks it over. | ||
|- | |- | ||
|align=center|[[File:MKW Triple Red Shell Roulette.png| | |align=center|[[File:MKW Triple Red Shell Roulette.png|75x75px]]<br>[[Triple Red Shells]] | ||
|Three Red Shells that orbit the player's kart, protecting them from incoming attacks. | |Three Red Shells that orbit the player's kart, protecting them from incoming attacks. | ||
|- | |- | ||
|align=center|[[File:MKW Banana Roulette.png|[[Banana]]| | |align=center|[[File:MKW Spiny Shell Roulette.png|75x75px]]<br>[[Spiny Shell (blue)|Spiny Shell]] | ||
|Targets the racer in first place, knocking over all other karts in its path. | |||
|- | |||
|align=center|[[File:MKW Banana Roulette.png|[[Banana Peel]]|75x75px]]<br>[[Banana Peel]] | |||
|Protects the player from incoming items, and spins out other racers that hit it. | |Protects the player from incoming items, and spins out other racers that hit it. | ||
|- | |- | ||
|align=center|[[File:MKW Triple Banana Roulette.png| | |align=center|[[File:MKW Triple Banana Roulette.png|75x75px]]<br>[[Triple Bananas]] | ||
|Three bananas that orbit the player's kart, protecting them from incoming attacks. | |Three bananas that orbit the player's kart, protecting them from incoming attacks. | ||
|- | |- | ||
|align=center|[[File:MKW Mushroom Roulette.png| | |align=center|[[File:MKW Mushroom Roulette.png|75x75px]]<br>[[Dash Mushroom|Mushroom]] | ||
|Provides the player's kart with a small speed boost. | |Provides the player's kart with a small speed boost. | ||
|- | |- | ||
|align=center|[[File:MKW Triple Mushroom Roulette.png| | |align=center|[[File:MKW Triple Mushroom Roulette.png|75x75px]]<br>[[Triple Mushrooms]] | ||
|Orbits the player's kart, providing them with three separate speed boosts. | |Orbits the player's kart, providing them with three separate speed boosts. | ||
|- | |- | ||
|align=center|[[File: | |align=center|[[File:MKW Golden Mushroom Item Roulette.png|75x75px]]<br>[[Golden Dash Mushroom|Golden Mushroom]] | ||
|Provides the player's kart with continuous speed boosts for a short time. | |Provides the player's kart with continuous speed boosts for a short time. | ||
|- | |- | ||
|align=center|[[File:MKW Mega Mushroom Roulette.png| | |align=center|[[File:MKW Mega Mushroom Roulette.png|75x75px]]<br>[[Mega Mushroom]] | ||
|Increases the player's size, allowing them to flatten any player they hit. | |Increases the player's size, allowing them to flatten any player they hit. | ||
|- | |- | ||
|align=center|[[File:MKW Feather Roulette.png| | |align=center|[[File:MKW Feather Roulette.png|75x75px]]<br>[[Cape Feather|Feather]] | ||
|Causes the player to spin and leap in the air, allowing them to reach high areas and even drive on walls. | |Causes the player to spin and leap in the air, allowing them to reach high areas, avoid attacks, and even drive on walls. | ||
|- | |- | ||
|align=center|[[File:MKW Fire Flower Roulette.png| | |align=center|[[File:MKW Fire Flower Roulette.png|75x75px]]<br>[[Fire Flower]] | ||
|Allows the player to throw up to eight fireballs for a short time that cause other karts to spin out on impact. | |Allows the player to throw up to eight fireballs for a short time that cause other karts to spin out on impact. | ||
|- | |- | ||
|align=center|[[File:MKW Ice Flower Roulette.png| | |align=center|[[File:MKW Ice Flower Roulette.png|75x75px]]<br>[[Ice Flower]] | ||
|Allows the player to throw up to eight ice balls for a short time that cause other karts to temporarily lose control on impact. | |Allows the player to throw up to eight ice balls for a short time that cause other karts to temporarily lose control on impact. | ||
|- | |- | ||
|align=center|[[File:MKW Boomerang Flower Roulette.png| | |align=center|[[File:MKW Boomerang Flower Roulette.png|75x75px]]<br>[[Boomerang Flower]] | ||
| | |Grants the player a [[Boomerang]] that can be thrown up to four times, hitting racers forward/backward and returns to its user before the final use. | ||
|- | |- | ||
|align=center|[[File:MKW | |align=center|[[File:MKW Super Star Roulette.png|75x75px]]<br>[[Super Star|Star]] | ||
| | |Provides the player invincibility from all terrain and items, and also giving a speed boost. | ||
|- | |- | ||
|align=center|[[File:MKW Super Horn Roulette.png| | |align=center|[[File:MKW Super Horn Roulette.png|75x75px]]<br>[[Super Horn]] | ||
|Emits a radial shockwave hitting racers, as well as destroying all obstacles, including the Spiny Shell. | |Emits a radial shockwave hitting racers, as well as destroying all obstacles, including the Spiny Shell. | ||
|- | |- | ||
|align=center|[[File:MKW | |align=center|[[File:MKW Lightning Roulette.png|75x75px]]<br>[[Lightning]] | ||
| | |Causes all opponents in front of the player to drop their items, shrink, and drive slowly for a short time in addition to summoning a temporary storm. | ||
|- | |||
|align=center|[[File:MKW Hammer Roulette.png|75x75px]]<br>[[Hammer]] | |||
|For a limited time, allows the player to throw multiple bursts of five hammers each, which travel in an arc and stick to the track, spinning out any player that comes into contact with them. | |||
|- | |- | ||
|align=center|[[File:MKW Blooper Roulette.png| | |align=center|[[File:MKW Blooper Roulette.png|75x75px]]<br>[[Blooper]] | ||
|Sprays ink on all racers ahead and reduces their visibility. The racers hit also lose some of their traction while sprayed. | |Sprays ink on all racers ahead and reduces their visibility. The racers hit also lose some of their traction while sprayed. | ||
|- | |- | ||
|align=center|[[File:MKW Bob-omb Roulette.png| | |align=center|[[File:MKW Bob-omb Roulette.png|75x75px]]<br>[[Bob-omb]] | ||
|Explodes after a short time when thrown or dropped, knocking over any kart in its blast radius. | |Explodes after a short time when thrown or dropped, knocking over any kart in its blast radius. | ||
|- | |- | ||
|align=center|[[File:MKW | |align=center|[[File:MKW Bullet Bill Roulette.png|75x75px]]<br>[[Bullet Bill]] | ||
| | |Transforms the player into a Bullet Bill, rocketing through the track with auto-pilot, and providing invincibility from all terrain and items. | ||
|- | |||
|align=center|[[File:MKW Boo Roulette.png|75x75px]]<br>[[Boo]] | |||
|Steals an item from a randomly selected racer in front of the player, while granting temporary invisibility, making the player invulnerable and able to pass through hazards. | |||
|} | |||
</center> | |||
==Missions== | |||
{{Main|List of Mario Kart World missions}} | |||
In Free Roam, the player can activate short missions in the open world by driving over [[P Switch]]es. Once activated, the player has within the time limit to complete a certain task. If they complete the task, they will briefly celebrate, accompanied by an abridged arrangement of the "Finish! (1st − 4th Place)" jingle from ''Super Mario Kart''. If not, they fail and have to redo it. After a mission is completed, its P Switch turns gray. | |||
==Music== | |||
{{stub|section=yes|Needs elaboration on which time of day in Free Roam the arrangements can play.}} | |||
{{media missing|section=yes|more=yes|Fill in more of the "Sample" columns}} | |||
''Mario Kart World'' has 226 newly arranged music tracks that can be listened to on the main menu, in Free Roam, or during [[route]]s in Grand Prix or VS Race; they consist of 108 arrangements from the [[Mario Kart (series)|''Mario Kart'' series]], 101 from the [[Super Mario (series)|''Super Mario'' series]], 10 from the [[Yoshi (series)|''Yoshi'' series]], 2 from ''[[Mario Paint]]'', and 1 each from ''[[Wario Land: Super Mario Land 3]]'', ''[[Donkey Kong Country]]'', ''[[Luigi's Mansion]]'', ''[[WarioWare, Inc.: Mega Microgame$!]]'', and ''{{wp|Flipnote Studio}}''. This randomized selection of music was referred to as the "jukebox" in development. | |||
Routes in Grand Prix have three to five dedicated arrangements that usually fit the theme of the source and/or the destination. Routes in VS Race have a completely random list of arrangements that don't tend to fit the theme of the route even if one used in Grand Prix is selected; all Grand Prix arrangements play in this mode, plus a few more exclusive ones. Most VS Race arrangements can play in Free Roam, along with a few calmer and slower paced arrangements exclusive to that mode. Some songs also play in a certain order, usually matching one of a game's soundtrack. | |||
Additionally, certain arrangements incorporate the melodies of other songs at certain points, such as the "Underground BGM" arrangement from ''Super Mario Bros. 2'' also including part of "Ground BGM," or the Mario Drawing Song having a nod to "Jump Up, Super Star!" While the arrangements for the returning courses usually stay true to the lengths of the original tracks, the battle course themes take after these arrangements and include improvised additional sections, except they loop. | |||
The following list does not include arrangements of themes for classic race courses and battle courses present in the game. "Koopa Beach" from ''Super Mario Kart'' is the only song that was arranged for both one of the game's courses and Free Roam. | |||
===''Mario Kart'' arrangements=== | |||
{| class="wikitable sortable" style="width:100%" | |||
! Song !! Game !! Location !! Sample !! Notes | |||
|- | |||
| "[[Super Mario Kart Title Screen|''Super Mario Kart'' Title Screen]]" (daytime) ||rowspan=11| ''[[Super Mario Kart]]'' || [[Crown City]] → [[Peach Stadium]], menus and Free Roam || || | |||
|- | |||
| "''Super Mario Kart'' Title Screen" (nighttime) || Menus and Free Roam || || | |||
|- | |||
| "[[Donut Plains (theme)|Donut Plains]]" || [[Mario Circuit (Mario Kart World)|Mario Circuit]] → Peach Stadium, menus and Free Roam || [[File:Mario Kart World Donut Plains.oga]] || | |||
|- | |||
| "[[Ghost House BGM#Super Mario Kart|Ghost Valley]]" || [[Boo Cinema]] → [[Dry Bones Burnout]] || || | |||
|- | |||
| "[[Bowser BGM#Super Mario Kart|Bowser Castle]]" || VS Race routes || || | |||
|- | |||
| "Choco Island" (daytime) || [[Choco Mountain]] → [[Toad's Factory]], menus and Free Roam || || | |||
|- | |||
| "Choco Island" (nighttime) || Menus and Free Roam || || | |||
|- | |||
| "[[Vanilla Lake (theme)|Vanilla Lake]]" || Menus and Free Roam || || | |||
|- | |||
| "[[Koopa Beach (theme)|Koopa Beach]]" || Menus and Free Roam || || | |||
|- | |||
| "[[Rainbow Road (Super Mario Kart theme)|Rainbow Road]]" || Menus and Free Roam || || | |||
|- | |||
| "Staff Credits" || Menus and Free Roam || || | |||
|- | |||
| "[[Super Mario Kart Title Screen#Mario Kart 64|''Mario Kart 64'' Title Screen]]" ||rowspan=12| ''[[Mario Kart 64]]'' || VS Race routes, menus and Free Roam || || | |||
|- | |||
| "Selection Screens" || Menus and Free Roam || || | |||
|- | |||
| "[[Moo Moo Farm (theme)|Moo Moo Farm/Yoshi Valley]]" || [[Moo Moo Meadows]] → Choco Mountain, menus and Free Roam || || | |||
|- | |||
| "[[Koopa Troopa Beach (theme)|Koopa Troopa Beach]]" (daytime) || [[Koopa Troopa Beach (Super Mario Kart)|Koopa Troopa Beach]] → [[Faraway Oasis]], menus and Free Roam || || | |||
|- | |||
| "Koopa Troopa Beach" (nighttime) || Menus and Free Roam || || | |||
|- | |||
| "[[Kalimari Desert (theme)|Kalimari Desert]]" || [[Desert Hills]] → [[Shy Guy Bazaar]], menus and Free Roam || || | |||
|- | |||
| "[[Toad's Turnpike (theme)|Toad's Turnpike]]" || VS Race routes, menus and Free Roam || || | |||
|- | |||
| "[[Frappe Snowland (theme)|Frappe Snowland/Sherbet Land]]" (daytime) || [[DK Pass]] → [[Starview Peak]] || || | |||
|- | |||
| "Frappe Snowland/Sherbet Land" (nighttime) || Menus and Free Roam || || | |||
|- | |||
| "[[D.K.'s Jungle Parkway (theme)|DK's Jungle Parkway]]" || Faraway Oasis → Crown City, menus and Free Roam || || | |||
|- | |||
| "[[Rainbow Road (Mario Kart 64 theme)|Rainbow Road]]" || Menus and Free Roam || || | |||
|- | |||
| "[[Results (1st − 4th Place)]]" || Menus and Free Roam || || | |||
|- | |||
| "[[GBA Mario Circuit (theme)|Peach Circuit/Mario Circuit/Luigi Circuit]]" ||rowspan=8| ''[[Mario Kart: Super Circuit]]'' || Mario Circuit → Peach Stadium, menus and Free Roam || || Takes elements from the [https://www.youtube.com/watch?v=XiqyXTgvYR0&t=684s prototype version] of the theme | |||
|- | |||
| "Shy Guy Beach/Cheep-Cheep Island" || Menus and Free Roam || || | |||
|- | |||
| "Riverside Park" || Faraway Oasis → Crown City, menus and Free Roam || || | |||
|- | |||
| "[[Koopa Castle Course|Bowser Castle]]" || VS Race routes || || | |||
|- | |||
| "[[GBA Cheese Land (theme)|Cheese Land]]" || VS Race routes, menus and Free Roam || || | |||
|- | |||
| "[[GBA Ribbon Road (theme)|Ribbon Road]]" || [[Whistlestop Summit]] → [[DK Spaceport]], menus and Free Roam || [[File:MKWd-Ribbon-Road-arrangement.oga]] || | |||
|- | |||
| "Yoshi Desert" || Shy Guy Bazaar → [[Wario Stadium (Mario Kart 64)|Wario Stadium]], menus and Free Roam || || | |||
|- | |||
| "[[Rainbow Road (Super Mario Kart theme)#Mario Kart: Super Circuit|Rainbow Road]]" || VS Race routes || || | |||
|- | |||
| "[[GCN Yoshi Circuit (theme)|Luigi Circuit/Mario Circuit/Yoshi Circuit]]" ||rowspan=8| ''[[Mario Kart: Double Dash!!]]'' || Menus and Free Roam || || | |||
|- | |||
| "[[GCN Baby Park (theme)|Baby Park]]" || Koopa Troopa Beach → Faraway Oasis, menus and Free Roam || || | |||
|- | |||
| "Dry Dry Desert" || Menus and Free Roam || || | |||
|- | |||
| "Mushroom Bridge/Mushroom City" || VS Race routes, menus and Free Roam || || | |||
|- | |||
| "Sherbet Land" || Starview Peak → [[Sky-High Sundae]] || || | |||
|- | |||
| "Bowser's Castle" || Toad's Factory → [[Bowser's Castle (Mario Kart World)|Bowser's Castle]] || || | |||
|- | |||
| "[[Rainbow Road (Super Mario Kart theme)#Mario Kart: Double Dash!!|Rainbow Road]]" || VS Race routes || || | |||
|- | |||
| Staff Credits || Menus and Free Roam || || | |||
|- | |||
| "Figure-8 Circuit/Mario Circuit" ||rowspan=12| ''[[Mario Kart DS]]'' || Menus and Free Roam || || | |||
|- | |||
| "Yoshi Falls" || VS Race routes, menus and Free Roam || || | |||
|- | |||
| "Cheep Cheep Beach" || Menus and Free Roam || || | |||
|- | |||
| "Luigi's Mansion" || Boo Cinema → Dry Bones Burnout || || Takes elements from its arrangement for [[Luigi's Mansion (battle course)|<small>GCN</small> Luigi's Mansion]] in ''Mario Kart 8 Deluxe'' | |||
|- | |||
| "Delfino Square" || [[Salty Salty Speedway]] → [[Dino Dino Jungle]], menus and Free Roam || || | |||
|- | |||
| "[[Waluigi Pinball (theme)|Waluigi Pinball/Wario Stadium]]" (daytime) || Wario Stadium → [[Airship Fortress]] || || | |||
|- | |||
| "Waluigi Pinball/Wario Stadium" (nighttime) || Menus and Free Roam || || | |||
|- | |||
| "Shroom Ridge" || Menus and Free Roam || || | |||
|- | |||
| "[[DS Tick-Tock Clock (theme)|Tick-Tock Clock]]" || VS Race routes, menus and Free Roam || || | |||
|- | |||
| "[[DS Peach Gardens (theme)|Peach Gardens]]" || Menus and Free Roam || || | |||
|- | |||
| "[[Rainbow Road (Super Mario Kart theme)#Mario Kart DS|Rainbow Road]]" || VS Race routes || || | |||
|- | |||
| "Staff Credits" || Menus and Free Roam || || | |||
|- | |||
| "[[Luigi Circuit/Mario Circuit]]" ||rowspan=13| ''[[Mario Kart Wii]]'' || VS Race routes, menus and Free Roam || || | |||
|- | |||
| "[[Mushroom Gorge (theme)|Mushroom Gorge]]" || VS Race routes, menus and Free Roam || || | |||
|- | |||
| "[[Coconut Mall (theme)|Coconut Mall]]" || VS Race routes, menus and Free Roam || [[File:WiiCoconutMall MKW.oga]] || | |||
|- | |||
| "[[Wii DK Summit (theme)|DK Summit]]" || Starview Peak → Sky-High Sundae, menus and Free Roam || || | |||
|- | |||
| "[[Wario's Gold Mine (theme)|Wario's Gold Mine]]" || VS Race routes, menus and Free Roam || || | |||
|- | |||
| "Daisy Circuit" (daytime) || Salty Salty Speedway → Dino Dino Jungle, menus and Free Roam || || | |||
|- | |||
| "Daisy Circuit" (nighttime) || Menus and Free Roam || || | |||
|- | |||
| "[[Wii Maple Treeway (theme)|Maple Treeway]]" || Menus and Free Roam || [[File:Mario Kart World Maple Treeway.oga]] || | |||
|- | |||
| "Grumble Volcano" || VS Race routes, menus and Free Roam || || | |||
|- | |||
| "Dry Dry Ruins" || Menus and Free Roam || || | |||
|- | |||
| "Moonview Highway" || Wario Stadium → Airship Fortress, menus and Free Roam || || | |||
|- | |||
| "[[Rainbow Road (Super Mario Kart theme)#Mario Kart Wii|Rainbow Road]]" || VS Race routes || || | |||
|- | |||
| "Staff Roll A" || Menus and Free Roam || || | |||
|- | |||
| "[[Toad Circuit (theme)|Toad Circuit/Mario Circuit]]" ||rowspan=9| ''[[Mario Kart 7]]'' || VS Race routes, menus and Free Roam || || | |||
|- | |||
| "Daisy Hills" || VS Race routes, menus and Free Roam || || | |||
|- | |||
| "Music Park" || Menus and Free Roam || || | |||
|- | |||
| "Rock Rock Mountain" || VS Race routes, menus and Free Roam || || | |||
|- | |||
| "[[Piranha Plant Slide (theme)|Piranha Plant Slide]]" || Choco Mountain → Toad's Factory, menus and Free Roam || || | |||
|- | |||
| "[[DK Island Swing#Mario Kart 7|DK Jungle]]" || Faraway Oasis → Crown City, menus and Free Roam || || | |||
|- | |||
| "[[Rosalina's Ice World (theme)|Rosalina's Ice World]]" || DK Pass → Starview Peak, menus and Free Roam || || | |||
|- | |||
| "[[Rainbow Road (Mario Kart 7 theme)|Rainbow Road]]" || Menus and Free Roam || || | |||
|- | |||
| "Staff Credits" || VS Race routes, menus and Free Roam || || | |||
|- | |||
| "''Mario Kart 8'' Title Screen" (daytime version) ||rowspan=25| ''[[Mario Kart 8]]'' || Crown City → Peach Stadium, menus and Free Roam || || | |||
|- | |||
| "''Mario Kart 8'' Title Screen" (nighttime version) || Menus and Free Roam || || | |||
|- | |||
| "Water Park" || Koopa Troopa Beach → Faraway Oasis, menus and Free Roam || || | |||
|- | |||
| "[[Sweet Sweet Canyon (theme)|Sweet Sweet Canyon]]" (daytime) || Menus and Free Roam || || | |||
|- | |||
| "Sweet Sweet Canyon" (nighttime) || Menus and Free Roam || || Quotes "[[Ground BGM (Super Mario Bros.)|Ground BGM]]" from ''[[Super Mario Bros.]]'' | |||
|- | |||
| "[[Thwomp Ruins (theme)|Thwomp Ruins]]" || Dino Dino Jungle → [[Great ? Block Ruins]], menus and Free Roam || || | |||
|- | |||
| "[[Mario Circuit (Mario Kart 8 theme)|Mario Circuit]]" || VS Race routes, menus and Free Roam || || | |||
|- | |||
| "[[Toad Harbor (theme)|Toad Harbor]]" (daytime) || Crown City → Whistlestop Summit, menus and Free Roam || || | |||
|- | |||
| "Toad Harbor" (nighttime) || Menus and Free Roam || || Quotes "Dolphin Shoals" | |||
|- | |||
| "[[Twisted Mansion (theme)|Twisted Mansion]]" || Boo Cinema → Dry Bones Burnout || || | |||
|- | |||
| "Shy Guy Falls" || VS Race routes, menus and Free Roam || || | |||
|- | |||
| "Sunshine Airport" (daytime) || [[Peach Beach]] → Salty Salty Speedway, menus and Free Roam || || | |||
|- | |||
| "Sunshine Airport" (nighttime) || Menus and Free Roam || || | |||
|- | |||
| "Dolphin Shoals" (daytime) || Salty Salty Speedway → Dino Dino Jungle, menus and Free Roam || || | |||
|- | |||
| "Dolphin Shoals" (nighttime) || Menus and Free Roam || || | |||
|- | |||
| "[[Electrodrome (theme)|Electrodrome]]" || VS Race routes, menus and Free Roam || || | |||
|- | |||
| "Mount Wario" || Sky-High Sundae → [[Wario Shipyard]], menus and Free Roam || || | |||
|- | |||
| "[[Cloudtop Cruise (theme)|Cloudtop Cruise]]" || Crown City → Peach Stadium, menus and Free Roam || [[File:MKWrldCloudtopCruise.oga]] || | |||
|- | |||
| "Bone-Dry Dunes" || Shy Guy Bazaar → Wario Stadium, menus and Free Roam || || | |||
|- | |||
| "Bowser's Castle" || VS Race routes || || | |||
|- | |||
| "[[Rainbow Road (Super Mario Kart theme)#Mario Kart 8|Rainbow Road]]" || VS Race routes, menus and Free Roam || || Quotes the bassline from "''Mario Kart 8'' Title Screen" | |||
|- | |||
| "[[Dragon Driftway (theme)|Dragon Driftway]]" || [[Cheep Cheep Falls (race course)|Cheep Cheep Falls]] → [[Dandelion Depths]], menus and Free Roam || || | |||
|- | |||
| "[[Ice Ice Outpost (theme)|Ice Ice Outpost]]" || Sky-High Sundae → Wario Shipyard, menus and Free Roam || || | |||
|- | |||
| "[[Wild Woods (theme)|Wild Woods]]" || [[Acorn Heights]] → Mario Circuit, menus and Free Roam || || | |||
|- | |||
| "Super Bell Subway" || Menus and Free Roam || || | |||
|- | |||
| "[[Tour Tokyo Blur (theme)|Tokyo Blur]]" ||rowspan=8| ''[[Mario Kart Tour]]'' || Crown City → Whistlestop Summit, menus and Free Roam || [[File:MKWd Tokyo Blur arrangement.oga]] || | |||
|- | |||
| "[[Tour Vancouver Velocity (theme)|Vancouver Velocity]]" || DK Pass → Starview Peak, menus and Free Roam || || | |||
|- | |||
| "[[Tour Los Angeles Laps (theme)|Los Angeles Laps]]" || Menus and Free Roam || || | |||
|- | |||
| "[[Merry Mountain (theme)|Merry Mountain]]" || Menus and Free Roam || || | |||
|- | |||
| "[[Ninja Hideaway (theme)|Ninja Hideaway]]" || Cheep Cheep Falls → Dandelion Depths || || | |||
|- | |||
| "[[Tour Singapore Speedway (theme)|Singapore Speedway]]" || Crown City → Whistlestop Summit, menus and Free Roam || || | |||
|- | |||
| "Bangkok Rush" || Acorn Heights → Mario Circuit, menus and Free Roam || || | |||
|- | |||
| "Piranha Plant Pipeline" || Choco Mountain → Toad's Factory, menus and Free Roam || || | |||
|- | |||
| Main theme || ''[[Mario Kart Live: Home Circuit]]'' || VS Race routes, menus and Free Roam || || | |||
|- | |||
| "[[Squeaky Clean Sprint (theme)|Squeaky Clean Sprint]]" || ''[[Mario Kart 8 Deluxe]]'' (''[[Mario Kart 8 Deluxe – Booster Course Pass|Booster Course Pass]]'') || Menus and Free Roam || || | |||
|} | |||
===''Super Mario'' arrangements=== | |||
{| class="wikitable sortable" style="width:100%" | |||
! Song !! Game !! Location !! Sample !! Notes | |||
|- | |||
| "[[Ground BGM (Super Mario Bros.)|Ground BGM]]" (daytime) ||rowspan=5| ''[[Super Mario Bros.]]'' || Menus and Free Roam || [[File:Ground-bgm-from-super-mario-bros-day.wav]] || Based on its arrangement from ''[[Super Mario All-Stars]]'' | |||
|- | |||
| "Ground BGM" and "[[Game Over (Super Mario Bros.)|Game Over]]" || Menus and Free Roam || || | |||
|- | |||
| "[[Underground BGM (Super Mario Bros.)|Underground BGM]]" (big band) || [[Dandelion Depths]] → [[Boo Cinema]], menus and Free Roam || || Based on its arrangement from ''[[Super Mario 3D Land]]'' | |||
|- | |||
| "Underground BGM" (Latin guitar) || Menus and Free Roam || || | |||
|- | |||
| "[[Underwater BGM (Super Mario Bros.)|Underwater BGM]]" || Menus and Free Roam || || | |||
|- | |||
| "[[Ground BGM (Super Mario Bros. 2)|Ground BGM]]" ||rowspan=3| ''[[Yume Kōjō: Doki Doki Panic]]'' / ''[[Super Mario Bros. 2]]'' || Menus and Free Roam || || | |||
|- | |||
| "[[Please Select Player]]" || [[Mario Circuit (Mario Kart World)|Mario Circuit]] → [[Peach Stadium]], menus and Free Roam || || | |||
|- | |||
| "[[Underground BGM (Super Mario Bros. 2)|Underground BGM]]" and "Ground BGM" || Dandelion Depths → Boo Cinema, menus and Free Roam || || | |||
|- | |||
| "[[World 1 Map (Grass Land)]]," "[[World 2 Map (Desert Land)]]," "World 5 Map (Sky Land) - In the Sky," "World 7 Map (Pipe Land)" and "[[World 3 Map (Water Land)]]" ||rowspan=7| ''[[Super Mario Bros. 3]]'' || Menus and Free Roam || || | |||
|- | |||
| "[[Ground BGM (Super Mario Bros. 3)|Ground BGM]]" || Menus and Free Roam || || Takes elements from its editor theme from ''[[Super Mario Maker]]'' | |||
|- | |||
| "[[Athletic BGM (Super Mario Bros. 3)|Athletic BGM]]" || [[Mario Bros. Circuit]] → [[Crown City]], menus and Free Roam || || | |||
|- | |||
| "[[Underwater BGM (Super Mario Bros. 3)|Underwater BGM]]" || [[Peach Beach]] → [[Salty Salty Speedway]], menus and Free Roam || || | |||
|- | |||
| "[[Fortress Boss (Super Mario Bros. 3)|Fortress Boss]]" || VS Race routes || || | |||
|- | |||
| "[[Airship BGM]]" || VS Race routes || || | |||
|- | |||
| "[[Ending (Super Mario Bros. 3)|Ending]]" || Menus and Free Roam || || Based on its arrangement from the "[[Mario & Zelda Big Band Live]]" concert series | |||
|- | |||
| "[[Main Theme (Super Mario Land)|Main Theme]]" ||rowspan=2| ''[[Super Mario Land]]'' || Menus and Free Roam || || Based on its arrangement from the "''[[Super Mario Land (album)|Super Mario Land]]''" album | |||
|- | |||
| "[[Underground Theme (Super Mario Land)|Underground Theme]]" || VS Race routes, menus and Free Roam || || | |||
|- | |||
| "[[Title BGM (Super Mario World)|Title BGM]]" ||rowspan=11| ''[[Super Mario World]]'' || Menus and Free Roam || || | |||
|- | |||
| "[[Ground BGM (Super Mario World)|Ground BGM]]" (rock) || VS Race routes, menus and Free Roam || || | |||
|- | |||
| "Ground BGM" (ska) || VS Race routes, menus and Free Roam || || | |||
|- | |||
| "Ground BGM" (bluegrass) || [[Moo Moo Meadows]] → [[Choco Mountain]], menus and Free Roam || || | |||
|- | |||
| "[[Ground BGM (Super Mario World)#Super Mario World|Underground BGM]]" || Dandelion Depths → Boo Cinema, menus and Free Roam || || | |||
|- | |||
| "Underwater BGM" || Menus and Free Roam || || | |||
|- | |||
| "[[Bonus Game BGM]]" || VS Race routes, menus and Free Roam || || | |||
|- | |||
| [[Yoshi's Island (Map Screen)]]," "[[Invincibility BGM|Star World (Map Screen)]]" "[[Donut Plains (Map Screen)]]," "Forest of Illusion (Map Screen)" and "Special World (Map Screen)" || Menus and Free Roam || || | |||
|- | |||
| "[[Castle BGM (Super Mario World)|Castle BGM]]" || VS Race routes || || | |||
|- | |||
| "[[Koopalings BGM]]" || VS Race routes, menus and Free Roam || || | |||
|- | |||
| "[[Ending (Super Mario World)|Ending]]" || Menus and Free Roam || || | |||
|- | |||
| "Main Theme" || ''[[Super Mario Land 2: 6 Golden Coins]]'' || VS Race routes, menus and Free Roam || [[File:MKW SML2 Main Theme.wav]] || | |||
|- | |||
| "[[File Select (Super Mario 64)|File Select]]" ||rowspan=11| ''[[Super Mario 64]]'' || Menus and Free Roam || || | |||
|- | |||
| "[[Main Theme (Super Mario 64)|''Super Mario 64'' Main Theme]]" || Menus and Free Roam || || Based on its arrangement from the "[[Super Mario Bros. 30th Anniversary Live|''Super Mario Bros.'' 30th Anniversary Live]]" concert series | |||
|- | |||
| "''Super Mario 64'' Main Theme" (Latin guitar) || Menus and Free Roam || || | |||
|- | |||
| "[[Peach's Castle (theme)|Peach's Castle]]" || Menus and Free Roam || [[File:Mario Kart World Peach's Castle Arrangement.oga]] || | |||
|- | |||
| "[[Piranha Plant's Lullaby]]" || Menus and Free Roam || || | |||
|- | |||
| "[[Dire, Dire Docks (theme)|Dire, Dire Docks]]" || Menus and Free Roam || || | |||
|- | |||
| "[[Cool, Cool Mountain (theme)|Cool, Cool Mountain]]" || Moo Moo Meadows → Choco Mountain, menus and Free Roam || || | |||
|- | |||
| "[[Slider]]" || [[Starview Peak]] → [[Sky-High Sundae]], menus and Free Roam || || | |||
|- | |||
| "[[Bowser's Road]]" || Toad's Factory → Bowser's Castle, menus and Free Roam || || | |||
|- | |||
| "[[Bowser's Theme (Super Mario 64)|Bowser's Theme]]" || Menus and Free Roam || || | |||
|- | |||
| "[[Staff Roll (Super Mario 64)|Staff Roll]]" || Menus and Free Roam || || | |||
|- | |||
| "[[Isle Delfino (theme)|Isle Delfino]]" ||rowspan=4| ''[[Super Mario Sunshine]]'' || VS Race routes, menus and Free Roam || || Based on its arrangement from the "Mario & Zelda Big Band Live" concert series | |||
|- | |||
| "Bianco Hills" || Whistlestop Summit → DK Spaceport, menus and Free Roam || || | |||
|- | |||
| "[[Ricco Harbor (theme)|Ricco Harbor]]" || Menus and Free Roam || || | |||
|- | |||
| "[[Secret Course - Sky and Sea]]" || VS Race routes, menus and Free Roam || || | |||
|- | |||
| "[[Main Theme (New Super Mario Bros.)|Main Theme]]"{{footnote|main|a}} ||rowspan=2| ''[[New Super Mario Bros.]]'' || VS Race routes, menus and Free Roam || || | |||
|- | |||
| "[[Shiro BGM (New Super Mario Bros.)|Shiro BGM]]" || VS Race routes || || | |||
|- | |||
| "[[Egg Planet]]" ||rowspan=8| ''[[Super Mario Galaxy]]'' || VS Race routes, menus and Free Roam || || | |||
|- | |||
| "[[Rosalina in the Observatory]]" || Menus and Free Roam || || | |||
|- | |||
| "[[Space Junk Road]]" || Menus and Free Roam || || | |||
|- | |||
| "[[Enter Bowser Jr.!]]" || VS Race routes, menus and Free Roam || || | |||
|- | |||
| "[[Buoy Base Galaxy (theme)|Buoy Base Galaxy]]" || VS Race routes, menus and Free Roam || || | |||
|- | |||
| "[[Gusty Garden Galaxy (theme)|Gusty Garden Galaxy]]" || Crown City → Peach Stadium, menus and Free Roam || || | |||
|- | |||
| "Final Battle with Bowser" || Toad's Factory → Bowser's Castle, menus and Free Roam || || | |||
|- | |||
| "[[Purple Comet (theme)|Purple Comet]]" || VS Race routes, menus and Free Roam || || | |||
|- | |||
| "[[Underwater Theme (New Super Mario Bros. Wii)|Underwater Theme]]" ||rowspan=7| ''[[New Super Mario Bros. Wii]]'' || Menus and Free Roam || || | |||
|- | |||
| "[[Desert Theme (New Super Mario Bros. Wii)|Desert Theme]]" || Menus and Free Roam || || | |||
|- | |||
| "[[Castle Theme (New Super Mario Bros. Wii)|Castle Theme]]" || VS Race routes || || | |||
|- | |||
| "[[Fortress Boss (Super Mario Bros. 3)#New Super Mario Bros. Wii|Castle Boss Battle]]" || Sky-High Sundae → [[Wario Shipyard]], menus and Free Roam || || | |||
|- | |||
| "[[Coast Theme (New Super Mario Bros. Wii)|Coast Theme]]" || VS Race routes, menus and Free Roam || || Takes elements from its arrangement from the [[Wii]] version of ''[[Mario & Sonic at the London 2012 Olympic Games (Wii)|Mario & Sonic at the London 2012 Olympic Games]]'' | |||
|- | |||
| "[[Lava Theme (New Super Mario Bros. Wii)|Lava Theme]]" || [[Shy Guy Bazaar]] → [[Wario Stadium (Mario Kart 64)|Wario Stadium]], menus and Free Roam || || | |||
|- | |||
| "[[Title Theme (New Super Mario Bros. Wii)#New Super Mario Bros. Wii|Staff Credit Roll]]" || Menus and Free Roam || || | |||
|- | |||
| "[[Super Mario Galaxy 2 Trailer Theme#Super Mario Galaxy 2|Sky Station Galaxy]]" ||rowspan=10| ''[[Super Mario Galaxy 2]]'' || Mario Bros. Circuit → Crown City, menus and Free Roam || || | |||
|- | |||
| "Starship Mario 1" || Menus and Free Roam || || | |||
|- | |||
| "[[The Starship's Journey]]" || VS Race routes, menus and Free Roam || || | |||
|- | |||
| "[[Yoshi Star Galaxy (theme)|Yoshi Star Galaxy]]" || Menus and Free Roam || || | |||
|- | |||
| "Digga-Leg" || VS Race routes, menus and Free Roam || || | |||
|- | |||
| "[[Puzzle Plank Galaxy (theme)|Puzzle Plank Galaxy]]" || Menus and Free Roam || || | |||
|- | |||
| "Wild Glide Galaxy" || Menus and Free Roam || || Based on its arrangement from the "''Super Mario Bros.'' 30th Anniversary Live" concert series | |||
|- | |||
| "Cloudy Court Galaxy" || VS Race routes, menus and Free Roam || || | |||
|- | |||
| "Melty Monster Galaxy" || [[Desert Hills]] → Shy Guy Bazaar, menus and Free Roam || || | |||
|- | |||
| "[[Bowser's Galaxy Generator (theme)|Bowser's Galaxy Generator]]" || Toad's Factory → Bowser's Castle, menus and Free Roam || || | |||
|- | |||
| "[[Main Theme (Super Mario 3D Land)|Main Theme]]" ||rowspan=4| ''[[Super Mario 3D Land]]'' || Menus and Free Roam || || Based on its arrangement from the "''Super Mario Bros.'' 30th Anniversary Live" concert series, which takes elements from the theme played during the staff roll | |||
|- | |||
| "[[Underwater Theme (Super Mario 3D Land)|Underwater Theme]]" (daytime) || Peach Beach → Salty Salty Speedway || || | |||
|- | |||
| "Underwater Theme" (nighttime) || Menus and Free Roam || || | |||
|- | |||
| "[[Snow Course]]" || Menus and Free Roam || || <!--This is also Snowball Park from 3D World but it is distinctly based on the 3D Land version; do not add Snowball Park to the 3D World section--> | |||
|- | |||
| "[[Ground Theme (New Super Mario Bros. U)|Ground Theme]]" || ''[[New Super Mario Bros. U]]'' || Menus and Free Roam || || | |||
|- | |||
| "[[Super Bell Hill (theme)|Super Bell Hill]]" and "The Credits Roll" ||rowspan=12| ''[[Super Mario 3D World]]'' || Menus and Free Roam || || Based on its arrangement played by the [[Super Mario Super Big Band]] at Nintendo Live 2023 | |||
|- | |||
| "[[The Toad Brigade|Captain Toad Goes Forth]]" || VS Race routes, menus and Free Roam || || | |||
|- | |||
| "Bowser's Highway Showdown" || Wario Stadium → [[Airship Fortress]], menus and Free Roam || || | |||
|- | |||
| "[[Double Cherry Pass (theme)|Double Cherry Pass]]" || Menus and Free Roam || || | |||
|- | |||
| "[[Shifty Boo Mansion (theme)|Shifty Boo Mansion]]" || Boo Cinema → [[Dry Bones Burnout]] || || | |||
|- | |||
| "[[Chainlink Charge (theme)|Chainlink Charge]]" (daytime) || VS Race routes, menus and Free Roam || || | |||
|- | |||
| "Chainlink Charge" (nighttime) || Menus and Free Roam || || Somewhat resembling "Sunshine Seaside" | |||
|- | |||
| "[[Hisstocrat (theme)|Hisstocrat]]" || Desert Hills → Shy Guy Bazaar, menus and Free Roam || || | |||
|- | |||
| "[[Piranha Creeper Creek (theme)|Piranha Creeper Creek]]" || Dino Dino Jungle → Great ? Block Ruins, menus and Free Roam || || | |||
|- | |||
| "[[Sprawling Savanna (theme)|Sprawling Savanna]]" || [[Acorn Heights]] → Mario Circuit, menus and Free Roam || || | |||
|- | |||
| "[[Hands-On Hall (theme)|Hands-On Hall]]" || [[Cheep Cheep Falls (race course)|Cheep Cheep Falls]] → Dandelion Depths, menus and Free Roam || || | |||
|- | |||
| "World 8" || Menus and Free Roam || || | |||
|- | |||
| "[[Title Theme (Super Mario Maker)|Title Theme]]" || ''[[Super Mario Maker]]'' || Menus and Free Roam || || | |||
|- | |||
| "[[Fossil Falls (theme)|Fossil Falls]]" ||rowspan=10| ''[[Super Mario Odyssey]]'' || Menus and Free Roam || || | |||
|- | |||
| "Tostarena: Ruins" || VS Race routes, menus and Free Roam || || | |||
|- | |||
| "Steam Gardens" (daytime) || Choco Mountain → Toad's Factory, menus and Free Roam || || | |||
|- | |||
| "Steam Gardens" (nighttime) || Menus and Free Roam || || | |||
|- | |||
| "Lake Lamode" || Menus and Free Roam || || | |||
|- | |||
| "[[Peronza Plaza (theme)|Peronza Plaza]]" || Salty Salty Speedway → Dino Dino Jungle, menus and Free Roam || || | |||
|- | |||
| "Shiveria: Town" || Sky-High Sundae → Wario Shipyard, menus and Free Roam || || | |||
|- | |||
| "Bowser's Castle: Main Courtyard" || Cheep Cheep Falls → Dandelion Depths || || | |||
|- | |||
| "[[Jump Up, Super Star!]]" || Mario Bros. Circuit → Crown City, menus and Free Roam || || | |||
|- | |||
| "[[Break Free (Lead the Way)]]" || VS Race routes, menus and Free Roam || || | |||
|- | |||
| [[Plessie]]'s theme ||rowspan=2| ''[[Super Mario 3D World + Bowser's Fury]]'' || VS Race routes, menus and Free Roam || || | |||
|- | |||
| "[[Attack! Fury Bowser]]" || VS Race routes || || | |||
|} | |||
{{footnote|note|a|Despite being based on the version of the song from ''New Super Mario Bros.'', as evidenced by the intro melody, the default order that can play in Free Roam and on the main menu groups the "Main Theme" with the songs from ''New Super Mario Bros. Wii''.}} | |||
===Other arrangements=== | |||
{| class="wikitable sortable" style="width:100%" | |||
! Song !! Game !! Location !! Sample !! Notes | |||
|- | |||
| "[[Drawing Board 1]]" ||rowspan=2| ''[[Mario Paint]]'' || Menus and Free Roam || [[File:MKWd_Drawing Board 1 arrangement.oga]] || | |||
|- | |||
| "[[Gnat Attack: Level 1]]" || VS Race routes || || | |||
|- | |||
| Main theme || ''[[Wario Land: Super Mario Land 3]]'' || VS Race routes, menus and Free Roam || || | |||
|- | |||
| "[[DK Island Swing]]" || ''[[Donkey Kong Country]]'' || Menus and Free Roam || || | |||
|- | |||
| "[[Opening Melody]]" ||rowspan=7| ''[[Super Mario World 2: Yoshi's Island]]'' || Menus and Free Roam || || | |||
|- | |||
| "[[Flower Field BGM]]" (ska) || [[Dino Dino Jungle]] → [[Great ? Block Ruins]], menus and Free Roam || || | |||
|- | |||
| "Flower Field BGM" (jazz) || Menus and Free Roam || || | |||
|- | |||
| "[[Athletic BGM (Super Mario World 2: Yoshi's Island)|Athletic BGM]]" || Dino Dino Jungle → Great ? Block Ruins, menus and Free Roam || || | |||
|- | |||
| "Stage Boss" (daytime) || [[Whistlestop Summit]] → [[DK Spaceport]], menus and Free Roam || || | |||
|- | |||
| "Stage Boss" (nighttime) || Menus and Free Roam || || | |||
|- | |||
| "[[Bowser (Super Mario World 2: Yoshi's Island theme)|Bowser]]" || [[Toad's Factory]] → [[Bowser's Castle (Mario Kart World)|Bowser's Castle]] || || | |||
|- | |||
| "[[Yoshi's Song]]" ||rowspan=3| ''[[Yoshi's Story]]'' || Menus and Free Roam || || | |||
|- | |||
| "[[Yoshi's Song|Yoshis on the Beach]]" || Menus and Free Roam || || | |||
|- | |||
| "Yoshi's Tale" || Menus and Free Roam || || | |||
|- | |- | ||
| | | "[[Title Theme (Humming)]]" || ''[[Luigi's Mansion]]'' || Menus and Free Roam || || | ||
| | |||
|- | |- | ||
| | | "[[Drifting Away]]" || ''[[WarioWare, Inc.: Mega Microgame$!]]'' || Menus and Free Roam || || Based on the ''[[Nintendo Sound Selection Vol.3: B-Side Music]]'' arrangement that alternates between the "Spring" and "Summer" variants | ||
|- | |- | ||
| [[The Mario Drawing Song]] || ''{{wp|Flipnote Studio}}'' || Menus and Free Roam || || Incorporates a nod to "Jump Up, Super Star!" | |||
| | |||
|} | |} | ||
== | ==Brands== | ||
{{Main|List of | {{Main|List of brands debuting in Mario Kart World}} | ||
{{multiframe|[[File:MKWorld Map pattern BG.jpg|200px]]<br>[[File:MKWorld BG pattern.png|200px]]|Graphics depicting various sponsors seen in the game|size=200}} | |||
===New=== | ===New=== | ||
*1st Place Shopping! | <div style="column-count:3"> | ||
*[[Banana]] | *[[List of brands debuting in Mario Kart World#1st Place Shopping!|1st Place Shopping!]] | ||
*[[ | *[[List of brands debuting in Mario Kart World#The Adventures of Toad|The Adventures of Toad]] | ||
* | *[[List of brands debuting in Mario Kart World#Banana Natural Oil|Banana Natural Oil]] | ||
* | *[[List of brands debuting in Mario Kart World#Bank Coin Coffer|Bank Coin Coffer]] | ||
*[[Bowser]] | *[[List of brands debuting in Mario Kart World#Batadon Aero Parts|Batadon Aero Parts]] | ||
*[[Bully]] | *[[List of brands debuting in Mario Kart World#Bayside Coffee|Bayside Coffee]] | ||
*[[Buzzy | *[[List of brands debuting in Mario Kart World#Birdo Jewelry|Birdo Jewelry]] | ||
*[[Conkdor]] | *[[List of brands debuting in Mario Kart World#Boo Cinema|Boo Cinema]] | ||
*[[Dash]] | *[[List of brands debuting in Mario Kart World#Bowser Motors|Bowser Motors]] | ||
*[[ | *[[List of brands debuting in Mario Kart World#Bully Steel|Bully Steel]] | ||
*[[Dolphin]] | *[[List of brands debuting in Mario Kart World#Buzzy Helmets|Buzzy Helmets]] | ||
*[[Dorrie]] | *[[List of brands debuting in Mario Kart World#Chargin' Chuck Monster Trucks|Chargin' Chuck Monster Trucks]] | ||
*Drink Refresh | *[[List of brands debuting in Mario Kart World#Cheep Cheep Premium Car Wash|Cheep Cheep Premium Car Wash]] | ||
* | *[[List of brands debuting in Mario Kart World#Conkdor Headlights|Conkdor Headlights]] | ||
*[[Fire Flower]] | *[[List of brands debuting in Mario Kart World#Daisy Air Freshener Orange|Daisy Air Freshener Orange]] | ||
*[[Fire | *[[List of brands debuting in Mario Kart World#Dash|Dash]] | ||
*[[List of brands debuting in Mario Kart World#Delicatessen|Delicatessen]] | |||
*[[Foo]] | *[[List of brands debuting in Mario Kart World#Diner|Diner]] | ||
* | *[[List of brands debuting in Mario Kart World#DK Boosters|DK Boosters]] | ||
*[[ | *[[List of brands debuting in Mario Kart World#Dolphin Marine Sports|Dolphin Marine Sports]] | ||
*Galaxy Engine Oil Cooler | *[[List of brands debuting in Mario Kart World#Dorrie Watercraft|Dorrie Watercraft]] | ||
*[[Garlic]] | *[[List of brands debuting in Mario Kart World#Drink Refresh|Drink Refresh]] | ||
*Golden Dash Mushroom | *[[List of brands debuting in Mario Kart World#Fire Flower Diner|Fire Flower Diner]] | ||
*[[Hot Foot]] | *[[List of brands debuting in Mario Kart World#Fire Flower Gas Station|Fire Flower Gas Station]] | ||
*Molten Energy | *[[List of brands debuting in Mario Kart World#Fire Mart|Fire Mart]] | ||
*[[Mario | *[[List of brands debuting in Mario Kart World#Foo Handy Air Duster|Foo Handy Air Duster]] | ||
*Mario | *[[List of brands debuting in Mario Kart World#Fresh Market|Fresh Market]] | ||
*[[Nabbit]] | *[[List of brands debuting in Mario Kart World#Fried Chicken|Fried Chicken]] | ||
*Pipeline | *[[List of brands debuting in Mario Kart World#Galaxy Engine Oil Cooler|Galaxy Engine Oil Cooler]] | ||
*[[Red Shell]] | *[[List of brands debuting in Mario Kart World#Garlic Power Pure Engine Oil|Garlic Power Pure Engine Oil]] | ||
*[[Rosalina]] Bus Tours | *Golden Dash Mushroom | ||
*Royal Motors | *[[List of brands debuting in Mario Kart World#Grrrol Metal|Grrrol Metal]] | ||
*[[Shine Sprite]] | *[[List of brands debuting in Mario Kart World#Hammer Bros. Repair Service|Hammer Bros. Repair Service]] | ||
*[[Spiny Shell]] | *[[List of brands debuting in Mario Kart World#Hot Foot Gasoline|Hot Foot Gasoline]] | ||
*Squid Motor Oil | *[[List of brands debuting in Mario Kart World#Household Supplies|Household Supplies]] | ||
*[[Stingby]] | *[[List of brands debuting in Mario Kart World#Huckit Crab|Huckit Crab]] | ||
*Sunshine Railway | *[[List of brands debuting in Mario Kart World#Kart Supplies|Kart Supplies]] | ||
*[[Super | *[[List of brands debuting in Mario Kart World#Koopa Body Coating|Koopa Body Coating]] | ||
*[[Swoop]] | *[[List of brands debuting in Mario Kart World#Koopa Construction|Koopa Construction]] | ||
* | *[[List of brands debuting in Mario Kart World#Koopa Hotel|Koopa Hotel]] | ||
*[[ | *[[List of brands debuting in Mario Kart World#Lagoon City|Lagoon City]] | ||
*Traffic Apparel | *[[List of brands debuting in Mario Kart World#Lakitu the Fisherman|Lakitu the Fisherman]] | ||
*Turbo Engines | *[[List of brands debuting in Mario Kart World#Lakitu's Item Box|Lakitu's Item Box]] | ||
*[[Waluigi | *[[List of brands debuting in Mario Kart World#Lava Bubble Molten Energy|Lava Bubble Molten Energy]] | ||
*[[List of brands debuting in Mario Kart World#Magmaargh Diner|Magmaargh Diner]] | |||
*[[ | *[[List of brands debuting in Mario Kart World#Monty Mole Mining Company|Monty Mole Mining Company]] | ||
*[[Wario|Wario's]] | *[[List of brands debuting in Mario Kart World#Muncher Coffee Roaster|Muncher Coffee Roaster]] | ||
* | *[[List of brands debuting in Mario Kart World#Nabbit Courier Service|Nabbit Courier Service]] | ||
*Yoshi's | *[[List of brands debuting in Mario Kart World#Para-Biddybud Construction|Para-Biddybud Construction]] | ||
*[[List of brands debuting in Mario Kart World#Peach: Deep-Forest Explorer|Peach: Deep-Forest Explorer]] | |||
*[[List of brands debuting in Mario Kart World#Peach Resort|Peach Resort]] | |||
*[[List of brands debuting in Mario Kart World#Penguin Bobsled|Penguin Bobsled]] | |||
*[[List of brands debuting in Mario Kart World#Pipeline Hotel|Pipeline Hotel]] | |||
*[[List of brands debuting in Mario Kart World#Pipeline Moving|Pipeline Moving]] | |||
*[[List of brands debuting in Mario Kart World#Red Shell Speed Tires|Red Shell Speed Tires]] | |||
*[[List of brands debuting in Mario Kart World#Rent-a-Car|Rent-a-Car]] | |||
*[[List of brands debuting in Mario Kart World#River Cruise Tour|River Cruise Tour]] | |||
*[[List of brands debuting in Mario Kart World#Rosalina Automobile|Rosalina Automobile]] | |||
*[[List of brands debuting in Mario Kart World#Rosalina Bus Tours|Rosalina Bus Tours]] | |||
*[[List of brands debuting in Mario Kart World#Royal Motors|Royal Motors]] | |||
*[[List of brands debuting in Mario Kart World#Seaside Resort|Seaside Resort]] | |||
*[[List of brands debuting in Mario Kart World#Seaside Sundae|Seaside Sundae]] | |||
*[[List of brands debuting in Mario Kart World#Shine Sprite Oil|Shine Sprite Oil]] | |||
*[[List of brands debuting in Mario Kart World#Shy Guy Ceramics|Shy Guy Ceramics]] | |||
*[[List of brands debuting in Mario Kart World#Shy Guy's Rowing Club|Shy Guy's Rowing Club]] | |||
*[[List of brands debuting in Mario Kart World#Snow Lake|Snow Lake]] | |||
*[[List of brands debuting in Mario Kart World#Spike Express|Spike Express]] | |||
*[[List of brands debuting in Mario Kart World#Spike Spokes|Spike Spokes]] | |||
*[[List of brands debuting in Mario Kart World#Spiny Shell Engine|Spiny Shell Engine]] | |||
*[[List of brands debuting in Mario Kart World#Squid Motor Oil|Squid Motor Oil]] | |||
*[[List of brands debuting in Mario Kart World#Stingby Biofuel|Stingby Biofuel]] | |||
*[[List of brands debuting in Mario Kart World#Sunshine Railway|Sunshine Railway]] | |||
*[[List of brands debuting in Mario Kart World#Super Star Metal Parts|Super Star Metal Parts]] | |||
*[[List of brands debuting in Mario Kart World#Surf Shop|Surf Shop]] | |||
*[[List of brands debuting in Mario Kart World#Swoop Car Interior Shop|Swoop Car Interior Shop]] | |||
*[[List of brands debuting in Mario Kart World#Tenants Wanted|Tenants Wanted]] | |||
*[[List of brands debuting in Mario Kart World#Thwomp Construction|Thwomp Construction]] | |||
*[[List of brands debuting in Mario Kart World#Toad Manufacturing|Toad Manufacturing]] | |||
*[[List of brands debuting in Mario Kart World#Toad's Wharf|Toad's Wharf]] | |||
*[[List of brands debuting in Mario Kart World#Toadette Ice Cream|Toadette Ice Cream]] | |||
*[[List of brands debuting in Mario Kart World#Traffic Apparel|Traffic Apparel]] | |||
*[[List of brands debuting in Mario Kart World#Treasure Tracker!|Treasure Tracker!]] | |||
*[[List of brands debuting in Mario Kart World#Turbo Engines|Turbo Engines]] | |||
*[[List of brands debuting in Mario Kart World#Waluigi Vintage Clothing|Waluigi Vintage Clothing]] | |||
*[[List of brands debuting in Mario Kart World#Wario Games|Wario Games]] | |||
*[[List of brands debuting in Mario Kart World#Wario Motors|Wario Motors]] | |||
*[[List of brands debuting in Mario Kart World#Wario Overland Transport|Wario Overland Transport]] | |||
*[[List of brands debuting in Mario Kart World#Wario's Premium Scrap|Wario's Premium Scrap]] | |||
*[[List of brands debuting in Mario Kart World#Warp Plaza Shopping Complex|Warp Plaza Shopping Complex]] | |||
*Wiggler's Flower Shop | |||
*[[List of brands debuting in Mario Kart World#Wiggler's Sightseeing|Wiggler's Sightseeing]] | |||
*[[List of brands debuting in Mario Kart World#Wilderness Coast|Wilderness Coast]] | |||
*[[List of brands debuting in Mario Kart World#Yoshi's|Yoshi's]] | |||
</div> | |||
===Returning=== | ===Returning=== | ||
*[[List of | *[[List of brands debuting in Mario Kart 8 and Mario Kart 8 Deluxe#1-Up Fuel|1-Up Fuel]] | ||
*[[List of | *[[List of brands debuting in Mario Kart 8 and Mario Kart 8 Deluxe#100% Organic Antifreeze|100% Organic Antifreeze]] | ||
*[[List of | *[[List of brands debuting in Mario Kart 8 and Mario Kart 8 Deluxe#BaNaNa Boy|BaNaNa Boy]] | ||
*[[List of | *[[List of brands debuting in Mario Kart 8 and Mario Kart 8 Deluxe#Bob-omb Plugs|Bob-omb Plugs]] | ||
*[[List of | *[[List of brands debuting in Mario Kart 8 and Mario Kart 8 Deluxe#Chain Chomp Racing Chains|Chain Chomp Racing Chains]] | ||
* | *[[List of brands debuting in Mario Kart Wii#Fire Flower Oil Company|Fire Flower Oil Company]] | ||
*[[List of | *[[List of brands debuting in Mario Kart 8 and Mario Kart 8 Deluxe#Fuzzy Batteries|Fuzzy Batteries]] | ||
*[[List of brands debuting in Mario Kart 8 and Mario Kart 8 Deluxe#Larry Lights|Larry Lights]] | |||
*[[Mario Kart | *[[List of brands debuting in Mario Kart: Double Dash!!#Luigi Tires|Luigi Tires]] | ||
*[[List of | *[[Mario Kart TV]] | ||
*[[List of | *[[List of brands debuting in Mario Kart Arcade GP and Mario Kart Arcade GP 2#Mario Motors|Mario Motors]] | ||
*[[List of | *[[List of brands debuting in Mario Kart 8 and Mario Kart 8 Deluxe#Moo Moo Milk|Moo Moo Milk]] | ||
*[[List of | *[[List of brands debuting in Mario Kart 8 and Mario Kart 8 Deluxe#Morton Construction|Morton Construction]] | ||
*[[ | *[[List of brands debuting in Mario Kart 8 and Mario Kart 8 Deluxe#Mushroom Piston|Mushroom Piston]] | ||
*[[List of brands debuting in Mario Kart 8 and Mario Kart 8 Deluxe#Peach & Daisy Royal Pâtisserie|Peach & Daisy Royal Pâtisserie]] | |||
*[[List of brands debuting in Mario Kart 8 and Mario Kart 8 Deluxe#Roy Smooth Sounds|Roy Smooth Sounds]] | |||
==Update history== | |||
This is a detailed list of updates ''Mario Kart World'' has received since launch. In order to play online, players must have downloaded the most recent software update.<ref>https://en-americas-support.nintendo.com/app/answers/detail/a_id/68580/~/how-to-update-mario-kart-world</ref> | |||
===Ver. 1.1.0=== | |||
An update was released on June 4, 2025 (June 5 in some time zones), also known as a "Day 1 patch." The following changes were made: | |||
<blockquote> | |||
;General | |||
*Enabled [https://en-americas-support.nintendo.com/app/answers/detail/a_id/68613 CameraPlay]. | |||
**A compatible USB camera (sold separately) is required for CameraPlay. | |||
**Players can turn camera ON or OFF in Multiplayer and Online Play modes. | |||
**When the camera is ON, the player’s face is displayed during the race. | |||
*Enabled Online Play. | |||
*Enabled LAN Play. | |||
**From the title screen if you press the L Stick and hold both the L Button and R Button, Wireless Play will change to LAN Play. | |||
*Enabled players to upload and download ghost data in Time Trials. | |||
*Enabled display of icons of players in close proximity in Free Roam. | |||
*Increased number of characters you can select from the start. | |||
*Improved operability when 3 or more players are playing in Multiplayer. | |||
*Eliminated time limit for choosing courses when playing Wireless Play or LAN Play. | |||
*Enabled display of update version on title screen. | |||
</blockquote> | |||
;Note | |||
*The characters enabled to be selectable from the start were [[Monty Mole]], [[Sidestepper]], [[Cheep Cheep]], [[Pokey]], [[Cow]], [[Stingby]], [[Snowman]], [[Penguin]], and [[Para-Biddybud]]. | |||
===Ver. 1.1.1=== | |||
An update was released on June 18, 2025 to fix various bugs. | |||
<blockquote> | |||
;Fixed Issues | |||
*Fixed an issue where items were no longer able to be used. | |||
*Fixed an issue where sometimes controls were inoperable when selecting a character and trying to start Free Roam from the "Free Roam" map. | |||
*Fixed an issue where sometimes the game shut down when watching replay after a race. | |||
*Fixed an issue where sometimes the game shut down after a race in "Online Play." | |||
*Fixed an issue where rate fluctuations were sometimes displayed incorrectly in "Knockout Tour" and "Online Play." | |||
*Fixed an issue where it was easy for a communication error to occur when trying to join Friends playing "VS Race" or "Battle" in "Online Play." | |||
*Fixed an issue where you sometimes slipped through the wall before the finish line of "DK Spaceport." | |||
*Fixed an issue where you sometimes couldn’t return to correct position after falling of{{sic}} the course between "Airship Fortress" and "Bowser’s Castle" while gliding. | |||
</blockquote> | |||
===Ver. 1.1.2=== | |||
An update was released on June 25, 2025. The following changes were made: | |||
<blockquote> | |||
;General | |||
*Adjusted courses selected in “Random” when selecting next course in a wireless “VS Race.” | |||
;Fixed Issues | |||
*Made readjustments to fix an issue where rate fluctuations were sometimes displayed incorrectly in “Online Play” and “Knockout Tour.” | |||
*Fixed an issue where you sometimes can’t recover quickly after falling off the course in "Dino Dino Jungle". | |||
*Fixed an issue where you continually hit the wall near the finish line of “Boo Cinema” when transformed into Bullet Bill. | |||
</blockquote> | |||
;Note | |||
*The Random option in wireless, LAN, and online VS Races now also selects courses that can be picked as options, including ones with [[route]]s. | |||
===Ver. 1.2.0=== | |||
An update was released on July 29, 2025. The following changes were made: | |||
<blockquote> | |||
;General | |||
*In the “VS Race” of “Single Player”, added “No COM” to the COM rules. | |||
*In the “VS Race” of “Single Player” and “Multiplayer”, added “Mushrooms only” to the item rules. | |||
*You can now choose “View Replay” after downloading ghost data in “Time Trials”. | |||
*You can now choose whom to watch when spectating in “Knockout Tour” and “Balloon Battle” in “Online Play”, “Wireless Play”, and “LAN Play”. | |||
*You can now see the waiting time until the next race or battle starts in “Online Play”, “Wireless Play”, and “LAN Play”. | |||
*When using CameraPlay in “Multiplayer” and “Online Play”, the game will now remember the camera cursor position and size until the player closes the game. | |||
**If you change the number of people playing, the cursor position and size will return to their original settings. | |||
*On the “Free Roam” map, when you gather all of the P Switches, ? Panels, and Peach Medallions, the colors of the various numbers will now change. | |||
*Made COM weaker in everything other than “Battle”. | |||
*Made homing of Boomerang weaker. | |||
*Decreased the probability of getting a Triple Dash Mushroom in the low position, whenever the item rules in a race are anything other than “Frantic”. | |||
*Changed it so order of getting ? Block is higher than in the past, whenever the item rules in a race are anything other than “Frantic”. | |||
*Made it so there is a wheel spinning animation if the player presses the A button (acceleration) too early when starting a race while driving. | |||
**Player will not lose speed even when spinning wheels. | |||
*Increased the frequency of lap-type courses appearing in the selection when choosing the next course in “VS Race” and wireless races. | |||
;Fixed Issues | |||
*Fixed an issue where the rate fluctuations were sometimes displayed incorrectly in wireless races. | |||
*Fixed an issue where the vehicle would stay floating in air when jumping off a half pipe. | |||
*Fixed an issue where, when a player crashes while gliding and uses Bullet Bill, they go out of the course. | |||
*Fixed an issue where, if a player quits a Rewind in the location where they were wall riding, the driver’s posture would not return to what it was before. | |||
*Fixed an issue where the item that was displayed in the item slot would turn into something else when using it. | |||
*Fixed an issue where in “Online Play”, the player would not dash even when getting on a Dash Panel. | |||
*Fixed an issue where the points in a team race in “Wireless Play” would display incorrectly. | |||
*Fixed an issue where sometimes controls were inoperable on the menu screen after the player was retired in “Balloon Battle” in “Wireless Play”. | |||
*Fixed an issue where a Peach Medallion would sometimes disappear when doing Rewind in “Free Roam”. | |||
*Fixed an issue where sometimes controls were inoperable when the player pointed the cursor at their own character or course and pressed A on the “Free Roam” map. | |||
*Fixed an issue where sometimes controls were inoperable when the player quit a mission in “Free Roam” right before entering a pipe. | |||
*Fixed an issue where the player would slip through some drift ice around “Sky-High Sundae”. | |||
*Fixed an issue where the player would get caught on the outside of a handrail on the left and right sides right after the start of “Airship Fortress”. | |||
*Fixed an issue where the player would get caught on the fence and not be able to move forward in “Bowser's Castle”. | |||
*Fixed an issue where, when the player used a Bullet Bill in “Bowser's Castle”, they would not be able to glide and fell into the abyss. | |||
*Fixed an issue where the player would go out of the course when using a Mega Mushroom on the last turn of “Whistlestop Summit”. | |||
*Fixed an issue where the player could not get out of the location where they fell from a railroad when “Smart Steering” is on in “Whistlestop Summit”. | |||
*Fixed an issue where the player would slip through the ground at a ramp near the goal at “Choco Mountain”. | |||
*Fixed an issue where the player would get caught on a block when using a Bullet Bill on the road that enters “Choco Mountain”. | |||
*Fixed an issue where the player would get caught on a plank of wood laid on the road when throwing a green shell on the road between “DK Spaceport” and “Whistlestop Summit”. | |||
*Fixed an issue where the last place would be sometimes incorrect in the wireless races of “Dino Dino Jungle”. | |||
*Fixed an issue where the player would get caught on the back of a leaf when using a Bullet Bill in “Acorn Heights”. | |||
*Fixed an issue where the player would not be able to slip through a vase that is placed on the road in “Shy Guy Bazaar”, when using a Boo. | |||
*Fixed an issue where the player would slip through the ceiling in “Dry Bones Burnout”. | |||
*Fixed an issue where the player would sometimes hit a fence when throwing a red shell on the first turn in “Moo Moo Meadows”. | |||
*Fixed an issue where one part of the effects that take place for the bridge transforming when heading toward “Rainbow Road” did not display. | |||
*Fixed an issue where the player would slip through the ground on the road between ”Starview Peak” and “Sky-High Sundae”. | |||
*Fixed an issue where some of the item boxes would not have appeared in “Wario Shipyard”. | |||
*Fixed an issue where the player would slip through the bottom of a rock near the goal of ”Wario Shipyard”. | |||
*Fixed an issue where the player would go out of the course when using a Mega Mushroom on a turn inside “Wario Stadium”. | |||
*Fixed an issue where the player gets caught on a tree in the middle of a shortcut if they have “Smart Steering” on when heading from “Starview Peak” to “Dandelion Depths” in “Ice Rally” of “Knockout Tour”. | |||
*Several other issues have been addressed to improve the gameplay experience. | |||
</blockquote> | |||
;Unlisted changes | |||
*The speed boost given when landing on the ground now happens immediately with higher acceleration.<ref>{{cite|author=@TechnicalMK49|date=July 29, 2025|url=https://x.com/TechnicalMK49/status/1950370089083253207|title=Ver. 1.2.0|publisher=X|accessdate=July 30, 2025}}</ref> | |||
*The item probability for the ? Block has been changed so it is now possible for 1st place to hold a ? Block and Coin at the same time. This update makes 1st place no longer guaranteed to get at least one defensive item with Normal item rules when the maximum item slots are filled (outside of online rooms with high lag), like ''[[Mario Kart 8]]'' for the Wii U, and unlike ''[[Mario Kart 8 Deluxe]]'', ''[[Mario Kart Tour]]'' (when using three item slots), and ''Mario Kart World'' before version 1.2.0.<ref>{{cite|author=TWD98|date=July 30, 2025|url=https://youtu.be/fll6bLCs5Qs?t=466|title=The New Mario Kart World Update is Hilarious|publisher=YouTube|accessdate=August 12, 2025}}</ref> | |||
===Ver. 1.2.1=== | |||
An update was released on August 18, 2025 to fix a bug. | |||
<blockquote> | |||
;Fixed Issues | |||
*Fixed an issue where, if the player chose “Race against Ghost” or “View Replay” right after downloading ghost data in “View Rankings” in “Time Trials,” a ghost that was different from the one that was downloaded would play. | |||
</blockquote> | |||
===Ver. 1.3.0=== | |||
An update was released on September 23, 2025. The following changes were made: | |||
<blockquote> | |||
;General | |||
*You can now join friends playing "Knockout Tour" by selecting "Friends" from "Online Play" "1p." | |||
*Up to 2 players can now play "Free Roam" while waiting if the game was full when trying to join friends playing "Race," "Knockout Tour" or "Battle" in "Online Play." | |||
*The "Free Roam" map now displays the locations of P Switches you've run over and Peach Medallions you've obtained. | |||
**You can now select a P Switch from the map and move to a location near the P Switch. | |||
*In "Free Roam", you can now transform into the character pulled into the UFO. | |||
**If "Dash Food" in "Settings/Controller" is set to "Doesn’t transform" then you will not transform. | |||
*It is now easier to encounter UFOs in "Free Roam." | |||
*The conditions for the appearance of some Peach Medallions in "Free Roam" have been adjusted. | |||
* When spectating in "Knockout Tour" or "Balloon Battle" in "Online Play" or "Wireless Play", you can now choose who to watch, even if you are holding the Joy-Con 2 or Joy-Con horizontally. | |||
*Decreased the time between when an item box is taken by someone and the next time it is revived. | |||
*Increased the invincible time after spinning or crashing during a race. | |||
*Reduced the force of jumps when landing on a rival from above. | |||
*Decreased the amount of time between when you finish and when spectating begins in "Knockout Tour" or "Balloon Battle" in "Online Play" or "Wireless Play." | |||
*Decreased the amount of time between passing through the checkpoint and when the ranking is displayed in "Knockout Tour" in "Wireless Play" and "LAN Play." | |||
*Further increased the frequency of lap-type courses appearing in the selection when choosing the next course in "VS Race" and wireless races. | |||
;Fixed Issues | |||
*Fixed an issue in "Online Play" and "Wireless Play" where the ranking would sometimes become incorrect if a player went off course at the same time as reaching the finish line. | |||
*Fixed an issue in "Grand Prix", "Knockout Tour", and "VS Race", where the CPU's ranking would sometimes drop after reaching the finish line. | |||
*Fixed an issue in "Knockout Tour" in "Online Play" where other players' ratings would sometimes appear as "0" on the results screen. | |||
*Fixed an issue where a Spiny Shell would sometimes pass the first place player in "Wireless Play" or "Online Play." | |||
*Fixed an issue where players would sometimes be sent flying backwards a great distance when hit by a Spiny Shell. | |||
*Fixed an issue where the second item in an item slot would sometimes not disappear when hit by Lightning. | |||
*Fixed an issue where hitting the base of a pillar in mid-air would sometimes cause a large jump. | |||
*Fixed an issue that sometimes caused movement to become unstable when doing a wall ride on water. | |||
*Fixed an issue where players would sometimes be swept away strongly after landing when doing a mini jump while going up a river. | |||
*Fixed an issue where players would sometimes pass through the ground when hit by a car driving on the road. | |||
*Fixed an issue in "Free Roam" where players would sometimes be unable to enter pipes correctly after exiting a trailer. | |||
*Fixed an issue where the results screen would sometimes become distorted after spectating "Balloon Battle" in "Online Play." | |||
*Fixed an issue where the game would sometimes not proceed to the course selection screen after exiting a pipe during "Free Roam" in "Online Play." | |||
*Fixed an issue where Bullet Bill would sometimes slip through walls when used in "Sky-High Sundae." | |||
*Fixed an issue where players would sometimes get stuck on a wall at the start of the race heading from "Airship Fortress" to "Shy Guy Bazaar." | |||
*Fixed an issue where players would sometimes get stuck in walls when using a Bullet Bill in "Bowser’s Castle." | |||
*Fixed an issue in "Cheep Cheep Falls" where item boxes were sometimes difficult to pick up when Smart Steering was turned on. | |||
*Fixed an issue in "Knockout Tour" "Spiny Rally" where sometimes there was an item box buried in the ground. | |||
*Several other issues have been addressed to improve the gameplay experience. | |||
</blockquote> | |||
==Differences from previous ''Mario Kart'' games== | ==Differences from previous ''Mario Kart'' games== | ||
*Races now consist of 24 racers compared to the previous | ===Gameplay=== | ||
* | *Races now consist of 24 racers compared to the eight or 12 from previous games. | ||
*Getting hit by a car or train causes the player to become unbalanced as opposed to spinning out. | *In races where the player travels along a [[route]], including Knockout Tour, racers will automatically begin moving before the starting countdown, though [[Rocket Start]]s can still be performed. | ||
*Rather than using hang-gliders like in ''[[Mario Kart 7]]'' and ''[[Mario Kart 8]]'', | *Getting hit by a car or train at certain angles causes the player to become unbalanced as opposed to spinning out. | ||
*The amount of coins a player can hold now caps off at 20 compared to the previous 10. | *Rather than using hang-gliders like in games since ''[[Mario Kart 7]]'', vehicles now use retractable wings to glide. | ||
* | *Several changes made in ''Mario Kart 8'' have been reverted back: | ||
**[[Lakitu (Mario Kart referee)|Lakitu]] has mostly been reverted to his pre–''Mario Kart 8'' behavior, where instead of immediately picking up a racer who falls off of a course, the screen will briefly fade to black before fading back in to him dropping the racer. However, Lakitu does appear briefly before the screen fades. | |||
**Players can once again receive a speed boost when being dropped off by Lakitu by pressing the drive button before hitting the ground when Lakitu drops them. | |||
**Falling off the course causes the player to lose their items. | |||
*If a racer falls off a course in the middle of a gliding section, Lakitu will place them back in the air so they continue gliding rather than bringing them to the nearest road. | |||
*Lakitu now picks up a racer if they have been facing backward for 5 seconds. | |||
*Vehicles no longer [[Underwater driving|drive underwater]], and instead continue along the surface of the water. | |||
*The traction stat is no longer visible on the vehicle selection screen. | |||
*Unlike in ''Mario Kart 8 Deluxe'', the [[Mini-Turbo]] boost charge thresholds when drifting are once again identical across all character and vehicle combinations, like they were in ''Mario Kart Wii'', ''Mario Kart 7'' and the Wii U version of ''Mario Kart 8''. | |||
*The functionally distinct [[Sport bike (vehicle class)|sport bike]] vehicle class that existed in ''Mario Kart Wii'' and ''Mario Kart 8'' / ''Mario Kart 8 Deluxe'' has been removed entirely. All bikes, regardless of their appearance or the rider's posture when riding them, are essentially considered to be [[Standard bike (vehicle class)|standard bikes]], with the same drifting mechanics as all other vehicle types in the game. | |||
*The amount of coins a player can hold now caps off at 20, compared to the previous 10. | |||
*[[Jump Boost]]ing has been made more versatile: | |||
**It can now be performed multiple times in the air. | |||
**It can be performed at any time while gliding; tricking to the left or right will cause the racer to do a barrel roll. | |||
**It is now possible to trick off of other racers or obstacles by landing on top of them. | |||
*Racers can now charge up a [[Charge Jump]], allowing them to gain additional height, perform tricks, and gain speed boosts. | |||
*[[Goomba]]s now charge towards racers when noticing them (similar to the 3D ''[[Super Mario (series)|Super Mario]]'' games), rather than simply walking in place or in a left-to-right pattern. | |||
*Explosions on the surface of water will create waves, which characters can trick off of. | |||
===Controls=== | |||
*The {{button|switch|Y}} button on the dual Joy-Con and Pro Controller and the {{button|switch|jc-left}} button on the single Joy-Con opens the map in Free Roam instead of accelerating. | |||
*The {{button|switch|rightstick}} stick moves the camera instead of accelerating and reversing when tilting up and down respectively. | |||
*{{button|switch|down}} on the dual Joy-Con directional buttons and Pro Controller D-pad is used to Rewind. | |||
*{{button|switch|left}} and {{button|switch|right}} on the dual Joy-Con directional buttons and Pro Controller D-pad for steering is no longer available. | |||
*The {{button|switch|minus}} button on the dual Joy-Con and Pro Controller opens Photo Mode instead of pausing. | |||
*Unlike ''Mario Kart 8 Deluxe'', the [[Nintendo Switch#Nintendo Labo|Toy-Con]] Motorbike, Car, Pedal, and Key are no longer available as control options, as the Nintendo Switch 2 and its Joy-Con are incompatible with Nintendo Labo. | |||
===Courses=== | |||
*Cups in Grand Prix are now based more on their region within the game's world map rather than following an overall difficulty progression across the game. | |||
*Unlike games since ''[[Mario Kart DS]]'', no race or battle courses from ''[[Mario Kart: Super Circuit]]'' return. | |||
===Game Modes=== | |||
*By default, a Grand Prix now involves the first course of the cup being played with the multiple laps before subsequent races involve two-section routes leading into a full lap of a course for the final section. | |||
*In Time Trials, the game can be paused before the race starts. | |||
*VS Race and Battle mode options have several changes from ''Mario Kart 8 Deluxe'': | |||
**Teams can be set to No, Two, Three, or Four Teams instead of just No Teams or two teams with Team Game. | |||
**Items can only be set to Normal, Frantic, or (as of version 1.2.0) Mushrooms Only. Custom Items, Shells Only, Bananas Only, Bob-ombs Only, No Items, and No Items or Coins in VS Race and Skilled Items in Battle mode are no longer available. | |||
**COM Difficulty can be set to No COM in single player VS Race (as of version 1.2.0). | |||
**Setting COM Vehicles (between All Vehicles, Karts Only, or Bikes Only) is no longer available. | |||
**The "Choose" option in Course Selection has been renamed to "Open". | |||
**"In Order" is no longer available as a Course Selection option in VS Race and Battle mode. | |||
**VS Race's Race Count can be set to 3 and 5 Races like the original ''Mario Kart 8'', along with 4, 6, 8, 12, 16, and 32 Races still available. 24 and 48 Races are no longer available. | |||
**Battle mode's Round Time is always 3 Minutes. Setting the Round Time from 1-5 Minutes is no longer available. | |||
**Battle mode's Round Count can be set to 3, 4, and 6 Rounds, along with 5 and 8 Rounds still available. 10, 15, 20, and 25 Rounds are no longer available. | |||
*There is no longer a play stats menu. | |||
===Items=== | ===Items=== | ||
*The [[Lightning]] now only shocks players ahead of the user, rather than all opponents. | *[[Mega Mushroom]]: | ||
*The [[Bullet Bill]] no longer causes players that it hits to spin out.<ref name= | **Racers under the effect of the Mega Mushroom item no longer shrink back to normal size when hit by Lightning. | ||
**After using a Mega Mushroom, the item slot shows the remaining time to be under the effect. As a result, the Mega Mushroom will count as being in use, so the player cannot use their other item nor receive another item if they already had two items, unlike in previous games where using the Mega Mushroom would remove it from the player's inventory immediately. | |||
**Like in ''Mario Kart Tour'', the Mega Mushroom's theme from ''[[New Super Mario Bros.]]'' does not play while the item is in effect. | |||
*[[Cape Feather|Feather]]: | |||
**The Feather is now available in races, rather than being exclusive to Battle Mode. | |||
**Using the Feather item now allows racers to jump much higher and perform tricks after using it. | |||
**Feathers can now be dropped on the ground. | |||
**The player does not gain a speed boost upon landing after using a Feather unless they perform a trick after using it. | |||
*[[Super Horn]]: | |||
**The Super Horn sound effect is identical across all characters, rather than being character-specific. | |||
**The Super Horn now stays in the item slot until it is fully used up. | |||
*[[Super Star|Star]]: | |||
**Stars can be found bouncing along the ground, as they do in the 2D ''Super Mario'' games, in Free Roam. If a Star is dropped during a race, it will remain stationary, however. | |||
**A sound effect now plays indicating that the Star's effect is about to run out, similar to the mainline ''Super Mario'' games. | |||
*[[Lightning]]: | |||
**The Lightning now only shocks players ahead of the user, rather than all opponents. | |||
**The Lightning now causes most players to be shrunk for the same amount of time, with racers in higher positions sequentially returning to their original size, similar to how it affected players prior to ''[[Mario Kart DS]]''. | |||
**The Lightning stuns players for longer when it first strikes, with each character having a unique animation for being struck. | |||
**Being under the effects of a Lightning does not cause the music to distort, similar to games prior to ''Mario Kart DS''. | |||
*[[Spiny Shell (blue)|Spiny Shell]]: | |||
**The Spiny Shell now launches racers into the air at a higher angle, similar to its effect from ''Mario Kart: Double Dash!!'' to ''Mario Kart Wii''. | |||
**Throwing the Spiny Shell has a slightly longer animation than throwing other items. | |||
*[[Bullet Bill]]: | |||
**The Bullet Bill no longer causes players that it hits to spin out, instead causing them to get bumped out of the way and become unbalanced. | |||
**The Bullet Bill travels slower than before. | |||
*[[Boo]]: | |||
**The Boo item now applies a dithered transparency effect onto the user rather than turning them invisible, which is also applied to their held item resulting in them being invulnerable. | |||
**When using the Boo item, the user can now drive through off-road without slowing down, reverting to its behavior in ''Mario Kart DS''. | |||
**When the Boo item steals from the player, like in ''Mario Kart DS'', the Boo will hold the stolen item before leaving. When stealing the triple items, he will only hold one of the items. | |||
**When the Boo is in effect, the music and sound effects will be muffled. | |||
*[[Fire Flower]]: | |||
**The Fire Flower now has a limit of eight fireballs, compared to the previous 10 in ''[[Mario Kart 7]]'' and ''[[Mario Kart 8]]''. | |||
*[[Boomerang Flower]]: | |||
**The Boomerang Flower now has a time limit when using it and does not leave the item slot until it is fully used up, similar to the Fire Flower. This allows for it to be used up to four times, compared to the previous three in ''Mario Kart 8''. | |||
*Items now float on the surface of water, rather than sinking. | |||
*Moving the camera with the right stick will aim items in that direction, with a full range of 360 degrees. | |||
*Due to 1st place being able to hold a ? Block and Coin at the same time (as of version 1.2.0), 1st place is no longer guaranteed to get at least one defensive item with Normal item rules when the maximum item slots are filled (outside of online rooms with high lag), like ''Mario Kart 8'' for the Wii U, and unlike ''Mario Kart 8 Deluxe'' and ''Mario Kart Tour'' (when using three item slots). | |||
===Aesthetic=== | |||
*Opening cinematics before races in the Grand Prix mode now show all of the courses at once before the first race, rather than each track individually at the start of each race. | |||
*The color of the sparks when charging an Ultra Mini-Turbo has been changed from purple to rainbow, similar to ''[[Mario Kart Arcade GP DX]]''. | |||
*Racers assume a horrified expression when they are about to be hit by a Spiny Shell. | |||
*Racers now brace themselves when tumbling, though they will still flail when spinning out. | |||
*The drivers of car obstacles are now visible. | |||
*The right stick can freely rotate characters and vehicles in the character and vehicle selection menu. Rotating in the vehicle selection menu will stop its automatic rotation. | |||
*The right stick can rotate cup trophies in the opposite direction of their automatic rotation. | |||
*Rather than being character-specific like in ''Mario Kart 8'' / ''Mario Kart 8 Deluxe'', vehicle horns are now vehicle-specific. | |||
*Vehicles' horns cannot be used after a race ends. | |||
*Vehicles briefly swerve left and right after spinning out. | |||
*A sound effect does not play when the player changes placement, similar to games prior to ''Mario Kart Wii''. | |||
*Similar to ''Mario Kart Tour'', a graphic appears on screen indicating that the player has either hit an opponent or has been hit during Battle mode. | |||
===Music=== | |||
*The sped-up version of a course's theme during the final lap is only used when playing the course without routes in either Grand Prix or VS Race. In Knockout Tour, the sped-up version is also used for the final race. | |||
*Frontrunning beats do not play when the player is in first. | |||
*When approaching a course from a route, a simple transitional version of its theme can be heard before the main theme starts playing upon crossing the finish line. | |||
==Staff== | |||
{{main|List of Mario Kart World staff}} | |||
''Mario Kart World'' is primarily developed by Nintendo EPD, with Kosuke Yabuki, Kenta Sato, Masaki Ishikawa, Shintaro Jikumaru, and Atsuko Asahi all returning from their respective roles from ''ARMS'', another game led by the same team. In addition to Bandai Namco Studios returning to contribute to development, Monolith Soft and 1-Up Studio were also involved in the game's development. This game features neither [[Shigeru Miyamoto]] nor series creator [[Hideki Konno]] in lead development roles; only Konno receives a Special Thanks credit in the game. | |||
This is the first ''Super Mario'' game to feature [[Courtney Lin]] as the voices of [[Peach]] and [[Baby Peach]], [[Laila Berzins]] and [[Paul Castro Jr.]] as the playable and non-playable [[Toad]]s respectively,<ref> https://www.instagram.com/p/DMapqWZRnPS/?igsh=NTc4MTIwNjQ2YQ==</ref> and [[Laura Stahl]] as [[Toadette]], following Nintendo's decision to recast their longtime voice actress, [[Samantha Kelly]]. It is also the first game where [[Kōji Takeda]] replaces [[Takashi Nagasako]] as the voice of Donkey Kong, reprising his role from the Japanese dub of ''[[The Super Mario Bros. Movie]]'', as well as the first game in the ''Mario Kart'' series to feature [[Kevin Afghani]], [[Giselle Fernandez]], and [[Dawn M. Bennett]] as the voices of their respective characters. | |||
==Development== | |||
{{redirect|Mario Kart 9|the ninth ''Mario Kart'' game released by Nintendo, excluding re-releases|[[Mario Kart Tour]]}} | |||
[[File:MKWorld Early Mario.png|Promotional prerelease art for Mario and the Standard Kart|thumb|right|220px]] | |||
Prototyping for ''Mario Kart World'' started in March 2017, with official work on the game beginning at the end of the year following the release of ''{{iw|armswiki|ARMS (game)|ARMS}}'', another game created by the same development team. The game was originally being developed for the [[Nintendo Switch]],<ref name="InterviewPart1">[https://www.nintendo.com/us/whatsnew/ask-the-developer-vol-18-mario-kart-world-part-1/ Ask the Developer Vol. 18, Mario Kart World — Part 1]. ''Nintendo''. Retrieved May 21, 2025.</ref> but it was moved to the Nintendo Switch 2 around 2020 following the conception of the ''[[Mario Kart 8 Deluxe – Booster Course Pass]]''.<ref name=InterviewPart2>[https://www.nintendo.com/us/whatsnew/ask-the-developer-vol-18-mario-kart-world-part-2/ Ask the Developer Vol. 18: Mario Kart World — Part 2]. ''Nintendo''. Retrieved May 21, 2025.</ref> ''Mario Kart World'' is the first ''Super Mario'' game since ''[[Super Paper Mario]]'' to be known to have been pushed back to a successor console. | |||
According to developers, had the game only introduced new courses and no new gimmicks, it would have likely been called ''Mario Kart 9''; however, the open world gameplay was decided from the beginning, with the name ''Mario Kart World'' already chosen very early in development.<ref name=InterviewPart1/> | |||
[[File:MKWorld Cow Concept Artwork 1.png|thumb|left|220px|A sketch of [[Cow]] driving a truck, which the producers enjoyed]] | |||
The decision to include [[Cow]] as a playable character originated from a sketch done by one of the artists, featuring Cow driving a blue truck. The producers were so amused by the image that Cow was soon added as a playable character, which the developers named one of the "NPC drivers". Other obstacles soon became "NPC drivers" following Cow's addition, such as [[Pokey]].<ref name="InterviewPart3">[https://www.nintendo.com/us/whatsnew/ask-the-developer-vol-18-mario-kart-world-part-3/ Ask the Developer Vol. 18, Mario Kart World — Part 3]. ''Nintendo''. Retrieved May 21, 2025.</ref> | |||
The decision to increase the racer count to 24 came from one of the developers thinking that 12-player races would feel empty once the racers became spread out.<ref name=InterviewPart1/> | |||
{{br}} | |||
==Glitches== | |||
===Stuck Bomber Bill=== | |||
[[File:MKWorld Bomber Bill Glitch.png|thumb|The shrunken [[Bomber Bill]] on the left side of the road, shortly before disappearing]] | |||
If a [[Banzai Bill Cannon]] carried by a [[pickup truck]] shoots a [[Bomber Bill]] inside of a [[Mario Kart World#Knockout Tour|Knockout Tour]] checkpoint, the Bomber Bill will briefly become stuck inside the checkpoint before disappearing. In this state, the Bomber Bill remains shrunken down as if it were still inside the cannon.<ref name=SirloinKnockout>{{cite|author=Sirloin|date=June 4, 2025|title=Mario Kart World - All Knockout-Tours 150 ccm [Full Walkthrough] (Nintendo Switch 2) [4K]|url=https://youtu.be/VWyP3yFvId8|publisher=YouTube|language=en|accessdate=June 5, 2025}}{{Timestamp needed}}</ref> | |||
{{br}} | |||
===Out-of-bounds shortcut=== | |||
In online races on [[Whistlestop Summit]] and [[Dandelion Depths]], players can abuse the fact that [[Lakitu (Mario Kart referee)|Lakitu]] will not pick up their COM-controlled character immediately after leaving a room.<ref>{{cite|author=Shortcat|date=July 15, 2025|url=https://www.youtube.com/watch?v=QyZn2gy9A8E|title=NEW GAME-BREAKING GLITCH SHORTCUTS IN MARIO KART WORLD|publisher=YouTube|accessdate=August 14, 2025}}</ref> On Whistlestop Summit, if a player jumps off to the right on the yellow rail after the long bridge and leaves the race before getting picked up by Lakitu, he will not pick up the COM-controlled character that races in place of the player, causing it to skip to the path below. On Dandelion Depths, if a player jumps off to the left of the road in the spiral turn and leaves the race before getting picked up by Lakitu, he will also not pick up the COM-controlled character that races in place of the player, causing it to skip to the end of the course's water section. If the glitch is done on the final lap, it will cause them a near guaranteed win unless first place is too close to the place where they end up after the shortcut. This is only useful in online lobbies during the last race due to the player's score resetting when they rejoin. | |||
==Reception== | |||
''Mario Kart World'' received generally positive reviews. The departure from the traditional formula was praised, but certain aspects were considered shortcomings of the result of that direction. | |||
{| class="wikitable" style="width:100%;text-align:center" | |||
!colspan="3"style="font-size:120%; text-align:center; background-color:silver;"|Reviews | |||
|-style="background-color:#E6E6E6" | |||
|Reviewer, publication | |||
|Score | |||
|Comment | |||
|- | |||
|Scott Duwe, [https://www.destructoid.com/reviews/mario-kart-world-review/ Destructoid] | |||
|9/10 | |||
|"''Mario Kart World is the latest and potentially greatest in the long-running arcade racer franchise, brought to the next level with the Nintendo Switch 2's hardware and an expansive roster of racers, tracks, and endless fun to be had. .''" | |||
|- | |||
|Steve Watts, [https://www.gamespot.com/reviews/mario-kart-world-review/1900-6418371/ GameSpot] | |||
|9/10 | |||
|"''Mario Kart World is a massive, sprawling sequel that playfully expands and iterates on the qualities that made Mario Kart 8 Deluxe such an enduring success. It's an incredibly fun and rewarding kart racing experience that's easy to understand, with enough mechanical nuance to reward veteran kart racers, all presented beautifully as a Switch 2 showpiece.''" | |||
|- | |||
|Logan Plant, [https://www.ign.com/articles/mario-kart-world-review IGN] | |||
|8/10 | |||
|"''Mario Kart World may not make the most convincing case that going open-world was the boost the series needed, but excellent multiplayer racing, incredible polish, and the thrilling new Knockout Tour mode still more than live up to its legacy.''" | |||
|- | |||
!colspan="4"style="font-size:120%; text-align:center; background-color:silver;"|Aggregators | |||
|-style="background-color:#E6E6E6" | |||
|colspan=2|Compiler | |||
|colspan=2|Score | |||
|- | |||
|colspan=2|Metacritic | |||
|colspan=2 style="background-color:limegreen"|[https://www.metacritic.com/game/switch/mario-kart-world 86] | |||
|} | |||
===Sales=== | |||
As of June 30th, 2025, the game had sold 5.63 million units worldwide.<ref>Nintendo (August 1, 2025) [https://www.nintendo.co.jp/ir/en/finance/software/index.html]. ''Top Selling Title Sales Units, Nintendo Co., Ltd''. Retrieved August 1, 2025.</ref> This meant the game had a 96% attach rate with sales of the Nintendo Switch 2 in the console's first month of availability. | |||
==Gallery== | ==Gallery== | ||
{{main-gallery}} | {{main-gallery}} | ||
<gallery> | <gallery> | ||
MKWorld Mario | MKWorld Mario.png|[[Mario]] | ||
MKWorld Peach 2.png|Touring [[Princess Peach|Peach]] | |||
MKWorld Peach.png|[[Princess Peach|Peach | |||
Goomba Mario Kart World.png|[[Goomba]] | Goomba Mario Kart World.png|[[Goomba]] | ||
MKW Knockout Tour Lakitu.png|Knockout Tour [[Lakitu (Mario Kart referee)|Lakitu]] | |||
MKWorld | MKWorld Dash Food bag.png|[[Dash Food]] bag | ||
MKWorld Yoshis Food Truck.png|Yoshi's food truck | |||
</gallery> | </gallery> | ||
==References to other media== | ==References to other media== | ||
'''Note:''' This list does not include arrangements from routes and Free Roam. | |||
* | |||
*'' | ;[[Game & Watch]] | ||
*The space station in [[Rainbow Road (Mario Kart World)|Rainbow Road]] has "GW-80" painted on it, referencing the system's release year of 1980. | |||
*' | [[File:DK Spaceport view.png|thumb|250px|View of [[DK Spaceport]] in the [[Mushroom Cup]]'s opening reel, showing its resemblance to [[25m]]]] | ||
;''[[Donkey Kong (game)|Donkey Kong]]'' (arcade) | |||
* | *[[DK Spaceport]] is directly based on this game: | ||
**The course's structure is based on [[25m]], being mainly comprised of an ascending sequence of zigzagging [[girder]]s held by blue ladder-like support beams, with [[Robo DK]] standing in for Donkey Kong. | |||
* | **Obstacles include giant rolling [[barrel]]s and [[oil drum]]s (based on their design from this game) with nearby [[Fire Snake]]s in place of [[Fireball (Donkey Kong)|Fireball]]s. Stacks of these barrels can also be found at the top of the course corresponding to the location where [[Donkey Kong]] would take his barrels from in 25m. | ||
* | **The course's decorations reference ''Donkey Kong'' iconography, including warning posters depicting the sprites of fireballs, oil drums, and barrels; a poster based on the "How high can you get?" screen; pixelated paintings of Donkey Kong's face on [[ramp]]s; and stylized neon illustrations of oil drums, upright and rolling barrels, [[hammer]]s, [[Fire (enemy)|Fire]]s, [[Pauline's lost items|Pauline's Parasol and Bag]], and the 300 [[point]]s for collecting them. The illustrations of Fires are either orange and yellow or cyan and magenta, which are the colors they originally appeared in. | ||
**The room past the finish line features arcade-inspired elements such as a "high score" message above the exit archway and a circuit board incorporated into the ceiling. | |||
**The course's music primarily consists of variations of "[[Round 1 BGM (Donkey Kong)|Round 1 BGM]]", with the "[[Round Start BGM]]" and "[[Game Start (Donkey Kong)|Game Start]]" jingles being incorporated as brass licks. Rather than a final lap variation, this track instead features an arrangement of "[[Hammer BGM]]". "Round 1 BGM" is also incorporated into the music played during DK Spaceport's pre-race, and the {{wp|Coda (music)|coda}} used in Knockout Tour uses the "Round 1 and 2 Clear" jingle. | |||
*'' | **The sound effect played when a racer is bounced by a Donkey Kong-branded [[trampoline]] is based on the one heard when accruing points in this game, like when jumping over barrels. | ||
*' | *Completing the [[List of Mario Kart World missions|mission]] "Remember the classic DONKEY KONG!" awards a [[List of stickers in Mario Kart World|sticker]] depicting Donkey Kong's sprite. Completing the mission "Race to get ahead of the explosives!" awards a sticker depicting a Fireball's sprite. Stickers depicting Donkey Kong grinning and frowning are awarded for driving three hundred twenty kilometers and gliding for forty kilometers respectively. Stickers depicting the oil drum's sprite and the neon illustrations of the hammer and Pauline's Parasol from DK Spaceport can be awarded. | ||
* | |||
;''[[Donkey Kong (Game & Watch)|Donkey Kong]]'' (Game & Watch) | |||
*The starting banner in DK Spaceport is based on the Donkey Kong Game & Watch unit, and directional pad iconography is seen throughout the course and on Robo DK's back. | |||
;''[[Mario Bros. (game)|Mario Bros.]]'' | |||
* | *The game's logo appears as an advertisement, and a neon sign of the logo and two pipes on either side of it appears at the last turn of [[Mario Bros. Circuit]]. | ||
*Various [[Warp Pipe]]-inspired object and structures take design elements from the red handwheel-bearing enemy-spawning pipes from this game, such as the exhaust pipes on [[cargo truck]]s and the bridge near Toad's Factory. | |||
*The [[Hyper Pipe]] incorporates various elements originating from this game including [[Warp Pipe]]s, a [[POW Block]], and a red handwheel, like those attached to the enemy-spawning pipes, in addition to having the game's logo printed on its exhaust pipe. | |||
* | |||
;[[Family Computer]] | |||
*The Rally Bike has a design inspired by the pulse line design of Family Computer cartridges, including text reading "RLB-01" reminiscent of the product codes on each cartridge. | |||
*Mario and Luigi's Mechanic outfits each includes a cap with text that reads "Famicom." | |||
* | |||
* | ;''[[Donkey Kong (game)#Family Computer / Nintendo Entertainment System version|Donkey Kong]]'' (Famicom / NES) | ||
*''[[ | *Completing the mission "Trick off vehicles on the way to the spaceport!" awards a sticker depicting Donkey Kong's sprite after having fallen in this port. | ||
* | ;''[[Super Mario Bros.]]'' | ||
*' | *[[Pipe Cannon]]s take the appearance of Warp Pipe-junctions, similar to the ones entered to access underground levels in this game. | ||
* | *Generic trampolines take the red and yellow coloration of trampolines from this game. | ||
;''[[Super Mario Bros.: The Lost Levels]]'' | |||
* | *Graffiti on a banked turn resembles {{file link|SMBLL Green Koopa Troopa Artwork.png|the artwork}} of the Green Koopa Troopa from this game. | ||
;''[[Yume Kōjō: Doki Doki Panic]]'' / ''[[Super Mario Bros. 2]]'' | |||
*Masks can be found being sold at a hidden stand at Shy Guy Bazaar including those belonging to [[Shy Guy]]s, [[Snifit]]s, and [[Phanto]]s (using their ''Super Mario Bros. 2'' design). | |||
*Vector illustrations of Phantos (using their ''Super Mario Bros. 2'' design) and their [[key]]s can be seen on sun shades at Shy Guy Bazaar. | |||
*One of the stickers unlocked by activating a ? Panel at Shy Guy Bazaar is based on the [[turnip]] sprite. | |||
;''[[Famicom Grand Prix II: 3D Hot Rally]]'' | |||
*The [[Tiny Titan]], based on the [[Monster (vehicle)|Monster]] from this game, returns. | |||
*The redesigned logo for the Mario Motors sponsor is based on the logo of this game. | |||
*Mario and Luigi's Pro Racer outfits, along with their Mechanic outfits, are based on promotional artwork from this game. | |||
;''[[Super Mario Bros. 3]]'' | |||
*One of the new sponsors is named after and has a logo featuring a [[Hot Foot]]. | |||
;[[Game Boy]] | |||
*The starting banner of [[Mario Circuit (Mario Kart World)|Mario Circuit]] resembles the original 1989 Game Boy model; the ''Mario Kart'' logo is shown on a dot matrix display in pixelated monochrome green, a red power light is present to the left of the screen, and the "Mario Circuit" logo is in the bottom left corner, written in navy blue resembling the Game Boy's logo. Below the starting banner, two outlets resembling the [[Super Nintendo Entertainment System]]'s controller ports are also visible. | |||
;''[[Super Mario Land]]'' | |||
*[[Batadon]] and [[Tokotoko]] reappear, and the former is the base of a sponsor, "Batadon Aero Parts". | |||
*Shy Guy Bazaar includes multiple references to this game, including [[Daisy]]'s emblem on the palace in [[Shy Guy Bazaar]], golden statues resembling [[Gao]], a [[Superball Flower]] statue on top of a fountain, and tapestry with a [[Tokotoko]] pattern on it. | |||
*The pattern of the pants of Daisy's Oasis outfit is reminiscent of the pattern of her dress in this game's official artwork. | |||
;''[[Super Mario World]]'' | |||
*The ''Mario Kart World'' logo colors the letters of the word "World" with the same colors as the ''Super Mario World'' logo, with the exception of the "D" being cyan instead of green. | |||
*[[Super Koopa]]s, [[Chargin' Chuck#Super Mario World / Super Mario World: Super Mario Advance 2|Passin' Chucks, Splittin' Chucks, and Clappin' Chucks]] reappear. | |||
*[[Dino Rhino]]s appear on the packaging of chocolate bars, referencing their [[Chocolate Island]] habitat. | |||
*One of [[Dolphin]]'s trick animations is based on the animations of vertically-jumping Dolphins in this game. | |||
*The "Prove yourself in a SPECIAL test of skill #!" missions reference the [[Special Zone]]. This is strengthened by their Japanese name「マリオカートスタッフもビックリ!」("Mario Kart's Staff is Just as Surprised!"), which references the Japanese name for [[Way Cool]] and [[Awesome]]「マリオスタッフもビックリ コース」("Mario's Staff is Just as Surprised Course"). | |||
[[File:MKWorld Mission KB1.jpg|thumb|250px|Koopa Beach 1's "tribute" appearance in the game]] | |||
;''[[Super Mario Kart]]'' | |||
*[[Mario Circuit (Mario Kart World)|Mario Circuit]] contains the layouts of [[Mario Circuit 1]], [[Mario Circuit 2]], and [[Mario Circuit 3]]. [[Koopa Troopa Beach (Super Mario Kart)|Koopa Beach 2]] returns as Koopa Troopa Beach, retaining its five laps. Additionally, the layouts of [[Ghost Valley 1]], [[Choco Island 1]], [[Ghost Valley 2]], [[Koopa Beach 1]], [[Choco Island 2]], [[Vanilla Lake 1]], and [[Ghost Valley 3]] can be driven as part of the world map; the "tribute" missions on these courses reuse the courses' respective themes from this game. | |||
*The [[Star Thwomp]]s on the space station at Rainbow Road are taken from this game's [[Rainbow Road (Super Mario Kart)|Rainbow Road]]. | |||
*Stickers of the racer sprites from this game appear on the walls and [[quarter pipe]]s at Mario Circuit. | |||
*A billboard near Mario Circuit features the racer sprites from this game and takes design elements from its title screen. Text on the billboard reading "1992-8-27" references the game's [[Super Nintendo Entertainment System|Super Famicom]] release date. | |||
*A sticker of [[Bowser]]'s sprite can be equipped on a kart. | |||
*[[? Panel]]s return, taking their pixelated question mark design and smiling, deactivated state as well as their rounded edges from their {{file link|Question Panel SMK sprite.png|in-game sprite}} and {{file link|SMK QuestionBlock.png|promotional artwork}} from this game respectively. | |||
*In the introduction of the ''Mario Kart World'' Direct, there is a side shot of [[Donkey Kong]] dropping a [[Banana Peel]] in front of [[Yoshi]], a reference to [[Donkey Kong Jr.]] doing the same to Yoshi in this game's title screen animation. | |||
*When a P Switch mission is successfully cleared, an abridged arrangement of "Finish! (1st − 4th Place)" plays. | |||
*Completing the mission "Collect blue coins around the control tower!" awards a sticker depicting Donkey Kong Jr.'s sprite. | |||
;''[[Donkey Kong Country]]'' / [[Donkey Kong Country (series)|''Donkey Kong Country'' series]] | |||
*[[Cannon (Mario Kart series)|Cannons]], which launch racers like [[Barrel Cannon]]s, appear. They are particularly common around DK Spaceport. Like in this series, they are sometimes found floating in groups, allowing racers to jump between them. | |||
;''[[Super Mario RPG: Legend of the Seven Stars]]'' | |||
*Yoshi's Biker outfit sports a spiked red collar similar to the one [[Boshi]] wears. | |||
;''[[Super Mario 64]]'' | |||
*A clip in the ''Mario Kart World'' Direct of Penguin falling off the track references how players can drop [[Baby Penguin]]s off the cliff in [[Cool, Cool Mountain]]. | |||
*Mirror Mode can be accessed in Free Roam by driving into the stained-glass portrait of Peach atop her castle in Peach Stadium, which creates a ripple effect like the paintings in this game. | |||
*[[Boo]]s use their laughter from this game when they return with stolen items. | |||
*Bowser's laughter from this game can faintly be heard as racers approach [[Bowser's Castle (Mario Kart World)|Bowser's Castle]]. | |||
;''[[Mario Kart 64]]'' | |||
*[[Choco Mountain]] and [[Wario Stadium (Mario Kart 64)|Wario Stadium]] return as race courses, and [[Big Donut]] returns as a battle course. | |||
*Explosions and the [[Super Horn]] cause stylized onomatopoeias to appear in a similar fashion to this game. | |||
*Part of the first place results theme's melody can only be heard after it has looped for five minutes and 43 seconds, in reference to a bug that would cause the "Results (1st − 4th Place)" theme to loop improperly. | |||
;''[[Super Mario Sunshine]]'' | |||
*The water jets that replace the kart's wheels when driving on water bear a striking resemblance to [[F.L.U.D.D.]] | |||
*Mario wears the [[Shine Sprite]] shirt and sunglasses originating from this game in his Sightseeing outfit. | |||
;''[[WarioWare, Inc.: Mega Microgame$!]]'' / [[WarioWare (series)|''WarioWare'' series]] | |||
*The denim jacket Wario wears for his Biker outfit resembles the one he wears for his biker outfit in this game and the rest of the ''WarioWare'' series. | |||
*The sponsor [[List of brands debuting in Mario Kart World#Wario Games|Wario Games]] is a reference to Wario's game company. | |||
;''[[Mario Kart: Double Dash!!]]'' | |||
*[[Peach Beach]] and [[Dino Dino Jungle]] return as courses. | |||
*The [[List of brands debuting in Mario Kart: Double Dash!!#Luigi Tires|Luigi Tires]] sponsor returns in this game. | |||
*Characters hold onto their kart when gliding at high speeds in a similar manner to this game. | |||
*The cables of suspension bridges can be used to [[Rail Ride]], in reference to the drivable bridge arches of [[Mushroom Bridge]]. | |||
;''[[Mario Party 6]]'' | |||
*The character select icons for {{file link|Waluigi Artwork - Mario Party 6.png|Waluigi}} and {{file link|Princess Peach Artwork - Mario Party 6.png|Peach}} are based on their promotional artwork from this game. | |||
;''[[Super Mario 64 DS]]'' | |||
*The character select icon for Wario is based on his {{file link|Wario SM64DS art.png|promotional artwork}} from this game. | |||
;''[[WarioWare: Touched!]]'' | |||
*The Wario Games sponsor uses the mustache creatures seen on the title screen of this game. The yellow background references the color used in the Japanese and Chinese versions of this game. | |||
;''[[Mario Kart DS]]'' | |||
*[[Desert Hills]], [[DK Pass]], and [[Airship Fortress]] return as courses. | |||
*The [[B Dasher]] returns as a kart. | |||
*A free-roaming [[Chain Chomp]] can be found hopping in a circle outside [[Peach Stadium]], in reference to [[Peach Gardens (race course)|Peach Gardens]]. | |||
*"05" is painted on the outside of the tower in Airship Fortress, referencing this game's release year of 2005. | |||
;[[New Super Mario Bros. (disambiguation)|''New Super Mario Bros.'' series]] | |||
*[[Peach Medallion]]s make the same sound that [[Star Coin]]s make when collected. | |||
;''[[WarioWare: Smooth Moves]]'' | |||
*The Wario Motors sponsor graphic resembles the graphic of Wario's face used on this game's box art and title screen. | |||
;''[[Super Paper Mario]]'' / [[Paper Mario (series)|''Paper Mario'' series]] | |||
*The heads of [[Frost Piranha]]s are light blue with white spots, as in this series. They also possess green stems, most-closely resembling their design in ''Super Paper Mario''. | |||
;''[[Mario Party 8]]'' | |||
*The character select icons for {{file link|MP8 Birdo.png|Birdo}} and {{file link|MP8 Toad Main Artwork.png|Toad}} are based on their promotional artwork from this game, while the character select icon for [[King Boo]] is based on {{file link|BooMP8Official.png|Boo's promotional artwork}} from this game. | |||
;''[[Super Mario Galaxy]]'' | |||
*The character select icons for {{file link|Bowser - Super Mario Galaxy.png|Bowser}} and {{file link|SMG BowserJr.png|Bowser Jr.}} are based on their promotional artwork from this game. | |||
*[[Starview Peak]] contains several references to the [[Comet Observatory]]: | |||
**The course's name in Japanese, Korean, and Chinese is "Rosalina Observatory"; its name in Dutch is "Rosalina's Observatory", and its name in French is "Observatory Peak". | |||
**The course's central building contains a library alluding to the [[Library (Super Mario Galaxy)|Library]] aboard the Comet Observatory. There is a painting of the Comet Observatory inside the library. | |||
**The course's music quotes the melody of "[[Rosalina in the Observatory]]". | |||
*Wario's Wicked Wasp outfit is similar to [[Bee Mario]]. | |||
;''[[Super Smash Bros. Brawl]]'' / [[Super Smash Bros. (series)|''Super Smash Bros.'' series]] | |||
*One of Wario's trick animations closely resembles his neutral air attack (especially in ''[[Super Smash Bros. for Nintendo 3DS]]'' / ''[[Super Smash Bros. for Wii U|Wii U]]'' and ''[[Super Smash Bros. Ultimate]]''). | |||
;''[[Mario Kart Wii]]'' | |||
*[[Dash Panel]]s feature a yellow-orange-fuchsia gradient which are the colors they typically alternate between in this game. | |||
*[[Moo Moo Meadows]] and [[Toad's Factory]] return as courses. | |||
*A sign in Moo Moo Meadows states the farm was established in 2008, a reference to this game's launch date. | |||
*The [[Dolphin Dasher]] and [[Tiny Titan]] return as vehicles. | |||
*An exclamation point appears above [[Cataquack]]s when they are alerted to passing karts, like in this game. | |||
*Racers are taken to Rainbow Road through a [[Launch Star]]-esque cannon, which is taken from this game's [[Rainbow Road (Mario Kart Wii)|Rainbow Road]]. | |||
*An arrangement of this game's spectating music plays approximately two minutes and seven seconds into Knockout Tour's online spectating music. | |||
;''[[Mario Super Sluggers]]'' | |||
*[[Pianta]]'s victory pose is based on the blue, male Pianta {{file link|MSS Pianta Artwork.png|promotional artwork}} from this game. | |||
;''[[New Super Mario Bros. Wii]]'' | |||
*One of the idle animations of the Boos is based on one of the idle animations of the [[Boo Buddies]] in this game. | |||
*The character select icon for Koopa Troopa is based on the dance they do in this game. | |||
;''[[Super Mario Galaxy 2]]'' | |||
*The [[Cloud Rally]] has an icon featuring the [[Cloud Flower]]. | |||
*[[Skeeter]]s reappear using their design from this game. | |||
;''[[Donkey Kong Country Returns]]'' | |||
*A pixelated [[Rocket Barrel]] appears in a mural at [[DK Spaceport]] depicting the history of the [[List of brands debuting in Mario Kart World#DK Boosters|DK Boosters]] sponsor. It also appears on a sticker unlocked by activating a DK Spaceport ? Panel. | |||
*Completing the mission "Check out the secret back-road barrel shortcut!" awards a sticker depicting a vector illustration of a Rocket Barrel. | |||
;''[[Mario Kart 7]]'' | |||
*[[Shy Guy Bazaar]] and [[Wario Shipyard]] return as courses. | |||
*The [[Bumble V]] and [[Cloud 9]] return as karts. | |||
*Starview Peak is built around a Comet Observatory-like structure based on the one that appears in [[Rosalina's Ice World]]. | |||
*Rainbow Road features elongated, [[Conveyor Belt]]-esque Dash Panels, in reference to the Conveyor Belts on this game's [[Rainbow Road (Mario Kart 7)|Rainbow Road]]. | |||
*The character select icon for Daisy is based on her {{file link|Daisy MK7.png|promotional artwork}} from this game. | |||
;''[[Mario Party 9]]'' | |||
*The character select icons for {{file link|MP9 Yoshi Artwork.png|Yoshi}} and {{file link|MP9 Shy Guy Artwork.png|Shy Guy}} are based on their promotional artwork from this game. | |||
;''[[New Super Mario Bros. 2]]'' | |||
*[[Boohemoth]] returns in the background of [[Boo Cinema]]. | |||
*Stacks of [[Gold Block]]s appear on [[Great ? Block Ruins]]. | |||
*The [[Coin Shell]]'s render is based on its {{file link|Gold Shell NSMB2 artwork.png|promotional artwork}} from this game. | |||
;''[[Paper Mario: Sticker Star]]'' | |||
*Humanoid [[Toad (species)|Toad]] hieroglyphs appear along the walls of [[Desert Hills]] resembling those seen in [[Drybake Stadium]]. | |||
;''[[New Super Mario Bros. U]]'' | |||
*[[Nabbit]] chases return. | |||
*The illustration of a [[Bomber Bill]] on the world map icon of [[Airship Fortress]] is based on its {{file link|BanzaibillNSMBU.png|artwork}} from this game. | |||
*The character select icons for {{file link|NSMBU Luigi Jumping Artwork.png|Luigi}}, {{file link|KoopatroopaNSMBU.png|Koopa Troopa}}, and {{file link|NSMBU Hammer Bro Artwork.png|Hammer Bro}} are based on their promotional artwork from this game. | |||
*The [[Bob-omb]] render is based on its {{file link|BobombNSMBU.png|promotional artwork}} from this game. | |||
;''[[Game & Wario]]'' | |||
*[[Wario]]'s Pirate outfit greatly resembles [[Captain Wario (Game & Wario)|Captain Wario]]. While in the outfit, Wario wields a near-identical sword (with the only difference being handle color) during one of his trick animations. | |||
;''[[New Super Luigi U]]'' | |||
*On the select screen, Nabbit makes short hops like he does after finishing a level in this game. | |||
;''[[Super Mario 3D World]]'' | |||
*The promotional renders for various [[Toad (species)|Toad]]s are based on [[Toad]]'s {{file link|Toad Artwork - Super Mario 3D World.png|key artwork}} from this game. | |||
*The snakes that pop out from [[Jar]]s and the golden snakes that adorn the [[Carpet Flyer]] are modeled after [[Hisstocrat]]s. | |||
*The towers of the bridge connecting [[Crown City]] and [[Faraway Oasis]] are modeled after the diamond-patterned blocks from this game. | |||
;''[[Mario Kart 8]]'' / ''[[Mario Kart 8 Deluxe]]'' | |||
*Several sponsors return from this game. | |||
*Course select icons generally feature prominent track elements superimposed over images of the courses they belong to, like in this game. | |||
*[[Jump Boost|Trick-able]], surfboard-bearing vehicles return. | |||
*[[Sky-High Sundae]] returns as a course. | |||
*Rainbow Road features a space station like this game's [[Rainbow Road (Mario Kart 8)|Rainbow Road]]. It also features a flying train that follows racers much like [[Rainbow Road (Mario Kart 64)|N64 Rainbow Road]]. | |||
*[[Kart]]s can illuminate the road ahead of them using headlamps, like in this game. | |||
*The main menu, item information, and [[trophy]] presentation screens appear very similar to how they do in this game. | |||
*Many of this game's lobby messages return. | |||
*The online play's random course icon's design is based on the one it had in this game. | |||
*The [[Biddybuggy]] returns as a kart. | |||
*[[Mario Kart 8 Deluxe#Gameplay|Smart Steering]] returns. | |||
*Some of the [[Ring (Mario Kart series)|rings]] found near [[water]] are based on the rings found on [[Dolphin Shoals]]. | |||
*Starview Peak features a segment of road split between a green left path and a yellow right path, similar to [[Ice Ice Outpost]]. | |||
*The design of the [[crown]] is inspired by its design in ''[[Mario Kart 8 Deluxe]]''. | |||
*Several Knockout Tour rally icons are based on [[cup]] icons from the ''[[Mario Kart 8 Deluxe – Booster Course Pass|Booster Course Pass]]''. | |||
*An arrangement of this game's spectating music plays approximately 57 seconds into Knockout Tour's online spectating music. | |||
;''[[Captain Toad: Treasure Tracker]]'' | |||
*The new "Treasure Tracker!" sponsor is named after this game. | |||
*Toadette holds up a [[Super Pickax]] in one of her trick animations in her Explorer outfit. | |||
;''[[Mario Party 10]]'' | |||
*The character select icons for {{file link|Mario - Mario Party 10.png|Mario}} and {{file link|Toadette - Mario Party 10.png|Toadette}} are based on their promotional artwork from this game. | |||
;''[[Super Mario Odyssey]]'' | |||
*A picture mode similar to this game's [[Photo Mode|Snapshot Mode]] appears. | |||
*Several of Mario's and Peach's outfits originate from this game or are based on their designs from this game. | |||
*The [[Moon Rally]] and the [[Heart Rally]] have icons featuring a yellow [[Power Moon]] and the [[Life-Up Heart]], respectively. | |||
*The dance Mario does in the character selection screen is similar to the one he makes when listening to music from the [[Boombox]]; additionally, Pauline's dance in the character selection screen is similar to the one she makes while performing. | |||
*The designs of [[cactus]]es and [[binoculars]] in this game resemble their designs in ''Super Mario Odyssey''. | |||
*Large flowers appear, resembling [[Hat Trampoline]]s. | |||
*The above-ground portion of [[Dandelion Depths]] takes inspiration from the design of the [[Wooded Kingdom]], featuring vermillion metal structures being overtaken by foliage. | |||
*Toad and Toadette's Explorer outfits contain the same hats that the [[Toad Brigade]] wear in this game, albeit with added headlights. | |||
*The Runner outfit for Koopa Troopa is based on an early design for the [[Roving Racers]] from this game. | |||
;''[[Super Mario Maker 2]]'' | |||
*[[Heavy Fire Bro|Heavy Fire Bros.]] return as audience members. | |||
;''[[Dr. Mario World]]'' | |||
*[[Baby Rosalina]]'s standard pacifier color is cyan instead of yellow, her shoes are turquoise instead of blue, and her crown is angled the opposite side from before; these traits were first seen on [[Baby Rosalina#Dr. Mario World|Dr. Baby Rosalina]]. | |||
;''[[Mario Kart Tour]]'' | |||
*The Grand Prix starting fanfare is based on the one used in this game. | |||
*[[Sky-High Sundae]] returns as a course. | |||
*The Hammer and Ice Flower return as items, while the ? Block item functions similarly to the Coin Box. | |||
*Items are generally held behind the player, like in this game. | |||
*Various outfits return from this game. | |||
*Pickup trucks with [[Piranha Plant]]s return. | |||
;''[[Super Mario Bros. Wonder]]'' | |||
*One of the stickers unlocked by completing a P Switch mission is based on a Wonder Flower; the same artwork can also be seen on a surfboard. | |||
;''[[Princess Peach: Showtime!]]'' | |||
*The princess seams on the bodice of Princess Peach's dress are kept from this game, and also applied to Daisy's design. | |||
<!-- Peach's Touring outfit having a pink bow is almost certainly a coincidence given the context of the outfit and concept art (see the talk page for more details). --> | |||
==References in other media== | |||
;''[[Mario Kart Tour]]'' | |||
*The 2025 rerun of the [[Sunshine Tour]] included an event celebrating the release of ''Mario Kart World'', which introduced [[Mario]] and [[Luigi]]'s mechanic outfits as separate variants and ''Mario Kart World''{{'}}s version of the [[Tiny Titan]] as a [[kart]]. | |||
;''[[Super Mario Bros. Wonder – Nintendo Switch 2 Edition + Meetup in Bellabel Park]]'' | |||
*The design of {{file link|SMBW NS2 Hint Toad.png|a pith helmet with a headlamp attached to it}}, similar to the ones worn by {{file link|MKWorld Toad Costume 1.png|Toad}} and {{file link|MKWorld Toadette Costume 1.png|Toadette}} in their explorer outfits in ''Mario Kart World'', is seen in the background of a Brigade Tent level. | |||
==Names in other languages== | ==Names in other languages== | ||
| Line 909: | Line 3,636: | ||
|JpnR=Mario Kāto Wārudo | |JpnR=Mario Kāto Wārudo | ||
|JpnM=Mario Kart World | |JpnM=Mario Kart World | ||
|JpnC=<ref name=jpnwebsite>{{cite|url=https://www.nintendo.com/jp/games/switch2/aaaaa/index. | |JpnC=<ref name=jpnwebsite>{{cite|url=https://www.nintendo.com/jp/games/switch2/aaaaa/index.html|title=マリオカート ワールド {{!}} Nintendo Switch 2 {{!}} 任天堂|publisher=nintendo.com|language=ja|accessdate=April 2, 2025}}</ref> | ||
|ChiS=马力欧卡丁车世界 | |||
|ChiSR=Mǎlì'ōu Kǎdīngchē Shìjiè | |||
|ChiSM=Mario Kart World | |||
|ChiSC=<ref>{{cite|author=Nintendo HK|url=https://www.bilibili.com/video/BV1YfTazmENF/|title=《马力欧卡丁车世界》Direct|publisher=Bilibili|language=Simplified Chinese|date=June 9, 2025|accessdate=July 21, 2025}}</ref> | |||
|ChiT=瑪利歐賽車世界 | |ChiT=瑪利歐賽車世界 | ||
|ChiTR= | |ChiTR=Mǎlì'ōu Sàichē Shìjiè | ||
|ChiTM=Mario Kart World | |ChiTM=Mario Kart World | ||
|ChiTC=<ref>{{cite|url=https://www.nintendo.com/hk/games/switch2/aaaaa/index.html|title=瑪利歐賽車世界 {{!}} Nintendo Switch 2 {{!}} 任天堂|publisher=nintendo.com|language=zh-hk|accessdate=April 2, 2025}}</ref> | |ChiTC=<ref name=hkwebsite>{{cite|url=https://www.nintendo.com/hk/games/switch2/aaaaa/index.html|title=瑪利歐賽車世界 {{!}} Nintendo Switch 2 {{!}} 任天堂|publisher=nintendo.com|language=zh-hk|accessdate=April 2, 2025}}</ref> | ||
|Kor=마리오 카트 월드 | |Kor=마리오 카트 월드 | ||
|KorR=Mario Kateu Woldeu | |KorR=Mario Kateu Woldeu | ||
|KorM=Mario Kart World | |KorM=Mario Kart World | ||
|KorC=<ref name=korwebsite | |KorC=<ref name=korwebsite/> | ||
}} | }} | ||
| Line 927: | Line 3,658: | ||
*[https://www.nintendo.com/us/gaming-systems/switch-2/featured-games/mario-kart-world/ Official North American website] | *[https://www.nintendo.com/us/gaming-systems/switch-2/featured-games/mario-kart-world/ Official North American website] | ||
*[https://www.nintendo.com/en-gb/Games/Nintendo-Switch-2-games/Mario-Kart-World-2790000.html Official European website] | *[https://www.nintendo.com/en-gb/Games/Nintendo-Switch-2-games/Mario-Kart-World-2790000.html Official European website] | ||
*[https://www.nintendo.com/pt-br/gaming-systems/switch-2/featured-games/mario-kart-world/ Official Brazilian website] | |||
*[https://www.nintendo.com/kr/games/switch2/aaaaa/index.html Official Korean website] | *[https://www.nintendo.com/kr/games/switch2/aaaaa/index.html Official Korean website] | ||
*[https://www.nintendo.com/hk/games/switch2/aaaaa/index.html Official Hong Kong website] | *[https://www.nintendo.com/hk/games/switch2/aaaaa/index.html Official Hong Kong website] | ||
*[https://www.nintendo.com/tw/games/switch2/aaaaa/index.html Official Taiwanese website] | |||
*[https://www.nintendo.com/sg/games/switch2/aaaaa/index.html Official Singaporean website] | |||
*[https://www.nintendo.com/ph/games/switch2/aaaaa/index.html Official Filipino website] | |||
*[https://www.nintendo.com/th/games/switch2/aaaaa/index.html Official Thai website] | |||
{{Mario Kart World}} | {{Mario Kart World}} | ||
{{Super Mario games}} | {{Super Mario games}} | ||
| Line 938: | Line 3,674: | ||
[[Category:2025 games]] | [[Category:2025 games]] | ||
[[Category:Launch titles]] | [[Category:Launch titles]] | ||
[[de:Mario Kart World]] | |||
[[fr:Mario Kart World]] | |||
[[it:Mario Kart World]] | [[it:Mario Kart World]] | ||
Latest revision as of 23:25, October 7, 2025
| Mario Kart World | |||||||||||||||||||||||||
|---|---|---|---|---|---|---|---|---|---|---|---|---|---|---|---|---|---|---|---|---|---|---|---|---|---|
 American box art For alternate box art, see the related gallery. | |||||||||||||||||||||||||
| Developers | Nintendo EPD[1] Monolith Soft 1-UP Studio Bandai Namco Studios | ||||||||||||||||||||||||
| Publisher | Nintendo | ||||||||||||||||||||||||
| Platform | Nintendo Switch 2 | ||||||||||||||||||||||||
| Release dates | |||||||||||||||||||||||||
| Languages | English (United States) English (United Kingdom) Japanese Chinese (Simplified) Chinese (Traditional) Dutch French (Canada) French (France) German Italian Korean Portuguese (Brazil) Portuguese (Portugal) Russian Spanish (Latin America) Spanish (Spain) | ||||||||||||||||||||||||
| Genre | Racing | ||||||||||||||||||||||||
| Ratings |
| ||||||||||||||||||||||||
| Modes | Single player Multiplayer (2–4 players) Local Wireless Play (2–8 players) Online Play (2–24 players) LAN Play (2–24 players) | ||||||||||||||||||||||||
| Format | Nintendo Switch 2: | ||||||||||||||||||||||||
| Input | Nintendo Switch 2: | ||||||||||||||||||||||||
- “A world of racing awaits”
- —Game tagline
Mario Kart World is a racing game in the Mario Kart series, released worldwide for the Nintendo Switch 2 on June 5, 2025. Initially teased during the Nintendo Switch 2's reveal trailer on January 16, 2025, the game was properly revealed during the Nintendo Switch 2 Direct presentation on April 2, 2025. It is the sixteenth entry in the Mario Kart series, the first new Mario Kart title since 2020's Mario Kart Live: Home Circuit, as well as the first original flagship entry in the series for a console since 2014's Mario Kart 8. It is also the first Mario Kart game to be a launch title for its console.
The game's roster marked the playable debut of many enemies from across the series, including Cataquack, Swoop, and Conkdor, among many more. Altogether, this game features the most brand new playable character additions to the Mario Kart series to date. Two new in-game modes were also added: Knockout Tour and Free Roam. The art style of the game's characters has changed to further resemble 2D illustrations drawn by Shigehisa Nakaue, much like the in-game look of Super Mario Bros. Wonder.
The game was covered during the Nintendo Treehouse: Live events on April 3 and 4, 2025.[35][36] A dedicated Nintendo Direct for the game titled the "Mario Kart World Direct" broadcast on April 17, 2025 at 6:00 a.m. PT / 9:00 a.m. ET / 2:00 p.m. BST.[37]
Gameplay
New features
Races now have 24 racers, doubling from the 12 seen in Mario Kart Wii, Mario Kart 8, and Mario Kart 8 Deluxe, tripling from the eight seen in the other entries, and quadrupling the six from the arcade series. Players receive points in racing as before, with some positions receiving the same number of points, making Mario Kart World the first Mario Kart game where racers who finished in different places received the same number of points since Mario Kart: Super Circuit, when 5th-8th place were all awarded zero points.
Although underwater driving (introduced in Mario Kart 7) and anti-gravity (from Mario Kart 8 and Mario Kart 8 Deluxe) do not return, gliding does, with gliders being replaced by retractable wings on the vehicles. When going over water, the wheels of all vehicles change into water skis, allowing them to float on the surface of the water. Both of these mechanics create a comparable vehicle system to Diddy Kong Racing and Diddy Kong Racing DS.
Many new mechanics are introduced in this game: when holding down the button after a hop without turning, players can charge up a Charge Jump instead of initiating a drift. After such a jump, the player is granted a small speed boost similar to a Mini-Turbo. The jumps can be charged, yielding blue, then yellow, then rainbow sparks, with longer charges granting a longer-lasting boost after landing, similarly to drifting. Vehicles now have the ability to Wall Ride by Jump Boosting or Charge Jumping onto walls, and Rail Ride on grindrails[conjectural] and other thin platforms to quickly charge up Mini-Turbos. A new Rewind feature has also been added, which allows the player to rewind their position back to where they were before. However, this feature does not rewind the other racers and can only be used in Free Roam or in solo races.
Unlike previous installments, all of the courses in the game take place in a large, open world, connected via the newly introduced routes, which are long, non-looping tracks filled with various hazards that connect from one course to another during races.
Players are able to enter large vehicles scattered around the world marked with question marks, and temporarily control them from the inside. The vehicles available to control are cargo trucks, boats, helicopters, and UFOs.
Visually, the game is the first entry in the series, and the first Super Mario game overall, that can be played in resolutions higher than 1080p.
Controls
| Action(s) | ||
|---|---|---|
| Steer | ||
| Accelerate / Rocket Start | ||
| Brake / Reverse | ||
| Item / Horn / Taunt | ||
| Drift / Hop / Trick / Charge Jump | ||
| Rear view | ||
| Pause menu | ||
| Photo Mode | ||
| Rewind | ||
| Move camera | ||
| Retry Mission (Free Roam) | ||
| Open map (Free Roam) |
Game modes
Grand Prix
Grand Prix returns as the main game mode from previous games, where the player races through four courses of a cup in a chosen engine class (50cc, 100cc, 150cc, or the unlockable Mirror Mode) to attain the most points, with higher placements yielding more points. However, the format of the Grand Prix has been changed significantly from previous games. Now, only the first race of a cup follows the traditional multiple-lap format. The last three races follow a sectioned format instead, with the first two sections (or more in certain cases) of the race taking place across routes that transition from the previous course to the next, while the final section consists of one lap of that next course.
Initially, only seven out of the eight cups are available in Grand Prix. Once a trophy has been obtained in all of them, a cutscene will play showing the seven trophies appearing at Acorn Heights and combining into the Special Cup trophy. The trophy will then fly across the sky with a rainbow trail behind it, much to the surprise of some of the racers. The trophy will then fly towards the Crown Bridge and immediately upwards, where it materializes into Rainbow Road offscreen. The Special Cup will then be unlocked for play.
Like in past games, the player is able to get up to three stars in addition to a trophy in a Grand Prix. Like Mario Kart 8, the stars are purely based on points, with the player getting all three stars by getting 60 points, which is done by getting first place in all four races.
As officially confirmed by Nintendo in a "Thank you for playing!" email sent to players,[38] Mirror Mode is unlocked by:
- Playing the first seven cups in Grand Prix on 150cc (Nintendo's email however, erroneously states that all eight cups must be played in Grand Prix before replaying the Special Cup)
- Playing all eight rallies in Knockout Tour on 150cc (with clearing checkpoints being optional)
- Completing 10 P Switch missions in Free Roam
- Activating 10 ? Panels in Free Roam
- Collecting 10 Peach Medallions in Free Roam
- Only after all of the above have been completed, the player must finish the Special Cup to unlock it, including replaying the Special Cup if it has already been completed.
Once all of the criteria have been fulfilled, a cutscene will play where a rainbow-colored light will travel into the stained glass on the castle in Peach Stadium. After a flash of light, the design on the stained glass will appear mirrored, and Mario will notice that the "L" on Luigi's cap is mirrored as well, in which the two will then celebrate. Mirror Mode will then be unlocked.
Unlike Mario Kart 8 and Mario Kart 8 Deluxe, progress made on a cup in Mirror Mode counts it for other engine classes as well, a feature that only applied to 100cc and 150cc in the aforementioned two games.
Due to the increased racer count, 7th, 8th, 9th, and 10th place are not considered losing places. Below is a chart of the point spread in Mario Kart World:
| 1st | 2nd | 3rd | 4th | 5th | 6th | 7th | 8th | 9th | 10th | 11th | 12th | 13th | 14th | 15th | 16th | 17th | 18th | 19th | 20th | 21st | 22nd | 23rd | 24th | |
|---|---|---|---|---|---|---|---|---|---|---|---|---|---|---|---|---|---|---|---|---|---|---|---|---|
| 15 | 12 | 10 | 9 | 9 | 8 | 8 | 7 | 7 | 6 | 6 | 6 | 5 | 5 | 5 | 4 | 4 | 4 | 3 | 3 | 3 | 2 | 2 | 1 | |
| A grove-green background signifies victory results (great clapping, character(s) cheering), unique finish music, and the best after-race music. A yellow-limegreen background signifies moderate results (mild clapping, moderate character reaction) and the same music in Wi-Fi as the winner (different in Mario Kart DS's Grand Prix). A normal background signifies losing results (no clapping, character(s) showing a sad expression) and music. | ||||||||||||||||||||||||
Knockout Tour
Knockout Tour is a new all-out battle mode where players race over consecutive tracks across the open world and are eliminated at a specific checkpoint if they are in the last four places. Unlike races, there are no breaks in between, as players who qualify for the next race will simply continue in it.
Knockout Tour consists of rallies rather than cups, with each of the eight rallies having six races within. Unlike the Grand Prix, Knockout Tour focuses primarily on the routes between the courses. The first five races take place on a continuous path of them, with each checkpoint eliminating the players that place in the bottom four of the group. For the final race, the last four players standing will race a lap around the final course.
Like in Grand Prix, there are up to three stars that can be obtained in each rally. Similar to Grand Prix requiring a first place finish in every race to obtain three stars, the player must place first at every checkpoint of a rally to get three stars in it.
Names in other languages
| Language | Name | Meaning | Notes |
|---|---|---|---|
| Japanese | サバイバル[3] Sabaibaru |
Survival | |
| Chinese (traditional) | 生存賽[5] Shēngcún sài |
Survival Match | |
| Dutch | Knock-outrally[39] | Knockout rally | |
| French | Survie[40][41] | Survival | |
| German | K.-o.-Tour[42] | K.O. Tour | |
| Italian | Sopravvivenza[43] | Survival | |
| Korean | 서바이벌[4] Seobaibeol |
Survival | |
| Portuguese | Eliminatória[44][45] | Knock Out | |
| Russian | Марафон на выбывание[46] Marafon na vybyvaniye |
Elimination Marathon | |
| Spanish | Supervivencia[47][48] | Survival |
Free Roam

Free Roam is an open-world adventure mode where one or multiple players can freely explore any course both on- and off-road. As displayed in the HUD when viewing the world map in this mode, P Switches, ? Panels, and Peach Medallions appear as discoverable objects, all of which award the player with stickers. P Switches activate missions reminiscent of the Missions mode from Mario Kart DS and bonus challenges from Mario Kart Tour. In total, Free Roam contains 394 P Switches, 150 ? Panels, and 200 Peach Medallions. CPU drivers can also be encountered in Free Roam; the main characters drive around locations indicated by the map, and random NPC characters can be found driving around the race courses. CPUs also appear as challengers in certain P Switch missions. Once Mirror Mode is unlocked, the player can drive through the stained glass on the castle in Peach Stadium to mirror the entire world map in Free Roam.
Names in other languages
| Language | Name | Meaning | Notes |
|---|---|---|---|
| Japanese | フリーラン[3] Furīran |
Free Run | |
| Chinese (traditional) | 自由行駛[49] Zìyóu xíngshǐ |
Free Drive | |
| Dutch | Rondrijden[39] | Driving around | |
| French | Balade[40][41] | Stroll | |
| German | Freies Fahren[42] | Free Drive | |
| Italian | Corsa libera[43] | Free run | |
| Korean | 프리 런[4] Peuri reon |
Free Run | |
| Portuguese | Modo livre[44][45] | Free mode | |
| Russian | Свободная езда[50] Svobodnaya ezda |
Free riding | |
| Spanish (NOA) | Paseo libre[47] | Free walk | |
| Spanish (NOE) | Modo libre[48] | Free mode |
Time Trials
Time Trials return and function the same as they have previously. Players drive through a selected course to complete it as fast as possible. Like in previous games, players can race against ghost times set by other players online. Staff ghosts return under the same name prefixes as in Mario Kart 8 Deluxe, those being "Nin★". Like with Mario Kart Tour, lap/section splits are no longer available on the results screen, and are only shown on the timer after each lap/section, with the final split never shown.
VS Race
VS Race allows up to four players to play together locally and eight players to play wireless with custom rules.
The settings available in VS Race are:
- Class: The engine class the races will be played in.
- Teams: Determines whether races are played in teams or individually. Unlike previous games, it is now possible to play in three teams of eight racers each or four teams of six in addition to only two teams of 12.
- Items: Sets the item balance, with "Normal" containing regular item balance and "Frantic" giving chaotic items more frequently. The version 1.2.0 update also added the "Mushrooms Only" option, which only gives Mushroom-based items.
- COM Difficulty: Sets the difficulty of computer racers, with the available options being "Easy", "Normal", and "Hard", or "No COM", which removes all computer racers. The latter option was initially only available in multiplayer, but was made available for single player as well starting in version 1.2.0.
- Course Selection: Determines how courses are selected:
- "Open" allows the player to select any course, including whether to play with routes or not.
- In "Connected", the first race is chosen similar to "Open", but after that, the player can only select from three courses that connect from the previous course, and the race will involve traversing the route to the next course. Occasionally, one to two of those options will be replaced by the option to play a track in the traditional lap-style. The player can also select a random course, which may pick from one of the previously given courses with routes, or select a random course without routes.
- "Random" has racers playing on a random course, which will also randomly choose whether it is played with laps or routes.
- Race Count: Select the number of races played. The player is able to select three, four, five, six, eight, 12, 16, or 32 races.
Several of the routes in VS Race give the destination course unique layouts compared to Grand Prix, Knockout Tour, and Time Trials, such as reverse layouts, combined layouts, or completely new layouts.
Battle
Battle modes return, though as in Mario Kart Wii and Mario Kart 7, there are only two battle modes to choose from: Balloon Battle and Coin Runners. The settings for Battle mode are similar to VS Race, but engine class cannot be set (as all battles are played in 50cc), only "Open" and "Random" are available in course selection, and the number of rounds has a maximum of eight, as opposed to the 32 races in VS Race. Matches have a set three-minute timer present during battles, which is non-adjustable like in Mario Kart Wii.
Balloon Battle
Balloon Battle has been reverted back to the elimination/point hybrid system used in Mario Kart 8, where players gain points by hitting other opponents, and all of the points they gained will be added to their total score if they survive until the end. If the player loses all of their balloons, they are not only eliminated from the game, but their score is also nullified, meaning that they do not get any points for the round.
Like in Mario Kart 8 Deluxe, players start with five balloons rather than three like in other games. Defeated players do not continue being able to use items like in Mario Kart 8. In local and online multiplayer, players can instead continue watching their opponents play, much like if they get eliminated in Knockout Tour.
Coin Runners
Coin Runners functions similarly its previous appearances, where the objective is to collect the most coins when time limit expires while avoiding getting hit which will cause the player to lose coins. However, similar to Mario Kart 7's version of Coin Runners, there is a limit to the number of coins the player can collect, that being 20. Once the time is up, the number of coins the player collected will be added to their total point tally.
Online Play
Online multiplayer returns from previous Mario Kart games and allows one or two people to play with others over the Internet. Four modes are available, being Race, Knockout Tour, Battle, and Friends. Race, Knockout Tour, and Battle feature random match-ups with players from around the world. The player has a separate score (similar to Versus Rating from previous titles) for each mode, starting with 3000 and gaining points for their performance in each race or battle. If playing with two players, the second player will not have a score kept.
- In Race, course selection is based on the "Connected" option seen in VS Race. After all players in the room have chosen a course, one player's choice is selected at random along with a random engine class.
- In Knockout Tour, a random rally in a random engine class is chosen and played.
- In Battle, the player can select from one of three battle courses, after which a course, along with either Balloon Battle or Coin Runners, is selected at random.
Friends
- "Intermission" redirects here. For the routes between courses, see Route.
The Friends mode allows the player(s) to create or join a room, or view their battle history with people in their friends list. When creating a friend room, the host is able to set the rules of the room, including whether the mode played is a VS Race, Knockout Tour, Balloon Battle, or Coin Runners. In the settings, there is an option known as Intermission, which determines how long the players will wait on the free roam map between races/battles, with the options being 10 seconds, one minute, or five minutes. Course selection in VS Race will initially appear like in worldwide matches. However, pressing ![]() on the course selection screen will instead toggle the "Open" course selection screen seen in offline VS Race. In Knockout Tour and Battle, the player is able to select any rally or battle course respectively they want to play on, which will then be chosen randomly among the players' choices.
on the course selection screen will instead toggle the "Open" course selection screen seen in offline VS Race. In Knockout Tour and Battle, the player is able to select any rally or battle course respectively they want to play on, which will then be chosen randomly among the players' choices.
In all online modes, players can roam the world before and between matches. Unlike in the offline Free Roam mode, P Switches do not appear in these free roam lobbies, though players can still collect ? Panels and Peach Medallions, which will count towards their own totals.
Characters
The game has a total of 50 racers, with 32 being available from the start and 18 being unlockable. Of the total racers, 30 return from past installments and 20 are new (labeled in bold), most of whom are also playable for the first time in a video game overall, excluding Goomba, Piranha Plant, Pianta, Spike, and Dolphin, as well as Cheep Cheep and Coin Coffer if captures in Super Mario Odyssey are counted, and Sidestepper if Mystery Mushroom costumes in Super Mario Maker are counted. Additionally, Nabbit, Hammer Bro, Chargin' Chuck, and Monty Mole are playable for the first time in a console Mario Kart game following their debuts in Mario Kart Tour. Excluding arcade games and Mario Kart Live: Home Circuit, this is the first game in the Mario Kart series since the introduction of Mii characters on the Wii to not feature them as playable characters. This is also the first game to feature Donkey Kong's 2025 redesign outside of profile icons.
Twenty-six drivers in this game are part of a sub-category of drivers referred to as "NPC drivers"[51] during development. These consist of all twenty newcomers, as well as six returning characters: Dry Bones, Wiggler, Hammer Bro, Chargin' Chuck, Nabbit, and Monty Mole. All appear in the game as either background characters, obstacles during races, or hazards in Free Roam. During races, the Kamek item can transform drivers into various characters from this group, while in some cases many members of that species will appear on the race track. Unlike the main roster, NPC drivers lack any alternate outfits, with Dash Food only providing them with a speed boost.
Default drivers
Cow*


* - unlockable in Version 1.0.0 but made default starting in Version 1.1.0
Unlockable drivers


Character outfits
- For a list of outfit names in other languages, see List of Mario Kart World outfit names in other languages.
Returning from Mario Kart Tour is the ability to equip the main 24 characters with various types of outfits. 103 total outfits are included in the game, with some outfits using designs seen previously in games such as Mario Kart Tour and Super Mario Odyssey. Outfits are obtained after eating Dash Food, with characters having up to nine outfits. Outfits have their own slot on the character selection screen, unlike in Mario Kart 8 and its port (except for Tanooki Mario and Cat Peach). Consuming Dash Food unlocks outfits for use anytime, and the type of food the player uses determines the outfit the character wears.
- Mario
Touring
Pro Racer
Mechanic
Dune Rider

Cowboy

Sightseeing
Aviator
Happi

All-Terrain


- Luigi

Touring
Pro Racer
Mechanic
Oasis

Farmer
Happi
All-Terrain
Gondolier


- Peach
Touring
Pro Racer
Farmer

Sightseeing
Aviator
Yukata
Aero
Vacation


- Daisy
Touring

Pro Racer
Oasis
Swimwear
Aero
Vacation


- Yoshi

Touring
Pro Racer

Aristocrat
Soft Server

Biker
Swimwear
Matsuri
Food Slinger


- Donkey Kong
All-Terrain

- Bowser

Pro Racer
Supercharged
Biker

All-Terrain


- Bowser Jr.
Pro Racer
Biker Jr.
Explorer


- Koopa Troopa
Runner
Pro Racer

Sailor
All-Terrain
Work Crew


- Toad
Pro Racer
Engineer
Burger Bud
Explorer


- Toadette
Pro Racer
Conductor
Soft Server
Explorer


- Lakitu
Pit Crew
Fisherman


- King Boo
Pro Racer
Aristocrat
Pirate


- Shy Guy
Pit Crew
Slope Styler


- Wario
Pro Racer
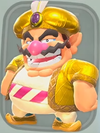
Oasis
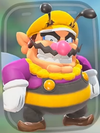
Wicked Wasp
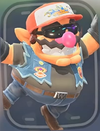
Biker
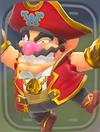
Pirate
Road Ruffian

Work Crew


- Waluigi
Pro Racer
Wampire
Mariachi
Biker
Road Ruffian


- Birdo
Pro Racer
Vacation


- Pauline
Aero

- Rosalina
Touring
Pro Racer
Aurora
Aero


- Baby Mario
Pro Racer
Swimwear
Work Crew


- Baby Luigi
Pro Racer
Work Crew


- Baby Peach
Touring
Pro Racer
Sailor
Explorer


- Baby Daisy
Touring
Pro Racer
Sailor
Explorer


- Baby Rosalina
Touring
Pro Racer
Sailor
Explorer


Unlock criteria
| Character | Criteria |
|---|---|
| Donkey Kong | Clear the Mushroom Cup |
| Daisy | Clear the Flower Cup |
| Rosalina | Clear the Star Cup |
| Lakitu | Clear the Shell Cup |
| Birdo | Clear the Banana Cup |
| King Boo | Clear the Leaf Cup |
| Bowser Jr. | Clear the Lightning Cup |
| Cataquack | Be summoned by the Kamek item for the first time / Abduct using the UFO for the first time |
| Chargin' Chuck | |
| Coin Coffer | |
| Conkdor | |
| Dolphin | |
| Fish Bone | |
| Peepa | |
| Pianta | |
| Rocky Wrench | |
| Spike | |
| Swoop | |
| Character outfits | Consume corresponding Dash Food for the first time |
Vehicles


Karts, bikes, and ATVs all return in Mario Kart World, the latter two following their absence in Mario Kart Tour. In the case of bikes, standard bikes return while sport bikes do not. Kart customization as seen in Mario Kart 7 and Mario Kart 8 does not return, with the vehicles in this game instead sporting a unique wheel design, and some lacking wheels entirely in favor of treads or skis. Like the aforementioned two games, however, vehicles are unlocked by collecting a certain number of coins. Despite ATVs returning, the Standard ATV does not. The Gold Standard from Mario Kart 7, Mario Kart 8, Mario Kart 8 Deluxe, and Mario Kart Tour does not return.
Players can also customize vehicles with stickers, decals that can be earned by completing certain objectives and placed on a specific spot on their vehicle, indicated by a pair of checkered flags as depicted in the vehicle's selection icon. There are 1,056 stickers, 39 of which are available from the start.
There are 40 vehicles in the game, including 23 karts, 11 bikes, and six ATVs. Vehicles returning from previous installments are marked with their corresponding game in parentheses.
11 vehicles (six karts, four bikes, and one ATV) are available from the start while the rest, labeled in bold, must be unlocked.
Karts
B Dasher
(Mario Kart DS)
Biddybuggy
Buggybud
(Mario Kart 8)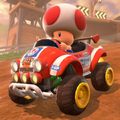
Tiny Titan
Rally Romper
(Mario Kart Wii)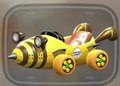
Bumble V
(Mario Kart 7)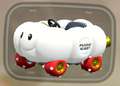
Cloud 9
(Mario Kart 7)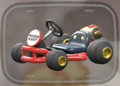
Pipe Frame
(Super Mario Kart)


Bikes
Dolphin Dasher
(Mario Kart Wii)


ATVs


CPU combinations
This section is under construction. Therefore, please excuse its informal appearance while it is being worked on. We hope to have it completed as soon as possible.
All characters in the game, including character outfits, can be used by CPUs. Each of these characters have four different vehicles that they can use as CPUs, two of which are always the Standard Kart and Standard Bike. Here are the remaining two vehicles used by each character as a CPU.
Drivers' and vehicles' statistics
This section is under construction. Therefore, please excuse its informal appearance while it is being worked on. We hope to have it completed as soon as possible.
Unlike Mario Kart 7, Mario Kart 8, and Mario Kart 8 Deluxe, 1 statistic point equals 0.2 statistic bars in-game instead of 0.25 bars, making 5 points instead of 4 points equal 1 bar. The statistics below are listed in number of points.
*The lightest (Baby Peach, Baby Daisy, Para-Biddybud, and Swoop) and heaviest (Bowser) driver weight classes receive adjustments to their statistics of -1 point (-0.2 bars) of speed and +1 point (+0.2 bars) of handling when using the Rally Kart, Zoom Buggy, Hot Rod, Ribbit Revster, Roadster Royale, B Dasher, Bumble V, Carpet Flyer, Cloud 9, Funky Dorrie, or Stellar Sled.[52] It is unknown if the aforementioned adjustments are applied to the driver and/or vehicle, but here are the adjustments applied to the vehicles:
| Vehicles' statistics (Baby Peach, Baby Daisy, Para-Biddybud, Swoop, Bowser) | ||||
|---|---|---|---|---|
| Vehicle | Speed | Acceleration | Weight | Handling |
| Rally Kart, Zoom Buggy, Hot Rod, Ribbit Revster, Roadster Royale, B Dasher, Bumble V, Carpet Flyer, Cloud 9 | 4 | 4 | 4 | 4 |
| Funky Dorrie | 4 | 5 | 5 | 2 |
| Stellar Sled | 7 | 0 | 6 | 3 |
Courses
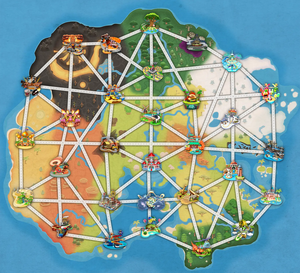

Counting courses with multiple variants together, Mario Kart World has 30 courses, 16 of which are new, while 14 return from previous entries. In addition to the 30 courses, there are 202 routes connecting them all. Routes cause a track to function similarly to sectioned courses, driving two to four sections to the track before playing one lap of the destination course. The 14 returning courses consist of one course that debuted in both Mario Kart Tour and the Mario Kart 8 Deluxe – Booster Course Pass, two courses each from Super Mario Kart, Mario Kart 64, Mario Kart: Double Dash!!, Mario Kart Wii, and Mario Kart 7, and three courses from Mario Kart DS. One of the courses from Super Mario Kart, Mario Circuit, is a combined version of multiple courses from that game, which can be driven through individually from certain routes. No courses from either Mario Kart: Super Circuit or Mario Kart 8 return, marking a series first for the former game, and the second instance for the latter game after Mario Kart Tour. This is the first Mario Kart game since Mario Kart Wii to not have a classic Rainbow Road and the first game where Mario Circuit is only present as a classic course.
Two new courses, Crown City and Peach Stadium, are used twice in Grand Prix with different layouts; when played without routes, Crown City combines both of its Grand Prix layouts (with its Shell Cup and third layouts being significantly cut and the former driven in reverse), while Peach Stadium exclusively uses its Special Cup layout. Certain routes may cause Peach Stadium's Shell Cup layout to be mirrored. Shy Guy Bazaar and Crown City have additional layouts exclusive to VS Races when approaching from certain routes; approaching Shy Guy Bazaar from Wario Stadium or Airship Fortress will take players onto a layout featuring a palace with Daisy's emblem adjacent to the bazaar, while Crown City has a third layout in the nearby water if approached from Peach Stadium, Moo Moo Meadows, or Choco Mountain.
Peach Beach returns as a three-section track with a new layout for sections 2 and 3; all routes leading to Peach Beach only utilize the new sections. Certain routes to Mario Bros. Circuit, Desert Hills, Wario Stadium, DK Pass, Koopa Troopa Beach, and Moo Moo Meadows lead to the course being driven backwards, similarly to reverse courses from Mario Kart Tour; in these cases, the minimap for the destination course will be flipped upside-down. Unlike previous games having a set skybox for each course, each course in the game (except Rainbow Road) has four different skyboxes for sunrise, daytime, sunset, and nighttime, which may progress when driving through routes and laps.
Classic courses in this game (marked with their origin game's prefix below) have been revamped to an even greater extent than that of Mario Kart 8, bearing even less resemblance to the original courses as they appeared in previous games. While most of the classic courses present had already appeared as such in previous games, Wario Stadium, Sky-High Sundae, and Toad's Factory appear as classic courses for the first time in the series. Unlike in Mario Kart 8 and Mario Kart Tour, all classic courses use the modern Mario Kart logo for their finish lines, regardless of what game they originated from. This is the first Mario Kart game since Mario Kart: Super Circuit to not have prefixes appended to the names of any of the classic race courses, and the first for battle courses since Mario Kart DS.
While not playable as traditional race courses, seven more courses from Super Mario Kart can be seen or visited in Free Roam or during routes, including Ghost Valley 1, Ghost Valley 2, and Ghost Valley 3 at the entrance to Boo Cinema, Koopa Beach 1 next to Koopa Beach 2 (here known as "Koopa Troopa Beach"), Choco Island 1 and Choco Island 2 south-east and south-west of Choco Mountain respectively, and Vanilla Lake 1 (referred to in-game as simply "Vanilla Lake") in an icy canyon north-east of Wario Shipyard. These courses can be raced in P Switch missions, the titles of which refer to them as "tributes". If these are counted, then Koopa Beach 1 and Ghost Valley 3 increase the number of courses making their classic course debut to five.
Courses with differing names between British English and American English (i.e. Wario Shipyard) once again use their respective name depending on the game's region, unlike in Mario Kart Tour.
Grand Prix
The cups are ordered slightly differently compared to previous entries; the Special Cup is the eighth and last cup in the game, rather than the fourth. Unlike previous games since Mario Kart DS, the cups are also not separated between new and classic courses and instead feature a varying amount of both types of courses, similar to Mario Kart 8 and Mario Kart 8 Deluxe's DLC cups, making this the first Mario Kart game to lack the distinction between cups, excluding Mario Kart Live: Home Circuit. Apart from the rotating cups in Mario Kart Tour, this is the second Mario Kart game after Mario Kart 8 Deluxe to have cups with multiple courses from the same game, as the Flower, Banana, and Lightning Cups have two tracks from Mario Kart DS, Mario Kart: Double Dash!!, and Mario Kart Wii, respectively, and it is the first entry to have this distinction from launch.
In Grand Prix, the first course in each cup is driven for three laps, while the remaining three utilize routes from the previous course. The backgrounds of the cup icons correspond to the region that some of the cup's courses are located in; for example, the Star Cup's icon has an icy background, as its courses are near or within the snow region. Unlike in Mario Kart 7 and 8, Grand Prix rivals are based off of the cup the player is racing on, rather than the character they chose, and they will always use a specific vehicle. If the player is playing as the cup's rival character, however, then a random character will serve as the primary rival instead. The rivals are unlocked as characters after receiving a trophy in their respective cups.
| Cup | Course 1 | Course 2 | Course 3 | Course 4 | Rival/unlockable character + Used vehicle |
|---|---|---|---|---|---|
Mushroom Cup |
Mario Bros. Circuit |
Crown City |
Whistlestop Summit |
DK Spaceport |
 Donkey Kong + Big Horn |
Flower Cup |
Desert Hills (DS) |
Shy Guy Bazaar (3DS) |
Wario Stadium (N64) |
Airship Fortress (DS) |
 Daisy + Rally Bike |
Star Cup |
DK Pass (DS) |
Starview Peak |
Sky-High Sundae (Switch/Tour) |
Wario Shipyard (3DS) Wario's Galleon |
 Rosalina + Stellar Sled |
Shell Cup |
Koopa Troopa Beach (SNES) |
Faraway Oasis |
Crown City |
Peach Stadium |
 Lakitu + Cloud 9 |
Banana Cup |
 Peach Beach (GCN) |
 Salty Salty Speedway |
 Dino Dino Jungle (GCN) |
Great ? Block Ruins |
 Birdo + Plushbuggy |
Leaf Cup |
Cheep Cheep Falls |
Dandelion Depths |
Boo Cinema |
Dry Bones Burnout |
 King Boo + Reel Racer |
Lightning Cup |
Moo Moo Meadows (Wii) |
Choco Mountain (N64) |
Toad's Factory (Wii) |
Bowser's Castle |
 Bowser Jr. + Mecha Trike |
 Special Cup |
Acorn Heights |
Mario Circuit (SNES) |
Peach Stadium |
Rainbow Road |
N/A |
Knockout Tour
The icons for each of the rallies correspond to a cup in Grand Prix in order, such as the Ice Rally matching the Flower Cup using a flower, the Cherry Rally matching the Banana Cup using fruit items, and the Cloud Rally matching the Lightning Cup using sky-themed items. Apart from the Ice, Cloud, and Heart Rallies, the icons for the other rallies were previously used as cup icons in the Mario Kart 8 Deluxe – Booster Course Pass. Of the courses available, Moo Moo Meadows, Cheep Cheep Falls, and Peach Stadium are visited the most frequently (three times each), while Rainbow Road is not visited at all.


Battle courses
Mario Kart World features eight battle courses, six of which are named after and derived from race tracks. Moo Moo Meadows features a new layout compared to its appearance in Mario Kart 8's Battle mode. Two battle courses are not named after race courses: Big Donut, returning from Mario Kart 64, and Chain Chomp Desert, a new course that functionally combines Thwomp Desert and Chain Chomp Wheel from Mario Kart Wii. The top row of battle courses function like the B variants of courses from Mario Kart Tour, taking place in the main race courses with additional pathways and areas opened up compared to their regular counterparts in order to be designed akin to older battle courses. DK Pass and Dino Dino Jungle instead take place on routes near their racing counterparts, and, alongside Big Donut and Chain Chomp Desert, also appear on the world map and are driven across during Grand Prix, marking the first time battle courses appear in a Grand Prix, though they are only driven across briefly.
Rather than sharing their music with their racing counterparts, all of the battle courses use arrangements of battle themes from past games: Mario Bros. Circuit uses Super Mario Kart's battle theme; Big Donut, Dino Dino Jungle, and DK Pass use their respective games' (64, Double Dash!!, and DS respectively) battle themes; Moo Moo Meadows, Salty Salty Speedway, and Chain Chomp Desert respectively use Chain Chomp Wheel, Delfino Pier, and Thwomp Desert's themes from Mario Kart Wii; and Peach Stadium uses Battle Stadium's theme from Mario Kart 8 Deluxe.
Unlike the battle courses in Mario Kart 8, the battle courses in this game have unique icons, rather than sharing them with their racing counterparts.
 Mario Bros. Circuit |
 Moo Moo Meadows |
 Peach Stadium |
 Salty Salty Speedway |
 Chain Chomp Desert |
 Dino Dino Jungle |
 Big Donut (N64) |
 DK Pass |
Staff ghosts
| Course | Staff Name | Time | Character | Vehicle |
|---|---|---|---|---|
| Mario Bros. Circuit | Nin★Erick | 2:04.488 | Mario | B-Dasher |
| Crown City | Nin★Rui | 2:24.487 | Luigi | Tune Thumper |
| Whistlestop Summit | Nin★Yunyun | 2:09.443 | Yoshi | Loco Moto |
| DK Spaceport | Nin★Anna | 1:41.918 | Pauline | Blastronaut III |
| Desert Hills | Nin★Matt | 1:48.580 | Pokey | Rally Kart |
| Shy Guy Bazaar | Nin★Sophia | 2:12.875 | Daisy | Carpet Flyer |
| Wario Stadium | Nin★Steven | 2:21.272 | Waluigi | W-Twin Chopper |
| Airship Fortress | Nin★David | 2:15.972 | Bowser Jr. | Mecha Trike |
| DK Pass | Nin★Bowen | 2:24.033 | Shy Guy | Dread Sled |
| Starview Peak | Nin★Rie | 2:32.873 | Rosalina | Stellar Sled |
| Sky-High Sundae | Nin★Clara | 2:08.490 | Snowman | Cute Scoot |
| Wario Shipyard | Nin★Sho | 2:42.276 | Wario | Lobster Roller |
| Koopa Troopa Beach | Nin★Hiromi | 1:40.002 | Koopa Troopa | Zoom Buggy |
| Faraway Oasis | Nin★Maria | 2:15.096 | Donkey Kong | Big Horn |
| Peach Beach | Nin★Susie | 1:53.839 | Baby Peach | Baby Blooper |
| Salty Salty Speedway | Nin★Gerald | 2:17.065 | Birdo | Plushbuggy |
| Dino Dino Jungle | Nin★Paula | 2:01.040 | Baby Rosalina | Junkyard Hog |
| Great ? Block Ruins | Nin★Frank | 2:27.687 | Lakitu | Cloud 9 |
| Cheep Cheep Falls | Nin★Masako | 2:25.189 | Cheep Cheep | Fin Twin |
| Dandelion Depths | Nin★Joseph | 2:38.460 | Para-Biddybud | Biddybuggy |
| Boo Cinema | Nin★Jeff | 2:21.551 | King Boo | Reel Racer |
| Dry Bones Burnout | Nin★Leonel | 2:24.264 | Dry Bones | Rallygator |
| Moo Moo Meadows | Nin★Chris | 2:15.382 | Cow | Rally Bike |
| Choco Mountain | Nin★Skip | 2:22.696 | Baby Mario | Tiny Titan |
| Toad's Factory | Nin★Joana | 2:07.530 | Toad | Li'l Dumpy |
| Bowser's Castle | Nin★Carlo | 2:37.113 | Bowser | Bowser Bruiser |
| Acorn Heights | Nin★Alice | 2:14.534 | Baby Daisy | Bumble V |
| Mario Circuit | Nin★Elena | 1:15.312 | Baby Luigi | Pipe Frame |
| Peach Stadium | Nin★John | 2:37.688 | Toadette | Mach Rocket |
| Rainbow Road | Nin★Akira | 4:21.295 | Peach | Roadster Royale |
Course elements
Mario Kart World has significantly more unique course elements compared to previous Mario Kart titles due to its interconnected, expanded world and new game mechanics. Several new course elements appear alongside a plethora of returning course elements taken from across the Super Mario franchise. Some species, such as Stingbies, appear both as enemies and as background characters.
Enemies, animals, and other species
| Species | Location | Description |
|---|---|---|
 Armadillo[53] |
Savanna and desert regions; mostly found on routes to Faraway Oasis | Armadillos that wander about in groups. They ball up and charge at racers as they approach. |
 Batadon |
Desert region; mostly found on Desert Hills | Large, winged moai heads that slowly bounce around an area. |
 Bob-omb Car |
On roads | Mega Bob-ombs strapped to two-wheeled platforms resembling the ones seen in Mario Kart: Double Dash!! and the Booster Course Pass for Mario Kart 8 Deluxe. They drive along the track and explode when something collides with them. |
 Bomber Bill |
On roads | Large missiles that fly along straight paths and explode when something collides with them. They are shot from Banzai Bill Cannons. |
 Boom Boom |
Near Bowser's Castle | Large Koopas that stand in place. They will spin wildly in an attempt to fist oncoming racers, as in Super Mario 3D Land and Super Mario 3D World. Unlike in most previous appearances, multiple Boom Booms exist and can be found in a single area. |
 Brachiosaurus |
Dino Dino Jungle | A large brachiosaurid replacing Noshi. Racers driving under it risk getting stomped, but its back acts like a grindrail, aiding racers in reaching high platforms by driving on its back. |
 Buffalo[54] |
Savanna region, near Faraway Oasis | Buffalo that run along the track in herds. |
 Bulber |
Near Wario Shipyard | Large anglerfish enemies that slowly move in circles at the surface of water. |
 Bully |
Certain roads and castle wall | Large, metallic enemies that walk in circles. They charge at oncoming racers. |
 Butterfly |
Large butterflies that carry rings. | |
 Camel [conjectural] |
Desert region | Dromedaries that walk across the track in groups. |
 Cataquack |
Peach Beach | Duck-like enemies that walk in circles. They charge at oncoming racers in an attempt to grab and toss them into the air. |
 Chain Chomp (chained) |
Hopping, metallic enemies bound by stakes that lunge at racers to attack. A free-roaming Chain Chomp can be found hopping in a circle outside Peach Stadium, in reference to Peach Gardens. | |
 Chain Chomp (unchained) |
Unbound Chain Chomps that roll along set paths or aimlessly on the track. | |
 Chargin' Chuck |
Found mostly in Choco Mountain | Koopa football players that charge back and forth between the sides of the track or at racers as they approach. |
 Clappin' Chuck |
Choco Mountain | Variants of Chargin' Chucks that jump horizontally between the sides of the track or jump in place, clapping in midair. |
 Passin' Chuck |
Choco Mountain | Variants of Chargin' Chucks that stand past the edge of the track and periodically toss footballs at oncoming racers. |
 Splittin' Chuck |
Choco Mountain | Variants of Chargin' Chucks that stand in lines and jump out to charge at racers. |
 Charvaargh |
In lava; in Big Donut | Large, magmatic dragons that leap from lava in arcs. |
 Cheep Cheep |
Cheep Cheep Falls and Koopa Troopa Beach | Small fish that are typically found swimming in groups, either slowly in circles or along straight paths at the surface of water. If they are in water too shallow to swim in, they will flop like they do in Super Mario Kart and Mario Kart DS. |
 Cheep Chomp |
Near Koopa Troopa Beach | Large variants of Cheep Cheeps that swim at the surface of water and periodically leap into the air to attack racers, akin to Boss Bass from Super Mario Bros. 3. They create waves upon landing that racers can trick off of. |
 Chill Bully |
On routes near Starview Peak | Frozen variants of Bullies with identical behavior: walking in circles and charging at oncoming racers. |
 Coin Coffer |
Coin purse enemies that wander about. They evade oncoming racers. | |
 Conkdor |
Desert region; near Desert Hills | Bird enemies with long necks that stand at the edge of the track and periodically slam their heads into the ground to attack racers. |
 Cow |
Meadow region; mostly in Moo Moo Meadows | Cows that stay in groups and walk across the track or stay in place and hop occasionally. |
 Crocodile |
Between Faraway Oasis and Great ? Block Ruins | Large reptilians that bask in the sun. Racers can jump from them to receive a speed boost. |
 Dolphin |
Oceans; mostly near Koopa Troopa Beach and Wario Shipyard | Dolphins that appear in groups and occasionally breach the water's surface. |
 Dragoneel |
Between Peach Beach and Wario Shipyard | Long, slender eels that repeatedly leap from the water along a sine-wave-like path. Their dorsal fins can be used in a similar fashion to a rail. |
 Dry Bones |
Near Dry Bones Burnout | Undead variants of Koopa Troopas that rise from the ground as racers approach and walk onto the track. |

|
Eagles that soar through the air. | |
  Elephant [conjectural] |
Near Faraway Oasis (wild) Near Shy Guy Bazaar (tamed) |
Elephants that walk across the track in groups. Some are ridden by Shy Guys. |
 Fire Snake |
DK Spaceport and near Desert Hills | Living chains of fireballs that hop around in an area. Their placement next to Donkey Kong-styled oil drums recalls Fireballs. |
 Fish Bone |
Hot springs near Dry Bones Burnout | Undead variants of Cheep Cheeps that behave identically to Cheep Chomps, swimming at the surface of water and periodically leaping into the air to attack racers. Unlike Cheep Chomps, they do not create waves upon landing. |
 Freezie |
Snow region | Frozen, stationary enemies. |
 Fuzzy |
Pulsating, inky enemies that ride along grindrails. | |
 Giraffe[55] |
Savanna region; near Faraway Oasis | Giraffes that walk across the track. |
 Goomba |
Mushroom enemies that stand in place, shuffling their feet as if sidestepping like in early Super Mario titles and previous Mario Kart titles. They charge at oncoming racers. They are significantly larger than usual, like in Mario Kart 7. | |

|
Linear and triangular stacks of mushroom enemies that stand in place, shuffling their feet. | |
 Innertube Goomba |
Certain rivers | Variants of Goombas that float motionlessly on the surface of water. They charge at oncoming racers. |
 Shoe Goomba |
Goomba's Shoe-wearing variants of Goombas that hop in circles. Their shoes take the yellow coloration of Ice Skates, like in Mario Kart Tour and the Booster Course Pass for Mario Kart 8 Deluxe. | |
 Skating Goomba |
Snow region | Ice Skate-wearing variants of Goombas that travel along the track. |
 Hammer Bro |
Near Shy Guy Bazaar and Airship Fortress | Stationary, lanky Koopas that periodically throw hammers that travel in arcs. These hammers break instantly upon touching the ground, unlike those racers can throw using the Hammer item. |
 Boomerang Bro |
Stationary variants of Hammer Bros. that periodically throw boomerangs, which travel a short distance before returning to their thrower. | |
 Fire Bro |
Stationary variants of Hammer Bros. that periodically hurl fireballs, which bounce along the track until they hit an obstacle. | |
 Ice Bro |
Stationary variants of Hammer Bros. that periodically hurl Ice Balls, which bounce along the track until they hit an obstacle. | |
 Hermity Cone |
Small creatures that hide in traffic cones, which they occasionally peek out from. | |
 Jellybeam |
Near Peach Stadium | Glowing jellyfish that float motionlessly on the surface of water. They bounce racers who drive into them into the air and can be tricked off of, like Mushroom Trampolines. |
 Lava Bubble |
Fireballs that periodically jump out of lava. Unlike in previous Mario Kart titles, they now possess eyes like they do in most other appearances. | |
 Manta-like creature |
Near Koopa Troopa Beach | Yellow Mobula rays resembling Jumbo Rays that periodically breach from the surface of water. |
 Monty Mole |
Moo Moo Meadows | Fossorial enemies that burrow through the ground before leaping into the air to attack racers. The temporary dirt trails they leave behind by burrowing can be tricked off of. |
 Moose[56] |
Near Acorn Heights and Boo Cinema | Bull moose that walk across the track. |
 Nabbit |
Free Roam in various regions | A rabbit-like entity that walks in circles. Nabbit evades approaching racers, running over land or water to keep his distance. He explodes into coins when caught. |
 Ostrich [conjectural] |
Savanna region; near Faraway Oasis | Ostriches that run across the track. |
 Para-Biddybud |
Dandelion Depths and certain routes | Multicolored, low-flying, ladybug-like enemies that slowly cross the track in processions of three. |
 Peepa |
Near Boo Cinema | Incorporeal enemies that appear in groups and float in circles close to the ground. Rather than slowing racers down when hit, they instead drop a coin. |
 Penguin |
Snow region near Sky-High Sundae | Penguins that can be found tobogganing down icy slopes or waddling together in groups. |

|
Carnivorous plants of which two varieties exist: a variant that lunges at racers to attack, which can appear in Warp Pipes and in holes in the ground, and a grounded, passive variant. | |
 Bone Piranha Plant |
Near Dry Bones Burnout | Warp Pipe-dwelling, undead variants of Piranha Plants with identical behavior: lunging at racers to attack. |
 Fire Piranha Plant |
Desert region | Warp Pipe-dwelling variants of Piranha Plants that periodically spit fireballs, which bounce along the track until they hit an obstacle. |
 Frost Piranha |
Snow region | Warp Pipe-dwelling variants of Fire Piranha Plants that, in place of fireballs, periodically spit Ice Balls, which bounce along the track until they hit an obstacle. |
 Ptooie |
Meadow region | Legged variants of Piranha Plants that shuffle in place and suspend items and hazards above themselves with jets of air. |
 Plesiosaur [conjectural] |
Dino Dino Jungle | A large plesiosaur-like reptile that replaces one of the bridges in Dino Dino Jungle. Like the brachiosaurus, its back acts like a grindrail. |
 Pokey |
Desert region | Tall, segmented cactus enemies that slide between the sides of the track while oscillating. |
 Snow Pokey |
Snow region | Tall, segmented, snowman variants of Pokeys that stand in place and oscillate. |
 Porcupuffer |
Near Koopa Troopa Beach | Spherical porcupinefish that float motionlessly on the surface of water in groups. |
 Pterosaurs |
Dino Dino Jungle | Large, winged reptiles that soar through the air. |
 Robo DK |
DK Spaceport | A large, mechanized version of Donkey Kong who gestures angrily at racers and travels ahead of them to toss rolling barrels onto the track. |
 Rocky Wrench |
Airship Fortress and certain roads | Mole-like Koopas that periodically pop out of manhole covers to ambush racers. |
Sandmaargh/Charvaargh hybrid[conjectural] |
Found on the route between Desert Hills and Shy Guy Bazaar | Enormous, worm-like dragons made of sand, taking design elements from Charvaarghs and Sandmaarghs, that repeatedly dive in and out of the desert along sine-wave-like paths. |
 Shy Guys piloting jet skis |
Peach Beach and certain rivers | Shy Guys riding Jet Skis across waterways. |
Snowboarding Shy Guy |
DK Pass | Shy Guys wearing winter clothing similar to the Slope Styler outfit that ride down snowy slopes on snowboards. |
 Flying Shy Guy |
Shy Guy Bazaar | Shy Guys riding magic carpets in the air.[3] |
 Sidestepper |
Near Salty Salty Speedway and Peach Beach | Enemy crabs that scuttle sideways between the sides of the track, bouncing several times before switching directions. |
 Signal Bug |
Metallic variants of Bramballs that flip across the road in a Slinky-like fashion. They act like rings when they are motionless and their traffic light-esque faces are illuminated, providing racers that pass between their legs with a speed boost. | |
 Skeeter |
On water near Acorn Heights and Toad's Factory | Water skeeters that skim on the surface of water, momentarily staying in one spot before propelling themselves to a nearby location. Their design is based on how they appear in Super Mario Galaxy 2. |
 Snake |
Shy Guy Bazaar | Green snakes that spring out of snake jars that are driven into. They now take design elements from Cobrats and Hisstocrats. |
 Snowman |
Snow region | Large, stationary snowmen. |
 Spike |
Stout, stationary Koopas that periodically regurgitate Spike Balls which they hurl at racers. | |
 Spiny |
Koopas that bear spikes on their shells and slowly walk across the track. | |
 Star Thwomp |
Rainbow Road | Rainbow variants of Thwomps with identical behavior: periodically shaking before crashing into the ground to squash racers underneath them. |
 Stingby |
Forest region; near Acorn Heights | Low-flying bee enemies that hover motionlessly. They charge at oncoming racers. |
 Sumo Bro |
Castle wall between Airship Fortress and Dry Bones Burnout | Large, stationary Koopas that stand atop floating blocks. They occasionally pound their feet to send balls of electricity onto the track below them. |
 Super Koopa |
Caped unshelled Koopas that fly above the track while periodically dropping Feathers. | |
 Swoop |
Near Boo Cinema | Low-flying bat enemies that follow set paths in groups. |
 Thwomp |
Grimacing stone enemies that are suspended in the air. They periodically begin shaking, crash into the ground to squash racers underneath them, and rise back to their original position. | |
 Tokotoko |
Desert region; mostly found on Desert Hills | Large, sunglasses-wearing moai heads that stand motionlessly. They run along the track as racers approach. |
 Treaded Grrrol |
Tire-wearing, metallic Grrrols that roll between the sides of the track. | |
 T. rex |
Dino Dino Jungle | Large Tyrannosaurus rexes that run along the track to squash oncoming racers. |
 Triceratops |
Dino Dino Jungle | A large ceratopsian that slowly walks along the track. Racers can drive up its face and neck frill like a ramp. |
 Ty-foo |
Near Starview Peak and Wario Shipyard | Large, floating cloud enemies that periodically blow powerful gusts of wind. |
 Whale |
Between Koopa Troopa Beach and Peach Stadium | Large baleen whales that either float at the surface of water, periodically creating trickable spouts from their blowholes, or breach from the water, creating trickable waves upon landing. Their dorsal fins can be tricked off of. |
 Whamp |
Near Dry Bones Burnout and Bowser's Castle | Wedge-shaped Whomps that stand in place, shuffling their feet. They fall over in an attempt to squash oncoming racers; while toppled over, racers can drive over them like ramps. |
 Wiggler |
Acorn Heights and routes leading to/from it | Large caterpillar enemies that walk along the track. They may become angered, causing them to turn red and begin charging. |
 Zebra |
Savanna region; near Faraway Oasis | Zebras that run along the track in herds. They are visually similar to the horses in Mario Sports Superstars. |


Obstacles
| Obstacle | Location | Description |
|---|---|---|
 Acorn[57] |
Acorn Heights | Large acorns that fall out of the treetops and roll down the track. |
 Anchor |
Wario Shipyard | A large anchor suspended above the track that rocks from side to side like a pendulum. |
 Banzai Bill Cannon |
On roads | Enlarged Bill Blasters that periodically shoot Bomber Bills. They often appear on the backs of trucks driving along roads. The Banzai Bill Cannon on Airship Fortress has the added ability to move side to side. |

|
Barrels of which two varieties exist: a smaller, stationary variant found on land or floating in water, which breaks and may release various items when hit, and a larger, rolling variant thrown by Robo DK and dispensed by barrel cannons. | |
Barrel-dispensing cannons [conjectural] |
DK Spaceport | Rocket engine-esque Cannons that dispense rolling barrels periodically in DK Spaceport. |
 Boulder |
Choco Mountain | Large, spherical rocks that roll down the track and break when they hit an obstacle. |
 Bouncy Cloud |
Great ? Block Ruins | Flat, floating clouds that bounce racers who drive onto them into the air and can be tricked off of, like Mushroom Trampolines. |
 Giant Bowser cloud [conjectural] |
Bowser's Castle | A cloud of volcanic ash resembling Lava Bowser that shoots Bowser's Flames from its mouth. |
 Bowser's Flame |
Bowser's Castle | Slow-moving Fireballs shot by the giant Bowser cloud that rain from the sky, akin to volcanic debris. Red cursors, like those seen during the flying battleship Wonder Effect, indicate where they will crash into and break apart on the track. |
 Brick Block |
Blocks that break instantly upon contact without slowing racers down, unlike crates. | |
 Bubble |
Floating bubbles that carry various items within them and drop them by popping randomly. | |
 Burner |
Airship Fortress | Flamethrowers hanging off Bolt Lifts that move between the sides of the track and constantly blast racers below with jets of fire. |
 Capsule [conjectural] |
Toad's Factory | Giant gashapon capsules that break and release various items when hit. |
 Cloud Lift |
Elongated, floating clouds that typically carry background characters and enemies but can also be summoned as platforms during missions. | |
 Conveyor Belt |
Toad's Factory | Platforms that either move parallel or horizontal to the direction of the track, periodically flashing before switching directions. Depending on the direction of the Conveyor Belt, racers driving on top of them may receive a speed boost or speed reduction or be pushed off-course. |
 Crate |
Wooden boxes found on land or floating in water. They break and release various items when hit. | |
 Crusher |
Toad's Factory | Hydraulic presses used to transform Brick Blocks into Item Boxes. They can squash racers that get caught below them as they periodically lower. |
 Current |
Faraway Oasis; route between Salty Salty Speedway and Dino Dino Jungle | Flowing water that can push racers off-course if it moves perpendicular to the track or push racers forward if it moves with the track. |
 Dinosaur egg [conjectural] |
Dino Dino Jungle | Large colored dinosaur eggs that can be knocked around by racers |
 Empty Block |
Blocks that typically carry enemies but can also be summoned as platforms or as obstacles during missions. | |
 Football [conjectural] |
Gridiron footballs kicked by Passin' Chucks that bounce several times before coming to a stop and vanishing. | |

|
Jets of water that periodically rise from fractures in the ground, which can be tricked off of, or from manholes. | |
 Hat Trampoline-esque flower |
Large flowers that bounce racers who drive onto them into the air and can be tricked off of, like Mushroom Trampolines. | |
 Ivy Piranha Plant |
Bulbs that extend into vines when touched, acting as grindrails. They flower when fully grown. They resemble the design Vines have commonly used since New Super Mario Bros. Wii, though with twisted stems. | |
 Jar |
Shy Guy Bazaar | Jars with various designs, which are found in clusters. Green jars occasionally have snake jars concealed among them. |
 Lava |
Near Dry Bones Burnout and Bowser's Castle | A glowing, molten liquid hazard that forms puddles and lakes. In a similar fashion to deep water in Super Mario Kart and Mario Kart: Super Circuit, racers that drive through lava are slowed and begin struggling; they are saved by Lakitu if they do not escape fast enough. |
 Lava Geyser |
Bowser's Castle | Geysers that periodically rise from lava. |
 Mud |
Choco Mountain | A liquid hazard of which two varieties exist: a light variant that merely slows racers that drive through it and a dark variant that, in a similar fashion to deep water in Super Mario Kart and Mario Kart: Super Circuit, also causes racers to begin struggling and to be saved by Lakitu if they do not escape fast enough. |
 Mushroom Trampoline |
Acorn Heights | Flat mushrooms that bounce racers who drive onto them into the air and can be tricked off of. |
 Note Block |
Blocks floating close to the ground that bounce racers who drive onto them into the air. | |
Poison swamp |
Near Boo Cinema | A purple liquid hazard. In a similar fashion to deep water in Super Mario Kart and Mario Kart: Super Circuit, racers that drive through poison are slowed and begin struggling; they are saved by Lakitu if they do not escape fast enough. |
 Quicksand [conjectural] |
Chain Chomp Desert | Enormous, sandy depressions resembling antlion pits that drag racers and other objects toward their central holes. |
 Snowball |
Variants of boulders with identical behavior: rolling down the track and breaking when they hit an obstacle. | |
 Spike Ball |
Metallic, spike-covered balls. They are regurgitated by Spikes and tumble down the track or exist separately and roll aimlessly, disappearing or getting knocked away when they hit an obstacle. | |
 Storm |
Weather phenomena that shower racers with different items depending on the storm. They can occur randomly or during specific missions. | |
 Straw bale [conjectural] |
Meadow region; mostly in Moo Moo Meadows | Large bales of straw that appear alone or in heaps, which can be can be knocked around by racers. |
 Tire stack |
Tires found in stacks, which can be toppled over. They knock back racers who drive into them. | |
 Tornado |
Enormous vortices that sweep up objects off the ground. Racers that drive into a tornado will be immobilized for a few seconds while they are moved around in the tornado before being released. When released, racers will start or retain their flying state. Flying just outside their wind will give gliding racers a boost upwards from the tailwinds. | |
| Trampolines of multiple shapes and sizes that bounce racers and objects that touch them into the air and can be tricked off of, like Mushroom Trampolines. | ||
 Tumbleweed [conjectural] |
Tumbling desert plants that can jump over obstacles. | |
 Turnip |
Central region | Plants that can be uprooted by driving into them. Occasionally, uprooting a turnip releases a Mushroom. |
Water |
A widespread liquid that interacts with its environment. Storms and disturbances cause waves to form in the water, which can be tricked off of. Unlike in previous Mario Kart titles, water can now be ridden on top of; doing so transforms the racer's wheels into water skis. | |
Whirlpool |
Large vortices that appears on the surface of water and suck racers towards their centers. |


Vehicles
| Obstacle | Location | Description |
|---|---|---|
 Bus |
Large vehicles that drive along the track. | |
 Car |
Common vehicles that drive along the track. | |
  Dash panel ramp truck [conjectural] |
Trucks that drive along the track which bear ramps that end in Dash Panels or Glide Ramps. Some, resembling the hat-wearing Yoshi employees of Yoshi's, carry Dash Food bags. | |
 Gondola [conjectural] |
Gondolas manned and ridden by Toads on waterways. | |
  Item-dispensing car |
Swerving cars that rapidly dispense items and obstacles behind them. | |
 Mushroom truck [conjectural] |
Mushroom-shaped box trucks that periodically drop Dash Mushrooms behind them onto the track. | |
 Pickup truck [conjectural] |
Smaller trucks that drive along the track. They typically carry an assortment of enemies and obstacles on their beds, a feature brought over from Mario Kart Tour. Some carry surfboards, small pipes, or Lifts based on their Super Mario 3D Land design, which act as ramps. | |
 Raft [conjectural] |
Small rafts manned by Toads that float down waterways. | |
 Truck [conjectural] |
Trucks with one or two containers that drive along the track. They are different from trucks that can be controlled. | |
Floatplane [conjectural] |
Amphibious aircraft whose wings can be driven on, including when they fly. | |
Train |
Steam locomotives that travel along railroads. Their rearmost cars are sometimes sloped, allowing racers to drive on top of them. |
Utility objects
| Object | Location | Description |
|---|---|---|
 ? Block |
Blocks floating close to the ground. If a racer hits one from below, several coins are added to their own coin counter while four additional coins will pop out of the top of the block. | |
 ? Panel |
Hidden panels, resembling those from Super Mario Kart, scattered across the map. | |
Arrow field |
Barriers that typically direct the player in the right direction, though they sometimes display advertisements instead. They are intangible to obstacles like cars. | |
 Binoculars |
Binoculars that, when touched, provide racers with a bird's eye view of their surroundings and allow them to zoom in on areas of interest. | |
Boat [conjectural] |
Boats that can be temporarily hijacked for a speed boost on water and to plow through obstacles. They are used on routes between Peach Beach and Wario Shipyard, as well as the route from DK Spaceport to Peach Stadium. | |

|
Cannons of which two varieties exist: a more typical, larger variant that launches racers who enter it into the air over large distances and a smaller variant that launches racers over shorter distances which can be strapped to pickup trucks or float in the air like Barrel Cannons. | |
 Cargo truck |
Large vehicles that can be temporarily hijacked for a speed boost on land and to plow through obstacles. They are used on three pairs of routes: between Crown City and Faraway Oasis, Toad's Factory and Mario Bros. Circuit, and Peach Stadium and Toad's Factory. Smaller cargo trucks also appear as obstacles. | |

|
Rings that give the player more time to complete a timed mission, like the + Clock. | |
Dash Panel |
Panels that provide racers that drive over them with a temporary speed boost. | |
Flying guide [conjectural] |
Yellow flying guides that direct racers as they glide. They resemble Flopters and Topmen. | |
Glide Ramp |
Panels that deploy the wings of racers that drive over them, allowing them to glide. | |
 Goal Pole |
A flagpole that marks the end goal of a timed mission, which is completed by touching the flagpole. | |
 Goal ring [conjectural] |
Rings that mark the end goals of timed missions, which are completed by passing through the rings. | |
Guide [conjectural] |
Traffic pylon-like guides that direct the player during missions. | |
 Helicopter [conjectural] |
Helicopters that can be temporarily hijacked to fly and to plow through obstacles. They are used on routes between Mario Bros. Circuit and Toad's Factory, as well as the route from DK Spaceport to Peach Stadium. Racers leave helicopters in their gliding state. Text that is only visible on their rotating blades read "MARIOKART". | |
.png) Item Ring [conjectural] |
At the start of a lap section on routes leading to/from Starview Peak. | Large rainbow-colored rings, similar to the checkpoints in Knockout Tour, that summon large walls of Item Boxes when approached. |
 Lakitu's Cloud |
Small, floating clouds. Circling groups of Lakitu's Clouds can form rings, providing racers that pass through them with a speed boost. They can also be summoned during missions, holding Arrow Signs to guide racers. | |
 Pipe Cannon |
L-shaped Warp Pipe junctions like those seen in Super Mario Bros. Racers enter through the lower opening and are launched into the air at an angle through the upper opening. | |

|
Switches scattered across the map that each provide a unique mission when pressed. After the mission is complete, it turns gray. | |
 Ring |
Circular, floating or grounded hoops with a wide variety of designs. They provide racers that pass through them with a speed boost. | |
 Road flare [conjectural] |
Road flares that release red smoke to alert racers at a distance. They mark areas of interest during missions. | |
 UFO |
UFOs that can be temporarily hijacked to fly and abduct objects. Racers leave UFOs in their gliding state. They are exclusive to Free Roam. | |
 Vending machine [conjectural] |
Vending machines that periodically cough up Dash Food bags. | |
 Warp Pipe |
Giant and regularly-sized pipes. They are mainly used as obstacles, but some of them can warp the player to nearby locations or spit the player out in the opposite direction they entered. |


Background characters

Bats, in the background of Boo Cinema
Boo Crews, in the background of Boo Cinema
Boohemoth, in the background of Boo Cinema
Drones resembling Koopa Shells
![Fireflies[conjectural]](https://mario.wiki.gallery/images/thumb/9/98/MKWorld_Firefly.png/120px-MKWorld_Firefly.png)
Fireflies[conjectural]
![Flies[conjectural]](https://mario.wiki.gallery/images/thumb/7/77/MKWorld_Flies.png/120px-MKWorld_Flies.png)
Flies[conjectural]
A red Lakitu that leads Knockout Tour
Para-Beetles wearing blue shells with propellers instead of wings
Seagulls, which fly in the air of beachfront courses


![Fireflies[conjectural]](/File:MKWorld_Firefly.png)
![Flies[conjectural]](/File:MKWorld_Flies.png)


.png)
Items
A total of 27 items appear in Mario Kart World, 28 if including Dash Food. As with Mario Kart Tour, items are automatically held behind racers in this game.
Of the returning items, the Ice Flower and Hammer make their first appearance in a home console Mario Kart game following their initial debut in Mario Kart Tour. The Mega Mushroom also makes its first home console appearance since its debut in Mario Kart Wii. Additionally, the Feather is now usable during races like in Super Mario Kart, rather than being exclusive to the Battle mode like in Mario Kart 8 Deluxe and Mario Kart Tour. Despite being returning items, the Ice Flower, Hammer, Feather, and Mega Mushroom are all classified as new items on the game's website and/or in the Mario Kart World Direct.[59][37]
During Free Roam, the only available items outside of certain missions are the Mushroom, Triple Mushroom, Golden Mushroom, Star, Feather, and Dash Food.
Items found on the track | |
|---|---|
 Item Box |
Gives the player a random item. Some are released from flying vehicles attached to parachutes. |
 Double Item Box |
Gives the player two random items as opposed to one. |
 Coin |
Gives the player a small boost and increases top speed when more are collected, up to a maximum of 20. |
 Coin pile |
Piles of coins that can be found exclusively in Free Roam that provide a large amount of coins at once. |
 Blue coin |
Appears in certain areas upon pressing a P Switch. |
 Dash Food bag[conjectural] |
A smiling, golden fast food bag that provides a random food item that changes the player's outfit when eaten, with a visual transformation effect similar to that of a Wonder Flower. |
 Peach Medallion |
New coin collectables imprinted with a portrait of Peach, resembling Princess Coins. |
New items | |
 Coin Shell |
Travels along the track and leaves a trail of coins behind before exploding, leaving eight coins in a ring shape on the track. Gold-colored shells previously appeared in Mario Kart Arcade GP DX, though they functioned differently. |
 ? Block |
Temporarily places a ? Block above the player's head, which they can repeatedly hit, giving them coins while also scattering more coins behind them. A similar item, the Coin Box, previously appeared in Mario Kart Tour. |
 Kamek |
A crystal ball with Kamek's magic symbols on it that summons him, who then proceeds to summon many of a certain type of enemy ahead of all the racers in front of the player who used it, as well as turning them into that enemy temporarily. |
 Dash Food |
Various food items obtained from the smiling bags that give the player a speed boost and may change the character's outfit. |
Returning items | |
 Coin |
Grants the player two extra coins and a small boost. |
 Green Shell |
Travels in a straight line and knocks over a kart it hits. |
 Triple Green Shells |
Three Green Shells that orbit the player's kart, protecting them from incoming attacks. |
 Red Shell |
Homes in on the closest kart in front of the player and knocks it over. |
 Triple Red Shells |
Three Red Shells that orbit the player's kart, protecting them from incoming attacks. |
 Spiny Shell |
Targets the racer in first place, knocking over all other karts in its path. |
 Banana Peel |
Protects the player from incoming items, and spins out other racers that hit it. |
 Triple Bananas |
Three bananas that orbit the player's kart, protecting them from incoming attacks. |
 Mushroom |
Provides the player's kart with a small speed boost. |
 Triple Mushrooms |
Orbits the player's kart, providing them with three separate speed boosts. |
 Golden Mushroom |
Provides the player's kart with continuous speed boosts for a short time. |
 Mega Mushroom |
Increases the player's size, allowing them to flatten any player they hit. |
 Feather |
Causes the player to spin and leap in the air, allowing them to reach high areas, avoid attacks, and even drive on walls. |
 Fire Flower |
Allows the player to throw up to eight fireballs for a short time that cause other karts to spin out on impact. |
 Ice Flower |
Allows the player to throw up to eight ice balls for a short time that cause other karts to temporarily lose control on impact. |
 Boomerang Flower |
Grants the player a Boomerang that can be thrown up to four times, hitting racers forward/backward and returns to its user before the final use. |
 Star |
Provides the player invincibility from all terrain and items, and also giving a speed boost. |
 Super Horn |
Emits a radial shockwave hitting racers, as well as destroying all obstacles, including the Spiny Shell. |
Lightning |
Causes all opponents in front of the player to drop their items, shrink, and drive slowly for a short time in addition to summoning a temporary storm. |
 Hammer |
For a limited time, allows the player to throw multiple bursts of five hammers each, which travel in an arc and stick to the track, spinning out any player that comes into contact with them. |
 Blooper |
Sprays ink on all racers ahead and reduces their visibility. The racers hit also lose some of their traction while sprayed. |
 Bob-omb |
Explodes after a short time when thrown or dropped, knocking over any kart in its blast radius. |
Bullet Bill |
Transforms the player into a Bullet Bill, rocketing through the track with auto-pilot, and providing invincibility from all terrain and items. |
 Boo |
Steals an item from a randomly selected racer in front of the player, while granting temporary invisibility, making the player invulnerable and able to pass through hazards. |
Missions
- Main article: List of Mario Kart World missions
In Free Roam, the player can activate short missions in the open world by driving over P Switches. Once activated, the player has within the time limit to complete a certain task. If they complete the task, they will briefly celebrate, accompanied by an abridged arrangement of the "Finish! (1st − 4th Place)" jingle from Super Mario Kart. If not, they fail and have to redo it. After a mission is completed, its P Switch turns gray.
Music
This section is a stub. Please consider expanding it to include any missing information. Specifics: Needs elaboration on which time of day in Free Roam the arrangements can play.
| It has been requested that more audio and/or video files related to this section be uploaded. Specifics: Fill in more of the "Sample" columns Please upload music, sound effects, voice clips, or any videos for this section. See the help page for help getting started. |
Mario Kart World has 226 newly arranged music tracks that can be listened to on the main menu, in Free Roam, or during routes in Grand Prix or VS Race; they consist of 108 arrangements from the Mario Kart series, 101 from the Super Mario series, 10 from the Yoshi series, 2 from Mario Paint, and 1 each from Wario Land: Super Mario Land 3, Donkey Kong Country, Luigi's Mansion, WarioWare, Inc.: Mega Microgame$!, and Flipnote Studio. This randomized selection of music was referred to as the "jukebox" in development.
Routes in Grand Prix have three to five dedicated arrangements that usually fit the theme of the source and/or the destination. Routes in VS Race have a completely random list of arrangements that don't tend to fit the theme of the route even if one used in Grand Prix is selected; all Grand Prix arrangements play in this mode, plus a few more exclusive ones. Most VS Race arrangements can play in Free Roam, along with a few calmer and slower paced arrangements exclusive to that mode. Some songs also play in a certain order, usually matching one of a game's soundtrack.
Additionally, certain arrangements incorporate the melodies of other songs at certain points, such as the "Underground BGM" arrangement from Super Mario Bros. 2 also including part of "Ground BGM," or the Mario Drawing Song having a nod to "Jump Up, Super Star!" While the arrangements for the returning courses usually stay true to the lengths of the original tracks, the battle course themes take after these arrangements and include improvised additional sections, except they loop.
The following list does not include arrangements of themes for classic race courses and battle courses present in the game. "Koopa Beach" from Super Mario Kart is the only song that was arranged for both one of the game's courses and Free Roam.
Mario Kart arrangements
| Song | Game | Location | Sample | Notes |
|---|---|---|---|---|
| "Super Mario Kart Title Screen" (daytime) | Super Mario Kart | Crown City → Peach Stadium, menus and Free Roam | ||
| "Super Mario Kart Title Screen" (nighttime) | Menus and Free Roam | |||
| "Donut Plains" | Mario Circuit → Peach Stadium, menus and Free Roam | 0:28 | ||
| "Ghost Valley" | Boo Cinema → Dry Bones Burnout | |||
| "Bowser Castle" | VS Race routes | |||
| "Choco Island" (daytime) | Choco Mountain → Toad's Factory, menus and Free Roam | |||
| "Choco Island" (nighttime) | Menus and Free Roam | |||
| "Vanilla Lake" | Menus and Free Roam | |||
| "Koopa Beach" | Menus and Free Roam | |||
| "Rainbow Road" | Menus and Free Roam | |||
| "Staff Credits" | Menus and Free Roam | |||
| "Mario Kart 64 Title Screen" | Mario Kart 64 | VS Race routes, menus and Free Roam | ||
| "Selection Screens" | Menus and Free Roam | |||
| "Moo Moo Farm/Yoshi Valley" | Moo Moo Meadows → Choco Mountain, menus and Free Roam | |||
| "Koopa Troopa Beach" (daytime) | Koopa Troopa Beach → Faraway Oasis, menus and Free Roam | |||
| "Koopa Troopa Beach" (nighttime) | Menus and Free Roam | |||
| "Kalimari Desert" | Desert Hills → Shy Guy Bazaar, menus and Free Roam | |||
| "Toad's Turnpike" | VS Race routes, menus and Free Roam | |||
| "Frappe Snowland/Sherbet Land" (daytime) | DK Pass → Starview Peak | |||
| "Frappe Snowland/Sherbet Land" (nighttime) | Menus and Free Roam | |||
| "DK's Jungle Parkway" | Faraway Oasis → Crown City, menus and Free Roam | |||
| "Rainbow Road" | Menus and Free Roam | |||
| "Results (1st − 4th Place)" | Menus and Free Roam | |||
| "Peach Circuit/Mario Circuit/Luigi Circuit" | Mario Kart: Super Circuit | Mario Circuit → Peach Stadium, menus and Free Roam | Takes elements from the prototype version of the theme | |
| "Shy Guy Beach/Cheep-Cheep Island" | Menus and Free Roam | |||
| "Riverside Park" | Faraway Oasis → Crown City, menus and Free Roam | |||
| "Bowser Castle" | VS Race routes | |||
| "Cheese Land" | VS Race routes, menus and Free Roam | |||
| "Ribbon Road" | Whistlestop Summit → DK Spaceport, menus and Free Roam | 0:31 | ||
| "Yoshi Desert" | Shy Guy Bazaar → Wario Stadium, menus and Free Roam | |||
| "Rainbow Road" | VS Race routes | |||
| "Luigi Circuit/Mario Circuit/Yoshi Circuit" | Mario Kart: Double Dash!! | Menus and Free Roam | ||
| "Baby Park" | Koopa Troopa Beach → Faraway Oasis, menus and Free Roam | |||
| "Dry Dry Desert" | Menus and Free Roam | |||
| "Mushroom Bridge/Mushroom City" | VS Race routes, menus and Free Roam | |||
| "Sherbet Land" | Starview Peak → Sky-High Sundae | |||
| "Bowser's Castle" | Toad's Factory → Bowser's Castle | |||
| "Rainbow Road" | VS Race routes | |||
| Staff Credits | Menus and Free Roam | |||
| "Figure-8 Circuit/Mario Circuit" | Mario Kart DS | Menus and Free Roam | ||
| "Yoshi Falls" | VS Race routes, menus and Free Roam | |||
| "Cheep Cheep Beach" | Menus and Free Roam | |||
| "Luigi's Mansion" | Boo Cinema → Dry Bones Burnout | Takes elements from its arrangement for GCN Luigi's Mansion in Mario Kart 8 Deluxe | ||
| "Delfino Square" | Salty Salty Speedway → Dino Dino Jungle, menus and Free Roam | |||
| "Waluigi Pinball/Wario Stadium" (daytime) | Wario Stadium → Airship Fortress | |||
| "Waluigi Pinball/Wario Stadium" (nighttime) | Menus and Free Roam | |||
| "Shroom Ridge" | Menus and Free Roam | |||
| "Tick-Tock Clock" | VS Race routes, menus and Free Roam | |||
| "Peach Gardens" | Menus and Free Roam | |||
| "Rainbow Road" | VS Race routes | |||
| "Staff Credits" | Menus and Free Roam | |||
| "Luigi Circuit/Mario Circuit" | Mario Kart Wii | VS Race routes, menus and Free Roam | ||
| "Mushroom Gorge" | VS Race routes, menus and Free Roam | |||
| "Coconut Mall" | VS Race routes, menus and Free Roam | 0:31 | ||
| "DK Summit" | Starview Peak → Sky-High Sundae, menus and Free Roam | |||
| "Wario's Gold Mine" | VS Race routes, menus and Free Roam | |||
| "Daisy Circuit" (daytime) | Salty Salty Speedway → Dino Dino Jungle, menus and Free Roam | |||
| "Daisy Circuit" (nighttime) | Menus and Free Roam | |||
| "Maple Treeway" | Menus and Free Roam | 0:30 | ||
| "Grumble Volcano" | VS Race routes, menus and Free Roam | |||
| "Dry Dry Ruins" | Menus and Free Roam | |||
| "Moonview Highway" | Wario Stadium → Airship Fortress, menus and Free Roam | |||
| "Rainbow Road" | VS Race routes | |||
| "Staff Roll A" | Menus and Free Roam | |||
| "Toad Circuit/Mario Circuit" | Mario Kart 7 | VS Race routes, menus and Free Roam | ||
| "Daisy Hills" | VS Race routes, menus and Free Roam | |||
| "Music Park" | Menus and Free Roam | |||
| "Rock Rock Mountain" | VS Race routes, menus and Free Roam | |||
| "Piranha Plant Slide" | Choco Mountain → Toad's Factory, menus and Free Roam | |||
| "DK Jungle" | Faraway Oasis → Crown City, menus and Free Roam | |||
| "Rosalina's Ice World" | DK Pass → Starview Peak, menus and Free Roam | |||
| "Rainbow Road" | Menus and Free Roam | |||
| "Staff Credits" | VS Race routes, menus and Free Roam | |||
| "Mario Kart 8 Title Screen" (daytime version) | Mario Kart 8 | Crown City → Peach Stadium, menus and Free Roam | ||
| "Mario Kart 8 Title Screen" (nighttime version) | Menus and Free Roam | |||
| "Water Park" | Koopa Troopa Beach → Faraway Oasis, menus and Free Roam | |||
| "Sweet Sweet Canyon" (daytime) | Menus and Free Roam | |||
| "Sweet Sweet Canyon" (nighttime) | Menus and Free Roam | Quotes "Ground BGM" from Super Mario Bros. | ||
| "Thwomp Ruins" | Dino Dino Jungle → Great ? Block Ruins, menus and Free Roam | |||
| "Mario Circuit" | VS Race routes, menus and Free Roam | |||
| "Toad Harbor" (daytime) | Crown City → Whistlestop Summit, menus and Free Roam | |||
| "Toad Harbor" (nighttime) | Menus and Free Roam | Quotes "Dolphin Shoals" | ||
| "Twisted Mansion" | Boo Cinema → Dry Bones Burnout | |||
| "Shy Guy Falls" | VS Race routes, menus and Free Roam | |||
| "Sunshine Airport" (daytime) | Peach Beach → Salty Salty Speedway, menus and Free Roam | |||
| "Sunshine Airport" (nighttime) | Menus and Free Roam | |||
| "Dolphin Shoals" (daytime) | Salty Salty Speedway → Dino Dino Jungle, menus and Free Roam | |||
| "Dolphin Shoals" (nighttime) | Menus and Free Roam | |||
| "Electrodrome" | VS Race routes, menus and Free Roam | |||
| "Mount Wario" | Sky-High Sundae → Wario Shipyard, menus and Free Roam | |||
| "Cloudtop Cruise" | Crown City → Peach Stadium, menus and Free Roam | 0:31 | ||
| "Bone-Dry Dunes" | Shy Guy Bazaar → Wario Stadium, menus and Free Roam | |||
| "Bowser's Castle" | VS Race routes | |||
| "Rainbow Road" | VS Race routes, menus and Free Roam | Quotes the bassline from "Mario Kart 8 Title Screen" | ||
| "Dragon Driftway" | Cheep Cheep Falls → Dandelion Depths, menus and Free Roam | |||
| "Ice Ice Outpost" | Sky-High Sundae → Wario Shipyard, menus and Free Roam | |||
| "Wild Woods" | Acorn Heights → Mario Circuit, menus and Free Roam | |||
| "Super Bell Subway" | Menus and Free Roam | |||
| "Tokyo Blur" | Mario Kart Tour | Crown City → Whistlestop Summit, menus and Free Roam | 0:31 | |
| "Vancouver Velocity" | DK Pass → Starview Peak, menus and Free Roam | |||
| "Los Angeles Laps" | Menus and Free Roam | |||
| "Merry Mountain" | Menus and Free Roam | |||
| "Ninja Hideaway" | Cheep Cheep Falls → Dandelion Depths | |||
| "Singapore Speedway" | Crown City → Whistlestop Summit, menus and Free Roam | |||
| "Bangkok Rush" | Acorn Heights → Mario Circuit, menus and Free Roam | |||
| "Piranha Plant Pipeline" | Choco Mountain → Toad's Factory, menus and Free Roam | |||
| Main theme | Mario Kart Live: Home Circuit | VS Race routes, menus and Free Roam | ||
| "Squeaky Clean Sprint" | Mario Kart 8 Deluxe (Booster Course Pass) | Menus and Free Roam |
Super Mario arrangements
| Song | Game | Location | Sample | Notes |
|---|---|---|---|---|
| "Ground BGM" (daytime) | Super Mario Bros. | Menus and Free Roam | 0:31 | Based on its arrangement from Super Mario All-Stars |
| "Ground BGM" and "Game Over" | Menus and Free Roam | |||
| "Underground BGM" (big band) | Dandelion Depths → Boo Cinema, menus and Free Roam | Based on its arrangement from Super Mario 3D Land | ||
| "Underground BGM" (Latin guitar) | Menus and Free Roam | |||
| "Underwater BGM" | Menus and Free Roam | |||
| "Ground BGM" | Yume Kōjō: Doki Doki Panic / Super Mario Bros. 2 | Menus and Free Roam | ||
| "Please Select Player" | Mario Circuit → Peach Stadium, menus and Free Roam | |||
| "Underground BGM" and "Ground BGM" | Dandelion Depths → Boo Cinema, menus and Free Roam | |||
| "World 1 Map (Grass Land)," "World 2 Map (Desert Land)," "World 5 Map (Sky Land) - In the Sky," "World 7 Map (Pipe Land)" and "World 3 Map (Water Land)" | Super Mario Bros. 3 | Menus and Free Roam | ||
| "Ground BGM" | Menus and Free Roam | Takes elements from its editor theme from Super Mario Maker | ||
| "Athletic BGM" | Mario Bros. Circuit → Crown City, menus and Free Roam | |||
| "Underwater BGM" | Peach Beach → Salty Salty Speedway, menus and Free Roam | |||
| "Fortress Boss" | VS Race routes | |||
| "Airship BGM" | VS Race routes | |||
| "Ending" | Menus and Free Roam | Based on its arrangement from the "Mario & Zelda Big Band Live" concert series | ||
| "Main Theme" | Super Mario Land | Menus and Free Roam | Based on its arrangement from the "Super Mario Land" album | |
| "Underground Theme" | VS Race routes, menus and Free Roam | |||
| "Title BGM" | Super Mario World | Menus and Free Roam | ||
| "Ground BGM" (rock) | VS Race routes, menus and Free Roam | |||
| "Ground BGM" (ska) | VS Race routes, menus and Free Roam | |||
| "Ground BGM" (bluegrass) | Moo Moo Meadows → Choco Mountain, menus and Free Roam | |||
| "Underground BGM" | Dandelion Depths → Boo Cinema, menus and Free Roam | |||
| "Underwater BGM" | Menus and Free Roam | |||
| "Bonus Game BGM" | VS Race routes, menus and Free Roam | |||
| Yoshi's Island (Map Screen)," "Star World (Map Screen)" "Donut Plains (Map Screen)," "Forest of Illusion (Map Screen)" and "Special World (Map Screen)" | Menus and Free Roam | |||
| "Castle BGM" | VS Race routes | |||
| "Koopalings BGM" | VS Race routes, menus and Free Roam | |||
| "Ending" | Menus and Free Roam | |||
| "Main Theme" | Super Mario Land 2: 6 Golden Coins | VS Race routes, menus and Free Roam | 0:30 | |
| "File Select" | Super Mario 64 | Menus and Free Roam | ||
| "Super Mario 64 Main Theme" | Menus and Free Roam | Based on its arrangement from the "Super Mario Bros. 30th Anniversary Live" concert series | ||
| "Super Mario 64 Main Theme" (Latin guitar) | Menus and Free Roam | |||
| "Peach's Castle" | Menus and Free Roam | 0:30 | ||
| "Piranha Plant's Lullaby" | Menus and Free Roam | |||
| "Dire, Dire Docks" | Menus and Free Roam | |||
| "Cool, Cool Mountain" | Moo Moo Meadows → Choco Mountain, menus and Free Roam | |||
| "Slider" | Starview Peak → Sky-High Sundae, menus and Free Roam | |||
| "Bowser's Road" | Toad's Factory → Bowser's Castle, menus and Free Roam | |||
| "Bowser's Theme" | Menus and Free Roam | |||
| "Staff Roll" | Menus and Free Roam | |||
| "Isle Delfino" | Super Mario Sunshine | VS Race routes, menus and Free Roam | Based on its arrangement from the "Mario & Zelda Big Band Live" concert series | |
| "Bianco Hills" | Whistlestop Summit → DK Spaceport, menus and Free Roam | |||
| "Ricco Harbor" | Menus and Free Roam | |||
| "Secret Course - Sky and Sea" | VS Race routes, menus and Free Roam | |||
| "Main Theme"a | New Super Mario Bros. | VS Race routes, menus and Free Roam | ||
| "Shiro BGM" | VS Race routes | |||
| "Egg Planet" | Super Mario Galaxy | VS Race routes, menus and Free Roam | ||
| "Rosalina in the Observatory" | Menus and Free Roam | |||
| "Space Junk Road" | Menus and Free Roam | |||
| "Enter Bowser Jr.!" | VS Race routes, menus and Free Roam | |||
| "Buoy Base Galaxy" | VS Race routes, menus and Free Roam | |||
| "Gusty Garden Galaxy" | Crown City → Peach Stadium, menus and Free Roam | |||
| "Final Battle with Bowser" | Toad's Factory → Bowser's Castle, menus and Free Roam | |||
| "Purple Comet" | VS Race routes, menus and Free Roam | |||
| "Underwater Theme" | New Super Mario Bros. Wii | Menus and Free Roam | ||
| "Desert Theme" | Menus and Free Roam | |||
| "Castle Theme" | VS Race routes | |||
| "Castle Boss Battle" | Sky-High Sundae → Wario Shipyard, menus and Free Roam | |||
| "Coast Theme" | VS Race routes, menus and Free Roam | Takes elements from its arrangement from the Wii version of Mario & Sonic at the London 2012 Olympic Games | ||
| "Lava Theme" | Shy Guy Bazaar → Wario Stadium, menus and Free Roam | |||
| "Staff Credit Roll" | Menus and Free Roam | |||
| "Sky Station Galaxy" | Super Mario Galaxy 2 | Mario Bros. Circuit → Crown City, menus and Free Roam | ||
| "Starship Mario 1" | Menus and Free Roam | |||
| "The Starship's Journey" | VS Race routes, menus and Free Roam | |||
| "Yoshi Star Galaxy" | Menus and Free Roam | |||
| "Digga-Leg" | VS Race routes, menus and Free Roam | |||
| "Puzzle Plank Galaxy" | Menus and Free Roam | |||
| "Wild Glide Galaxy" | Menus and Free Roam | Based on its arrangement from the "Super Mario Bros. 30th Anniversary Live" concert series | ||
| "Cloudy Court Galaxy" | VS Race routes, menus and Free Roam | |||
| "Melty Monster Galaxy" | Desert Hills → Shy Guy Bazaar, menus and Free Roam | |||
| "Bowser's Galaxy Generator" | Toad's Factory → Bowser's Castle, menus and Free Roam | |||
| "Main Theme" | Super Mario 3D Land | Menus and Free Roam | Based on its arrangement from the "Super Mario Bros. 30th Anniversary Live" concert series, which takes elements from the theme played during the staff roll | |
| "Underwater Theme" (daytime) | Peach Beach → Salty Salty Speedway | |||
| "Underwater Theme" (nighttime) | Menus and Free Roam | |||
| "Snow Course" | Menus and Free Roam | |||
| "Ground Theme" | New Super Mario Bros. U | Menus and Free Roam | ||
| "Super Bell Hill" and "The Credits Roll" | Super Mario 3D World | Menus and Free Roam | Based on its arrangement played by the Super Mario Super Big Band at Nintendo Live 2023 | |
| "Captain Toad Goes Forth" | VS Race routes, menus and Free Roam | |||
| "Bowser's Highway Showdown" | Wario Stadium → Airship Fortress, menus and Free Roam | |||
| "Double Cherry Pass" | Menus and Free Roam | |||
| "Shifty Boo Mansion" | Boo Cinema → Dry Bones Burnout | |||
| "Chainlink Charge" (daytime) | VS Race routes, menus and Free Roam | |||
| "Chainlink Charge" (nighttime) | Menus and Free Roam | Somewhat resembling "Sunshine Seaside" | ||
| "Hisstocrat" | Desert Hills → Shy Guy Bazaar, menus and Free Roam | |||
| "Piranha Creeper Creek" | Dino Dino Jungle → Great ? Block Ruins, menus and Free Roam | |||
| "Sprawling Savanna" | Acorn Heights → Mario Circuit, menus and Free Roam | |||
| "Hands-On Hall" | Cheep Cheep Falls → Dandelion Depths, menus and Free Roam | |||
| "World 8" | Menus and Free Roam | |||
| "Title Theme" | Super Mario Maker | Menus and Free Roam | ||
| "Fossil Falls" | Super Mario Odyssey | Menus and Free Roam | ||
| "Tostarena: Ruins" | VS Race routes, menus and Free Roam | |||
| "Steam Gardens" (daytime) | Choco Mountain → Toad's Factory, menus and Free Roam | |||
| "Steam Gardens" (nighttime) | Menus and Free Roam | |||
| "Lake Lamode" | Menus and Free Roam | |||
| "Peronza Plaza" | Salty Salty Speedway → Dino Dino Jungle, menus and Free Roam | |||
| "Shiveria: Town" | Sky-High Sundae → Wario Shipyard, menus and Free Roam | |||
| "Bowser's Castle: Main Courtyard" | Cheep Cheep Falls → Dandelion Depths | |||
| "Jump Up, Super Star!" | Mario Bros. Circuit → Crown City, menus and Free Roam | |||
| "Break Free (Lead the Way)" | VS Race routes, menus and Free Roam | |||
| Plessie's theme | Super Mario 3D World + Bowser's Fury | VS Race routes, menus and Free Roam | ||
| "Attack! Fury Bowser" | VS Race routes |
a - Despite being based on the version of the song from New Super Mario Bros., as evidenced by the intro melody, the default order that can play in Free Roam and on the main menu groups the "Main Theme" with the songs from New Super Mario Bros. Wii.
Other arrangements
| Song | Game | Location | Sample | Notes |
|---|---|---|---|---|
| "Drawing Board 1" | Mario Paint | Menus and Free Roam | 0:31 | |
| "Gnat Attack: Level 1" | VS Race routes | |||
| Main theme | Wario Land: Super Mario Land 3 | VS Race routes, menus and Free Roam | ||
| "DK Island Swing" | Donkey Kong Country | Menus and Free Roam | ||
| "Opening Melody" | Super Mario World 2: Yoshi's Island | Menus and Free Roam | ||
| "Flower Field BGM" (ska) | Dino Dino Jungle → Great ? Block Ruins, menus and Free Roam | |||
| "Flower Field BGM" (jazz) | Menus and Free Roam | |||
| "Athletic BGM" | Dino Dino Jungle → Great ? Block Ruins, menus and Free Roam | |||
| "Stage Boss" (daytime) | Whistlestop Summit → DK Spaceport, menus and Free Roam | |||
| "Stage Boss" (nighttime) | Menus and Free Roam | |||
| "Bowser" | Toad's Factory → Bowser's Castle | |||
| "Yoshi's Song" | Yoshi's Story | Menus and Free Roam | ||
| "Yoshis on the Beach" | Menus and Free Roam | |||
| "Yoshi's Tale" | Menus and Free Roam | |||
| "Title Theme (Humming)" | Luigi's Mansion | Menus and Free Roam | ||
| "Drifting Away" | WarioWare, Inc.: Mega Microgame$! | Menus and Free Roam | Based on the Nintendo Sound Selection Vol.3: B-Side Music arrangement that alternates between the "Spring" and "Summer" variants | |
| The Mario Drawing Song | Flipnote Studio | Menus and Free Roam | Incorporates a nod to "Jump Up, Super Star!" |
Brands
- Main article: List of brands debuting in Mario Kart World


New
- 1st Place Shopping!
- The Adventures of Toad
- Banana Natural Oil
- Bank Coin Coffer
- Batadon Aero Parts
- Bayside Coffee
- Birdo Jewelry
- Boo Cinema
- Bowser Motors
- Bully Steel
- Buzzy Helmets
- Chargin' Chuck Monster Trucks
- Cheep Cheep Premium Car Wash
- Conkdor Headlights
- Daisy Air Freshener Orange
- Dash
- Delicatessen
- Diner
- DK Boosters
- Dolphin Marine Sports
- Dorrie Watercraft
- Drink Refresh
- Fire Flower Diner
- Fire Flower Gas Station
- Fire Mart
- Foo Handy Air Duster
- Fresh Market
- Fried Chicken
- Galaxy Engine Oil Cooler
- Garlic Power Pure Engine Oil
- Golden Dash Mushroom
- Grrrol Metal
- Hammer Bros. Repair Service
- Hot Foot Gasoline
- Household Supplies
- Huckit Crab
- Kart Supplies
- Koopa Body Coating
- Koopa Construction
- Koopa Hotel
- Lagoon City
- Lakitu the Fisherman
- Lakitu's Item Box
- Lava Bubble Molten Energy
- Magmaargh Diner
- Monty Mole Mining Company
- Muncher Coffee Roaster
- Nabbit Courier Service
- Para-Biddybud Construction
- Peach: Deep-Forest Explorer
- Peach Resort
- Penguin Bobsled
- Pipeline Hotel
- Pipeline Moving
- Red Shell Speed Tires
- Rent-a-Car
- River Cruise Tour
- Rosalina Automobile
- Rosalina Bus Tours
- Royal Motors
- Seaside Resort
- Seaside Sundae
- Shine Sprite Oil
- Shy Guy Ceramics
- Shy Guy's Rowing Club
- Snow Lake
- Spike Express
- Spike Spokes
- Spiny Shell Engine
- Squid Motor Oil
- Stingby Biofuel
- Sunshine Railway
- Super Star Metal Parts
- Surf Shop
- Swoop Car Interior Shop
- Tenants Wanted
- Thwomp Construction
- Toad Manufacturing
- Toad's Wharf
- Toadette Ice Cream
- Traffic Apparel
- Treasure Tracker!
- Turbo Engines
- Waluigi Vintage Clothing
- Wario Games
- Wario Motors
- Wario Overland Transport
- Wario's Premium Scrap
- Warp Plaza Shopping Complex
- Wiggler's Flower Shop
- Wiggler's Sightseeing
- Wilderness Coast
- Yoshi's
Returning
- 1-Up Fuel
- 100% Organic Antifreeze
- BaNaNa Boy
- Bob-omb Plugs
- Chain Chomp Racing Chains
- Fire Flower Oil Company
- Fuzzy Batteries
- Larry Lights
- Luigi Tires
- Mario Kart TV
- Mario Motors
- Moo Moo Milk
- Morton Construction
- Mushroom Piston
- Peach & Daisy Royal Pâtisserie
- Roy Smooth Sounds
Update history
This is a detailed list of updates Mario Kart World has received since launch. In order to play online, players must have downloaded the most recent software update.[60]
Ver. 1.1.0
An update was released on June 4, 2025 (June 5 in some time zones), also known as a "Day 1 patch." The following changes were made:
- General
- Enabled CameraPlay.
- A compatible USB camera (sold separately) is required for CameraPlay.
- Players can turn camera ON or OFF in Multiplayer and Online Play modes.
- When the camera is ON, the player’s face is displayed during the race.
- Enabled Online Play.
- Enabled LAN Play.
- From the title screen if you press the L Stick and hold both the L Button and R Button, Wireless Play will change to LAN Play.
- Enabled players to upload and download ghost data in Time Trials.
- Enabled display of icons of players in close proximity in Free Roam.
- Increased number of characters you can select from the start.
- Improved operability when 3 or more players are playing in Multiplayer.
- Eliminated time limit for choosing courses when playing Wireless Play or LAN Play.
- Enabled display of update version on title screen.
- Note
- The characters enabled to be selectable from the start were Monty Mole, Sidestepper, Cheep Cheep, Pokey, Cow, Stingby, Snowman, Penguin, and Para-Biddybud.
Ver. 1.1.1
An update was released on June 18, 2025 to fix various bugs.
- Fixed Issues
- Fixed an issue where items were no longer able to be used.
- Fixed an issue where sometimes controls were inoperable when selecting a character and trying to start Free Roam from the "Free Roam" map.
- Fixed an issue where sometimes the game shut down when watching replay after a race.
- Fixed an issue where sometimes the game shut down after a race in "Online Play."
- Fixed an issue where rate fluctuations were sometimes displayed incorrectly in "Knockout Tour" and "Online Play."
- Fixed an issue where it was easy for a communication error to occur when trying to join Friends playing "VS Race" or "Battle" in "Online Play."
- Fixed an issue where you sometimes slipped through the wall before the finish line of "DK Spaceport."
- Fixed an issue where you sometimes couldn’t return to correct position after falling of[sic] the course between "Airship Fortress" and "Bowser’s Castle" while gliding.
Ver. 1.1.2
An update was released on June 25, 2025. The following changes were made:
- General
- Adjusted courses selected in “Random” when selecting next course in a wireless “VS Race.”
- Fixed Issues
- Made readjustments to fix an issue where rate fluctuations were sometimes displayed incorrectly in “Online Play” and “Knockout Tour.”
- Fixed an issue where you sometimes can’t recover quickly after falling off the course in "Dino Dino Jungle".
- Fixed an issue where you continually hit the wall near the finish line of “Boo Cinema” when transformed into Bullet Bill.
- Note
- The Random option in wireless, LAN, and online VS Races now also selects courses that can be picked as options, including ones with routes.
Ver. 1.2.0
An update was released on July 29, 2025. The following changes were made:
- General
- In the “VS Race” of “Single Player”, added “No COM” to the COM rules.
- In the “VS Race” of “Single Player” and “Multiplayer”, added “Mushrooms only” to the item rules.
- You can now choose “View Replay” after downloading ghost data in “Time Trials”.
- You can now choose whom to watch when spectating in “Knockout Tour” and “Balloon Battle” in “Online Play”, “Wireless Play”, and “LAN Play”.
- You can now see the waiting time until the next race or battle starts in “Online Play”, “Wireless Play”, and “LAN Play”.
- When using CameraPlay in “Multiplayer” and “Online Play”, the game will now remember the camera cursor position and size until the player closes the game.
- If you change the number of people playing, the cursor position and size will return to their original settings.
- On the “Free Roam” map, when you gather all of the P Switches, ? Panels, and Peach Medallions, the colors of the various numbers will now change.
- Made COM weaker in everything other than “Battle”.
- Made homing of Boomerang weaker.
- Decreased the probability of getting a Triple Dash Mushroom in the low position, whenever the item rules in a race are anything other than “Frantic”.
- Changed it so order of getting ? Block is higher than in the past, whenever the item rules in a race are anything other than “Frantic”.
- Made it so there is a wheel spinning animation if the player presses the A button (acceleration) too early when starting a race while driving.
- Player will not lose speed even when spinning wheels.
- Increased the frequency of lap-type courses appearing in the selection when choosing the next course in “VS Race” and wireless races.
- Fixed Issues
- Fixed an issue where the rate fluctuations were sometimes displayed incorrectly in wireless races.
- Fixed an issue where the vehicle would stay floating in air when jumping off a half pipe.
- Fixed an issue where, when a player crashes while gliding and uses Bullet Bill, they go out of the course.
- Fixed an issue where, if a player quits a Rewind in the location where they were wall riding, the driver’s posture would not return to what it was before.
- Fixed an issue where the item that was displayed in the item slot would turn into something else when using it.
- Fixed an issue where in “Online Play”, the player would not dash even when getting on a Dash Panel.
- Fixed an issue where the points in a team race in “Wireless Play” would display incorrectly.
- Fixed an issue where sometimes controls were inoperable on the menu screen after the player was retired in “Balloon Battle” in “Wireless Play”.
- Fixed an issue where a Peach Medallion would sometimes disappear when doing Rewind in “Free Roam”.
- Fixed an issue where sometimes controls were inoperable when the player pointed the cursor at their own character or course and pressed A on the “Free Roam” map.
- Fixed an issue where sometimes controls were inoperable when the player quit a mission in “Free Roam” right before entering a pipe.
- Fixed an issue where the player would slip through some drift ice around “Sky-High Sundae”.
- Fixed an issue where the player would get caught on the outside of a handrail on the left and right sides right after the start of “Airship Fortress”.
- Fixed an issue where the player would get caught on the fence and not be able to move forward in “Bowser's Castle”.
- Fixed an issue where, when the player used a Bullet Bill in “Bowser's Castle”, they would not be able to glide and fell into the abyss.
- Fixed an issue where the player would go out of the course when using a Mega Mushroom on the last turn of “Whistlestop Summit”.
- Fixed an issue where the player could not get out of the location where they fell from a railroad when “Smart Steering” is on in “Whistlestop Summit”.
- Fixed an issue where the player would slip through the ground at a ramp near the goal at “Choco Mountain”.
- Fixed an issue where the player would get caught on a block when using a Bullet Bill on the road that enters “Choco Mountain”.
- Fixed an issue where the player would get caught on a plank of wood laid on the road when throwing a green shell on the road between “DK Spaceport” and “Whistlestop Summit”.
- Fixed an issue where the last place would be sometimes incorrect in the wireless races of “Dino Dino Jungle”.
- Fixed an issue where the player would get caught on the back of a leaf when using a Bullet Bill in “Acorn Heights”.
- Fixed an issue where the player would not be able to slip through a vase that is placed on the road in “Shy Guy Bazaar”, when using a Boo.
- Fixed an issue where the player would slip through the ceiling in “Dry Bones Burnout”.
- Fixed an issue where the player would sometimes hit a fence when throwing a red shell on the first turn in “Moo Moo Meadows”.
- Fixed an issue where one part of the effects that take place for the bridge transforming when heading toward “Rainbow Road” did not display.
- Fixed an issue where the player would slip through the ground on the road between ”Starview Peak” and “Sky-High Sundae”.
- Fixed an issue where some of the item boxes would not have appeared in “Wario Shipyard”.
- Fixed an issue where the player would slip through the bottom of a rock near the goal of ”Wario Shipyard”.
- Fixed an issue where the player would go out of the course when using a Mega Mushroom on a turn inside “Wario Stadium”.
- Fixed an issue where the player gets caught on a tree in the middle of a shortcut if they have “Smart Steering” on when heading from “Starview Peak” to “Dandelion Depths” in “Ice Rally” of “Knockout Tour”.
- Several other issues have been addressed to improve the gameplay experience.
- Unlisted changes
- The speed boost given when landing on the ground now happens immediately with higher acceleration.[61]
- The item probability for the ? Block has been changed so it is now possible for 1st place to hold a ? Block and Coin at the same time. This update makes 1st place no longer guaranteed to get at least one defensive item with Normal item rules when the maximum item slots are filled (outside of online rooms with high lag), like Mario Kart 8 for the Wii U, and unlike Mario Kart 8 Deluxe, Mario Kart Tour (when using three item slots), and Mario Kart World before version 1.2.0.[62]
Ver. 1.2.1
An update was released on August 18, 2025 to fix a bug.
- Fixed Issues
- Fixed an issue where, if the player chose “Race against Ghost” or “View Replay” right after downloading ghost data in “View Rankings” in “Time Trials,” a ghost that was different from the one that was downloaded would play.
Ver. 1.3.0
An update was released on September 23, 2025. The following changes were made:
- General
- You can now join friends playing "Knockout Tour" by selecting "Friends" from "Online Play" "1p."
- Up to 2 players can now play "Free Roam" while waiting if the game was full when trying to join friends playing "Race," "Knockout Tour" or "Battle" in "Online Play."
- The "Free Roam" map now displays the locations of P Switches you've run over and Peach Medallions you've obtained.
- You can now select a P Switch from the map and move to a location near the P Switch.
- In "Free Roam", you can now transform into the character pulled into the UFO.
- If "Dash Food" in "Settings/Controller" is set to "Doesn’t transform" then you will not transform.
- It is now easier to encounter UFOs in "Free Roam."
- The conditions for the appearance of some Peach Medallions in "Free Roam" have been adjusted.
- When spectating in "Knockout Tour" or "Balloon Battle" in "Online Play" or "Wireless Play", you can now choose who to watch, even if you are holding the Joy-Con 2 or Joy-Con horizontally.
- Decreased the time between when an item box is taken by someone and the next time it is revived.
- Increased the invincible time after spinning or crashing during a race.
- Reduced the force of jumps when landing on a rival from above.
- Decreased the amount of time between when you finish and when spectating begins in "Knockout Tour" or "Balloon Battle" in "Online Play" or "Wireless Play."
- Decreased the amount of time between passing through the checkpoint and when the ranking is displayed in "Knockout Tour" in "Wireless Play" and "LAN Play."
- Further increased the frequency of lap-type courses appearing in the selection when choosing the next course in "VS Race" and wireless races.
- Fixed Issues
- Fixed an issue in "Online Play" and "Wireless Play" where the ranking would sometimes become incorrect if a player went off course at the same time as reaching the finish line.
- Fixed an issue in "Grand Prix", "Knockout Tour", and "VS Race", where the CPU's ranking would sometimes drop after reaching the finish line.
- Fixed an issue in "Knockout Tour" in "Online Play" where other players' ratings would sometimes appear as "0" on the results screen.
- Fixed an issue where a Spiny Shell would sometimes pass the first place player in "Wireless Play" or "Online Play."
- Fixed an issue where players would sometimes be sent flying backwards a great distance when hit by a Spiny Shell.
- Fixed an issue where the second item in an item slot would sometimes not disappear when hit by Lightning.
- Fixed an issue where hitting the base of a pillar in mid-air would sometimes cause a large jump.
- Fixed an issue that sometimes caused movement to become unstable when doing a wall ride on water.
- Fixed an issue where players would sometimes be swept away strongly after landing when doing a mini jump while going up a river.
- Fixed an issue where players would sometimes pass through the ground when hit by a car driving on the road.
- Fixed an issue in "Free Roam" where players would sometimes be unable to enter pipes correctly after exiting a trailer.
- Fixed an issue where the results screen would sometimes become distorted after spectating "Balloon Battle" in "Online Play."
- Fixed an issue where the game would sometimes not proceed to the course selection screen after exiting a pipe during "Free Roam" in "Online Play."
- Fixed an issue where Bullet Bill would sometimes slip through walls when used in "Sky-High Sundae."
- Fixed an issue where players would sometimes get stuck on a wall at the start of the race heading from "Airship Fortress" to "Shy Guy Bazaar."
- Fixed an issue where players would sometimes get stuck in walls when using a Bullet Bill in "Bowser’s Castle."
- Fixed an issue in "Cheep Cheep Falls" where item boxes were sometimes difficult to pick up when Smart Steering was turned on.
- Fixed an issue in "Knockout Tour" "Spiny Rally" where sometimes there was an item box buried in the ground.
- Several other issues have been addressed to improve the gameplay experience.
Differences from previous Mario Kart games
Gameplay
- Races now consist of 24 racers compared to the eight or 12 from previous games.
- In races where the player travels along a route, including Knockout Tour, racers will automatically begin moving before the starting countdown, though Rocket Starts can still be performed.
- Getting hit by a car or train at certain angles causes the player to become unbalanced as opposed to spinning out.
- Rather than using hang-gliders like in games since Mario Kart 7, vehicles now use retractable wings to glide.
- Several changes made in Mario Kart 8 have been reverted back:
- Lakitu has mostly been reverted to his pre–Mario Kart 8 behavior, where instead of immediately picking up a racer who falls off of a course, the screen will briefly fade to black before fading back in to him dropping the racer. However, Lakitu does appear briefly before the screen fades.
- Players can once again receive a speed boost when being dropped off by Lakitu by pressing the drive button before hitting the ground when Lakitu drops them.
- Falling off the course causes the player to lose their items.
- If a racer falls off a course in the middle of a gliding section, Lakitu will place them back in the air so they continue gliding rather than bringing them to the nearest road.
- Lakitu now picks up a racer if they have been facing backward for 5 seconds.
- Vehicles no longer drive underwater, and instead continue along the surface of the water.
- The traction stat is no longer visible on the vehicle selection screen.
- Unlike in Mario Kart 8 Deluxe, the Mini-Turbo boost charge thresholds when drifting are once again identical across all character and vehicle combinations, like they were in Mario Kart Wii, Mario Kart 7 and the Wii U version of Mario Kart 8.
- The functionally distinct sport bike vehicle class that existed in Mario Kart Wii and Mario Kart 8 / Mario Kart 8 Deluxe has been removed entirely. All bikes, regardless of their appearance or the rider's posture when riding them, are essentially considered to be standard bikes, with the same drifting mechanics as all other vehicle types in the game.
- The amount of coins a player can hold now caps off at 20, compared to the previous 10.
- Jump Boosting has been made more versatile:
- It can now be performed multiple times in the air.
- It can be performed at any time while gliding; tricking to the left or right will cause the racer to do a barrel roll.
- It is now possible to trick off of other racers or obstacles by landing on top of them.
- Racers can now charge up a Charge Jump, allowing them to gain additional height, perform tricks, and gain speed boosts.
- Goombas now charge towards racers when noticing them (similar to the 3D Super Mario games), rather than simply walking in place or in a left-to-right pattern.
- Explosions on the surface of water will create waves, which characters can trick off of.
Controls
- The
 button on the dual Joy-Con and Pro Controller and the
  button on the single Joy-Con opens the map in Free Roam instead of accelerating.
 - The
 stick moves the camera instead of accelerating and reversing when tilting up and down respectively.
  on the dual Joy-Con directional buttons and Pro Controller D-pad is used to Rewind.
 and
and  on the dual Joy-Con directional buttons and Pro Controller D-pad for steering is no longer available.
- The
 button on the dual Joy-Con and Pro Controller opens Photo Mode instead of pausing.
 - Unlike Mario Kart 8 Deluxe, the Toy-Con Motorbike, Car, Pedal, and Key are no longer available as control options, as the Nintendo Switch 2 and its Joy-Con are incompatible with Nintendo Labo.
Courses
- Cups in Grand Prix are now based more on their region within the game's world map rather than following an overall difficulty progression across the game.
- Unlike games since Mario Kart DS, no race or battle courses from Mario Kart: Super Circuit return.
Game Modes
- By default, a Grand Prix now involves the first course of the cup being played with the multiple laps before subsequent races involve two-section routes leading into a full lap of a course for the final section.
- In Time Trials, the game can be paused before the race starts.
- VS Race and Battle mode options have several changes from Mario Kart 8 Deluxe:
- Teams can be set to No, Two, Three, or Four Teams instead of just No Teams or two teams with Team Game.
- Items can only be set to Normal, Frantic, or (as of version 1.2.0) Mushrooms Only. Custom Items, Shells Only, Bananas Only, Bob-ombs Only, No Items, and No Items or Coins in VS Race and Skilled Items in Battle mode are no longer available.
- COM Difficulty can be set to No COM in single player VS Race (as of version 1.2.0).
- Setting COM Vehicles (between All Vehicles, Karts Only, or Bikes Only) is no longer available.
- The "Choose" option in Course Selection has been renamed to "Open".
- "In Order" is no longer available as a Course Selection option in VS Race and Battle mode.
- VS Race's Race Count can be set to 3 and 5 Races like the original Mario Kart 8, along with 4, 6, 8, 12, 16, and 32 Races still available. 24 and 48 Races are no longer available.
- Battle mode's Round Time is always 3 Minutes. Setting the Round Time from 1-5 Minutes is no longer available.
- Battle mode's Round Count can be set to 3, 4, and 6 Rounds, along with 5 and 8 Rounds still available. 10, 15, 20, and 25 Rounds are no longer available.
- There is no longer a play stats menu.
Items
- Mega Mushroom:
- Racers under the effect of the Mega Mushroom item no longer shrink back to normal size when hit by Lightning.
- After using a Mega Mushroom, the item slot shows the remaining time to be under the effect. As a result, the Mega Mushroom will count as being in use, so the player cannot use their other item nor receive another item if they already had two items, unlike in previous games where using the Mega Mushroom would remove it from the player's inventory immediately.
- Like in Mario Kart Tour, the Mega Mushroom's theme from New Super Mario Bros. does not play while the item is in effect.
- Feather:
- The Feather is now available in races, rather than being exclusive to Battle Mode.
- Using the Feather item now allows racers to jump much higher and perform tricks after using it.
- Feathers can now be dropped on the ground.
- The player does not gain a speed boost upon landing after using a Feather unless they perform a trick after using it.
- Super Horn:
- The Super Horn sound effect is identical across all characters, rather than being character-specific.
- The Super Horn now stays in the item slot until it is fully used up.
- Star:
- Stars can be found bouncing along the ground, as they do in the 2D Super Mario games, in Free Roam. If a Star is dropped during a race, it will remain stationary, however.
- A sound effect now plays indicating that the Star's effect is about to run out, similar to the mainline Super Mario games.
- Lightning:
- The Lightning now only shocks players ahead of the user, rather than all opponents.
- The Lightning now causes most players to be shrunk for the same amount of time, with racers in higher positions sequentially returning to their original size, similar to how it affected players prior to Mario Kart DS.
- The Lightning stuns players for longer when it first strikes, with each character having a unique animation for being struck.
- Being under the effects of a Lightning does not cause the music to distort, similar to games prior to Mario Kart DS.
- Spiny Shell:
- The Spiny Shell now launches racers into the air at a higher angle, similar to its effect from Mario Kart: Double Dash!! to Mario Kart Wii.
- Throwing the Spiny Shell has a slightly longer animation than throwing other items.
- Bullet Bill:
- The Bullet Bill no longer causes players that it hits to spin out, instead causing them to get bumped out of the way and become unbalanced.
- The Bullet Bill travels slower than before.
- Boo:
- The Boo item now applies a dithered transparency effect onto the user rather than turning them invisible, which is also applied to their held item resulting in them being invulnerable.
- When using the Boo item, the user can now drive through off-road without slowing down, reverting to its behavior in Mario Kart DS.
- When the Boo item steals from the player, like in Mario Kart DS, the Boo will hold the stolen item before leaving. When stealing the triple items, he will only hold one of the items.
- When the Boo is in effect, the music and sound effects will be muffled.
- Fire Flower:
- The Fire Flower now has a limit of eight fireballs, compared to the previous 10 in Mario Kart 7 and Mario Kart 8.
- Boomerang Flower:
- The Boomerang Flower now has a time limit when using it and does not leave the item slot until it is fully used up, similar to the Fire Flower. This allows for it to be used up to four times, compared to the previous three in Mario Kart 8.
- Items now float on the surface of water, rather than sinking.
- Moving the camera with the right stick will aim items in that direction, with a full range of 360 degrees.
- Due to 1st place being able to hold a ? Block and Coin at the same time (as of version 1.2.0), 1st place is no longer guaranteed to get at least one defensive item with Normal item rules when the maximum item slots are filled (outside of online rooms with high lag), like Mario Kart 8 for the Wii U, and unlike Mario Kart 8 Deluxe and Mario Kart Tour (when using three item slots).
Aesthetic
- Opening cinematics before races in the Grand Prix mode now show all of the courses at once before the first race, rather than each track individually at the start of each race.
- The color of the sparks when charging an Ultra Mini-Turbo has been changed from purple to rainbow, similar to Mario Kart Arcade GP DX.
- Racers assume a horrified expression when they are about to be hit by a Spiny Shell.
- Racers now brace themselves when tumbling, though they will still flail when spinning out.
- The drivers of car obstacles are now visible.
- The right stick can freely rotate characters and vehicles in the character and vehicle selection menu. Rotating in the vehicle selection menu will stop its automatic rotation.
- The right stick can rotate cup trophies in the opposite direction of their automatic rotation.
- Rather than being character-specific like in Mario Kart 8 / Mario Kart 8 Deluxe, vehicle horns are now vehicle-specific.
- Vehicles' horns cannot be used after a race ends.
- Vehicles briefly swerve left and right after spinning out.
- A sound effect does not play when the player changes placement, similar to games prior to Mario Kart Wii.
- Similar to Mario Kart Tour, a graphic appears on screen indicating that the player has either hit an opponent or has been hit during Battle mode.
Music
- The sped-up version of a course's theme during the final lap is only used when playing the course without routes in either Grand Prix or VS Race. In Knockout Tour, the sped-up version is also used for the final race.
- Frontrunning beats do not play when the player is in first.
- When approaching a course from a route, a simple transitional version of its theme can be heard before the main theme starts playing upon crossing the finish line.
Staff
- Main article: List of Mario Kart World staff
Mario Kart World is primarily developed by Nintendo EPD, with Kosuke Yabuki, Kenta Sato, Masaki Ishikawa, Shintaro Jikumaru, and Atsuko Asahi all returning from their respective roles from ARMS, another game led by the same team. In addition to Bandai Namco Studios returning to contribute to development, Monolith Soft and 1-Up Studio were also involved in the game's development. This game features neither Shigeru Miyamoto nor series creator Hideki Konno in lead development roles; only Konno receives a Special Thanks credit in the game.
This is the first Super Mario game to feature Courtney Lin as the voices of Peach and Baby Peach, Laila Berzins and Paul Castro Jr. as the playable and non-playable Toads respectively,[63] and Laura Stahl as Toadette, following Nintendo's decision to recast their longtime voice actress, Samantha Kelly. It is also the first game where Kōji Takeda replaces Takashi Nagasako as the voice of Donkey Kong, reprising his role from the Japanese dub of The Super Mario Bros. Movie, as well as the first game in the Mario Kart series to feature Kevin Afghani, Giselle Fernandez, and Dawn M. Bennett as the voices of their respective characters.
Development
- "Mario Kart 9" redirects here. For the ninth Mario Kart game released by Nintendo, excluding re-releases, see Mario Kart Tour.

Prototyping for Mario Kart World started in March 2017, with official work on the game beginning at the end of the year following the release of ARMS, another game created by the same development team. The game was originally being developed for the Nintendo Switch,[1] but it was moved to the Nintendo Switch 2 around 2020 following the conception of the Mario Kart 8 Deluxe – Booster Course Pass.[64] Mario Kart World is the first Super Mario game since Super Paper Mario to be known to have been pushed back to a successor console.
According to developers, had the game only introduced new courses and no new gimmicks, it would have likely been called Mario Kart 9; however, the open world gameplay was decided from the beginning, with the name Mario Kart World already chosen very early in development.[1]

The decision to include Cow as a playable character originated from a sketch done by one of the artists, featuring Cow driving a blue truck. The producers were so amused by the image that Cow was soon added as a playable character, which the developers named one of the "NPC drivers". Other obstacles soon became "NPC drivers" following Cow's addition, such as Pokey.[51]
The decision to increase the racer count to 24 came from one of the developers thinking that 12-player races would feel empty once the racers became spread out.[1]
Glitches
Stuck Bomber Bill

If a Banzai Bill Cannon carried by a pickup truck shoots a Bomber Bill inside of a Knockout Tour checkpoint, the Bomber Bill will briefly become stuck inside the checkpoint before disappearing. In this state, the Bomber Bill remains shrunken down as if it were still inside the cannon.[65]
Out-of-bounds shortcut
In online races on Whistlestop Summit and Dandelion Depths, players can abuse the fact that Lakitu will not pick up their COM-controlled character immediately after leaving a room.[66] On Whistlestop Summit, if a player jumps off to the right on the yellow rail after the long bridge and leaves the race before getting picked up by Lakitu, he will not pick up the COM-controlled character that races in place of the player, causing it to skip to the path below. On Dandelion Depths, if a player jumps off to the left of the road in the spiral turn and leaves the race before getting picked up by Lakitu, he will also not pick up the COM-controlled character that races in place of the player, causing it to skip to the end of the course's water section. If the glitch is done on the final lap, it will cause them a near guaranteed win unless first place is too close to the place where they end up after the shortcut. This is only useful in online lobbies during the last race due to the player's score resetting when they rejoin.
Reception
Mario Kart World received generally positive reviews. The departure from the traditional formula was praised, but certain aspects were considered shortcomings of the result of that direction.
| Reviews | |||
|---|---|---|---|
| Reviewer, publication | Score | Comment | |
| Scott Duwe, Destructoid | 9/10 | "Mario Kart World is the latest and potentially greatest in the long-running arcade racer franchise, brought to the next level with the Nintendo Switch 2's hardware and an expansive roster of racers, tracks, and endless fun to be had. ." | |
| Steve Watts, GameSpot | 9/10 | "Mario Kart World is a massive, sprawling sequel that playfully expands and iterates on the qualities that made Mario Kart 8 Deluxe such an enduring success. It's an incredibly fun and rewarding kart racing experience that's easy to understand, with enough mechanical nuance to reward veteran kart racers, all presented beautifully as a Switch 2 showpiece." | |
| Logan Plant, IGN | 8/10 | "Mario Kart World may not make the most convincing case that going open-world was the boost the series needed, but excellent multiplayer racing, incredible polish, and the thrilling new Knockout Tour mode still more than live up to its legacy." | |
| Aggregators | |||
| Compiler | Score | ||
| Metacritic | 86 | ||
Sales
As of June 30th, 2025, the game had sold 5.63 million units worldwide.[67] This meant the game had a 96% attach rate with sales of the Nintendo Switch 2 in the console's first month of availability.
Gallery
- For this subject's image gallery, see Gallery:Mario Kart World.


References to other media
Note: This list does not include arrangements from routes and Free Roam.
- The space station in Rainbow Road has "GW-80" painted on it, referencing the system's release year of 1980.

- Donkey Kong (arcade)
- DK Spaceport is directly based on this game:
- The course's structure is based on 25m, being mainly comprised of an ascending sequence of zigzagging girders held by blue ladder-like support beams, with Robo DK standing in for Donkey Kong.
- Obstacles include giant rolling barrels and oil drums (based on their design from this game) with nearby Fire Snakes in place of Fireballs. Stacks of these barrels can also be found at the top of the course corresponding to the location where Donkey Kong would take his barrels from in 25m.
- The course's decorations reference Donkey Kong iconography, including warning posters depicting the sprites of fireballs, oil drums, and barrels; a poster based on the "How high can you get?" screen; pixelated paintings of Donkey Kong's face on ramps; and stylized neon illustrations of oil drums, upright and rolling barrels, hammers, Fires, Pauline's Parasol and Bag, and the 300 points for collecting them. The illustrations of Fires are either orange and yellow or cyan and magenta, which are the colors they originally appeared in.
- The room past the finish line features arcade-inspired elements such as a "high score" message above the exit archway and a circuit board incorporated into the ceiling.
- The course's music primarily consists of variations of "Round 1 BGM", with the "Round Start BGM" and "Game Start" jingles being incorporated as brass licks. Rather than a final lap variation, this track instead features an arrangement of "Hammer BGM". "Round 1 BGM" is also incorporated into the music played during DK Spaceport's pre-race, and the coda used in Knockout Tour uses the "Round 1 and 2 Clear" jingle.
- The sound effect played when a racer is bounced by a Donkey Kong-branded trampoline is based on the one heard when accruing points in this game, like when jumping over barrels.
- Completing the mission "Remember the classic DONKEY KONG!" awards a sticker depicting Donkey Kong's sprite. Completing the mission "Race to get ahead of the explosives!" awards a sticker depicting a Fireball's sprite. Stickers depicting Donkey Kong grinning and frowning are awarded for driving three hundred twenty kilometers and gliding for forty kilometers respectively. Stickers depicting the oil drum's sprite and the neon illustrations of the hammer and Pauline's Parasol from DK Spaceport can be awarded.
- Donkey Kong (Game & Watch)
- The starting banner in DK Spaceport is based on the Donkey Kong Game & Watch unit, and directional pad iconography is seen throughout the course and on Robo DK's back.
- The game's logo appears as an advertisement, and a neon sign of the logo and two pipes on either side of it appears at the last turn of Mario Bros. Circuit.
- Various Warp Pipe-inspired object and structures take design elements from the red handwheel-bearing enemy-spawning pipes from this game, such as the exhaust pipes on cargo trucks and the bridge near Toad's Factory.
- The Hyper Pipe incorporates various elements originating from this game including Warp Pipes, a POW Block, and a red handwheel, like those attached to the enemy-spawning pipes, in addition to having the game's logo printed on its exhaust pipe.
- The Rally Bike has a design inspired by the pulse line design of Family Computer cartridges, including text reading "RLB-01" reminiscent of the product codes on each cartridge.
- Mario and Luigi's Mechanic outfits each includes a cap with text that reads "Famicom."
- Donkey Kong (Famicom / NES)
- Completing the mission "Trick off vehicles on the way to the spaceport!" awards a sticker depicting Donkey Kong's sprite after having fallen in this port.
- Pipe Cannons take the appearance of Warp Pipe-junctions, similar to the ones entered to access underground levels in this game.
- Generic trampolines take the red and yellow coloration of trampolines from this game.
- Graffiti on a banked turn resembles the artwork of the Green Koopa Troopa from this game.
- Masks can be found being sold at a hidden stand at Shy Guy Bazaar including those belonging to Shy Guys, Snifits, and Phantos (using their Super Mario Bros. 2 design).
- Vector illustrations of Phantos (using their Super Mario Bros. 2 design) and their keys can be seen on sun shades at Shy Guy Bazaar.
- One of the stickers unlocked by activating a ? Panel at Shy Guy Bazaar is based on the turnip sprite.
- The Tiny Titan, based on the Monster from this game, returns.
- The redesigned logo for the Mario Motors sponsor is based on the logo of this game.
- Mario and Luigi's Pro Racer outfits, along with their Mechanic outfits, are based on promotional artwork from this game.
- One of the new sponsors is named after and has a logo featuring a Hot Foot.
- The starting banner of Mario Circuit resembles the original 1989 Game Boy model; the Mario Kart logo is shown on a dot matrix display in pixelated monochrome green, a red power light is present to the left of the screen, and the "Mario Circuit" logo is in the bottom left corner, written in navy blue resembling the Game Boy's logo. Below the starting banner, two outlets resembling the Super Nintendo Entertainment System's controller ports are also visible.
- Batadon and Tokotoko reappear, and the former is the base of a sponsor, "Batadon Aero Parts".
- Shy Guy Bazaar includes multiple references to this game, including Daisy's emblem on the palace in Shy Guy Bazaar, golden statues resembling Gao, a Superball Flower statue on top of a fountain, and tapestry with a Tokotoko pattern on it.
- The pattern of the pants of Daisy's Oasis outfit is reminiscent of the pattern of her dress in this game's official artwork.
- The Mario Kart World logo colors the letters of the word "World" with the same colors as the Super Mario World logo, with the exception of the "D" being cyan instead of green.
- Super Koopas, Passin' Chucks, Splittin' Chucks, and Clappin' Chucks reappear.
- Dino Rhinos appear on the packaging of chocolate bars, referencing their Chocolate Island habitat.
- One of Dolphin's trick animations is based on the animations of vertically-jumping Dolphins in this game.
- The "Prove yourself in a SPECIAL test of skill #!" missions reference the Special Zone. This is strengthened by their Japanese name「マリオカートスタッフもビックリ!」("Mario Kart's Staff is Just as Surprised!"), which references the Japanese name for Way Cool and Awesome「マリオスタッフもビックリ コース」("Mario's Staff is Just as Surprised Course").

- Mario Circuit contains the layouts of Mario Circuit 1, Mario Circuit 2, and Mario Circuit 3. Koopa Beach 2 returns as Koopa Troopa Beach, retaining its five laps. Additionally, the layouts of Ghost Valley 1, Choco Island 1, Ghost Valley 2, Koopa Beach 1, Choco Island 2, Vanilla Lake 1, and Ghost Valley 3 can be driven as part of the world map; the "tribute" missions on these courses reuse the courses' respective themes from this game.
- The Star Thwomps on the space station at Rainbow Road are taken from this game's Rainbow Road.
- Stickers of the racer sprites from this game appear on the walls and quarter pipes at Mario Circuit.
- A billboard near Mario Circuit features the racer sprites from this game and takes design elements from its title screen. Text on the billboard reading "1992-8-27" references the game's Super Famicom release date.
- A sticker of Bowser's sprite can be equipped on a kart.
- ? Panels return, taking their pixelated question mark design and smiling, deactivated state as well as their rounded edges from their in-game sprite and promotional artwork from this game respectively.
- In the introduction of the Mario Kart World Direct, there is a side shot of Donkey Kong dropping a Banana Peel in front of Yoshi, a reference to Donkey Kong Jr. doing the same to Yoshi in this game's title screen animation.
- When a P Switch mission is successfully cleared, an abridged arrangement of "Finish! (1st − 4th Place)" plays.
- Completing the mission "Collect blue coins around the control tower!" awards a sticker depicting Donkey Kong Jr.'s sprite.
- Cannons, which launch racers like Barrel Cannons, appear. They are particularly common around DK Spaceport. Like in this series, they are sometimes found floating in groups, allowing racers to jump between them.
- Yoshi's Biker outfit sports a spiked red collar similar to the one Boshi wears.
- A clip in the Mario Kart World Direct of Penguin falling off the track references how players can drop Baby Penguins off the cliff in Cool, Cool Mountain.
- Mirror Mode can be accessed in Free Roam by driving into the stained-glass portrait of Peach atop her castle in Peach Stadium, which creates a ripple effect like the paintings in this game.
- Boos use their laughter from this game when they return with stolen items.
- Bowser's laughter from this game can faintly be heard as racers approach Bowser's Castle.
- Choco Mountain and Wario Stadium return as race courses, and Big Donut returns as a battle course.
- Explosions and the Super Horn cause stylized onomatopoeias to appear in a similar fashion to this game.
- Part of the first place results theme's melody can only be heard after it has looped for five minutes and 43 seconds, in reference to a bug that would cause the "Results (1st − 4th Place)" theme to loop improperly.
- The water jets that replace the kart's wheels when driving on water bear a striking resemblance to F.L.U.D.D.
- Mario wears the Shine Sprite shirt and sunglasses originating from this game in his Sightseeing outfit.
- The denim jacket Wario wears for his Biker outfit resembles the one he wears for his biker outfit in this game and the rest of the WarioWare series.
- The sponsor Wario Games is a reference to Wario's game company.
- Peach Beach and Dino Dino Jungle return as courses.
- The Luigi Tires sponsor returns in this game.
- Characters hold onto their kart when gliding at high speeds in a similar manner to this game.
- The cables of suspension bridges can be used to Rail Ride, in reference to the drivable bridge arches of Mushroom Bridge.
- The character select icons for Waluigi and Peach are based on their promotional artwork from this game.
- The character select icon for Wario is based on his promotional artwork from this game.
- The Wario Games sponsor uses the mustache creatures seen on the title screen of this game. The yellow background references the color used in the Japanese and Chinese versions of this game.
- Desert Hills, DK Pass, and Airship Fortress return as courses.
- The B Dasher returns as a kart.
- A free-roaming Chain Chomp can be found hopping in a circle outside Peach Stadium, in reference to Peach Gardens.
- "05" is painted on the outside of the tower in Airship Fortress, referencing this game's release year of 2005.
- Peach Medallions make the same sound that Star Coins make when collected.
- The Wario Motors sponsor graphic resembles the graphic of Wario's face used on this game's box art and title screen.
- The heads of Frost Piranhas are light blue with white spots, as in this series. They also possess green stems, most-closely resembling their design in Super Paper Mario.
- The character select icons for Birdo and Toad are based on their promotional artwork from this game, while the character select icon for King Boo is based on Boo's promotional artwork from this game.
- The character select icons for Bowser and Bowser Jr. are based on their promotional artwork from this game.
- Starview Peak contains several references to the Comet Observatory:
- The course's name in Japanese, Korean, and Chinese is "Rosalina Observatory"; its name in Dutch is "Rosalina's Observatory", and its name in French is "Observatory Peak".
- The course's central building contains a library alluding to the Library aboard the Comet Observatory. There is a painting of the Comet Observatory inside the library.
- The course's music quotes the melody of "Rosalina in the Observatory".
- Wario's Wicked Wasp outfit is similar to Bee Mario.
- One of Wario's trick animations closely resembles his neutral air attack (especially in Super Smash Bros. for Nintendo 3DS / Wii U and Super Smash Bros. Ultimate).
- Dash Panels feature a yellow-orange-fuchsia gradient which are the colors they typically alternate between in this game.
- Moo Moo Meadows and Toad's Factory return as courses.
- A sign in Moo Moo Meadows states the farm was established in 2008, a reference to this game's launch date.
- The Dolphin Dasher and Tiny Titan return as vehicles.
- An exclamation point appears above Cataquacks when they are alerted to passing karts, like in this game.
- Racers are taken to Rainbow Road through a Launch Star-esque cannon, which is taken from this game's Rainbow Road.
- An arrangement of this game's spectating music plays approximately two minutes and seven seconds into Knockout Tour's online spectating music.
- Pianta's victory pose is based on the blue, male Pianta promotional artwork from this game.
- One of the idle animations of the Boos is based on one of the idle animations of the Boo Buddies in this game.
- The character select icon for Koopa Troopa is based on the dance they do in this game.
- The Cloud Rally has an icon featuring the Cloud Flower.
- Skeeters reappear using their design from this game.
- A pixelated Rocket Barrel appears in a mural at DK Spaceport depicting the history of the DK Boosters sponsor. It also appears on a sticker unlocked by activating a DK Spaceport ? Panel.
- Completing the mission "Check out the secret back-road barrel shortcut!" awards a sticker depicting a vector illustration of a Rocket Barrel.
- Shy Guy Bazaar and Wario Shipyard return as courses.
- The Bumble V and Cloud 9 return as karts.
- Starview Peak is built around a Comet Observatory-like structure based on the one that appears in Rosalina's Ice World.
- Rainbow Road features elongated, Conveyor Belt-esque Dash Panels, in reference to the Conveyor Belts on this game's Rainbow Road.
- The character select icon for Daisy is based on her promotional artwork from this game.
- The character select icons for Yoshi and Shy Guy are based on their promotional artwork from this game.
- Boohemoth returns in the background of Boo Cinema.
- Stacks of Gold Blocks appear on Great ? Block Ruins.
- The Coin Shell's render is based on its promotional artwork from this game.
- Humanoid Toad hieroglyphs appear along the walls of Desert Hills resembling those seen in Drybake Stadium.
- Nabbit chases return.
- The illustration of a Bomber Bill on the world map icon of Airship Fortress is based on its artwork from this game.
- The character select icons for Luigi, Koopa Troopa, and Hammer Bro are based on their promotional artwork from this game.
- The Bob-omb render is based on its promotional artwork from this game.
- Wario's Pirate outfit greatly resembles Captain Wario. While in the outfit, Wario wields a near-identical sword (with the only difference being handle color) during one of his trick animations.
- On the select screen, Nabbit makes short hops like he does after finishing a level in this game.
- The promotional renders for various Toads are based on Toad's key artwork from this game.
- The snakes that pop out from Jars and the golden snakes that adorn the Carpet Flyer are modeled after Hisstocrats.
- The towers of the bridge connecting Crown City and Faraway Oasis are modeled after the diamond-patterned blocks from this game.
- Several sponsors return from this game.
- Course select icons generally feature prominent track elements superimposed over images of the courses they belong to, like in this game.
- Trick-able, surfboard-bearing vehicles return.
- Sky-High Sundae returns as a course.
- Rainbow Road features a space station like this game's Rainbow Road. It also features a flying train that follows racers much like N64 Rainbow Road.
- Karts can illuminate the road ahead of them using headlamps, like in this game.
- The main menu, item information, and trophy presentation screens appear very similar to how they do in this game.
- Many of this game's lobby messages return.
- The online play's random course icon's design is based on the one it had in this game.
- The Biddybuggy returns as a kart.
- Smart Steering returns.
- Some of the rings found near water are based on the rings found on Dolphin Shoals.
- Starview Peak features a segment of road split between a green left path and a yellow right path, similar to Ice Ice Outpost.
- The design of the crown is inspired by its design in Mario Kart 8 Deluxe.
- Several Knockout Tour rally icons are based on cup icons from the Booster Course Pass.
- An arrangement of this game's spectating music plays approximately 57 seconds into Knockout Tour's online spectating music.
- The new "Treasure Tracker!" sponsor is named after this game.
- Toadette holds up a Super Pickax in one of her trick animations in her Explorer outfit.
- The character select icons for Mario and Toadette are based on their promotional artwork from this game.
- A picture mode similar to this game's Snapshot Mode appears.
- Several of Mario's and Peach's outfits originate from this game or are based on their designs from this game.
- The Moon Rally and the Heart Rally have icons featuring a yellow Power Moon and the Life-Up Heart, respectively.
- The dance Mario does in the character selection screen is similar to the one he makes when listening to music from the Boombox; additionally, Pauline's dance in the character selection screen is similar to the one she makes while performing.
- The designs of cactuses and binoculars in this game resemble their designs in Super Mario Odyssey.
- Large flowers appear, resembling Hat Trampolines.
- The above-ground portion of Dandelion Depths takes inspiration from the design of the Wooded Kingdom, featuring vermillion metal structures being overtaken by foliage.
- Toad and Toadette's Explorer outfits contain the same hats that the Toad Brigade wear in this game, albeit with added headlights.
- The Runner outfit for Koopa Troopa is based on an early design for the Roving Racers from this game.
- Heavy Fire Bros. return as audience members.
- Baby Rosalina's standard pacifier color is cyan instead of yellow, her shoes are turquoise instead of blue, and her crown is angled the opposite side from before; these traits were first seen on Dr. Baby Rosalina.
- The Grand Prix starting fanfare is based on the one used in this game.
- Sky-High Sundae returns as a course.
- The Hammer and Ice Flower return as items, while the ? Block item functions similarly to the Coin Box.
- Items are generally held behind the player, like in this game.
- Various outfits return from this game.
- Pickup trucks with Piranha Plants return.
- One of the stickers unlocked by completing a P Switch mission is based on a Wonder Flower; the same artwork can also be seen on a surfboard.
- The princess seams on the bodice of Princess Peach's dress are kept from this game, and also applied to Daisy's design.
References in other media
- The 2025 rerun of the Sunshine Tour included an event celebrating the release of Mario Kart World, which introduced Mario and Luigi's mechanic outfits as separate variants and Mario Kart World's version of the Tiny Titan as a kart.
- The design of a pith helmet with a headlamp attached to it, similar to the ones worn by Toad and Toadette in their explorer outfits in Mario Kart World, is seen in the background of a Brigade Tent level.
Names in other languages
| Language | Name | Meaning | Notes |
|---|---|---|---|
| Japanese | マリオカート ワールド[3] Mario Kāto Wārudo |
Mario Kart World | |
| Chinese (simplified) | 马力欧卡丁车世界[68] Mǎlì'ōu Kǎdīngchē Shìjiè |
Mario Kart World | |
| Chinese (traditional) | 瑪利歐賽車世界[5] Mǎlì'ōu Sàichē Shìjiè |
Mario Kart World | |
| Korean | 마리오 카트 월드[4] Mario Kateu Woldeu |
Mario Kart World |
References
- ^ Jump up to: a b c d Ask the Developer Vol. 18, Mario Kart World — Part 1. Nintendo. Retrieved May 21, 2025.
- ^ Mario Kart World - Nintendo Switch 2. Nintendo (Australian English). Retrieved June 1, 2025.
- ^ Jump up to: a b c d e f マリオカート ワールド | Nintendo Switch 2 | 任天堂. nintendo.com (Japanese). Retrieved April 2, 2025.
- ^ Jump up to: a b c d e Official Korean website
- ^ Jump up to: a b c 瑪利歐賽車世界 | Nintendo Switch 2 | 任天堂. nintendo.com (Chinese (Hong Kong)). Retrieved April 2, 2025.
- ^ NINTENDO SWITCH 2 LAUNCHES JUNE 5TH, BRINGING NEW FORMS OF GAME COMMUNICATION TO LIFE. Nintendo Saudi Arabia (English). Retrieved June 1, 2025.
- ^ Nintendo Israel (April 8, 2025). Photo of the Nintendo Switch 2 and Mario Kart World's release date. Facebook. Retrieved June 1, 2025.
- ^ Jump up to: a b European website
- ^ Mario Kart World | Nintendo Switch 2 games | Games. Nintendo ZA (English). Retrieved June 1, 2025.
- ^ Mario Kart World. Nintendo CH. Retrieved September 20, 2025.
- ^ Mario Kart World. Nintendo UK. Retrieved September 20, 2025.
- ^ Mario Kart™ World para Nintendo Switch 2 - Site Oficial da Nintendo para Brasil. Nintendo Brasil. Retrieved September 20, 2025.
- ^ Mario Kart™ World para Nintendo Switch 2 - Sitio Oficial de Nintendo para Argentina. Nintendo Argentina. Retrieved September 20, 2025.
- ^ Mario Kart™ World for Nintendo Switch 2 - Nintendo Official Site for Canada. Nintendo Canada. Retrieved September 20, 2025.
- ^ Mario Kart™ World pour Nintendo Switch 2 - Site Officiel Nintendo pour Canada. Nintendo Canada. Retrieved September 20, 2025.
- ^ Mario Kart™ World para Nintendo Switch 2 - Sitio Oficial de Nintendo para Chile. Nintendo Chile. Retrieved September 20, 2025.
- ^ Mario Kart™ World para Nintendo Switch 2 - Sitio Oficial de Nintendo para Colombia. Nintendo Colombia. Retrieved September 20, 2025.
- ^ Mario Kart™ World para Nintendo Switch 2 - Sitio Oficial de Nintendo para Mexico. Nintendo Mexico. Retrieved September 20, 2025.
- ^ Mario Kart™ World para Nintendo Switch 2 - Sitio Oficial de Nintendo para Peru. Nintendo Peru. Retrieved September 20, 2025.
- ^ Nintendo of America (April 2, 2025). Mario Kart World – Nintendo Direct | Nintendo Switch 2. YouTube. Retrieved April 2, 2025.
- ^ Mario Kart World | Nintendo Switch 2 | Nintendo. Nintendo Philippines (English). Retrieved June 1, 2025.
- ^ Mario Kart World | Nintendo Switch 2 | Nintendo. Nintendo Singapore (English). Retrieved June 1, 2025.
- ^ Mario Kart World | Nintendo Switch 2 | Nintendo. Nintendo (Thai). Retrieved June 1, 2025.
- ^ Nintendo Switch 2. Nintendo Malaysia (English). Retrieved June 1, 2025.
- ^ Jump up to: a b Taiwanese website
- ^ @NintendoMDE (September 17, 2025). "Exciting news! 🎮 The official UAE version Nintendo Switch 2 console, with a wide range of accessories and games, is now available in all the major retail stores across UAE!". X (English). Retrieved September 17, 2025.
- ^ English language website
- ^ German website
- ^ Brazilian website
- ^ Mexican website
- ^ Nintendo Saudi Facebook page
- ^ File:Mario Kart World AE box art.jpg
- ^ Australian Nintendo Switch 2 website
- ^ Official Nintendo South Africa web store
- ^ Nintendo of America (April 3, 2025). Mario Kart World – Grand Prix Gameplay – Nintendo Treehouse: Live | Nintendo Switch 2. YouTube. Retrieved April 6, 2025.
- ^ Nintendo of America (April 4, 2025). Mario Kart World – Knockout Tour & GameChat Gameplay – Nintendo Treehouse: Live | Nintendo Switch 2. YouTube. Retrieved April 6, 2025.
- ^ Jump up to: a b Nintendo of America (April 17, 2025). Mario Kart World Direct 4.17.2025. YouTube (English). Retrieved April 17, 2025.
- ^ "Nintendo Japan sent a “Thank you for playing” email to Japanese players confirming how to unlock Mirror Mode in Mario Kart World!
- Play all 8 Grand Prix at 150cc
- Play all 8 Knockout Tours at 150cc
Free Roam:
- Clear 10 P-Switch Missions
- Find 10 ? Panels
- Find 10 Peach Medals
- Then clear the “Special Cup”Grand Prix at 150cc" – Genki. https://x.com/Genki_JPN/status/1933563020627882150. Twitter (English). Retrieved June 14, 2025. (Archived 14 Jun 2025 05:50:51 UTC via archive.today.) - ^ Jump up to: a b https://www.nintendo.com/nl-nl/Games/Nintendo-Switch-2-games/Mario-Kart-World-2790000.html
- ^ Jump up to: a b https://www.nintendo.com/fr-fr/Jeux/Jeux-Nintendo-Switch-2/Mario-Kart-World-2790000.html
- ^ Jump up to: a b https://www.nintendo.com/fr-ca/gaming-systems/switch-2/featured-games/mario-kart-world/
- ^ Jump up to: a b https://www.nintendo.com/de-de/Spiele/Nintendo-Switch-2-Spiele/Mario-Kart-World-2790000.html
- ^ Jump up to: a b https://www.nintendo.com/it-it/Giochi/Giochi-per-Nintendo-Switch-2/Mario-Kart-World-2790000.html?srsltid=AfmBOorXtsZGL8eBm7ILFkOvVHKDI2S-CKcfXWjyRPCqM20iGTGqjmW5
- ^ Jump up to: a b https://www.nintendo.com/pt-pt/Jogos/Jogos-para-a-Nintendo-Switch-2/Mario-Kart-World-2790000.html
- ^ Jump up to: a b https://www.nintendo.com/pt-br/gaming-systems/switch-2/featured-games/mario-kart-world/
- ^ From the game. Retrieved June 5th, 2025.
- ^ Jump up to: a b https://www.nintendo.com/es-cl/gaming-systems/switch-2/featured-games/mario-kart-world/
- ^ Jump up to: a b https://www.nintendo.com/es-es/Juegos/Juegos-de-Nintendo-Switch-2/Mario-Kart-World-2790000.html?srsltid=AfmBOooa9V_Ek_wfP9aUriow6fp1lob5eBXEJkJU8HbcPVHH8xoh58bC
- ^ 瑪利歐賽車世界|下載版軟體|任天堂. Nintendo (Chinese (Hong Kong)). Retrieved June 4, 2025.
- ^ From the game. Retrieved June 5th, 2025.
- ^ Jump up to: a b Ask the Developer Vol. 18, Mario Kart World — Part 3. Nintendo. Retrieved May 21, 2025.
- ^ "It appears that only for characters in the lightest class and the heaviest class, certain machines receive adjustments of Speed -0.2 and Handling +0.2. The target machines are Funky Dorrie, Stellar Sled, and karts in the same class as Rally Kart." – theta_k. https://x.com/_theta_kappa/status/1930885525470417078. Twitter (English). Retrieved June 8, 2025. (Archived 8 Jun 2025 04:32:28 UTC via archive.is.)
- ^ In-game mission "Evade the armadillos on your way to the goal"
- ^ In-game mission "Brave the buffalo stampedes from both sides!"
- ^ In-game mission "Mind the giraffes as you rocket toward blue coins!"
- ^ In-game mission "Maneuver through the leisurely moose herd!"
- ^ In-game mission "Endure a storm of acorns!
- ^ In-game mission "Ride geysers and shoot through rings to the goal!"
- ^ マリオカート ワールド : アイテム&テクニック. Nintendo (Japanese). Retrieved April 23, 2025.
- ^ https://en-americas-support.nintendo.com/app/answers/detail/a_id/68580/~/how-to-update-mario-kart-world
- ^ @TechnicalMK49 (July 29, 2025). Ver. 1.2.0. X. Retrieved July 30, 2025.
- ^ TWD98 (July 30, 2025). The New Mario Kart World Update is Hilarious. YouTube. Retrieved August 12, 2025.
- ^ https://www.instagram.com/p/DMapqWZRnPS/?igsh=NTc4MTIwNjQ2YQ==
- ^ Ask the Developer Vol. 18: Mario Kart World — Part 2. Nintendo. Retrieved May 21, 2025.
- ^ Sirloin (June 4, 2025). Mario Kart World - All Knockout-Tours 150 ccm [Full Walkthrough (Nintendo Switch 2) [4K]]. YouTube (English). Retrieved June 5, 2025.[timestamp needed]
- ^ Shortcat (July 15, 2025). NEW GAME-BREAKING GLITCH SHORTCUTS IN MARIO KART WORLD. YouTube. Retrieved August 14, 2025.
- ^ Nintendo (August 1, 2025) [1]. Top Selling Title Sales Units, Nintendo Co., Ltd. Retrieved August 1, 2025.
- ^ Nintendo HK (June 9, 2025). 《马力欧卡丁车世界》Direct. Bilibili (Simplified Chinese). Retrieved July 21, 2025.
External links
- Official Japanese website
- Official North American website
- Official European website
- Official Brazilian website
- Official Korean website
- Official Hong Kong website
- Official Taiwanese website
- Official Singaporean website
- Official Filipino website
- Official Thai website
| show Mario Kart World |
|---|
| show Super Mario games |
|---|
| show Nintendo Switch 2 games |
|---|
